
![Install macOS Catalina on VirtualBox on Windows PC [New Method]](https://www.geekrar.com/wp-content/uploads/2020/02/Install-macOS-Catalina-on-VirtualBox-on-Windows-PC-New-Method-min.jpg)
In this post, we’ll Install macOS High Sierra on VirtualBox on Windows PC with macOS High Sierra ISO. New update, new version. Apple’s non-stop update makes another new version of macOS with a few changes to its name but huge changes to itself from inside. From it’s name which is High Sierra, which is another high mountain, it lifts up pretty much everything in macOS. This probably continues another series of new features, much enhancements, fixes of the problems from the old version and more importantly security updates and more and more updates. With everything update, we’ve also come up with another Install macOS High Sierra on VirtualBox on Windows PC.
While we had chances of installing macOS Catalina on VMware and install macOS Catalina on VirtualBox on Windows PC, we’ll continue not to skip install macOS High Sierra on VirtualBox with a new method. Just like we did install macOS High Sierra on VMware on Windows with a new method, we’ll also Install macOS High Sierra on VirtualBox on Windows PC with a new method in addition to the old method we did.
Table of Contents
Install macOS High Sierra on VirtualBox on Windows PC
For those who are new, typically, there are two ways to install macOS which is install macOS on VMware and install macOS on VirtualBox. Now inside this, each one of this is done into two another ways. Like install macOS Mojave on VMware, and the next one is Install MacOS Mojave on Vmware on Windows PC or install macOS Mojave on VirtualBox and the next one is Install MacOS Mojave on VirtualBox on Windows PC.
Another example we could make is of installing macOS Catalina on Windows. First, we install macOS Catalina on VMware and next up, we’ve install macOS Catalina on VMware in a new method or install macOS Catalina on VirtualBox, and next up, we’ve install macOS Catalina on VirtualBox in a new method. That moves on like this with installing other versions on Windows.
The purpose is the same but the path is different. This difference probably includes different steps to install, different files and different stuff to complete the installation. The primary reason that it’s made is to try and install macOS High Sierra and other versions with a new method when the first method doesn’t work, so no one should fail from installation. For the installation particularly, we’ve prepared the files uploaded to servers which can be easily obtained or create, and also the instructional step by step tutorial with shots. In this tutorial, I’ll show how to Install macOS High Sierra on VirtualBox on Windows PC in a completely different way and different files.
Step One – Create or Download High Sierra ISO
Whether macOS Mojave or macOS Catalina or other new versions should be out, macOS High Sierra will still be preferred for most. Just like Windows, that announced Windows 10 but users still love Windows 7. Whatever the reason, now unlike installing High Sierra with the previous version, for installing macOS High Sierra, we’ll need a couple of files that are completely easy to get from us. Here’s how to Install macOS High Sierra on VirtualBox on Windows PC.
First, for those who would like to create macOS High Sierra ISO themselves, they could probably do that but requires an actual macOS or macOS running machine like macOS on VMware or VirtualBox and speed and reliable internet connection which shouldn’t interrupt when downloading.
Creating High Sierra ISO might be a bit difficult for some, so for this purpose, we’ve created macOS High Sierra beforehand and put it online to make use of it. This is definitely easy as it’s only a matter of clicks. We’ve shared the file plus even in two sections that is in one file and the second one is within parts. It’s completely safe, secure, and easy to approach within a few clicks, so catch it easy. We’ll also update the file when a newer version is out. Here’s how to install macOS High Sierra on VirtualBox on Windows PC.
macOS High Sierra ISO DIRECT DOWNLOAD
- The macOS High Sierra updates has almost come to end but still remains favorite for most. Like its previous and newer version which we’ve covered up. We’ve taken this part under our hand and created and provided the file online through multiple service so users shouldn’t have problems with it. Apart from this, we’ve also covered up other supported files of High Sierra, like macOS High Sierra DMG which is required for installing High Sierra on Mac. While the High Sierra DMG installer file is provided within the App Store but in terms of macOS High Sierra ISO, it’s nowhere and isn’t easy to find.
From the BIOS, watch out if the Intel VT-x hardware acceleration options are enabled.
Step Two – Install Oracle VM VirtualBox on Windows
In terms of installing High Sierra particularly on a virtual machine, there are two options. First, we’ve to install High Sierra on VMware and install macOS High Sierra on VirtualBox. So as we did install High Sierra on VMware, we’ll now install High Sierra on VirtualBox in a new method. For this installation, we’ll need VirtualBox first. From the BIOS, watch out if the Intel VT-x hardware acceleration options are enabled.
Goto VirtualBox Download page or VirtualBox official website and install it.
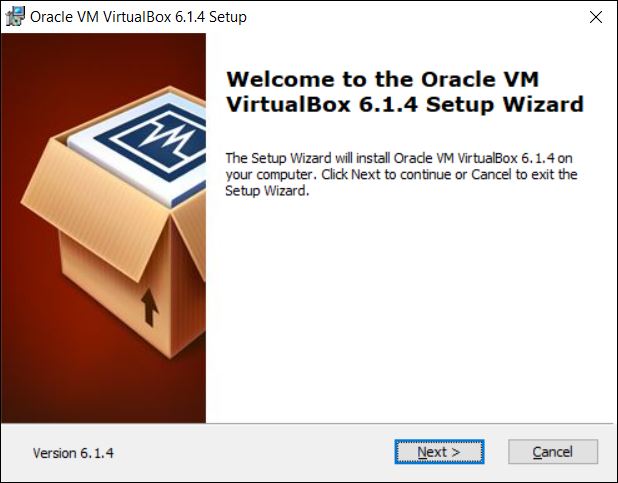
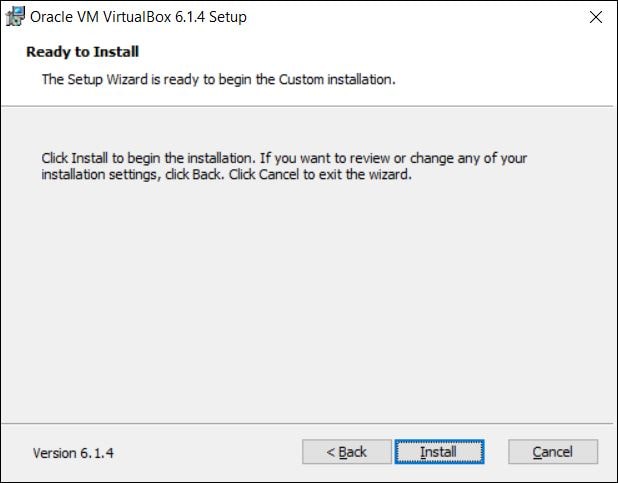
Click Next on the wizards a few times, and it will be installing.
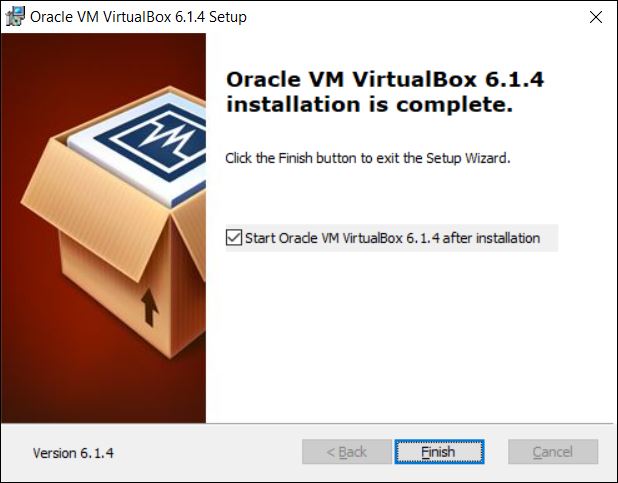
On the finish line, let the VirtualBox launch after the installation so hit Finish.
Step Three – Install VirtualBox Extension Pack
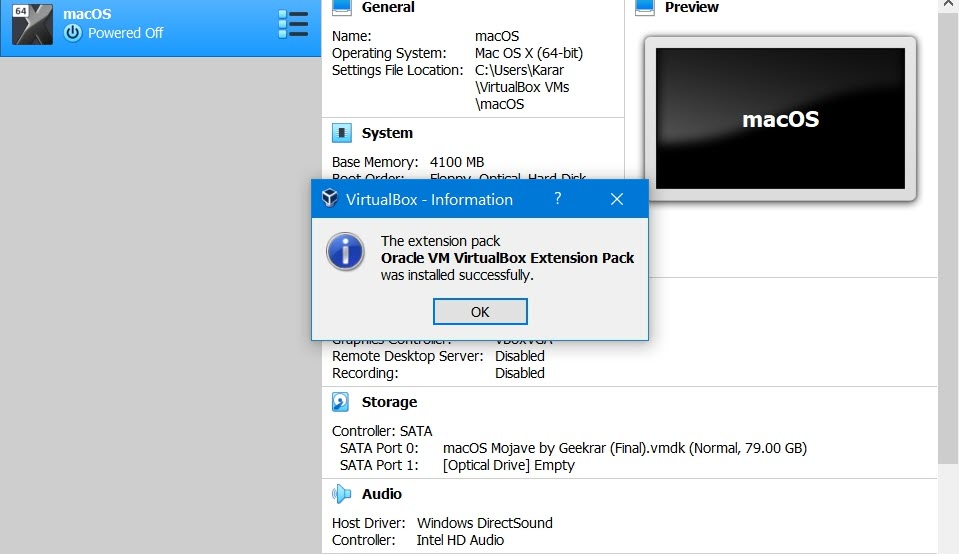
As long as installing VirtualBox Extension Pack is important, it’s more important than anywhere else. Installing VirtualBox Extension Pack not only enhances features like installing Guest Tool but also makes mouse and keyboard work in High Sierra on VirtualBox. Even we’ve created a seprate tutorial for that. Here’s how to install VirtualBox Extension Pack.
Here’s how to Fix Mouse & Keyboard Stuck on macOS VirtualBox.
Step Four – Create a New Virtual Machine
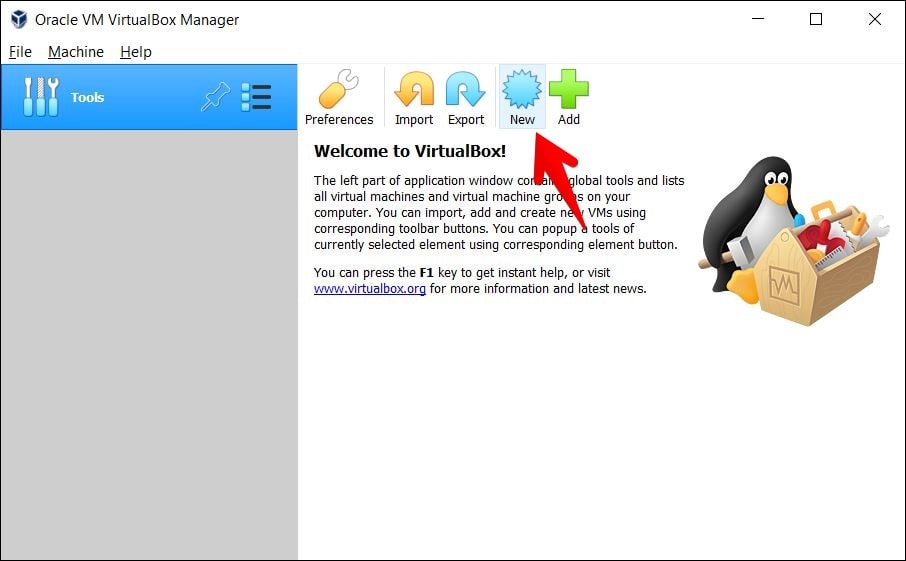
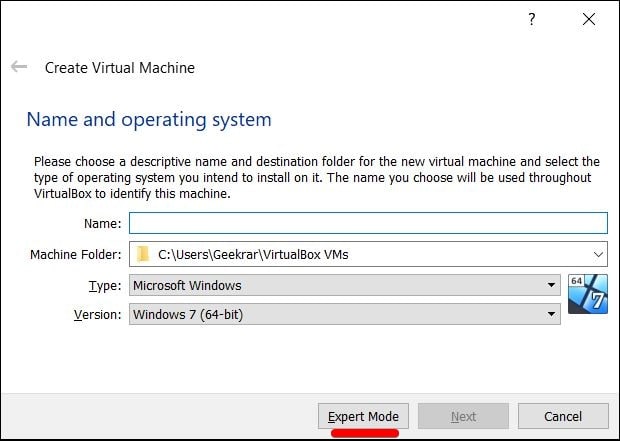
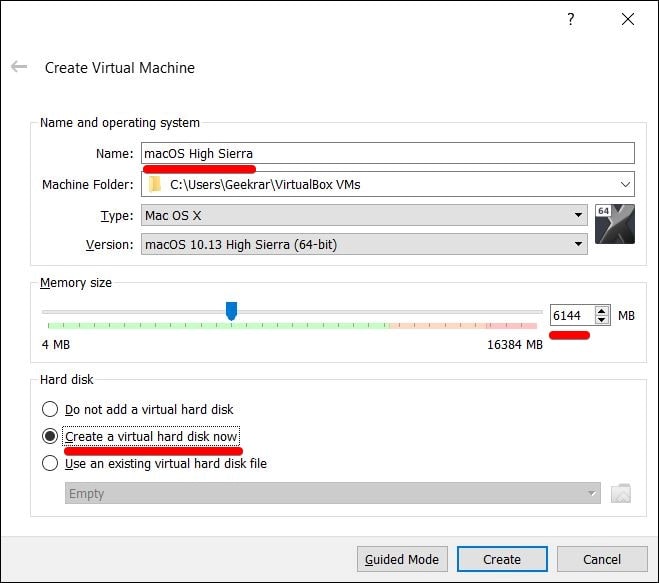
In this important step, write down macOS High Sierra for the name and it will automatically detect the type, version. Then set up 50% of your system’s memory and click on Create a virtual hard disk now. In the end, click on Create.
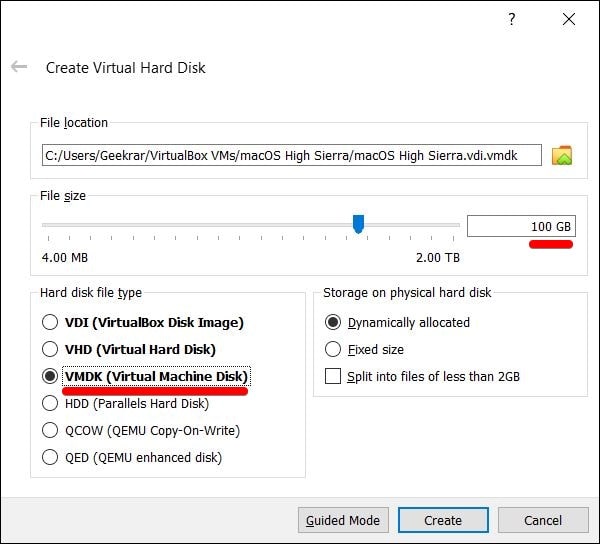
For the hard disk, set 100GB of space and select VMDK for the disk then click Next.
Step Five – Set up Virtual Machine Settings
One of the important parts of working a virtual machine is setting it up. While virtual machine won’t work without setting it and also adding a disk or removing something else so we’ve done it. For making the installation sucessful, make sure you change the settings to the one carefully otherwise the installation may fail so take care.
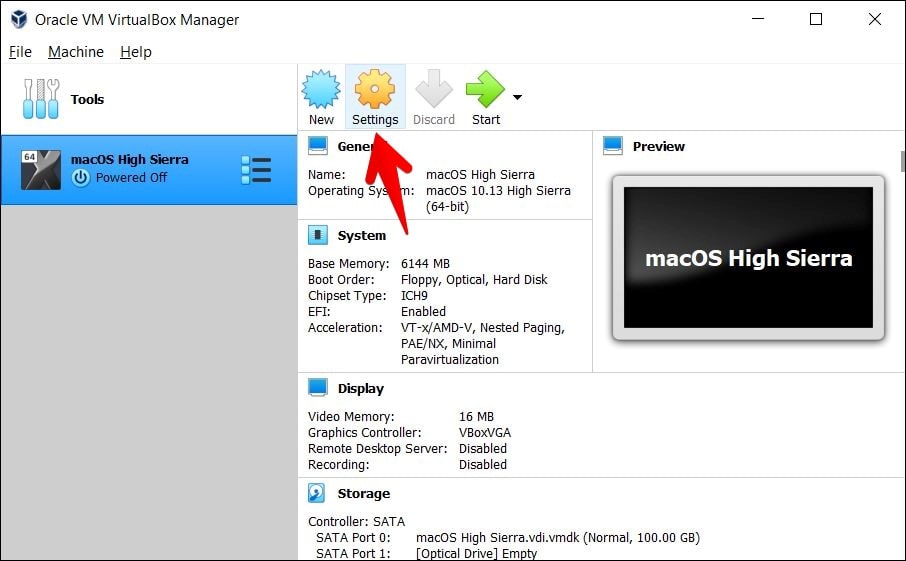
From the top, click on the Settings.
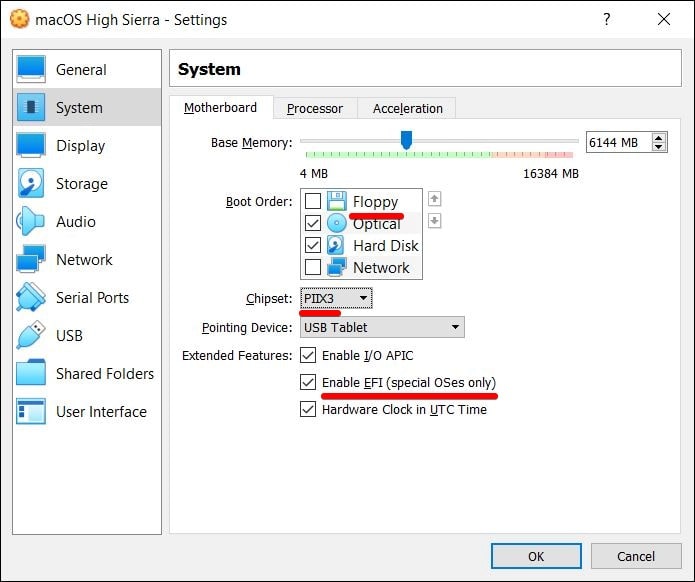
Then select the System tab and uncheck Floppy, change the chipset to PIIX3 and also enable EFI (special OSes only).
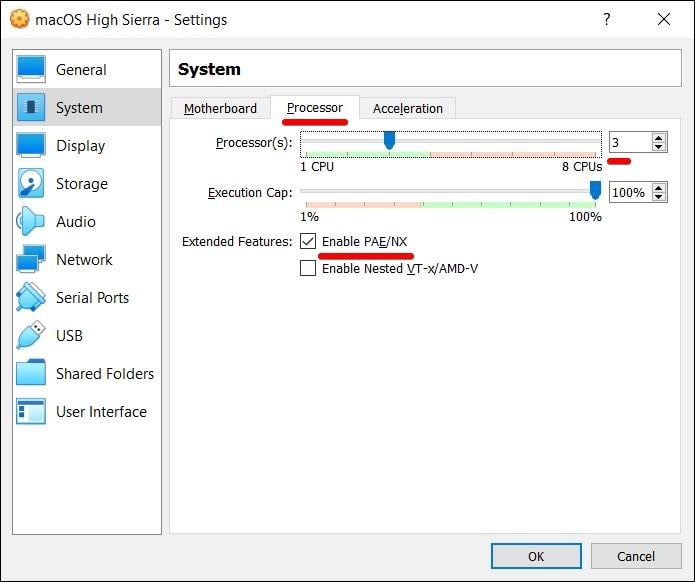
Next, click on the Processor tab and increase the processor to at least 2 Cores or more and enable PAE/NX also.
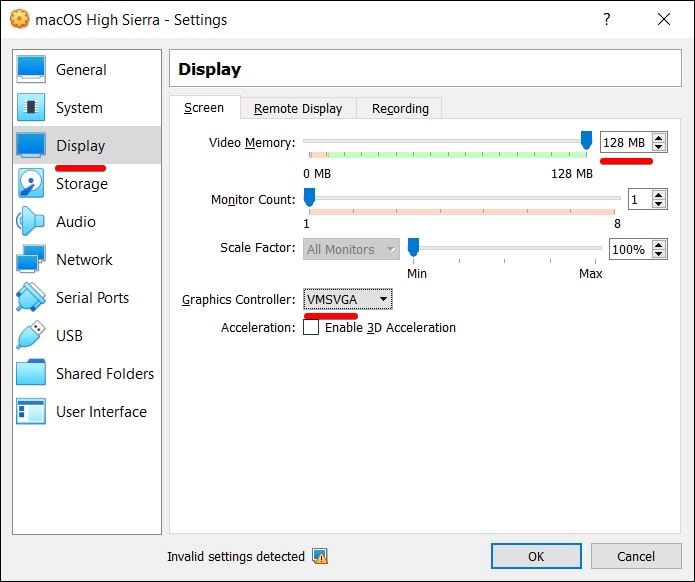
Jump to the Display tab and increase the amount of video memory to the maximum.
Now head to the Storage tab and click on Empty disc icon and click on the disc on the right side and click Choose/Create a Virtual Optical Disk.
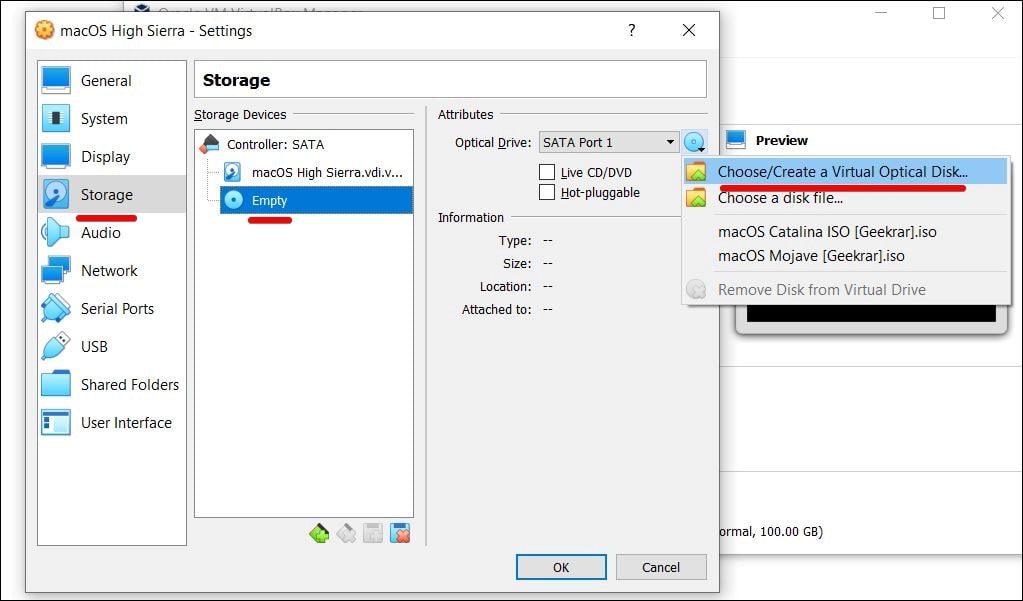
Now click on Add and choose High Sierra ISO then click on Choose.

When the settings finished, click on OK on the virtual machine settings window.
Step Six – Apply Commands To The Machine
The settings is near to end except a simple step we need to take. Here’s how to do it.
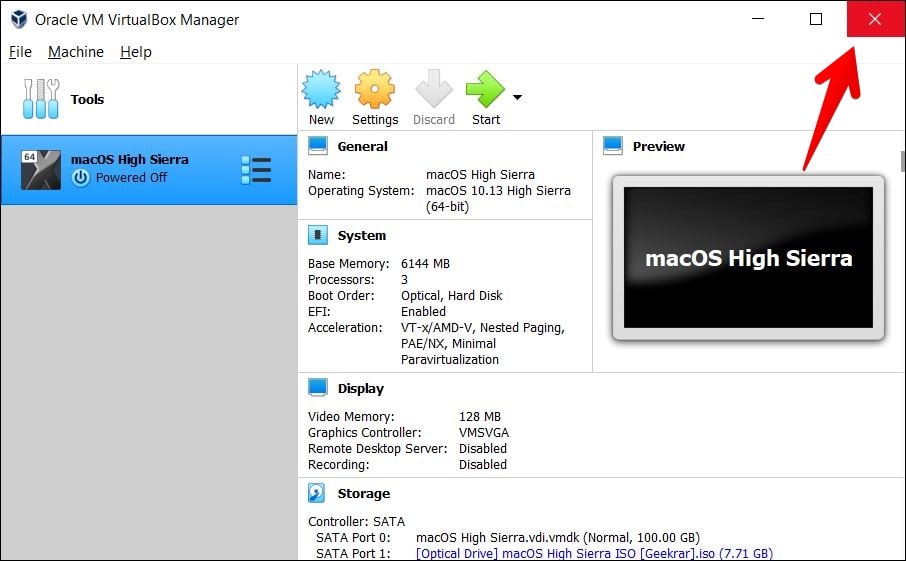
First, close the VirtualBox simply by clicking on close.
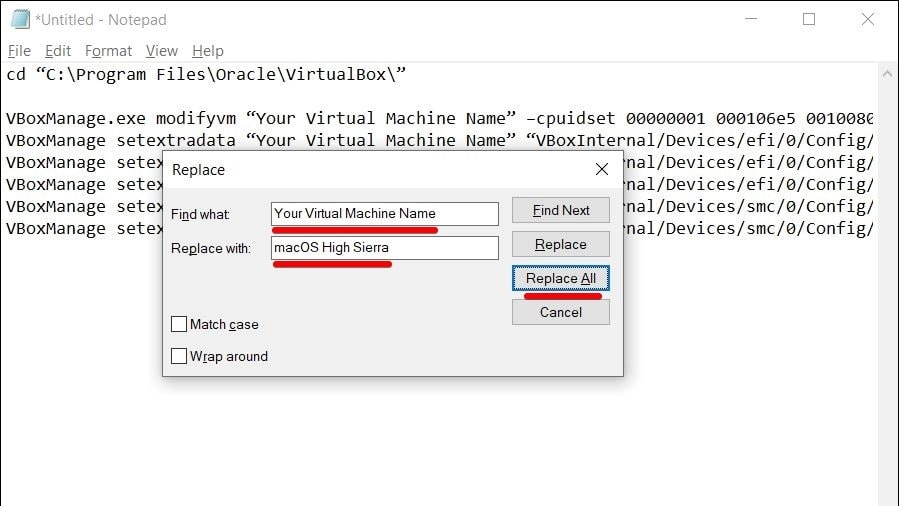
Now open Notepad and copy and paste the following command into it. Once done, press Ctrl + H to open the replace the panel. There,
type “Your virtual machine name” in the Find What then type “macOS High Sierra” in replace with tab and click Replace All.
cd "C:\Program Files\Oracle\VirtualBox\"
VBoxManage.exe modifyvm "Your Virtual Machine Name" --cpuidset 00000001 000106e5 00100800 0098e3fd bfebfbff
VBoxManage setextradata "Your Virtual Machine Name" "VBoxInternal/Devices/efi/0/Config/DmiSystemProduct" "iMac11,3"
VBoxManage setextradata "Your Virtual Machine Name" "VBoxInternal/Devices/efi/0/Config/DmiSystemVersion" "1.0"
VBoxManage setextradata "Your Virtual Machine Name" "VBoxInternal/Devices/efi/0/Config/DmiBoardProduct" "Iloveapple"
VBoxManage setextradata "Your Virtual Machine Name" "VBoxInternal/Devices/smc/0/Config/DeviceKey" "ourhardworkbythesewordsguardedpleasedontsteal(c)AppleComputerInc"
VBoxManage setextradata "Your Virtual Machine Name" "VBoxInternal/Devices/smc/0/Config/GetKeyFromRealSMC" 1
Now open Command Prompt from Start Menu.
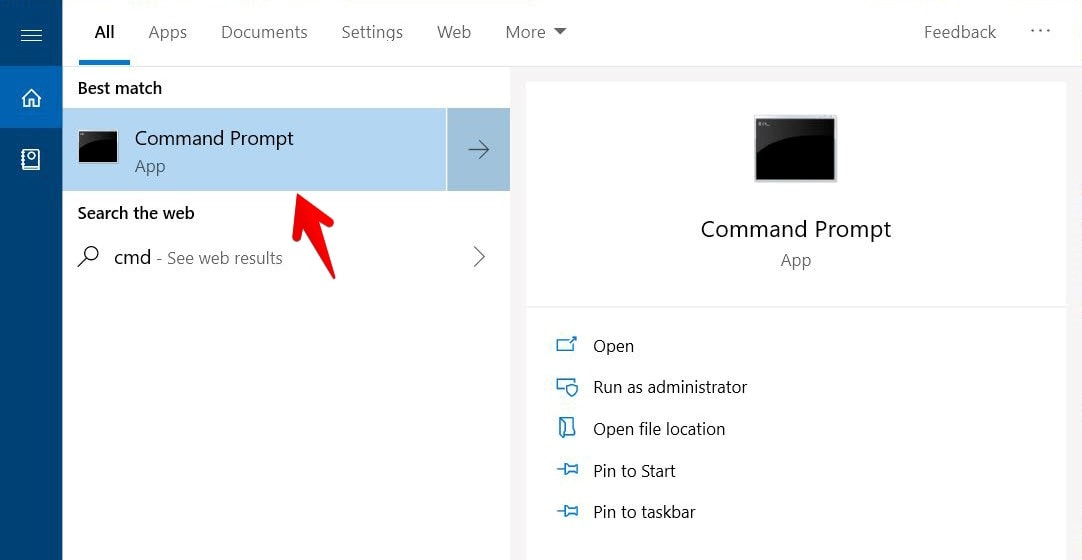
On Command Prompt, copy and paste the commands into it and hit Enter.

Step Seven – Install macOS High Sierra on VirtualBox on Windows PC
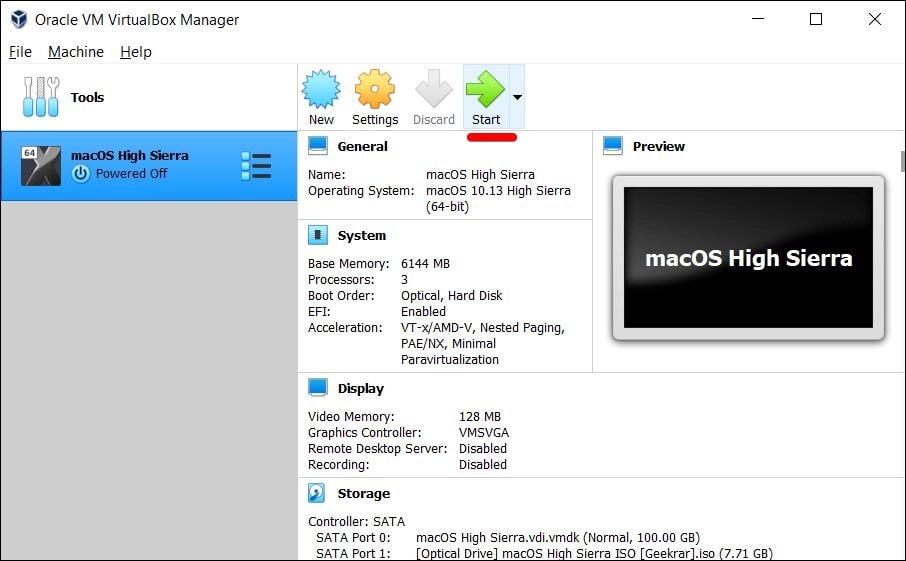
When done, close it and open VirtualBox and start the machine.
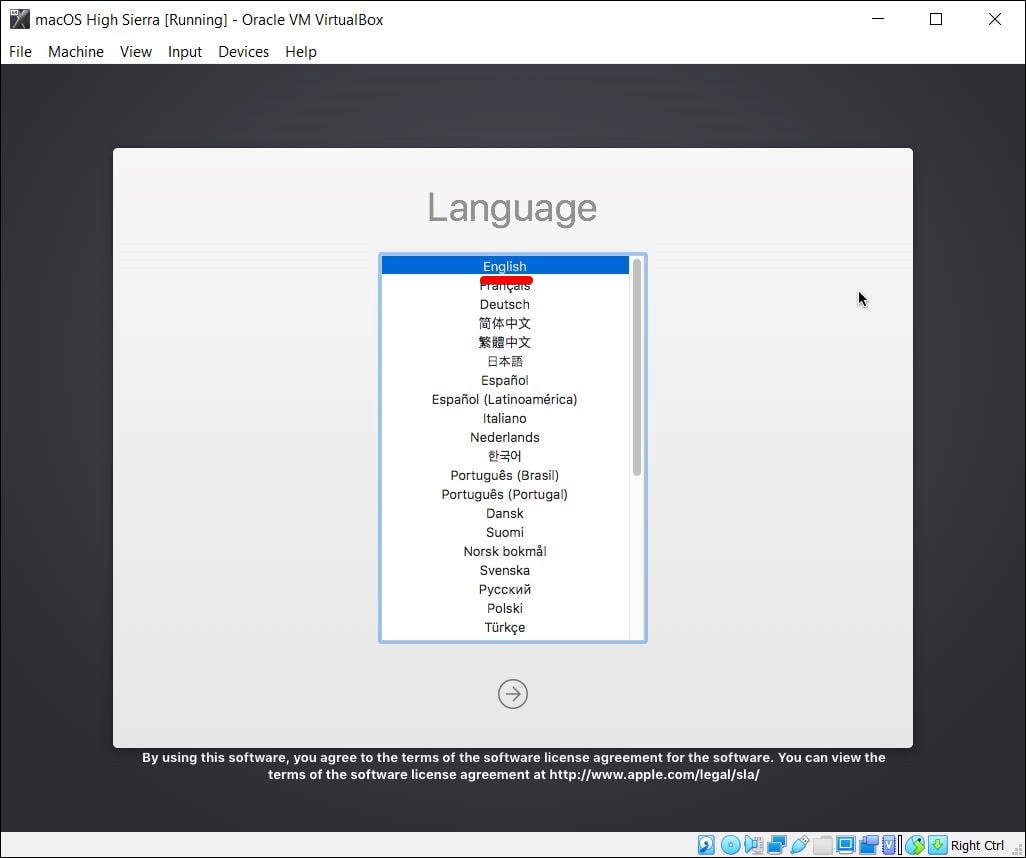
On the first window, simply Continue.
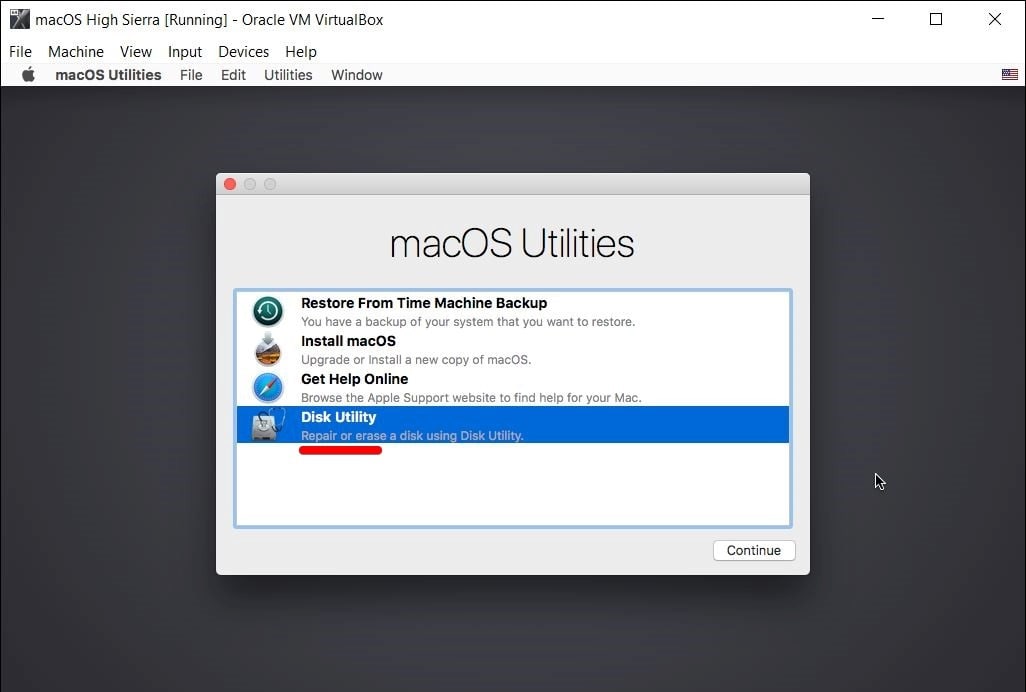
When this window appeared, click on Disk Utility and click on Continue.
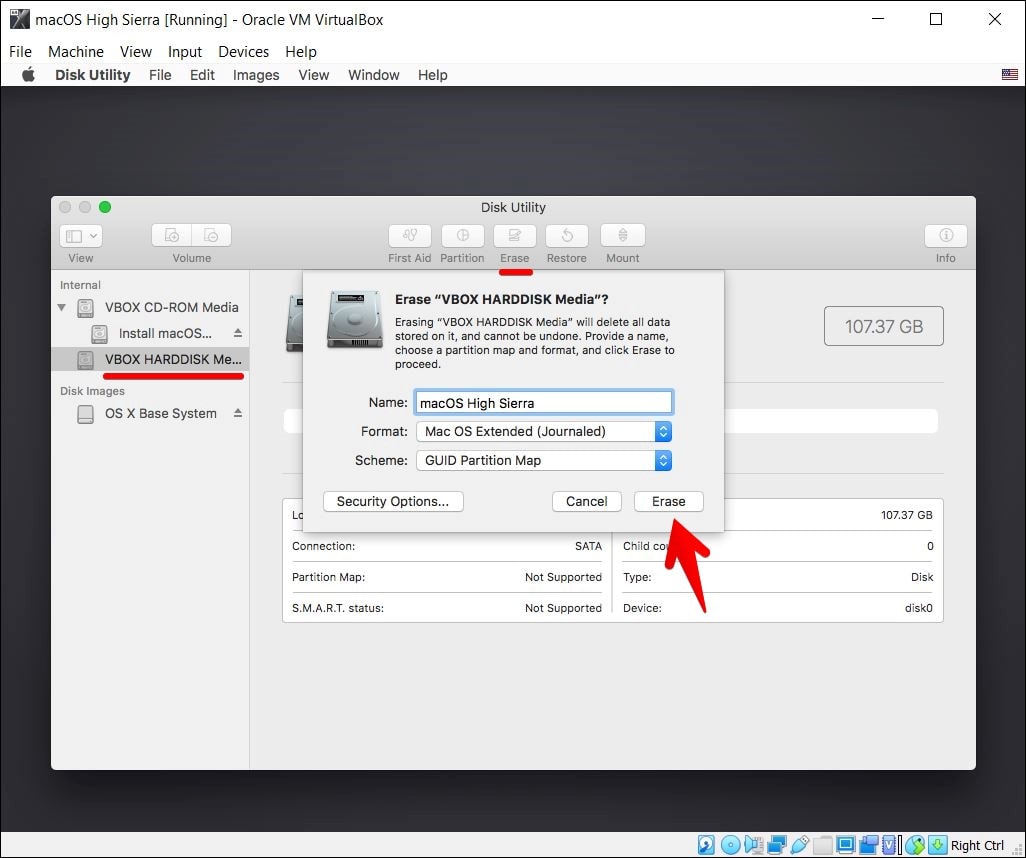
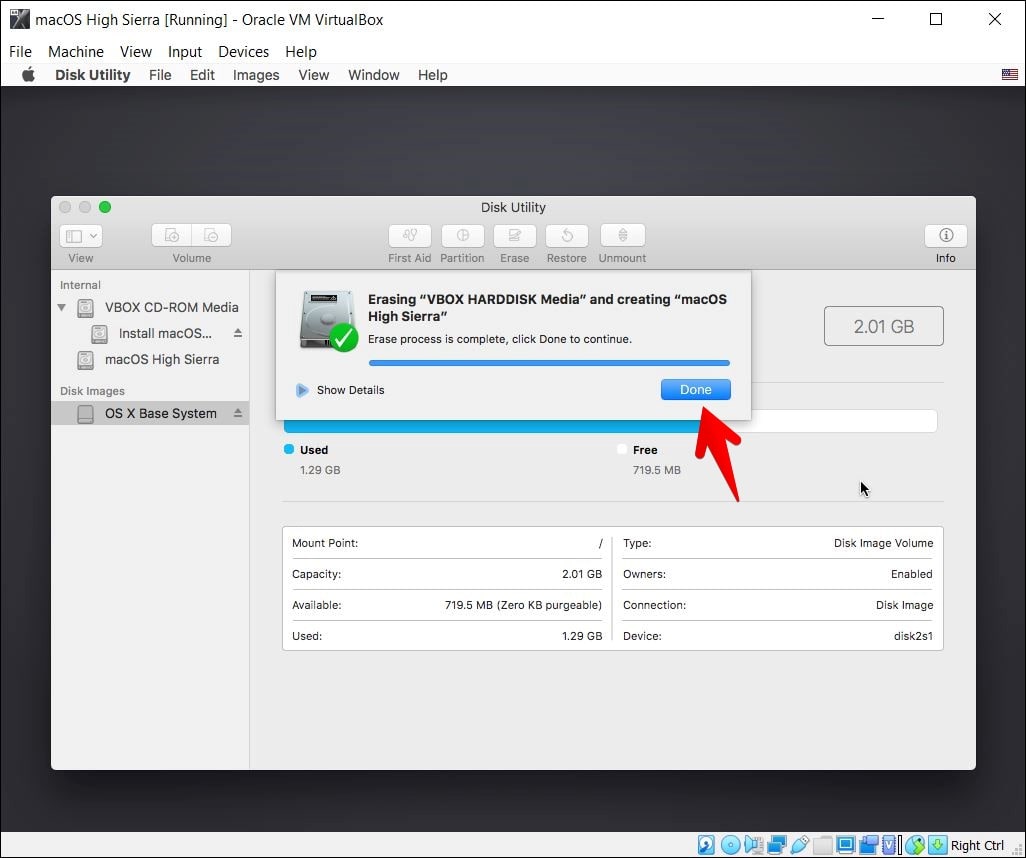
Next, click on VBOX Harddisk which is VirtualBox’s default disk and click Erase from the top then name it and click on Erase.
Click on Done then close the window.
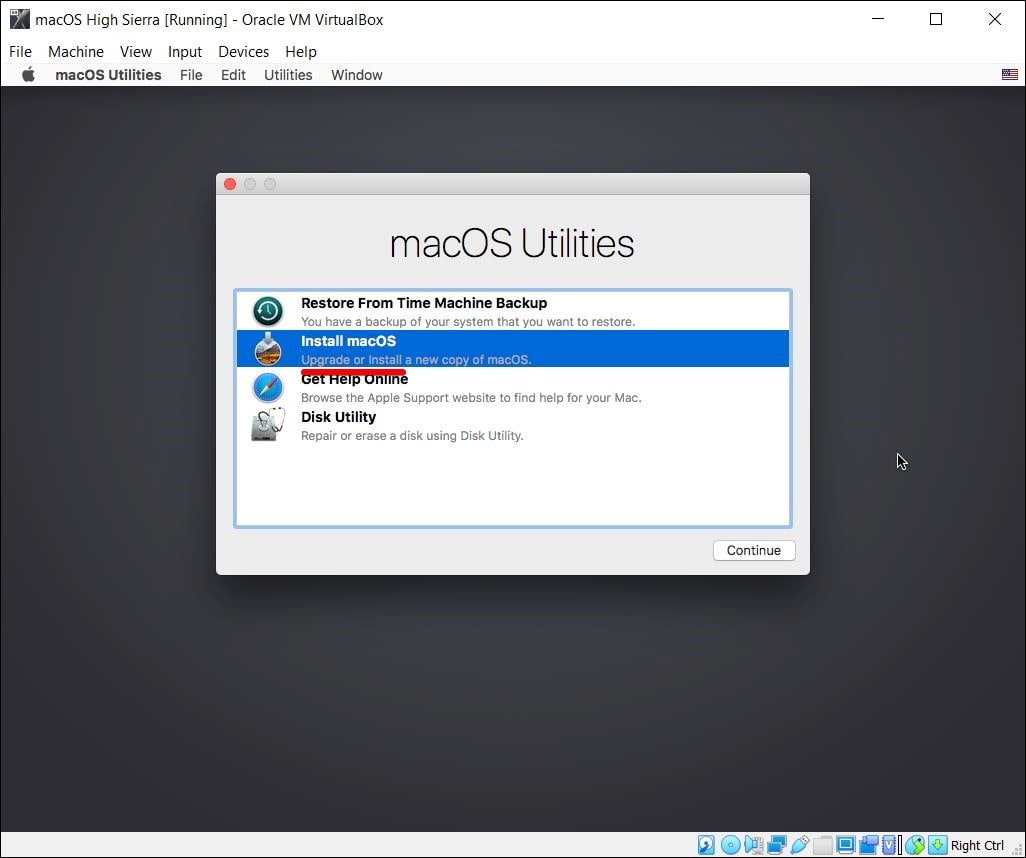
Now select Install macOS and click on Continue.
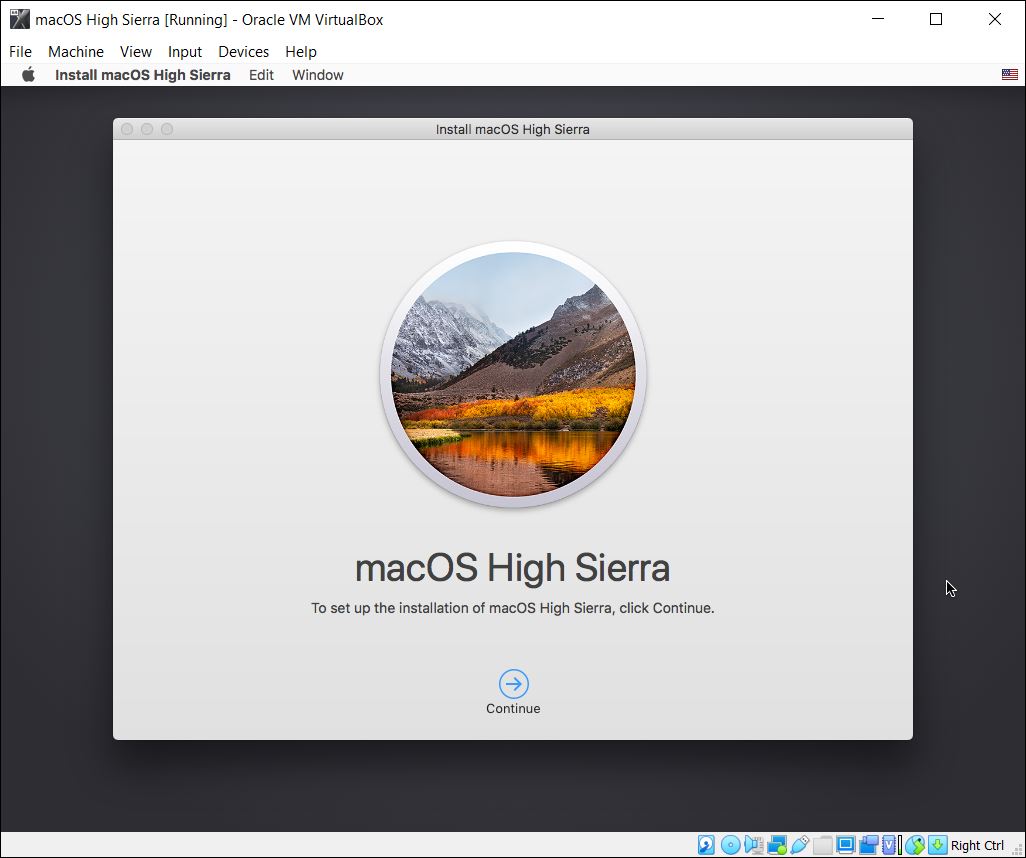
Continue with this window.
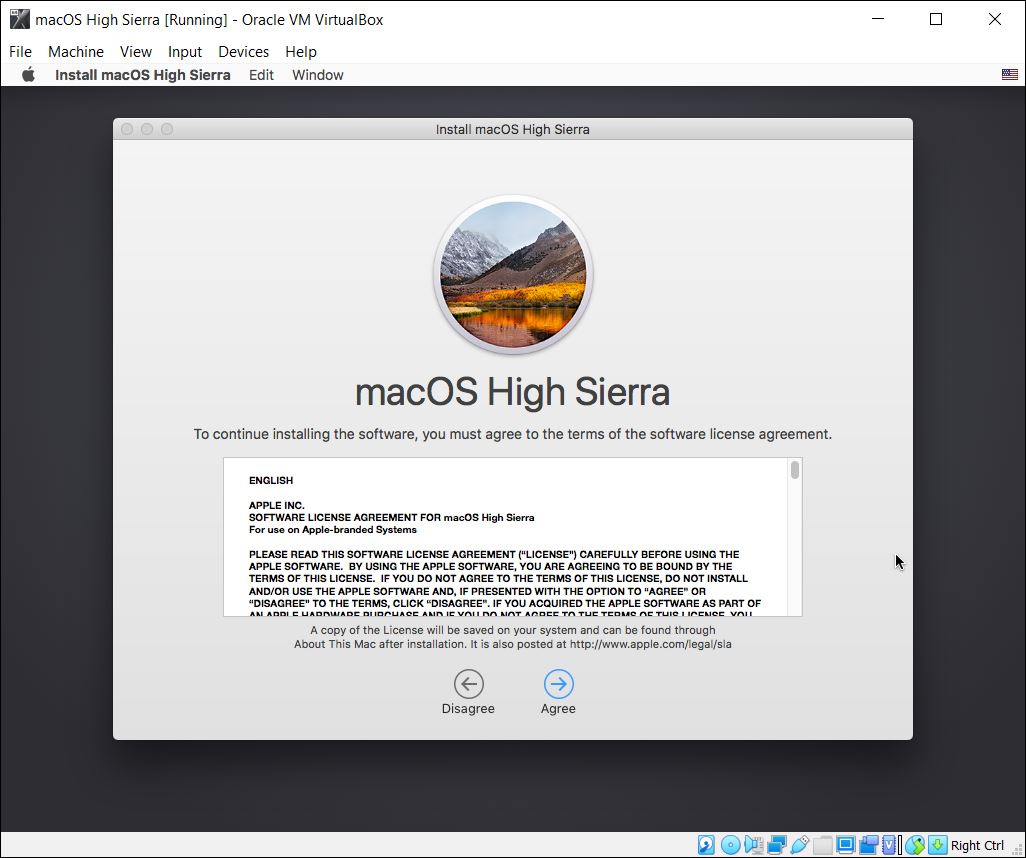
Accept the terms and conditions.
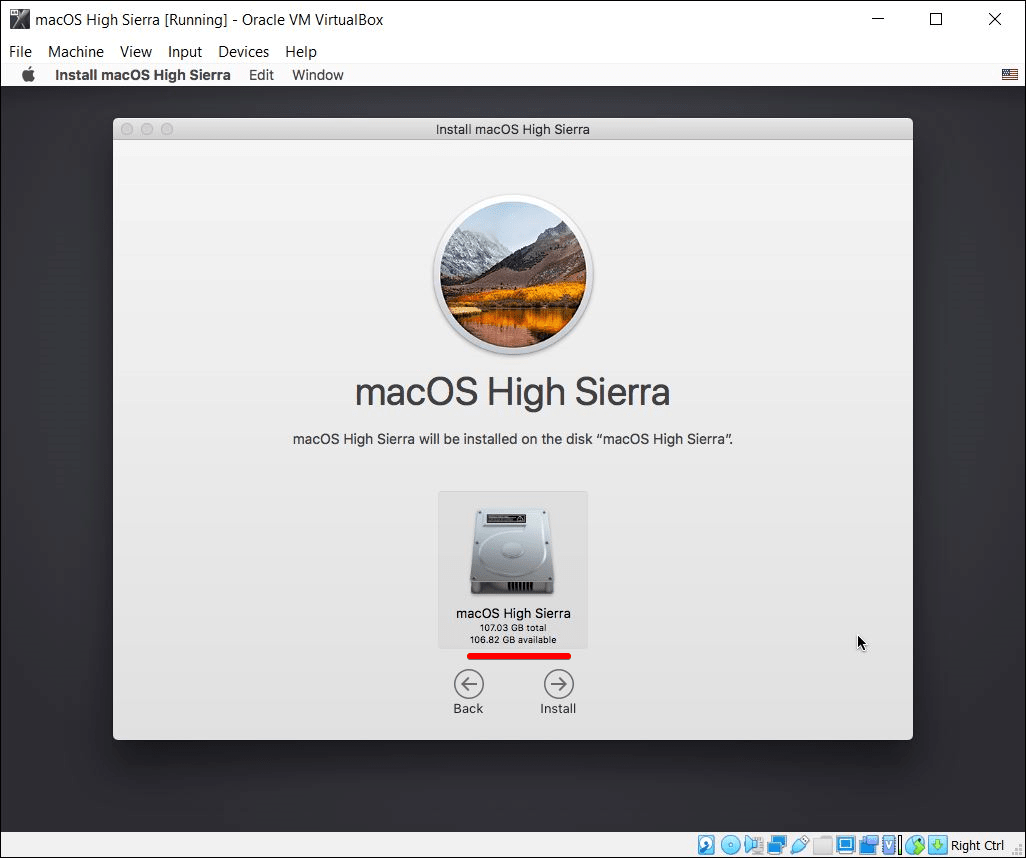
Select the disk for the installation and click on Install.
The macOS will soon begin installing, so be patient.
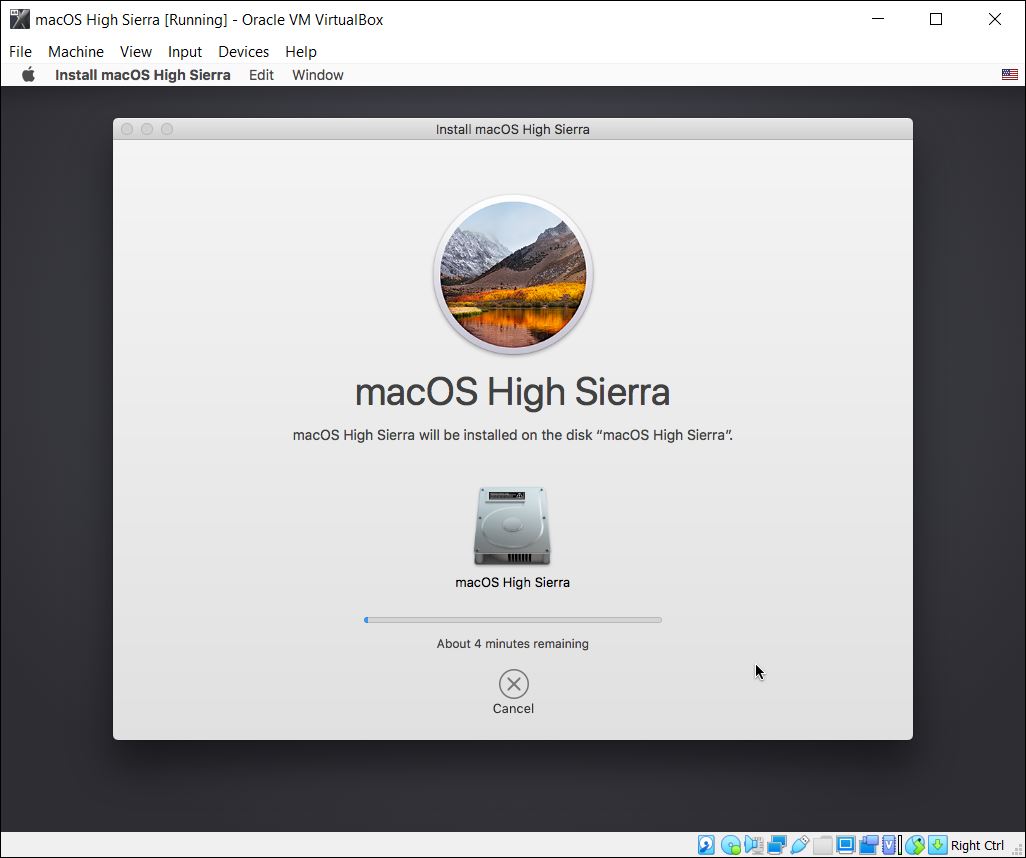
Once it does install, it will reboot and the loading will also take some time.

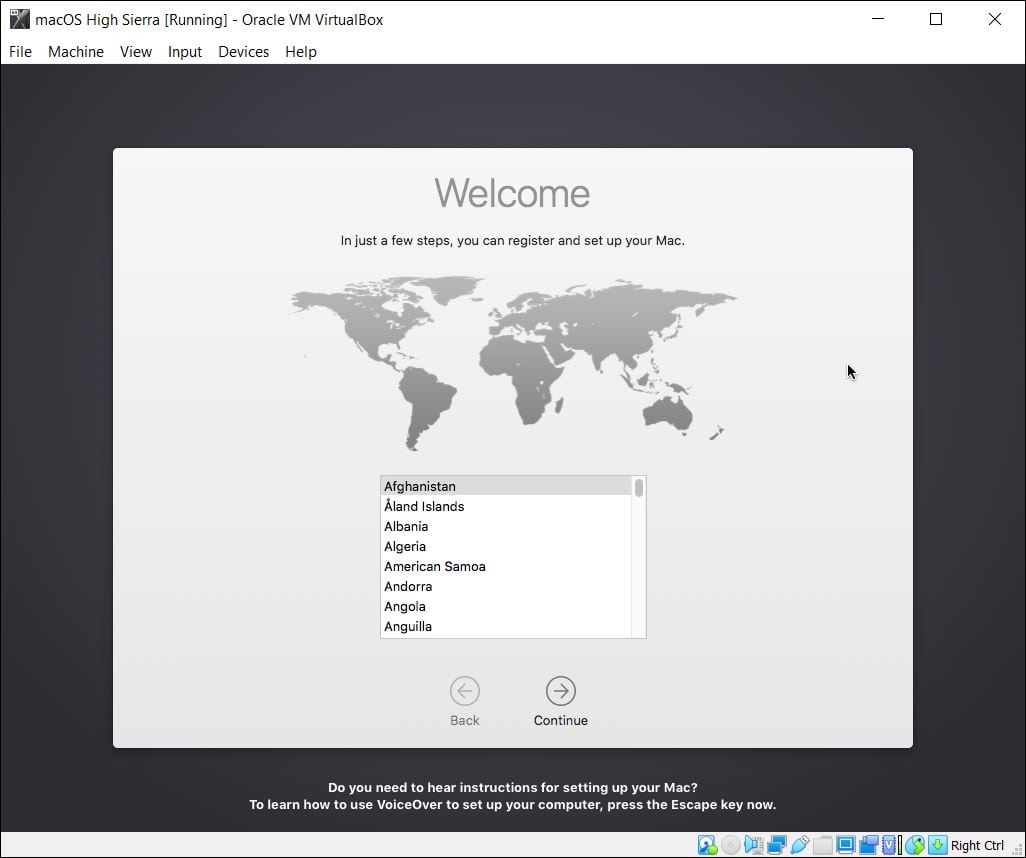
After it’s finished, it will appear on the Welcome window. The actual installation has started and it’s ready to use.
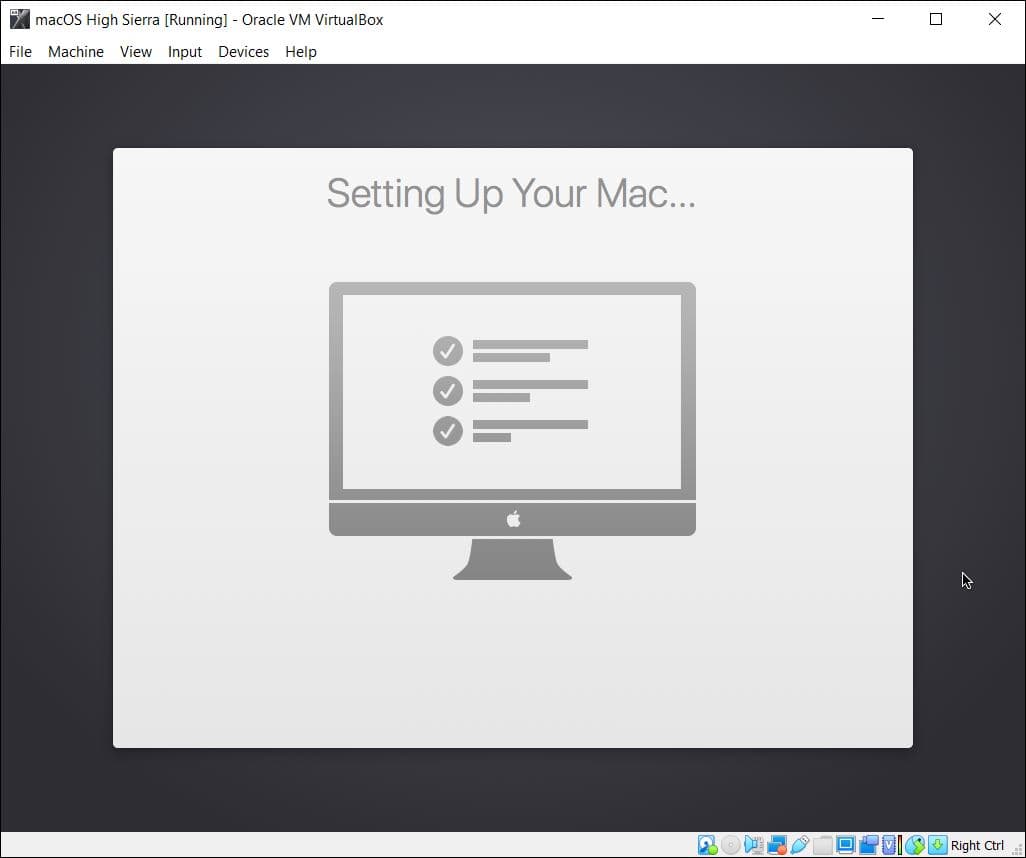
Continue with the installation steps, creating your account, enabling or disabling some features, and you’ll be all done. Once it’s done, the Mac will set up everything and you’ll see the macOS High Sierra Desktop.
The macOS High Sierra has now finished installing and is ready to work. The macOS should be completely working fine and there’s no problem with it. This macOS works completely like an actual macOS on Mac and there’s no difference in it.
![Install macOS High Sierra on VirtualBox on Windows PC [New Method]](https://www.geekrar.com/wp-content/uploads/2020/02/Install-macOS-High-Sierra-on-VirtualBox-on-Windows-PC-New-Method.jpg)
Recommended – Fix macOS High Sierra Screen Resolution
One more thing we recommend is to increase or fix High Sierra screen resolution which could turn into your actual screen resolution. While this step is completely optional, but for a better view and better experience, we recommend this step. For this step, we’ve prepared a completely different step by step tutorial, here’s how to do that.
The most interesting part is, it can be updated to the latest version when a newer version is out. While macOS High Sierra’s update has come to end but still you can do it. Besides this, we recommend taking a snapshot of the machine which will take a complete backup even better than a backup that can be restored when required.
If there are some problems with performance, you could easily fix speed slow running macOS High Sierra. Else if there’s problem other than the performance, we’ve catch you up with all. Here’s how to fix them all.
With that done, there’s nothing more to do. From the installation to the optional steps and fixing problems, we’ve done all that.
That comes to the end of this. That was all about Install macOS High Sierra on VirtualBox on Windows PC. If there’s some problem or would like to add or make some cool suggestions, we’re happy to hear that.


Just in case anyone else is getting the “This copy of the macos high sierra application is damaged, and cant be used to install macOS” error;
I set my PC time to 7th June 2019 restarted VMBox, then restarted the macOS High Sierra, and it ran as described and installed without issue.
Many thanks
everything went well but when i try to install mac os after erasing it gives me following error
This copy of the macos high sierra application is damaged, and cant be used to install macOS
Any solution around it?
Is the ISO image from our site? Have you tried a different copy?
You forgot a step, when you go to disk utility, you need to click “view” at the top of the screen, and “show all devices”
AH .. thats for pointing that out
I did everything as recommended here but when I start the machine it goes to shell> and does not show any fs0 fs1 etc not working.
can you paste any error messages that appear?
While installing the macOS, it says the copy of application is damaged and can’t be used to install macOS. What should I Do?
Try downloading the latest files from here-
https://forum.geekrar.com/forums/forum/macos-high-sierra/
Every iso I try gives the sam error saying it is damaged
I am gonna check this out now
Both are working as of May 3. Which link were you using? (mediafire or mega)
“we’ll need a couple of files that are completely easy to get from us.” Where? I don’t see a link anywhere.
Can you please recheck the links?
Doesn’t work :-/ Waiting for DSMOS… no way to get past that and get it started. Oh well.. Worth a try. Wanted to learn how to set up a MAC before I paid out for one for my daughter on tele-schooling, so I wouldn’t waste time setting it up for her. Thanks anyway 🙂
This was given by a user:
Grab the latest FakeSMC.kext and replace with the old one. From the MAC drive or USB installer the boot with the flag “GraphicsEnaber=No”
Alternatively, boot your mac drive with single-user mode(-s) and type:
/sbin/mount -uw
mkdir ~/backup
cd /System/Library/Extensions
If you have NVIDIA graphics then type:
mv -R NVD*.kext ~/backup
If you have AMD/ATI Graphics then type:
mv -R ATI*.kext ~/backup
If you have IntelGraphics then type:
mv -R AppleIntelGMA* ~/backup
mv -R AppleIntelHD* ~/backup
mv -R AppleIntelSNB* ~/backup
mv -R AppleIntelIntegratedFramebuffer.kext ~/backup
I’m on step seven and when I click on Disk Utility, I don’t see VBOX Harddisk. It only shows Install macOS High Sierra. I thought, maybe I don’t have to erase anything so I went back and clicked on Install macOS but it showed me “The copy of the Install macOS High Sierra application is damaged, and can’t be used to install macOS”.
Help?
Is the date correct in the BIOS? If it’s too far in the future or past you can get that message.
still in boot screen
It stuck on black screen. Please help
black screen on boot up?
Mine starts installing, but then stops and boots back into the install disk
Hello. If you have AMD the SO could no start and stuck at ‘end RondomSeed” – you have to execute also this instruction with the others inserted above:
VBoxManage.exe modifyvm “MacOS High Sierra” —-cpu-profile “Intel Core i7–6700K
rgds
You have to go into your BIOS and look up for your specific motherboard on how to enable “SVM MODE”.
Thanks, It worked.
I have an Invalid Settings Detected warning on the Settings page and cannot change any options. It says to disable hardware virtualization because it is not supported by the host system.
thanks a lot ..it really worked
How long should it take for the VM to boot for the first time in step 7?