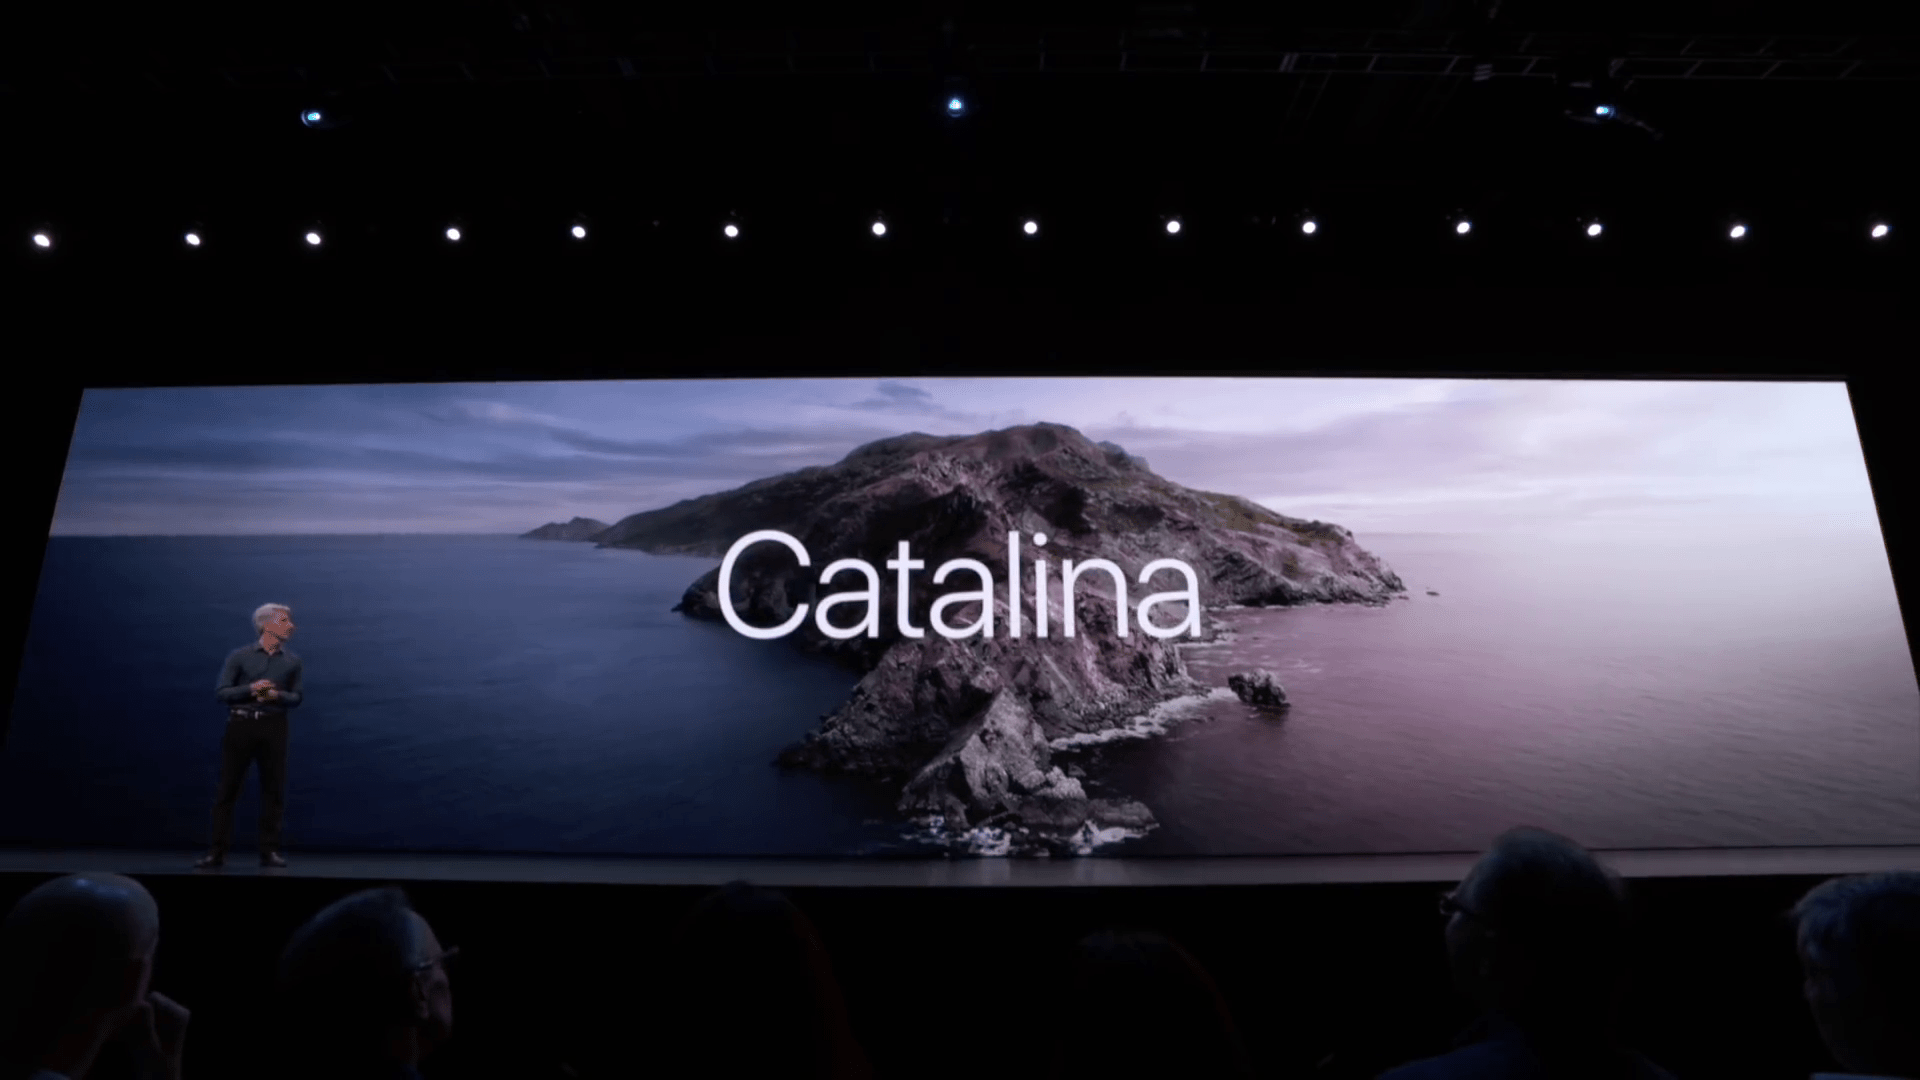
On the morning of 3rd June, Apple kicked off its 2019 annual developer conference with all the new stuff Apple has been working on for the last year will be front and center. The keynote was significantly exciting mostly for software but a little for hardware lovers. While WWDC is one of the most important and significant events with the biggest update to Mac, iPhone, iPad, Mac Pro, Apple Watch and Apple TV. In this post, we’ll install macOS Catalina on VirtualBox on Windows PC.
With all those things updated, the biggest update to macOS is the more exciting new version of macOS which is popular by macOS Catalina. With the new version of macOS – Catalina arriving on Mac’s, it’s fine to some Windows users wanting it within their computer. While Catalina works perfectly on Mac, but when it comes to installing it on Windows, it’s not the case. If you’re would like to install Catalina on a Mac, all you do is enroll in the developer program and download it. Once you’ve the installer file, you will straightly boot into and install Catalina in your Mac.
Instead, if you’re willing to install macOS Catalina on VirtualBox on Windows PC, first of all, you’ll need to download macOS Catalina VirtualBox image, (not from App Store or Apple’s developer program, they don’t work with virtual machines) which is pretty difficult to figure out. Getting a copy of the Catalina VirtualBox installer is even very tricky. If you Google, you’ll find some broken or corrupt files or download links that are completely rubbish. Even searching deep and more and more won’t help you out.
In terms of installing Catalina on Windows, there is no such question. Even Catalina is now risky to install but you have the perfect option which is a virtual machine. The virtual machines solve almost all questions and make riskiness faraway. It will completely work separate from your actual operating system without harming a single thing. If there’s some problem at some point, you’ve two solid options whether to delete the virtual machine or use the snapshot that is pretty easy. That’s the best option to try everything up without taking a risk.
Excited about Catalina, but don’t want to wait until fall? The public beta is now available to try on your Windows PC; here’s how to install macOS Catalina on VirtualBox. If you want to install macOS Catalina on VirtualBox worth of new features to play with, the Public Beta of Catalina VirtualBox image gives you access right now.
Table of Contents
Install macOS Catalina on VirtualBox on Windows PC
Whether you would like to install macOS Mojave on VirtualBox or would like to install macOS Catalina on VirtualBox, we are with you. In this tutorial, we’ll walk you through how to install macOS Catalina on VirtualBox on your Windows PC.
- Related: Install macOS Catalina on VirtualBox on Windows PC [New Method]
What You’ll Need
This process requires some necessary tools that are very easy to get at this point. We’ve prepared the things for you that you won’t have to dig around. These images are straightforward to obtain. They are securely created, compressed, uploaded to two powerful servers. All you’ve to do is click on the images and acquire those.
- VirtualBox — This virtual machine app makes the process quite easy. With VirtualBox, it’s pretty easy to understand everything, and not only that but is easy to install and use it. There’s nothing more you’d need that VirtualBox needs to run with. All of its components are integrated into it. The nice thing is, it supports installing macOS no matter which version, unlike VMware. But still, there’s a simple trick which we need to do.
Join us on Patreon and support us for making better content.
macOS Catalina Final Version (19A602) 15 Oct 2019 (Recently Uploaded)
Finally, when you’re done, you’ll need to extract the files into a single folder.
Before we get to the important part, one last thing before we jump in: make sure the Intel VT-x is turned on for Intel users. If you’re an AMD user, you could definitely ignore this.
Done downloading things? Good. Now it turns to Install macOS Catalina on VirtualBox on Windows PC which is pretty simple.
- Related: Install macOS Catalina on VirtualBox on Windows PC [New Method]
Step One: Install VirtualBox on Windows
The first thing you need to do is start the VirtualBox installation with the setup.exe from the VirtualBox setup files.
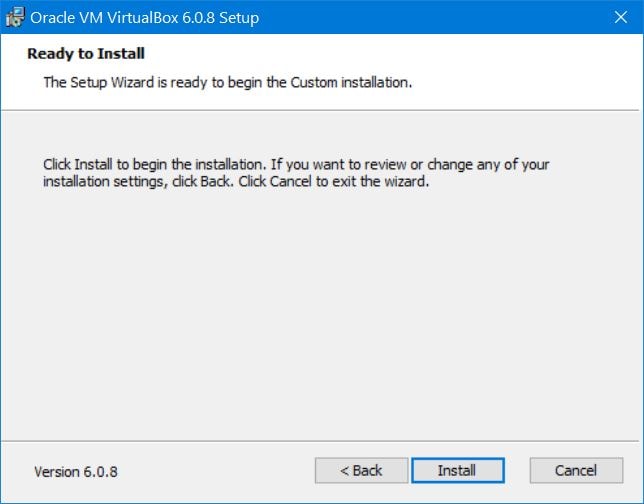
The installation part is simple, with a few clicks you’ll end up installing it.
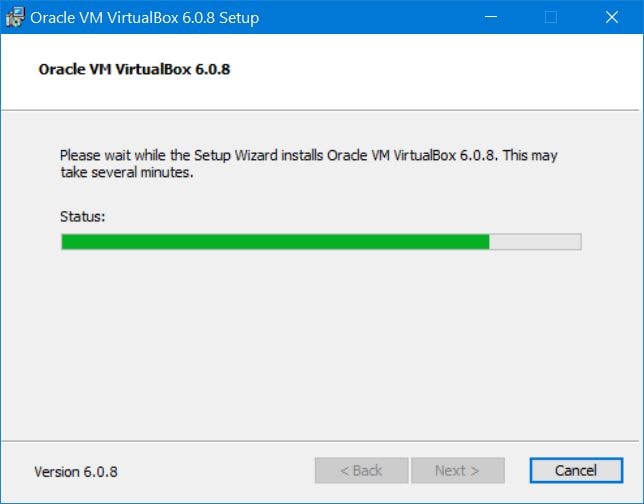
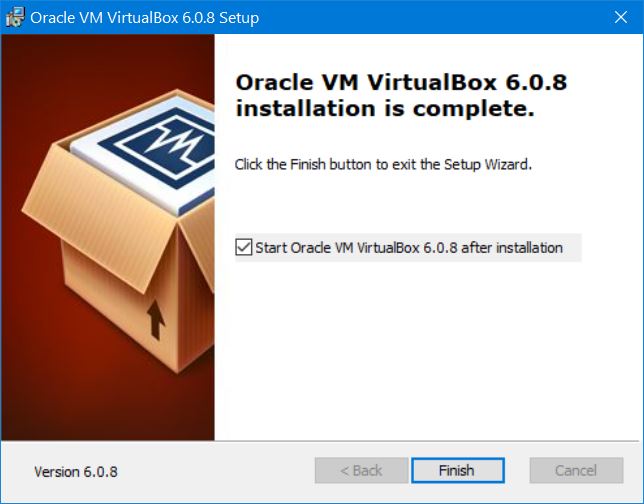
At the end, start the VirtualBox from the installation and click Finish.
Step Two: Set Up A New Virtual Machine
Speaking of installing Catalina, you’ll need to set up a new virtual machine in order to install macOS Catalina.
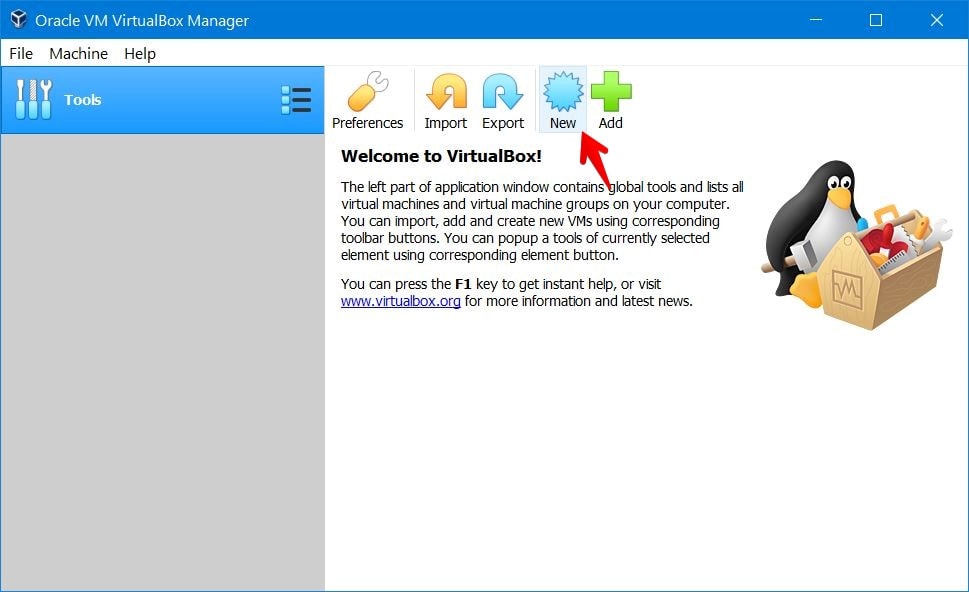
From the VirtualBox, click on New.
Now choose Expert Mode from the bottom.
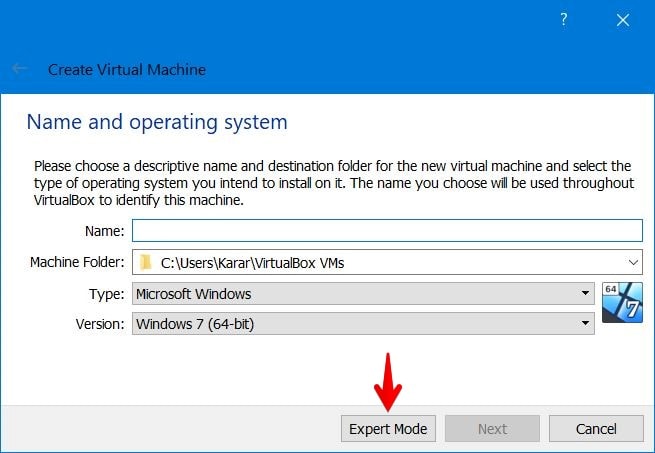
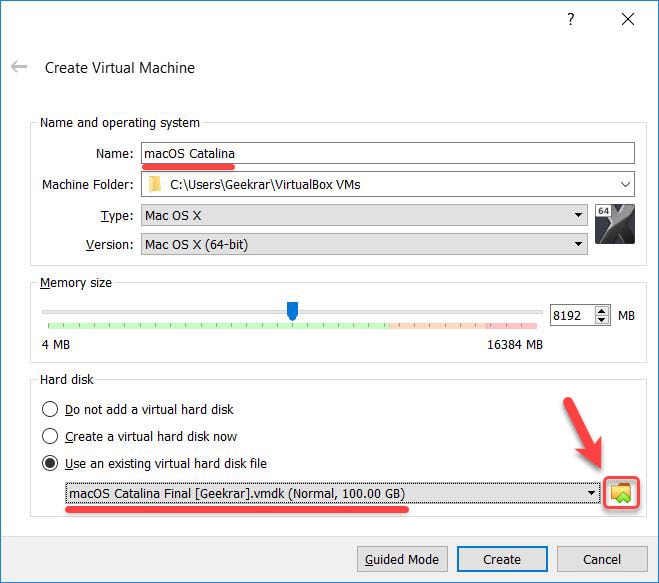
For the Name & operating system, write down the name of the virtual machine. In my case, I will write down “macOS Catalina”. Select “Mac OS X” for the Type and Mac OS X (64-bit) for the version.
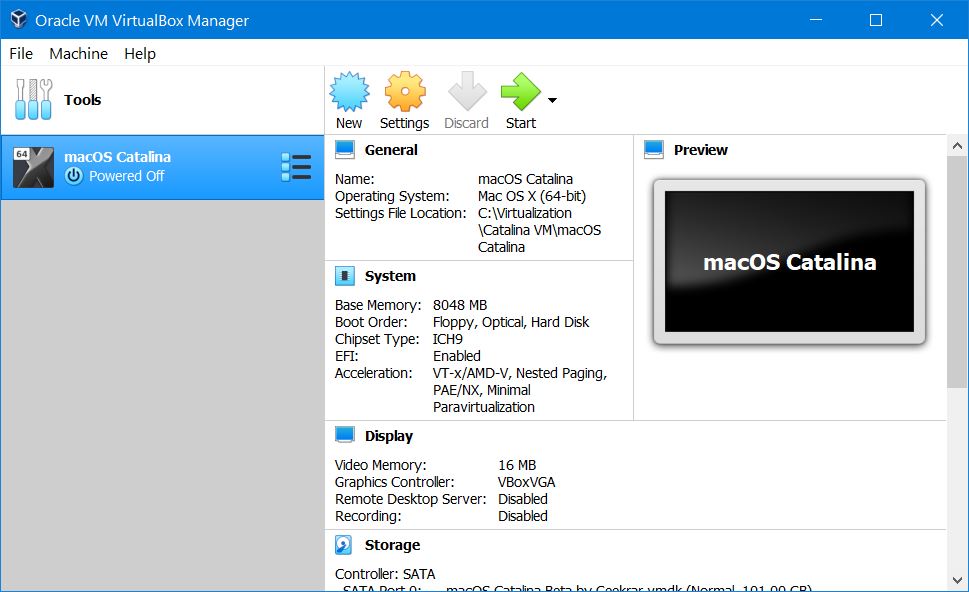
For Memory, I recommend you to go with the 50-50 rule which is to assign 50 to 60% of your computer’s memory for the virtual machine. For Hard Disk, select Use an existing virtual hard disk file and choose the macOS Catalina’s extracted VirtualBox image which is Catalina’s VMDK file. In the end, click Create. Here’s the preview of how it looks like.
With the virtual machine created, simply close the VirtualBox (Important!). If you didn’t, you would likely end up with EFI Internal Shell. Here’s how to fix EFI Internal Shell on VirtualBox.
Done all that? Alright, here’s what else you need to do.
Step Three: Configure macOS Catalina Virtual Machine
Install macOS Catalina on VirtualBox on Windows PC will essentially work straightforward similar to a Mac, and devotes most of your Windows power and its graphics card to running Catalina. How much ever you allocate, it will get more thirsty of power. The more you allocate, the better the performance. That is what makes the experience better and better. So note this!
The virtual machine won’t work without configuring. We need to do some quick configuration from the virtual machine settings. From the top of the window, click on Settings.
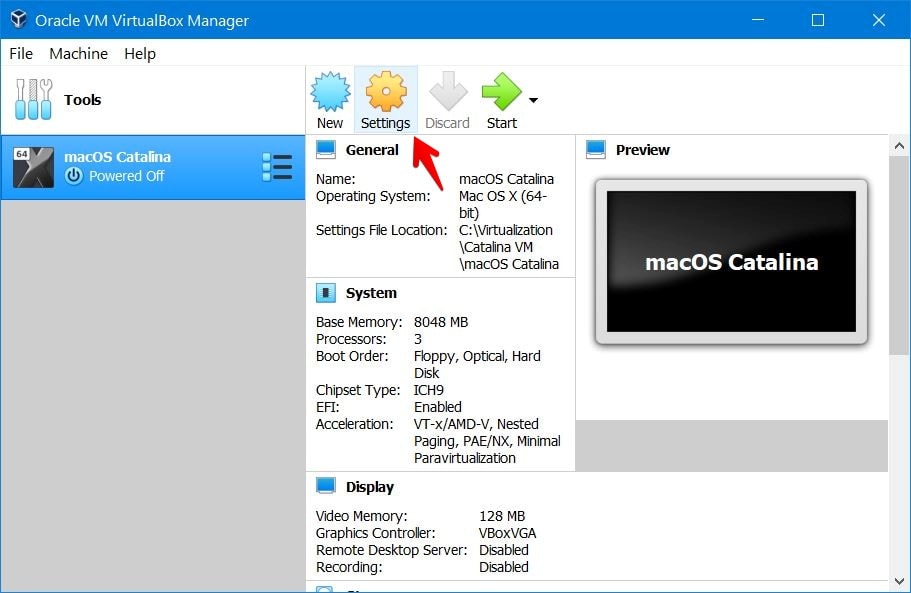
Now select the System tab and click on Processor. Increase the processor to 2 at least or more (Seriously, otherwise, the virtual machine won’t boot).
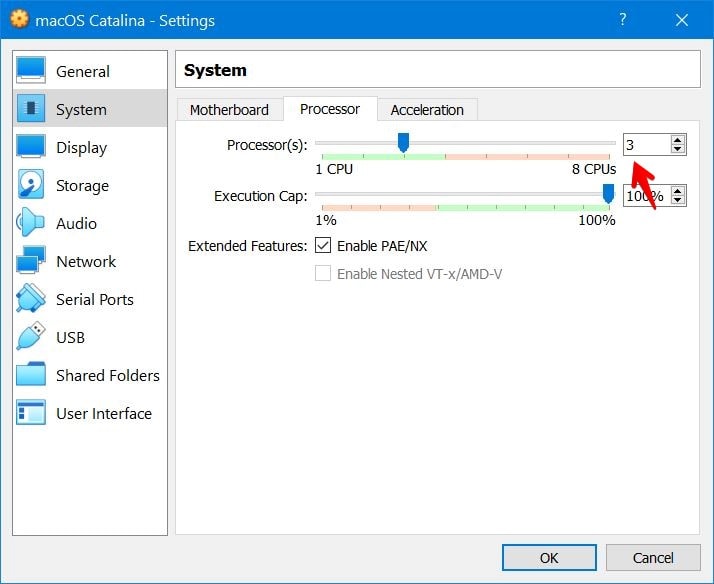
Under it, click the Display tab. Increase the video memory to the highest which is 128 MB. When you’re done, click OK.
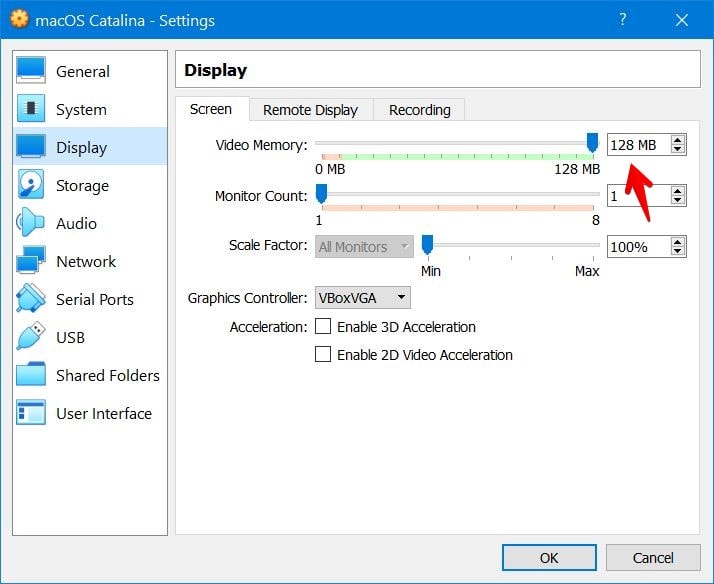
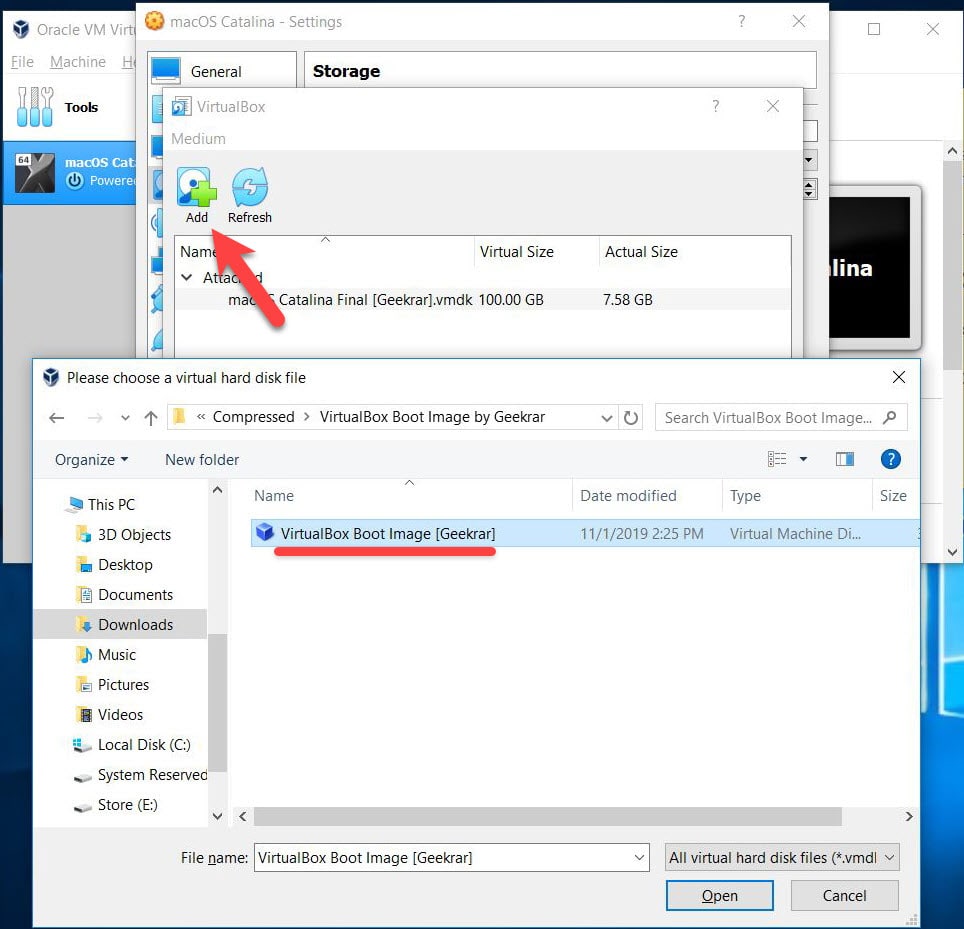
Next head to the storage tab and click on the hard disk plus icon at then choose existing disk on the pop up that appears.
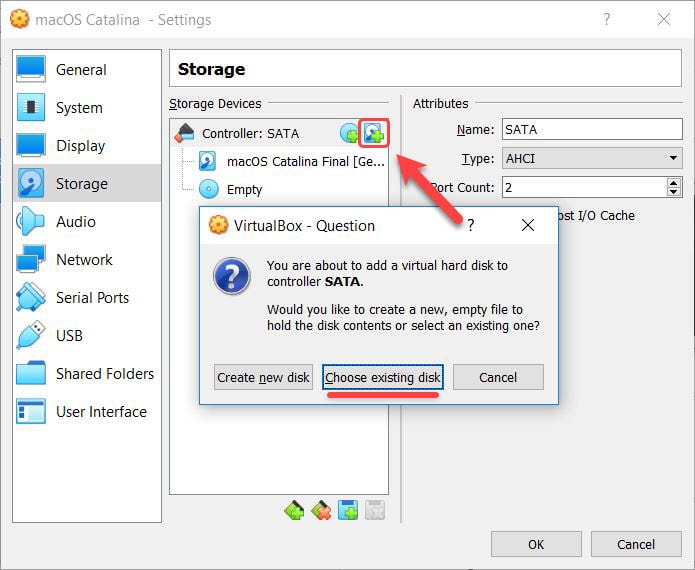
Now first click on Add button and choose VirtualBox Boot Image by Geekrar.
If the top one didn’t work, here’s another one.
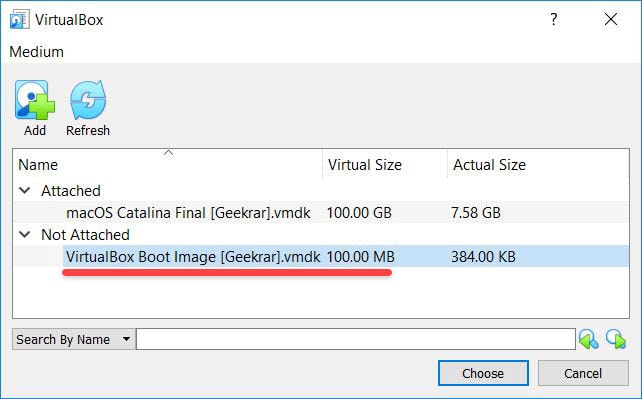
When that’s added, click choose.
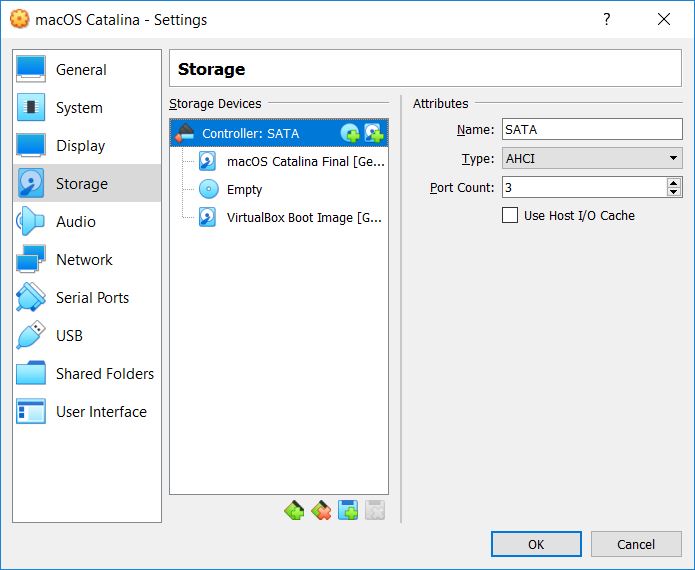
When done, click OK on the virtual machine settings.
Step Four: Install VirtualBox Extension Pack
The virtual machine is nearly finished configuration. In order to work mouse and keyboard, you’ll need to install the VirtualBox extension pack. Here’s how to do it.
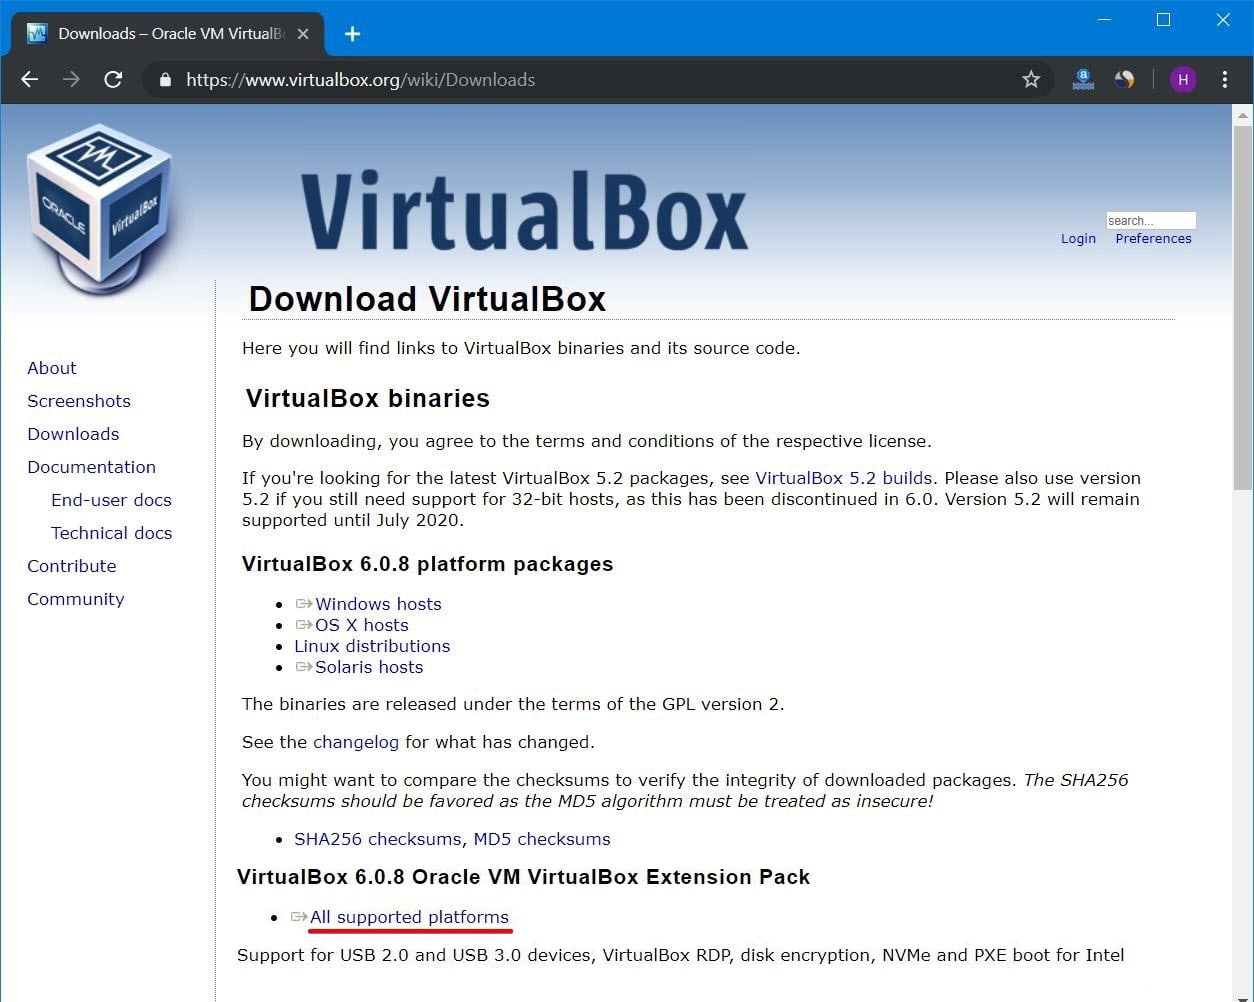
Go to the VirtualBox downloads page and scroll down for the VirtualBox extension pack. Click on the All supported forms to download it.
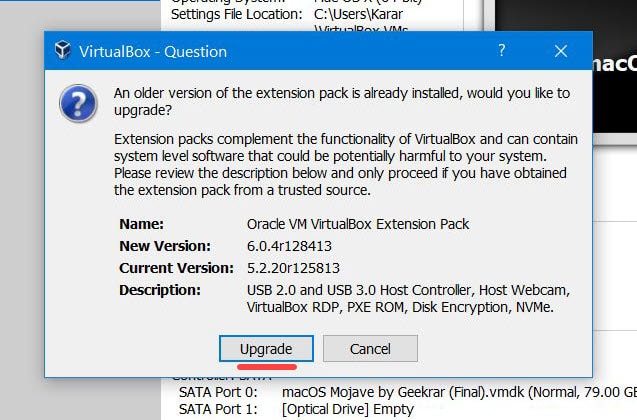
When it’s finished, open it. It will pop up the extension installing a window, click on Install. It will immediately upgrade the VirtualBox extension. If you haven’t installed yet, you need to Install VirtualBox Extension Pack.
Step Five: Apply Commands on VirtualBox
Once you’ve accomplished those, there are some commands which you need to apply in order to run macOS Catalina.
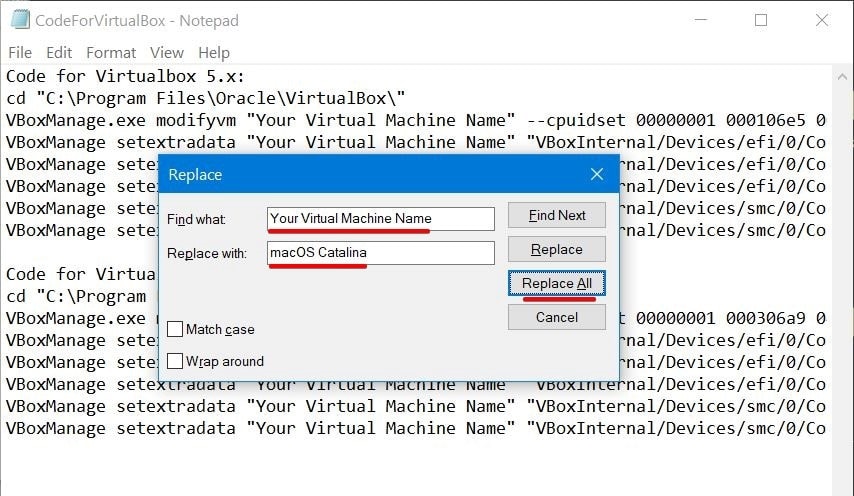
Open the commands and press Ctrl + H. When the window popped up, write “macOS Catalina” (your machine name) in front of Find What and write “Your Virtual Machine Name” in front of Replace with.
Note: If you’ve an AMD Ryzen or AMD Radeon, you need a different command. This won’t work for you. Here’s how to install macOS Catalina on VirtualBox on AMD system.
cd "C:\Program Files\Oracle\VirtualBox\"
VBoxManage.exe modifyvm "Your Virtual Machine Name" --cpuidset 00000001 000106e5 00100800 0098e3fd bfebfbff
VBoxManage setextradata "Your Virtual Machine Name" "VBoxInternal/Devices/efi/0/Config/DmiSystemProduct" "iMac11,3"
VBoxManage setextradata "Your Virtual Machine Name" "VBoxInternal/Devices/efi/0/Config/DmiSystemVersion" "1.0"
VBoxManage setextradata "Your Virtual Machine Name" "VBoxInternal/Devices/efi/0/Config/DmiBoardProduct" "Iloveapple"
VBoxManage setextradata "Your Virtual Machine Name" "VBoxInternal/Devices/smc/0/Config/DeviceKey" "ourhardworkbythesewordsguardedpleasedontsteal(c)AppleComputerInc"
VBoxManage setextradata "Your Virtual Machine Name" "VBoxInternal/Devices/smc/0/Config/GetKeyFromRealSMC" 1
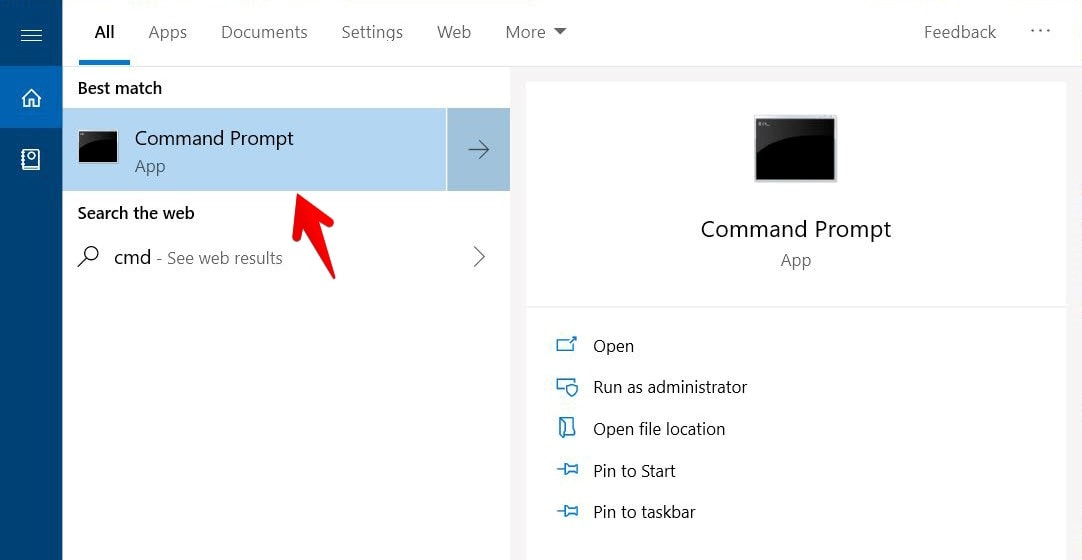
Now open up Command Prompt (CMD) without administrator privileges.
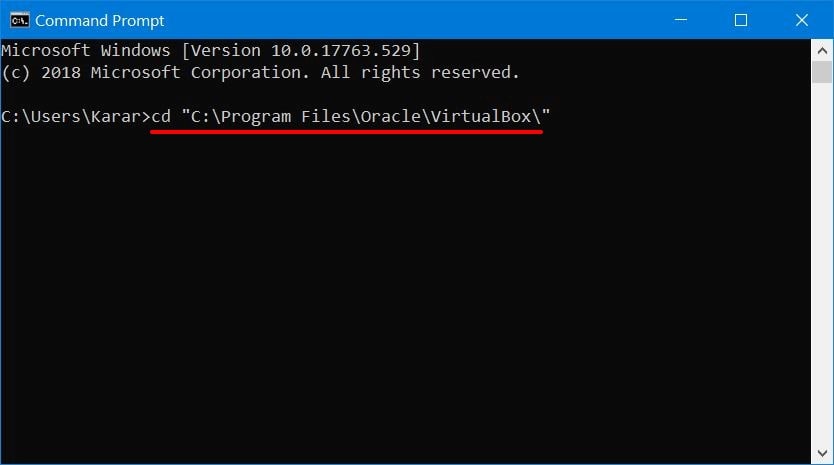
First, copy and paste the first line of the commands.
cd "C:\Program Files\Oracle\VirtualBox\"
VBoxManage.exe modifyvm "Your Virtual Machine Name" --cpuidset 00000001 000106e5 00100800 0098e3fd bfebfbff
VBoxManage setextradata "Your Virtual Machine Name" "VBoxInternal/Devices/efi/0/Config/DmiSystemProduct" "iMac11,3"
VBoxManage setextradata "Your Virtual Machine Name" "VBoxInternal/Devices/efi/0/Config/DmiSystemVersion" "1.0"
VBoxManage setextradata "Your Virtual Machine Name" "VBoxInternal/Devices/efi/0/Config/DmiBoardProduct" "Iloveapple"
VBoxManage setextradata "Your Virtual Machine Name" "VBoxInternal/Devices/smc/0/Config/DeviceKey" "ourhardworkbythesewordsguardedpleasedontsteal(c)AppleComputerInc"
VBoxManage setextradata "Your Virtual Machine Name" "VBoxInternal/Devices/smc/0/Config/GetKeyFromRealSMC" 1
Then, copy and paste all the remaining part of the commands.
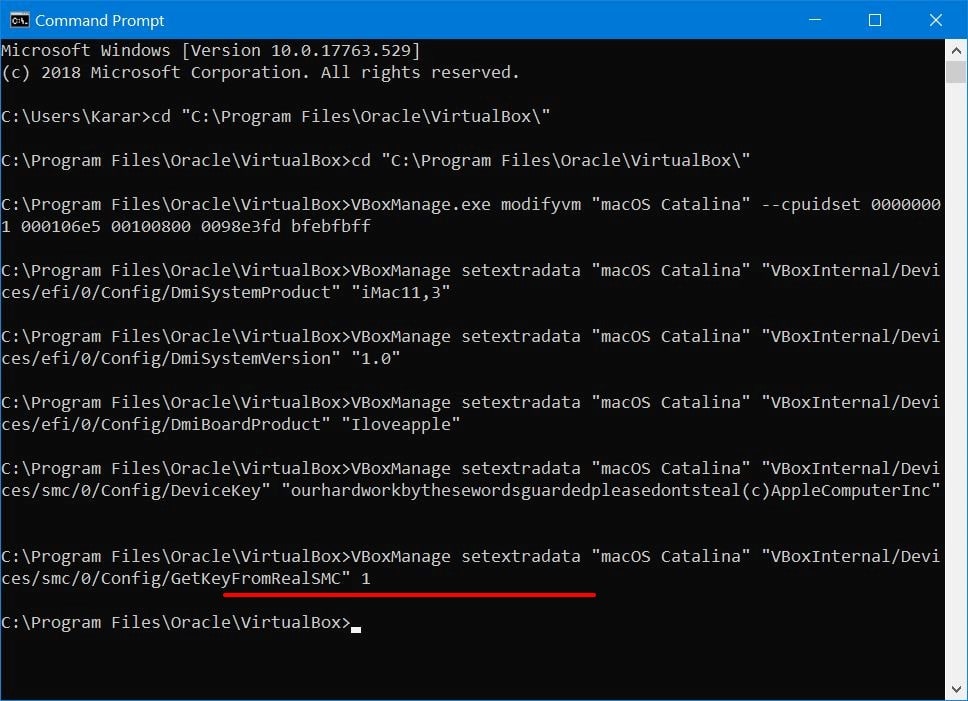
Step Six: Install macOS Catalina on VirtualBox on Windows PC
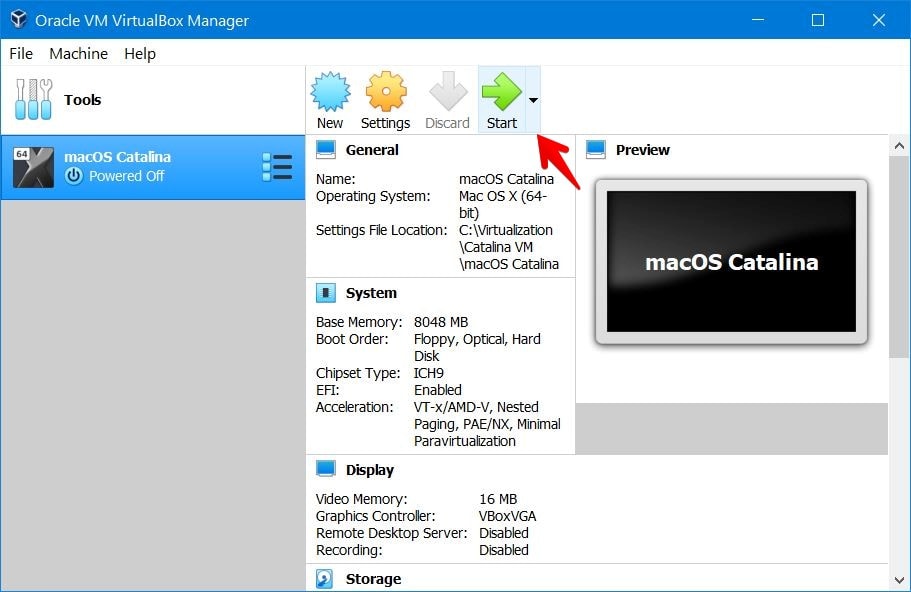
The time has come to succeed with the installation war. Start Install macOS Catalina on VirtualBox on Windows PC. Now fire up VirtualBox and click Start.
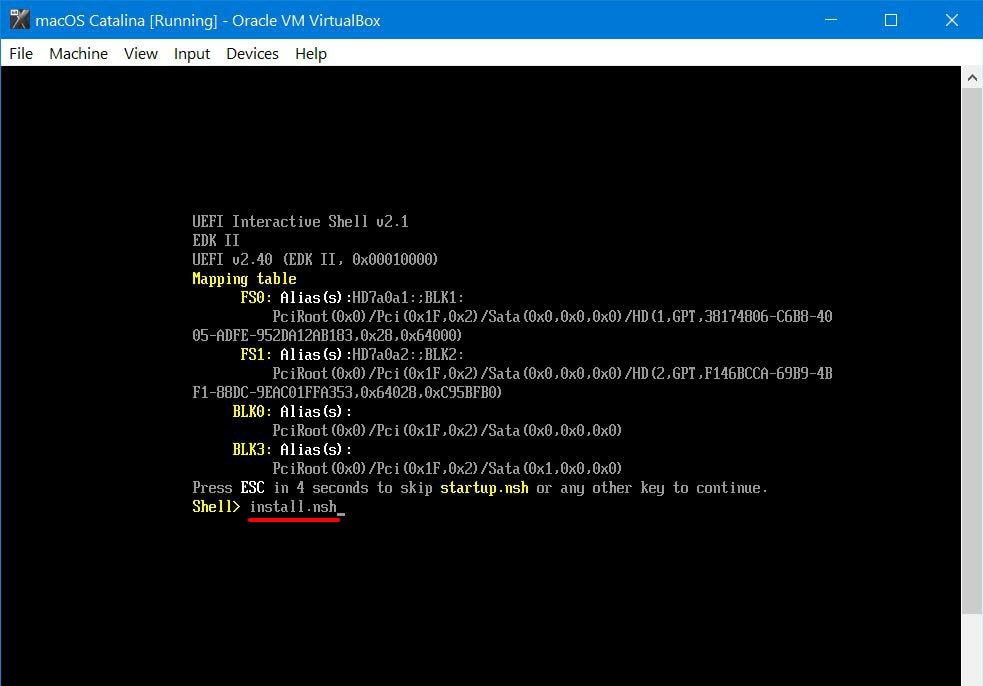
Once the booting finished, press ESC to skip startup.nsh. Now type “install.nsh” and hit Enter. This will definitely take a while.
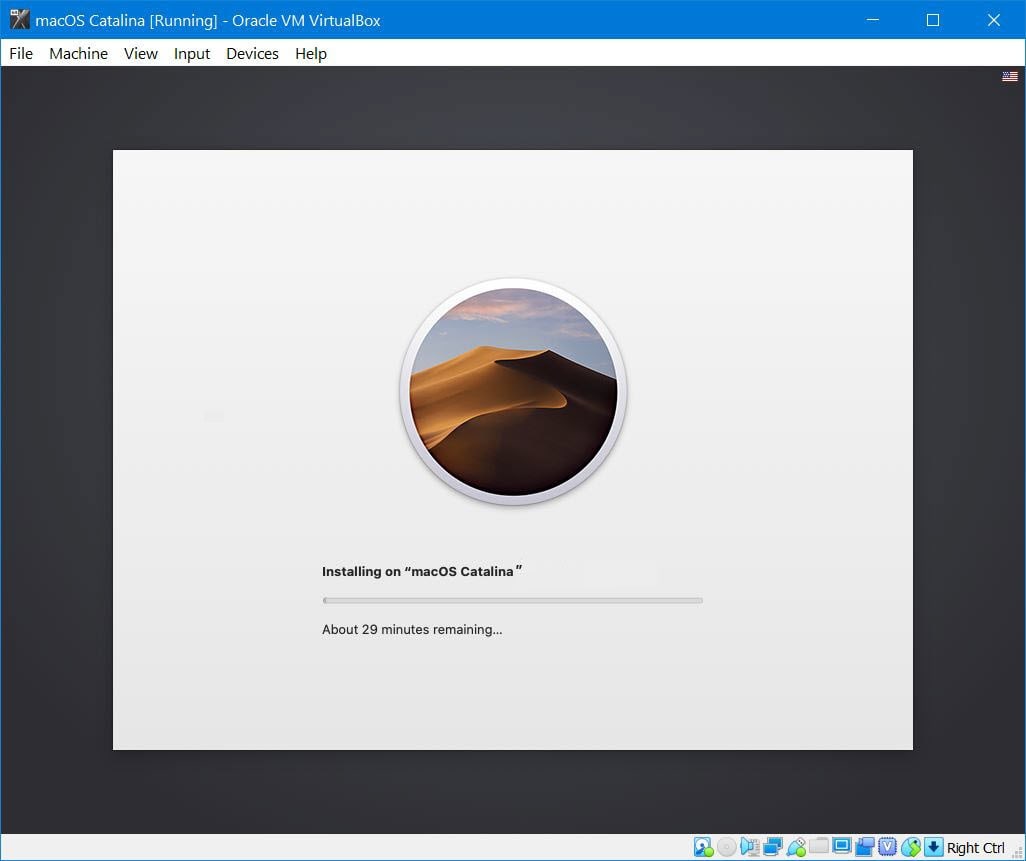
The installation will begin in a moment that will look like this.
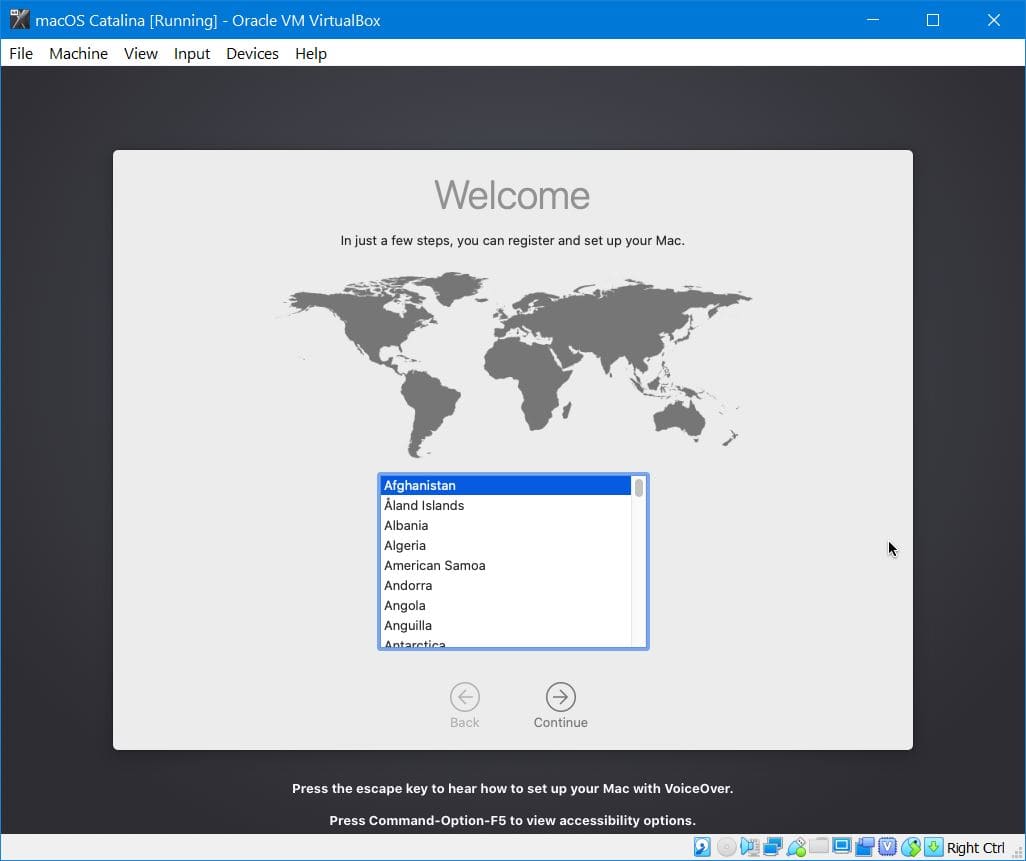
After this, it will restart with hundreds of lines of codes appearing. Don’t worry, that’s fine. When the machine boots up, you’ll figure out the Welcome screen. There you go! Choose where you are located and click Continue.
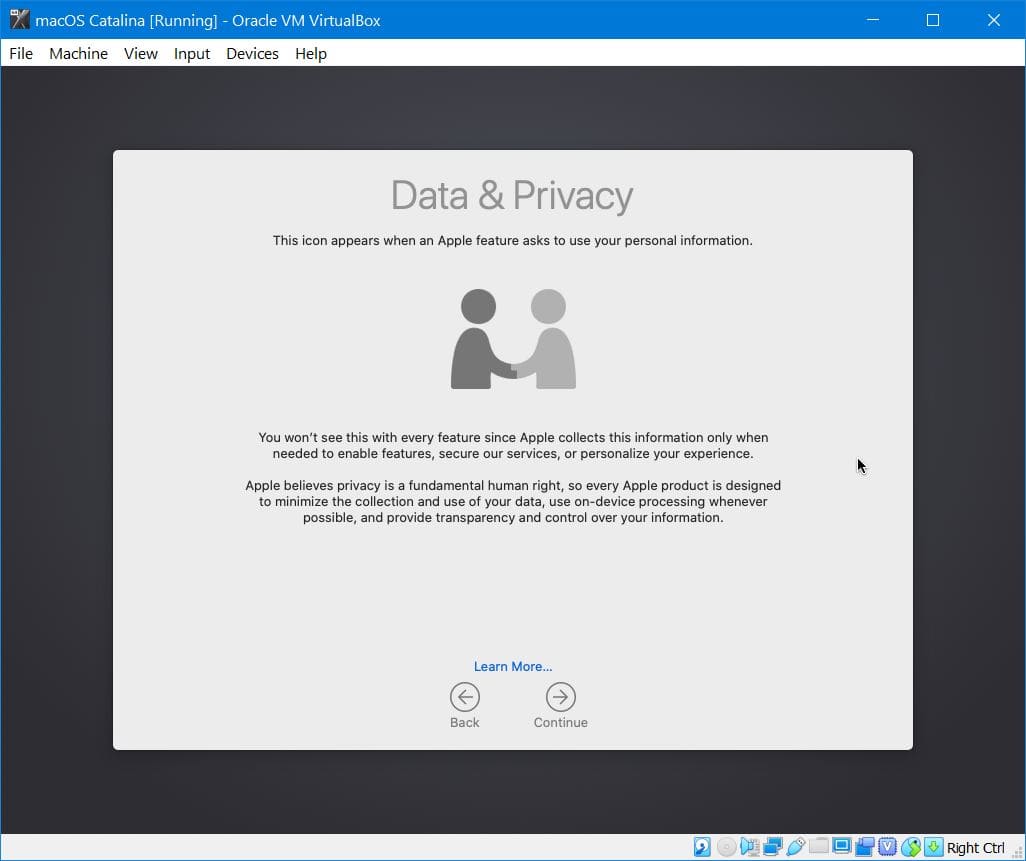
Great! From now, whenever you use an Apple feature, Apple might collect some information of you, simply Continue. There’s no risk in it.
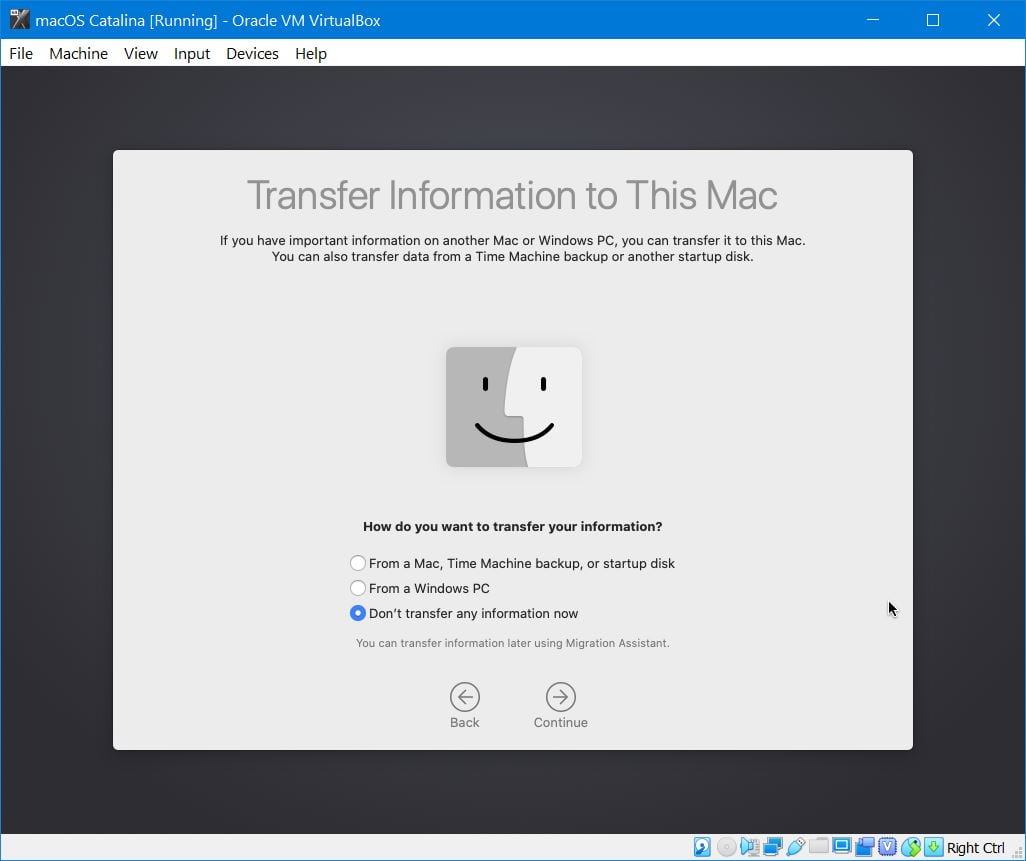
Next, if you would like to make your information here, you’re free to go. In my case, I’ll use the Don’t transfer any information now.
The sign in option is there. If you have an Apple ID, use it to sign in there. Next, you’ll be asked for your credential, type it and click Continue.
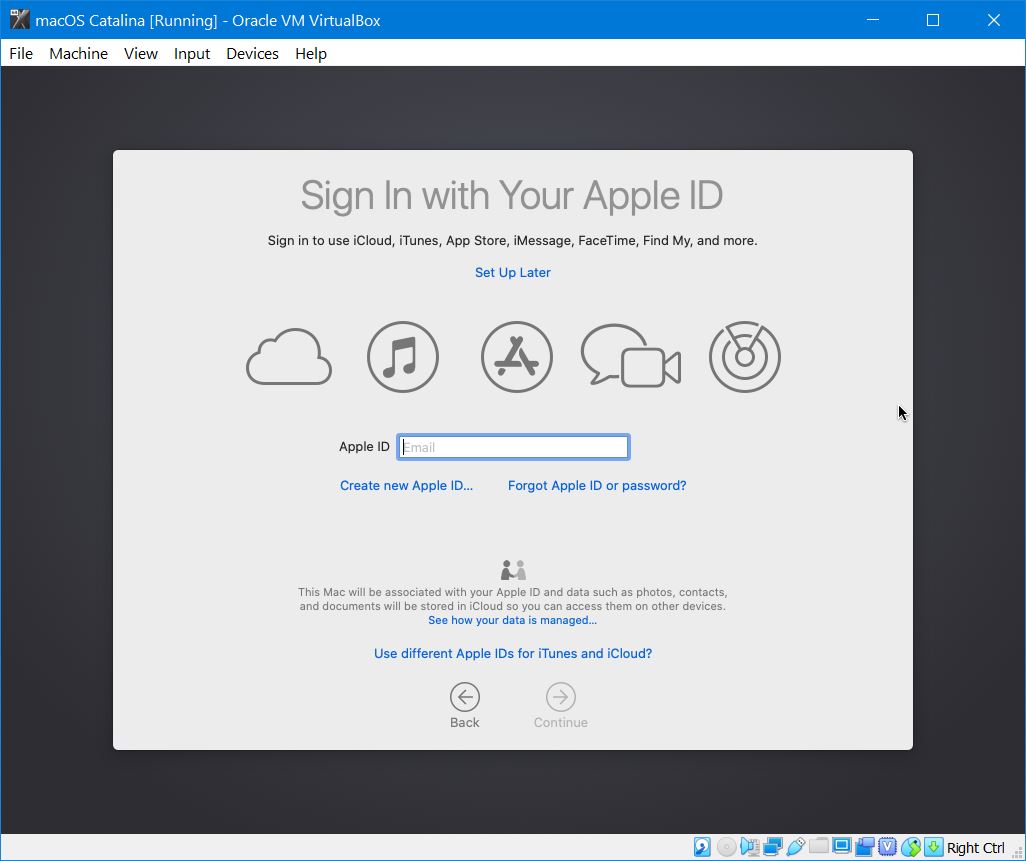
Since I’ve signed in with my Apple ID, Apple recommends using two-factor authentication.

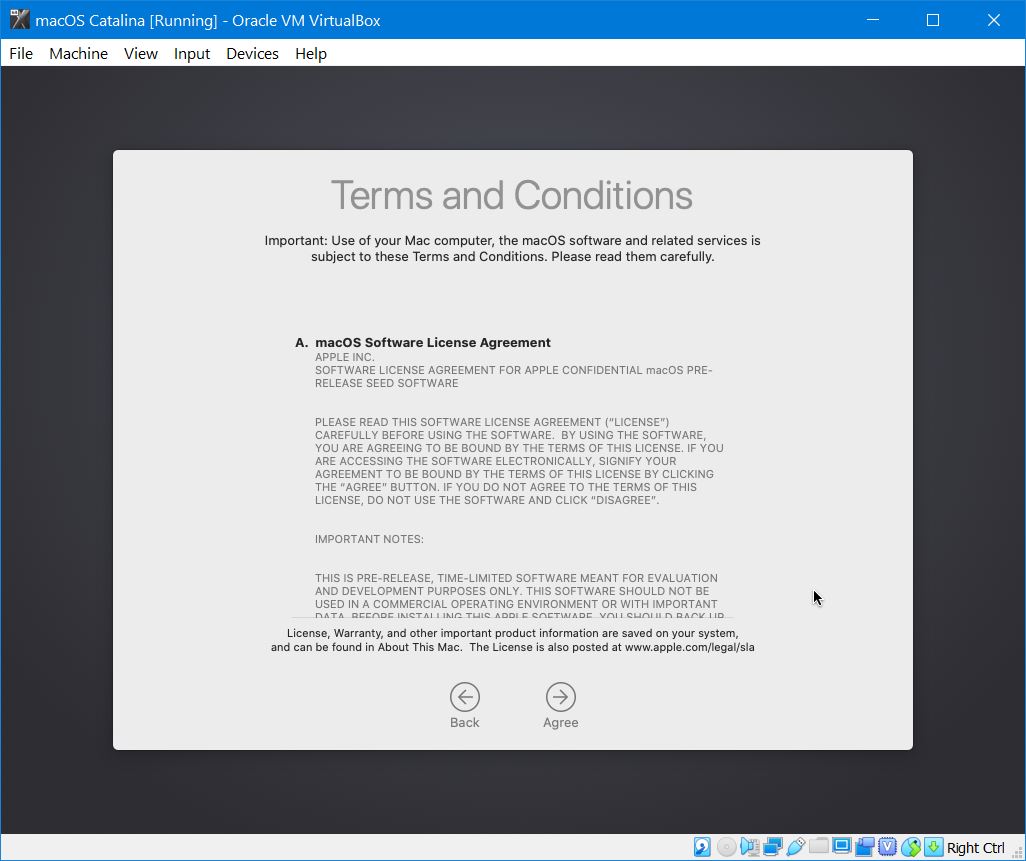
The use of the macOS Catalina points to the terms and conditions. Click Agree and continue with the installation.
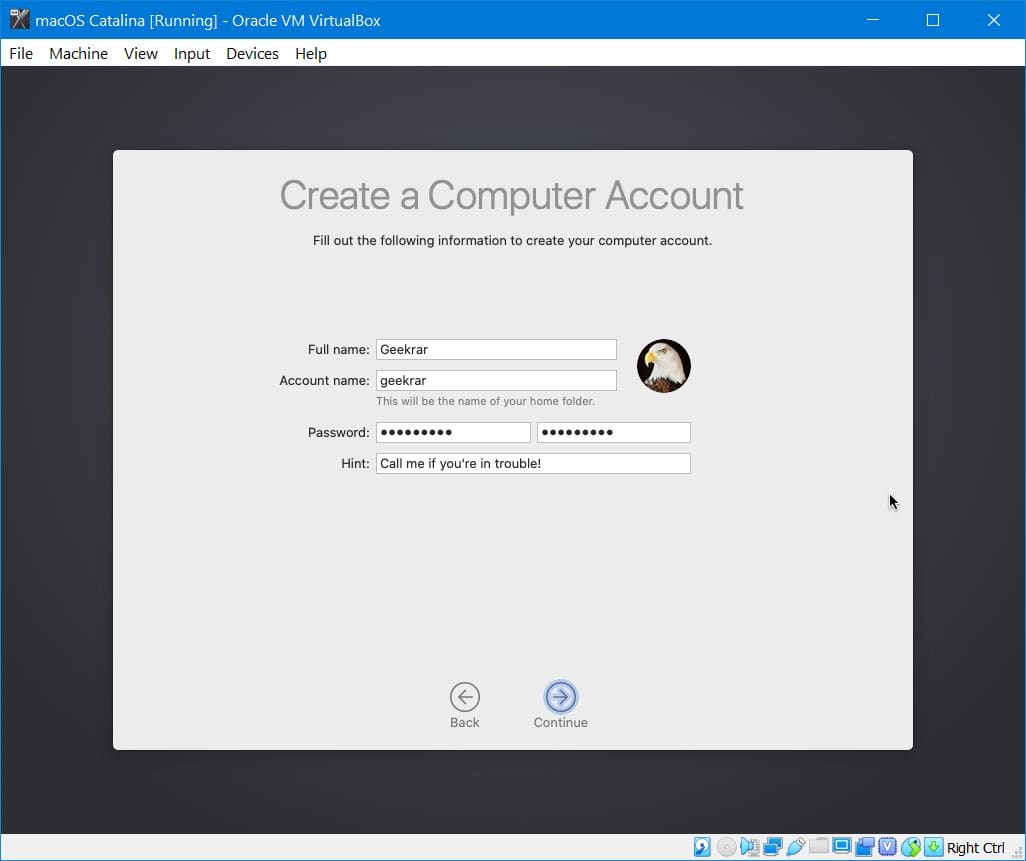
Create your account with the following details and Continue.
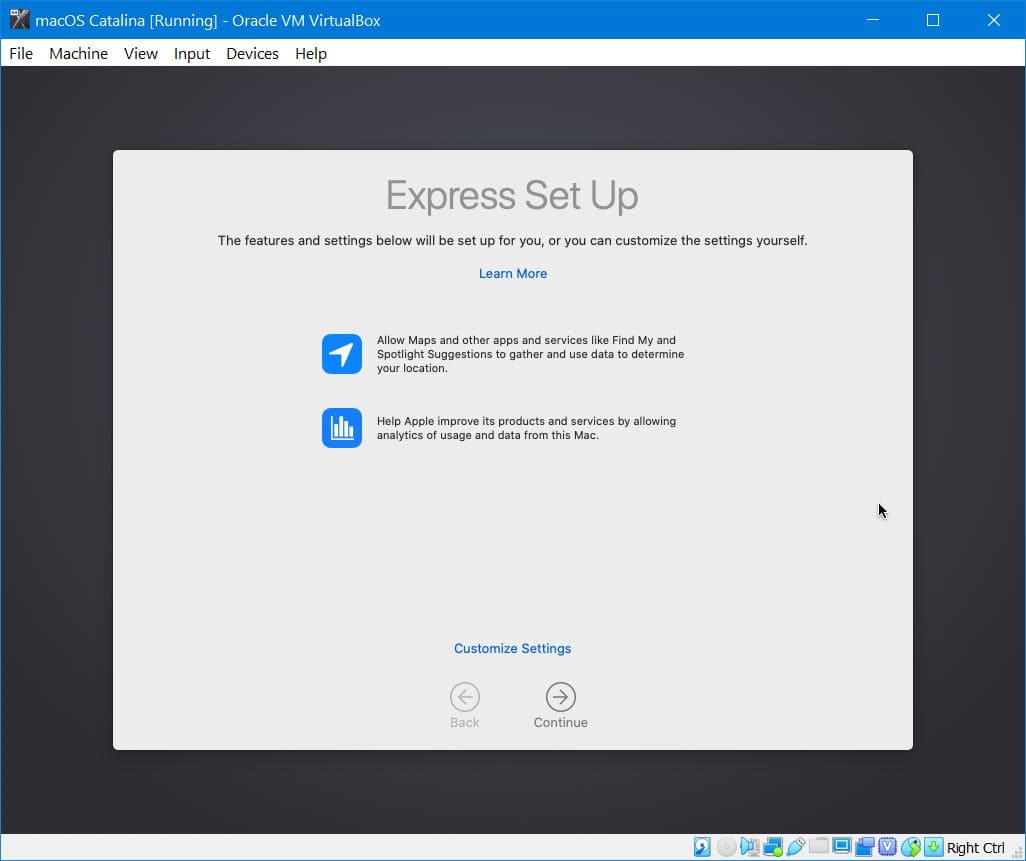
There are some useful features which will be set up for you, Continue with it.
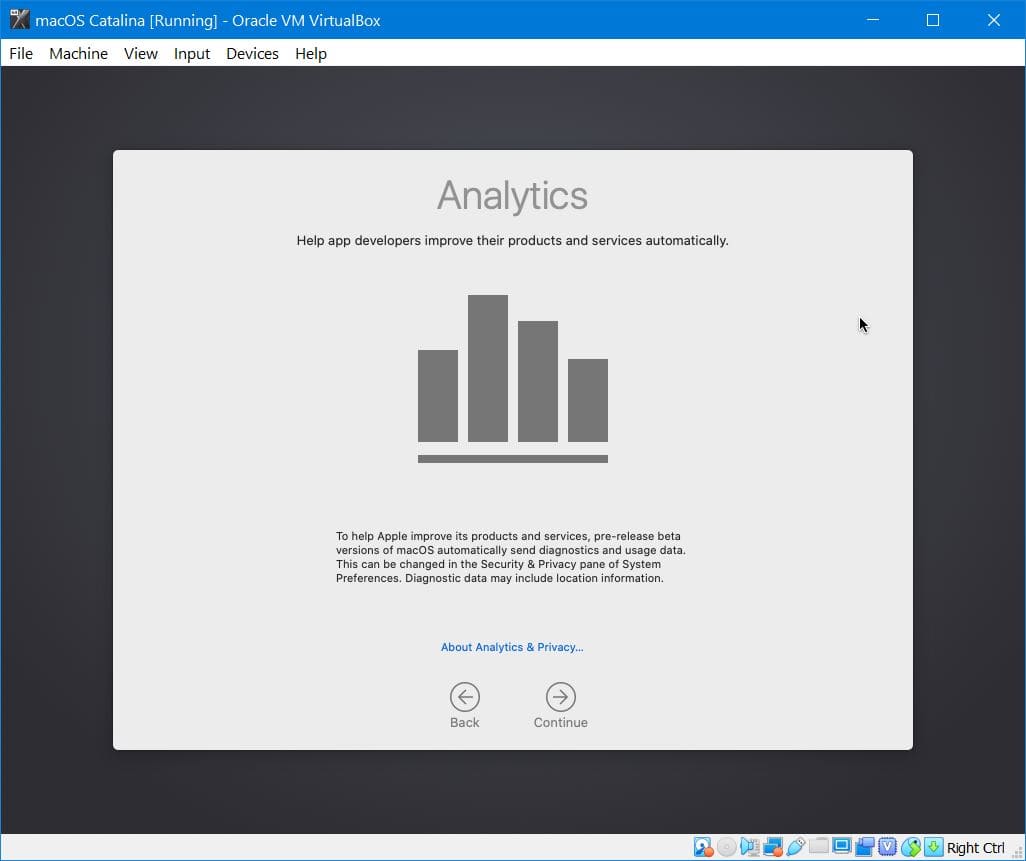
Apple might receive some information about the software, Continue with it. This can be changed from the System Preferences later.
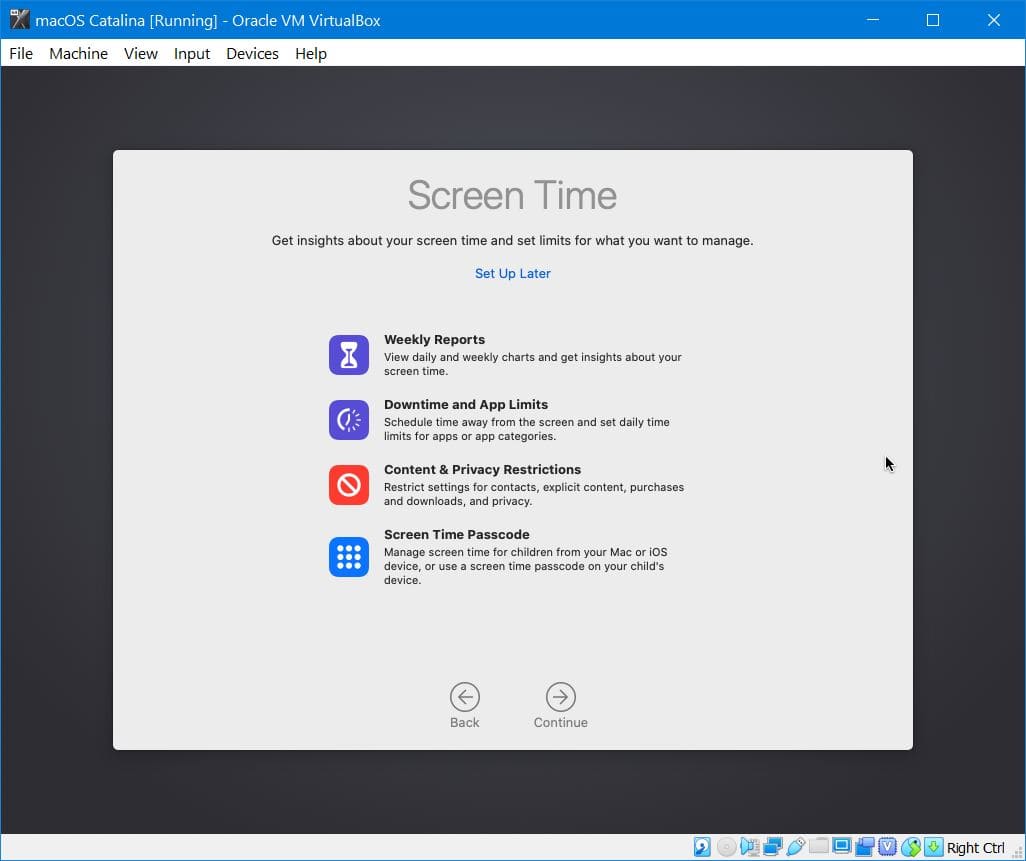
Wonderful! The new screen time feature is under your hands, Continue with it.
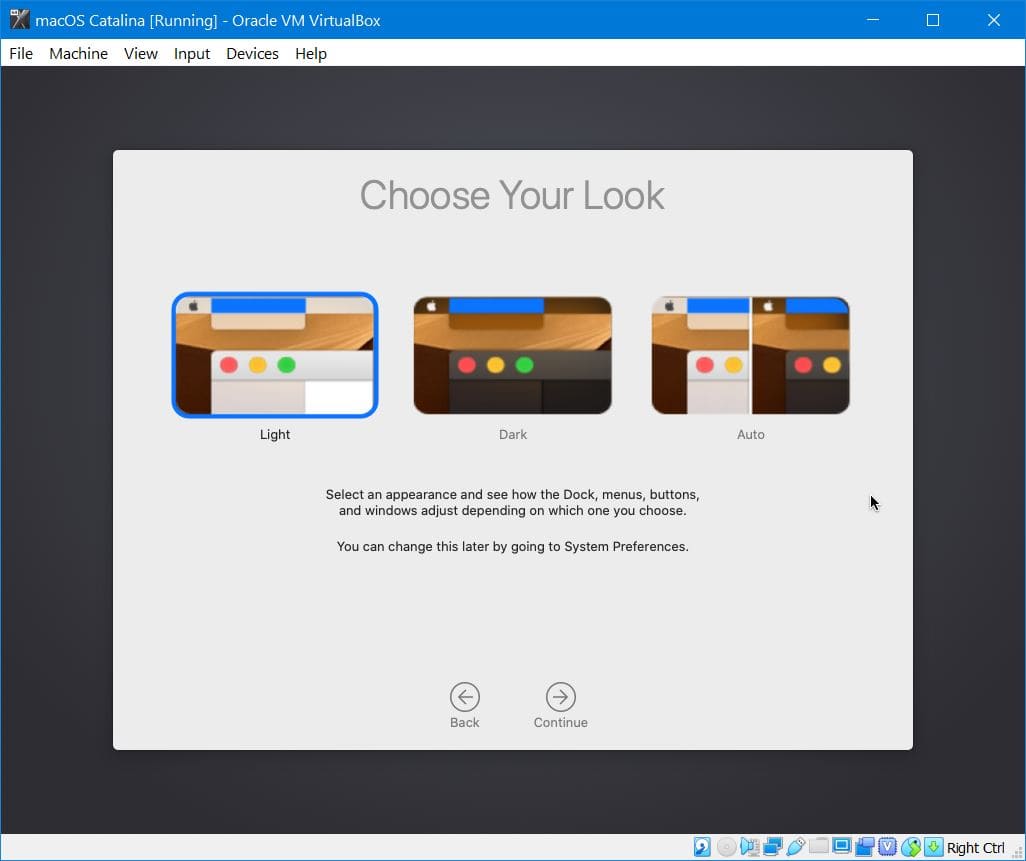
Select your desired interface which looks the best to you and click Continue.
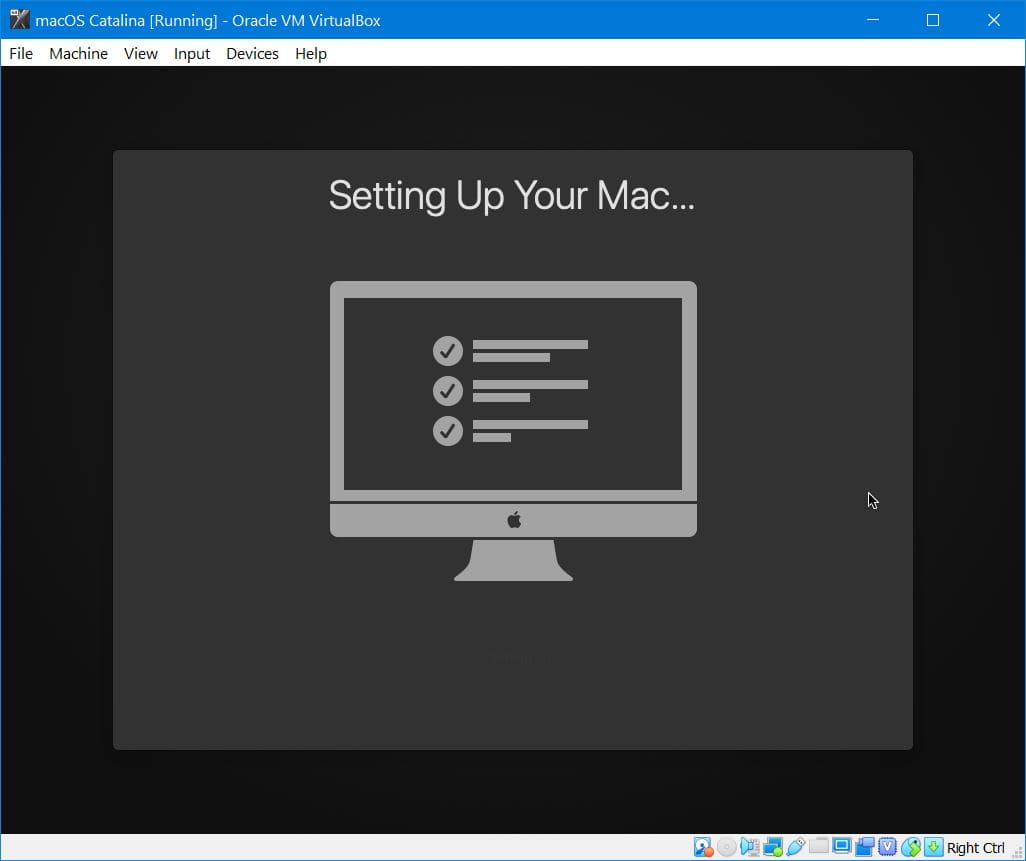
Once you’ve done the settings, your Mac will begin setting up.
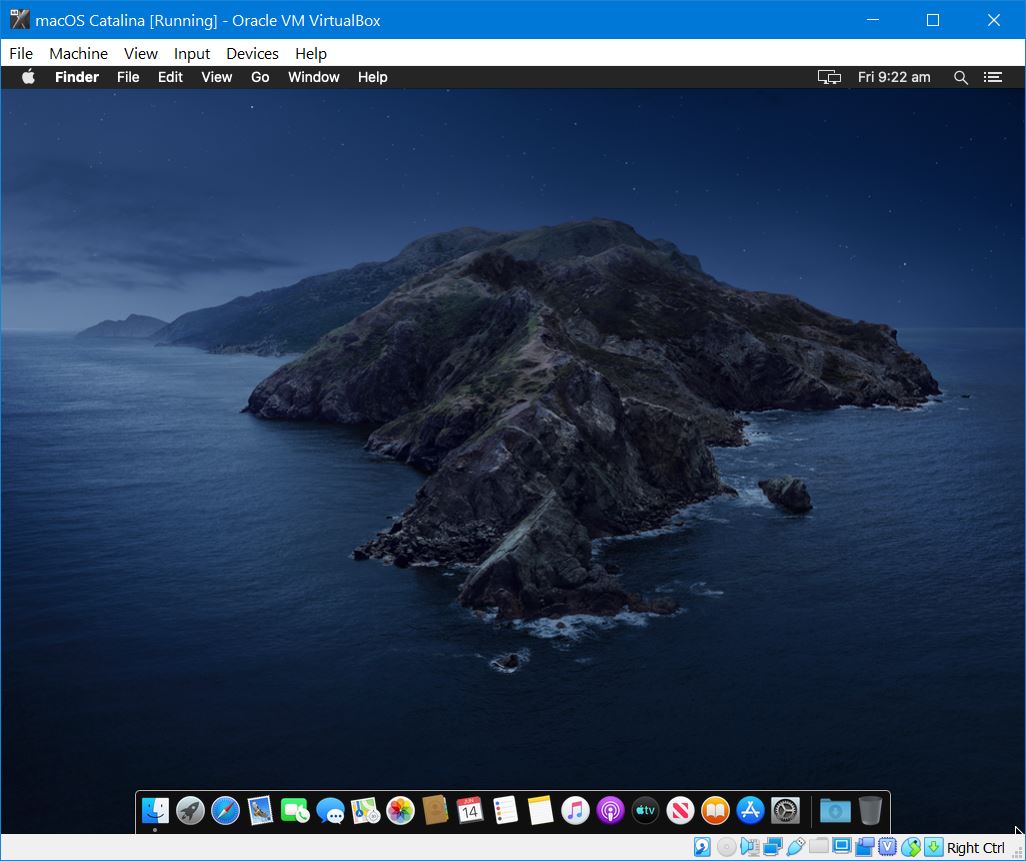
When it’s finished, you’ll see the newest version of macOS which is macOS Catalina. The dark mode of Catalina is super stunning. Here’s a quick look at what we expect to see.
Optional Step: Fix macOS Catalina Small Screen Resolution
With all the things done, you will likely notice a small resolution when you turn into a full screen. Here’s how to fix macOS Catalina screen resolution.
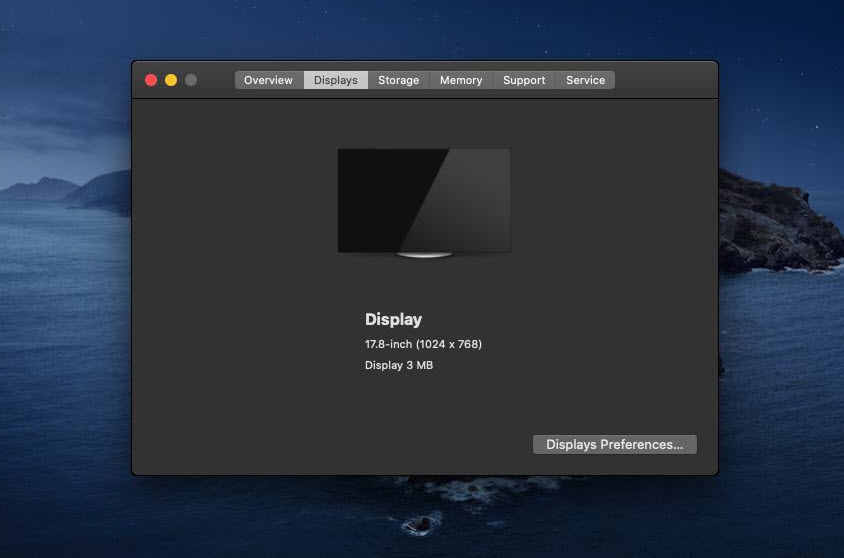
With the assigned resources, you should now do speed experience a speed surf of Catalina. Here’s how to speed up macOS Catalina or Mojave on Virtual Machine.
One More Step: Take A Snapshot
We recommend taking a backup of your virtual machine and when something goes wrong, you may simply switch to backup. This is really easy on VirtualBox.

From now, you can surf, try new apps and features, develop apps on XCode and even install Windows on Catalina. Including these, there’s plenty of things you could do. While running macOS on VirtualBox mightn’t be the best, but however, it’s the most convenient and cheapest way to try and even work. It’s worth giving a try! Now that you’ve done all these, there’s nothing more you’ve to do. This isn’t probably perfect experience for trying out Catalina on an actual computer, but with virtual machine, you’ll experience nearly the most similar experience. That way, whenever a new version is dropped, you don’t need to wait for us to upload an image, instead, you can directly update your macOS to the latest version.
However, if there were some issues with slow performance, you can always speed up slow running macOS Catalina.
That’s the end line of Install macOS Catalina on VirtualBox on Windows PC. If you’ve some questions, suggestions or ideas for improvement, we are here to know.








Got stuck on Step 6, following error:
Failed to query SMC value from the host
(VERR_INVALID_HANDLE)
E_FAIL (0X80004005)
ConsoleWrap
]Console{6ac83d89-6ee7-4e33-8ae6-b257b2e81be8}
Thank you! It works for me on Linux Mint!
Hola buenos días, no he podido instalar Catalina en mi Virtualbox, he seguido paso por paso su video, pero algo no debo estar haciendo bien, me da este error y no se como solucionarlo, podría ayudarme, Gracias
Virtualbox se requiere un disco con un punto de montaje. (-69854)
Hlo friend,
My installation freezes at about a minute remaining
I don’t know. What to do.
I followed your steps carefully.
This is a macOS guest issue rather then a problem with your host installation of VirtualBox. Please confirm that you have the VirtualBox Extensions Pack installed, and a USB 3.0 controller enabled in your VM settings.
Have you tried to reboot the vm?
Thank you for detailed instructions!
I was able to roll it out on Ubuntu 20.04.2 LTS. https://i.imgur.com/7Km63J2.jpg
There were few differences in steps:
Step 5:
`vboxmanage list vms` to get appropriate name of your VM. This command also suggested me some steps to do with boot.efi
Rest of commands (except cd C:\Program Files….) were run according to instructions.
Step 6: After the first start I either missed that or there was no way to press ESC to skip startup.nsh and run “install.nsh”. Installation began automatically.
This is very helpful. I am planning to make an updated post because of alternative steps that can be taken. Thanks for sharing what you did.
Hi. I can’t install anything from the App Store or log into iCloud. It says : “[app name] can’t be installed on “macOS Catalina by Geekrar” because macOS version 11 or later is required.
Did you try updating the OS first from System Settings?
I’ve fallowed this tutorial step by step and… I get the exact same screen of infinit commands as if I would of just used an update disk image instead, the only diffrence in my case is that I have VirtualBox and all my virtual machiness on the D:\ drive, I don’t suppose anyone has a fix for that.
Try looking at this video-
https://www.youtube.com/watch?v=VzBEk28lBLU
tried to download your file and it always failed. Is there any option?
Can you re-try now?
Works great after installing Catalina VM. Xcode can connect iPhone12 and do debugging.
But weeks later, iPhone can’t be found by the VM. Googling and trying some workaround, failed.
Do you have any idea on this kind of issue? Thanks!
this is a whole new problem to me. i’ve never tried this, so i will ask around
After pressing esc and command “install.nsh” it shows follwing content and stuck there witout any progress, Plz help:
Shell> load “fs1:\vboxapfs.efi”
Error. File ‘fs1:\vboxapfs.efi’ was not found.
Shell> load “fs2:\vboxapfs.efi”
Image File ‘fs2:\VBoxApfs.efi’ loaded at DBD65000 – Success
Shell> load “fs3:\vboxapfs.efi”
Error. File ‘fs3:\vboxapfs.efi’ was not found.
Shell> load “fs4:\vboxapfs.efi”
Error. File ‘fs4:\vboxapfs.efi’ was not found.
Shell> map -r
Mapping table
FS0: Alias(s):HD7a0a1:;BLK1:
PciRoot(0x0)/Pci (0x1F,0x2) /Sata (0x0,0x0,0x0)/HD(1,GPT,F81D8F36-33A7-4FF8-8ADA-5ADFD95F65CD,0x28,0x64000)
FS1: Alias(s):HD7a0a2:;BLK2:
PciRoot(0x0)/Pci (0x1F,0x2) /Sata (0x0,0x0,0x0)/HD(2,GPT,56B49DBA-75E7-4FC4-AE10-2C7FC64939C5,0x64028,0xC75BFB0)
FS2: Alias(s):HD7a0a1:;BLK4:
PciRoot(0x0)/Pci (0x1F,0x2) /Sata (0x2,0x0,0x0)/HD(1,MBR,0x00000000,0x3F,0x31F8F)
BLK0: Alias(s):
PciRoot(0x0)/Pci(0x1F,0x2)/Sata(0x0,0x0,0x0)
BLK3: Alias(s):
PciRoot(0x0)/Pci(0x1F,0x2)/Sata(0x2,0x0,0x0)
Shell> “fs1:\macOS Install Data\Locked Files\BootFiles\boot.efi”
the same problem i am facing how do i resolve the problem?
Please help me out this.
looking into it.. i update you if i find a solution
followed the instructions…it’s installing now on ubuntu host!
Cross fingers I’ll get this hackintosh done 😉
alright brother! i hope you have success!
I tried to download your rar file but it’s too large that it takes too long to download the file.
unfortunately, the iso file is about 4.5gb. you’re going to need the whole file to install it.
Hello, any alternative url? Quota exceeded on drive.
Thanks and cheers.
Fantastic!
Can’t use the download link for catalina.vmdk! Page not found
nevermind use this link: https://drive.google.com/drive/folders/1ZX-YEPPNC6aT_w8eiU3ztaLhXH6-e4zx?usp=sharing
it’s have to enter password, but i don’t have. can you help me ?
The password is Geekrar.com with a capital G. You can also find all files with no password at forum.geekrar.com
Prefect, Easy installation no issues with VB or the install of Catalina. Cheers
thats great
For users who are stuck on “install.nsh” not running, make sure you have the Operating System set to 64-bit and not 32-bit.
After running install.nsh, the installation went extremely slow, then stuck in (com.apple.locationd.597) : Service exited with abnormal code: 1.
After running “install.nsh”, it stuck in (com.apple.locationd.595) Warning>: Service exited with abnormal code: 1
Hi Ali Nazari, the download link for macOS Catalina Final Version (19A602) 15 Oct 2019 (Recently Uploaded) is not working. Do you have another link ?
Can you please recheck the links? I think they are working!
Mine is just stuck on this:
apfs_module_stop:1724: unload: com.apple.filesytems.apfs, v1412.11.7, apfs-1412.11.7, 2019/09/26 (remaning mem allocated: 0)
The torrent rar file is corrupted. Pls update the file
The download link for macOS Catalina Final Version (19A602) 15 Oct 2019 (Recently Uploaded) is not active (Error 404 Not Found).
Can I request a reactivation?
Please!!!
Fixed!
hello…
i am trying to extract but it demanding password
Geekrar.com is the password!
It boots into a apple grey screen but it suddenly go back and shut down. Can anyone help?
I am not able to see install.nsh shell. i’ve also tried the new method, is this a problem?
You have to use Windows cmd. There, copy each line of code one at a time. I got stuck for a while in that part of the proccess, but now I have a running Catalina in Virtual Box. Hope this comment was useful!
PD: I have the latest VB and Catalina Version and I didn’t need to do the install.nsh part.
❤❤
Did your issue got resolved , i have a same question
Password is ‘Geekrar.com’, I believe
how would i go about setting up the code for a ubuntu host
I cannot connect any iPhones. Finder does not see devices. Tried iPhone 8, 11 and iPad. Tried to use USB 2 and 3. VirtualBox shows state captured for USB device. But nothing happens in Catalina. Any ideas? What else I can check?
Followed directions. But once I get to booting the system with both ISO or vmdk with the boot image add on. Install.nsh isn’t found or I get After I typed ‘install.nsh’, it seems stuck in “fs2:\macOS Install Data\Locked Files\Boot Files\boot.efi”
mine is also stuck, AMD Ryzen 5 3500U, i have followed all the steps, on the Shell prompt i tried typing exit and navigated to path that displays when install.nsh is typed, it’s still stuck.
Hi,
Update VirtualBox to the latest version. Try.
I can’t get any sound to be played. Is this expected
I try many times but when i start the machine dont have option to run the command
After pressing esc and command “install.nsh” it shows follwing content and stuck there witout any progress, Plz help:
Shell> load “fs1:\vboxapfs.efi”
Error. File ‘fs1:\vboxapfs.efi’ was not found.
Shell> load “fs2:\vboxapfs.efi”
Image File ‘fs2:\VBoxApfs.efi’ loaded at DBD65000 – Success
Shell> load “fs3:\vboxapfs.efi”
Error. File ‘fs3:\vboxapfs.efi’ was not found.
Shell> load “fs4:\vboxapfs.efi”
Error. File ‘fs4:\vboxapfs.efi’ was not found.
Shell> map -r
Mapping table
FS0: Alias(s):HD7a0a1:;BLK1:
PciRoot(0x0)/Pci (0x1F,0x2) /Sata (0x0,0x0,0x0)/HD(1,GPT,F81D8F36-33A7-4FF8-8ADA-5ADFD95F65CD,0x28,0x64000)
FS1: Alias(s):HD7a0a2:;BLK2:
PciRoot(0x0)/Pci (0x1F,0x2) /Sata (0x0,0x0,0x0)/HD(2,GPT,56B49DBA-75E7-4FC4-AE10-2C7FC64939C5,0x64028,0xC75BFB0)
FS2: Alias(s):HD7a0a1:;BLK4:
PciRoot(0x0)/Pci (0x1F,0x2) /Sata (0x2,0x0,0x0)/HD(1,MBR,0x00000000,0x3F,0x31F8F)
BLK0: Alias(s):
PciRoot(0x0)/Pci(0x1F,0x2)/Sata(0x0,0x0,0x0)
BLK3: Alias(s):
PciRoot(0x0)/Pci(0x1F,0x2)/Sata(0x2,0x0,0x0)
Shell> “fs1:\macOS Install Data\Locked Files\BootFiles\boot.efi”
Just right click on that file, select “make a copy” option and then “locate the file” from notification that appears after copy action. Then download file from that location.
Good afternoon, when an installation restarts, it does not find boot.efi .. I can do the installation by the command install.nsh after that it gets this error.
Shell> ‘fs8: \ system \ library \ coreservices \ boot.efi’ is not recognized as an internal or external command, operable program or script file.
My VirtualBox is at version 6.1.6
My notebook is an Acer i5 – 16GB RAM – 256GB SSD NVMe
I have already successfully installed Catalina and I can run any applications on it. I can also do a left and right click of the mouse. But one thing that is not working is when i do a click and drag of an item or window, it’s not working. Anyone who can help me here? Really appreciate it. Thanks
Hi @macness, if you are still struggling with this, I have found a way out from this situation.
you can get in touch with me on
connection speed inside virtalbox osx is pretty slow. seems to take forever to download xcode. maybe you can also share it in your google drive?
It works on AMD Ryzen 5 1600, thanks.
If you get this installed successfully but the disk IO is super high and the run speed is too slow to even move the mouse:
Open settings
Hit System >> Acceleration
Change the dropdown to Minimal
Keep nested paging checked.
This made it from the mouse moving about 1 pixel every 10 seconds to being usable.
Hi,
The installations is stuck on installing macOS
fourteen minutes remaining for the last 2 hrs
Well …. stuck in “install.nsh” it does not do anything, saying that the command does not exist.
Any of you guys got around that problem?
Thanks
I have the same problem.. did you find a fix for this?
After I typed ‘install.nsh’, it seems stuck in “fs2:\macOS Install Data\Locked Files\Boot Files\boot.efi”
Hi Where can I find the codeforcommands file? I stucked at step 5.
Hi,
I’ve updated the post, please check.
I’m using Ubuntu and your tutorial works very well and worked but I have the problem of boot.efi, how do you replace it? I see only the .vmdk files. First where can I grab the old boot.efi and how? And second where I paste and how? Thank you I have one week trying without luck.
Please everyone, read through the comments before commenting as @Ali Nazari has given the password for the .rar many times now.
I believe a lot of people are having trouble because of this (just skipping through) if you read through everything and the instructions properly then you should not have any troubles and it should all work.
thanks for answer me, but i don’t know how ?
can you paste a link
I can not open the rar file as it asking for a password
Hello everyone :)… I have a solution for everyone that will get this working… Everything so far from these Instructions that have been followed out have been quite accurate only ONE thing is missing that NEEDS to be done in order for this to work 100% and I will put the link underneath to get it done. I’m currently using it atm on a Intel machine (i7-4770, 16GB DDR3-1600 RAM, GTX 970 4GB)
What needs to be done. You will need at least 16GB system RAM being sufficient as you’ll be needing to contribute at least 8GB RAM to the Virtual Drive (This is because macOS Catalina is pretty hungry and needs a bit of resource for it to run well and for a successful boot)
Set at least 4 cores+ for Processor, I tick the use of 3D support under Display settings with 128MB video MEM.
MOST IMPORTANT!… You will need to shrink your HDD/SSD for at least 40-60-80GB of Storage that is going to be used for the Virtual machines hard drive storage space (I used what was said on the VDMK file which was 120GB of storage so I set the Virtual hard drive space to 120GB shrinked from my internal HDD)
When you Create a new Virtual Machine you will need to select Expert Mode and where it says System Location I do believe you will be setting that to the new created hard drive space e.g. “E:\macOS Catalina” where the Virtual Machine will be saved to and will install to as it’s system local drive.
This gave me a 100% success with booting into the Setup process FINALLY with installing and setting up Catalina 😀
I have not tried this method YET on an AMD Ryzen build as I have one present with me here but will try out some different work arounds and will get back to the AMD folks 🙂 but so far I can defiantly say that this works 100% for Intel users.
FYI just re-reminding that this has been successful so far with Intel based systems, I will try this and if it doesn’t work will find a work-around and will get back to this post 🙂
Good morning, after Update to 15.2 i have trouble, don’t start, any considerations or solution?
Hi,
Replace boot.efi with older version (10.15.1) to fix this problem.
No matter how many times i try to setup and run it , i get a NtCreateFile(\Device\VBoxDrvStub) failed : 0xc00000e STATUS_NO_SUCH_DEVICE (113 retries) – File/Device open failed. Driver is probably stuck stopping/starting.
I run it on Oracle VM 6.1 , on a Lenovo T470
No matter how many times i try to setup and run it , i get a NtCreateFile(\Device\VBoxDrvStub) failed : 0xc00000e STATUS_NO_SUCH_DEVICE (113 retries) – File/Device open failed. Driver is probably stuck stopping/starting.
I run it on Oracle VM 6.1 , on a Lenovo T470
I can’t click ‘OK’ button on the configuring window of the VirtualBox there is a text in the left side of the button that says Invalid settings detected- “The hardware virtualization is enabled in the acceleration section of the system page although it is not supported by the system. It should be disabled in order to start the virtual system.”
Hello. I’m stuck at the “install.nsh” step. What can I do?
Remember that at this moment virtualbox does not support 10.15.2. You will have to wait until it does.
Normally a gtx1060 is not compatible with a mac (All Nvidia Cards are not suported)(You can try to download a nvidia di´river for mac( I dont have a driver for you becouse i only know how to do it with Clover(Clover boots the mac if you have it installed on your system like you have installed windows))
error loading kernel cache
I could install macOS Catalina and also XCode, but the iOS simulator is not working, I’m getting this error: SpringBoard quit unexpectedly.
cannot sign in to apple id
Everytime I try to update to macOs 10.15.2 by clicking Update Now, it starts installing, reboots like normal, and then asks if I want to update to 10.15.2. Do I need to do something to make it stop running setup.nsh at boot?
Can’t download VirtualBox Boot Image by Geekrar – download quota exceeded for this file. Where I can get it?
Yeah, same here. I’ve allocated over 20gbs of RAM, and I have an i7-8750h, but it’s annoyingly slow. There’s lag when moving the mouse sometimes. I might switch to Mojave too if its better than this
I was able to get it installed successfully and seems to be running ok, but ran into a few issues while testing:
1) Can’t install iMovie, error message: “Your computer’s video card does not meet the minimum system requirements”. I have an nVidia GTX 1060 graphics card.
2) Can’t sign into iMessage/Facetime, but I was able to sign into the app store. Would love to get iMessage working.
3) Overall there’s noticeable lag and it runs fairly slow/choppy, but I’ve already allocated over 20gbs (out of 32) of RAM, and I have an i7-8750h – it should be more than capable of handling this, right? I’ve also maxed out video memory as mentioned in your instructions. I tried enabling 3d acceleration but no difference, plus I keep getting an error message that Virtual Box is removing support for 3d acceleration.
4) Lastly I notice it always takes a solid 5 mins of running through text before it actually boots. Anyway to speed it up?
Thanks for the great write up! Much appreciated.
it keeps crashing during installation
Crashes during installation.
I keep getting a corrupt .ISO file that i cannot unpack. I assume i have to unpack the .ISO file to get the VMDK i need.
Downloaded the large file twice and the patial files also. Both let me extract the ISO from the RAR file(s), but both only give a corrupted .ISO file.
Anyone else have the same issue?
what is the password for all your rar files???
Virtualbox Boot File and Catalina????
The password is the following.
Password: Geekrar.com
Geekrar.com
Getting prompted for password for boot image?
I finally got it working, your instructions need to be more clear about requiring TWO VMDK images, not just one…
This is a Catalina 10.15 BETA version? I’m not sure if it’s the Beta, or the APFS driver… but it runs SLOW on my VirtualBox… much, much slower than Mojave. It is almost unusable, at least for me… I will go back to using my VirtualBox Mojave, for now.
I finally made it thru all the steps, to find that this is Catalina 10.15 Beta? The APFS driver runs slow as molasses on my PC, this is almost unusable in its current form. Will go back to my VirtualBox Mojave for now
i have: ‘install.nsh’ is not recognized as an internal or external command, operable program, or script file.
I’ve tried in both 5.2 and 6.0+ versions but am getting this error: ‘install.nsh’ is not recognized as an internal or external command, operable program, or script file. Please need help!!
I’m using virtualbox 6 on linux, already done the command’s part. Then it said ‘install.nsh’ is not recognized as internal or external command…
Did I do something wrong?
install.nsh is not recognized as an internal or external command 🙁
Hi,
I’ve updated the steps, check the step there now.
I am having the same issue, I have been waiting about 20 minutes and nothing has happened
What are the network adapter settings required in VirtualBox 6? I can only finish the installation if I choose not to connect the MacOS to a local network. If I choose to connect in the installer dialog it will crash and just reboot.
installed successfully..only problem i have no sound.
any idea why ?
thanks
Why am i not able to drag my mouse clicks? Is there a fix for that? I’m trying to use an iPhone Emulator (Xcode) and because I cant click and drag i cant operate the simulated phone at all!
What did you do to get the simulator working? mine does not load at all.. i get a srpingboard quit unexpectedly message all the time
After entering install.nsh, it restarts into shell and starts with running startup.nsh and gives error no command found boot.efi.
I get to the step to boot, hit escape and type install.nsh How long should this take? Its been quite some time and its still sitting there.
Try reinstalling step by step carefully again.
After the install.nsh command: install.nsh is not recognized as an internal or external command, operable programm, or script file. … back to shell – what to do? Tried VMware player before – worked like a charm – unfortunately no snapshot available.
Hello,
Are there any different codes for Virtualbox 6? I installed the ones for Virtualbox 5.0. After the install.nsh command, I only get a terminal screen which lists line after line and eventually gives an error message. What am I doing wrong?
hi,
after install.nsh command is complete
it display apple logo and shows 29 minutes
to install but after few seconds it shows error A disk with a mount point is required(-69854)
Hi,
What is your PC specifications?
xps 630i, 8gb ram, intel core 2 quad processor
I can’t see the commands…
Hi,
I’ve updated the commands, check now.
Halo I have ssen in Workstation Player 16 there is no longer possible to choose MacOS Versions like in Player 14 is your way to install only possible until the VM Player Version 15 as in your documentation for example to install descripted ?
have you tried a unlocker file? that should allow you to use macOS