
If you’re looking to get a little more versatility out of your Windows, installing macOS is a great way of giving a shot. There’s nothing wrong with wanting to play in macOS interface or willing to get a full macOS experience you’re looking for. With that said, here’s a considerable way to install. So Here is Install macOS High Sierra on VirtualBox on Windows PC.
While installing macOS on your Windows isn’t as simple as installing the standard Windows or macOS system but slightly different. Because you’ll fiddle with things before you actually do the installation. But don’t worry, you don’t have to, because we’ve covered you up with everything you’ll need.
For this, we’ll be using “Oracle VirtualBox”. This app takes advantage of virtual machine that lets you install and run both operating systems at once. In addition, it provides an equivalent experience just like the true actual one. This is pretty useful when installing a complete macOS desktop alongside your Windows OS and instantly switch between with a hotkey, without rebooting. However, you can install pretty much every OS you want, including macOS.
When you use VirtualBox, you’re actually running two or more operating system. Like, when you install and run macOS, you’re actually running two environments on top of the another. While this might be considered cheating, but not for educational purpose that we do. It’s worth mentioning that it may take a bit time and effort, but the result is quite interesting. In the meantime, you might have many questions going on in your mind, assuming those, you’ll not harm or damage anything. This works for everyone you and everyone, because there’s no sort of compatibility or restrictions that are for actual Mac users. After all, if you decide you’re done with it, you can easily get rid of the boot screen or anything you don’t like and get your internal storage space back. In this tutorial, I will walk you through how to install macOS High Sierra on VirtualBox. Here’s how it’s done and Install macOS High Sierra on VirtualBox on Windows PC.
Table of Contents
Here’s What You’ll Need
To make this work, here are a few things you need.
- VirtualBox: For running macOS on virtual machine, there’s no better option then VirtualBox.
The best thing is, you’re entirely free at no cost, unlike other apps. Also, it includes macOS option and features automatically without you have to. Here’s how to download.
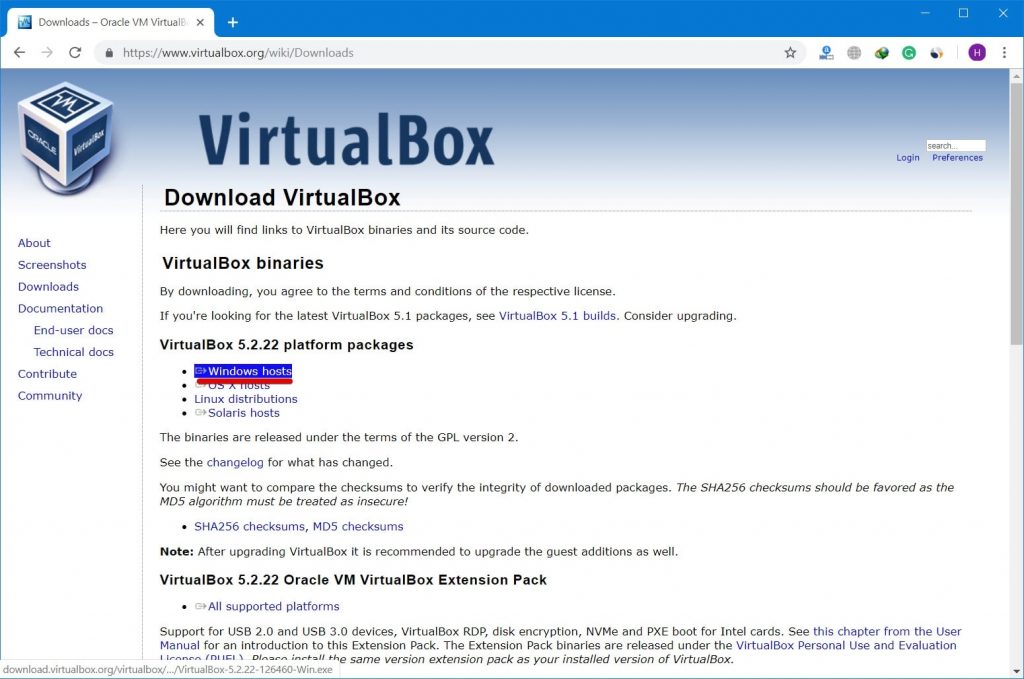
Goto VirtualBox website and watch out for Windows hosts. Click on that, and it will begin downloading.
- macOS High Sierra (One Full – Google Drive): This is the virtual image installer file of High Sierra that is available for free. The file is compressed, secure and ready. If for some reason you’ve had to skip from the prior servers, you’re good to get it from MediaFire server if you want. Go ahead and download it now. This file also contains the similar High Sierra virtual image installer file but in pieces. If you’ve some issues or whatever, you are able to get it, one by one in parts.This file contains the similar High Sierra virtual image installer file but in pieces. If you’ve some issues or whatever, you are able to get it, one by one in parts.
- CodeforVirtualBox: This is a text file that contains commands you’ll need when installing.
- WinRAR: With the files download, you’ll need to extract them. Get this to extract files easily.
Got all that? Great. Let’s go for it.
Step One: Install VirtualBox on Windows
Before you do anything, the first and foremost thing you’ll need to install VirtualBox. If you do have installed, you’ll need to update it to the latest version, that’s easy. You can do it from the VirtualBox itself without worry, just check for updates from File in the menu and if available, update it. If you don’t, this may cause problem later.
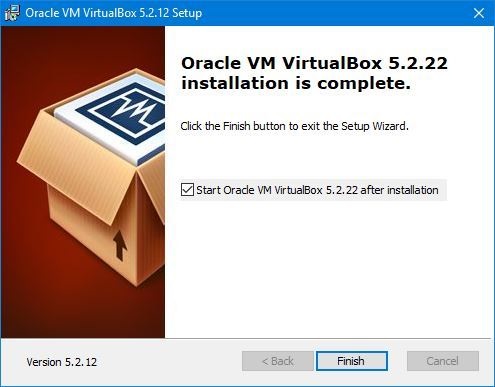
First of first, open up VirtualBox setup and run it. Install it as you would any other program. When done, Finish it and let it begin.
Step Two: Configure a New Virtual Machine
The virtual machine is where we’re gonna install and run High Sierra. In this case, you’ll of course need to first create a virtual machine and then go up with the installation.
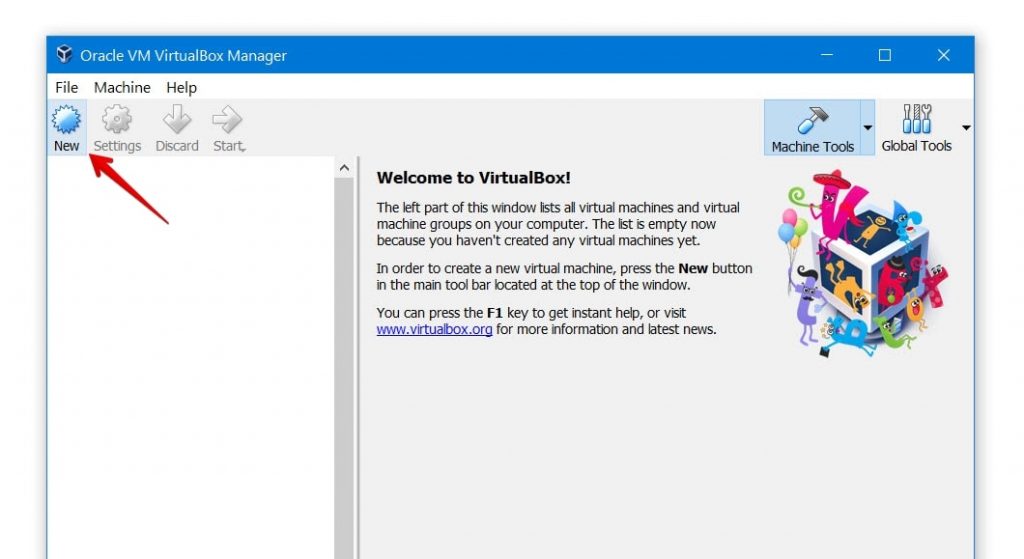
Start off by firing up the VirtualBox and hit New for creating a new virtual machine.
In the virtual machine creation wizard that opens, choose Expert Mode. For this example, we’re going to do it in a geeky way, don’t worry, we’ve got you up.
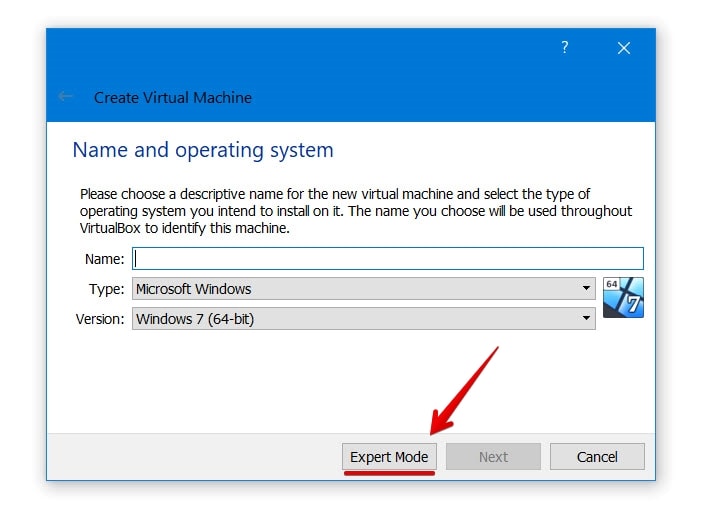
This screen will display everything you’ll need to configure.
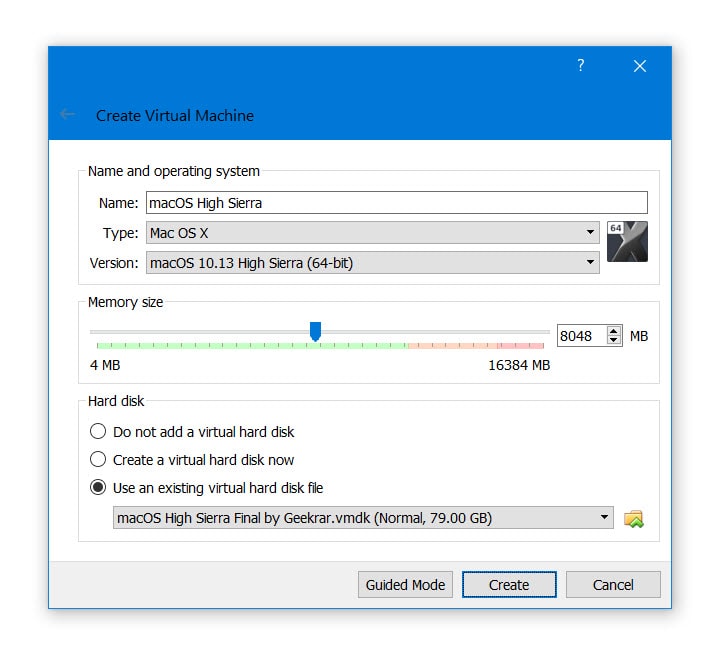
At the first, write down the virtual machine name that is of course High Sierra in my case. With that, it will automatically detect the type and version. If not, be sure to select the type and version as the example.
For memory, set up the most size of memory your computer has. And in terms of hard disk, select Use an existing virtual hard disk file and browse the extracted VMDK file of High Sierra by Geekrar. Confirm the settings as you’ve done, then hit the Create key. Here’s an example of how it would look like.
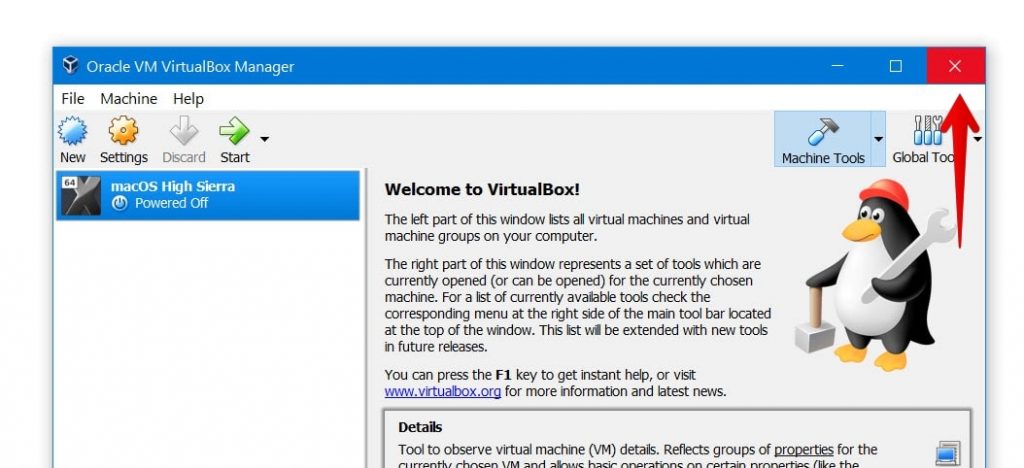
Now Quit VirtualBox as it’s open.
The next step will only work if it’s closed. Otherwise, this may not work (seriously), you’ve been warned!
Step Three: Apply Commands on VirtualBox
With the virtual machine all set up, you’re ready to apply this.
Go ahead and open the CodeforVirtualBox text file where the commands are located.
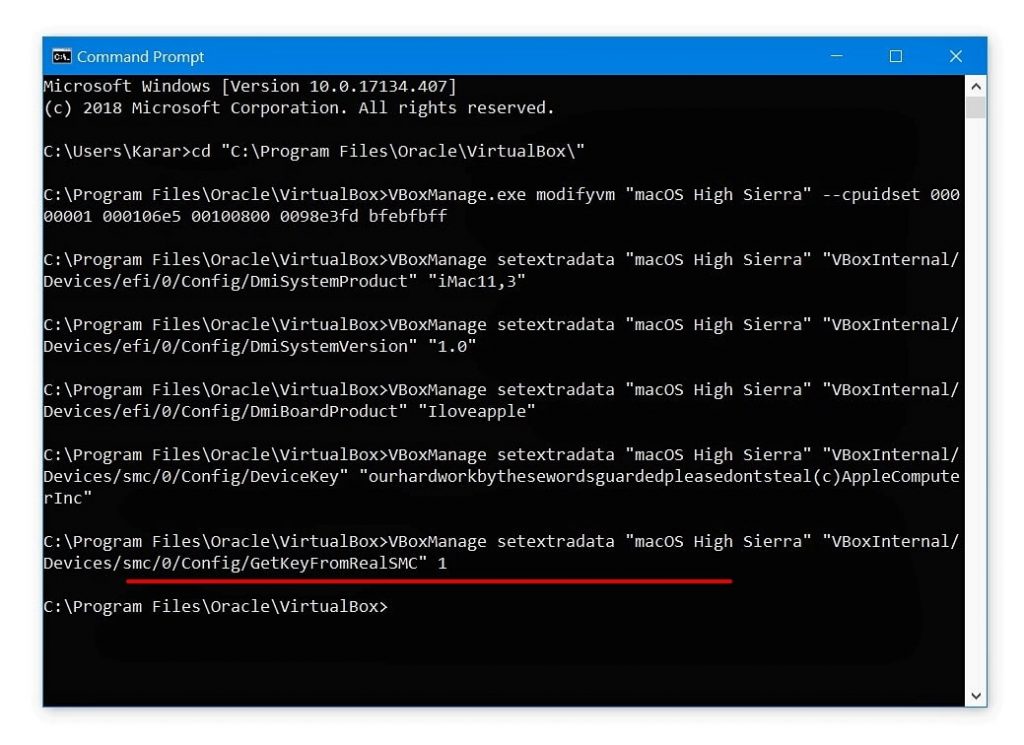
cd "C:\Program Files\Oracle\VirtualBox\"
VBoxManage.exe modifyvm "Your Virtual Machine Name" --cpuidset 00000001 000106e5 00100800 0098e3fd bfebfbff
VBoxManage setextradata "Your Virtual Machine Name" "VBoxInternal/Devices/efi/0/Config/DmiSystemProduct" "iMac11,3"
VBoxManage setextradata "Your Virtual Machine Name" "VBoxInternal/Devices/efi/0/Config/DmiSystemVersion" "1.0"
VBoxManage setextradata "Your Virtual Machine Name" "VBoxInternal/Devices/efi/0/Config/DmiBoardProduct" "Iloveapple"
VBoxManage setextradata "Your Virtual Machine Name" "VBoxInternal/Devices/smc/0/Config/DeviceKey" "ourhardworkbythesewordsguardedpleasedontsteal(c)AppleComputerInc"
VBoxManage setextradata "Your Virtual Machine Name" "VBoxInternal/Devices/smc/0/Config/GetKeyFromRealSMC" 1
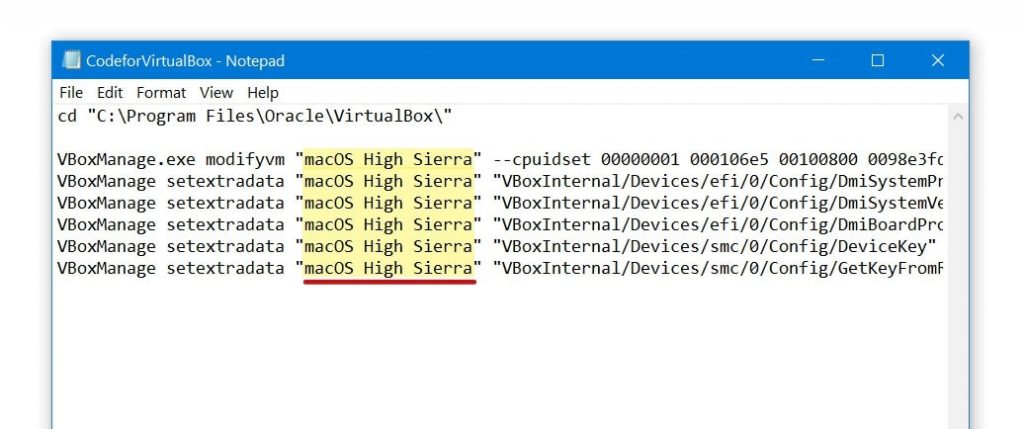
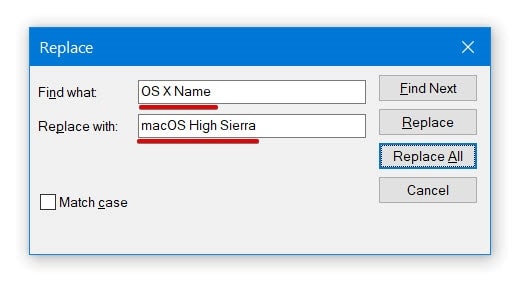
At this point, press Ctrl + H key to pop up the replace dialog box. There, on Find What, enter the default “OS X Name” and on the next one that is Replace with type down” macOS High Sierra” if your virtual machine name is this. Or if your virtual machine name is another, type down that in the form of Replace with. When you do, click Replace All.
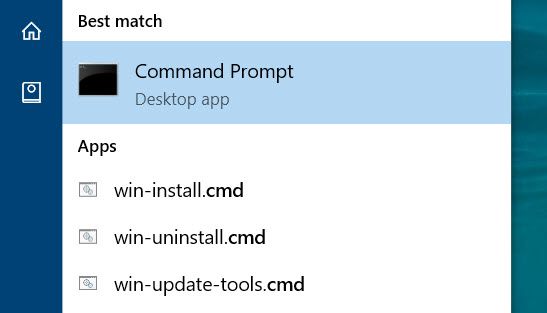
Next, open up Command Prompt. This can be with without admin.
Copy and paste the first line of the command from Notepad that will appoint where VirtualBox is. Just like the shot.

Now, copy and paste rest or the remaining part of the commands and paste it, when done, press Enter.
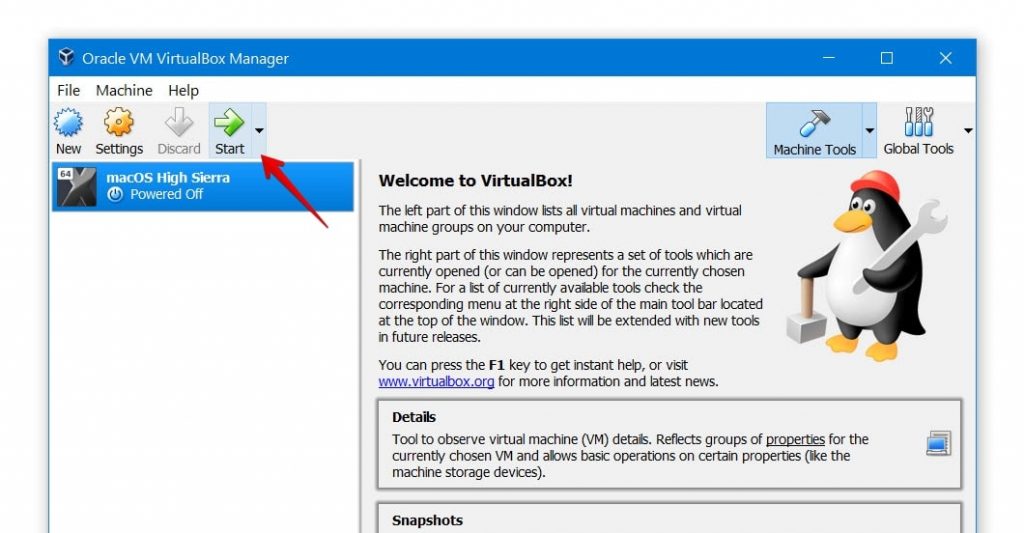
Step Four: Install macOS High Sierra on VirtualBox
This is where the fun really starts. When you’re done with commands, Start High Sierra from VirtualBox. The first boot may take a while, but when it’s up and running, you’ll set things up like any other macOS installation.
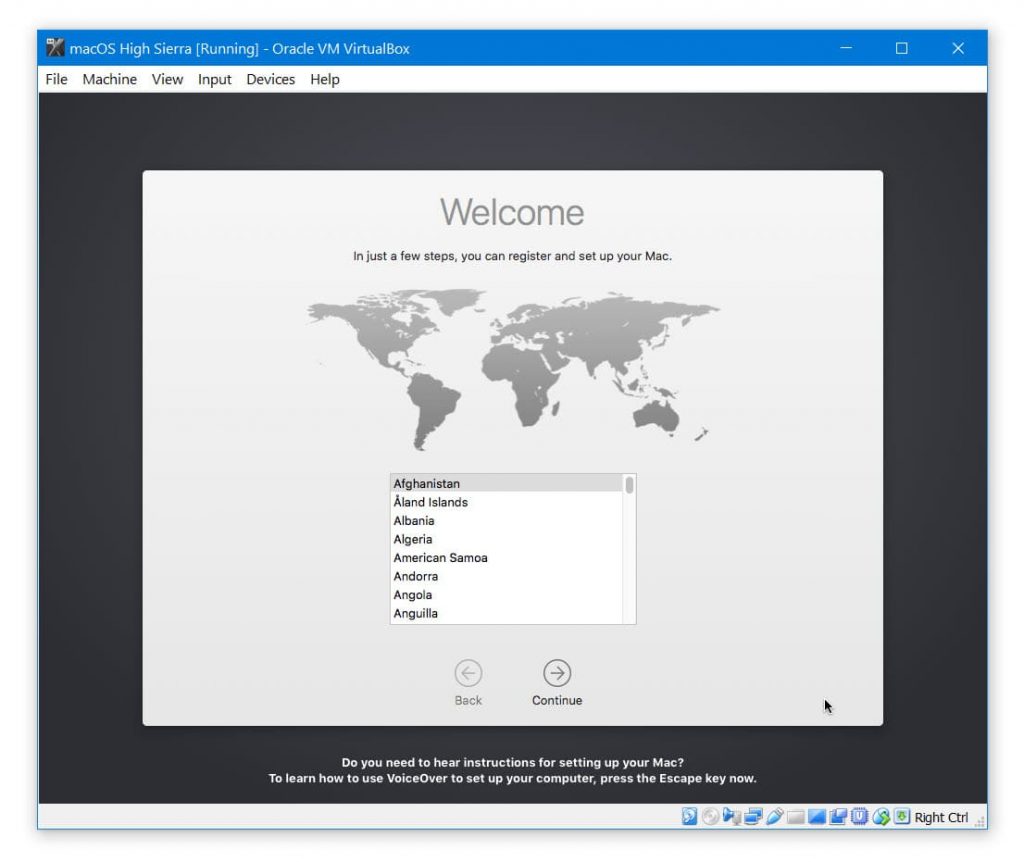
Give it a little time and you’ll eventually see this screen. Typically, like every other installation, choose the region you’re located then Continue.
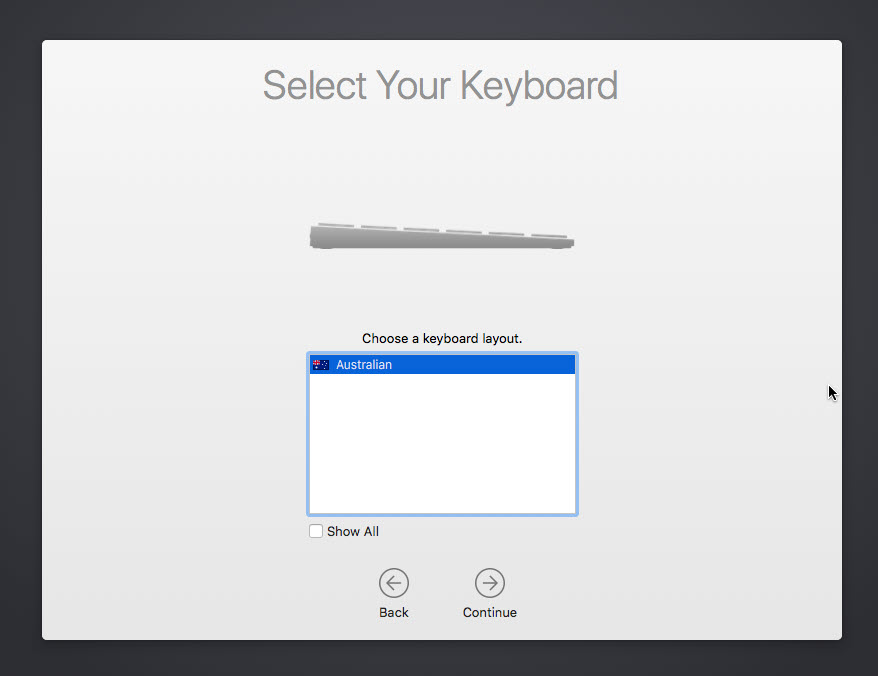
For the keyboard, it will be selected by default, if that’s okay then Continue.
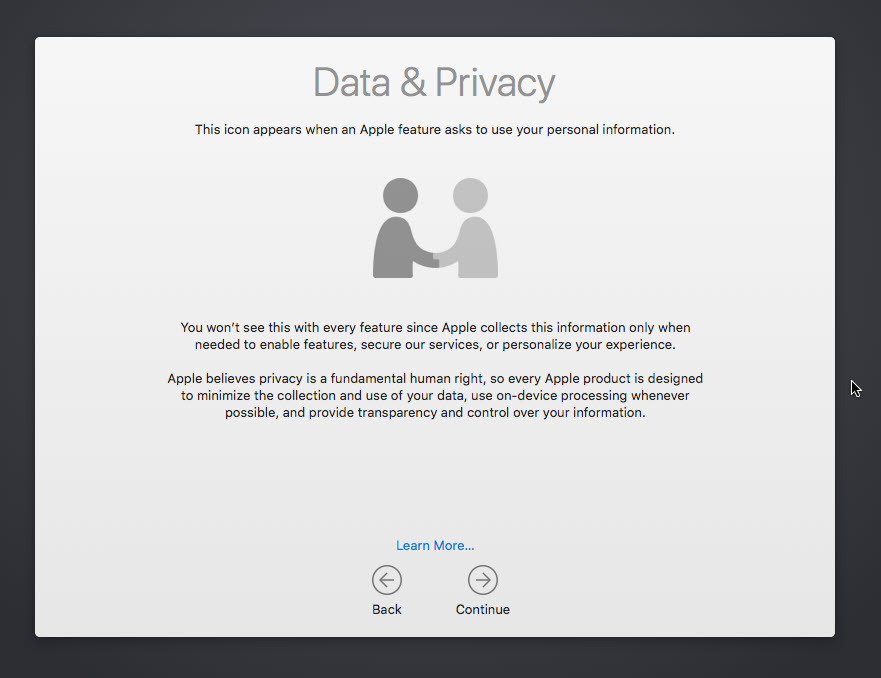
Leave everything as it is and go Continue.
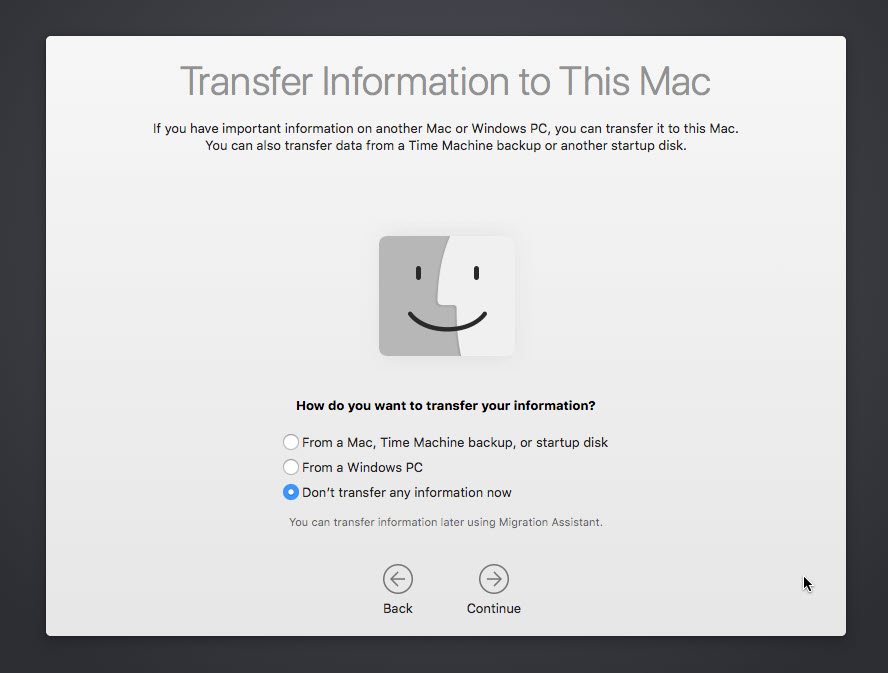
If you’ve personal files you would like to transfer, you’re good to select a way, else I’d recommend Don’t transfer any information now.
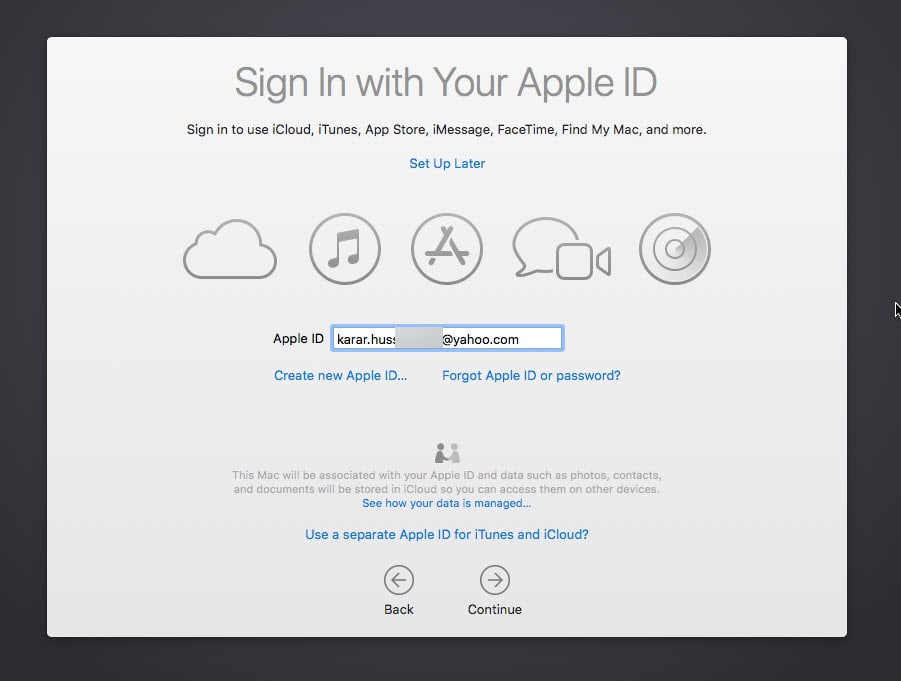
Log in with your existing Apple ID account (or create one if you don’t have already).
When you’re prompted, enter your password and Continue.
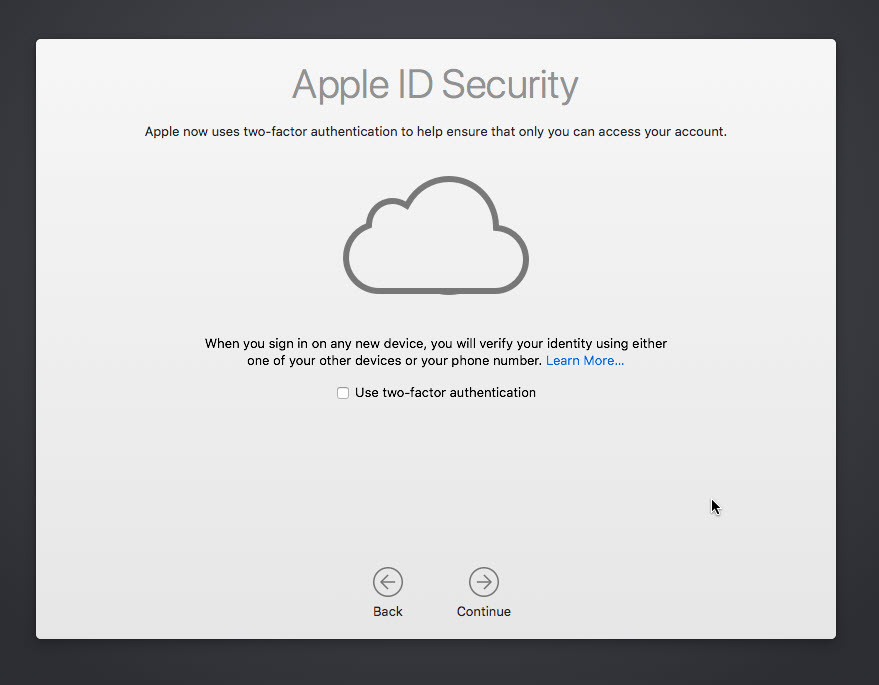
Apple wants you to upgrade your account security with enabling two-factor authentication, that’s up to you, whether you opt or not, Continue.
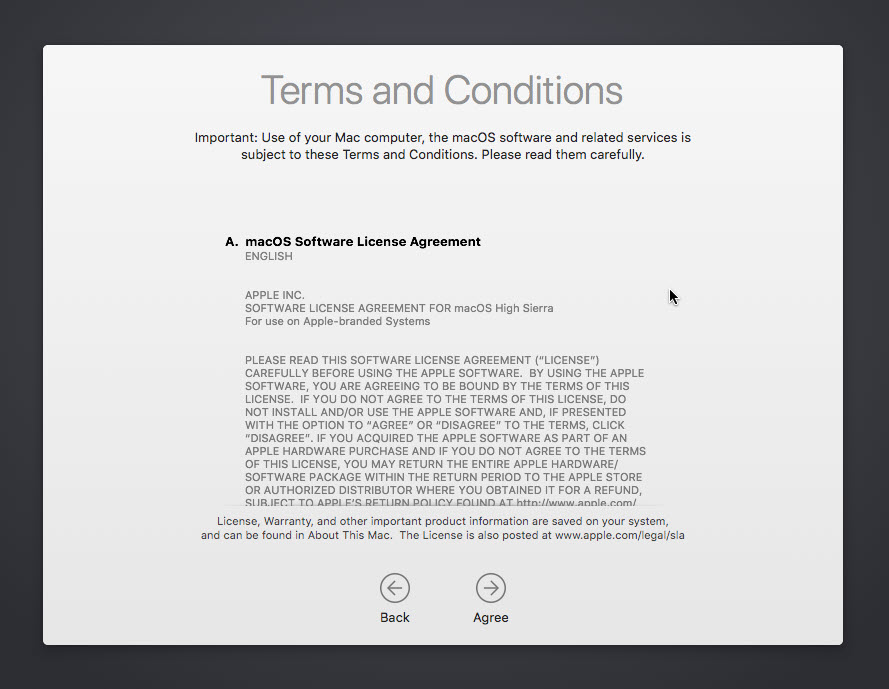
The terms and conditions provide the license agreement, hit Agree.
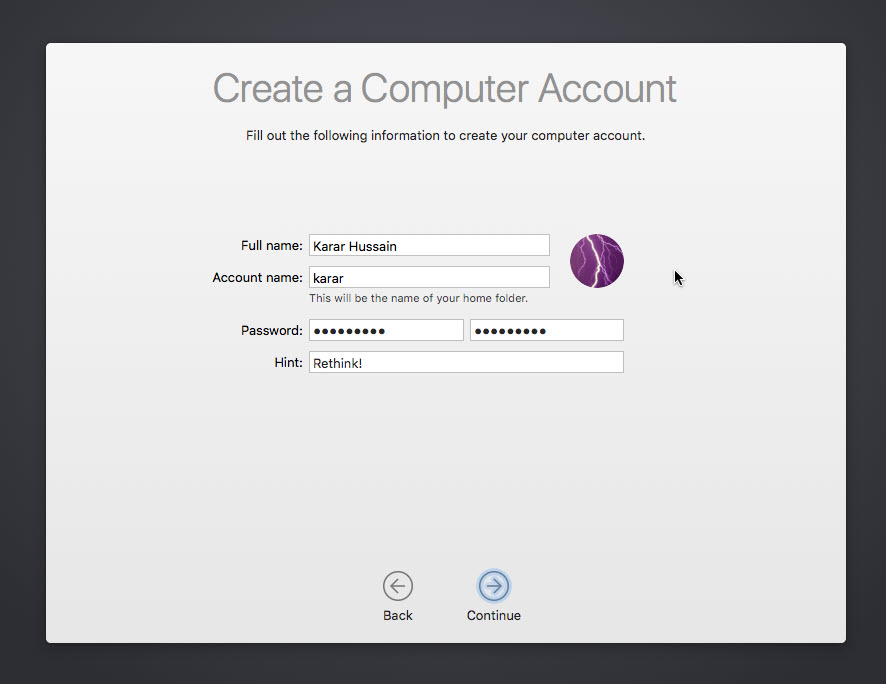
With all that out of the way, create your account with covering your information.
The features are going to set up for you, if that’s okay, go with it. Else, stick with it and Customize Settings and do it as you wish.

The installation process will take some time as your configuration is setting up with your account.

Congratulations, you’re now running macOS on your Windows!
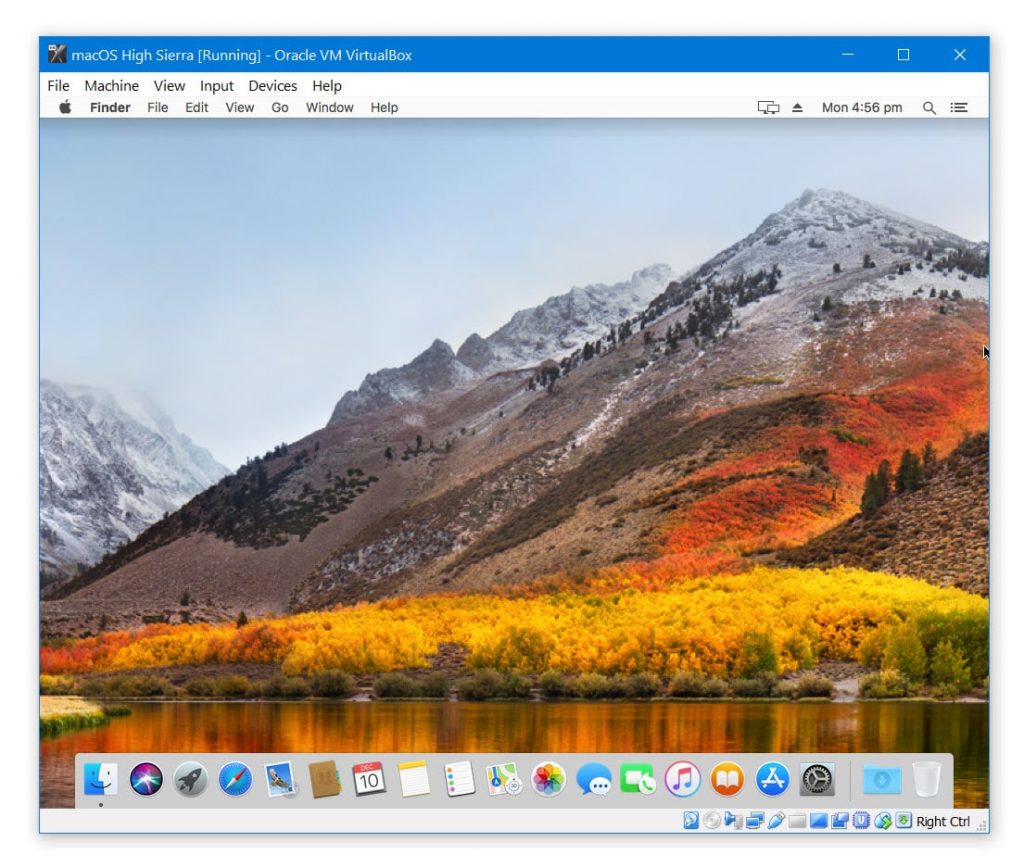
By default, there are no files, folders or anything else as if a new computer. Including that, you considerably have little screen resolution. The easiest way to do is to fix macOS High Sierra or Mojave screen resolution, which works for both. Do note that the resolution that works with Mojave may not work with High Sierra, but for sure you can try your screen resolution.
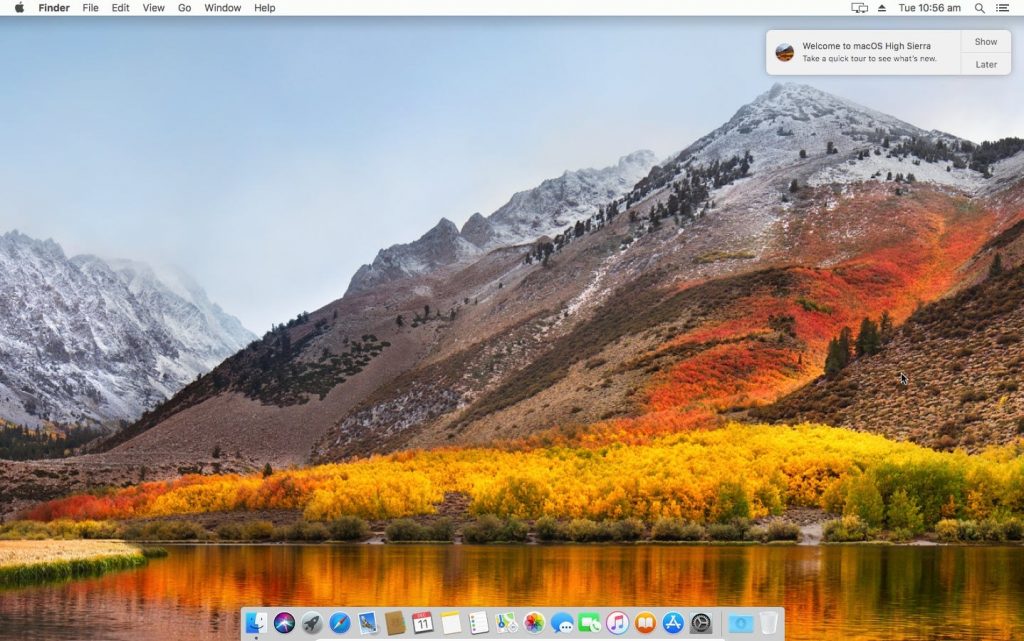
This is really great, once you’d get the full-screen resolution just like this.
Final Thing
As of installation, everything’s clear and things should go really as expected. But there’s a catch though. There’s one thing to note that close the VirtualBox completely when applying the commands. This closing is no different than just closing another app or window, simply quit it before you open Command Prompt. So, consider this, when installing or if you’ve failed this time. Don’t worry, you can do it again now, later or any time. Enjoy!


when i tryna boot that sucker not working up;
it says:Press ESC in 1 seconds to skip startupp.nsh or any other key to continue.
Shell>
If You Stuck at End Random Seed
You on off the virtual Spoofer
Figure Out Today So I will Share Solution
———Solution Spopf———–
VBoxManage modifyvm “YOUR MACHINE” –cpu-profile “Intel Xeon X5482 3.20GHz”
VBoxManage modifyvm “YOUR MACHINE” –CPU-profile “Intel Core i7-2635QM”(working For Me)
VBoxManage modifyvm “YOUR MACHINE” –CPU-profile “Intel Core i7-3960X”
VBoxManage modifyvm “YOUR MACHINE” –CPU-profile “Intel Core i5-3570”
VBoxManage modifyvm “YOUR MACHINE” –CPU-profile “Intel Core i7-5600U”
VBoxManage modifyvm “YOUR MACHINE” –cpu-profile “Intel Core i7-6700K”
Sorry not off Use Virtualbox Spoofer
Karan, thanks for sharing this
geekrar.com as pw does not work
make sure the G is capitalized.
Wrong password sir? Geekrar.com
Try downloading the latest files from here-
https://forum.geekrar.com/forums/forum/macos-high-sierra/
stuck at End randomseed
you forget this line
VBoxManage modifyvm ‘Your VM Name’ –cpu-profile “Intel Core i7-6700K”
Stuck at start randomseed
try these steps…
– Close VirtualBox
– Open “Command Prompt” in administrator mode.
– Copy and paste this exactly into the command line (with quotes): cd “C:\Program Files\Oracle\VirtualBox”
Note: This will only work if you installed VirtualBox in the default location. Otherwise, you will have to locate it yourself.
– Enter this into the command line: VBoxManage modifyvm “name your mac os” –cpu-profile “Intel Core i7-6700K”
Tried in ubuntu and win7 but not working if you want i will share you my screen omg error
yes, share it.. we’ll try to figure it out
Downloaded the image but requires password to unzip, can you please provide? Just using it for educational purposes, thank you.
Password is: geekrar.com
Password for high sierra rar file sir?
Geekrar.com … Use a capital G
Type exit, and it’s going to be in the uefi option
Select the Harddisk as boot
It got stucked at “End RandomSeed” to…What happened?
Thanks! It works for me on ubuntu.
OS booting is very slow. How I can make it fast.
me too…
hello ive got the following error :
Call to WHvSetupPartition failed: ERROR_SUCCESS (Last=0xc000000d/87) (VERR_NEM_VM_CREATE_FAILED).
It got stucked at “End RandomSeed”
Worked like a charm, only 1 problem. The OS doesn’t recognize the sound hardware. Do you know how to get that working? Thanks for an amazing job.
Thanks. I got half way, but this happens:
blurb, more blurb…
Press ESC in 1 seconds to skip startupp.nsh or any other key to continue.
Shell>
I have followed the instructions but did have an issue with:
“Now, copy and paste rest or the remaining part of the commands and paste it, when done, press Enter.”
I found that part vague but know that I am nearly there.
If anybody could help, I’d be very grateful as I miss the word prediction and other App Store purchases.
Thanks,
Sarah
Hi,
What is your computer specifications?
Sarah, Did you ever get past this issue? I’m in the same place now and cant figure out how to get past it.
Thanks
AMD support?
For network choose Intel PRO/1000 MT Server (82545EM)
Hi, I have downloaded the file, but it is password protected. how i can follow up the tutorial if i cant access the file?
I got to step 4 and the OS setup never came up.