how to install Kali Linux on VMware workstation 15, how to install kali Linux on VMware 2019, how to install kali linux on vmware fusion, how to install kali linux in VMWare workstation 14, how to install kali linux in vmware workstation 15 pro, can’t install kali linux on VMware, how to install vmware tools in kali linux 2018, how to install kali linux in vmware workstation 15 player. Kali Linux mostly used by Hackers is developed by Offensive Security. With Kali Linux, you can do Penetration Testing, Vulnerability Scanning, and Security Audit. Kali is a Debian based Linux operating system. The main reason for the creation of kali is for digital forensics and penetration testing. It has lots of penetration testing programs like Armitage, NAMP, Wireshark, etcetera. Maximum packages that Kali is having are imported from some Debian Repos. If you are a beginner to Linux OS, I recommend starting with Ubuntu which is for development purposes or with RedHat Linux. In this post, I’ll show how to install Kali Linux on VMware or VirtualBox on Windows 10 PC.
No, it’s not like that. Kali just helps you in creating a path to enter some other host. To install Kali Linux for practice instead of dual booting your PC, we’re here. In this tutorial, you will learn how to install Kali Linux on VMware or VirtualBox on Windows 10 PC.
- More than 600 penetration testing tools included
- Free (as in beer) and always will be
- Open source Git tree
- FHS compliant
- Wide-ranging wireless device support
- Custom kernel, patched for injection
- Developed in a secure environment
- GPG signed packages and repositories
- Multi-language support
- Completely customizable
- ARMEL and ARMHF support
Related: Install macOS Catalina on VMware on Windows PC
Table of Contents
Install Kali Linux on VMware or VirtualBox on Windows 10 PC
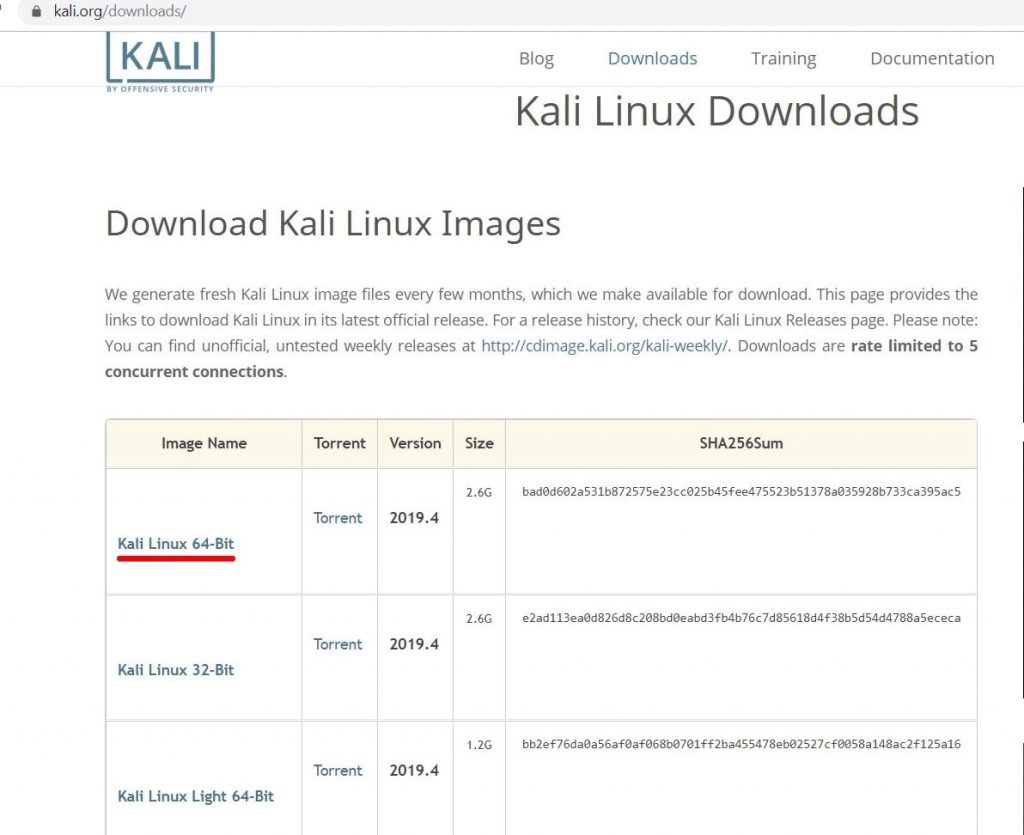
Download Kali Linux ISO Image
First, off Download the Kali Linux ISO image file from the official site of Kali Linux. You may have many different versions of Kali Linux so go for the first one as mentioned below in the screenshot. You can directly download it from here: Download Kali Linux for Virtualbox & VMWare
Create a New Virtual Machine on VMware
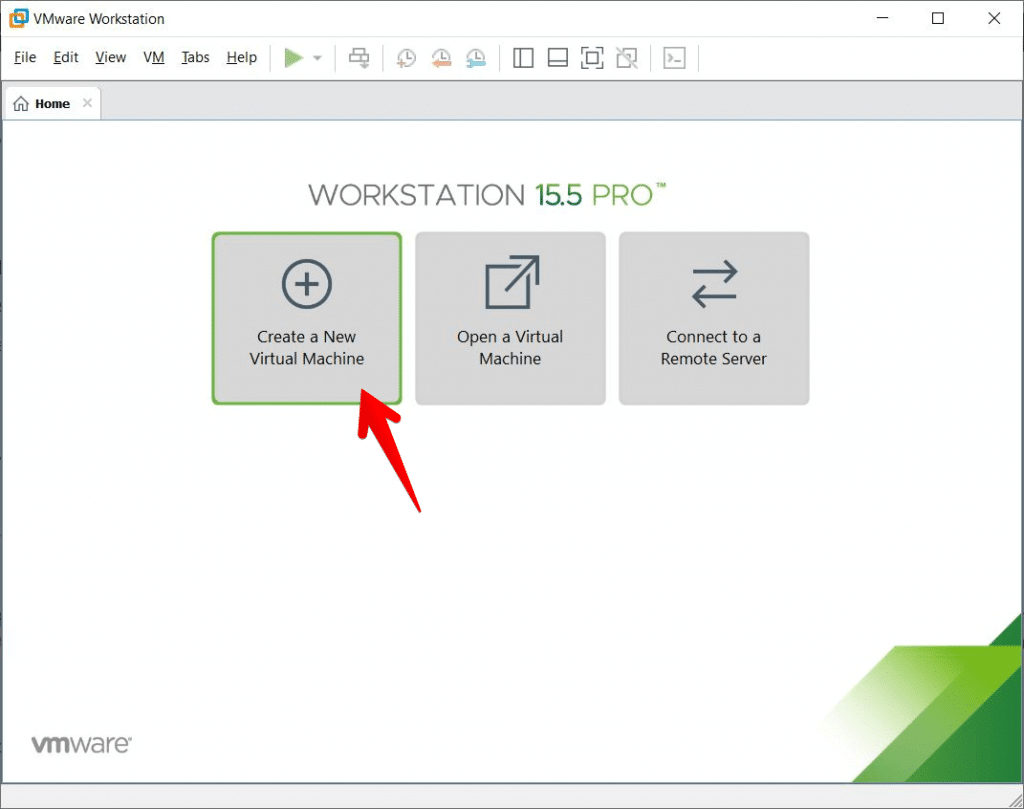
Go ahead and start how to install Kali Linux on VMware or VirtualBox on Windows 10 PC. First, open VMware Workstation player, then click on Create a New Virtual Machine as shown below.
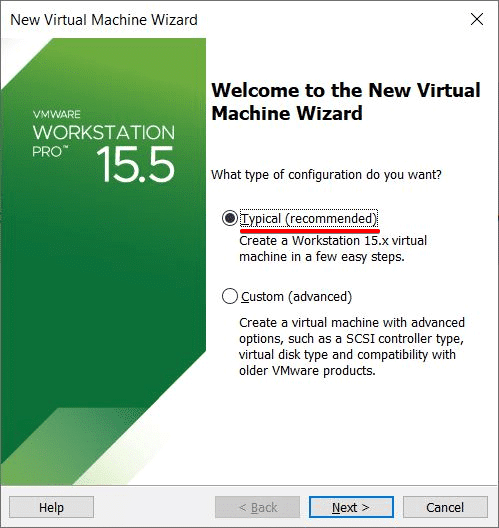
When the wizard opened, click on Typical (recommended) then click Next.
On the Guest Operating System Installation, select Installer Disc Image File (ISO). After that, click Browse and choose the Kali Linux ISO file then click Next .

On the next window, select Linux for the operating system and Debian 9.x 64-bit for the version. Then hit Next.

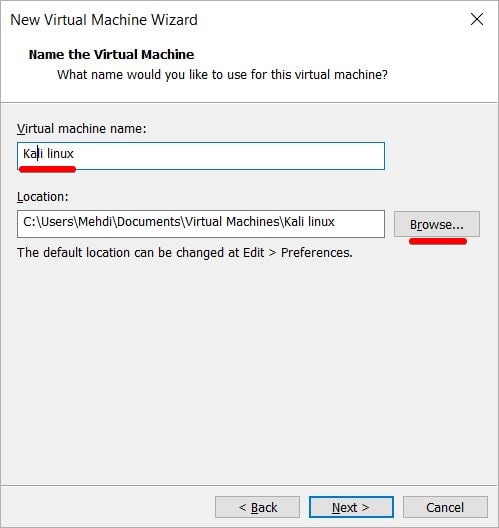
Name the virtual machine, choose a location for it then click Next.
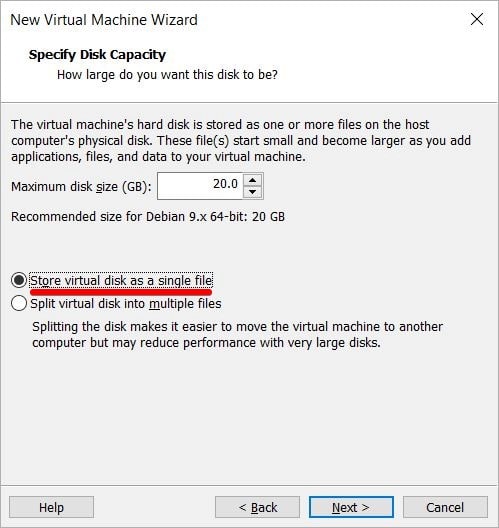
For the disk capacity, assign 20 or 25 GB. Then select Store virtual disk as a single file. Then click Next.
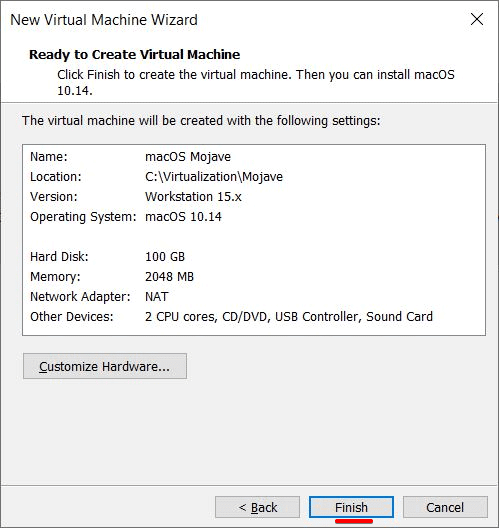
When done, click Finish.
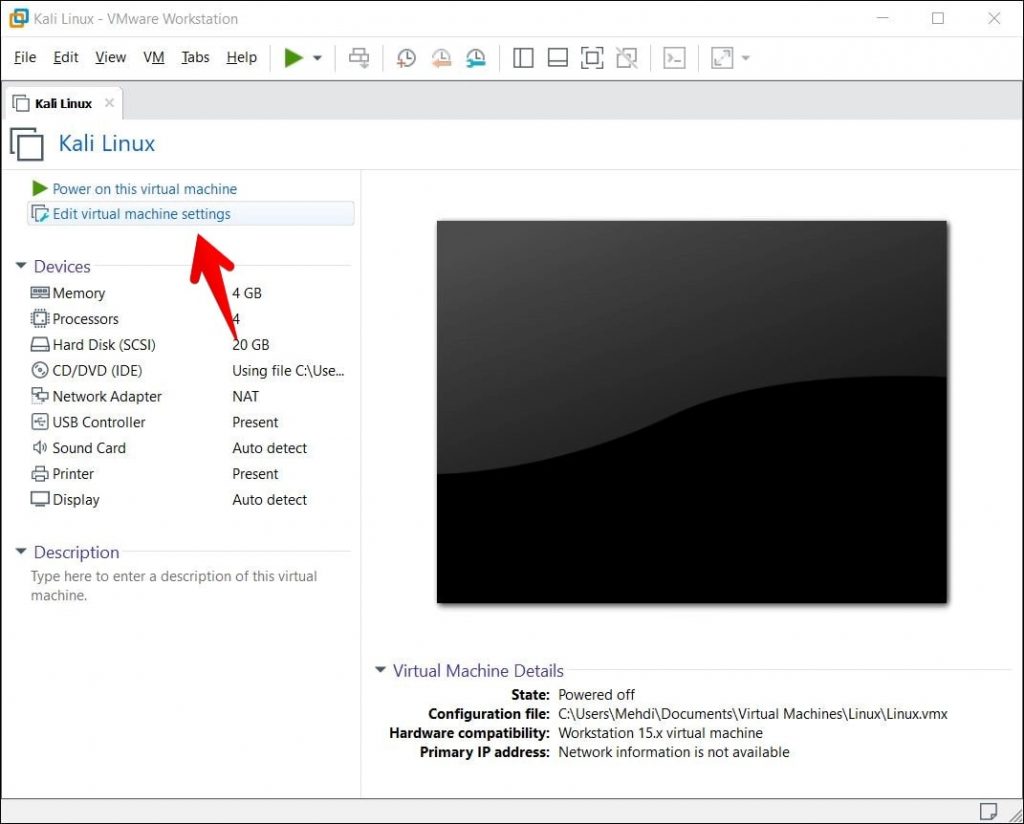
Edit Virtual Machine Settings on VMware
Now proceed with how to install Kali Linux on VMware or VirtualBox on Windows 10 PC. Goto VMware and click Edit Virtual Machine Settings on Kali Linux.
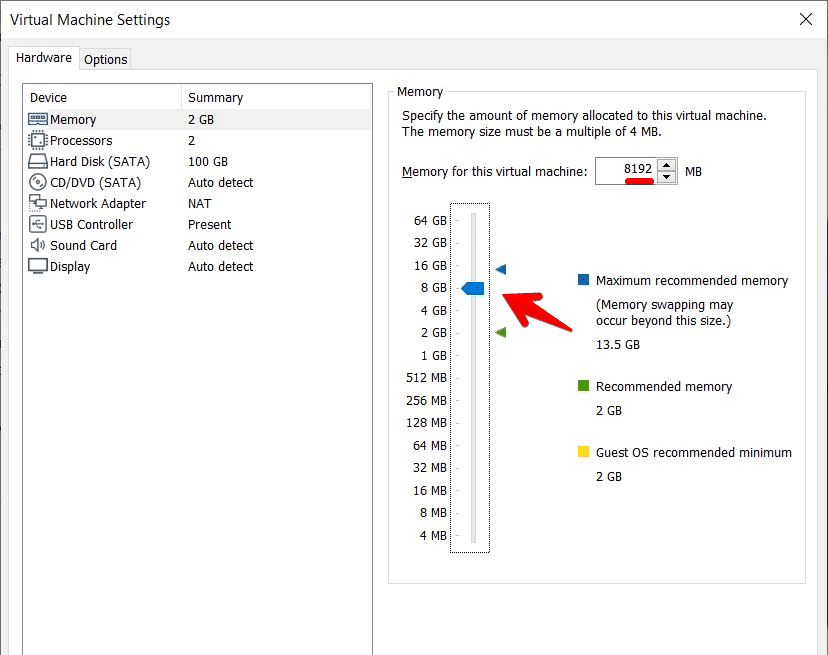
Allocate RAM for your Kali Linux OS. If you have installed 4 GB RAM than set 2 GB, 4 GB if you have 8 GB Ram and 8 GB if you have 16 GB.
Click the Processors tab, from the left side menu, increase the number of processors to 4 and click OK.
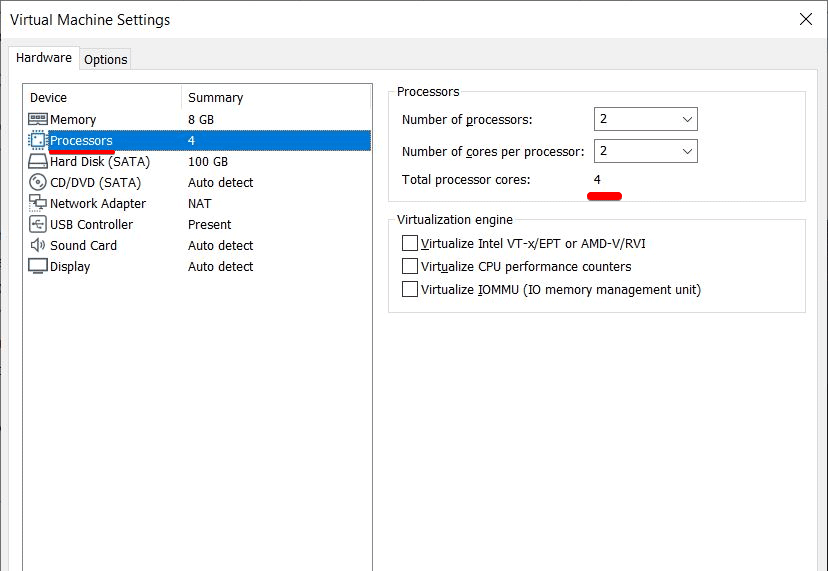
Here you go .The Virtual machine is now set.
Create Virtual Machine on VirtualBox
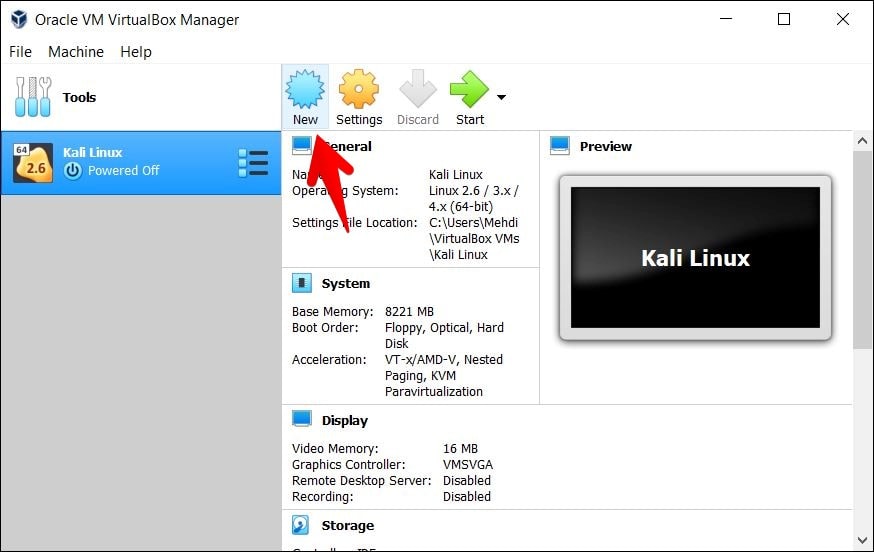
Open your Virtual Box Manager. Click on the new button to create new Virtual Machine.
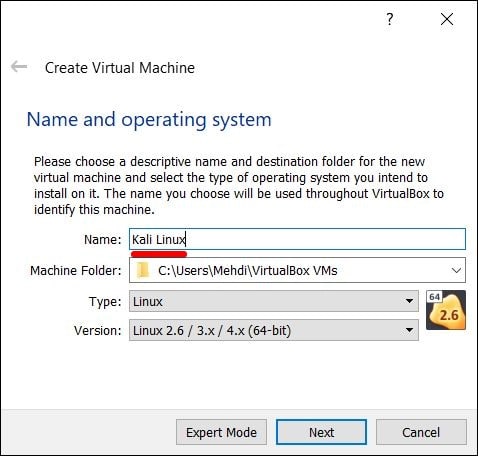
Set the name of Virtual Machine as you desire.The type and version option is set automatically and choose the machine folder in which you want to store Kali Linux.
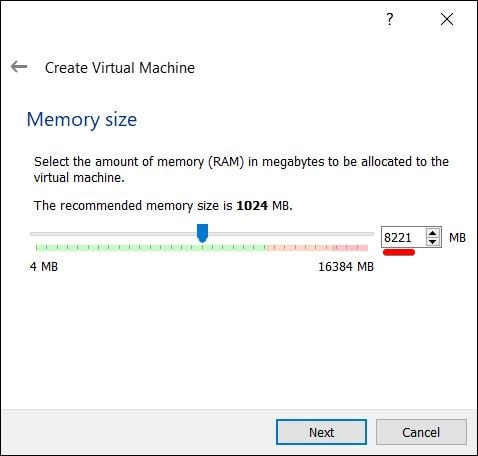
Set the amount of memory RAM in megabytes to be allocated the virtual machine. Allocate more than 2GB ..
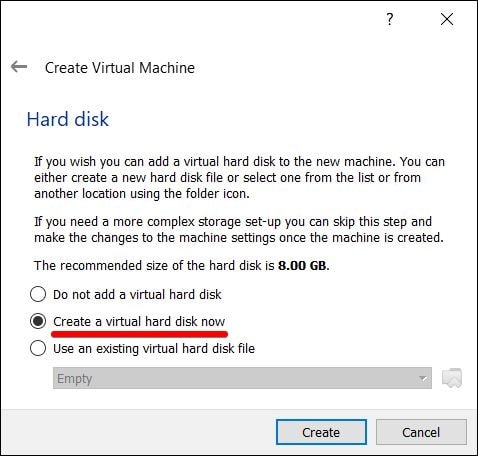
Create a virtual hard disk now.
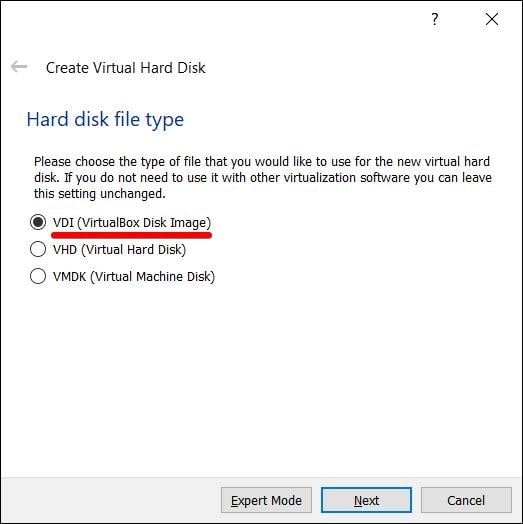
Leave selected VDI (VirtualBox Disk Image ) and click Next.
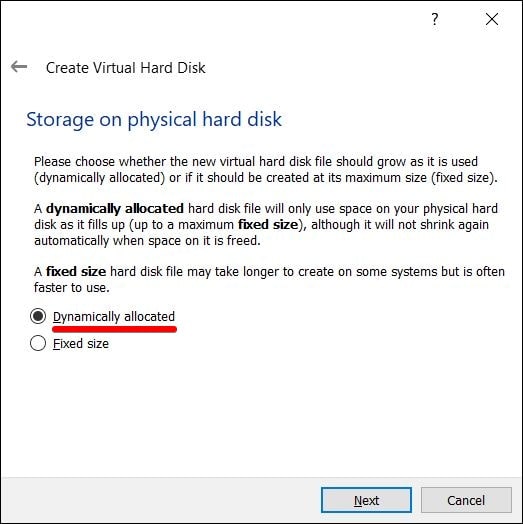
Select the option Dynamically allocated and click Next.
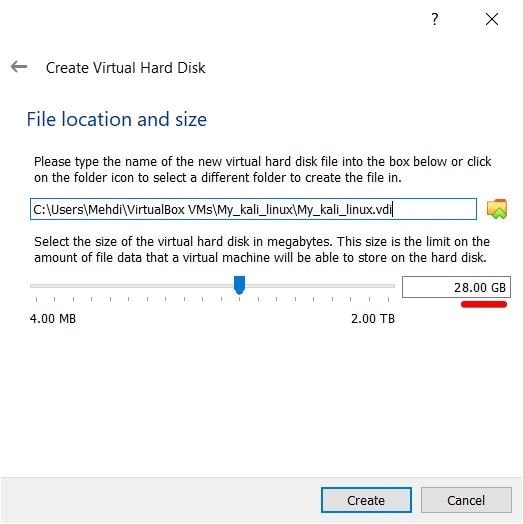
Choose the disk location, set the amount disk to 20 GB which will automatically reduce 20 GB from your selected disk and click Create .
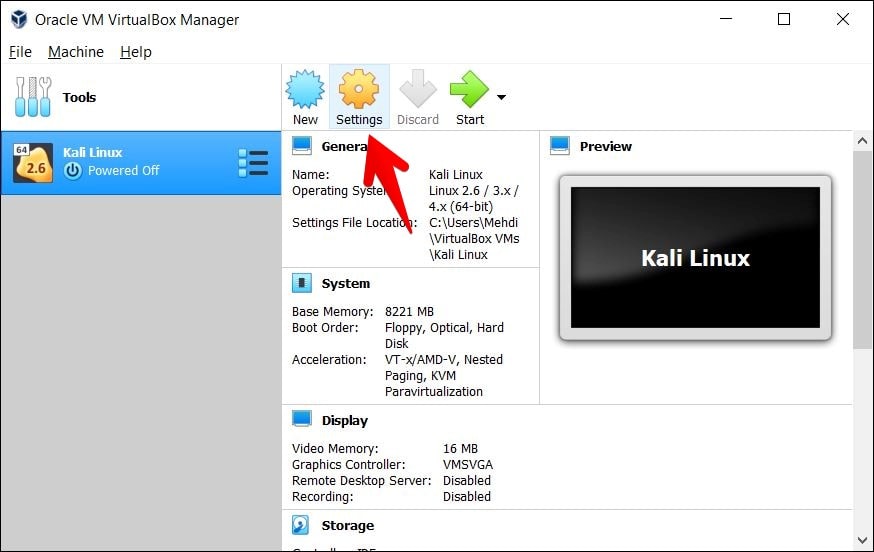
The virtual machine is now created . Click Settings as shown below.
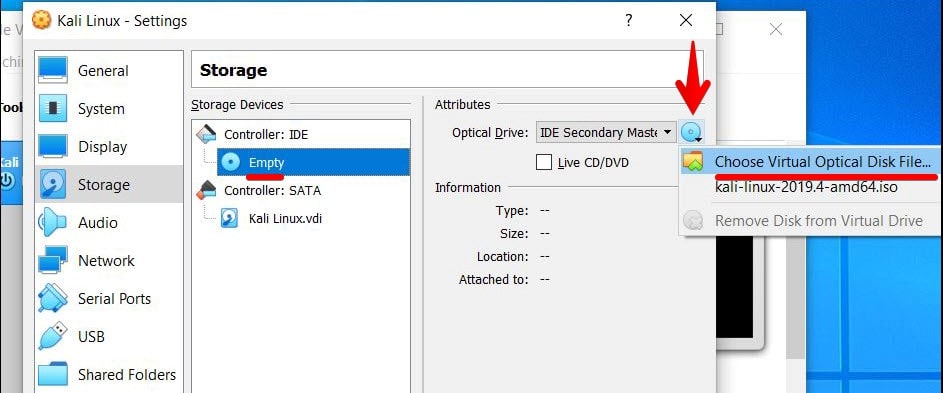
In the left side of settings window , click on the Storage tab .The list of storage devices appears in the middle of window then click on the empty. Choose the icon (looks like CD) at the right side of window the list of options appears then select option, choose virtual optical disk as shown below.
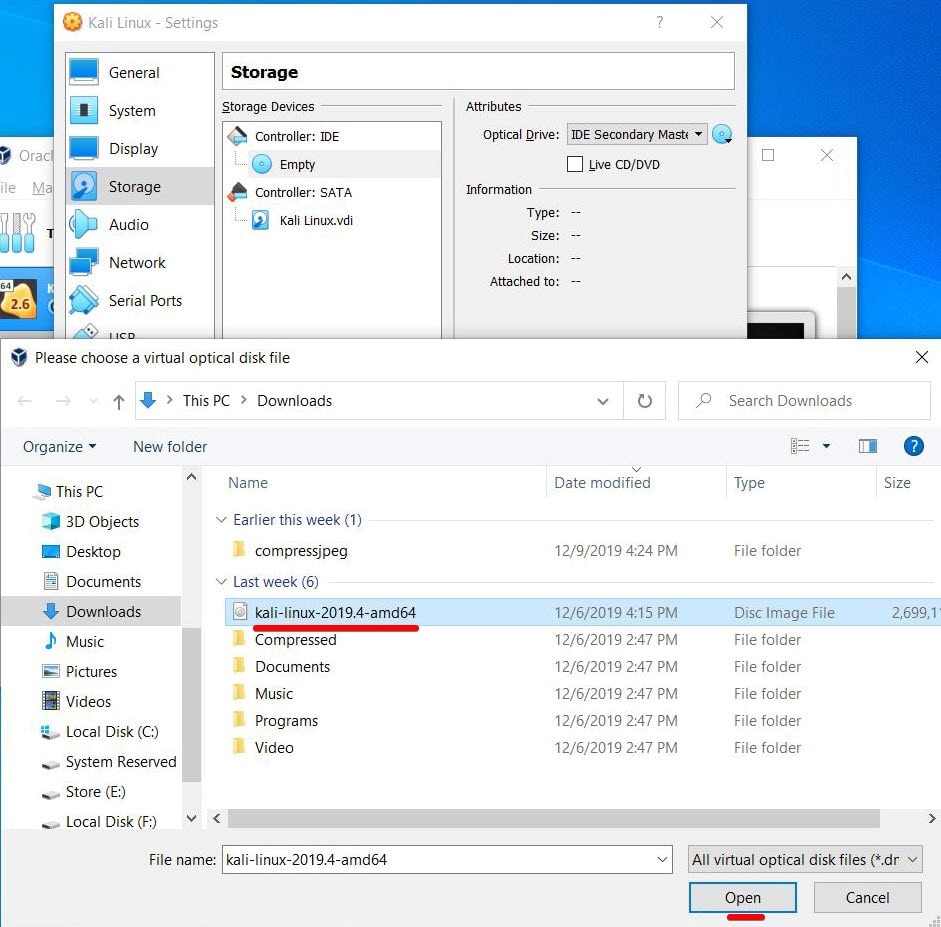
Select the Kali Linux ISO image file that you had downloaded, and click open.
Click Start. 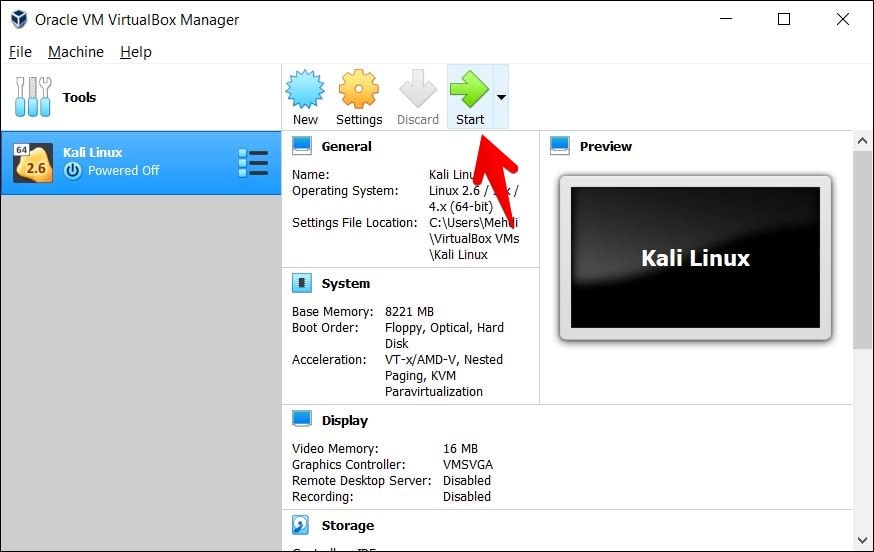
Install Kali Linux on VMware or VirtualBox
Next up, head over to another step of how to install Kali Linux on VMware or VirtualBox on Windows 10 PC. The installation process of Kali Linux on VMware and VirtualBox are the same.
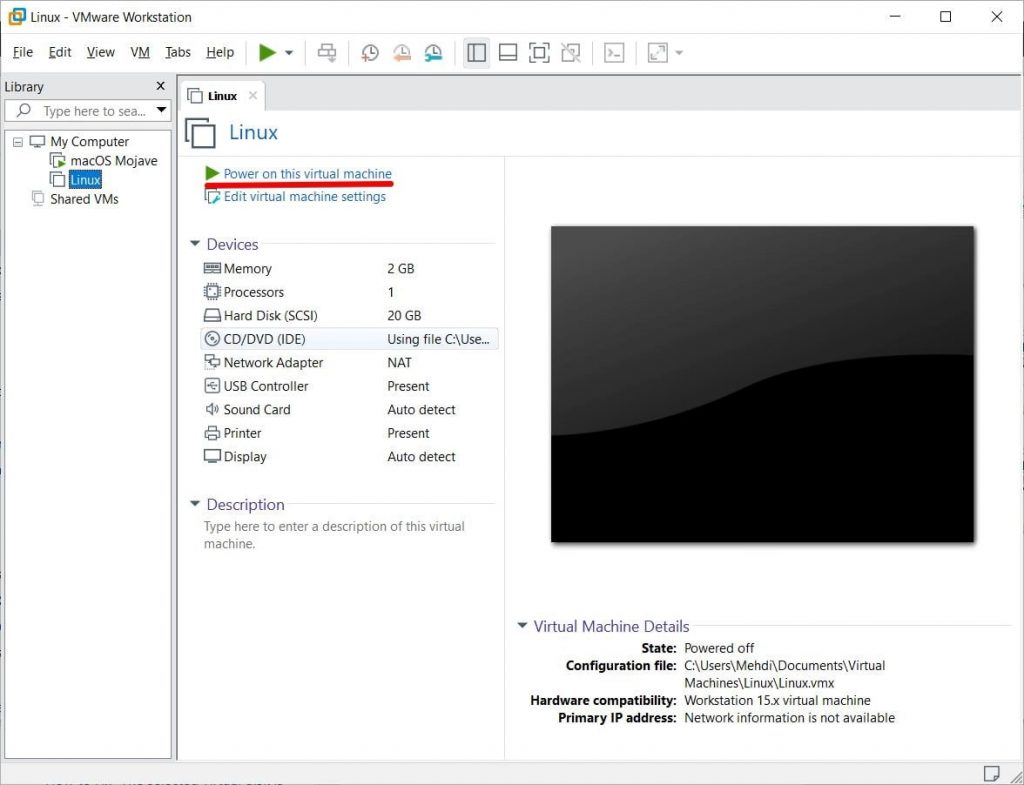
Now it’s time to install Kali Linux so click the button Power on this Virtual Machine.
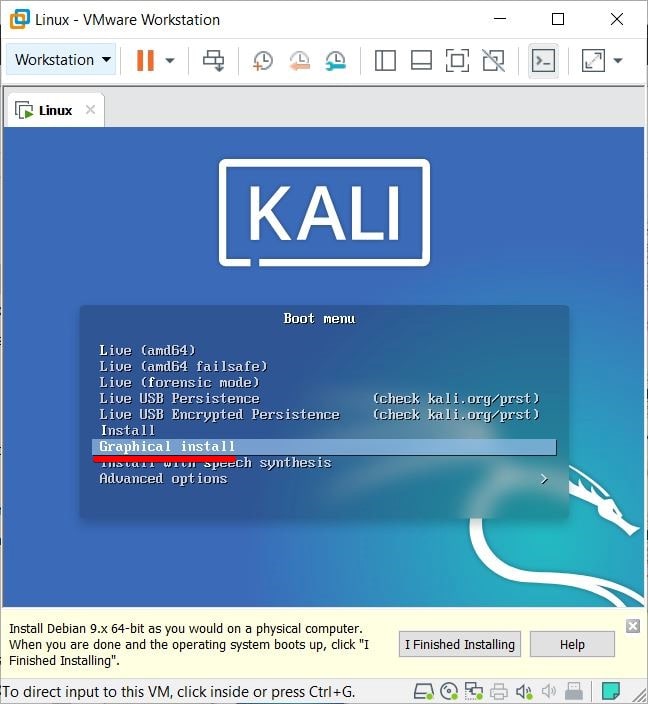
The installation option Interface appears as below so click on Graphical Install.
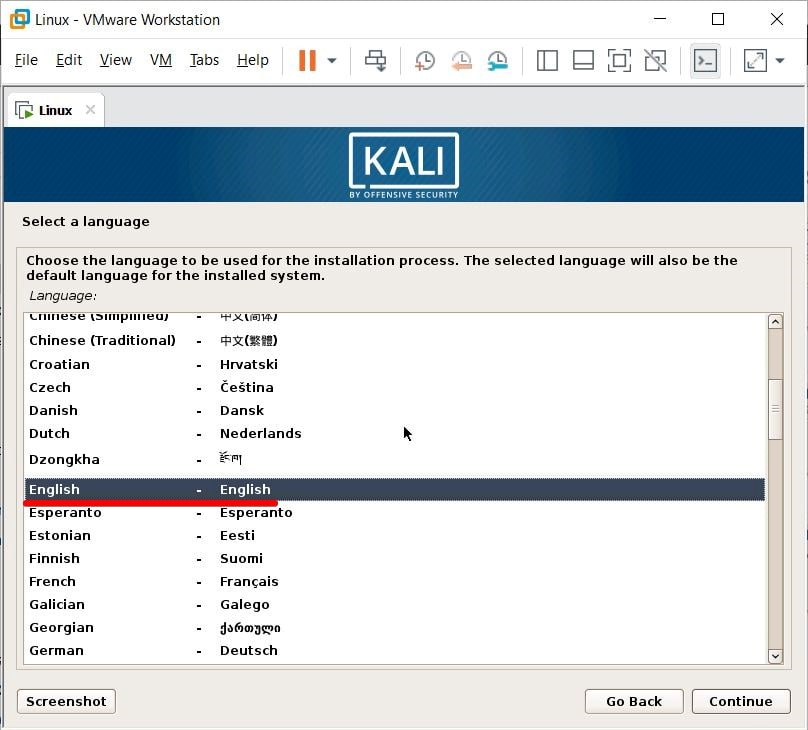
Choose you language and click Continue.
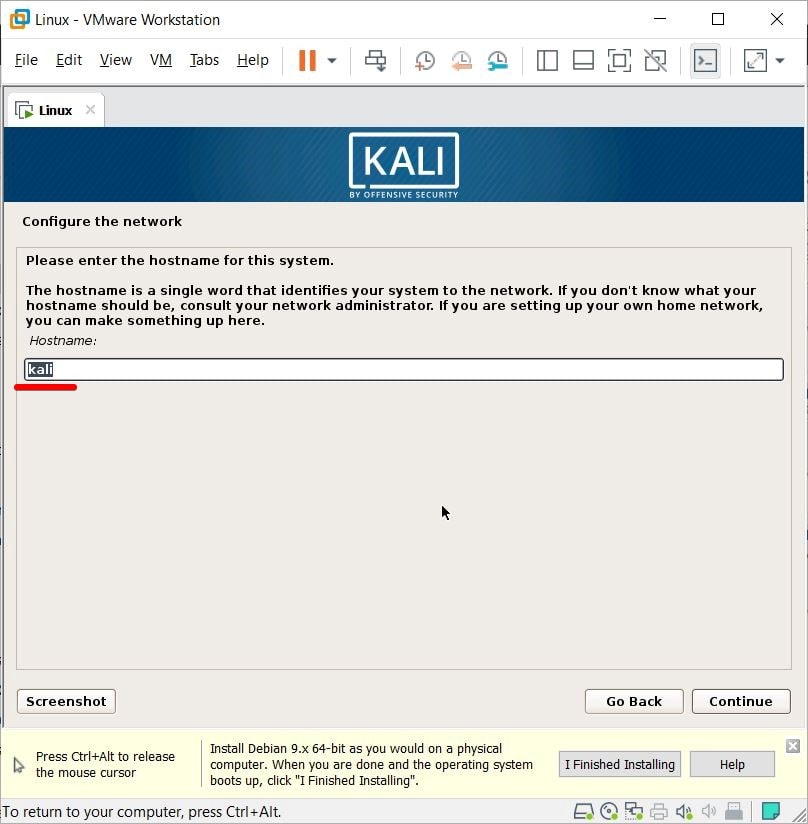
Name your desired Host Name and click Continue.
Leave the Domain Name empty and click Continue.

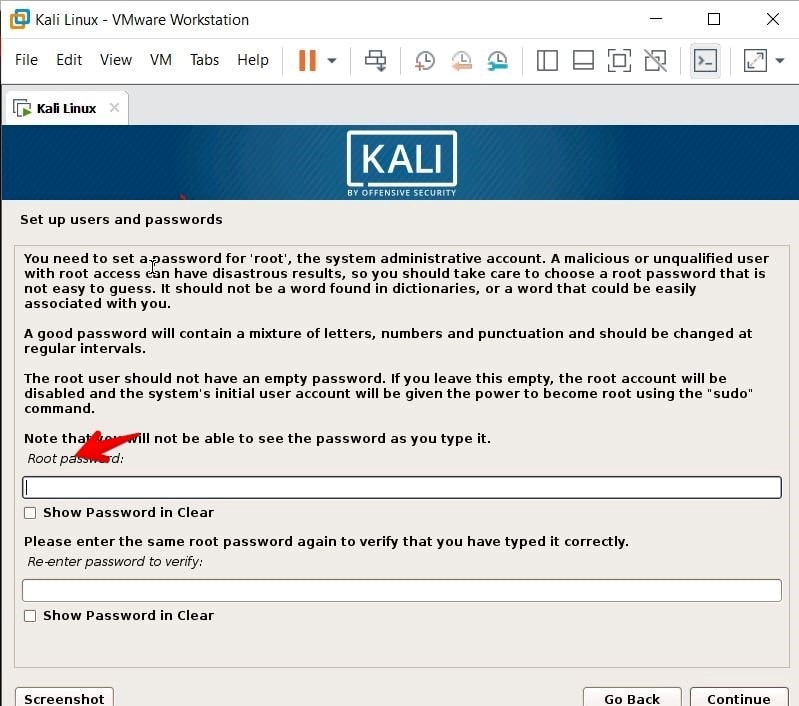
Enter your own password that will be required for signing in to the Linux and click Continue.
In this step, set the time zone according to your geography and Continue.
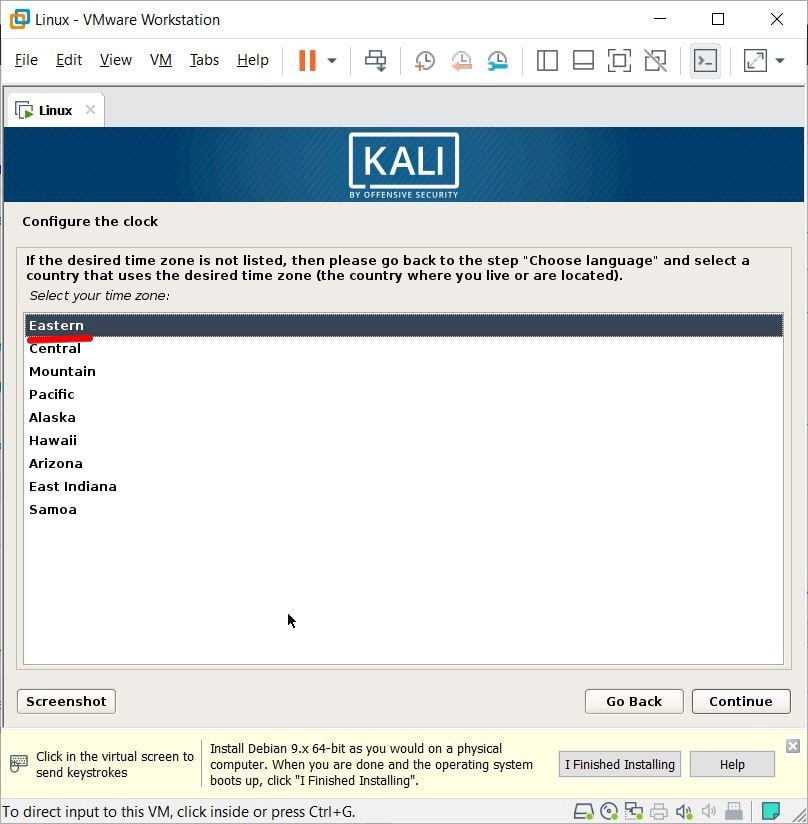
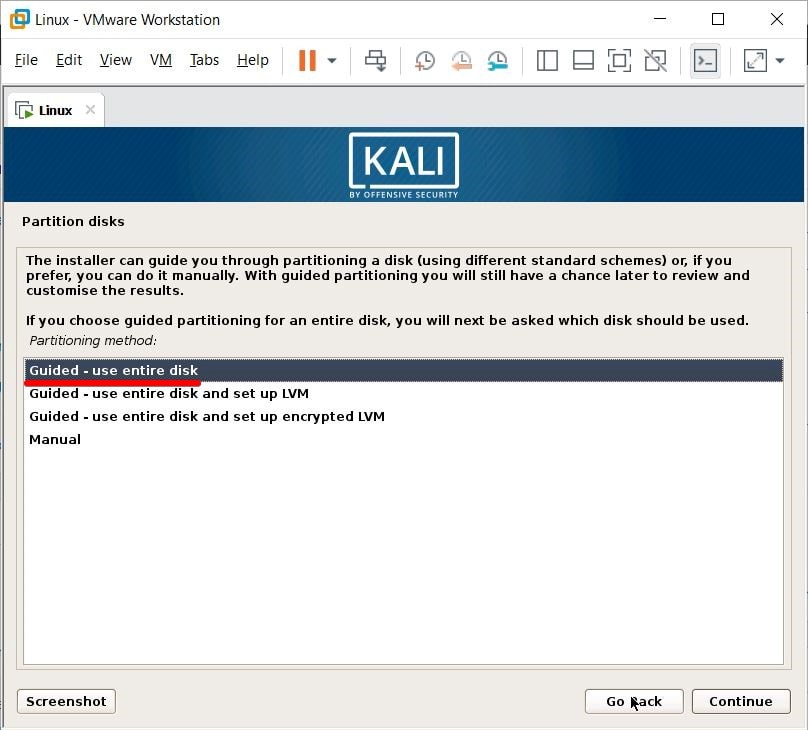
Now select Guided – use entire disk and Continue.
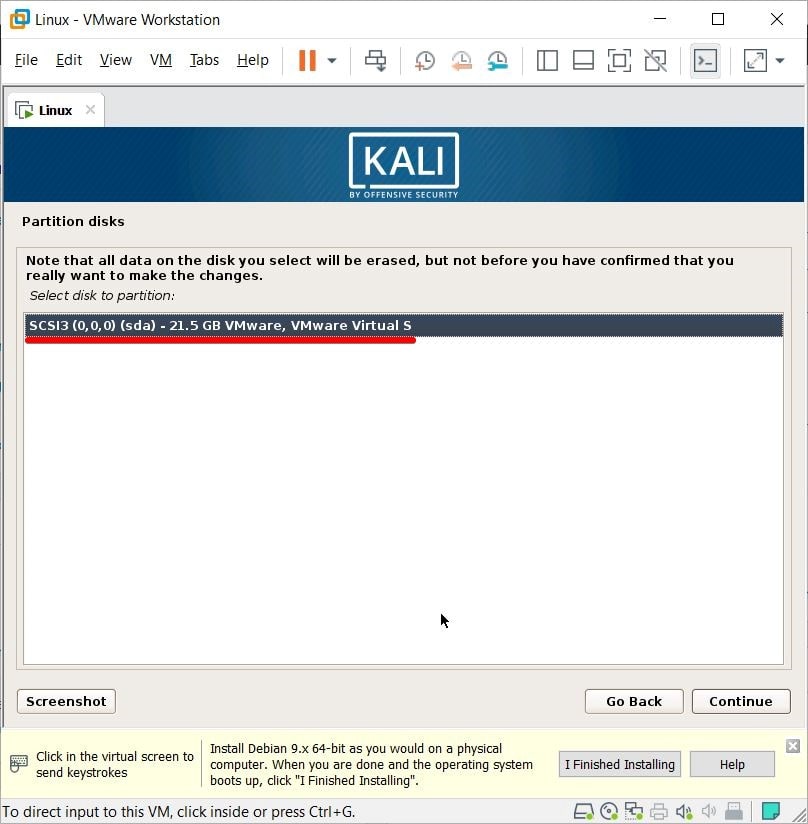
Next up, select SCSI3 (0,0,0) (sda) – 21.5GB VMware, VMware Virtual and Continue.
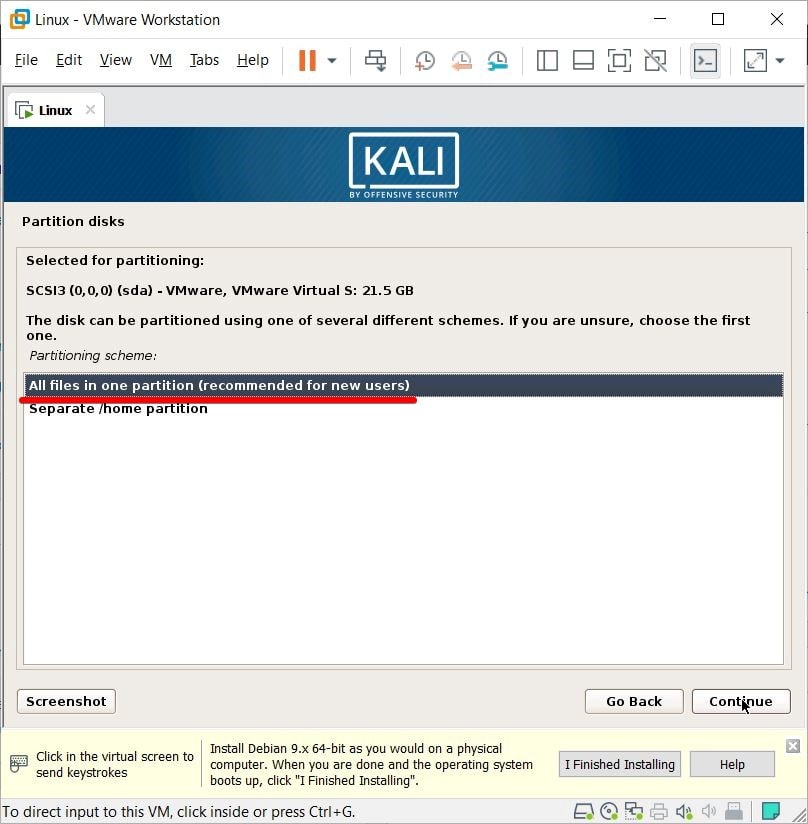
On this screen, select All files in one partition (recommended for new users) and Continue.
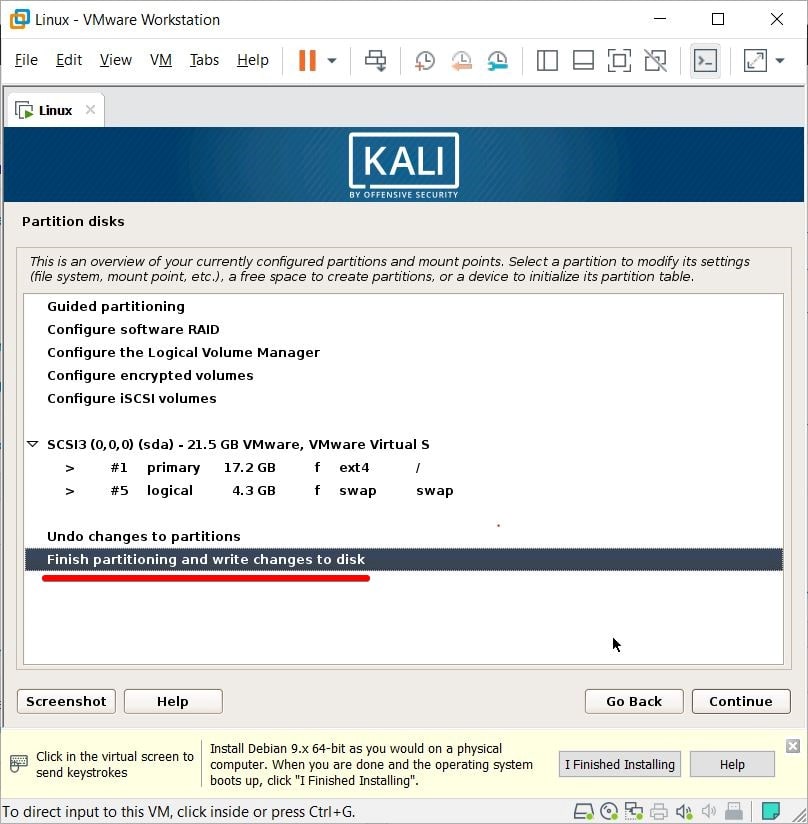
At this window, select Finish partitioning and write changes to disk and click Continue.
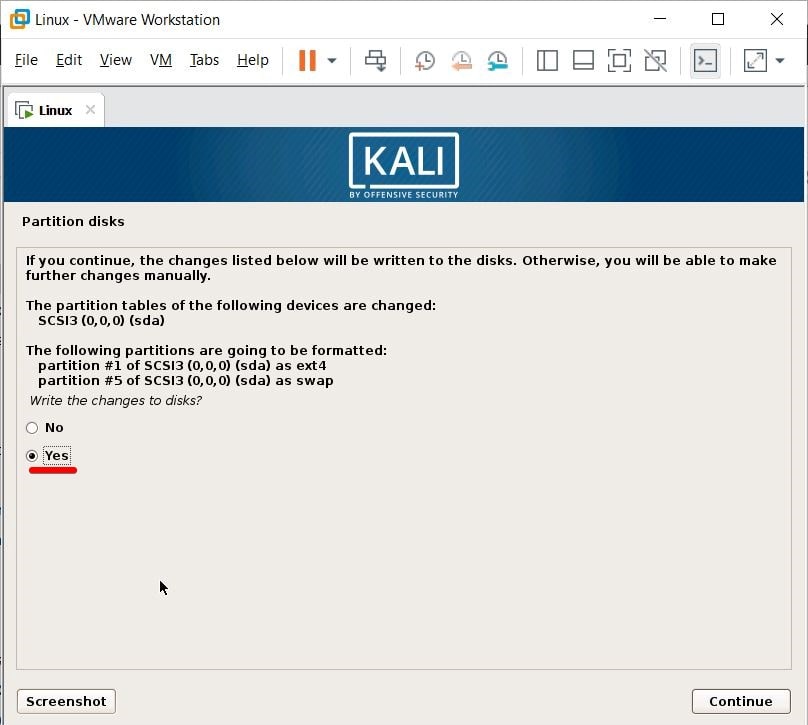
For partition disks, select the Yes option and click Continue.
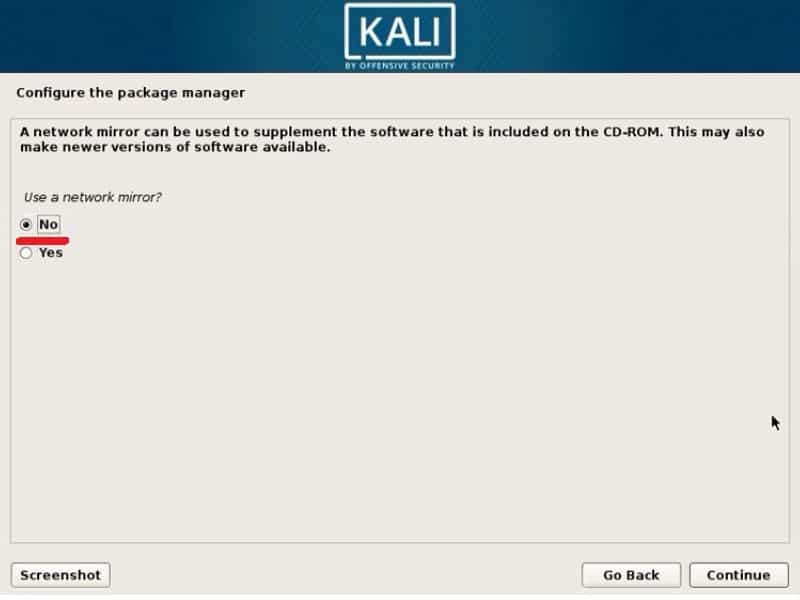
Hit No and Continue.
Accept it by clicking on Yes and Continue.
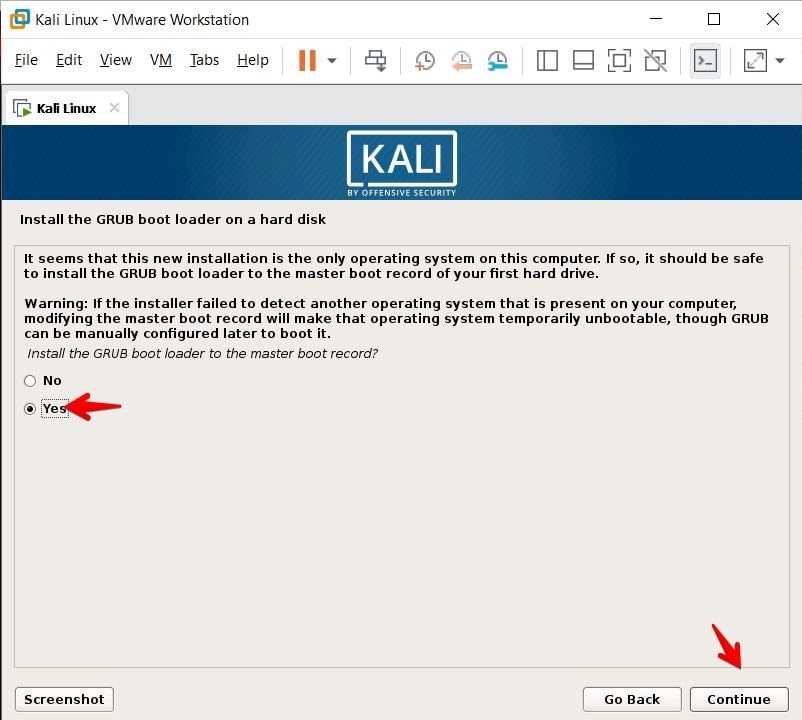
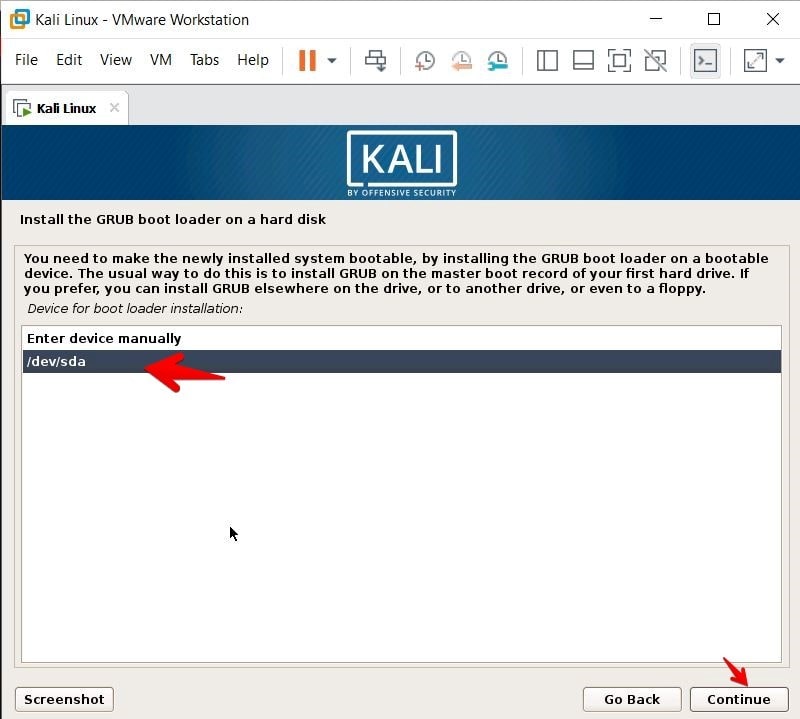
Select “/dev/sda” and Continue.
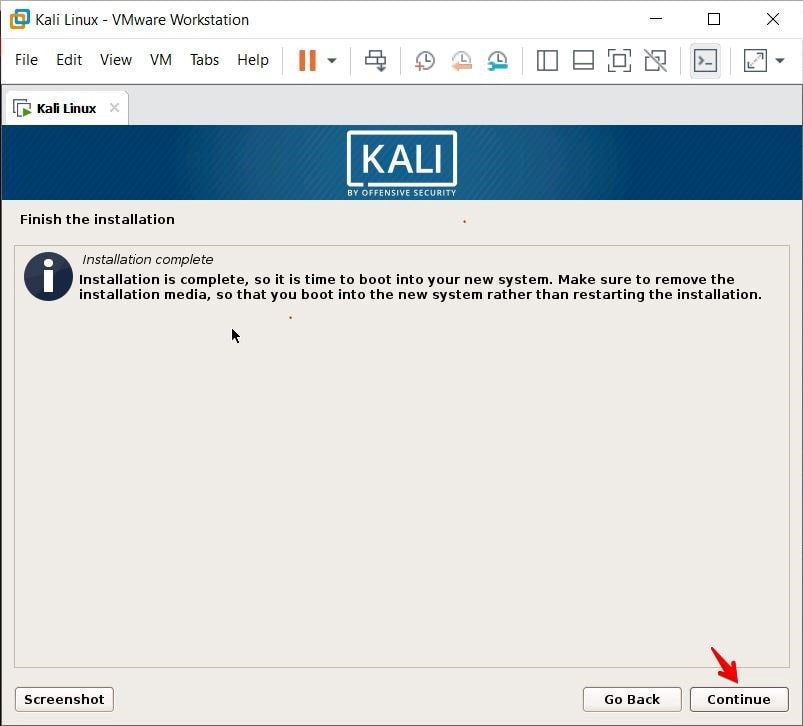
That’s all and click Continue to finish the installation.
All done, here you go. Enter the default user name “root”. The password is the password that you set during the installation so simply enter it.
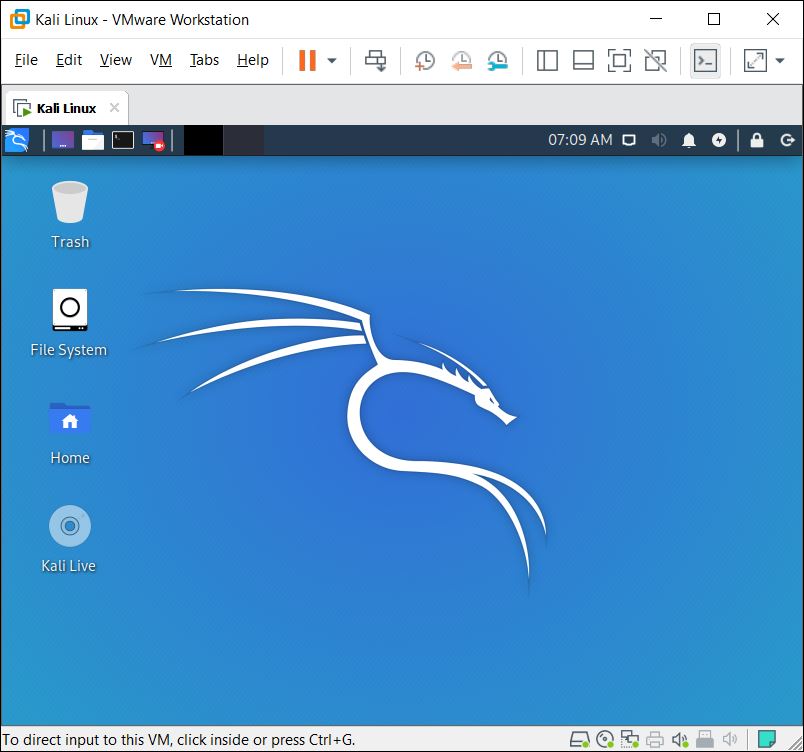
That was how to install Kali Linux on VMware or VirtualBox on Windows 10 PC.
Enjoy hacking!.

