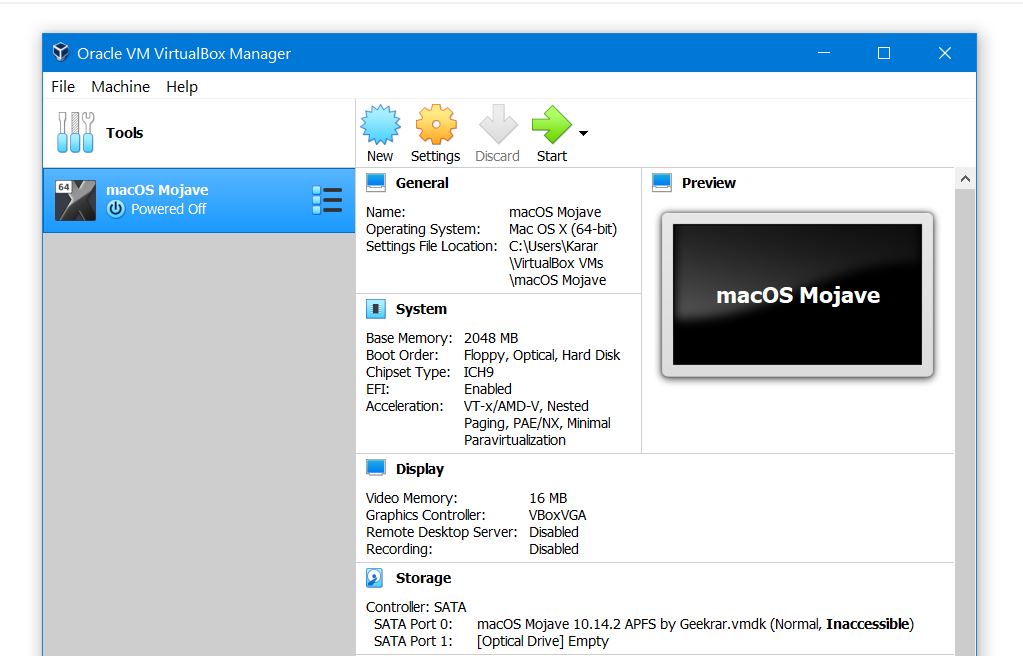
Need to delete a virtual machine from VirtualBox or VMware Workstation or Player? Removing a virtual machine can be necessary when you are done working with virtual machine whether on VirtualBox or VMware Workstation or player. There is no reason to keep it once you are finished using an operating system or you are just tired of it or more importantly you want to free up some space as the virtual machine takes much space. Like if you’ve installed macOS Mojave on VirtualBox for some reasons but would like to remove now, you may do it within some steps. Here is How to Completely Delete a Virtual Machine on Windows
For whatever reason you want to delete a virtual machine, you can do it however but deleting it completely is what you might not know about. Deleting a VM seems very easy and simple. Like many users, you might have tried to delete a VM but what you may have done is remove it from the VMware or VirtualBox library which doesn’t delete any of the VM files from the disk. Perhaps, it will only be only deleted from the VM app library and the files will be still on the disk.
When you delete a VM from VMware by right-clicking on it and selecting remove, you might think it’s all done, but it isn’t. This will cause delete the virtual machine only from the VM app library by name but in actual, no files will be deleted of the VM from the disk which is taking huge space on the disk. Here is How to Completely Delete a Virtual Machine on Windows
We’re going to look at how to delete a virtual machine on the two most popular virtual machine apps—VirtualBox and VMware Workstation Player—but the process is similar in other virtual machine apps.
- Related: Install macOS Mojave on VMware on Windows PC
Delete a Virtual Machine in VMware Workstation or Player Completely
Deleting a virtual machine is actually pretty easy and can save you a massive amount of storage if you do it the right way. As you delete the virtual machine from VMware, it won’t delete a single file of the virtual machine that makes the virtual machine. In order to run it up, all you have to do is locate the vmx file and open it with the VM app. It will continue to run. Don’t worry, we’ve covered you up.
Whether you are using VMware on Windows, Mac or Linux, you can do it as simple as we do it. To get started, open up VMware and navigate to the virtual machine you want to delete completely. Now right-click on it and select Manage and click Delete from Disk.
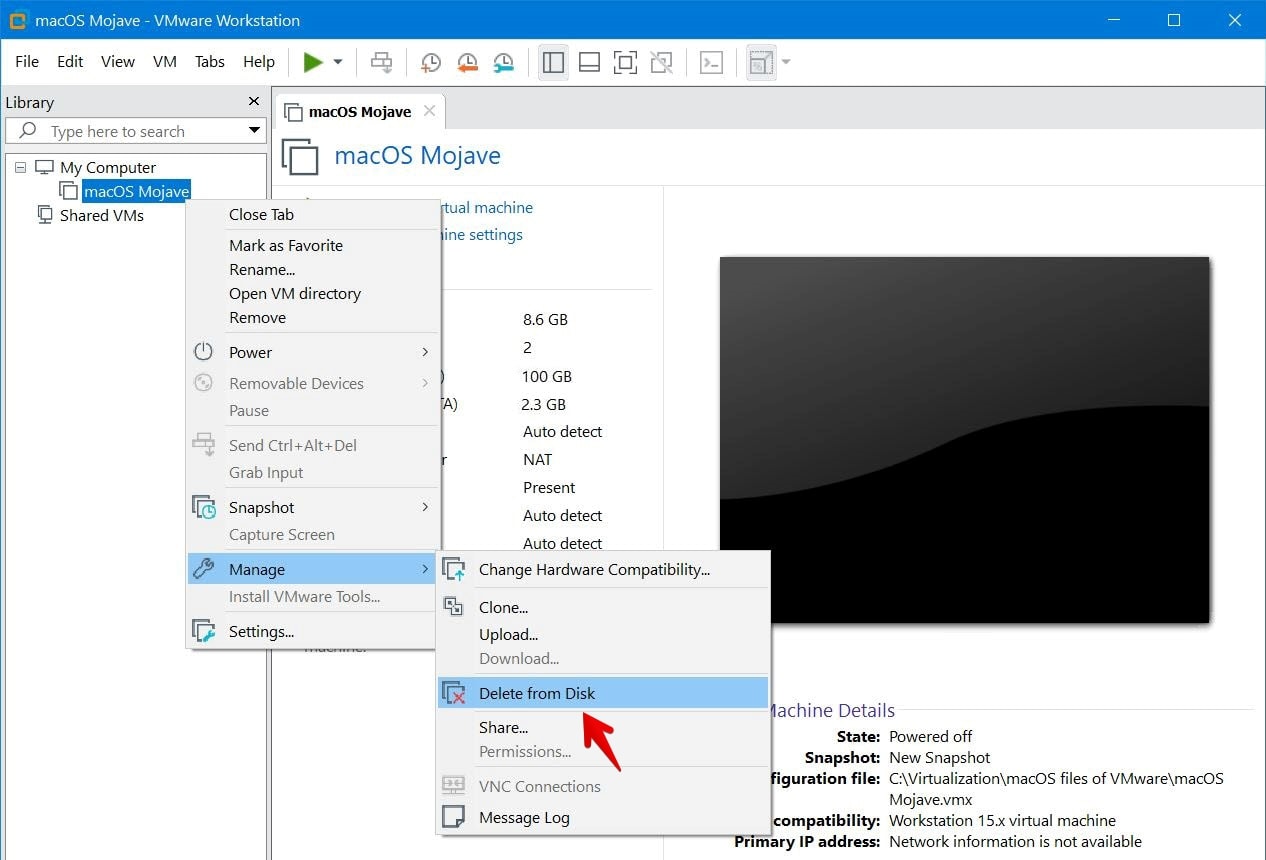
This will appear the pop up the warning confirming are you sure you want to delete the virtual machine and its files completely for permanent, click Yes. It will delete the virtual machine complete with its files.
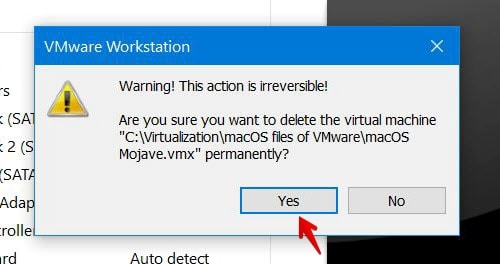
Once it’s deleted, you won’t see any files of the virtual machine including its disk files like VM, OS, VDI, VMDK or anything else associated to the virtual machine.
Delete a Virtual Machine in VirtualBox Completely
With no doubt, VirtualBox is the easiest and most reliable virtual machine app in the market. You can create and run any virtual machine you want for entirely for free. So when you are finished working with them, you may probably want to delete it completely with its files from VirtualBox, so here’s How to Completely Delete a Virtual Machine on Windows
First, head to VirtualBox and open it. When it’s open, navigate to the virtual machine you want to delete. Right-click and select Remove.
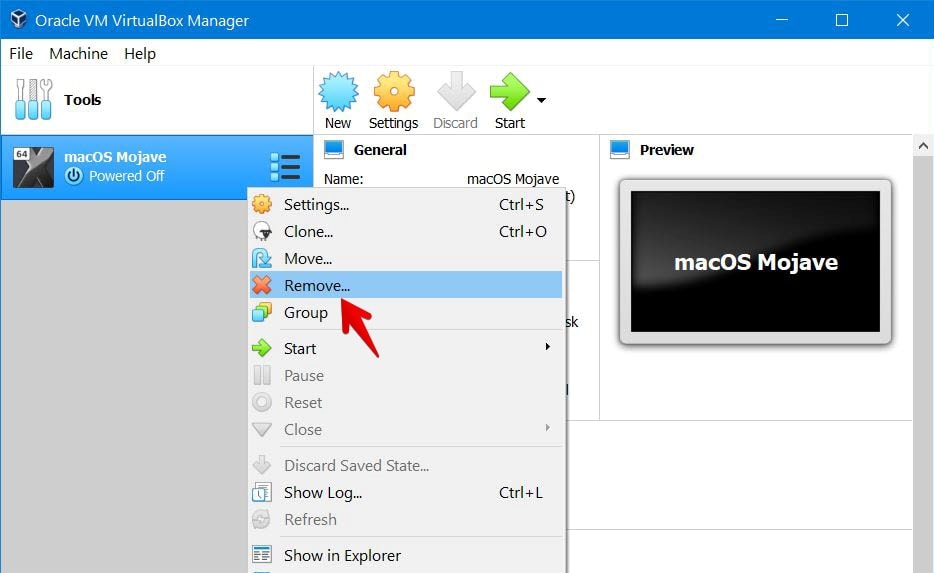
Since we want to delete the virtual machine with all the files, we will choose Delete all files option. It will immediately delete the VM with all the files including the VMDK of the virtual machine.
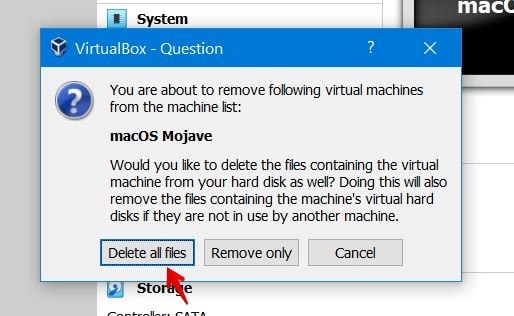
Deleting the virtual machine will delete all the files including VDI, VMDK, VHD or HDD that preserves a huge amount of space and resources. Doing that, it will free up much space on your disk that in result you will get more space, more performance. If you have any ideas, suggestions or anything regarding us, we are happy to know it.


