

In this guide, we will learn how to install the latest version of macOS, Monterey, on your PC with VMware. Apple announced Monterey on October 30th 2020 and described it as “the most advanced Mac OS ever.”
The new macOS Monterey update is full of new features on your desktop.
Apple has radically redesigned the Finder window to make it look more modern and intuitive. Users can select the grid or list view they prefer, as well as for opting for one of two size options.
This latest update includes a ton of new and exciting features, such as an app dock for your smartphone, notifications to let you know when apps want your attention, and window management tools that let you split your screen into two. There are also a number of new features such as News.
Table of Contents
macOS Monterey On Vmware: Step by step guide
Step 1: Download necessary files
- Download VMWare from their official website and install it. Here is a complete video tutorial that you can use.
- Download Macos Unlocker and install it. Here is a complete guide that you can use: How to download and install macOS Unlocker for VMWare.
- Download macOS Monterey ISO File. You can download the latest macOS Monterey ISO file here.
Step 2: Creating a Virtual Machine for macOS Monterey On Vmware
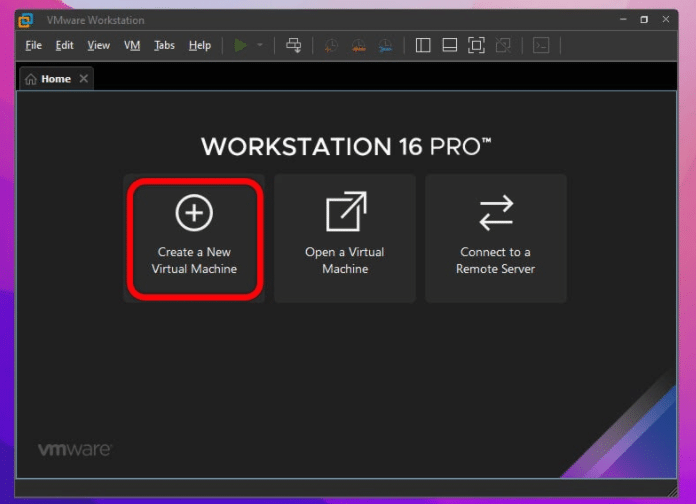
- First- Create a New Virtual Machine
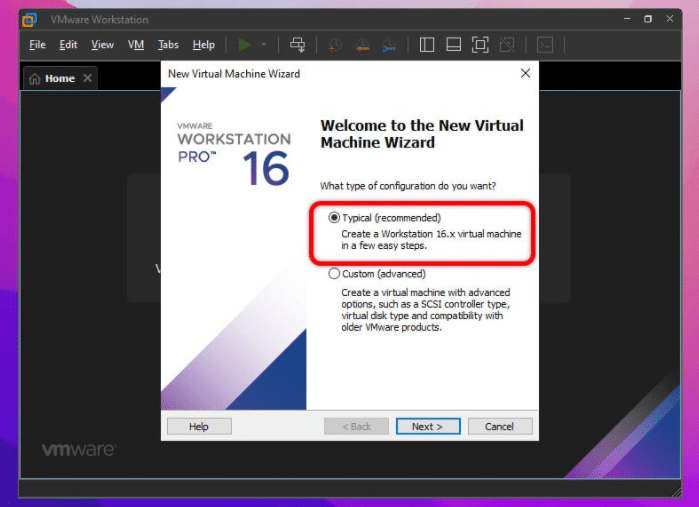
- Next- Typical (recommended).
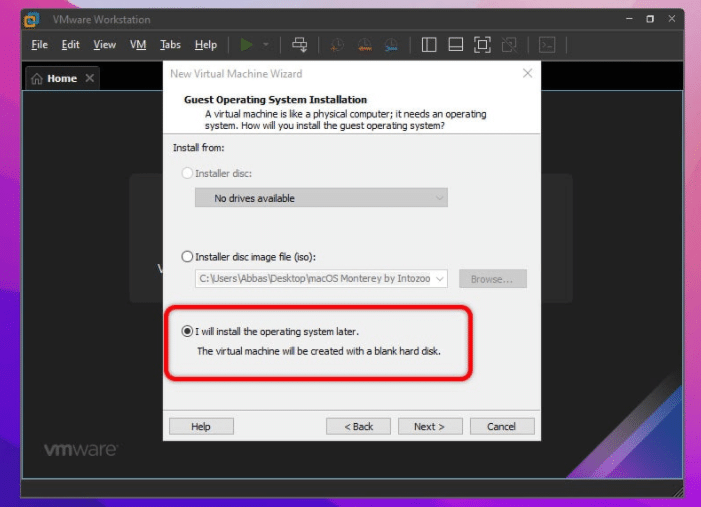
- Next- I will install the operating system later.
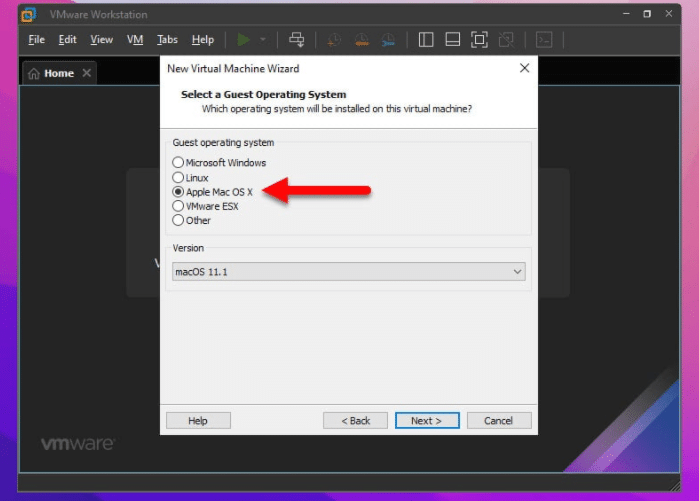
- Next- Apple Mac OS X
- Type in Name and set the location where you want to store your Virtual Machine files.
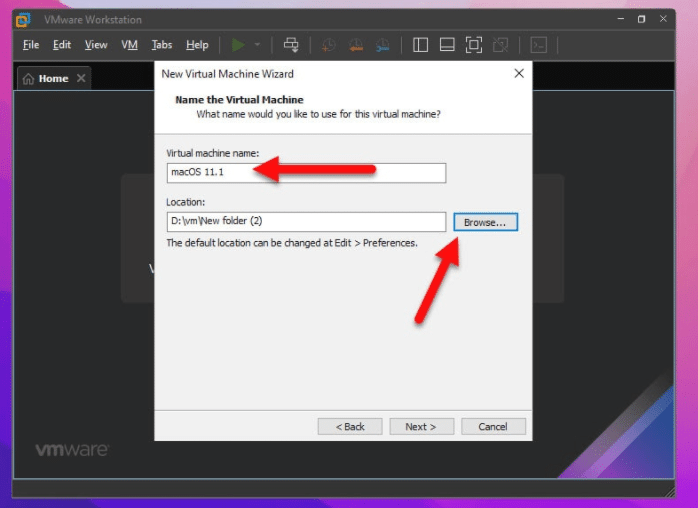
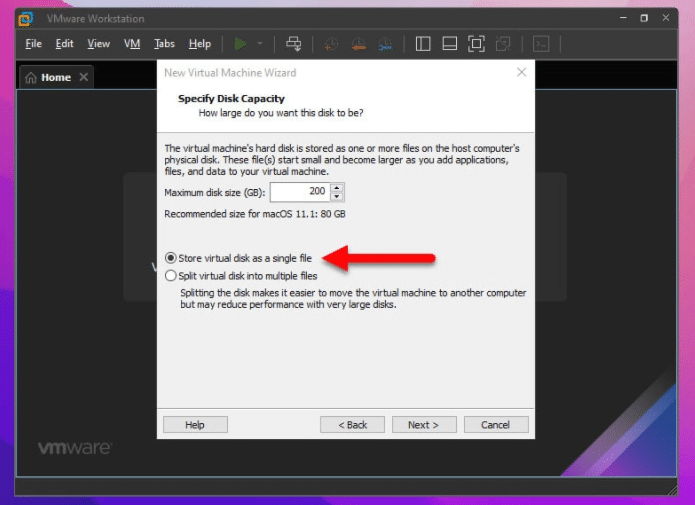
- Increase Macimum disk size (GB): to anything greater than 200GB.
- Next- Store virtual disk as a single file.
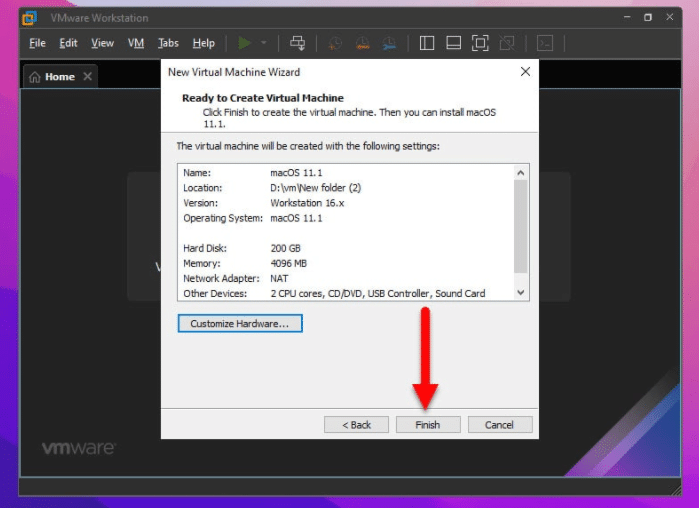
- Next- Customize Hardware
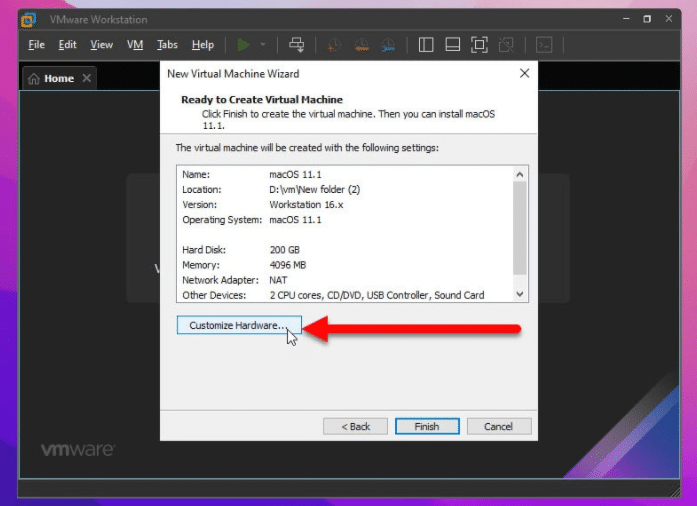
- Memory: 4GB
- Processors: 2
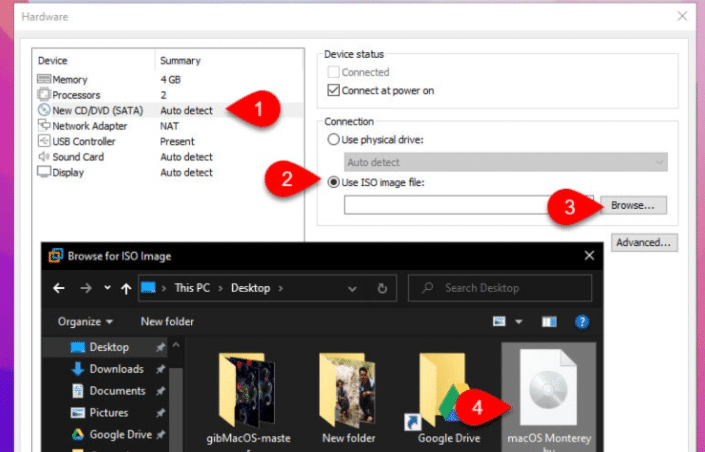
- New CD/DVD (Sata): Auto Detect
- Network Adaptor: NAT
- Next- Browse and Select macOS Monterey ISO file (You should have downloaded this file in step 1). Click Close.
- Next- Finish.
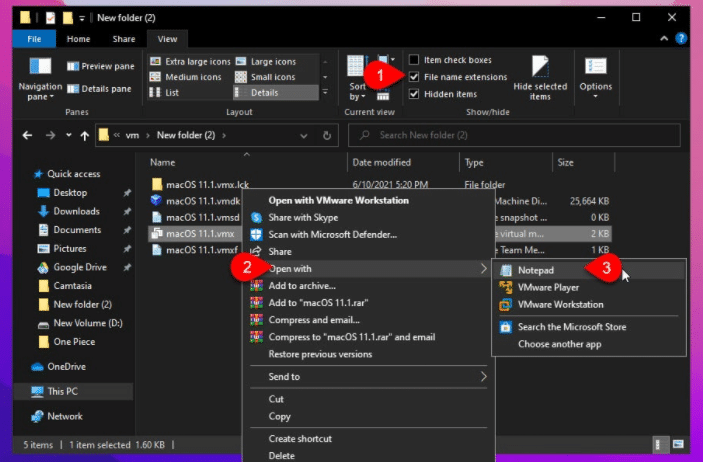
Step 3: Editing the VMX File
- To edit the VMX file, locate the VM file you created above. Enable the extension name from the view menu. Right-click on our VMX file and open it with Notepad.
- Go to the last line > Hit Enter > Type the following.
smc.version = 0
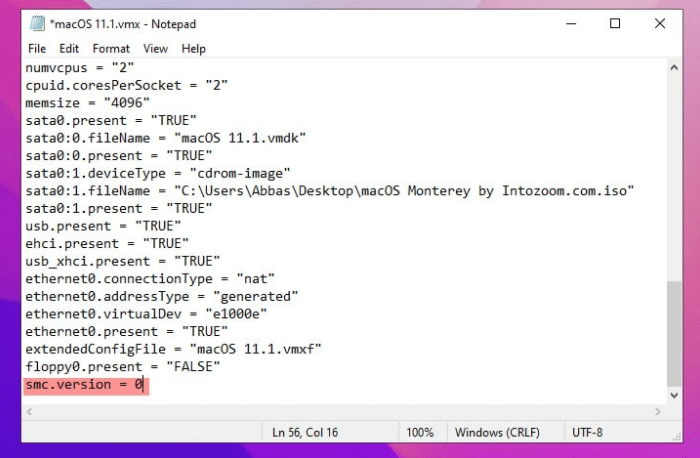
- Save the file and exit.
Step 4: Install macOS Monterey On Vmware
Start your virtual machine now and follow the steps. The final step is to set up macOS Monterey on Microsoft Windows. Simply power on the machine and continue with the setup.
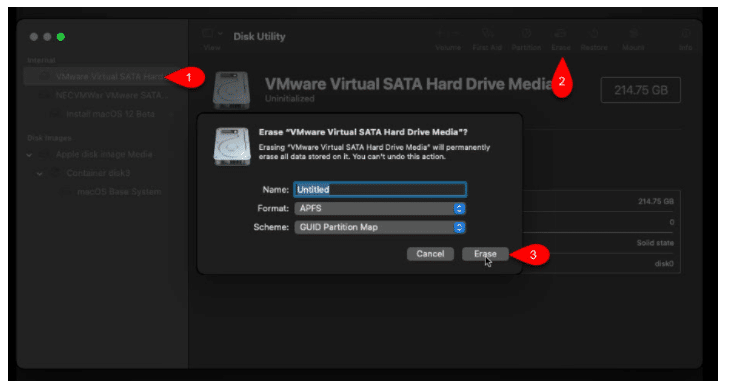
- Here you can use Disk Utility, click on it.
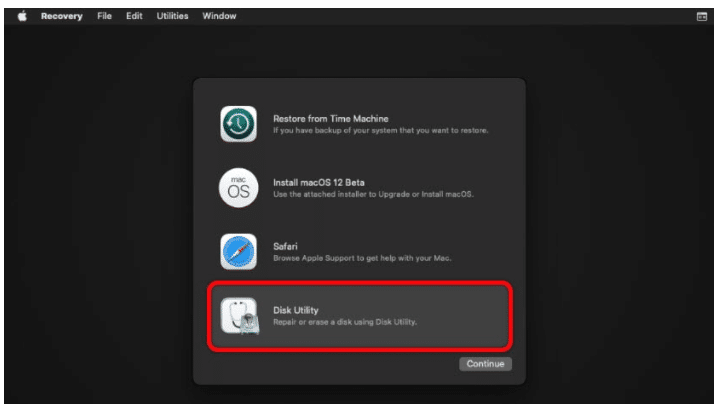
- Select Virtual Disk, VMware Virtual System, and click Erase in the top menu
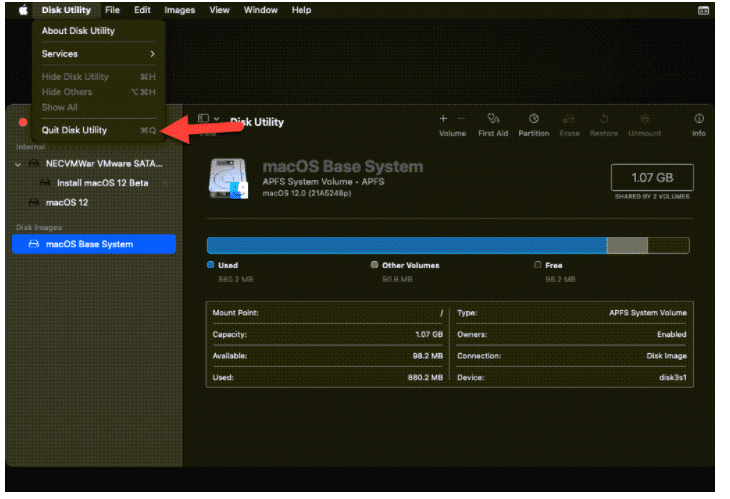
- Now Quit disk utility and follow the simple steps to Install macOS Monterey On Vmware On Windows
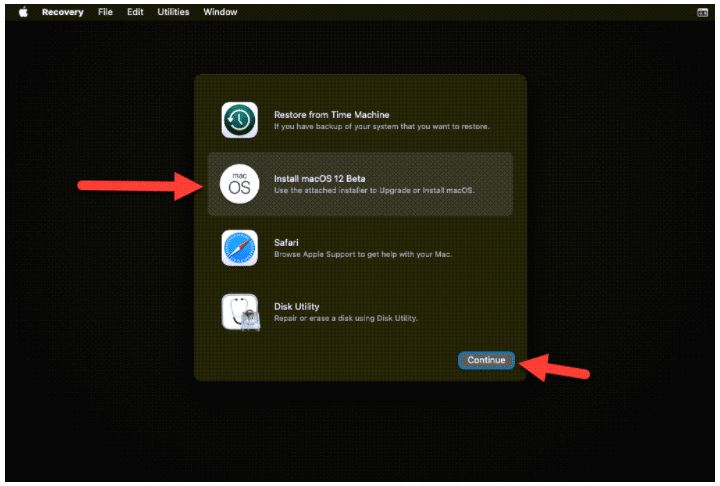
- Select Install macOS 12 Beta and then click Continue.
Step 5: Avoid macOS Monterey Stuck at black screen after a restart on VMware
If you want to use macOS Monterey On Vmware On Windows for quite some time, make sure to follow this guide in order to avoid macOS Monterey Stuck a black screen after a restart on VMware. Or you might have to re-install the complete macOS Monterey again.
After installing macOS Monterey on VMWare, you need to enable auto-login BEFORE you reboot. If you do not, the machine will require reinstallation.
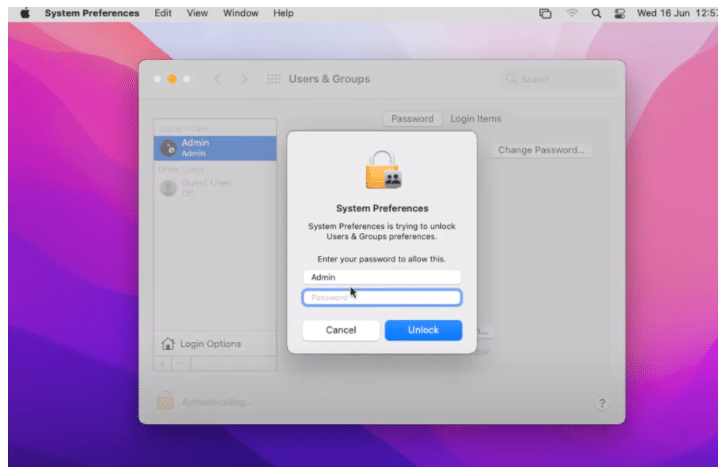
- Open System Preferences.
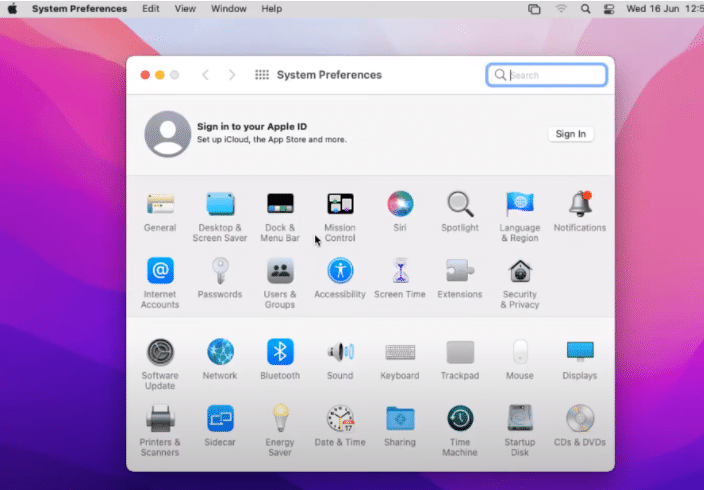
- Click User and group and unlock it by typing your username and password.
- Click Login Options > Automatic login dropdown and select your user.
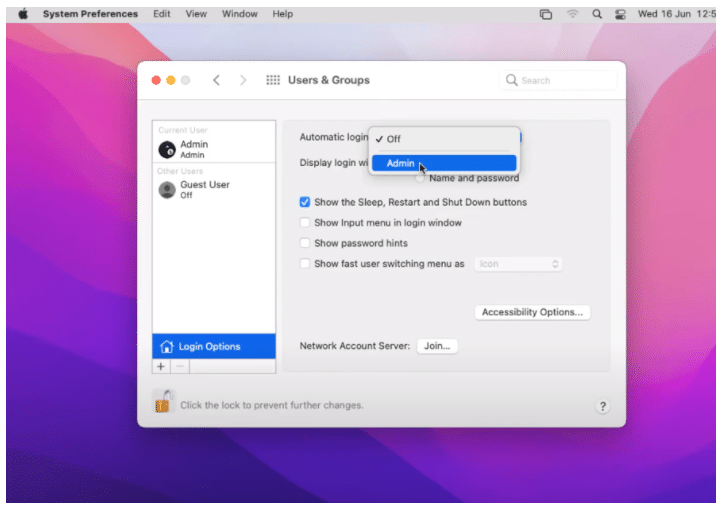
- Save the new changes and exit.
Some other issues that you might face
Working with macOS Monterey on VMWare will eventually result in new errors day by day. So, to avoid those errors we will be updating this article with the problems and their solution. If you have faced any issues other than the ones mentioned. You can drop us an email at admin@geekrar.com and we will help you fix them.
Final Words: Install macOS Monterey On Vmware On Windows
I hope this guide on how to Install macOS Monterey On Vmware On Windows was easy and up to the mark. If you have any suggestions and request you can drop us an email at admin@geekrar.com.
Cheers and happy macOS Monterey!


Will I be able to connect to the internet on the virtual macOs?
Yes
macOS Monterey Beta 9 : https://mega.nz/file/XU1T2IZb#-AeuFvsN70s64v_N4XFoZrUEXitWp9yUMLMy26dHOaU