
Running Android on a PC is an excellent way to experiment or just run apps on your PC that you often do not use. Installing Android in Virtualbox is a superb solution to do this. Because the Operating System does not use many resources, you can be running a virtual machine concurrently with your other Windows-based apps.
Android is a portable operating system based on Linux and other open-source programs and is created specifically for phones and tablets. The creators of Android are a group of engineers known as the Open Handset Alliance and financially supported by Google. It was launched in November 2007 and released on a retail device in September 2008.
The source code for Android is open-source, released by Google under the open source license. With almost 70% running Google’s ecosystem, it’s nice to access it and all the apps associated with your desktop.
- Related : How to Install Parrot OS for VirtualBox
Table of Contents
Required Files to Download:
For a successful installation, you will need to download the Android ISO image files and VirtualBox for Windows. Both direct download links are below.
– x86 Android ISO
– Virtualbox for Windows
Install Android in VirtualBox – Complete Step by Step Guide
We are going to assume that you have already installed VirtualBox on your desktop. If you haven’t done it already, here is an article and video on how to install it on Windows 10.
Creating the Android OS Virtual Disk.
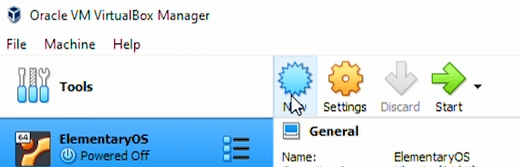
The first step to install Android in VirtualBox is to launch VirtualBox and select the ‘New’ icon at the top.
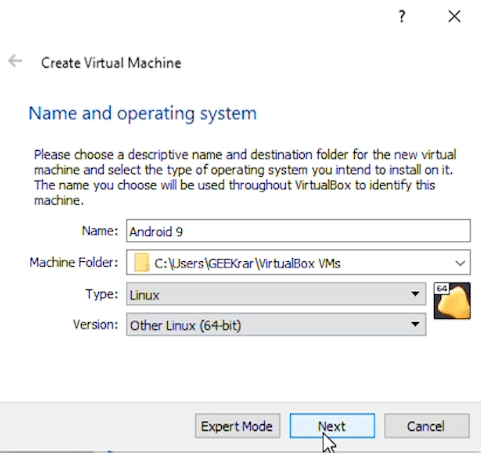
In the ‘Create Virtual Machine’ window, type a relevant name in the first field. ‘Machine Folder” can stay at the default location, unless you have a reason to change it. ‘Type’ should be Linux, and the version will be ‘Other Linux (64-bit)’.
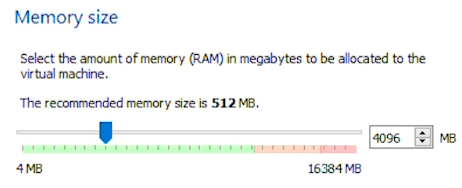
Memory size requirements for Android in VirtualBox is 2GB, we recommend 4GB. You can further increase this if you plan to run multiple apps.
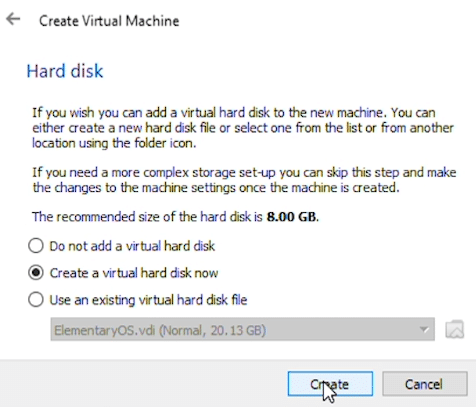
The next few steps will be default settings. Hard disk will be ‘Create a virtual hard disk now’
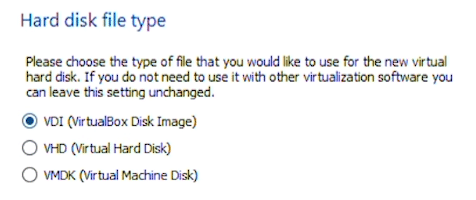
Hard disk file type will be VDI (VirtualBox Disk Image).
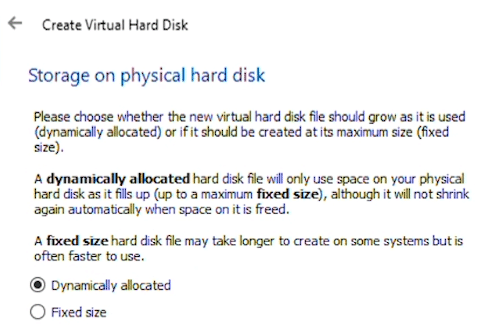
Create Virtual Hard Disk will be Dynamically allocated.
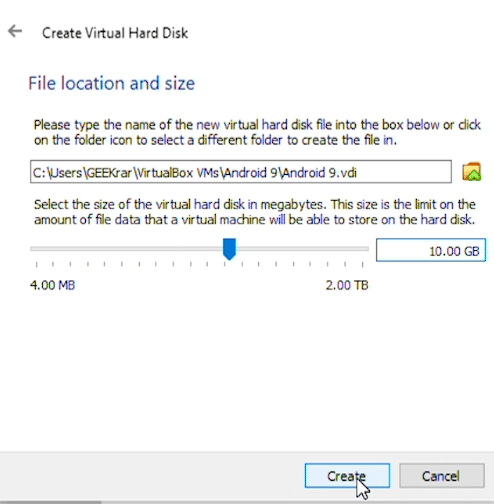
Under ‘File location and size’ we have left the folder path as default but increased the size for the virtual hard disk to 10GB. If you plan to install a lot of applications for games, you may want to give even more space. Once you’re settled on a size, click ‘Create’ and we have finished the first step.
Modifying Android OS virtual disk
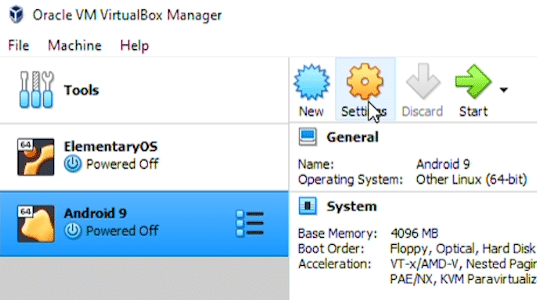
Before you can run Android in VirtualBox, we need to make a few changes to ensure it runs cleanly. To make the changes, select the newly created virtual drive on the left, then select ‘Settings’ icons at the top.
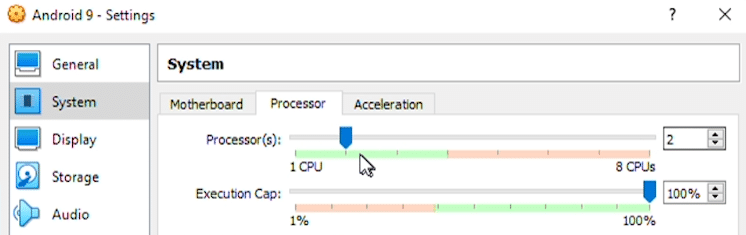
In the Settings window, select ‘System’ from the list on the left, and then the ‘Processor’ tab in the middle. We will increase the number of available processors to 2.
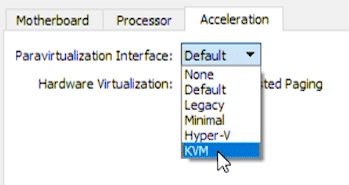
In the next tab, ‘Acceleration’, select ‘KVM’ in the Paravirtualization Interface drop-down list.
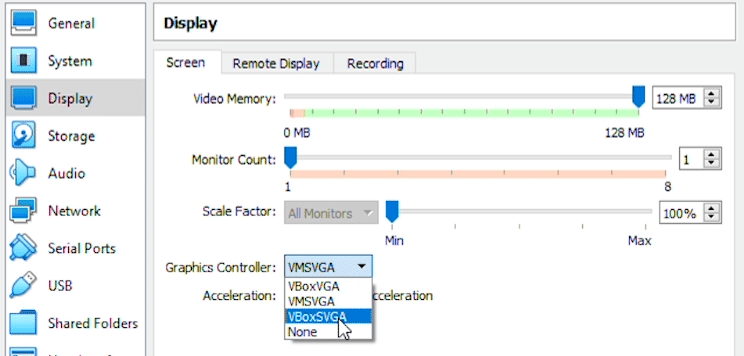
‘Display’ is the next option we want to select. The first tab ‘Screen’ has a scale for video memory. Increase the number to the maximum amount available (within the green zone). Then below under ‘Graphics Controller’, select VBoxSVGA in the drop-down menu.
Next, under ‘Storage’ looking for ‘Storage Devices’ and the empty disc icon. Click on the disc icon, then under ‘Attributes’ click on the other disc icon. Here we can select ‘Choose a disk file…’
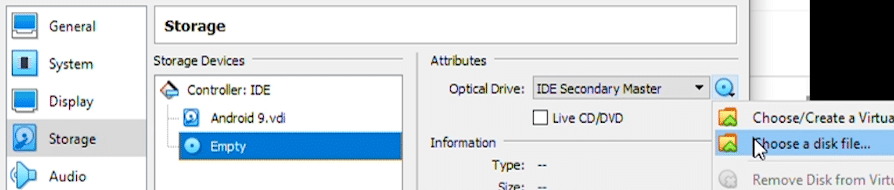
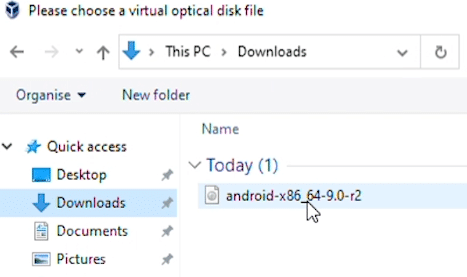
Navigate to the location where you downloaded you Android ISO file. Once you’ve found it, click on it, then click on ‘Open’
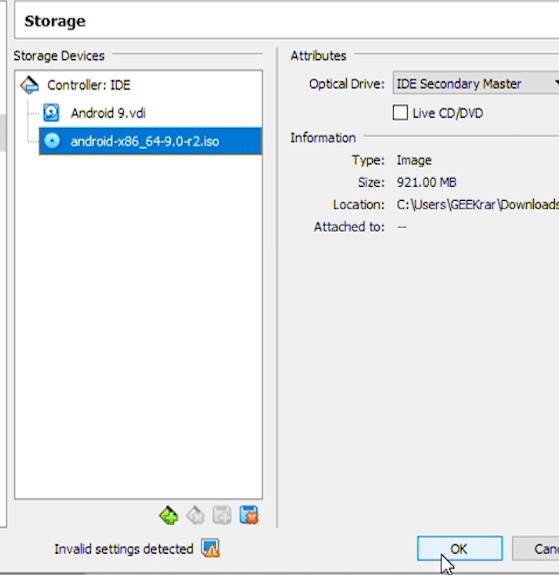
When you return back to the Storage window, you should see the Android ISO file now listed. If you do, click ‘Okay’ and close out of the window.
Setup and installation for Android in VirtualBox
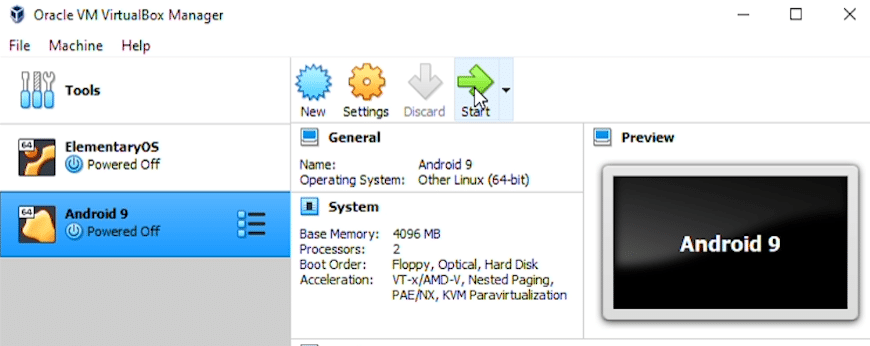
Now that all the configuration for the virtual disk is complete, we are ready to launch and install the operating system. Select the Android virtual machine in the list on the left and click on the green ‘Start’ button.
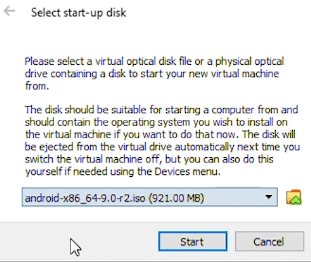
When prompted to ‘Select start-up disk’, ensure that you have the correct ISO file selected before click on ‘Start’.
In the Android installation menu, navigate down with your cursor keys to ‘Advanced options…’, hit enter.
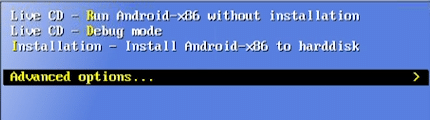
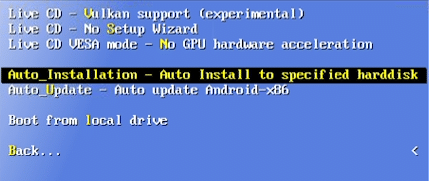
Then go down to ‘Auto_Installation – Auto Install to specified harddisk’ and hit enter
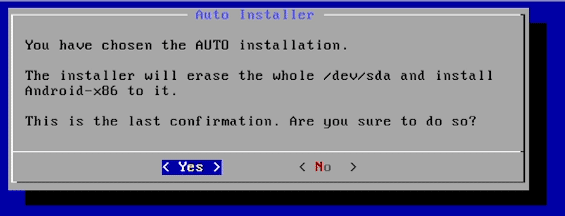
You will be prompted by the Auto Installer to confirm if you want to proceed with the installation, select ‘Yes’ to continue.
Now, your virtual drive will be formatted and files for the new OS will be extracted and installed. Once this process is done you will see the below screen, confirming the installation was successful. Select OK and hit enter.

The virtual machine will reboot and when its back up, the Android setup wizard will walk you through the final steps.
Setup Wizard for Android OS
If you have used an Android device before, this process will be very similar to setting up a phone or tablet. You will be asked a few questions to customize the system for personal use. The first step is to select the default language.

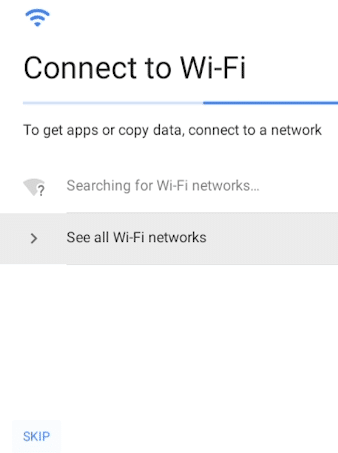
You’ll be asked to connect to Wi-Fi. Because this is a virtual machine, and you are already online this step can be skipped.
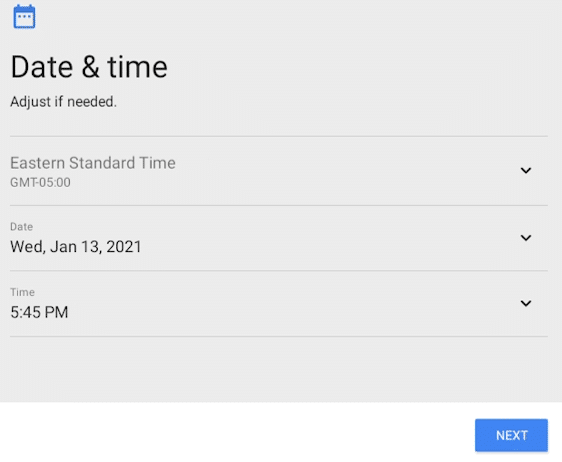
For ‘Date & time’ select your region and update the time and date.
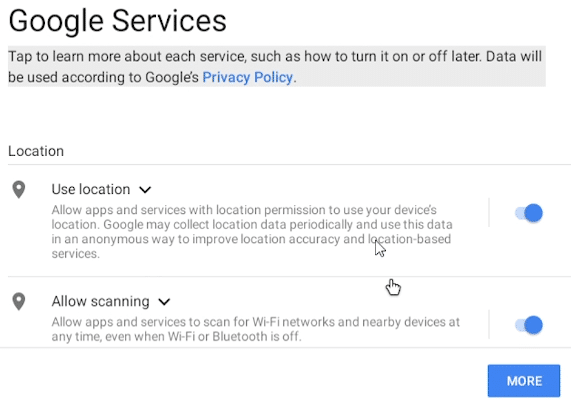
Google Services will ask you some questions about access. You can either leave them as default, or turn off the options you prefer.
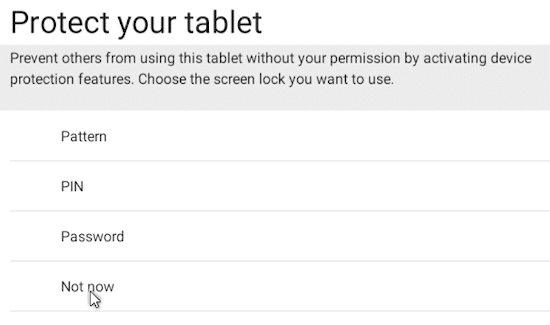
Under ‘Protect your tablet’ you have the option of locking the system with a PIN or password. Because this is a virtual machine, you can select ‘Not now’ and skip this.
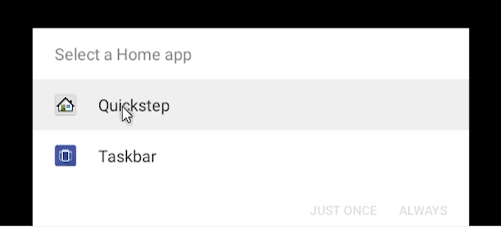
Finally, you need to pick a Launcher. Most people are familiar with Quickstep, so you can move forward with this option. This can be changed at a later time if needed.
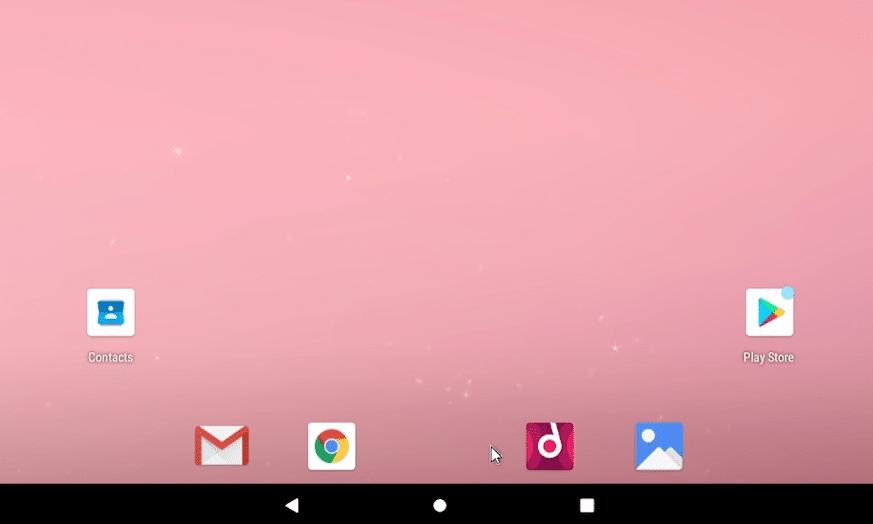
We have now installed Android in VirtualBox on a Windows 10 PC. To access the preloaded apps you swipe up or click and pull your mouse from the bottom to the top. Also, if you want to install any specific apps you open the Google Play store, sign in and install anything in the marketplace.
If you need any of this is confusing or you would like to watch the step in a video, below we have provide an installation video covering all the steps above.


