
After you’ve accomplished with a least tricky installation of Catalina on VMware, and maybe do a few fixes to proceed with the installation, there’s some more still remaining. But don’t worry, this one won’t be difficult, take my word. When you install an operating system, you’ll probably need some configurations to do. The configuration between an operating system and operating system on an actual computer might be a little different, but it’s never difficult as installing. For instance, if you’ve installed Windows now, you’d probably try installing drivers first, or maybe download updates which include drivers from their manufactures. These are the important part of the operating system to work even if you don’t use usually. With those features, you’ll go through the ultimate experience of the operating system. Here is How to Fix macOS Catalina Screen Resolution on VMware.
While VMware provides a smooth experience on a virtual machine but that’s not the end of it. In order to enhance the performance and provide the handy features, VMware offers its pretty solid VMware Tools which fixes most of the problems on operating system on virtual machine. This useful tool is integrated in VMware without you need to download. This tiny tool includes a couple of things such as, sound, network, graphics, speed, drag and drop and more.
In terms of macOS, whether macOS Catalina or Mojave, however, even it doesn’t support installing macOS on VMware, it still provides its super-useful VMware Tools. As great as VMware is, the VMware Tools takes the experience of an operating system on virtual machine to the next level. No operating system is complete without its features, that includes sound, screen resolution and more. This will probably surprise you when you’ll see the full-screen resolution after you’ve installed. In this tutorial, I’ll explain and show you how to install VMware Tools on macOS Catalina. This is really useful when you’ve newly installed macOS Catalina and wish to work with it. Here isHow to Fix macOS Catalina Screen Resolution on VMware.
Table of Contents
Step One: Start VMware Tools From VMware
Since the VMware Tools is already in VMware, we’ll only need to start it up.
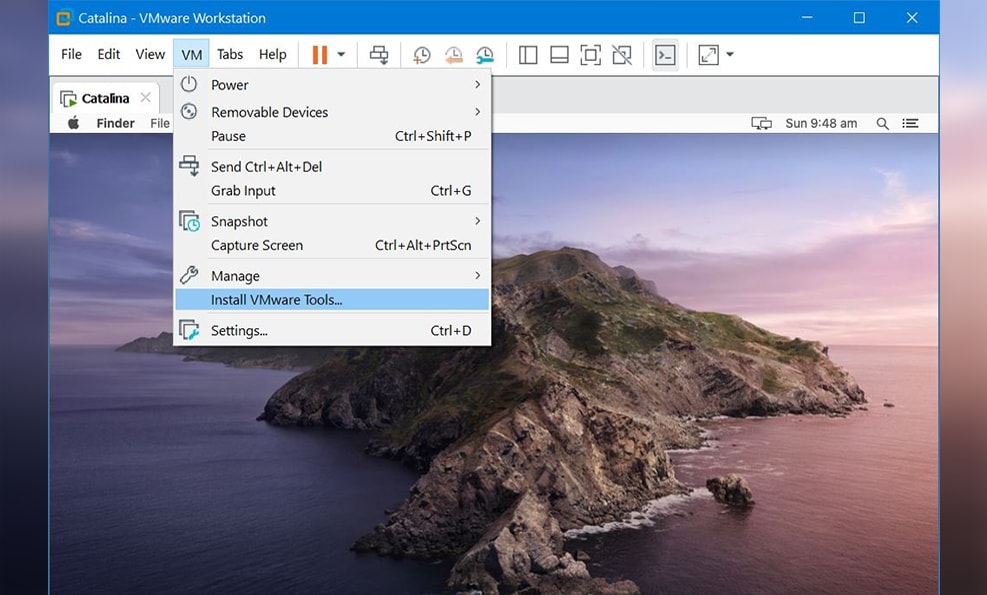
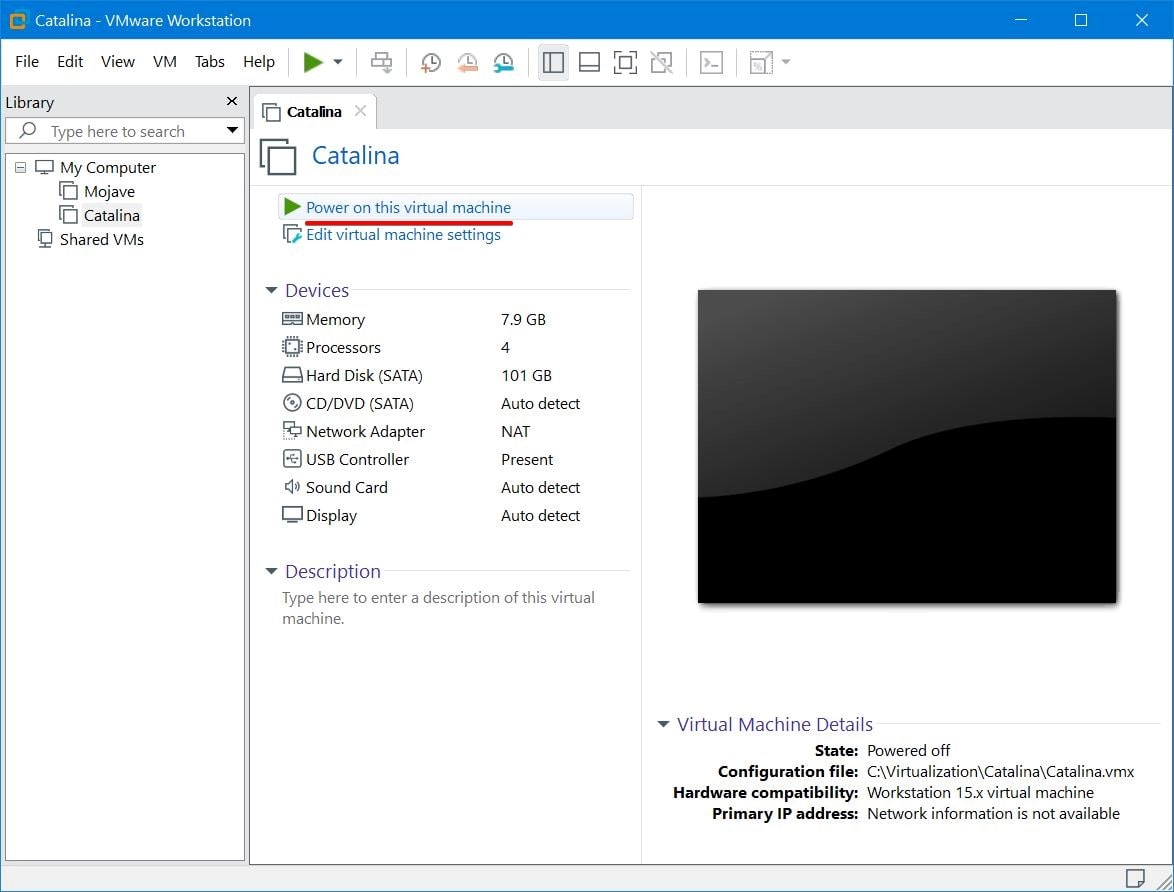
In order to install VMware Tools, open VMware Workstation Player and select the macOS Catalina virtual machine. Click on Power on this virtual machine.
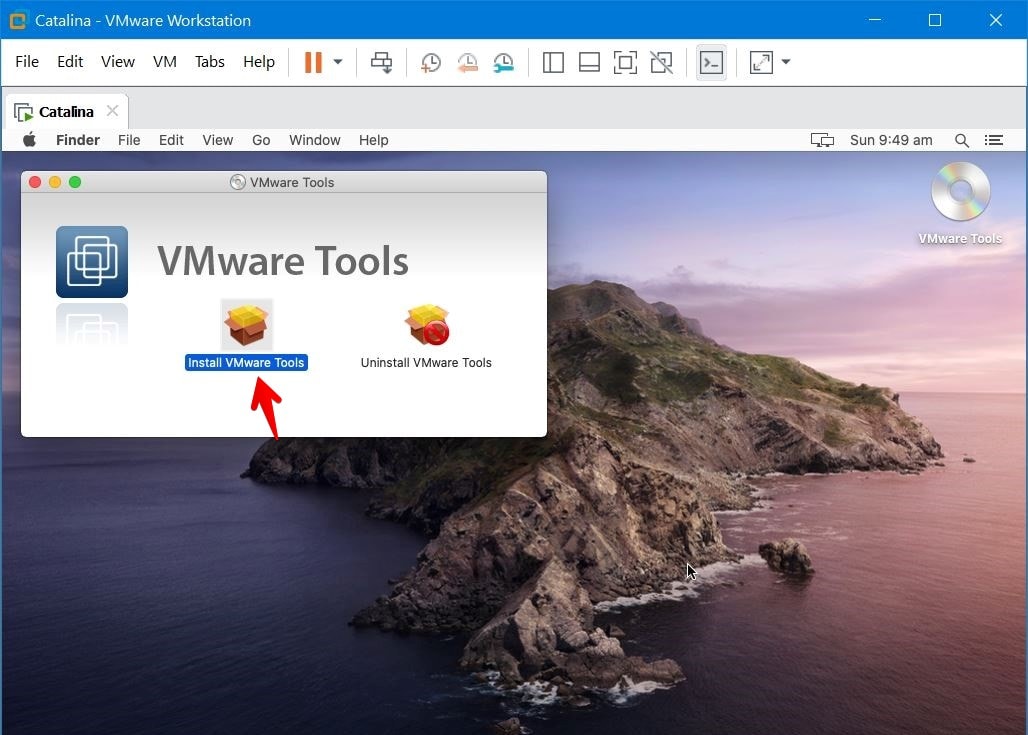
Once the machine boots, sign into and from the menu, click on VM > Install VMware Tools.

The VMware Tools window will pop up, double-click on Install VMware Tools. When you’re asked for permission, click Allow.
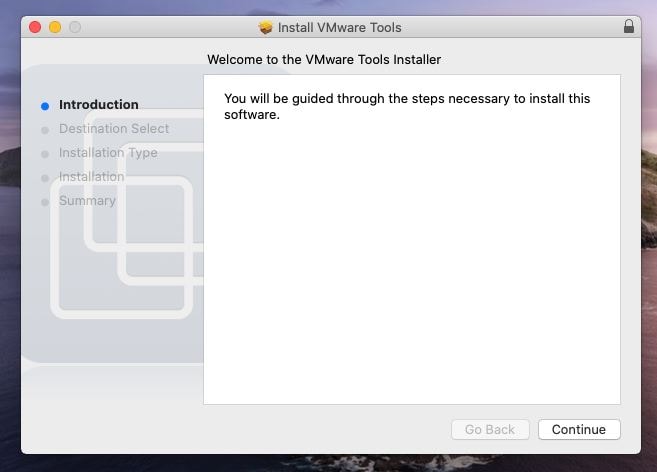
Step Two: Install VMware Tools on macOS Catalina
On the wizard that appears, Continue with the introduction.
This window specifies the installation for all the users, click Continue.
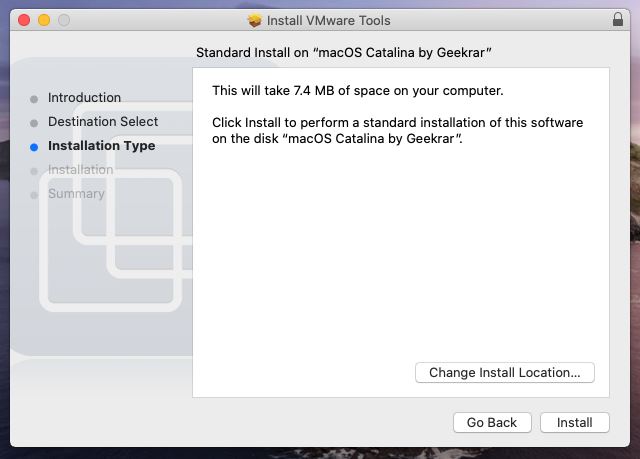
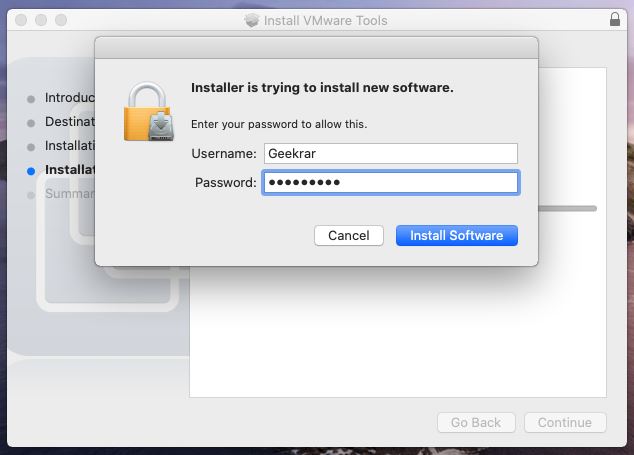
The installation process will begin with your permission, enter your credential and let it install.
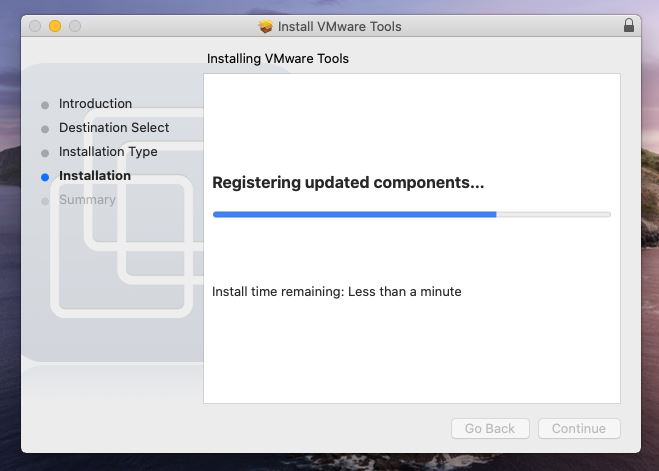
The installation won’t take long, it will be no more than five minutes the most.
Step Three: Allow VMware Tools From System Preferences
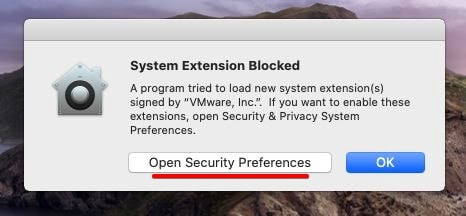
When it’s done, you’ll see the System Extension Blocked, click on Open Security Preferences.
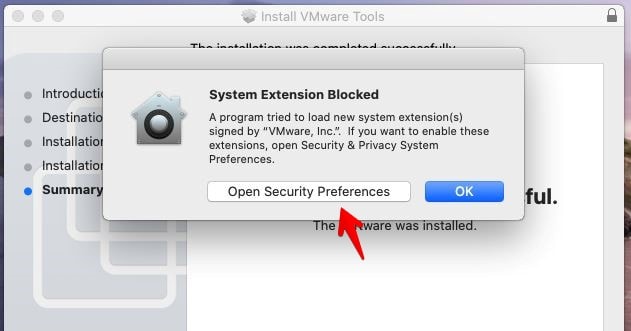
Next, in order to make changes, you’ll need to enter your password, then click Unlock.
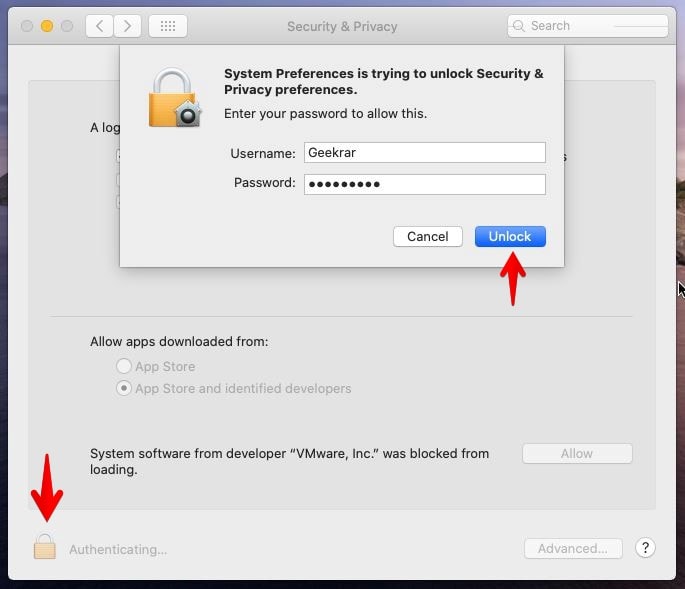
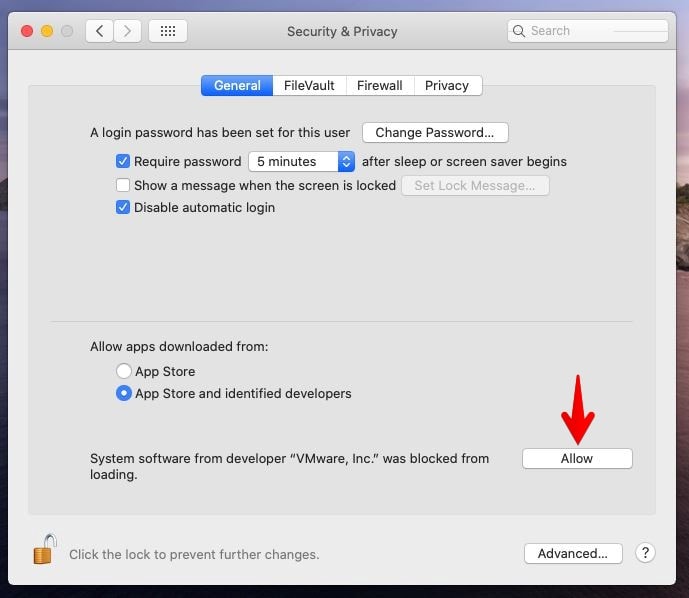
The important part but easy is to Allow the extension from VMware which is blocked.
Step Four: Reboot Your Mac
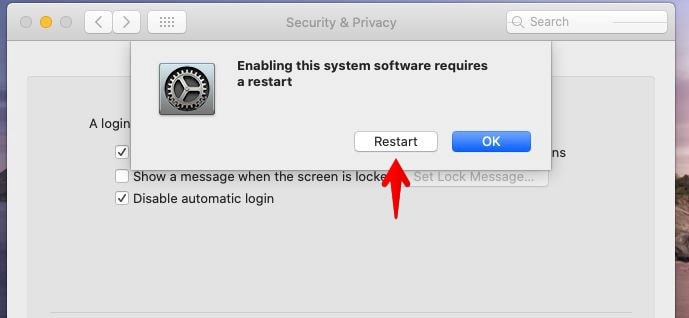
For making this change, you’ll be prompted to reboot, click on Restart and wait until it completely boots up.
Now click Cancel.
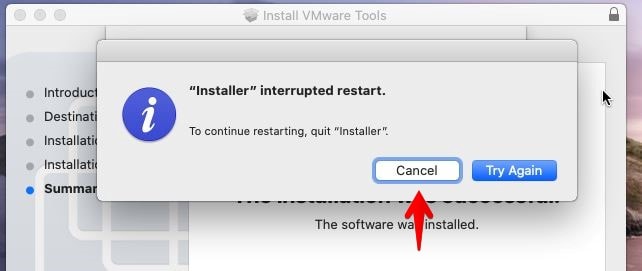
Then click OK on the installer and click Restart. This will straightly reboot your Mac.
Step Six: Allow VMware Tools From System Preferences Again
When it’s up, you’ll likely see the unpleasant System Extension Blocked error again, click on Open Security Preferences to allow this app from the Gatekeeper.
It will take you to Security and Privacy where you should Allow again.
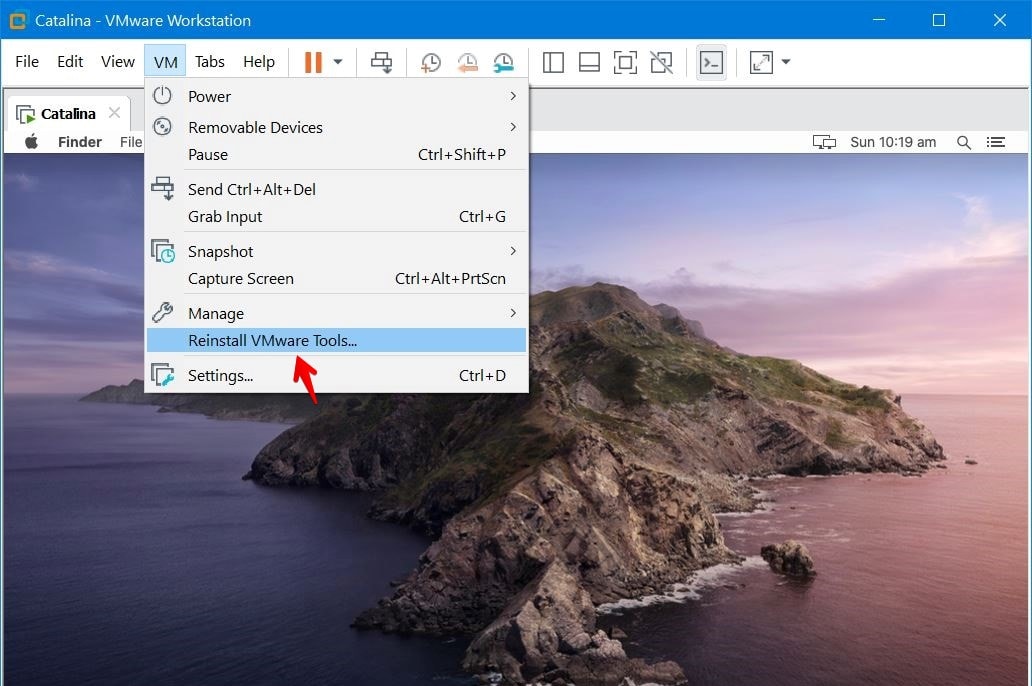
Step Seven: Reinstall VMware Tools
Now once again, start with VMware Tools and proceed with the installation from the beginning.
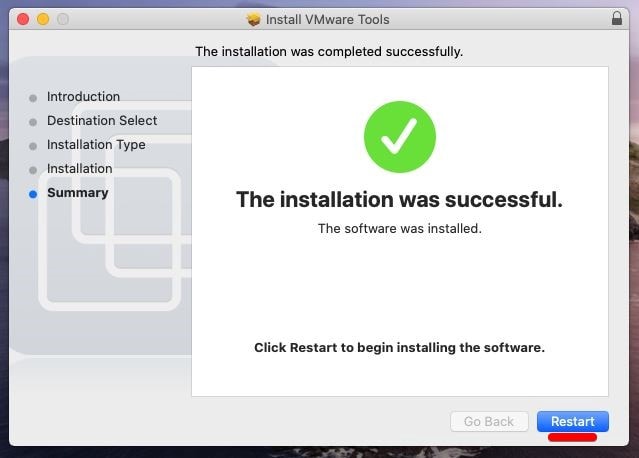
When you’re completely done, click on Restart.
After the restart, the VMware Tools will be installed successfully without an error. So you can take a taste of full-screen resolution which I like the most.
That’s all to it. If there’s something you’d like to let me know, I’m happy to know it.


Hey, There’s a way to get the right resolution for your pc. Do the following for the right resolution
1.Click on the edit in the VM ware
2.Select preferences
3.Click on display
4.Under full screen select auto fit guest
That’s all
NOTE: Before doing these steps make sure you installed the VM ware tools
Thank you @mahmood2395, you deserve a cookie.
Vmware-resolutionSet does the trick. I can change the resolution to any I want but I’m experiencing really slow typing when the resolution is larger than 1024×768. For example on 1024×768 I can smoothly type down my password on login screen. If the resolution goes higher (1280×1024) then typing password on login screen is very slow. No idea why.
Here are some tips to speed up your MAC-
https://techrechard.com/how-to-speed-up-macos-catalina/
So this might work on VMware Workstation… but it doesn’t seem to be working with Catalina on ESXi 6.7
Hi,
When trying Install VMware Tools, the following error message shows: “This operation cannot proceed because your Mac OS guest is using the CD/DVD. Dismiss this message, eject the disc from inside the guest, and retry this operation”.
Please advise.
Thanks
I was able to change the resolution with the VMWare tools but for me it caps out at indicated 2728×1534. I can’t reallly understand why that is. I have reinstalled the VMWare tools multiple times to no avail. With the resolution utility I can set any resolution below that, eg. 1920×1080 but nothing above.
I have checked the VMWare settings multiple times, trying “use host settings” or “specify monitor settings” or “Display scaling” none of which worked…
Can’t be a catalina problem (I think) as it was possible in Virtualbox (which in turn had abysmal performance on my high-ish end system)
Anyone know something else I could try?
In Step 1, there was an error message when selecting “Install VMware Tools” from the menu. It said “Mac OS guest is using the CD/DVD”. Had to right-click on the DVD icon at the top right of the desktop within Catalina, then select Eject.
Now running smoothly at full resolution. Thank you so much for the guides!
thank you very much
I search many method can’t solve problem.your solution is perfect.
i finally found a way to set the desired resolution,
for this you have to open the terminal in path”/Library/Application Support/VMware Tools/”
and run this command “sudo ./vmware-resolutionSet 1920 1080” and the resolution changes
For anyone who can’t get it working with Catalina. Make sure to use the latest VMWare tools which is as of writing 11.0.5
https://my.vmware.com/group/vmware/details?downloadGroup=VMTOOLS1105&productId=742
Mount the darwin.iso and first uninstall the current vmware tools installation. Then reinstall and reboot. Then after a couple of minutes after login vmware-tools-daemon asks for Accessibility permissions. If it doesn’t happen go to Settings > Security & Privacy > Privacy and scroll to Accessibility and unlock the padlock. If vmware-tools-daemon isn’t there in the list on the right hand side add it manually by clicking on the + sign. The path is /Library/Application Support/VMware Tools/vmware-tools-daemon. Then give it permission by clicking the toggle.
Once you’ve done that reboot and the display should have the right resolution. If not click the “Stretch and keep display aspect ratio” button of VMware on and off to see if it snaps to the right resolution
I’ve reinstalled about 10 times with 3 different sources for VMWare Tools, the installation doesn’t seem to be sticking, and when I try to manually uninstalling, nothing is in the Application Support folder for VMWare… Any suggestions?
Hey, I’m going on about my 10th reinstall of my 3rd source for VMWare tools and although the fullscreen works, I’m still locked at 1024×768 res. I tried updating VMWare Workstation Pro to 15.5.1 but that bricked my entire system, so I rolled back to 15.1.0. The VM is running in compatibility for 10.x. Other than the resolution, everything is working fine, but I would love to at least up it to 1920×1080. I have a High Sierra VM that VM Tools works properly on, but for the life of me, cant get it going on Catalina. Any advice?