• Home
  • MAC
  • Virtual Machines
    • VMware
    • VirtualBox
  • Windows
  • Linux
  • Downloads
    • ISO Files
      • Open Mamba ISO
      • AnduinOS ISO
      • Windows 7 ISO
      • Windows 11 ISO
    • macOS DMG
    • macOS ISO
    • macOS VMDK
    • VMware Workstation Pro
    • macOS Unlocker
    • DirectX 12
    • MSI Afterburner
    • Hyper-V Server 2019
  • Others
    • Android
    • Discord
    • iOS
    • Internet
GEEKrar
  • Home
  • MAC
  • Virtual Machines
    • VMware
    • VirtualBox
  • Windows
  • Linux
  • Downloads
    • ISO Files
      • Open Mamba ISO
      • AnduinOS ISO
      • Windows 7 ISO
      • Windows 11 ISO
    • macOS DMG
    • macOS ISO
    • macOS VMDK
    • VMware Workstation Pro
    • macOS Unlocker
    • DirectX 12
    • MSI Afterburner
    • Hyper-V Server 2019
  • Others
    • Android
    • Discord
    • iOS
    • Internet
No Result
View All Result
GEEKrar
No Result
View All Result
Home VirtualBox

Fix macOS Mojave Screen Resolution on VirtualBox

Ali by Ali
February 21, 2025
in VirtualBox, Virtual Machine
15
Fix macOS Mojave Screen Resolution on VirtualBox

Fix macOS Mojave Screen Resolution on VirtualBox

46
SHARES
651
VIEWS
Share on TwitterShare on Facebook

When you’ve successfully installed macOS Mojave on VirtualBox, you’re ready to catch on everything inside there. Once you start and sign into that the screen appears, the first thing you have probably noticed is the pretty small resolution –  black screen at the edges of your virtual machine which you may want to increase. Here is How to Fix macOS Mojave Screen Resolution on VirtualBox.

By default, when you install macOS Mojave or High Sierra, you’ll have 1024×768 screen resolution. In fact, you have a larger monitor or screen, this might be quite small for you and you won’t be happy with that. This frustrating problem with macOS has been from past enough with previous versions as well. However, there are some tricks and tweaks you can do about this to increase and fix macOS screen resolution for your monitor.  In this case, you aren’t supposed to do it alone, because we have covered you up, here’s how to fix it up. It’s important to know that the steps work for previous versions as well such as macOS High Sierra, Sierra. Here is Fix macOS Mojave Screen Resolution on VirtualBox.

How to Fix macOS Mojave Screen Resolution

First things first, shut down the virtual machine and exit VirtualBox entirely if it is running (seriously).

Note: In order to work these steps, you should have installed the latest version of VirtualBox.

Screen Resolution
Screen Resolution

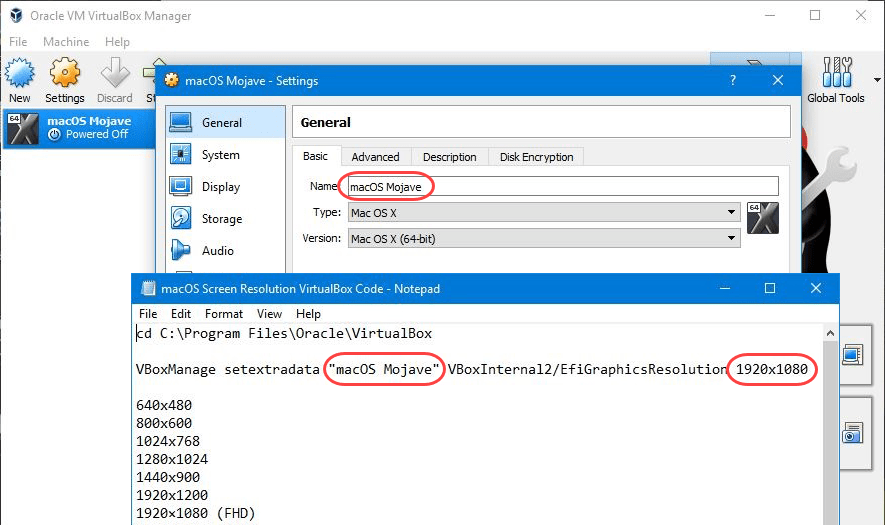
In this step, open macOS Screen Resolution VirtualBox Code you had downloaded before. Just replace ” Your VM Name ” with your accurate virtual machine name properly or you can copy the virtual machine name from VirtualBox virtual machine settings.

Next, replace ” Your Screen resolution ” with your desired or actual screen from the list for the screen resolutions you can choose from.

The important part is that I have tested these resolutions individually one by one and worked for me. In case, if you tried and didn’t work for you, you may want to use similar resolution to your preferred one, it will absolutely work.

Remember, when you replace ‘ Your Screen resolution ‘ with your favorite screen resolution, remove the quotation marks from beside. Here’s the idea of how to do it.

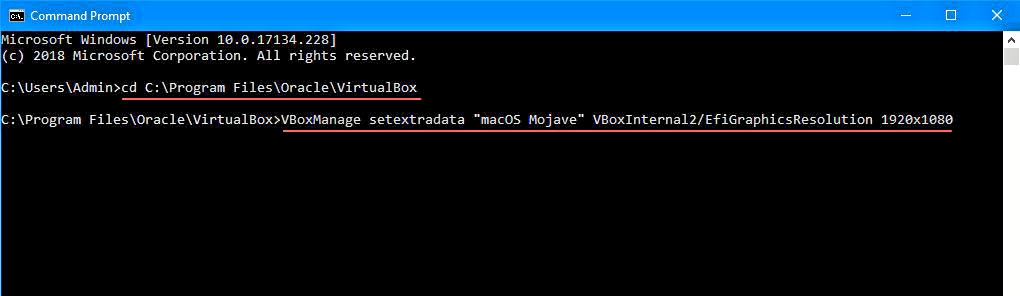
cd "C:\Program Files\Oracle\Virtualbox"
VBoxManage setextradata “Your Virtual Machine Name” VBoxInternal2/EfiGraphicsResolution X

1280x720 
1920x1080 
2048x1080 
2560x1440 
3840x2160 
1280x800
1280x1024
1440x900
1600x900

VirtualBox doesn't support 1366x768 so you can use 1280x720 with "Scaled Mode".
Replace Commands
Replace Commands

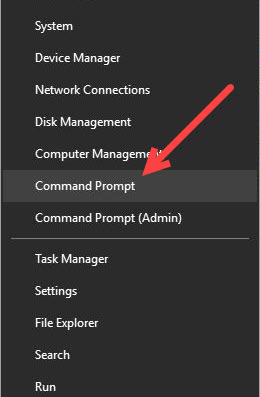
Now open Command Prompt by pressing Win + x and select “Command Prompt”.

Run Command Prompt
Run Command Prompt

On Command Prompt, navigate to VirtualBox folder in which “VBoxManage.exe”. To do that, copy and right-click to paste the first line of command then hit Enter.

To set your preferred resolution, select, copy and enter the command.

Remember not to enter both the commands at the same time, it won’t work.

Enter Screen Resolution Commands

When you have applied your screen resolution command, you’re all set.

Just hit the start button and you’ll see the screen pop up.

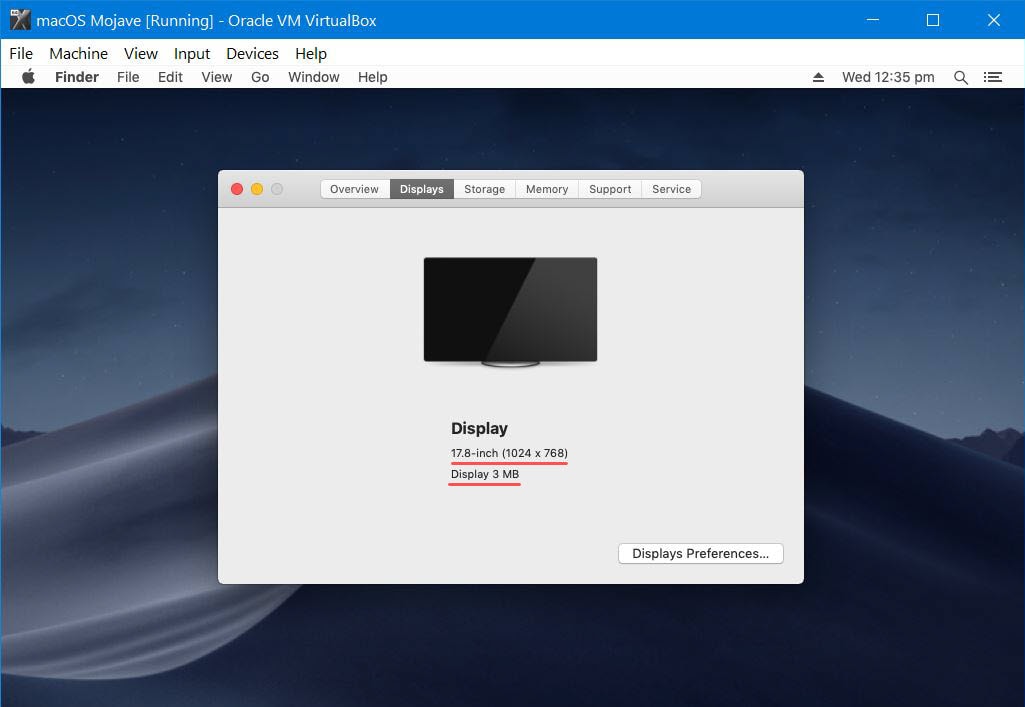
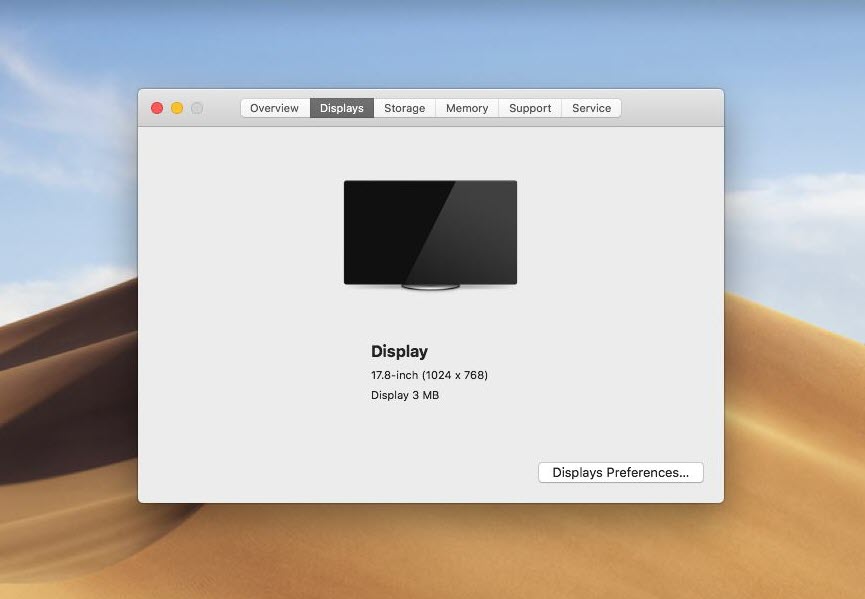
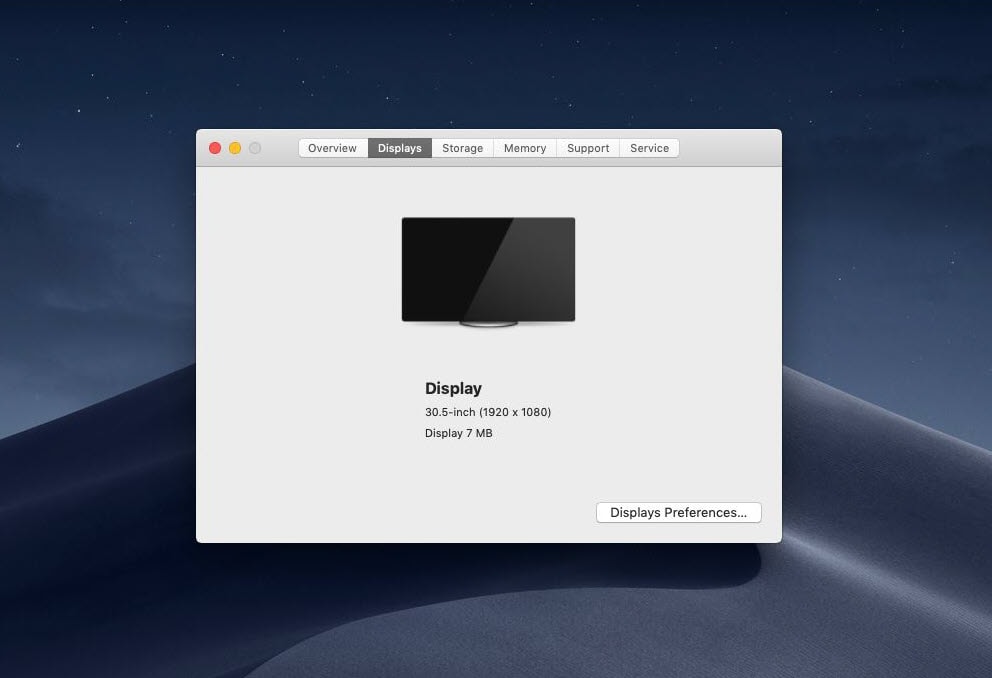
Once you have switched on and signed into macOS, you’ll have your preferred resolution screen at your front. To make sure you have the resolution, you can check by clicking at logo button at the top right screen and select About. On the window, select Displays from the categories, you’ll see the exact screen resolution.

New Screen Resolution

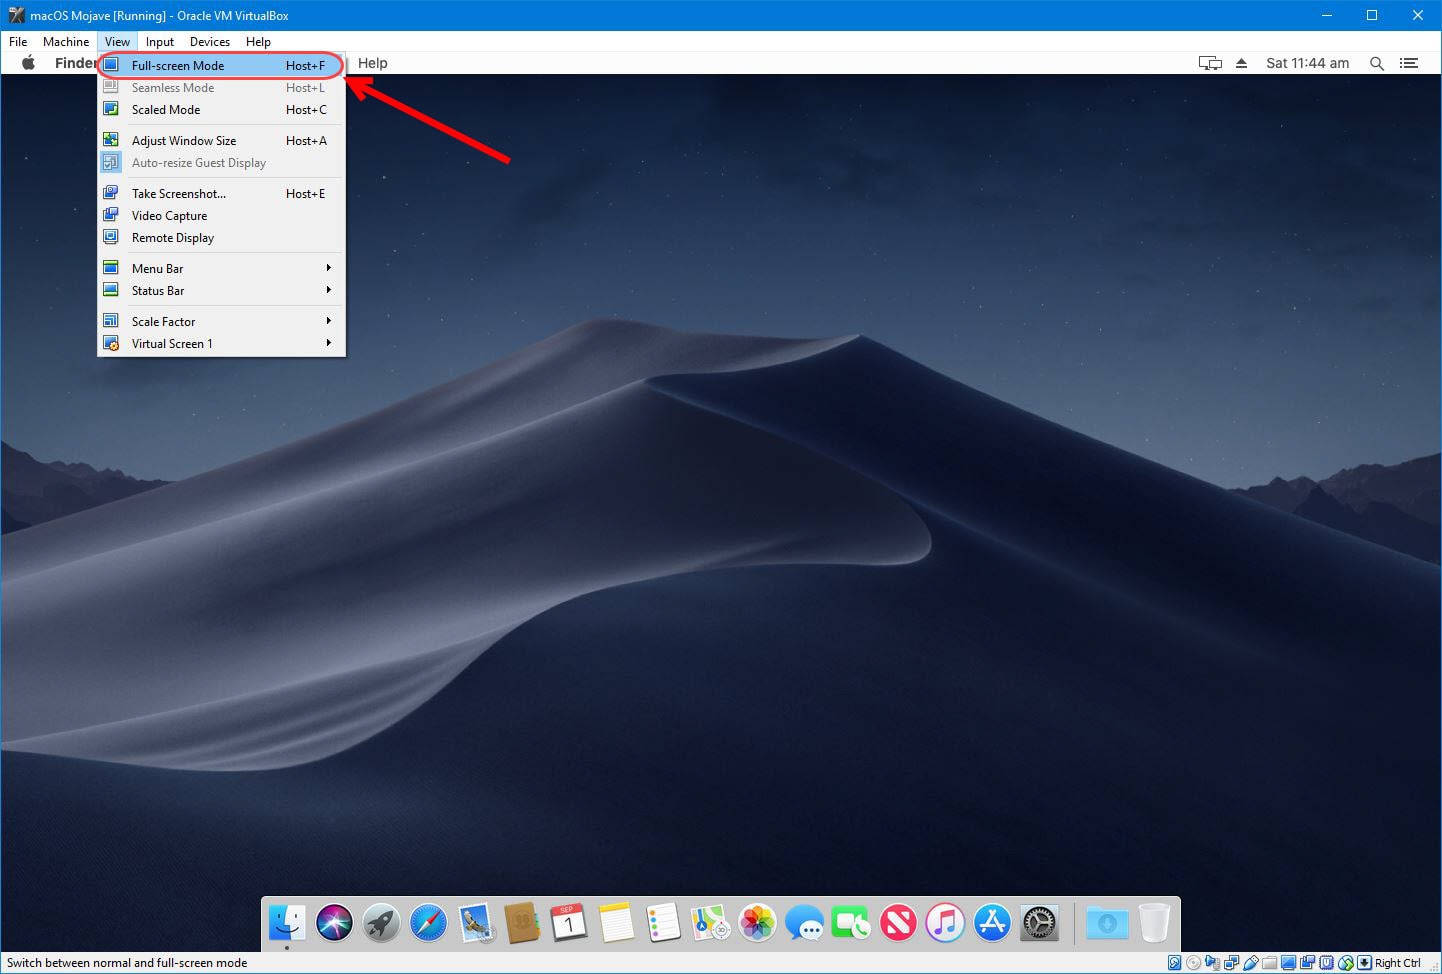
For the full screen, head to View > Full-Screen Mode or press right-hand Ctrl + F. It’s important to know that here the wherever you see the host key it refers to the right hand Ctrl, not the left one.

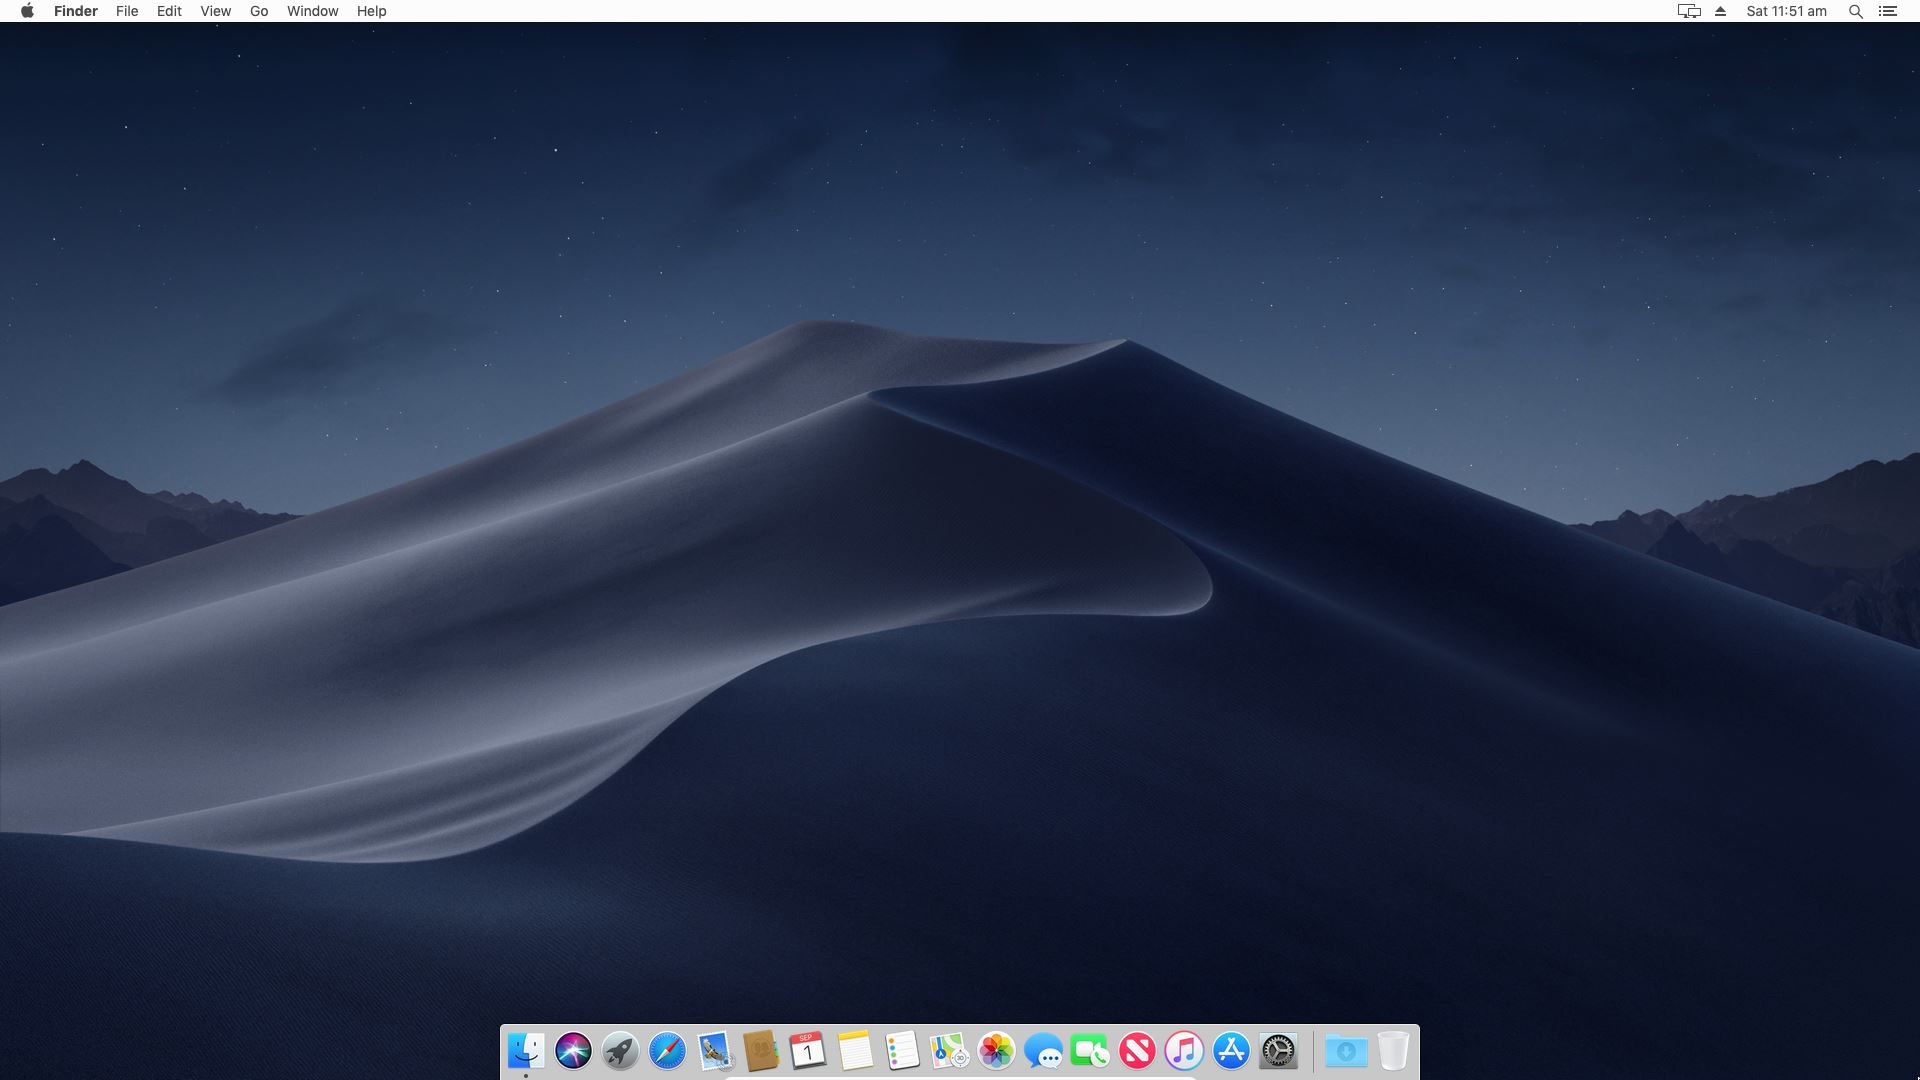
However, if you want to change this resolution whether it doesn’t fit or whatever, you can do. Go with the same steps and this time, just change the screen resolution at the second line of command instead of the previous resolution you entered last time. When you have run the commands on Command Prompt, congratulations, you’ve changed the resolution. Just play and enjoy the full screen.

macOS Mojave Full Screen Resolution
macOS Mojave Full-Screen Resolution

All right, everything should now be working fine. I will be glad to know if you have questions, suggestions, ideas for improvement.


Tags: fixFix macOS Mojavefix screenfix screen resolutionscreen resolution
Previous Post

How Do I Restore Trash on Mac?

Next Post

How to fix Error 0x80004005 for VirtualBox VM on Windows 10

Ali

Ali

Next Post
How to fix Error 0x80004005 for VirtualBox VM on Windows 10

How to fix Error 0x80004005 for VirtualBox VM on Windows 10

Comments 15

  1. greg says:
    6 years ago

    thank you so much!!!!! This was so incredibly helpful

    Reply
  2. undered says:
    6 years ago

    Just add vboxmanage setextradata “Your VM Name” “VBoxInternal2/EfiGraphicsResolution” “1920×1080”

    Reply
  3. Mirek Kašpar says:
    6 years ago

    VirtualBox needs to be shut down as well.

    When I first tried I’ve just shut the MacOS down, run the command and started it again and it didn’t work. Next time I tried completely closing VBox, running the command and it worked.

    Reply
  4. Michael says:
    7 years ago

    Can someone help? Audio and internet is not working. Does not see my wireless network adapter.

    Reply
  5. Michael A says:
    7 years ago

    Thanks, I can confirm this works on VirtualBox 6.0.6

    Reply
  6. Jack says:
    7 years ago

    Thank you lulian, .exe worked

    Reply
  7. Shanjul Mittal says:
    7 years ago

    now os isn’t booting up

    Reply
    • Ali Nazari says:
      7 years ago

      Hi. You may try to enable AMD-v in BIOS and turned off PAE/NX and Nested VT-X/AMD-V in VirtualBox.

      Reply
  8. Iulian Neagoe says:
    7 years ago

    guys, found the fix you’ve been waiting for. use this code:

    VBoxManage.exe setextradata “macOS Mojave” VBoxInternal2/EfiGraphicsResolution 1920×1080

    It just needed a .exe after VBoxManage

    You’re welcome!

    Reply
  9. Lane Jasper says:
    7 years ago

    didn’t work….

    Reply
  10. Max says:
    7 years ago

    Hi , Thanks for the great tutorial. I am able to bring up the Majove guest OS just fine. However, I don’t see Audio device getting added . i.e. I am unable to hear audio from mojave guest. I am using Dell XPS laptop with Windows 10 host os.

    Reply
  11. M says:
    7 years ago

    Hi,
    that didn’t work with VirtualBox 6.0.2, what’s wrong?

    Reply
  12. Dnore says:
    7 years ago

    Hi,
    Thank you so much for all this thorough guides on how to install Mac OS. It’s very helpful.
    I have only one problem, that is my resolution cannot be fixed even after following your tutorial step by step. I followed every step correctly.

    Reply

Leave a Reply Cancel reply

Your email address will not be published. Required fields are marked *

No Result
View All Result

Recent Articles

  • Why Some Security Teams Are Looking Beyond VDI for Safe Remote Access
  • Specialized IT Solutions for Architecture Companies: Why Your Firm Needs Them
  • How to Stop Medical Bills From Piling Up After a Car Accident
  • Download Tiny10 ISO for Windows 10 (Complete Guide)
  • Download VMware Workstation Pro 25H2 (Windows | Linux): Direct Downloads
  • Download macOS Unlocker for VMware Workstation Pro 25H2 | Old Versions Available
  • Download Tiny11 25H2 ISO for Windows 11: Older Verions Available
  • How to Enable Intel VT-x or AMD-V On BIOS or UEFI Firmware
  • How to Dual Boot macOS Catalina & Windows 10 on PC
  • How to Install VMware Tools on Kali Linux
Facebook Twitter Youtube

Browse by Category

  • Android (15)
  • Discord (4)
  • Downloads (17)
  • Featured (8)
  • Internet (66)
  • iOS (16)
  • Linux (10)
  • Mac (151)
  • Virtual Machine (31)
  • VirtualBox (81)
  • VMware (67)
  • Windows (82)

Downloads

Download macOS DMG
Download macOS ISO
Download macOS VMDK
Download Windows ISO

GEEKrar

We are a team of skilled writers, editors and tech enthusiasts that help you how to get tech into work, pros and cons, explain hows and whys, hacks, and fixes of new modern tech.

© 2026 geekRAR.com

We use cookies on our website to give you the most relevant experience by remembering your preferences and repeat visits. By clicking “Accept”, you consent to the use of ALL the cookies.
Do not sell my personal information.
Cookie settingsACCEPT
Manage consent

Privacy Overview

This website uses cookies to improve your experience while you navigate through the website. Out of these, the cookies that are categorized as necessary are stored on your browser as they are essential for the working of basic functionalities of the website. We also use third-party cookies that help us analyze and understand how you use this website. These cookies will be stored in your browser only with your consent. You also have the option to opt-out of these cookies. But opting out of some of these cookies may affect your browsing experience.
Necessary
Always Enabled
Necessary cookies are absolutely essential for the website to function properly. This category only includes cookies that ensures basic functionalities and security features of the website. These cookies do not store any personal information.
Non-necessary
Any cookies that may not be particularly necessary for the website to function and is used specifically to collect user personal data via analytics, ads, other embedded contents are termed as non-necessary cookies. It is mandatory to procure user consent prior to running these cookies on your website.
SAVE & ACCEPT
No Result
View All Result

© 2026 geekRAR.com

Go to mobile version