
This tutorial will show you how to install Ubuntu 20.04 on VirtualBox 6.1 using a Windows 10 PC. Installing both Virtualbox and Ubuntu is completely free, and you can download the latest copies from the official websites. Before we begin, we will assume that you have already installed VirtualBox, but you haven’t, you can follow those steps here to get it up and to run. Before proceeding with the tutorial, we recommend that you check for Windows 10 updates and run anything listed to ensure your PC is up to date.
- Related: Watch a video of the installation? click here.
Table of Contents
Minimum Requirements for Ubuntu
- Processor: 2 GHz dual-core
- Memory: At least 4GB.
- Hard Disk: 25 GB of hard drive space
- Internet Access is helpful to run updates
How to Install Ubuntu 20.04 on VirtualBox 6.1
VituralBox Configuration
Once at your desktop, open your web browser and head over to the Ubuntu website and download the current ISO file. Then when the download is complete, we will open up VirtualBox and begin.
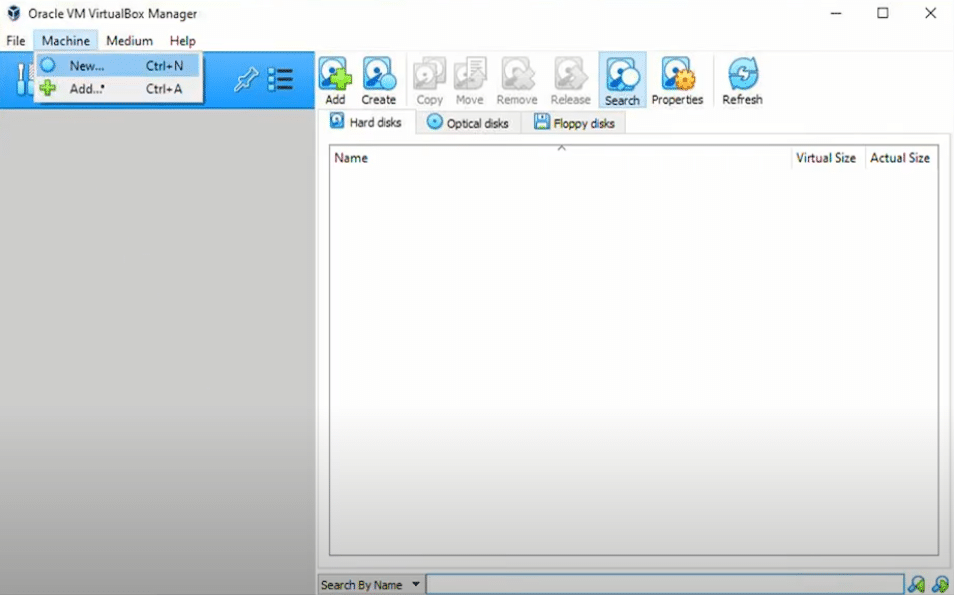
The first step in the VirtualBox Manager is to click on the ‘Machine’ menu and select ‘New.’
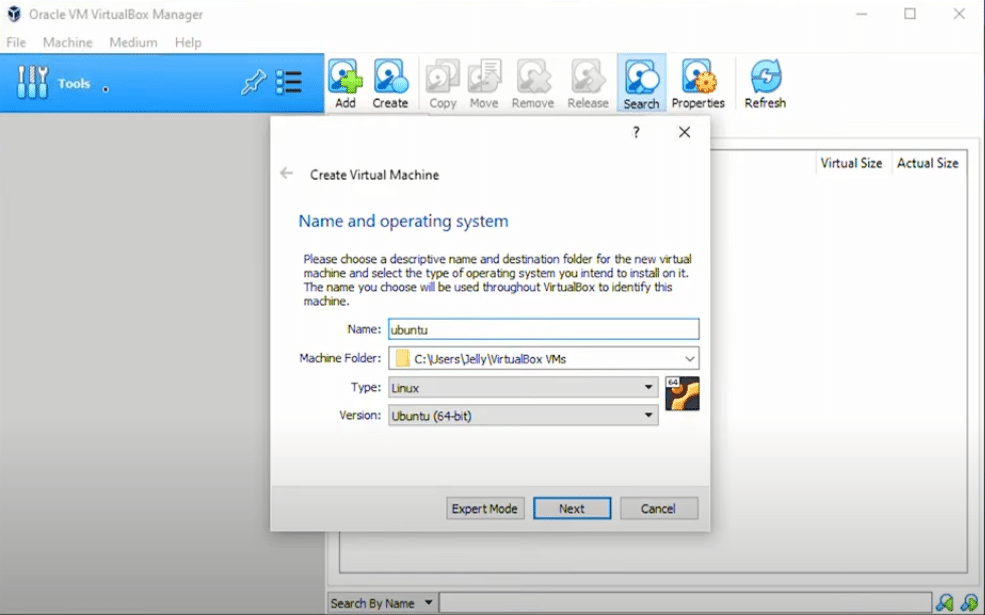
A configuration wizard will start, and you will be prompted to provide a name for this installation. You can give it any relevant name you’d like. The Machine Folder can be left in the default path unless you have a reason to change it. Type should auto fill to Linux and Verison to Ubuntu 64-bit, but you can manually select them in the list if it does not. Click ‘Next’
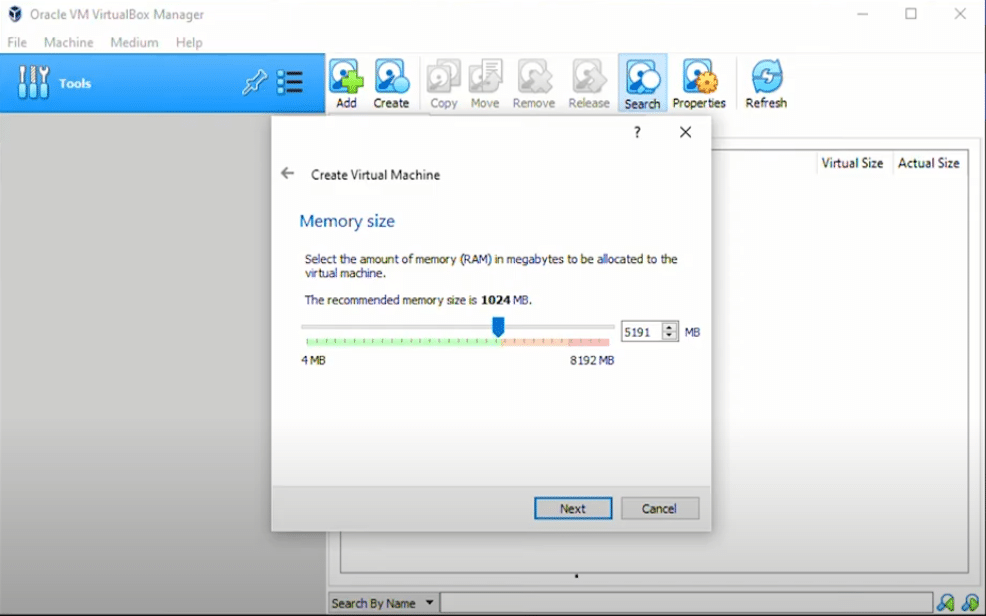
In Memory Size, select the maximum amount to allow in the green zone. We want to ensure that we’re giving as much memory as possible, so the VM runs smoothly. 4GB should be the lowest amount you allocate. Click ‘Next’
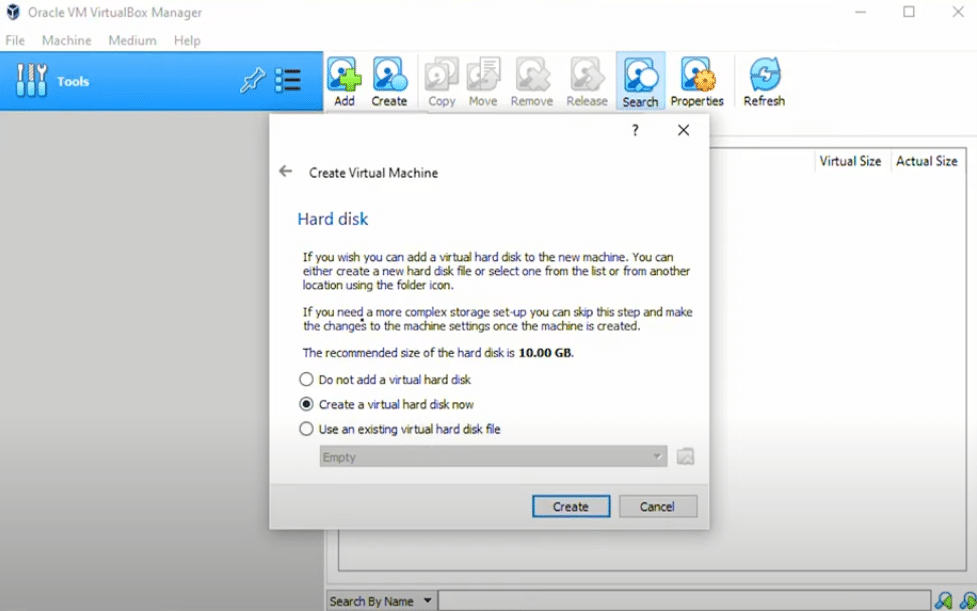
Hard Disk can be left at the default setting ‘Create a virtual hard disk now’. Click ‘Create’
For the Hard disk file type, we are leaving VDI (VirtualBox Disk Image). Click ‘Next’

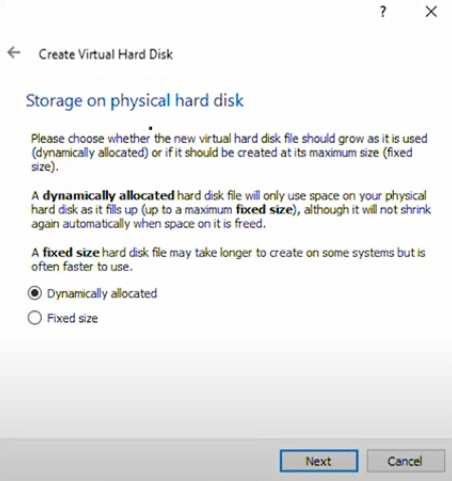
With ‘Storage on physical hard disk,’ we will leave the default selection of ‘Dynamically allocated.’ Using fixed size can run faster, but is a limitation and will lengthen the installation time.
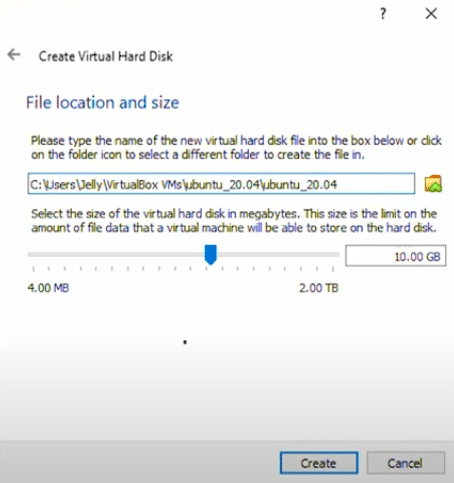
In File location and size, we are going to leave the default path as is. I recommend you do the same unless you have a specific reason to change this. 10GB will automatically be selected, but going with the recommend 25GB or larger will provide sufficient space for applications and tools. Click ‘Create,’ and that will close this configuration wizard.
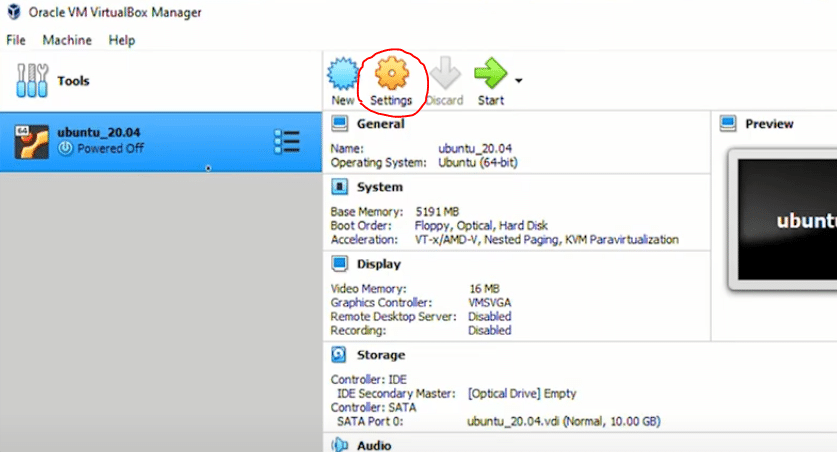
Before we run the virtual machine, we need to make a few more changes to the settings.
In the top middle of your VirtualBox Manager, click one the ‘Settings’ icon.
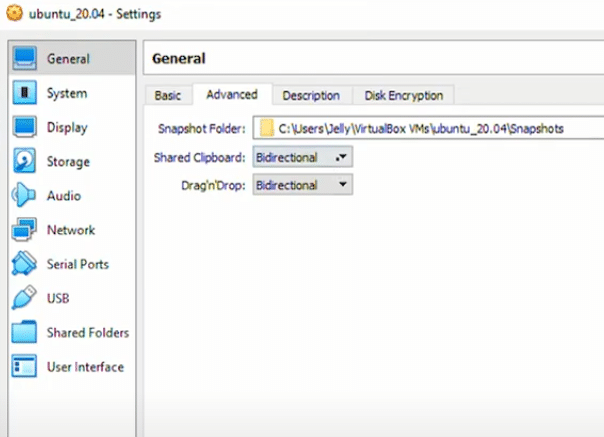
In the ‘Settings‘ window under the ‘General‘ category, select the ‘Advanced‘ tab. Here, we want to ensure that ‘bidirectional’ is selected in the drop-down list for both ‘Shared Clipboard’ and ‘Drag n’ Drop.’
Next, under the ‘System’ category, select the ‘Processor’ tab, and increase the available CPUs to the maximum allowed in the green metered area.

In the ‘Storage’ category, under ‘Storage Devices’, select the ‘Empty’ sub-category under Controller IDE, then on the right-click the CD icon, and select ‘Choose a disk file…’
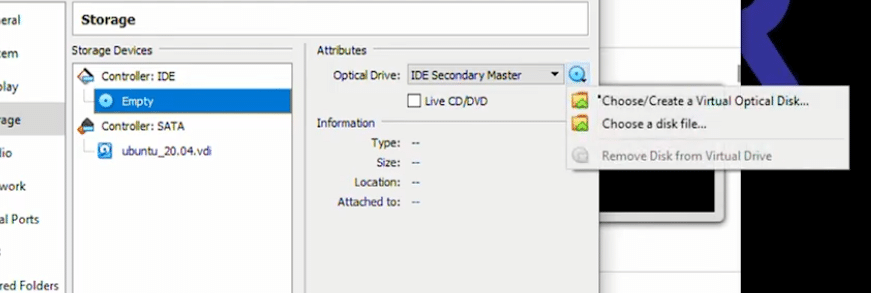
Here, you want to select the location where you have downloaded the ISO image of Ubuntu. Once you have located the file, you can click on ‘Open.’
The storage window should now show the ISO image loaded under ‘Controller: IDE’
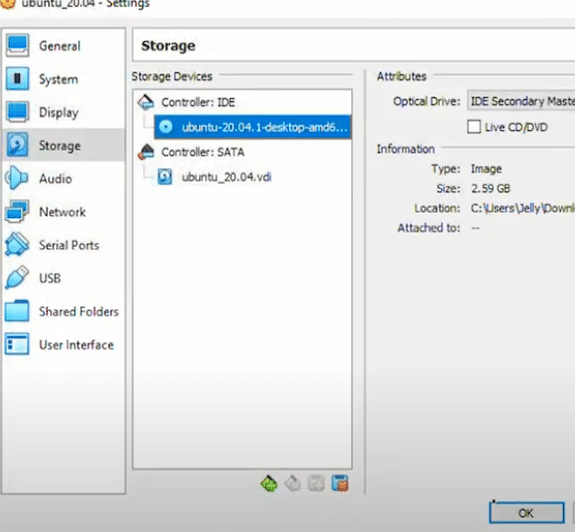
We will then click ‘Ok’ to save our changes.
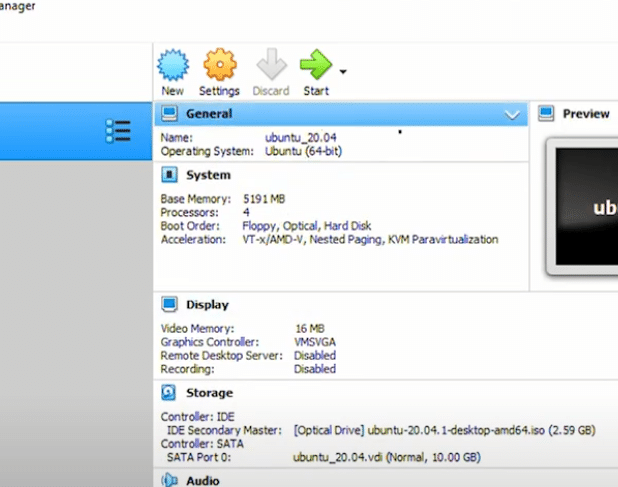
Back at the Oracle VM VirtualBox Manager, we will click on ‘Start’ to install the operating system.
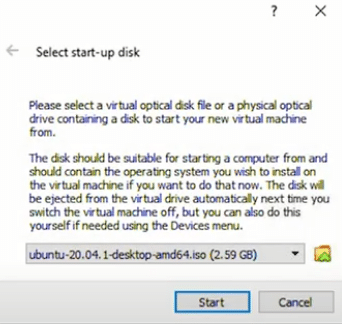
As the process begins, you will be asked to ‘Select a start-up disk.’ The image file we had selected in the settings earlier will automatically populate in the field. From here, we can click ‘Start’ and allow it to continue.
Ubuntu Setup and configuration
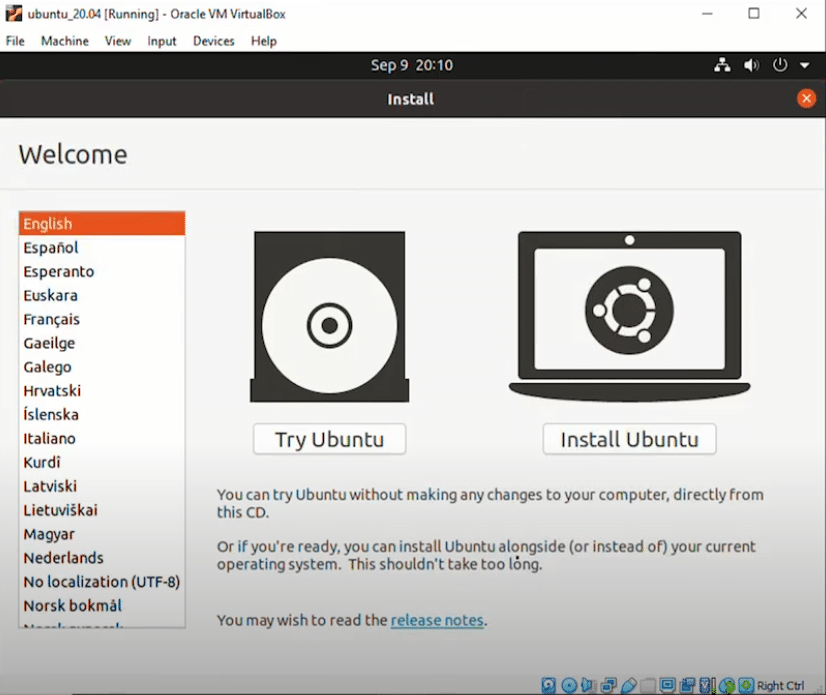
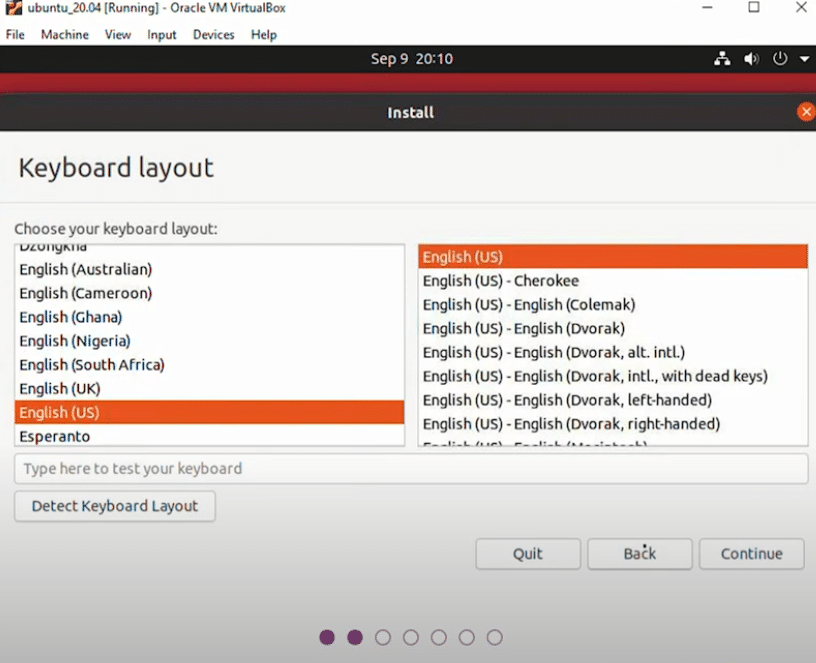
The Ubuntu Welcome wizard will begin, and you will need to select your language and keyboard.
In our example, we’re choosing the default, US English.
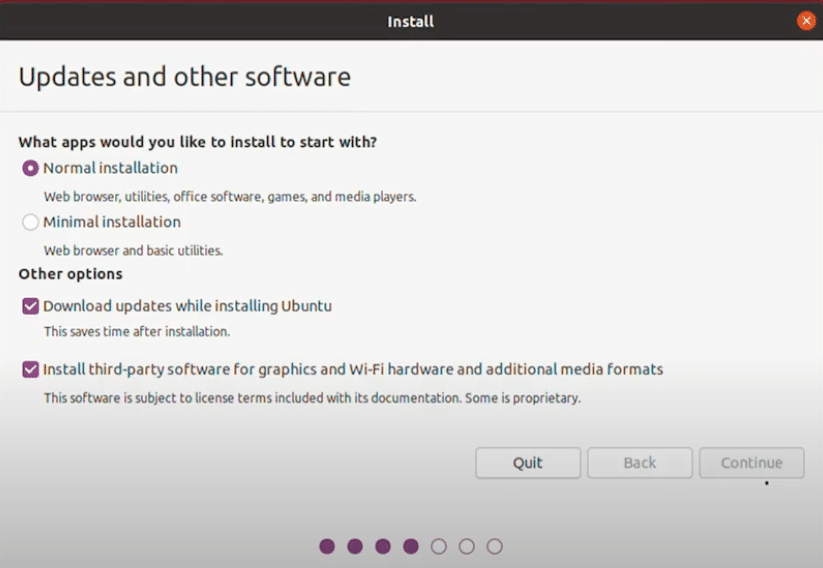
In ‘Update and other software,’ we can leave the default options selected.
In the ‘Installation type,’ leave the default ‘Erase disk and install Ubuntu.’ This option will only format the virtual disk space assigned to the virtual machine, not your computer hard disk. You can click

‘Install Now’ and proceed.
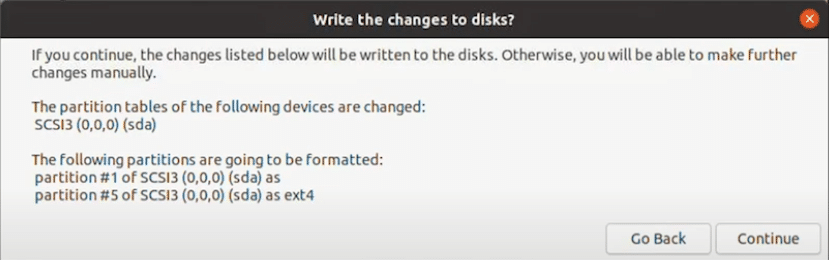
There should be a prompt to “write changes to disk’. Click on ‘Continue.’
Under ‘Where are you?’, enter the city you live in or time zone. Click ‘Continue’

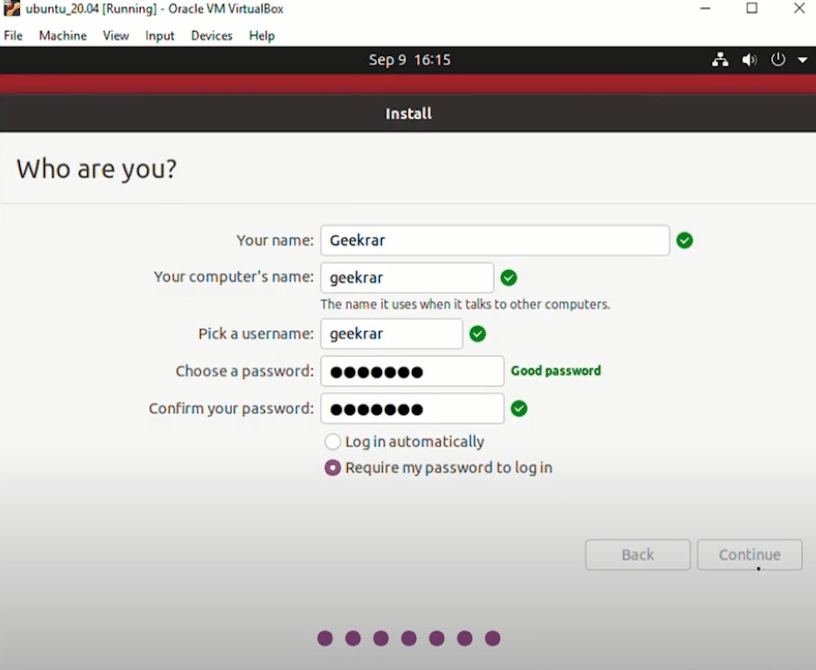
In ‘Who Are You?’, enter your name, computer name, username, and password. We recommend you use an alphanumeric password to be safe. Click ‘ Continue’
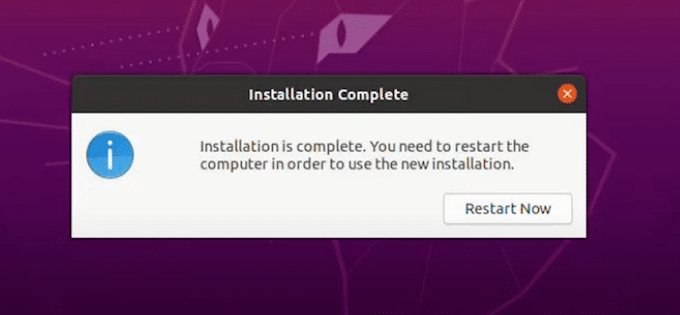
Over the next few minutes, the installation will copy and install files for the operating system. You can leave the PC until its complete. When finished, you will be prompted to ‘Restart Now.’
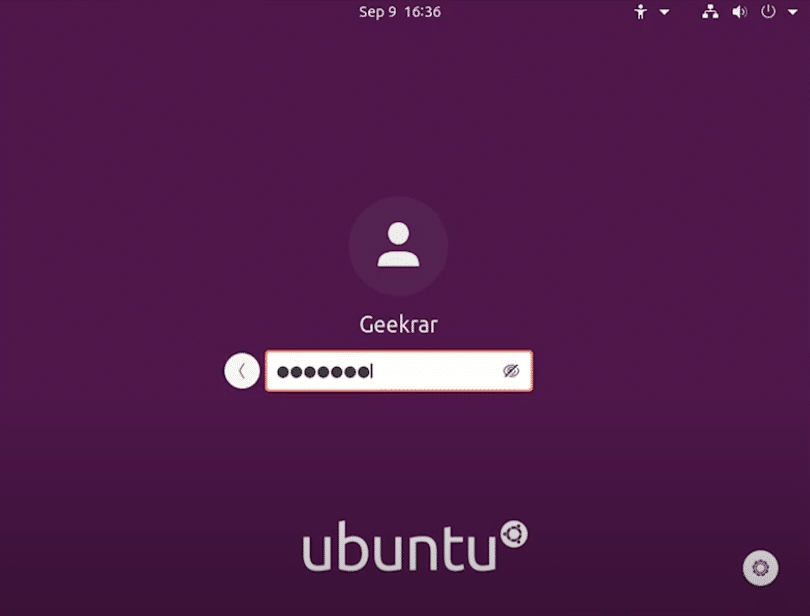
The virtual machine will reboot and load into the login screen. At the prompt, type in the password you had created during the configuration and hit ‘enter’ on your keyboard.
Once at your desktop, Ubuntu will ask you to complete a couple more questions about cloud storage services and customized settings. You can either proceed or skip these options.
Now at the desktop, you have completed Ubuntu’s installation on Virtualbox, and you can start using the operating system as needed.

If you have any questions, please add them in the comments below, and we’ll do our best to answer them.
Video Tutorial
Here is a video tutorial for a visual walkthrough of the steps taken. We have posted this video on YouTube channel.


