
Setting up Windows 11 On Mac with Boot Camp sometimes can be a complicated task. Newer Apple computers such as Mac Studio, MacBook Air M2, and MacBook Pro M2, which use Apple Silicon chips, don’t support Boot Camp. Therefore, users of these Apple devices can’t take advantage of Windows applications. This guide will show you how to install Windows 11 ARM on Mac devices with the M1 and M2 chips, using the free VMware Fusion Player as the virtual machine software. This means you can use both Windows 11 and macOS Ventura or macOS Sonoma, gaining the best of both worlds.
Table of Contents
Setup for VMware Fusion
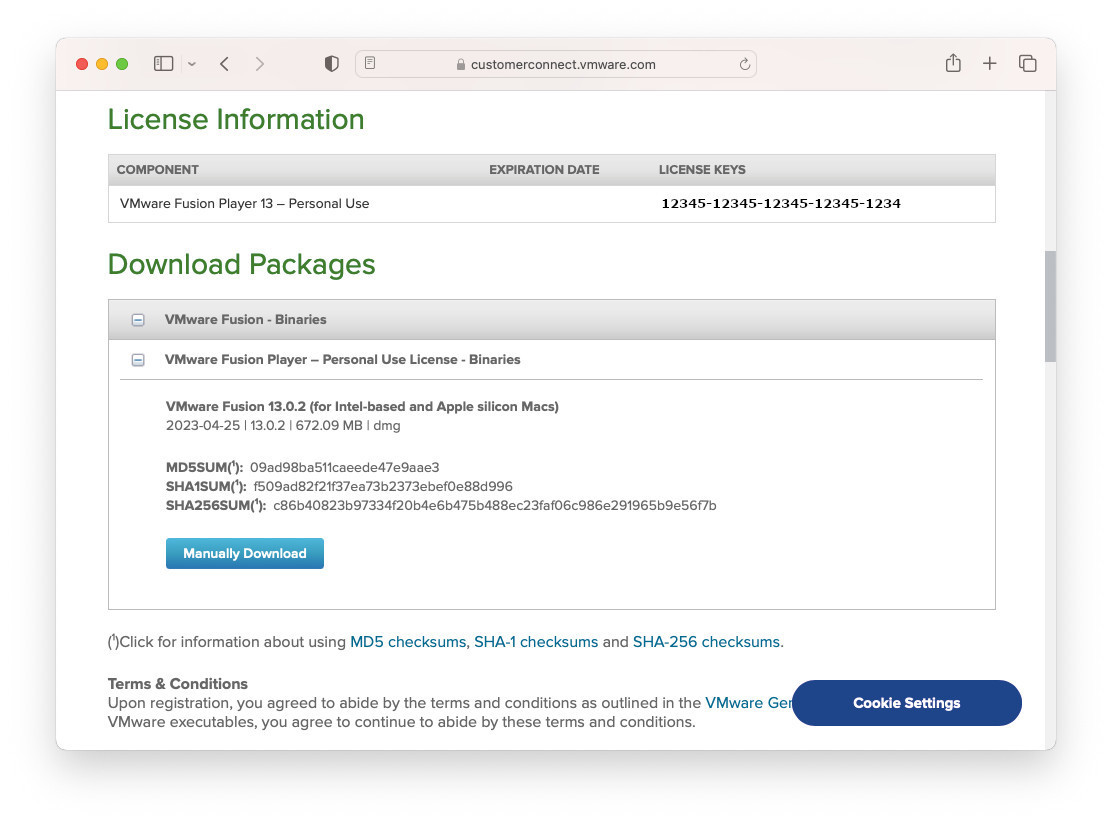
For personal use, VMware Fusion Player is available for free. To get the download, you need to register a VMware account and access the link to VMware Fusion which is provided. Don’t forget to save the free license key to activate VMware Fusion during setup.
Download Windows 11 ARM Version
The Windows 11 ARM installer is available for free and can be obtained by joining the Windows Insider program through the link provided. Once enrolled, users can obtain the Windows 11 ARM version designed for Virtual Machines by downloading from the designated location. The Virtual Disk format used by Hyper-V, VHDX, is the format that the Windows 11 ARM installer is in and it has a pre-configured size of 10GB.
The following image is available for download: 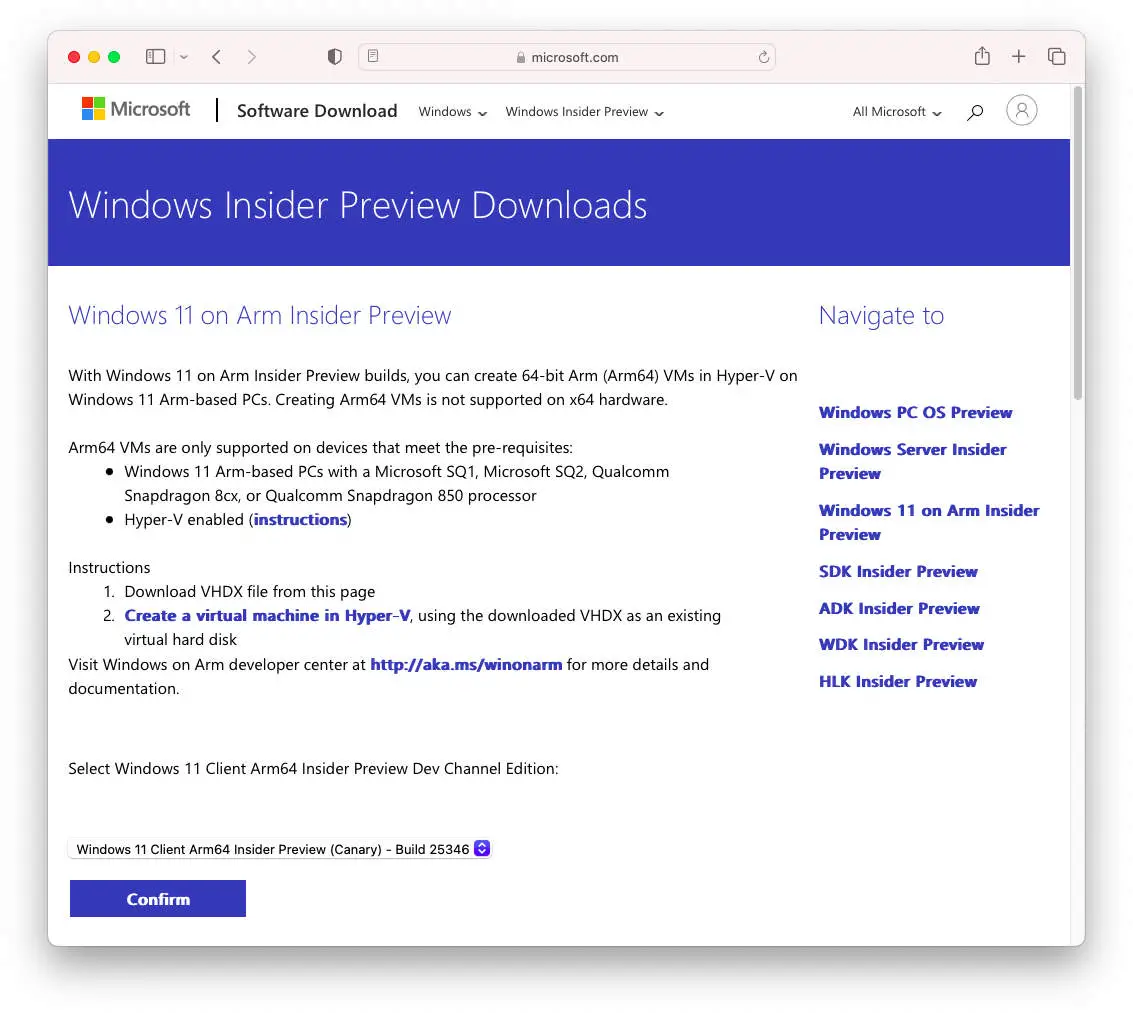
Transforming Windows 11 ARM into a VMware Virtual Disk
In order to use the Windows 11 ARM installation package, which is in VHDX format, on other virtual machine software, we need to make a conversion of the VHDX file to VMDK, the virtual disk file developed for VMware.
In order to change a VHDX into a VMDK, QEMU can be used, a virtualization application for Ubuntu and Linux. To get QEMU, Homebrew, a package management program for Mac, can be employed. If you are a coder, you may already be familiar with these utilities. To get Homebrew and then QEMU, the following commands can be entered in the macOS Terminal in succession.
In order to install Home Brew on Mac, you need to open the Terminal application in the Mac Spotlight search. After that, you should type in the following command:
/bin/bash -c "$(curl -fsSL https://raw.githubusercontent.com/Homebrew/install/HEAD/install.sh)"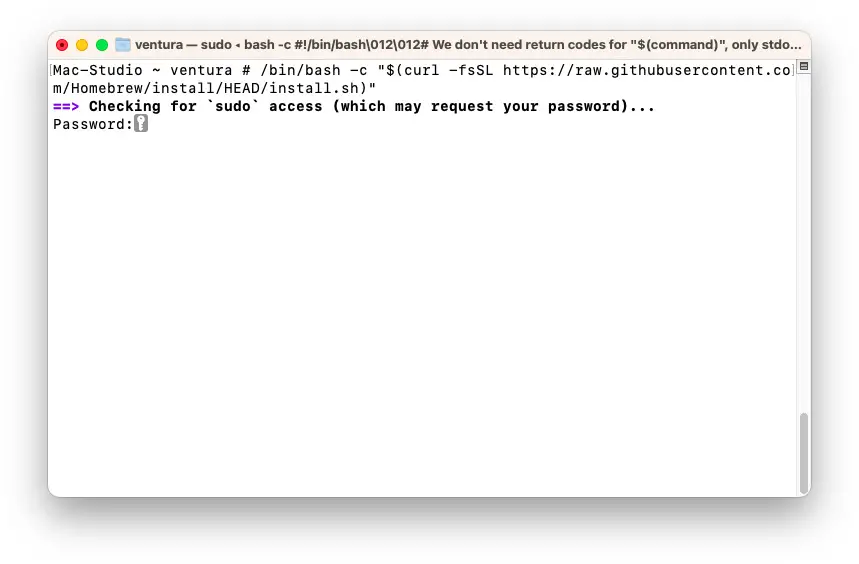
Getting Brew set up on a Mac is possible with just a few steps. It can be achieved by following a few simple instructions.
Using the terminal, QEMU can be installed by utilizing the command:
brew install qemu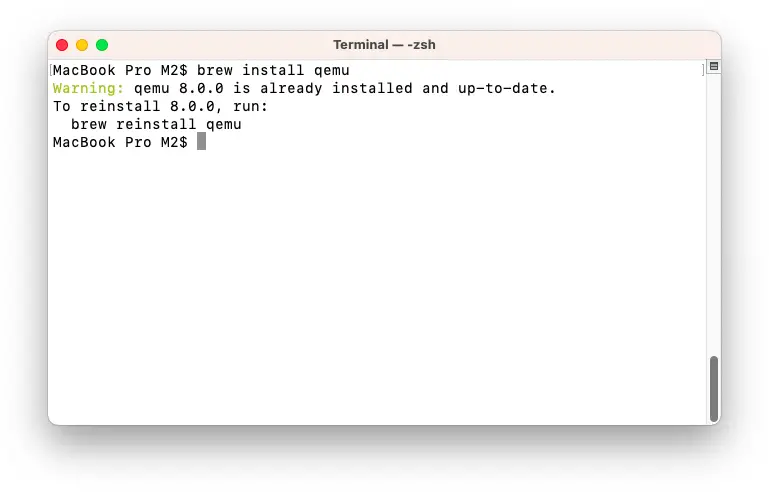
Utilizing the Terminal, one can install QEMU.
Using the command line, one can install QEMU on their computer.
Once QEMU is in place, one can utilize the following commands to easily translate the VHDX image into VMDK format:
qemu-img convert -f vhdx ~/Desktop/Windows11_InsiderPreview_Client_ARM64_en-us_25346.VHDX -O vmdk ~/Desktop/Windows11_InsiderPreview_Client_ARM64_en-us_25346.vmdk -pThe -f vhdx flag can be used to specify the location of the VHDX file, while the -O vmdk flag can be used to set the output as a VMDK file with a specified path. Additionally, the -p flag can be used to show the process of the conversion.
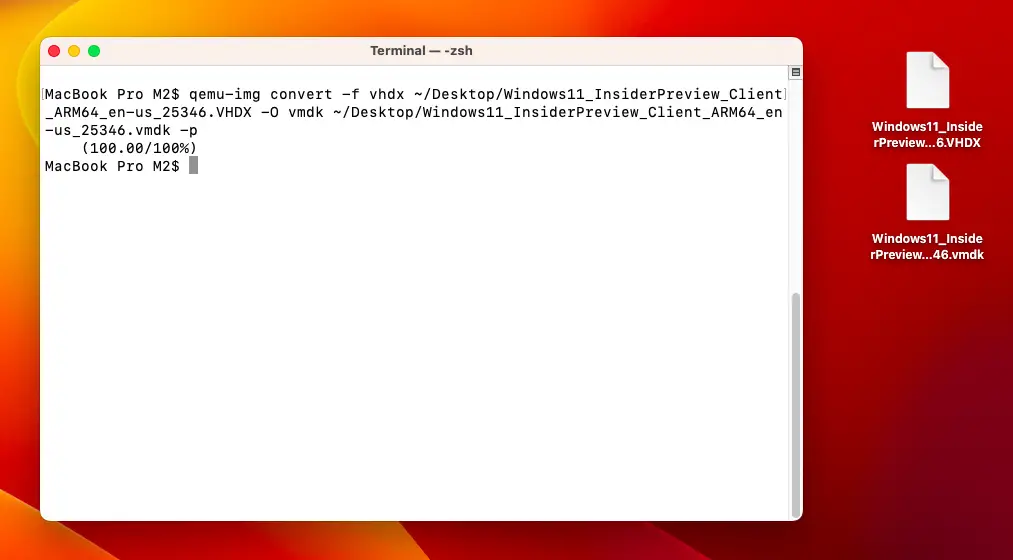
It is possible to transform a Windows 11 ARM VHDX file into a VMDK Virtual Image.
Utilize VMware Fusion to install Windows 11 ARM
To get going, Step 1 provides a free key which you can use to install VMware Fusion Player onto your Mac computer. After the installation has been completed, you can open VMware Fusion Player from either the Launchpad or the Applications folder.
To start the process of setting up a new virtual machine, tap the ‘Create a Custom Virtual Machine’ button.
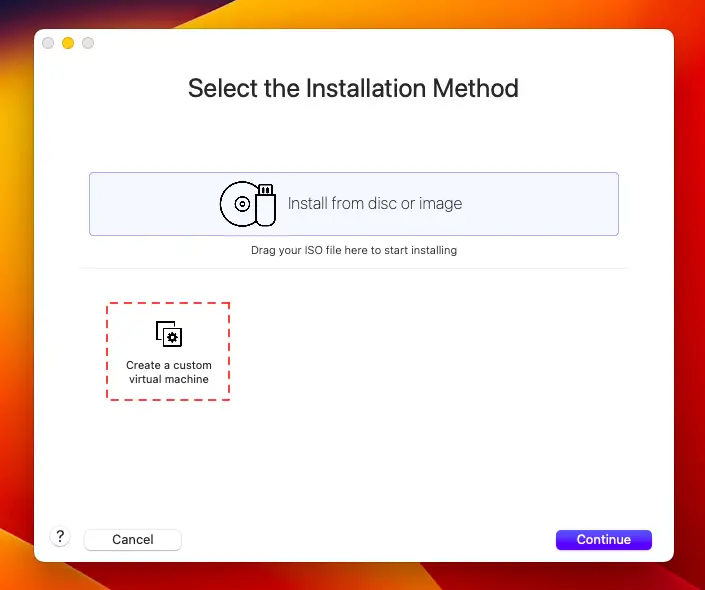
Design your Own Personalized Virtual Machine
For the Guest OS, go with ‘Windows 11 x64 ARM’ and press ‘Continue’ to go on.
One option to consider for a computer is Windows 11 64-bit ARM. 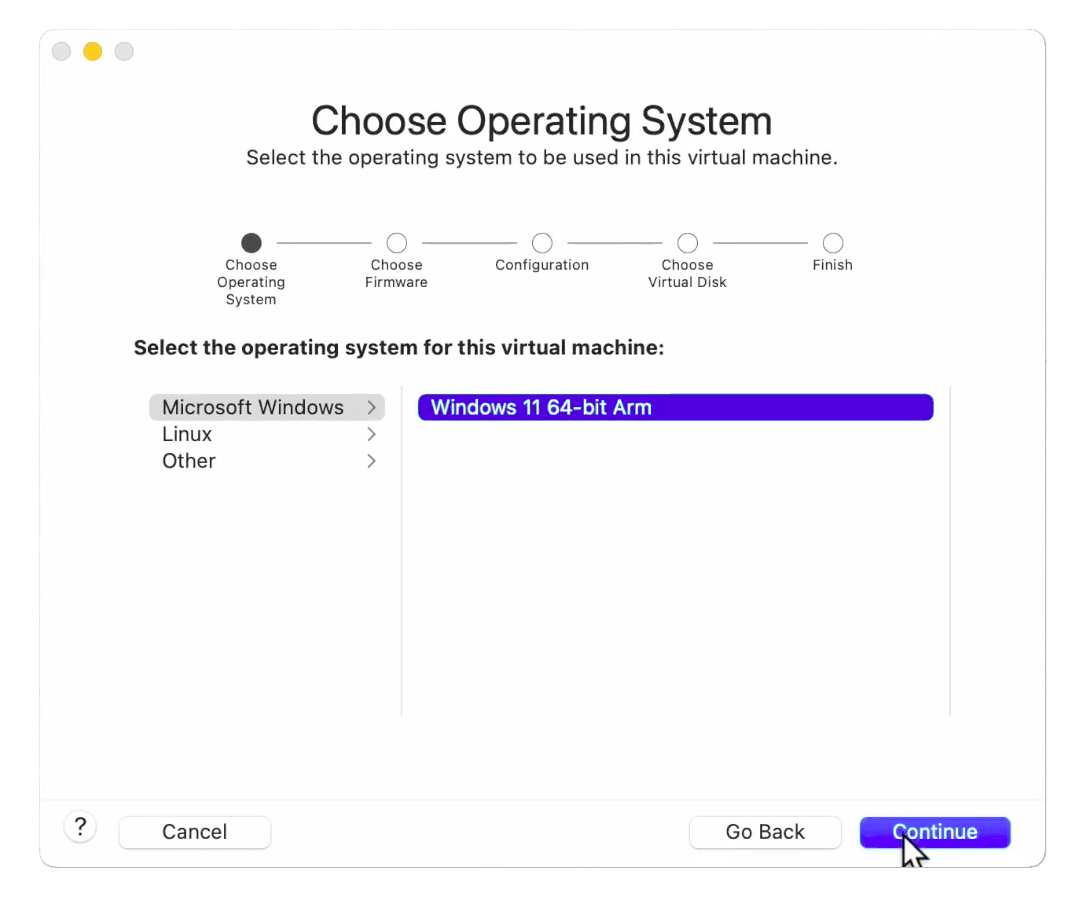
In the ‘Choose a Virtual Disk’ section, you will need to find and open the Windows 11 ARM. VMDK file you converted earlier. When you have done that, press ‘Continue’ to finish the remaining steps. You may tweak the RAM and CPU allocation if you wish, however, the default settings offered by VMware ought to be enough to run Windows 11 ARM on your M1 or M2 Mac without it taking up too many resources.
An image of the Open Windows 11 ARM VMDK Virtual Image can be seen below.
When you have finished adjusting the settings of your virtual machine, select the ‘Play’ button to initiate the Windows 11 ARM on VMware. Microsoft has already done the setup, so you won’t have to go through any installation procedure. The initial action you’ll have to do is to make an account on the Windows 11 ARM.VMDK.
When setting up a Windows 11 ARM account, you can opt to go through the process of signing up online with a Microsoft account. But if you don’t have access to the internet or are in a hurry, it is possible to skip this step by following these directions.
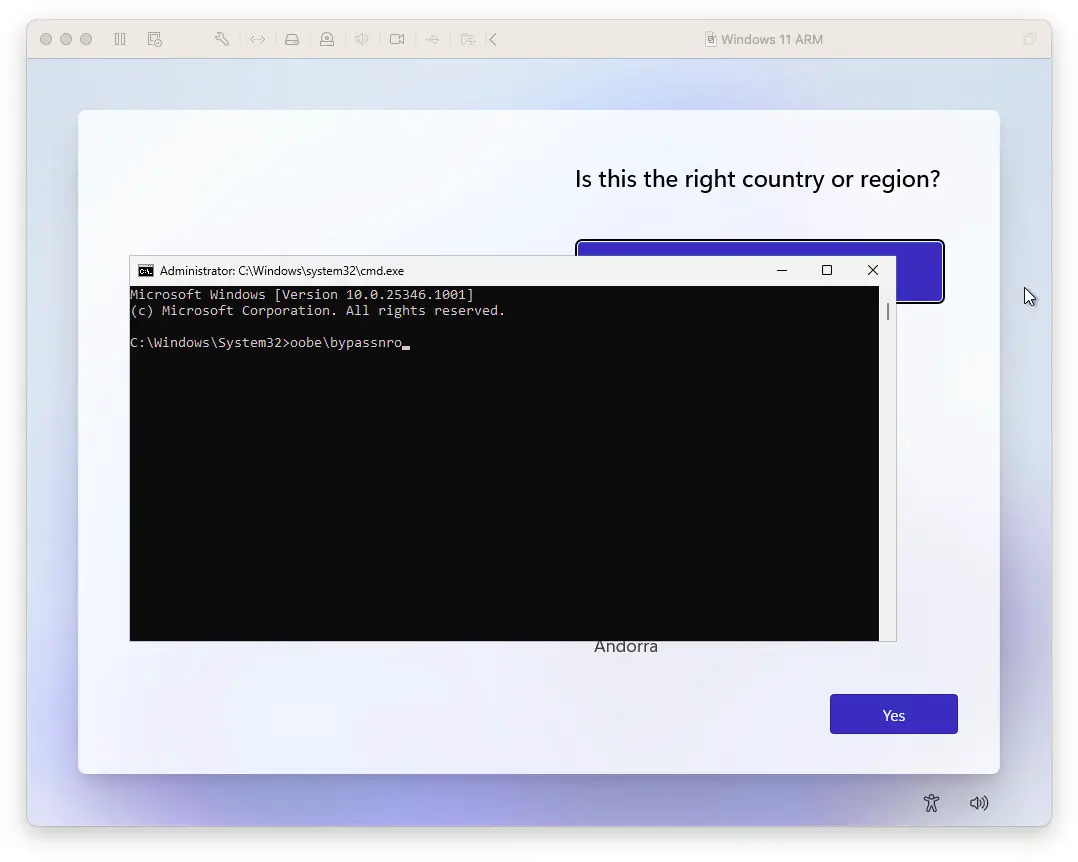
Launching the CMD application in Windows 11 ARM operating system is possible.
When you’re at the Windows 11 ARM welcome screen and language selection in the virtual machine, utilize the Command + Shift + F10 command to open the Command Prompt (CMD). After entering ‘oobe\bypassnro‘ in the CMD, restart the virtual machine. This will allow you to create a Windows 11 account without needing an internet connection.
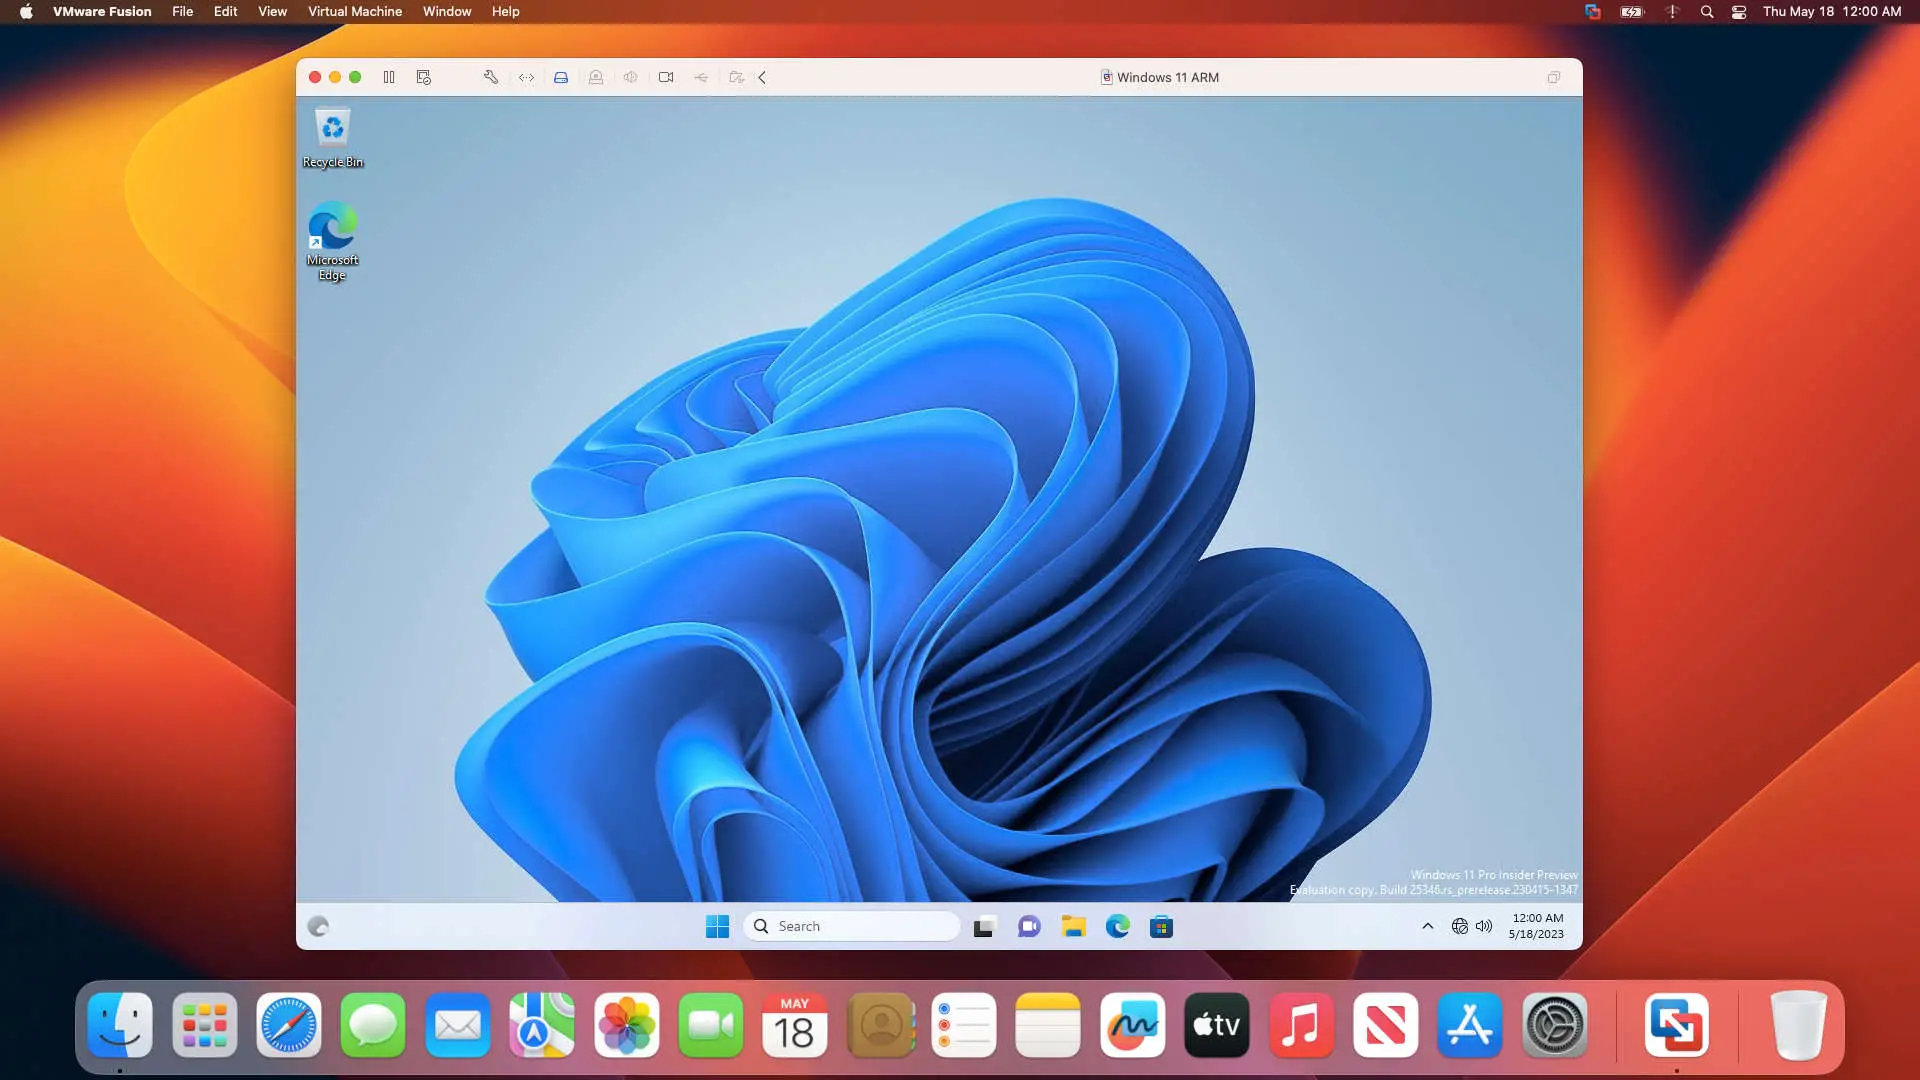 It is possible to operate Windows 11 ARM on Macs with M1 and M2 processors.
VMware Tool should be installed and Unity mode can be used
Now that you have successfully gotten Windows 11 ARM to work on VMware, you can further boost its performance and grant yourself access to helpful features such as file dragging and dropping, and being able to use macOS Ventura programs through Unity mode. To be able to do this, you must install VMware Tools.
In order to set up VMware Tools, go to the View menu and select “Install VMware Tools.” Then, from the File Explorer on your Windows 11 ARM machine, run the VMware Tools installer to conclude the setup.
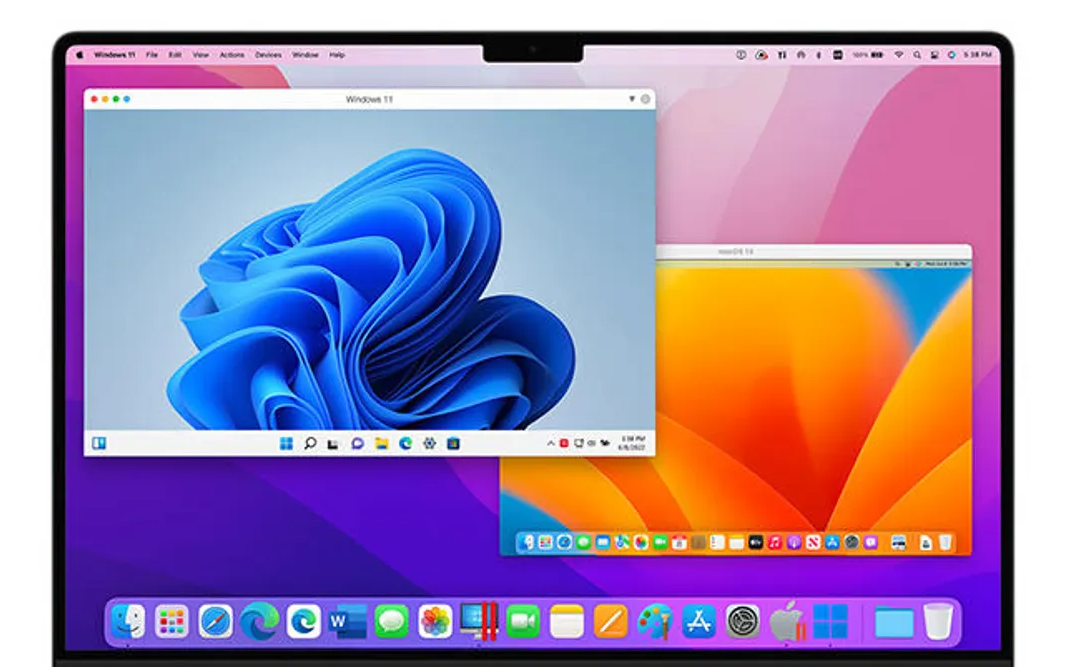
When VMware Tools is successfully installed, you can use any Windows program on your Mac desktop without any issues. We tested Microsoft Store on macOS Ventura and there was no difficulty in transitioning between Mac and Windows.
It is possible to use the Microsoft Store on a Mac by running it in VMware Unity Mode. 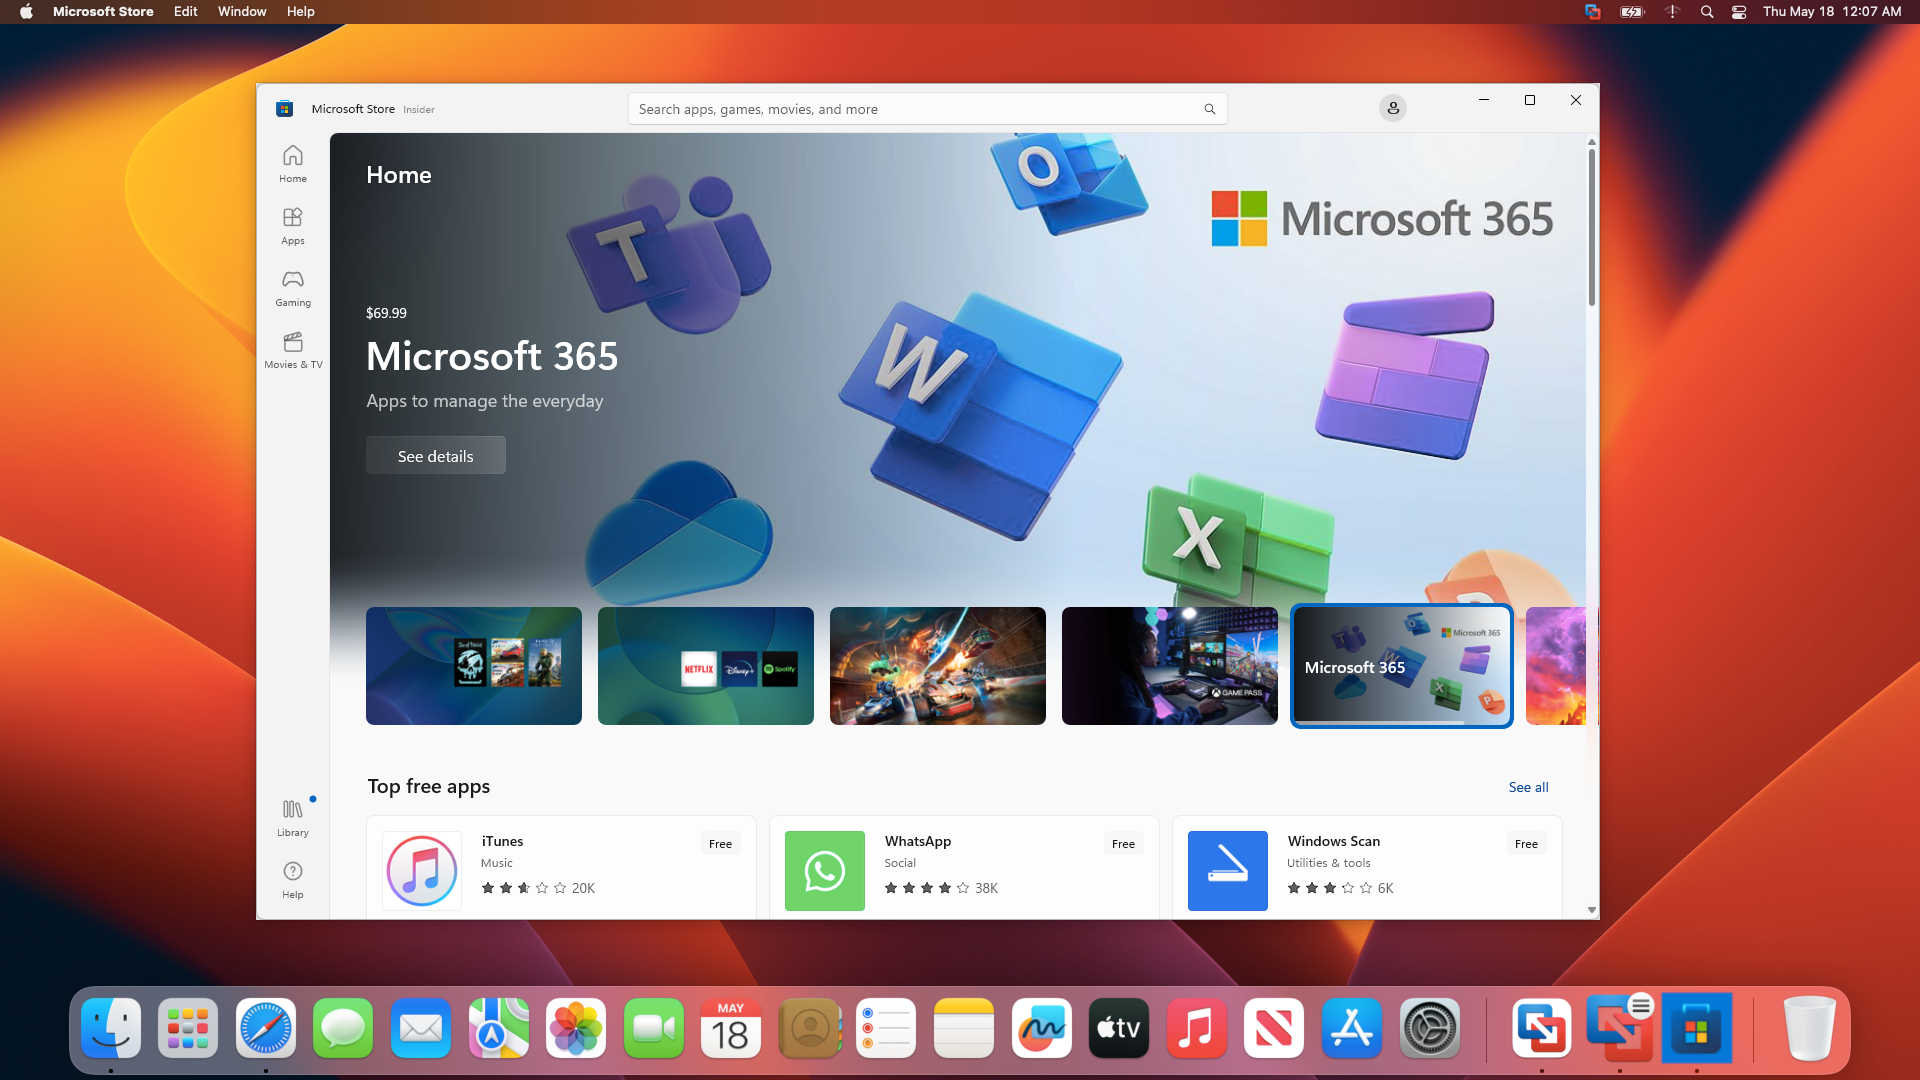
It is essential to be aware that virtual machines may not employ the GPU to its maximum potential. Consequently, powerful programs such as Core VideoStudio or Revit may not be able to take full advantage of the M1 or M2 GPU. Virtual machines are more suitable for everyday applications.
This guide outlines how to take advantage of Windows 11 ARM on ARM processor-driven Macs, for instance, the M1 and M2 models. By using the free personal edition of VMware Fusion, you can now access a number of Windows apps which had only been available on Windows devices until now.
It is possible to avoid plagiarism by restructuring the text without altering its meaning or context. This can be done by rearranging the words, phrases, and sentences to create a new output while preserving the original message.


