During World Wide Developer Conference (WWDC), an announcement was made to release the macOS Mojave 10.14 publicly. The latest version of macOS Mojave 10.14 comes with improvements making it bugs or error-free. It is also true that macOS Mojave 10.14 comes with great features such as time-based wallpaper and Dark mode. Moreover, its finder, along with some other features, is also now improved.
Apple is regularly updating the macOS Mojave. Provided with high security, macOS Mojave will keep all of your data protected from any cyber-attacks and errors. However, the latest macOS, the macOS Big Sur, still possess some problems.
I have been using macOS Mojave since its release to the public. And I haven’t found any problems with macOS Mojave to date. So, I strongly recommend you to install macOS Mojave 10.14 on PC – Hackintosh.
With the previous Operating system – macOS Sierra, macOS High Sierra, I did find some issues. However, they were all gone when I installed macOS Mojave 10.14 as it is compatible with AMD processor, and installing macOS Mojave on Nvidia graphic is supported. In this article, we will learn how to install macOS Mojave 10.14 on PC-Hackintosh.
Table of Contents
Install macOS Mojave 10.14 on PC-Hackintosh – Complete Guideline
- First, you need to create macOS Mojave 10.14 USB installer disk.
- Download macOS Mojave 10.14 dmg file.
- Now create macOS Mojave 10.14 Post-installation disk.
- Make some changes in BIOS settings.
- Now install macOS Mojave 10.14 on PC-Hackintosh.
- For Post-installation of macOS Mojave 10.14, install all the drivers of macOS Mojave 10.14 properly.
Before you install macOS Mojave 10.14 on your PC – Hackintosh, you must download all required files that are given below.
Required files of macOS Mojave 10.14 for PC-Hackintosh
Below are the total files you need to install macOS Mojave 10/14 on PC.
- Firstly you need to download the macOS Mojave dmg file.
- Also, you need a set of macOS Mojave 10.14 files Kexts Download Link.
- USB EFI partition of Mojave is also required, so download it from here. Download Link.
- You also need to download the Mojave EFI partition. Here is Download Link.
- Also, Download Clover Configurator.
- Then, Download Clover Boot-Loader’s latest version.
- You also need VoodooHDA that is all the drivers’ pack for macOS Mojave 10.14 Download Link.
- All formats of Mojave can be found on Geekrar Forum
Related: Install macOS Catalina on VirtualBox on Windows PC (2021)
How to install macOS Mojave 10.14 on PC-Hackintosh
Create macOS Mojave 10.14 USB installer Disk:
Before creating a Bootable USB for macOS Mojave 10.14, you have to download the dmg file mentioned above with the download link. Remember that the macOS Mojave 10.14 dmg file is more than 6 Gigabytes. Thus you need enough space and a good internet connection for downloading.
- To create macOS Mojave 10.14 USB installer Disk, you need to format, Erase, or partition the USB drive. And for the macOS Mojave installer disk, you need at least 16 GB of USB. If it is less than 16 GB, you cannot even copy a single dmg file of macOS Mojave.
- Firstly you need to insert the USB drive into your computer.
- Then, open Spotlight and search for Disk Utility.
- From the present disks, select the USB drive with which you want to create a partition.
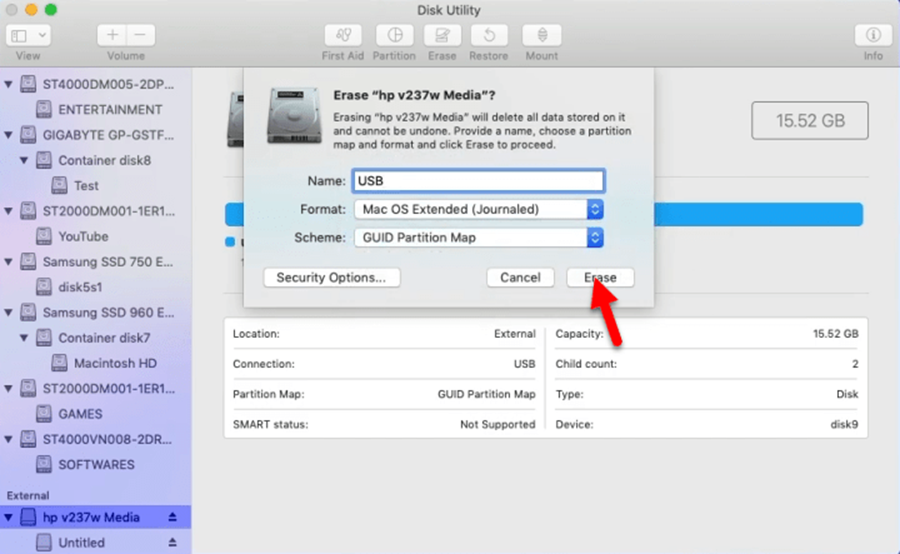
- Then give a name to the option of file partition.
- File format should be MacOS X Extended.
- And its scheme must be as GUID partition Map.
Make sure you are with the recommended setting of the USB partition. Now click on the “Erase” button, and finally, when the Disk Utility has erased all data on USB, click ‘Done’ and close the Disk Utility.
Now create a partition for macOS Mojave.
- Go to Spotlight and search for the terminal.
- When the terminal has launched, copy-paste the below code.
- By pressing ‘Enter,’ you will be asked to enter the password. The whole process will take just a few seconds
sudo /Applications/install\ macOS\ Mojave.app/Contens/Reources/createinstallmedia -- Volume /Volumes/USB- After erasing the USB drive again, type “Y” to confirm it and press the ‘enter’ key.
- The USB drive has been created for macOS Mojave 10.14, but it doesn’t work for the laptop. Therefore, you are required to mount the partition.
- Insert the USB Drive and open the Clover Configurator. Here, click on Mount EFI, select “EFI on install macOS,” and click mount partition.
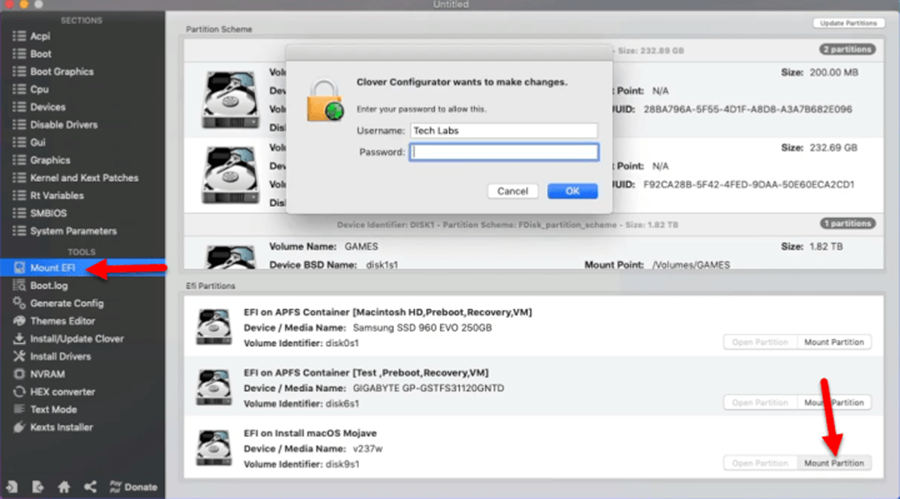
Mount partition
Copy the macOS Mojave 10.14 Fixes file into the USB drive
After macOS Mojave 10.14 USB installer is created, copy the dmg file and eject the macOS Mojave 10.14 USB. Then insert the next USB drive for file fixes.
- After you have inserted the USB drive, click on Go and then on Utilities to open Disk Utility.
- Open and select the USB Drive from the left side of the screen.
- Click on the Erase button.
- Give a name: Whatever you like.
- Format: Mac OS X Extended (Journaled).
- Scheme: GUID Partition Map.
- After that, click on the Erase button and click ‘Done.’
- Now the partition is created, go ahead, copy the Post EFI file, and fix it into the USB drive.
Edit BIOS setting for macOS Mojave 10.14
Now you have completely downloaded all the requirements to install macOS Mojave 10.14 on PC and created a bootable USB drive. You have also completely copied all the fixed files into the USB drive, and now you are ready to install macOS Mojave 10.14 on PC-Hackintosh. Before installation, you have to perform or confirm your computer’s BIOS settings for the macOS Mojave. After doing all the BIOS settings, you can install macOS Mojave; otherwise, you can’t install macOS Mojave.
Step 1. Enter the BIOS menu button on your computer. Then on the “Exit,” select “Load Setup Default” and choose “Yes.”
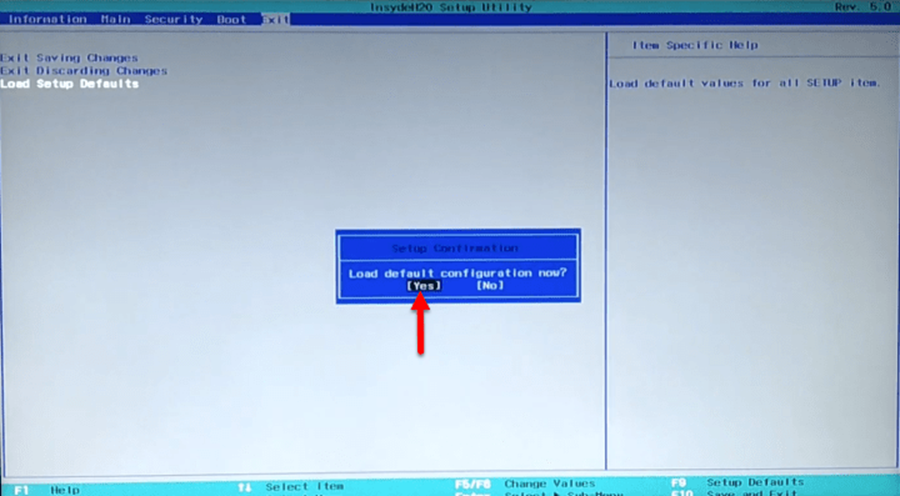
Step 2. Again select “Exit Saving Changes” and select “Yes,” and press enter.

Step 3. After pressing save changes, your computer will restart. Coming back to the computer, press the boot menu again, and on “Main,” select “F12 Boot Menu” and press enter, then select “Enabled” again press enter.
Press ‘Save changes’, and your computer will restart. When it is all done, press the boot menu again, and on ‘Main’ select ‘F12 Boot Menu’. After pressing ‘Enter,’ select the “Enabled” and re-press the Enter button.

Step 4. In this step, you need to select ‘Security’ on ‘Set Supervisor Password.’ Set a password and press enter.

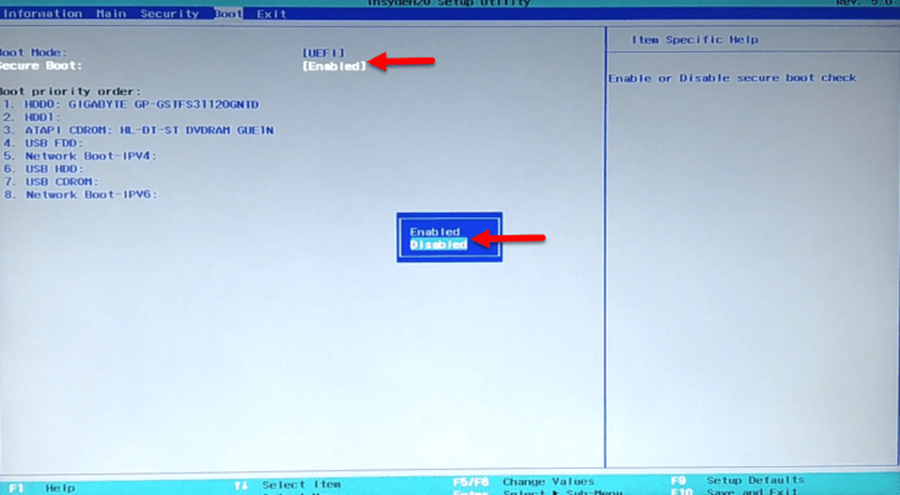
Step 5. In this step, you first need to select “Boot” on “Boot Mode,” then change “Legacy” to “UEFI” and press enter.

Step 6. Here you will first select “Secure Boot” and then “Disabled.” Now press enter.
How to install macOS Mojave 10.14 on PC-Hackintosh
As you have made the required changes to your computer’s BIOS setting to install macOS Mojave 10.14, you are ready to have it done. So, let’s start with the installation process; here are the basic steps for this installation:
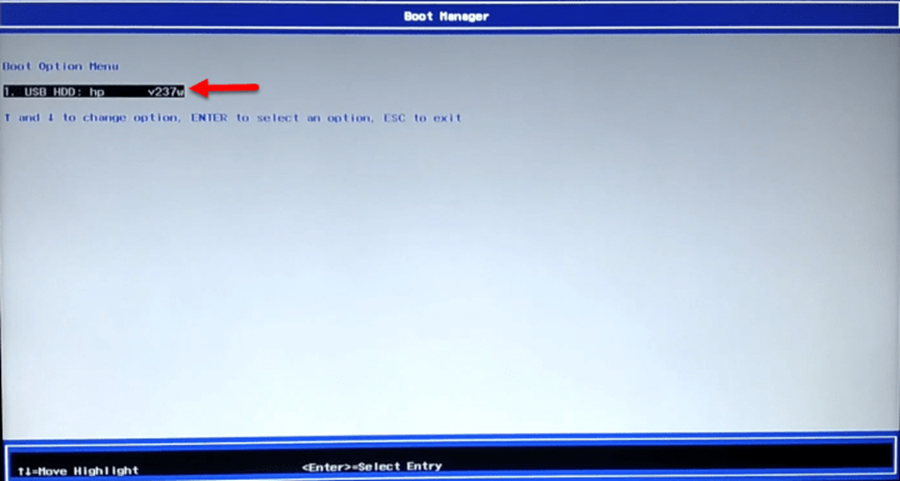
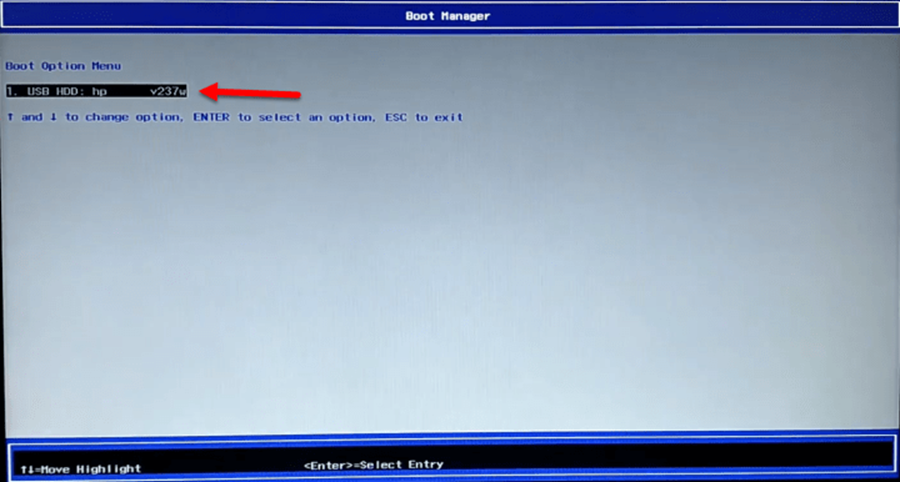
Step 1. First of all, you will restart your USB drive and press the “Boot Menu” key, and boot macOS Mojave from USB Drive.
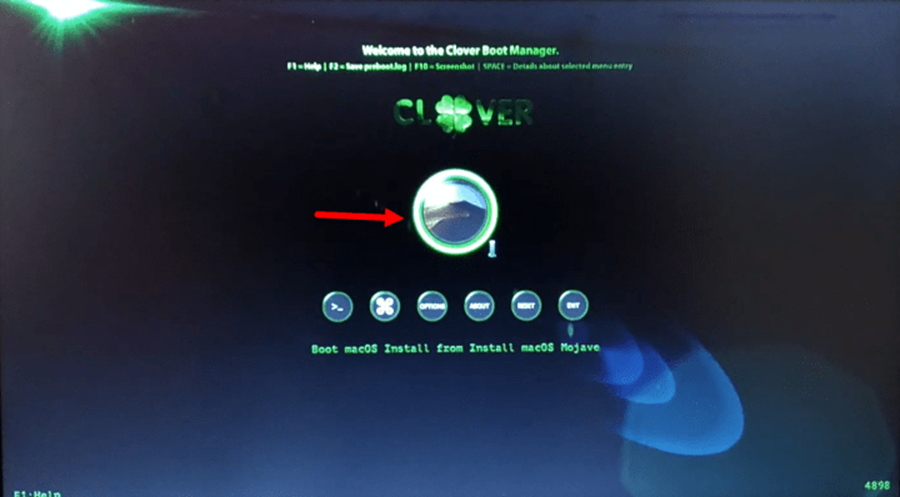
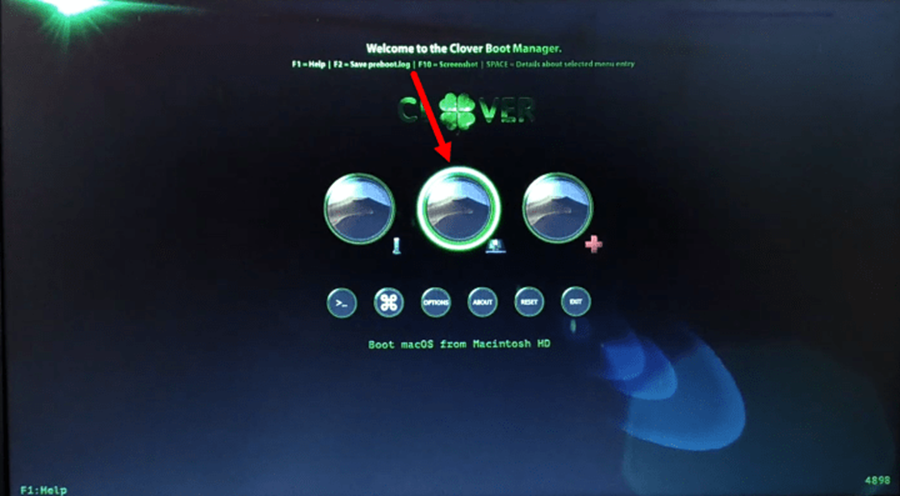
Step 2. After booting from the USB drive, a window for the Clover boot-loader will appear. Here you need to choose macOS Mojave and press enter.
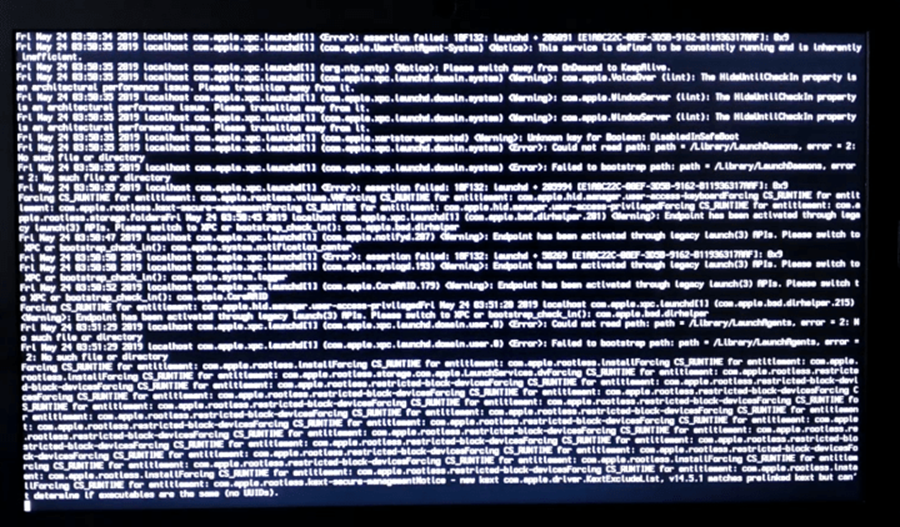
Step 3. Now get ready and bypass this screen.
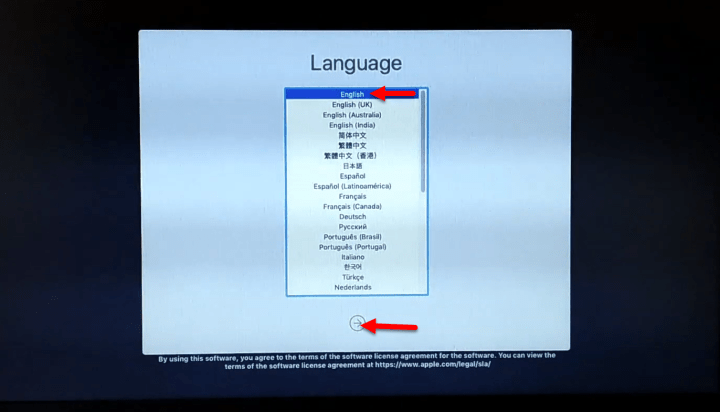
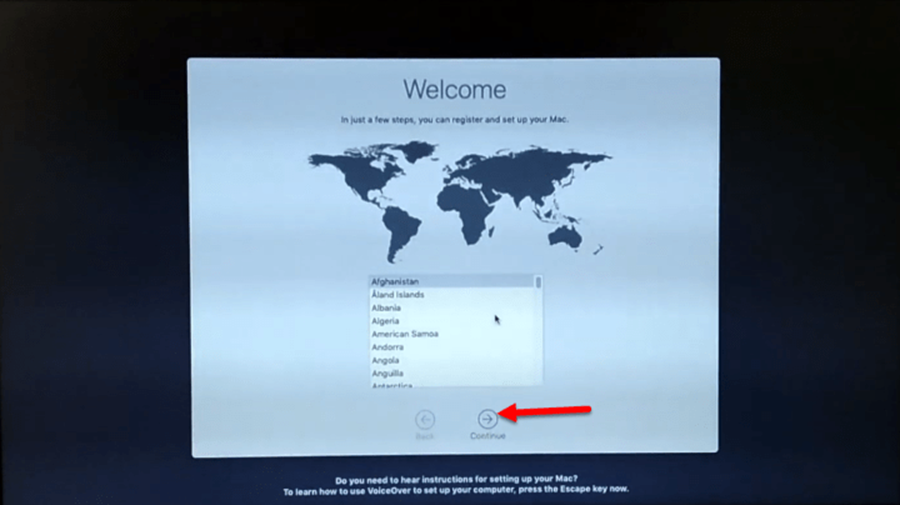
Step 4. Select your required ‘Language’ and press ‘continue.’
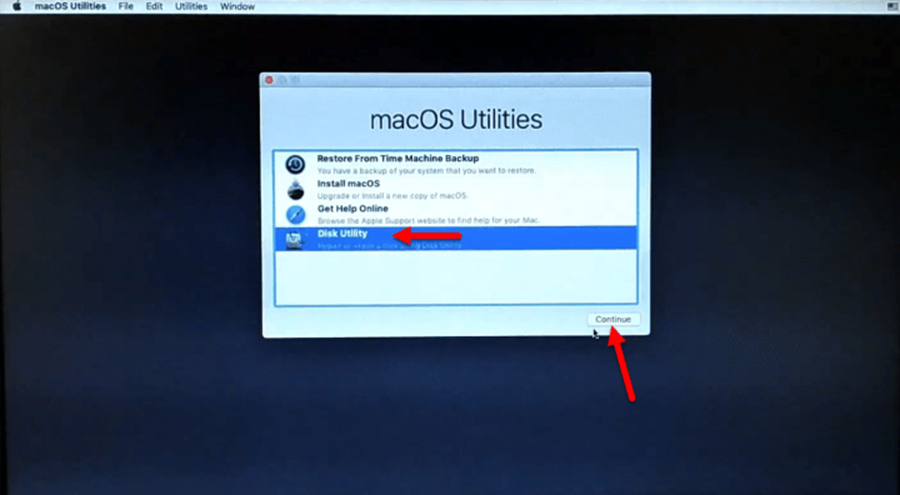
Step 5. In this step, you should click ‘Disk Utility’ and press ‘Continue.’
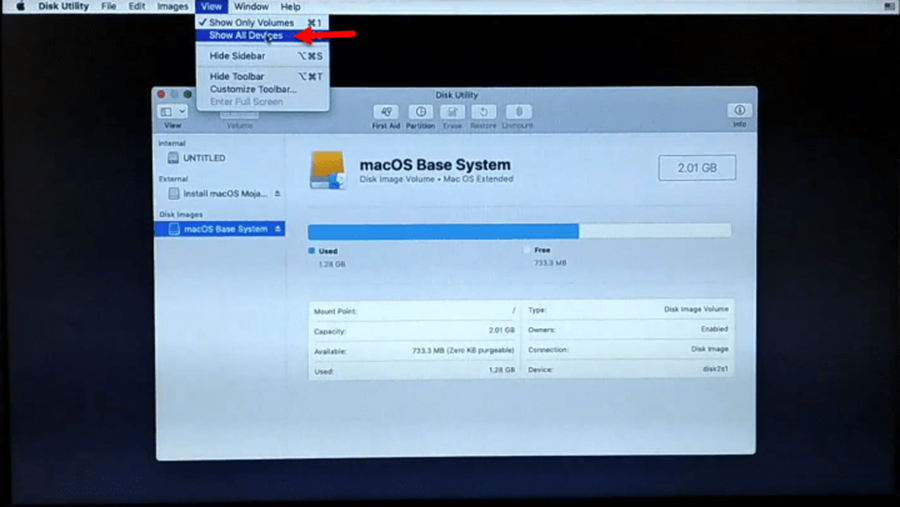
Step 6. Here, click on “View” from the given option and then click on “Show All Devices” to create the hard disk partition.
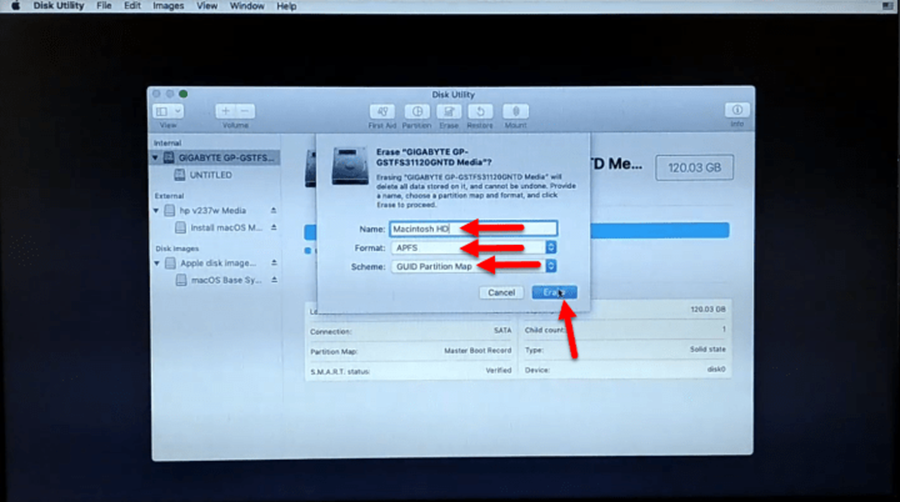
Step 7. In this step, you have to create the Hard Drive partition for macOS Mojave 10.14. For this purpose, select the Hard Disk and click on “Erase” then, while choosing Name>Format>APFS>Scheme>GUID Partition Map, click ‘Erase.’ It might take few minutes to create your Hard Disk partition. Then click ‘Done’ when it is.
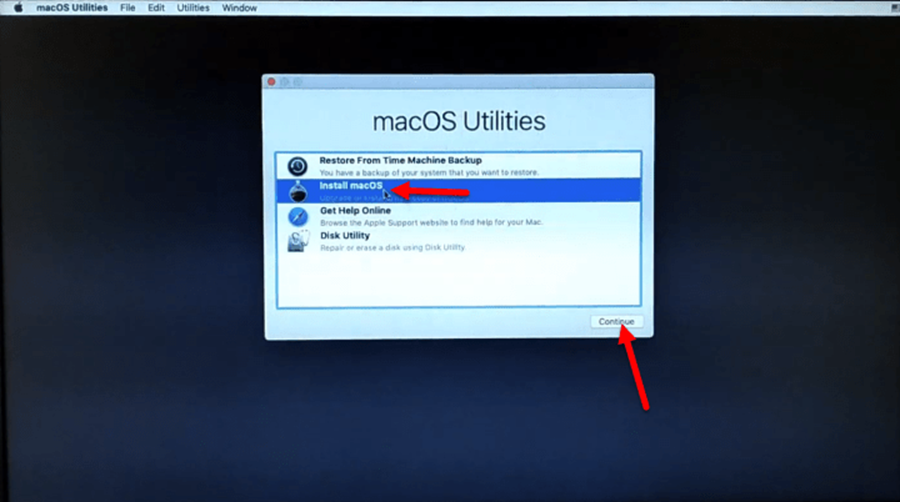
Step 8. When you are done with the previous step, you will see a window where you will need to select ‘Install macOS’ and click ‘Continue.’
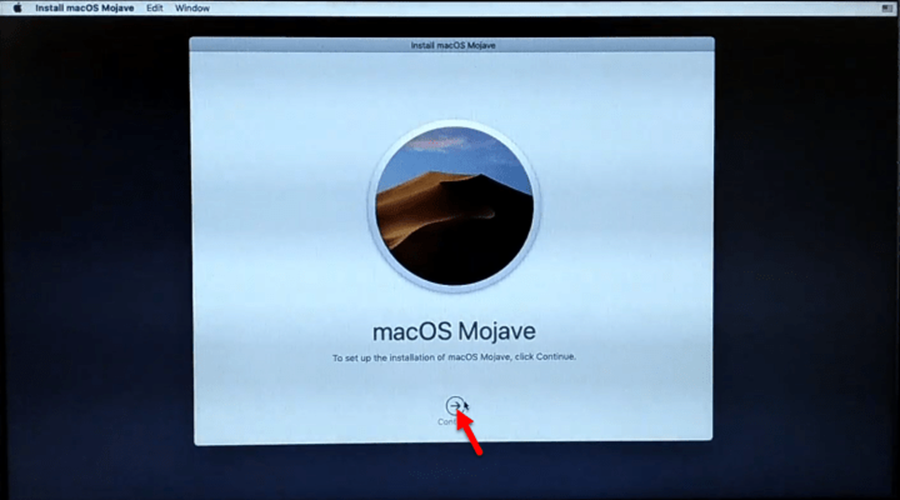
Step 9. To set up the installation of macOS Mojave, click Continue.
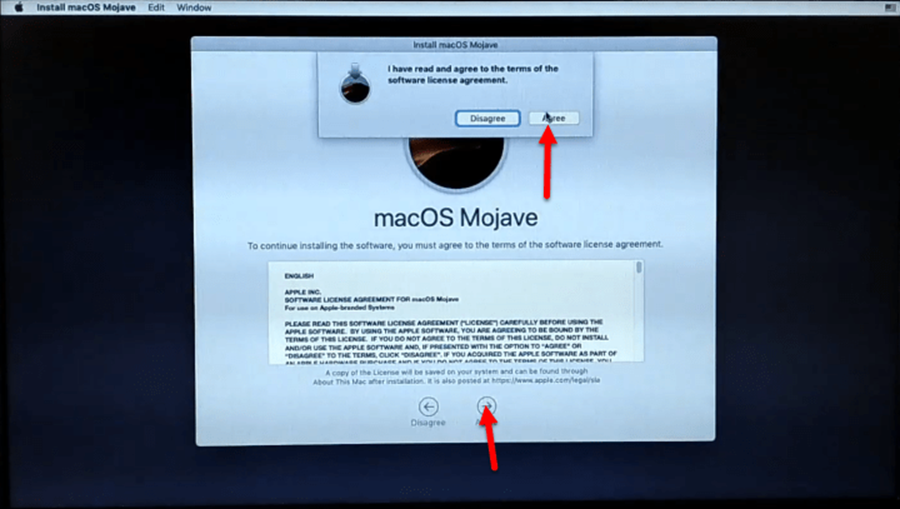
Step 10. In this step, you agree with the terms and conditions of the software license agreement, click Agree.
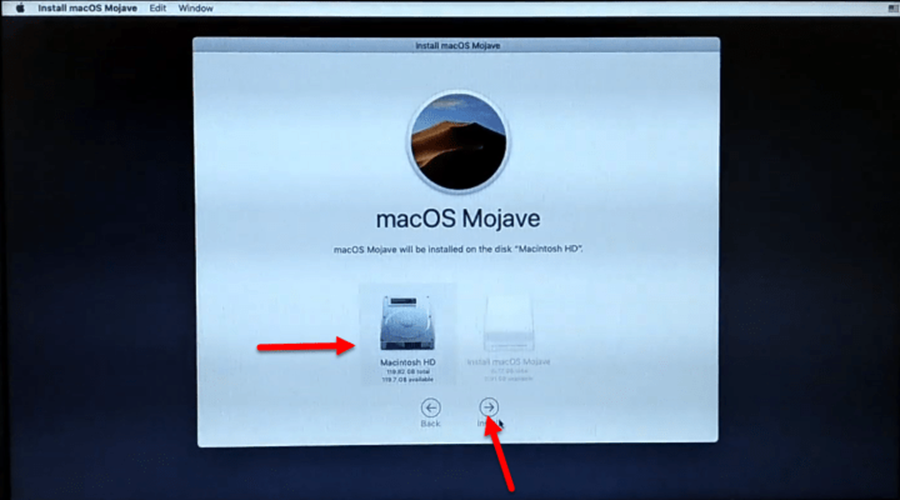
Step 11. In this step, you will see the list of Drive which you created through the partition. Here, click on the created partition drive, then click ‘Install.’
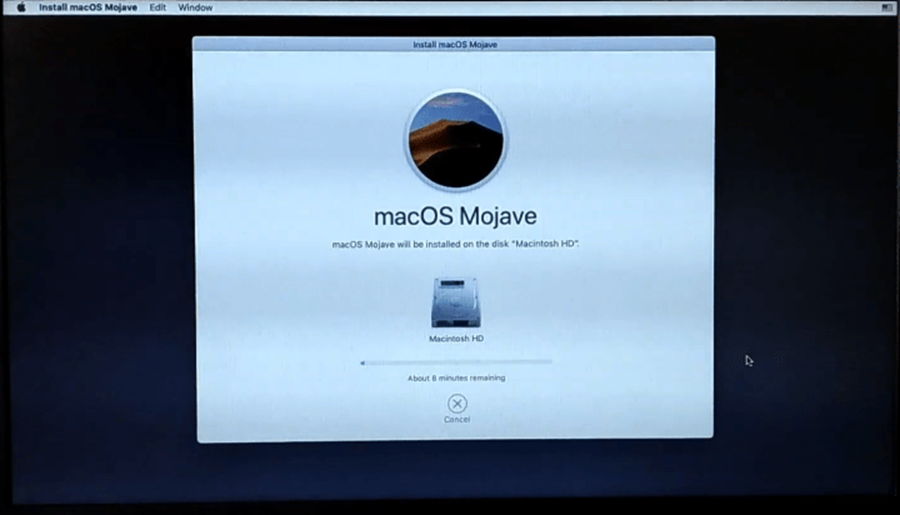
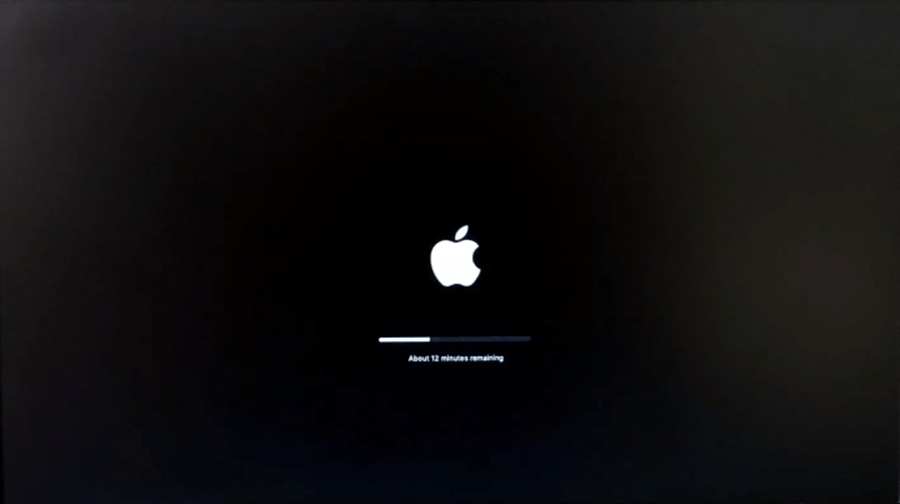
Step 12. In this step, the macOS Mojave 10.14 installation will take about 10 minutes. Depending on lower specs PC, this could take a bit longer!
Boot macOS Mojave install from Macintosh HD
Step 13. In this step of the process, again press the ‘boot menu’ key and boot from the USB drive

Step 14. In the Clover screen, you need to select ‘Boot macOS Install’ from Macintosh HD.

Step 15. It will take a few minutes to install macOS Mojave now completely. When you complete the installation process, your computer will restart automatically.
Step 16. After your computer restarted, again press the ‘Boot Menu’ key and boot from USB Drive.
Step 17. Now again, in the Clover screen, choose boot macOS Mojave from Macintosh HD.
Step 18. In this step, you will choose your ‘Country’ and click ‘Continue.’
Here you will be required to quickly follow the instructions as following by keeping it ‘Continue’ for a while.
- Firstly, select your keyboard and click ‘Continue.’
- When it appears as “My computer doesn’t connect to a computer,” click continue and continue.
- On Data & Privacy, click ‘Continue.’
- Then instruct it as “Don’t transfer any information right now” and click ‘Continue.’
- An option will appear as “Agree to the terms and condition of macOS Mojave” click it and click ‘Continue.’
- Now create your computer account for macOS Mojave 10.14 for the first use and click ‘Continue.’
- In Express set up, you again will press ‘Continue.’
- Now choose your look for the system on the first use, and click ‘Continue.’
- Here you have to wait for some minutes so that your computer can get ready for the first time.
Post-installation of macOS Mojave 10.14 on PC-Hackintosh
Finally, we are at the last step to install macOS Mojave on PC-Hackintosh that is Post-installation. Well, it is straightforward and easy, as you have already created a USB pen drive for post-installation. And the important and needed set of files are also available on the USB drive. So here is the series of step as following:
- First of all, you will insert the post-installation USB into your computer and copy the files into the desktop.
- Next, you will eject the post-install USB Drive.
- Now, open the Post-install folder and open Clover configurator.
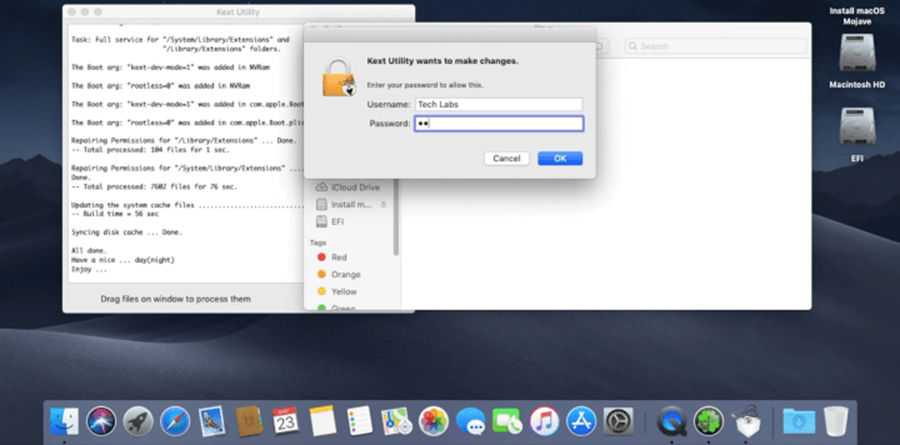
- When the clover configurator is opened, select the ‘USB drive’ and click on ‘Mount EFI.’ Now you need to mount the EFI partition of SSD/HDD by providing the username and password.
- After the above-mentioned steps, you will see that a separate ‘Drive’ has been created on the desktop.
- Open the SSD/HDD drive and right-click on the EFI file, and delete.
- Now copy all fixed files of your computer, open the SSD/HDD drive and paste them there.
After all the above-mentioned steps, you are supposed to install all the drivers of your computer. For this purpose, you have to install the Graphics, Audio, Video, Bluetooth, and by inserting the Kext Utility with VoodooHDA, you will fix the drivers of your computer.
- After the installation is completed, remove the SDD/HDD EFI drive from your desktop.
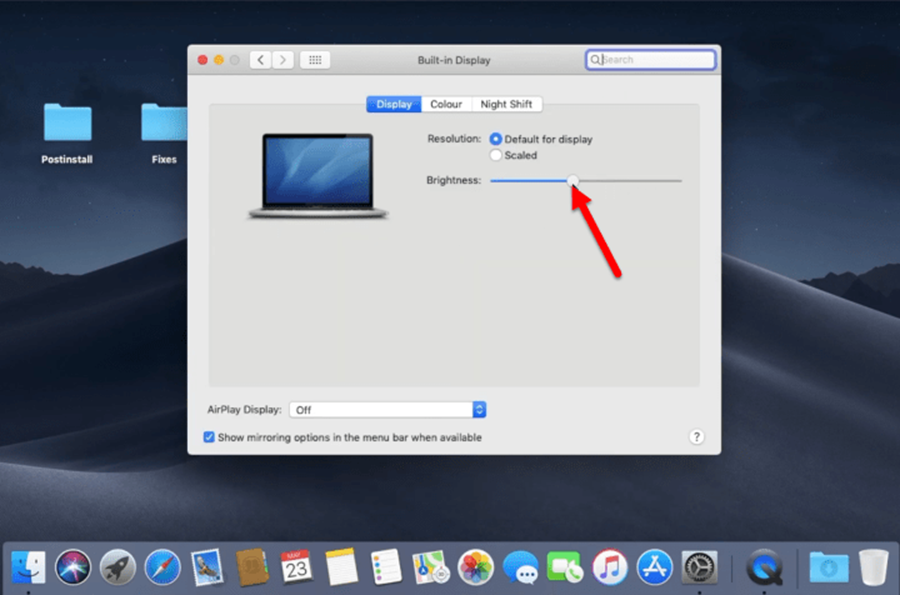
Now, the installation of drivers is completed. Go ahead; click on “System Preferences.” Then, by clicking on ‘Display setting,’ customize the setting and make yourself sure that the drivers are working successfully or not.
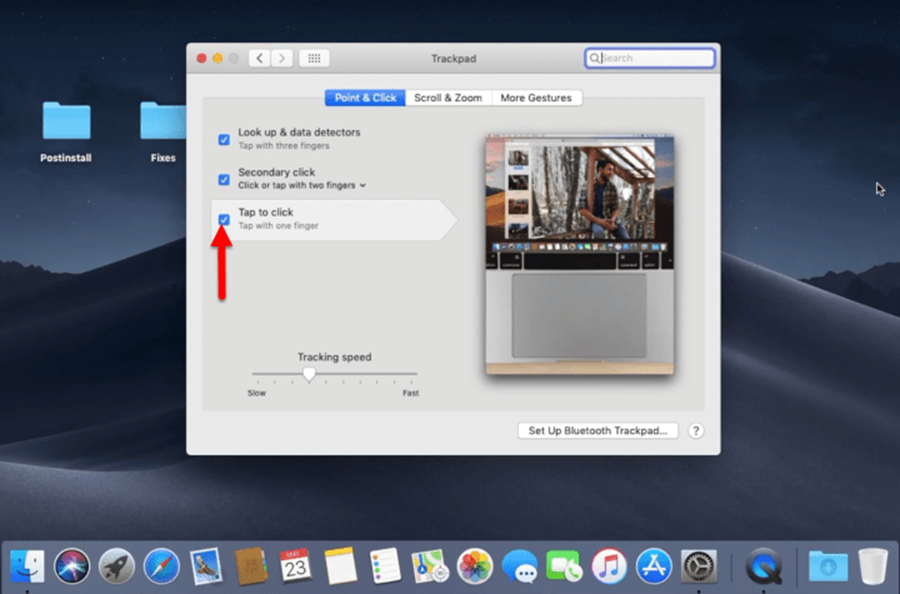
Tap to click, be sure if ‘Point & click’ of “Trackpad” is working properly.
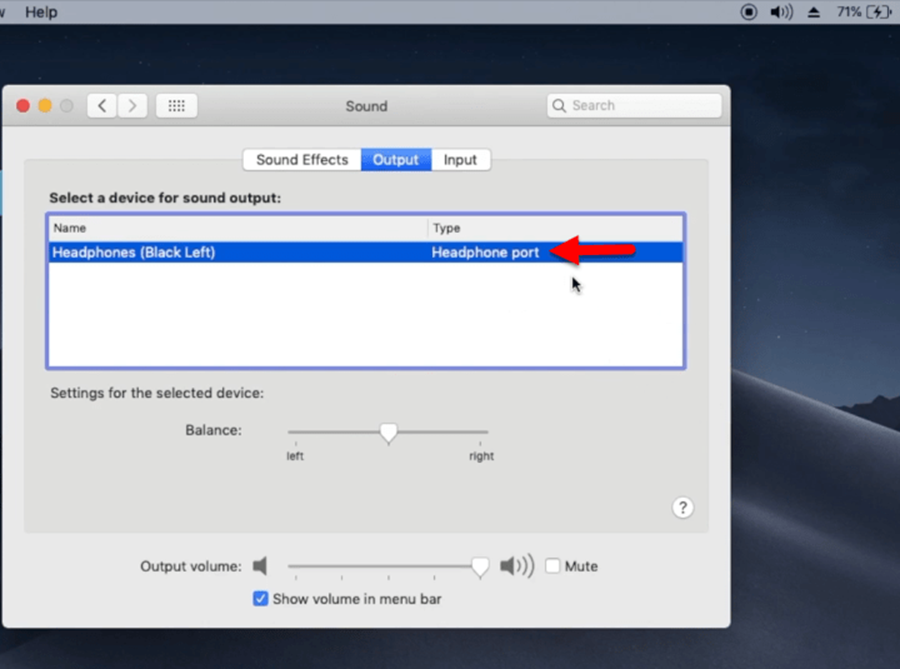
Ensure that sound is also working correctly after installing the sound drivers. Click mark on “Play feedback when the volume is changed” and also mark “Show all volume in the menu bar.”
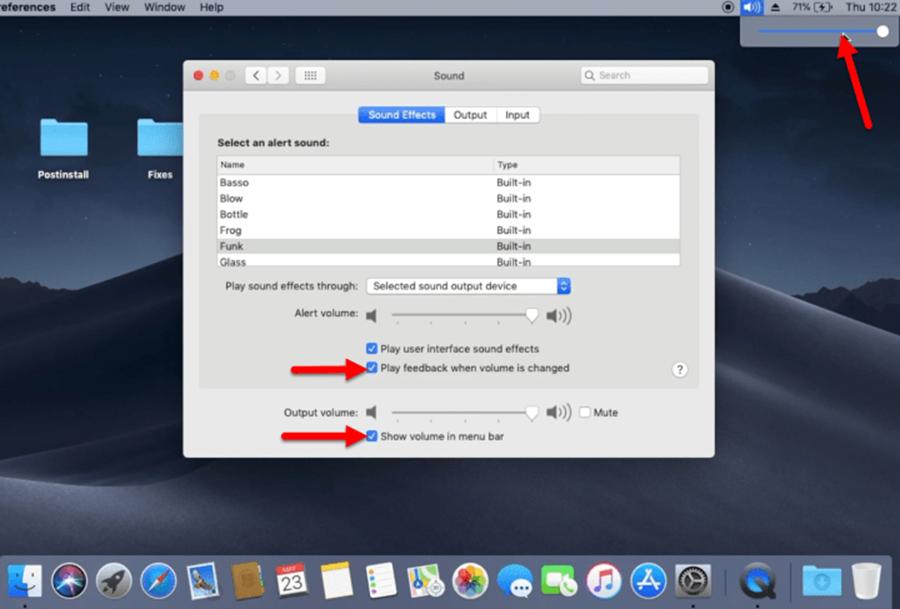
Connect the Speaker/Headphone cable to your computer and check if the output sound is working perfectly or not.
Conclusion
You have successfully installed macOS Mojave 10.14 on your PC-Hackintosh. No doubt, the installation process was based on a series of a bit complicated steps, though, but the time is taken, or performance of this guide may also depend on your PC. With a better PC, you will complete this procedure more quickly. Hopefully, you can now easily repeat this whole process when needed, or at-least follow up the given steps. If you find the article useful for you, don’t forget to share your comments, suggestions, and feedback below in the comment section. And if you want to hear about the future post updates, then subscribe to our Blog with your email address.