Developed and maintained by Offensive Security, Kali Linux is a powerful and widely used operating system designed for penetration testing, digital forensics, and ethical hacking. With its vast array of security tools and utilities, Kali Linux in VirtualBox has become the go-to choice for cybersecurity professionals, researchers, and enthusiasts.
This guide will walk you through installing Kali Linux on VirtualBox, a popular virtualization software that allows you to run multiple operating systems on a single physical machine. VirtualBox provides a safe and isolated environment for experimenting with different operating systems, making it an ideal platform for exploring Kali Linux. If you havent already done so, here is the guide to install VirtualBox in Windows.
Table of Contents
System Requirements
Before you get started, ensure your system meets the minimum requirements for Kali Linux and Virtual Box.
- Windows 10 or 11 64 bit
- 2 GB RAM (4GB recommended)
- 20 GB Free disk space
- 1 CPU core (2 cores recommended)
- Image file (see below)
- VirtualBox and Extension pack (download here)
- Download Kali Linux Image
The best place to download the image is straight from the source. I keep mirror copies of Kali Linux and all other OS (macOS, Windows, Linux) that I use in my guides available for Patreon members.
Latest version: Kali Linux 2023.2
Install Kali Linux in VirtualBox
Create Virtual Machine
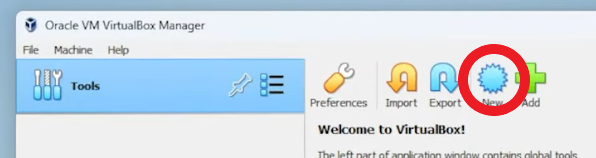
We will start by opening VirtualBox and clicking the New button at the top.

Select Expert Mode, and we’ll fill in the required details for ‘Name and Operating System.’

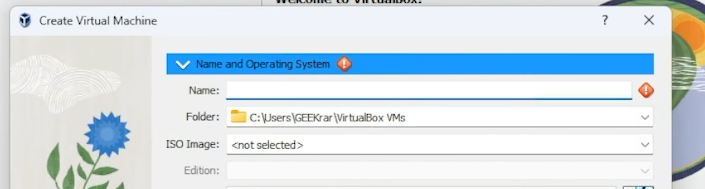
Name: Kali Linux (any name)
Folder: (default is fine)
ISO image: (point to where you downloaded the ISO)
Type: Linux
Version: Debian 64bit
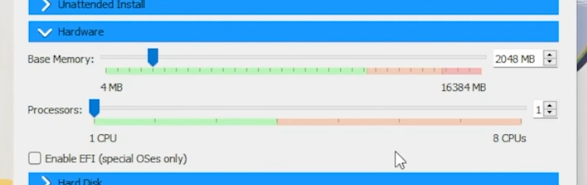
Jump down to the ‘Hardware’ section. Base Memory should be at least 2048 MB or greater, and Processors should be at least 1 CPU.

In ‘Hard Disk,’ ensure that Create a Virtual Hard Disk Now is selected.

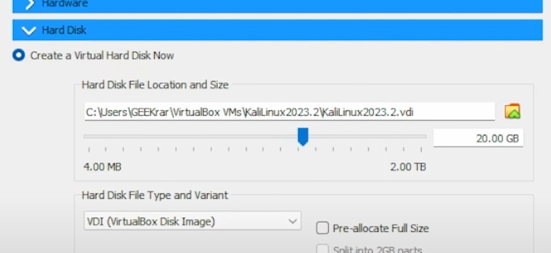
20 GB is the minimum requirement, but if you need more space, select the folder icon and choose a different drive.
Click Finish to close the wizard.
Install Operating System
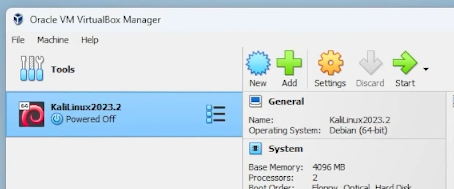
In the VirtualBox Manager, you will see your Kali Linux virtual machine created and ready to be used. Select the virtual machine on the left and click the Start button.

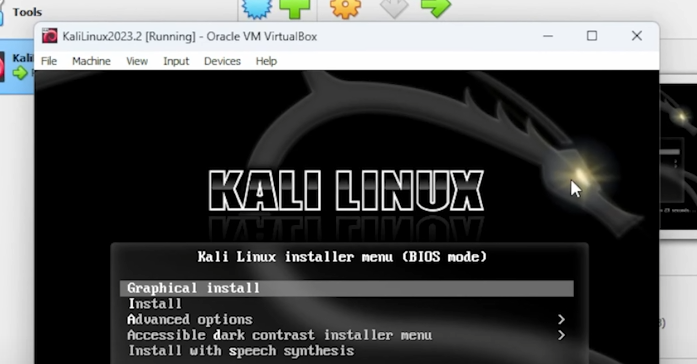
The virtual machine will begin to start up. You will then see an installer menu with options to select. Choose the Graphic Install option.

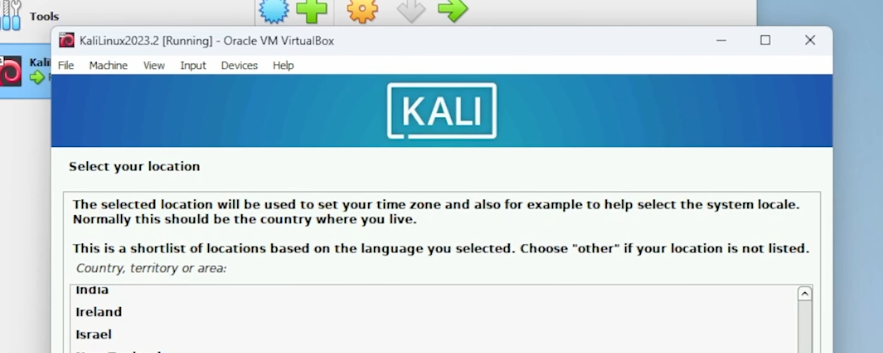
The first few options are regional base. Select the options that best suit your location, language, and keyboard setup.

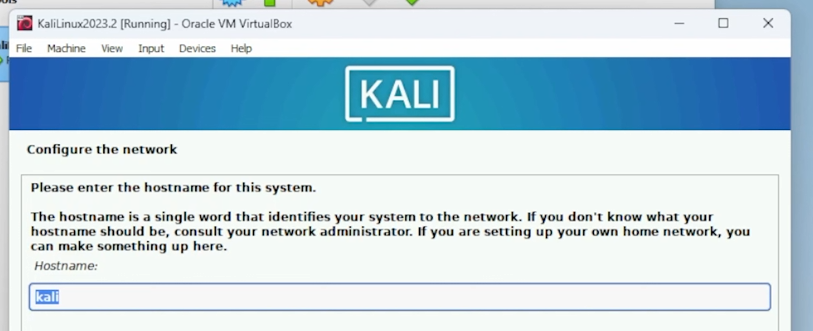
At ‘Configure the network,’ leave the default hostname as kali and ‘Domain name’ as blank.

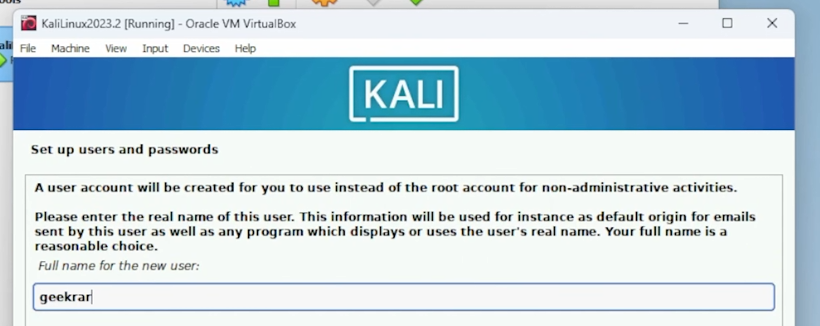
Then with ‘Set up users and passwords, ‘ you can create your unique username and password. When complete, you will use these user credentials to log in to the operating system. Record this somewhere safe to refer to later on when needed.

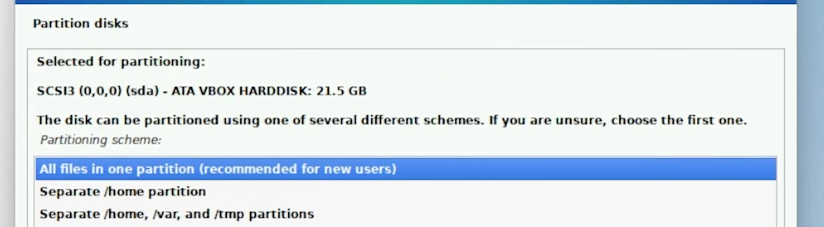
Partition disk options will appear. Use the ‘Guided – use entire disk’ option in the list.


Partition disks will only have one to choose from; the SCSI3 drive in the list. Select ‘All files in one partition on the next screen.’ You can then ‘Finish partitioning and write changes to disk.’

The installation will continue as files are extracted and installed. This process may take a few minutes.
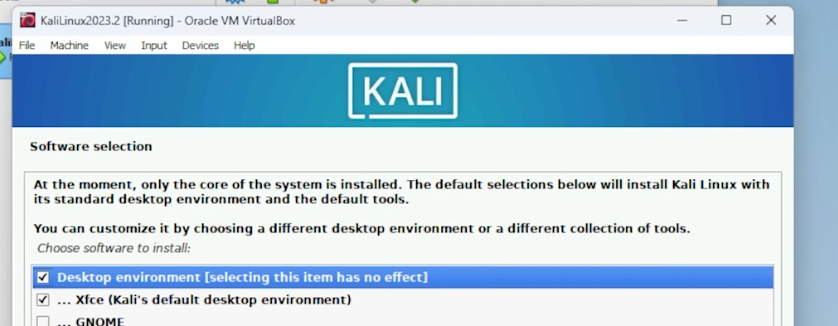
Software selection will provide default options; you do not need to add anything additional unless required.

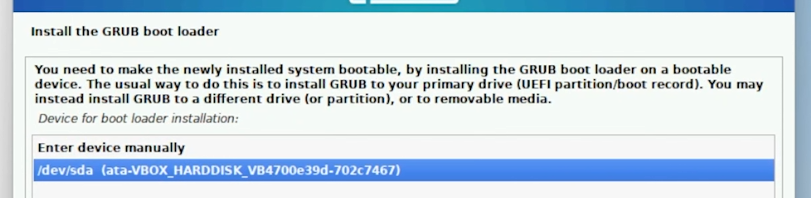
When asked, ‘ Install the GRUB boot loader to your primary drive,’ select the Yes option. Next, select the VBOX_HARDDISK option in the list.

More files will now be extracted and installed into the virtual machine. Again this process may take a few minutes. Once completed, you will be prompted to finish the installation by rebooting the virtual machine.

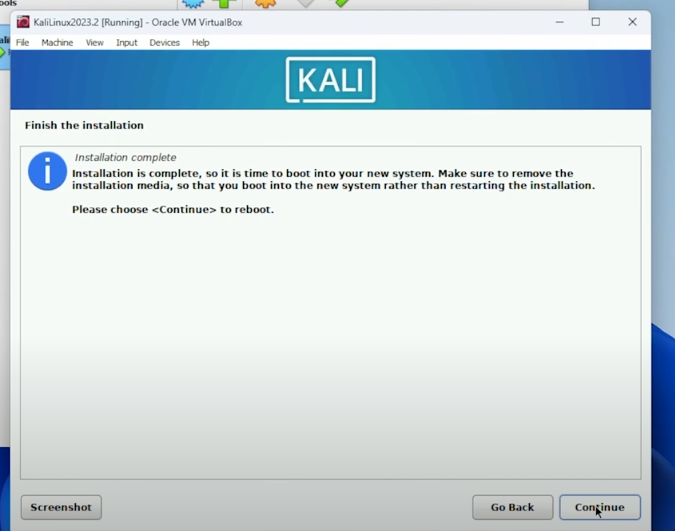
Log in to Kali Linux in VirtualBox
After the virtual machine reboots, you will come to a login screen. You will need to enter the username and password from the one you created during the installation process.


After you have logged in, you can start using Kali Linux in VirtualBox immediately, as you would if you had installed it on a bare metal PC. The installation is complete.
Video: Install Kali Linux 2023.2 in VirtualBox