This guide will show you how to remove bloatware on a Windows 10 PC by removing it from the menus and uninstall it. To remove the bloatware, we’ll use a popular script to download to your computer and then quickly deleted it when complete.
Table of Contents
What is Bloatware?
Bloatware is software or apps that are pre-installed on your device by default. Users often find bloatware crippling the user experience and reduce battery life. It usually takes up spaces on the hard drive and clouds menus, making it confusing to navigate and slows down the device. Bloatware is typically loaded to help increase revenue for the manufacture and is common with Windows 10.
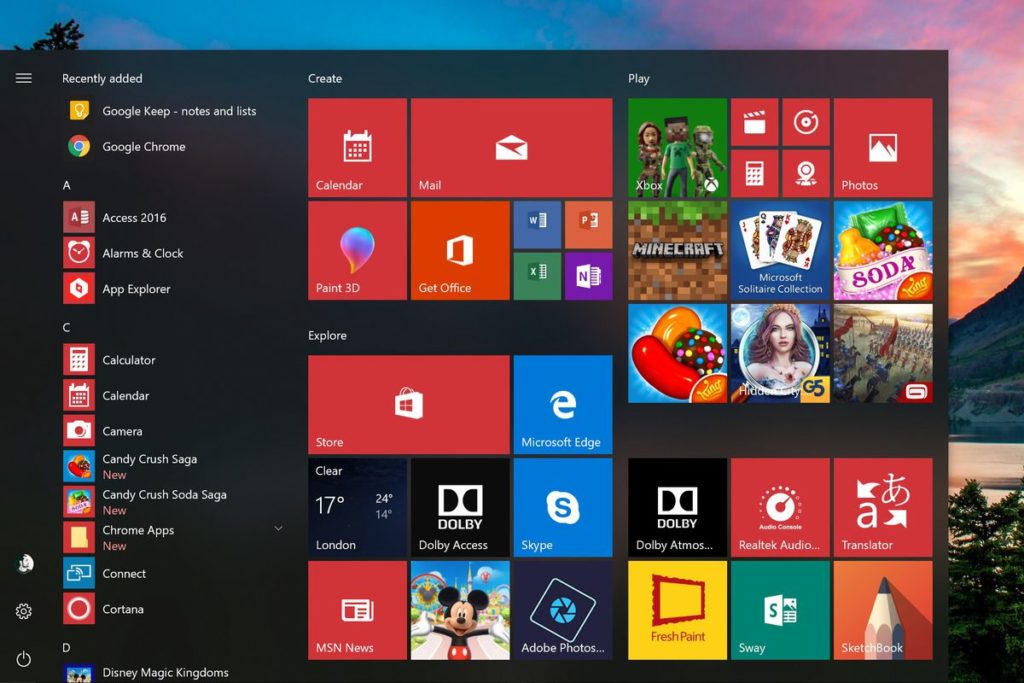
In the image below, you will see the pre-installed apps in the menu for Windows 10

Download Windows 10 Debloater Script
The script we are going to use to remove the bloatware automatically is called Windows 10 Debloater by Sycnex. The files are available for download from Github for free. If you have any issues downloading, you can check out the video below that walks you through the download.
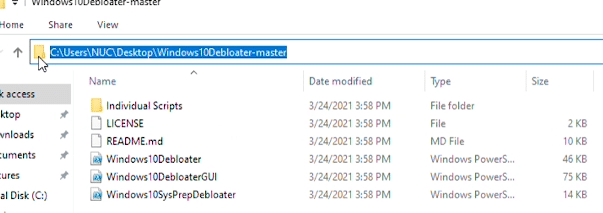
Once you have the files downloaded, extract the files to an easy-to-find location on your PC. I will use the Desktop as the location in this example.
- Related: DirectX Download for Windows 10
Run Script to Remove Bloatware From Windows 10
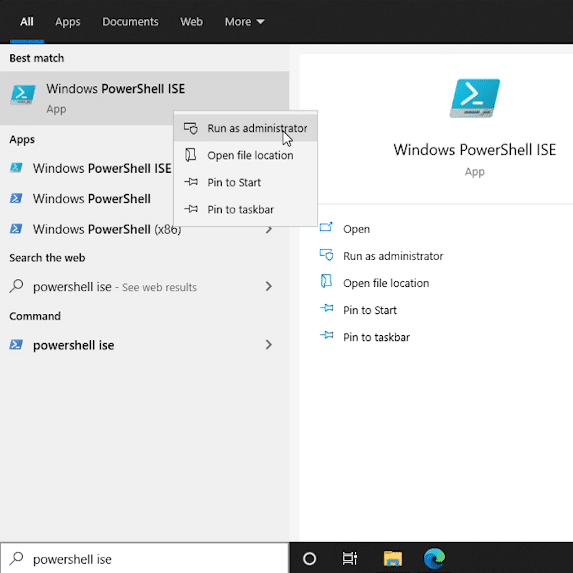
We will begin by opening up Windows PowerShell. To launch, open the start menu, click in the search field, and type “Powershell ISE,” then select the first item in the list. Next, right-click on it, and run it as administrator.

In Windows PowerShell, we want to navigate to the correct directory. The easiest way to switch folders is to open up Windows File Explorer and navigate to the file folder. In the address bar at the top, you can highlight and select the path, then copy it.

Now you can switch back to Windows Powershell and change the directory by entering in the below.
cd <INSERT YOU PATH HERE>

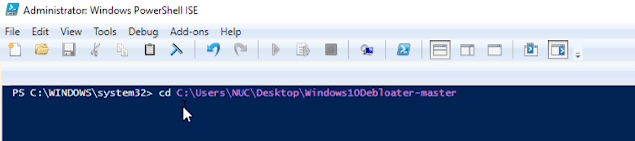
Once you past the path, you can then hit enter.
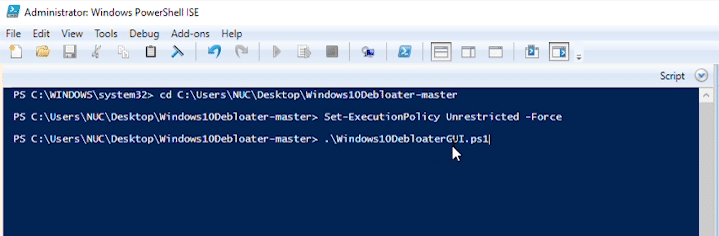
Now, we want to allow access to execute file in this folder. Enter the below command to do this.
Set-ExecutionPolicy Unrestricted -Force
We are now ready to run the script. We can execute the script by typing in the below.
.\Windows10DebloaterGUI.ps1

You may get a security warning that pops up. Select the options to ‘Run once’.


It will take few seconds to load, and then you will see an interface with many options.

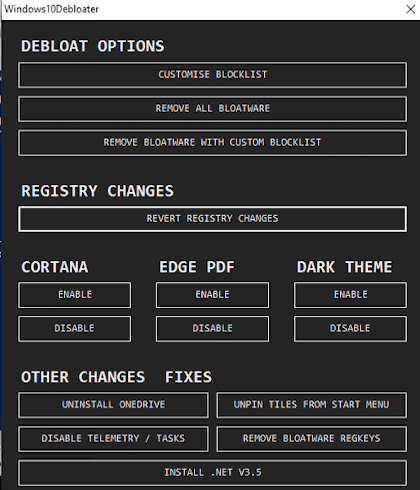
The interface is simple. With just a few clicks, many changes in Windows 10 will execute. There are pre-selected options to run automatically, or you can get specific and select only the ones you want to remove.
The first option at the top is to make changes in the registry. I don’t recommend this option unless you specifically know what you want to change. Modifications done in this area can be hard to revert if you make a mistake. Only proceed with this area if you are comfortable.


Under ‘Debloat Options’, you also have and the ‘Remove all Bloatware’. This is the easiest to use, and will remove most of the annoying stuff found in your Start menu. ‘Remove Bloatware with Custom Blocklist’ allows you to get a little most specific with the options of removal.


With ‘Registry Changes’, you have the option to revert anything you have just done. I haven’t always had success with this. I think it varies on the the version of Windows 10 you are using and they type of updates done.


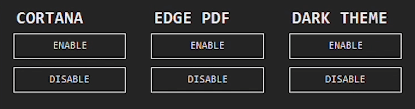
Next, we have some commonly used options. Here we have the choice to enable or disable Cortana, Microsoft Edge, and Windows Dark Theme. You can switch back and forth whenever you want or disable it permanently.

Last we have ‘Other Changes Fixes’. You can uninstall One Drive with a click, but I have noticed that the One Drive service comes back when you perform Windows 10 updates. ‘Unpin Tiles From Start Menu’ will just remove bloatware icons in the Start menu. The script does not uninstall the software, it just removes clutter in the Start menu. ‘Remove Bloatware RegKeys’ will remove the commands from Windows 10 registry. ‘Install .Net v3.5’ will go online and download this version of the framework for your computer.


Overall I have found this script very useful because I reinstall Windows 10 frequently. This script one of my primary tools used because it saves me a lot of time removing the clutter of the Operating System. I recommend it to users that want a clean, simple and straightforward interface.
VIDEO: How to Remove Bloatware From Windows 10