


This post will show you how to disable Cortana permanently on a Windows 10 PC. The annoying Cortana has frustrated users by popping up and running on your Windows 10 even when turned off. It can happen because of Windows updates, uninstalling applications, or making changes to the OS.
There are two methods to follow, and it depends on which version of Windows 10 you are using. The first method uses Regedit and is for Windows 10 Home Edition. The second use group policy editor and is for Windows 10 Professional edition and Windows Enterprise edition.
To find which version of Windows 10 you are using, click on the Start button then Settings. In the Settings windows, select System and then About. Here, you can see the exact version you are running.

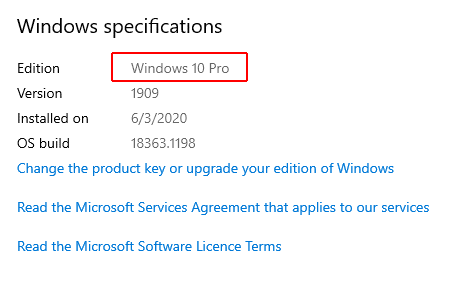
Based on this, you can continue to method 1 Windows Home Edition, or method 2 Windows Professional & Windows Enterprise. If you would like a visual guide to walk you through the steps we have created this video.
Table of Contents
Method 1 – Windows 10 Home Edition
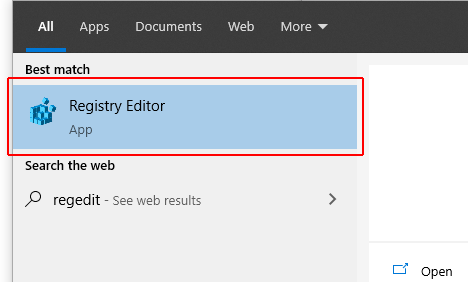
For Windows 10 Home addition, we begin by clicking on ‘Start’ and type in ‘regedit‘ and click on the icon for the application that appears at the top.
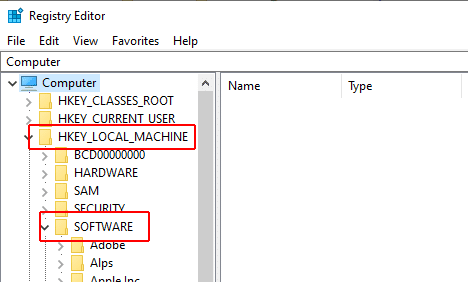
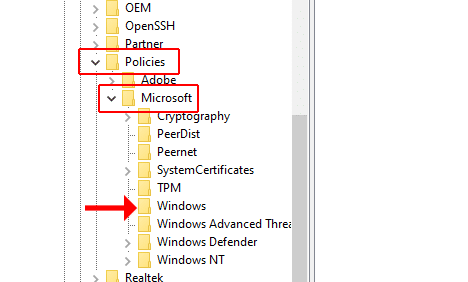
Inside the Registry Editor, click and expand ‘HKEY LOCAL MACHINE.’
and then expand ‘SOFTWARE.’
Now look for ‘Policies,’ click and expand it, and do the same for ‘Microsoft.’
Below look for ‘Windows‘,
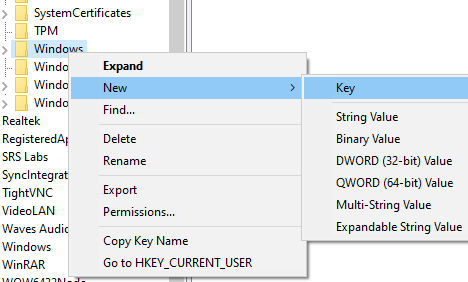
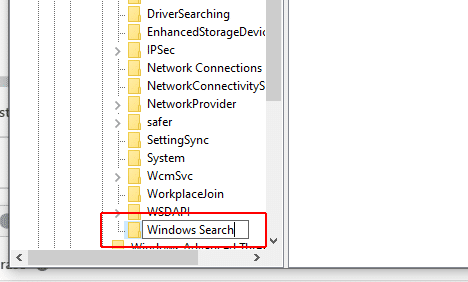
Right-click on it and create a New > Key. We will label this new key ‘Windows Search’.
On the right side of the window, right-click and make a New >DWORD (32-bit) Value entry.
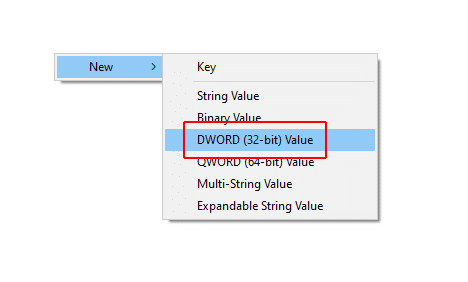
We’re going to call it ‘AllowCortana‘ and hit the enter key.
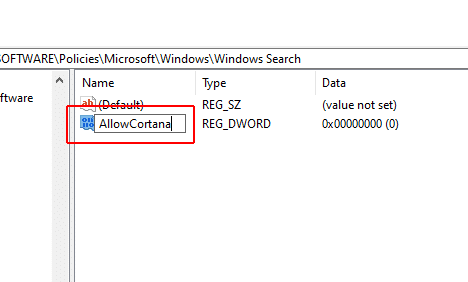
Now right-click on it and select ‘Modify…‘ We want to make sure the Value Data is set to 0.

After these changes, you can close out of the Registry Editor and restart your computer. Once your Windows system has rebooted, the changes will take effect, and you should no longer be prompted or see Cortana run.
Method 2 – Windows 10 Professional & Windows 10 Enterprise
Before we begin with method 2, if you would like a visual guide to walk you through the steps, we have created this video. Method 2 is for Windows 10 Professional and Windows 10 Enterprise.
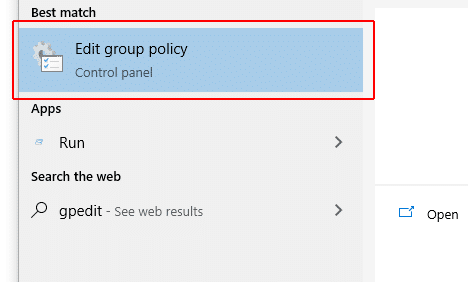
We begin by going to Start and typing in ‘group policy editor’ or ‘gpedit.’
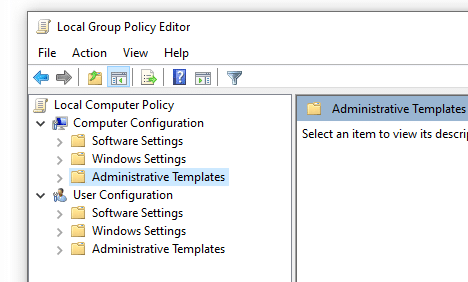
Inside the editor, look under Local Computer Policy for Computer Configuration and then Administrative Templates.
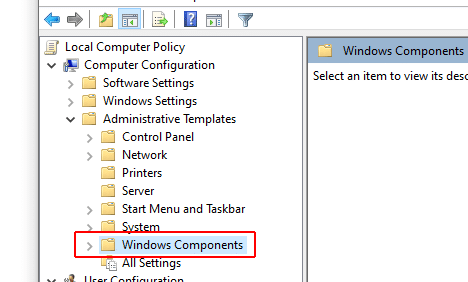
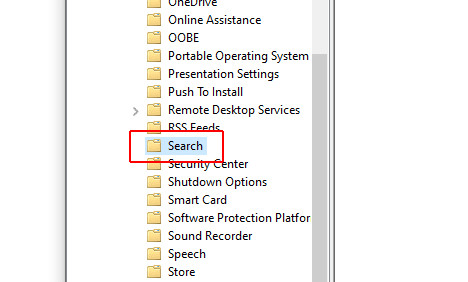
Then expand ‘Administrative Templates‘ and then expand ‘Windows Components.‘
Scroll down to ‘Search,’
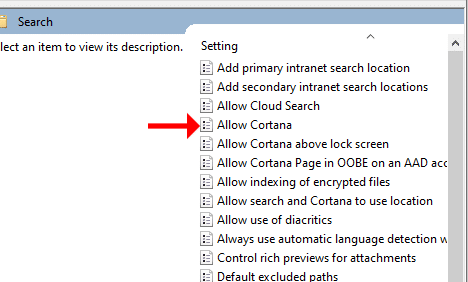
On the Window’s right side, look for the setting called ‘Allow Cortana.’
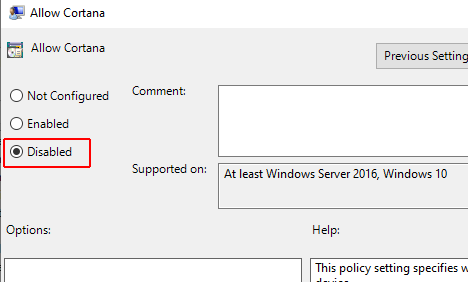
double click to open it, then select to Disable, and click on ‘Apply‘ and ‘Okay.’
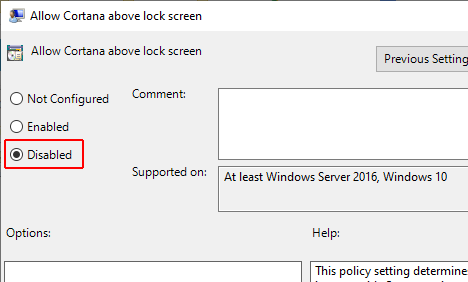
Next, on the Window’s right side, look for the setting called ‘Allow Cortana above lock screen.’
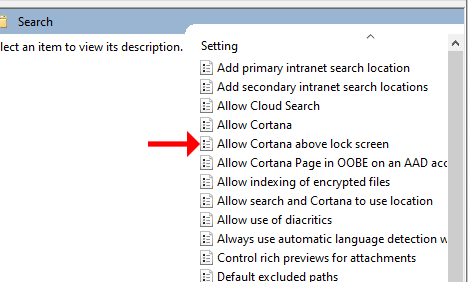
Double click to open it, then select to Disable, and click on ‘Apply‘ and ‘Okay.’
After these changes, you can close out of the Registry Editor and restart your computer. Once your Windows system has rebooted, the changes will take effect, and you should no longer be prompted by Cortana or see Cortana run.
VISUAL STEP BY STEP GUIDE – HOW TO PERMANENTLY DISABLE CORTANA IN WINDOWS 10
