Zorin OS was first released in 2008, and it was designed with the intention of making Linux more accessible for people who are used to Windows and macOS. Zorin OS is also compatible with Windows software, which means that you can run Windows programs on it without any issues.
Table of Contents
Install Zorin OS on VirtualBox | Step by Step Guide
This tutorial will show you how to install Zorin OS on VirtualBox.
Minimum Requirements
RAM: 2GB (4GB is recommended)
20GB of free disk space (40GB is recommended)
CPU: 2 cores
ZorinOS ISO
VirtualBox and extension pack
1. Preparing the Virtual Machine
Step 1: Open zorin.com and head directly to Zorin OS download page. You will see multiple options (paid and unpaid) on download page, we will go for Zorin OS 16 core and download the ISO file. The download size is 2.7GB.
Step 2: Once downloaded, download and install Virtualbox on your Windows PC. Here is a guide that you can use: How To Install VirtualBox 6.1 On Windows 10.
Step 3: Install the Virtualbox Extension Package. Use this guide: How To Install VirtualBox 6.1 On Windows 10.
Step 4: Open Virtualbox and click add a new virtual machine. Set the following parameters and click Next.
Name: ZorinOS
Type: Linux
Version: Other Linux (64 bit)
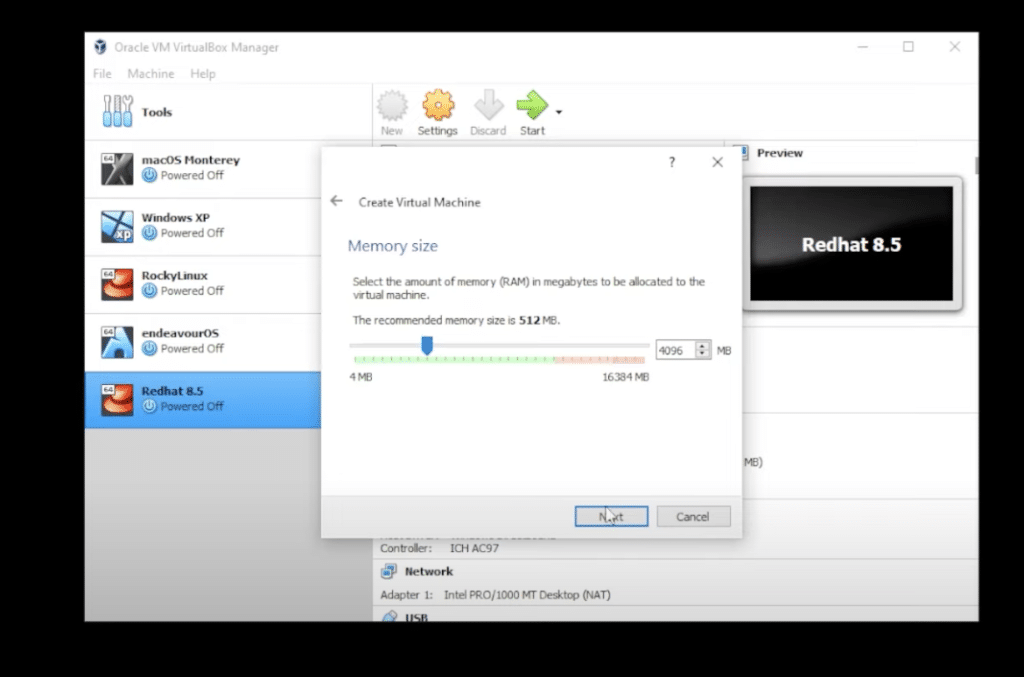
Step 5: In the memory size, select 4GB and click Next.

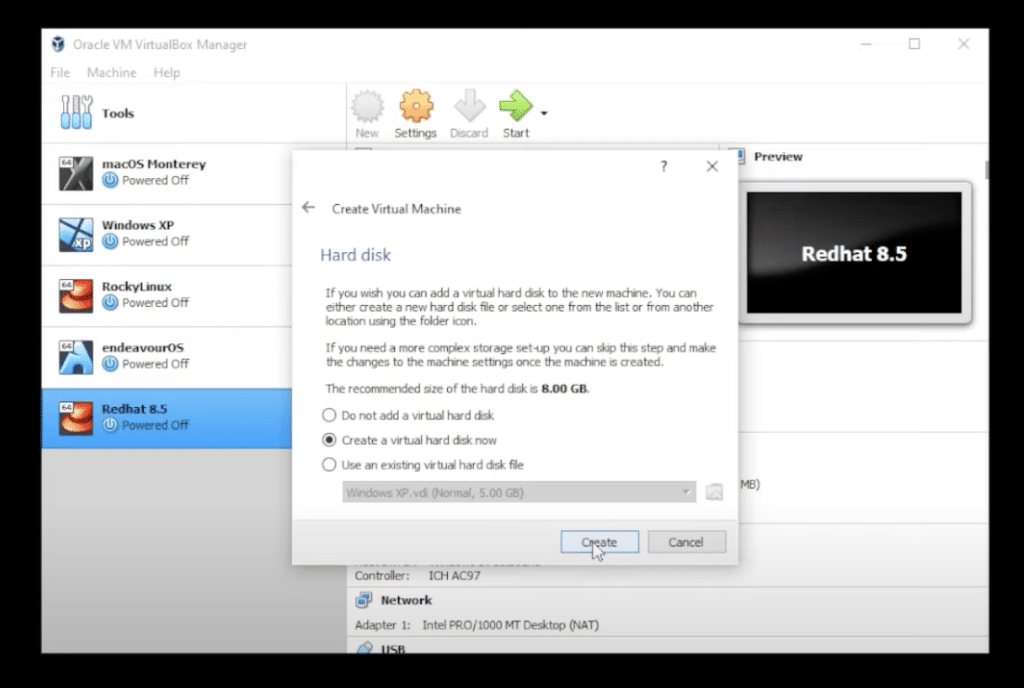
Step 6: Select Create a Virtual Hark Disk File and click Create.

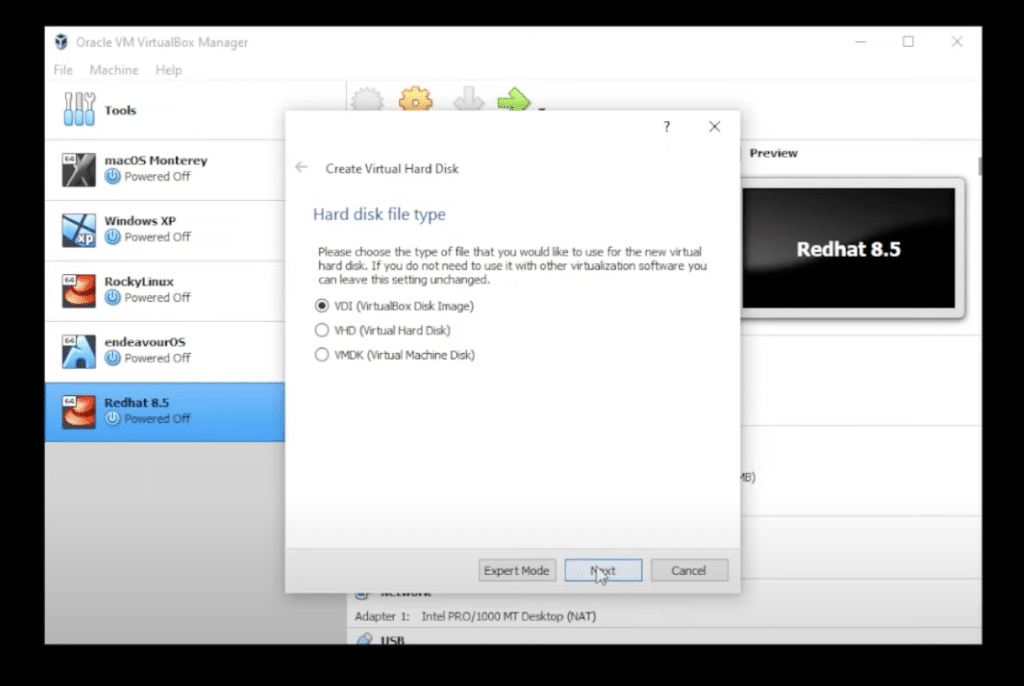
Step 7: Select VDI (Virtual Disk Image) and click Next.

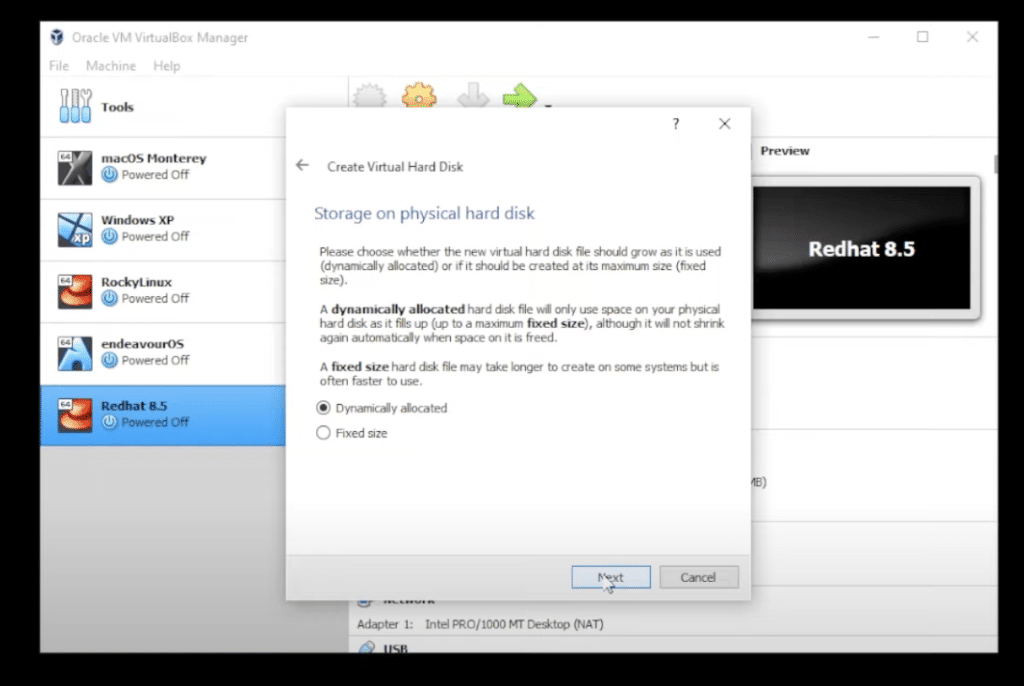
Step 8: Select dynamically allocated and click Next.
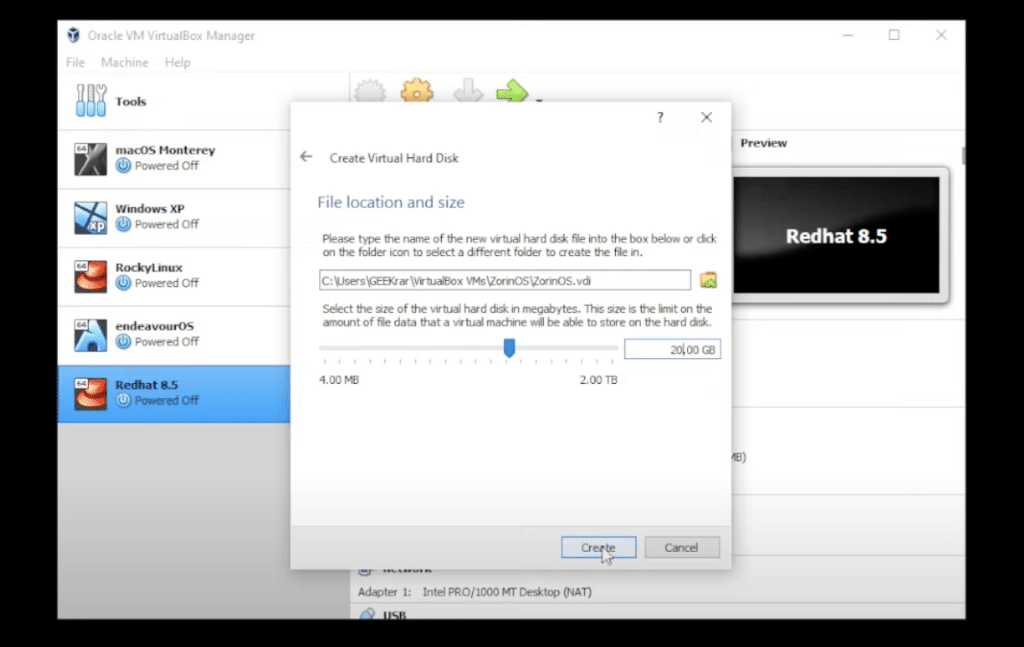
Step 9: For the hard disk space, select 20GB, and then click on Create.

2. Customize the Virtual Machine
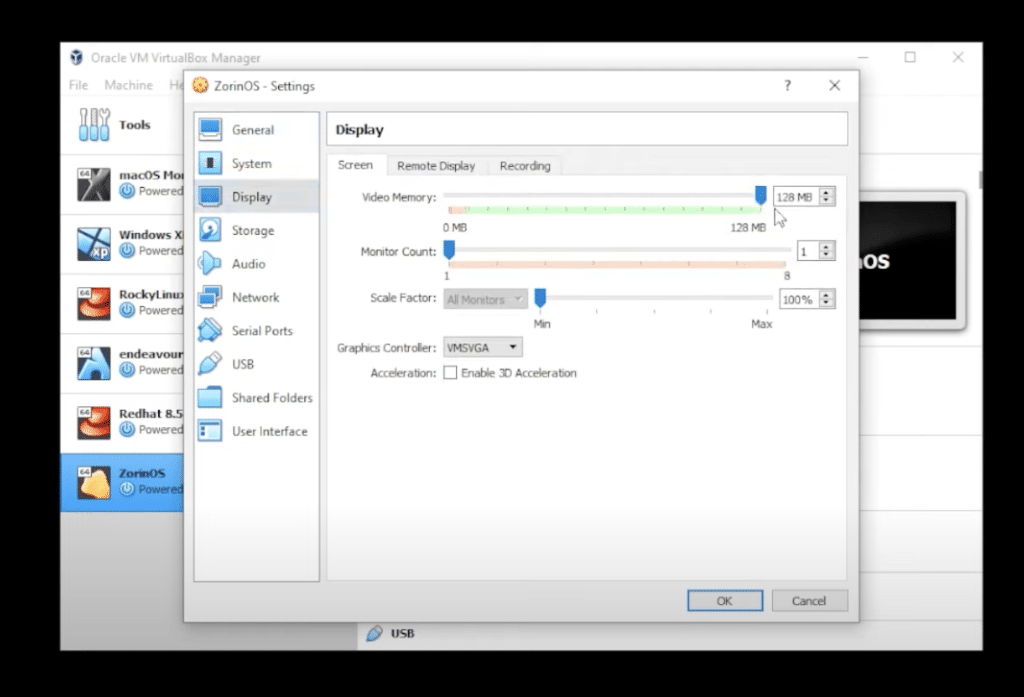
Step 10: Click on the settings button and come under display. Setup the display for 128GB.

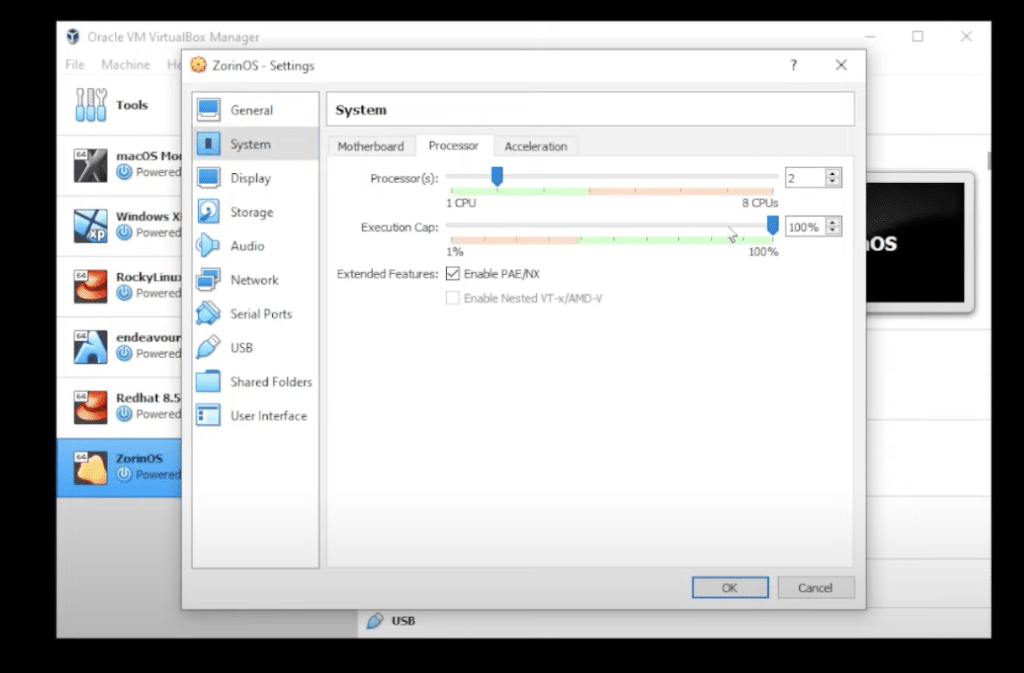
Step 11: Click on the System button, go to the processors tab and select 2CPU.

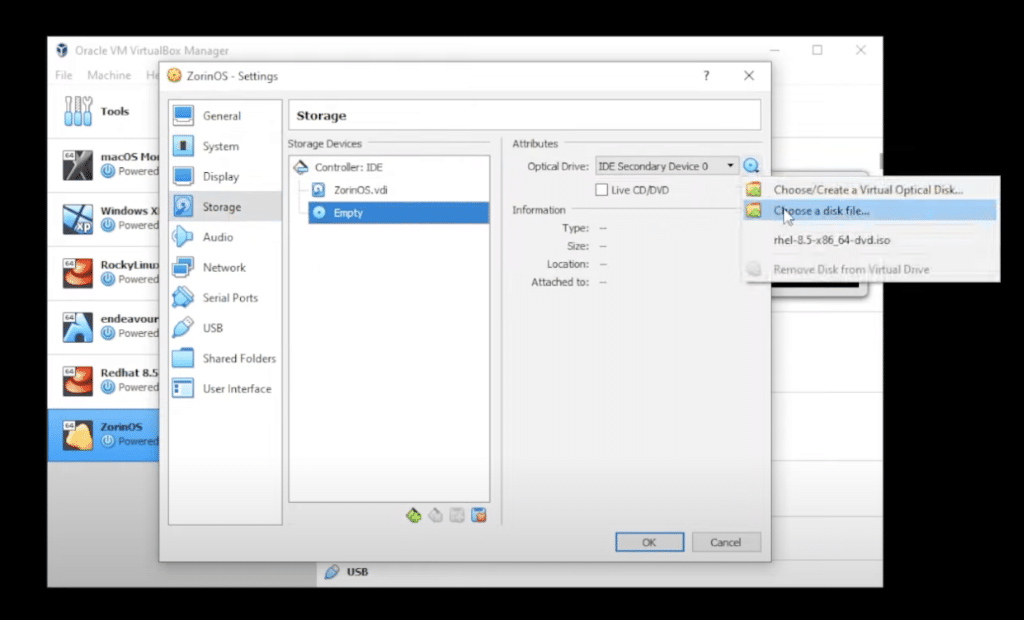
Step 12: Click on Storage and inside Storage, you want to select the empty disk, then click on the little disk on the right-hand side. Choose a disk file and this is where you need to go to your Downloads folder, where you’ve downloaded the ISO image file, select the ISO image file and then click on open.

3. Starting the Virtual Machine
Step 13: Go to VirtualBox Manager and make sure that ZorinOS is selected and then click on the Start button.

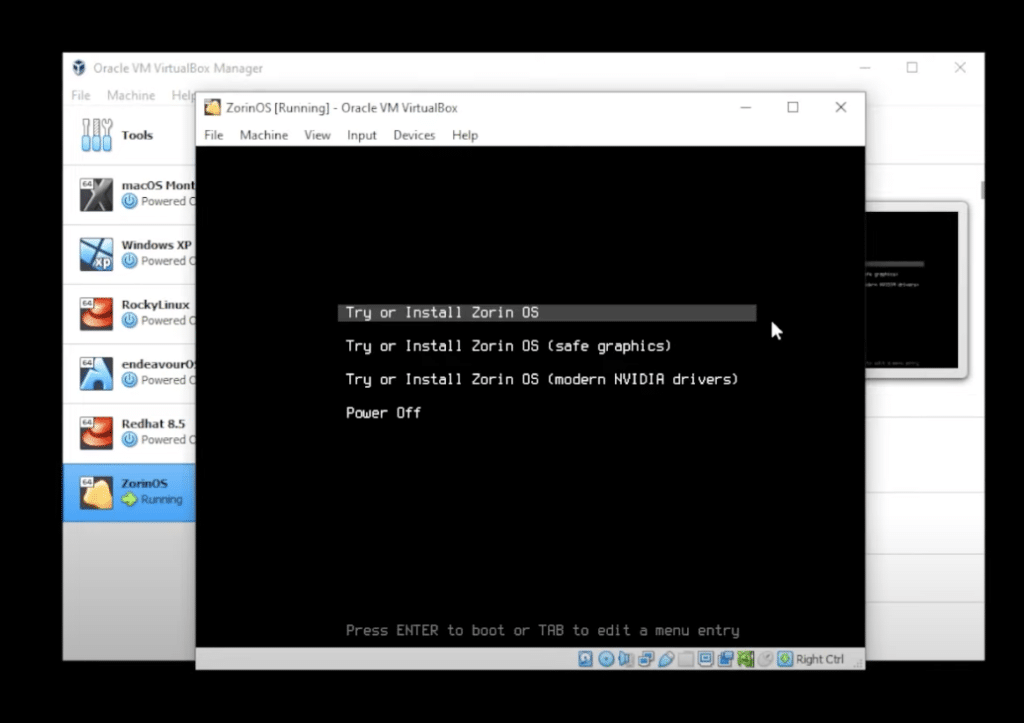
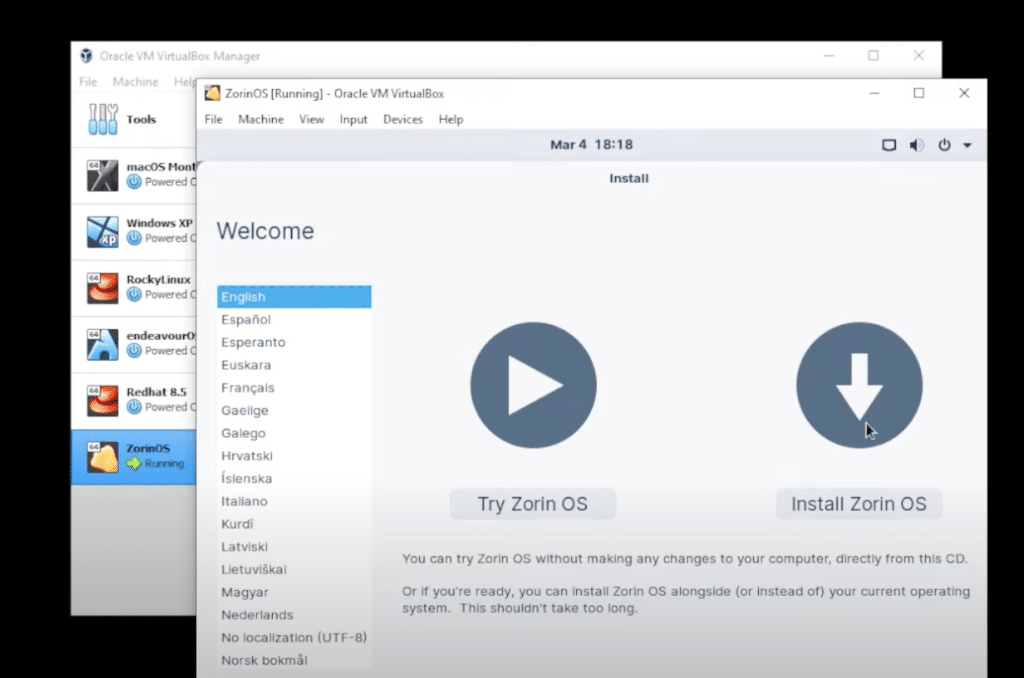
Step 14: So now we have the installation wizard. Select the language of your choice and click on install ZorinOS.

Srep 15: For keyboard we will be leaving everything as default and click on continue.
Step 16: Leave the update and software page as default and click on continue.
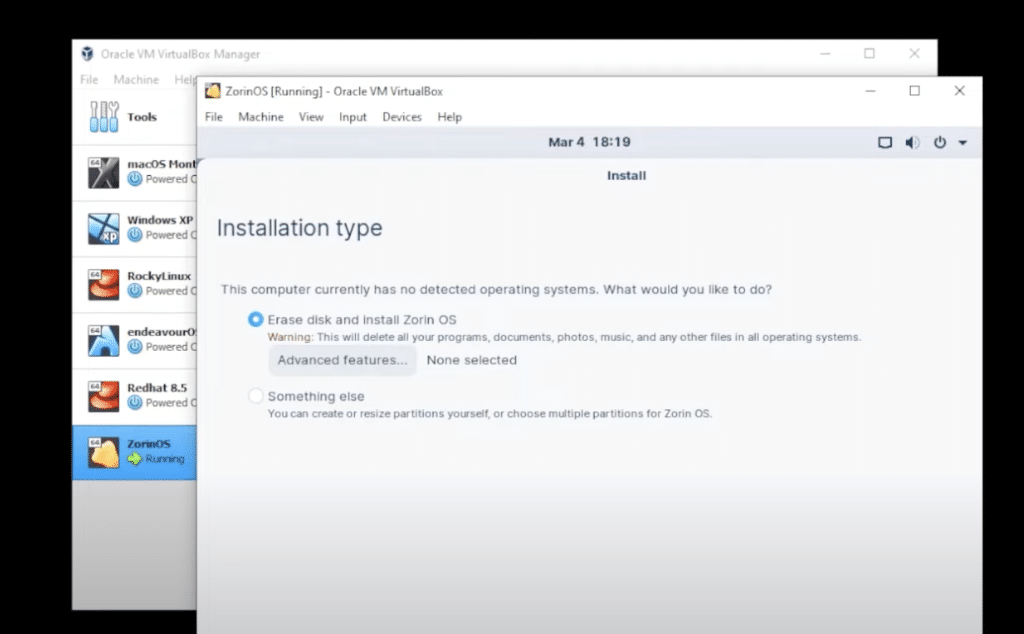
Step 17: Next you will get the installation type. Leave this as default as well and click on continue.

Step 18: Slect your location and click on continue.


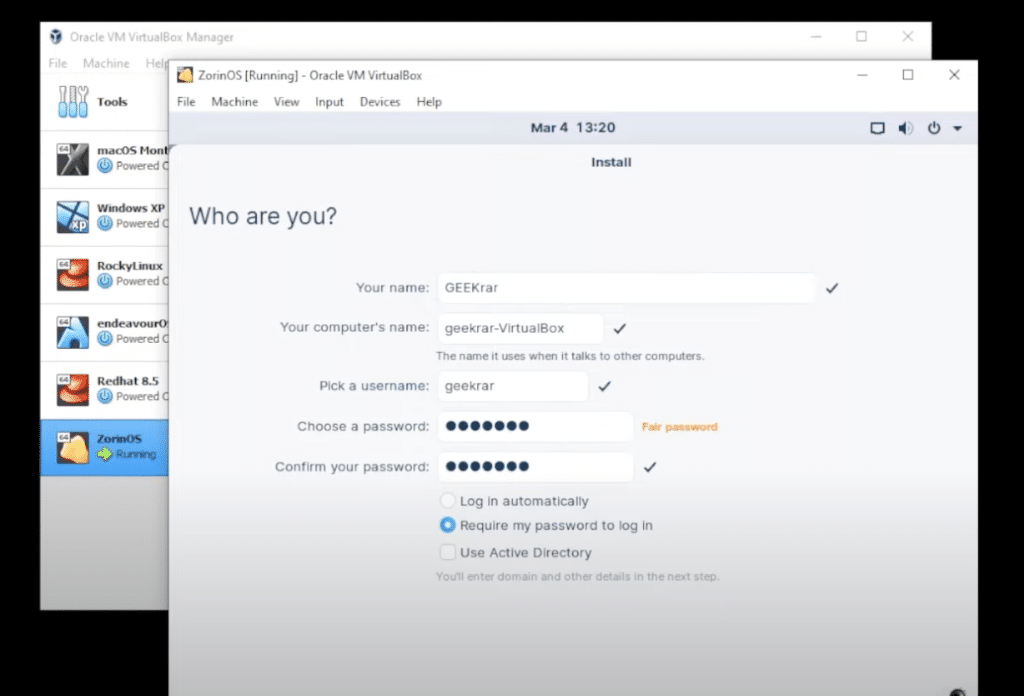
Step 19: Now you will have to enter your name. It will automatically fill in your computer name and will give you the user name. All you have to do is choose your password and click on continue.

Now the system will copy all the files and it will take few minutes for this to happen.
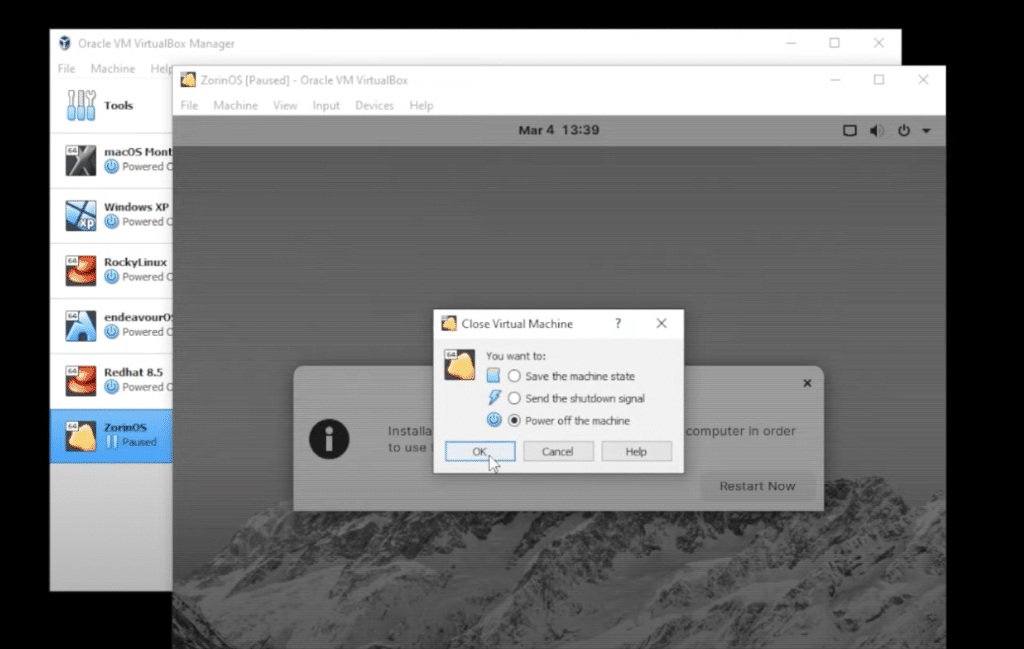
Step 20: The installation is now complete. We will now shutdown the virtual machine. Go up to the file menu and go down to the close option and select power off machine.

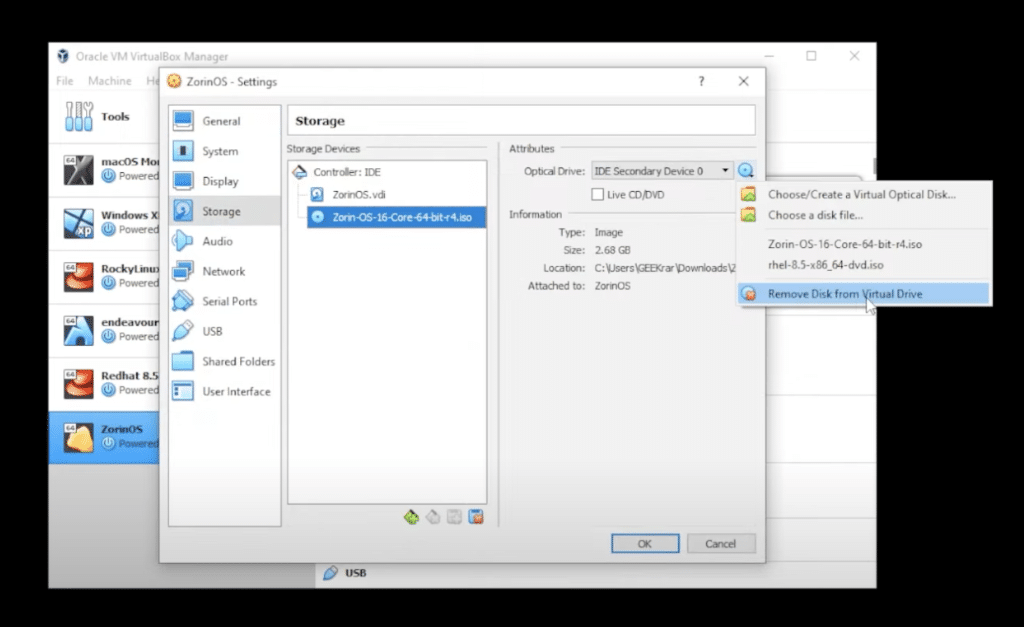
Step 21: Now select ZorinOS and click on settings and go to the storage and select ISO file and remove it and click on ok.

Step 22: Now select ZorinOS and start the virtual machine. You will get the login screen and enter your password.
Congratulations. You have successfully installed ZoeinOS in VirtualBox on Windows 10 PC.
Conclusion
You make some tweaks according to your own requirements. It suggests to install guest edition for virtual bo which is a great idea, so I went ahead and downloaded it.
So ZorinOS has been installed inside VirtualBox on a Windows 10 PC. I hope you found this article useful.
You can watch a detailed video tutorial below –