


Using VirtualBox in Windows is an extremely useful tool. Install VirtualBox in Windows a straightforward process, and in this post, we will walk through the steps. If you like having the option of running a completely separate operating system within Windows and switching back and forth, then look no further. As long as you have the ISO image file, then the option of what you can concurrently run is limitless. For example, once VirtualBox is installed on Windows, you can follow this Guide on installing Ubuntu in VirtualBox. Before we begin, you want to ensure that the PC you choose to use meets the minimum requirements. To see those, jump to it here.
Table of Contents
What is VirtualBox?
Similarly to VMware, Virtualbox is a hosted hypervisor for virtualization. This means you can run a completely alternate operating system within the same pc without a reboot, dual-booting, or logout. The program is free and open-source and maintained by Oracle and a community of users. Though this article will show you how to install VirtualBox on Windows 10, it can also be installed on Linux, Solaris, macOS, and older Windows versions. Many other unofficial ported versions also exist that can be explored as well.
This Guide is to install the most current version, as of September 2020, VirtualBox 6.1.14 on Windows 10.
System Requirements
- Processor: Reasonably powerful x86 hardware. Any recent Intel or AMD processor should do.
- Memory: Depending on the operating systems, you will need at least 512 MB of RAM. We highly recommend at least 2GB.
- Hard Disk: VirtualBox is super efficient and only requires 30MB to install, but images of operating systems and require files can ballon significantly. We recommend a minimum of 10GB hard disk space.
- Host OS: Currently, the official supported versions are Windows, many Linux distributions, Mac OS X, Solaris, and OpenSolaris.
How to Install VirtualBox on Windows 10
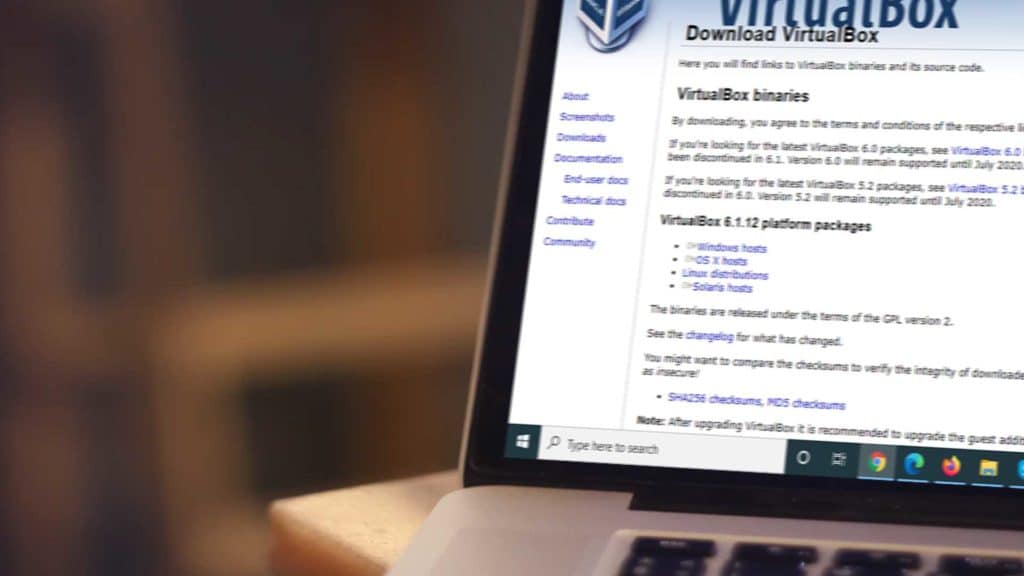
Once at your desktop, open your web browser and head over to the VirtualBox website and download it. Then when the download is complete, open the file, and the installation wizard will begin.
The first window is a welcome screen to introduce you to the installation; Click’ Next’.

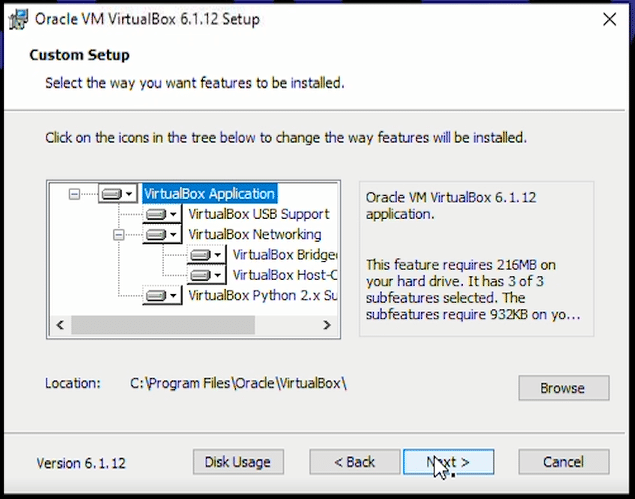
After, we will see the Custom Setup choices to select the additional support features needed. By default, they are all selected, and we will keep it this way. Click ‘Next’

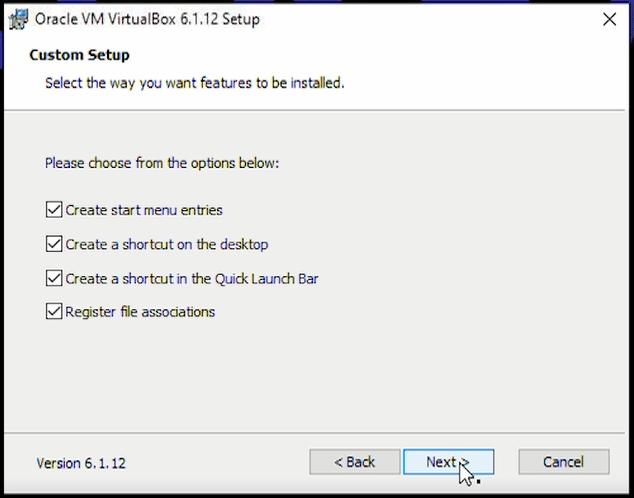
The next screen will allow us to add short cuts to our system and register file associations. Again, we will keep the default settings and click ‘Next’.

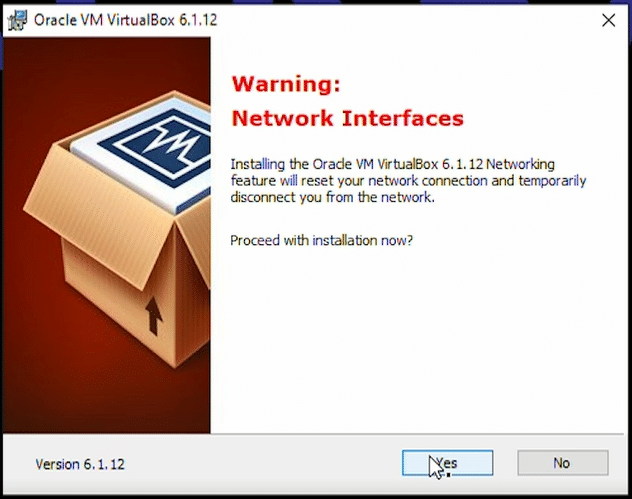
We will be prompted with a warning about ‘Network Interfaces’. This lets you know that your network connection many drop serval times during the installation as it incorporates the devices with the virtual machine. Click ‘Yes’

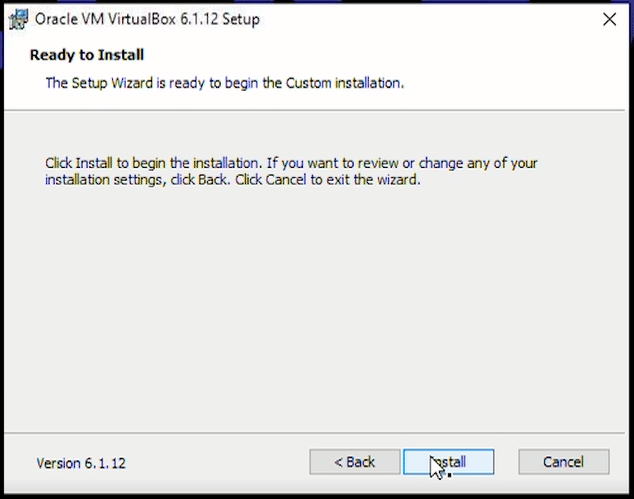
Next, the wizard has all the information it needs to install and is ready to begin. Click on ‘Install’ to start.

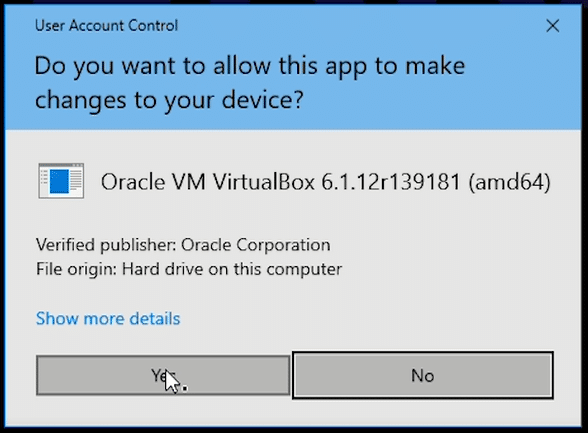
Depending on your Windows 10 system’s permissions, you may be prompted to allow system access to the VirtualBox app. It is safe to click ‘Yes’ and continue.

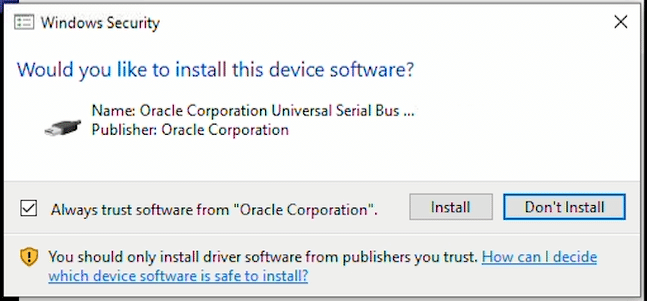
Midway through the installation, you will be asked to install device software for Oracle Corp Universal Serial Bus. We’ll need this, so click on ‘Install’ and allow it to proceed.

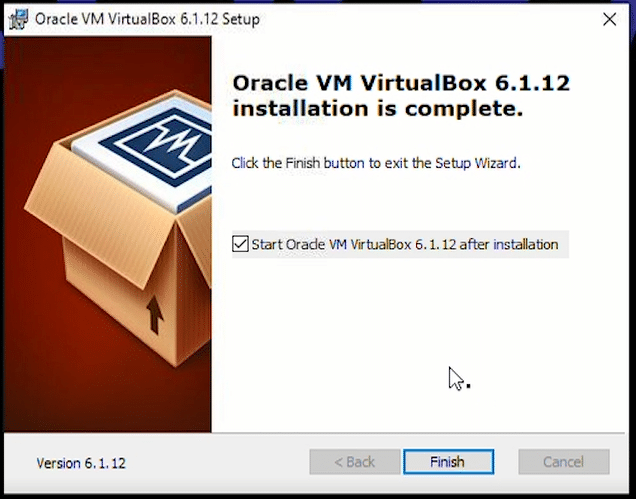
After a few minutes of the installation, it will be completed, and you can leave ‘Start Oracle VM VirtualBox 6.1.12 after installation’ then click on ‘Finish’. This will start the program immediately after closing the window.
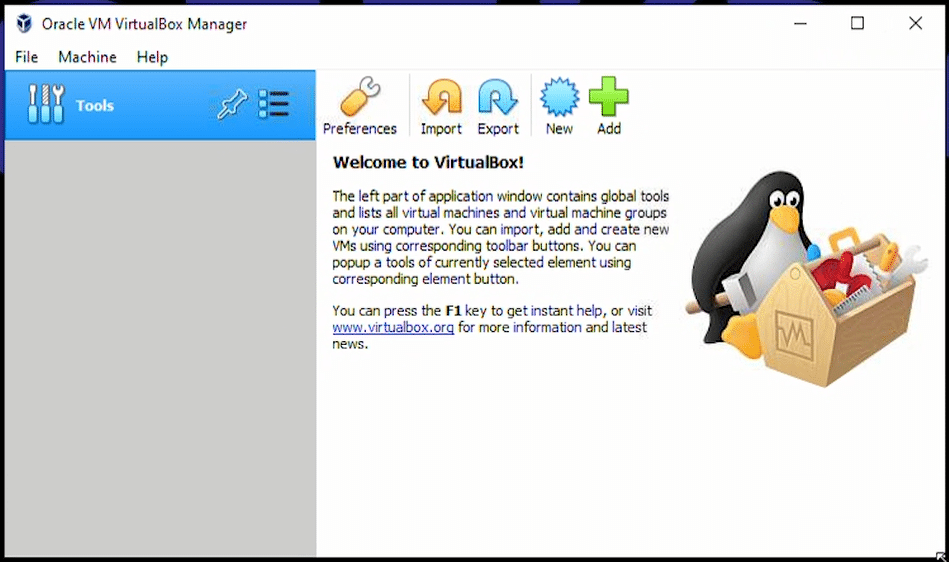
You will now see the VirtualBox application loaded. From here, you can modify the preferences to the system, change settings for various OS’s and start installing a virtually run operating system.

If you are looking to install Ubuntu on VirtualBox, click here for the tutorial.
For a visually guided walkthrough of the installation, we have created a YouTube video tutorial. See below to watch the install.
