Kali Linux is a Debian-based distribution that was initially designed with tools for computer security professionals in mind. It includes numerous updated packages, including new tools and features. The latest operating system, Kali Linux 2022.3, includes many updates to the installed apps, including newer versions of some of the most popular security-related packages and features.
Table of Contents
Install Kali Linux 2022.3 In VirtualBox | Step-by-Step Guide
This article is about downloading and installing Kali Linux in VirtualBox on Windows 11.
Minimum Requirements
RAM: 2GB (4GB is recommended)
20GB of free disk space (40 GB is recommended)
CPU: 2 cores
Kali Linux ISO
VirtualBox and extension pack
1. Preparing the Virtual Machine
Step 1: Open your browser, go to the official website Kali.org, and click on the download link. Different versions are available for download, but we will use the Bare Metal version. Click on the bare metal and download the 64-bit version of the ISO file.
Step 2: Once downloaded, download and install Virtualbox on your Windows PC. Here is a guide that you can use: How To Install VirtualBox 6.1 On Windows 10.
Step 3: Install the Virtualbox Extension Package. Use this guide: How To Install VirtualBox 6.1 On Windows 10.
Step 4: Open Virtualbox and click add a new virtual machine. Set the following parameters and click Next.
Name: Kali Linux 2022.3
Type: Linux
Version: Debian (64-bit)
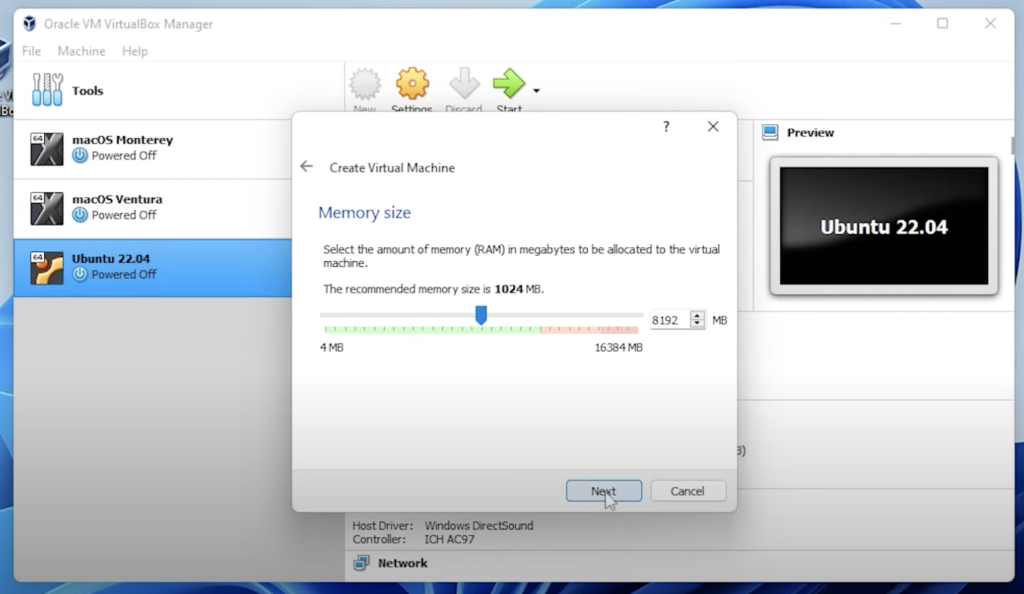
Step 5: In the memory size, select 8GB and click Next.

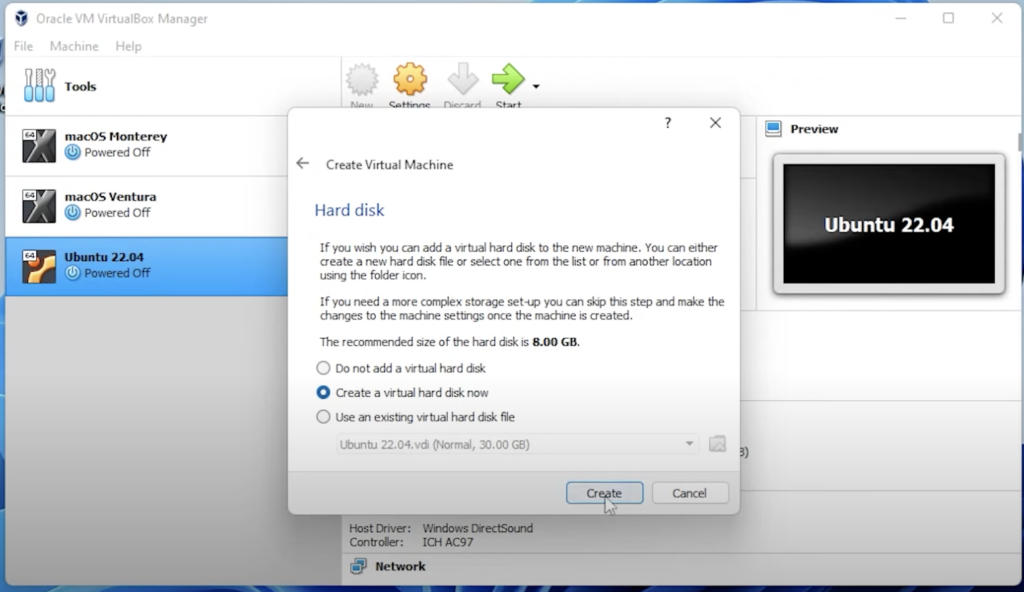
Step 6: Select Create a Virtual Hark Disk File and click Create.

Step 7: Select VDI (Virtual Disk Image) and click Next.

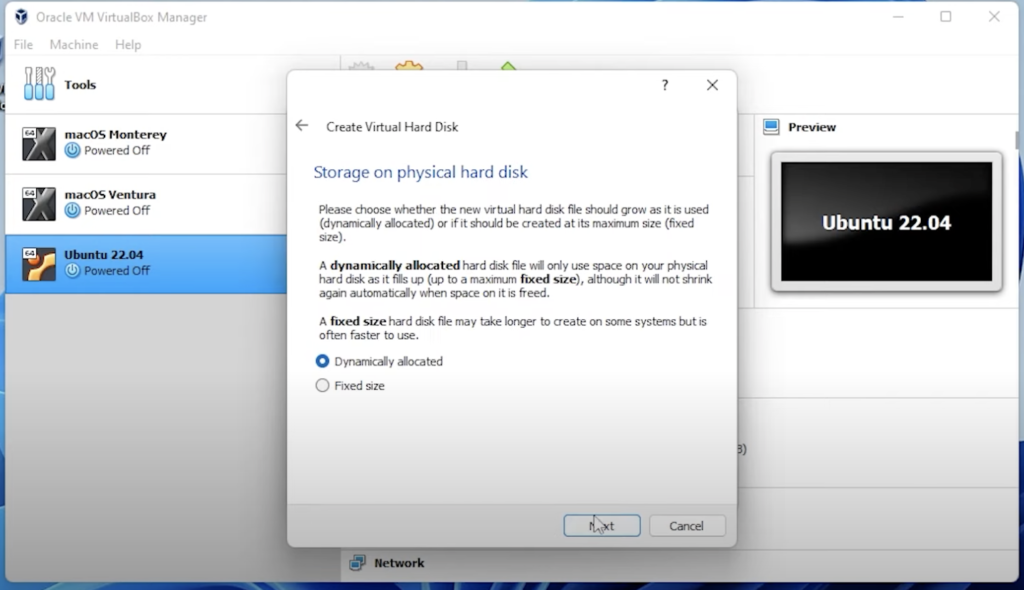
Step 8: Select dynamically allocated and click Next.

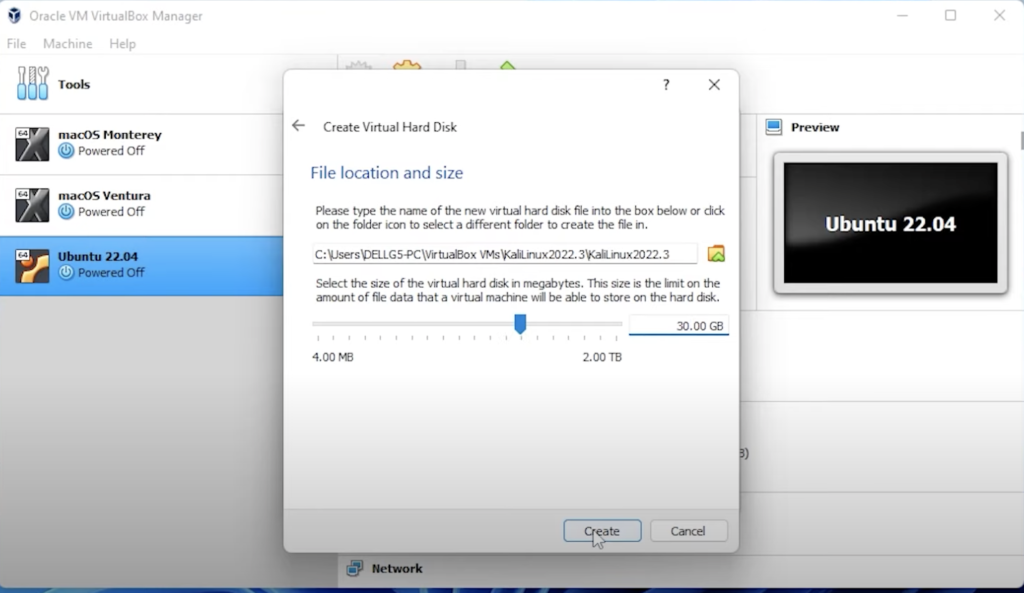
Step 9: For the hard disk space, select 30GB, and then click on Create.

2. Customize the Virtual Machine
Step 10: Click on the settings button, and increase the base memory and processor to 8 GB under the system.
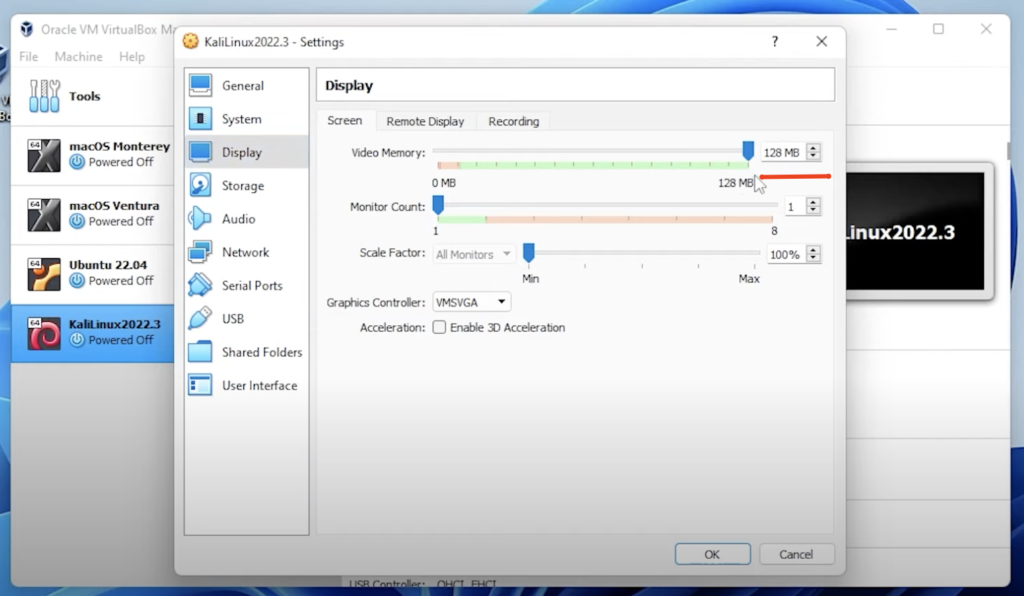
Step 11: Click on display and set up the display for 128 GB.

Step 12: Click on Storage, and inside Storage, you want to select the empty disk, then click on the little disk on the right-hand side. Choose a disk file; this is where you need to go to your Downloads folder, where you’ve downloaded the ISO image file, select the ISO image file, and then click on open.


3. Starting the Virtual Machine
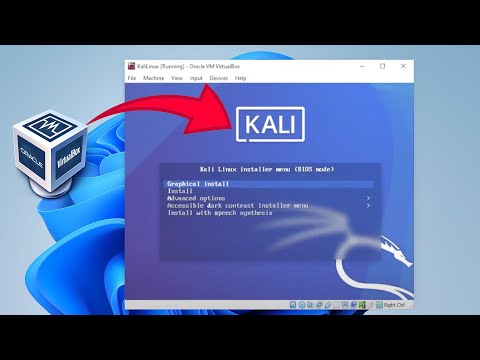
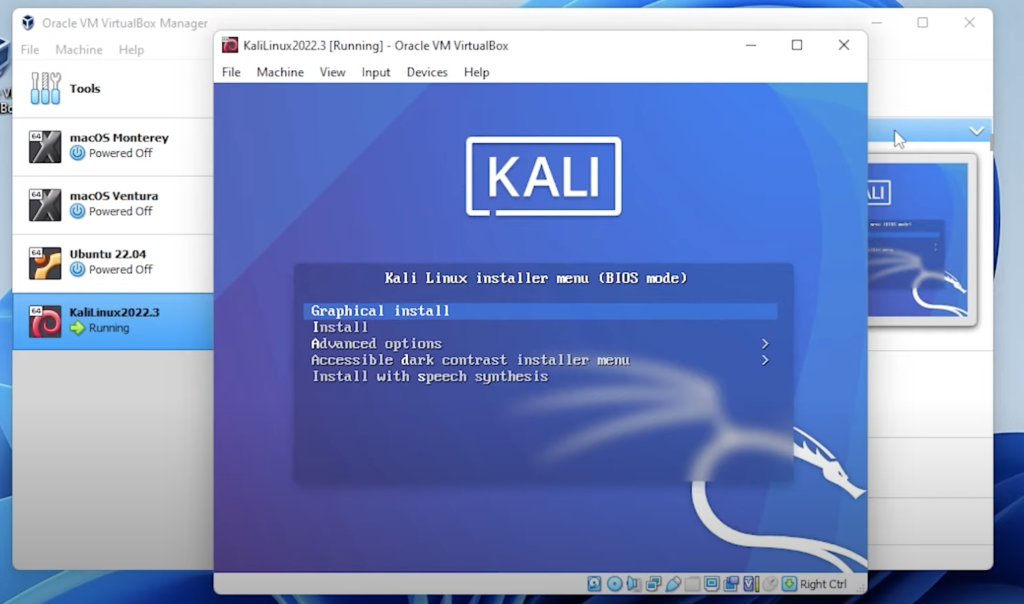
Step 13: Go to VirtualBox Manager, ensure that Kali Linux is selected, and then click on the Start button. Click on the first option, which Graphical install and start the installation process.

Step 14: Select the language of your choice and click on continue.
Step 15: Select the location and click on continue.
Stwp 16: Select the keyboard layout and click on continue.
Step 17: Enter your host name and click on continue. You can keep the host name Kali or change it according to your choice.
Step 18: Leave the domain name blank and click on continue.
Step 19: Enter the username and click on continue. This is the username you will be using to log in to your computer, so choose accordingly.
Step 20: Enter your password and click on continue.
Step 21: Set the clock according to your region and click on continue.
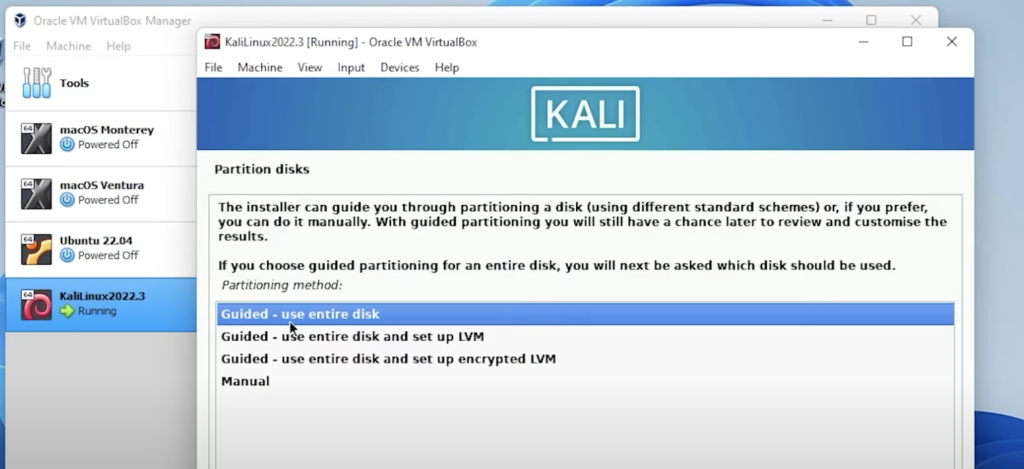
Step 22: For partition disk we’re going to be using the guided – use entire disk and click on continue.

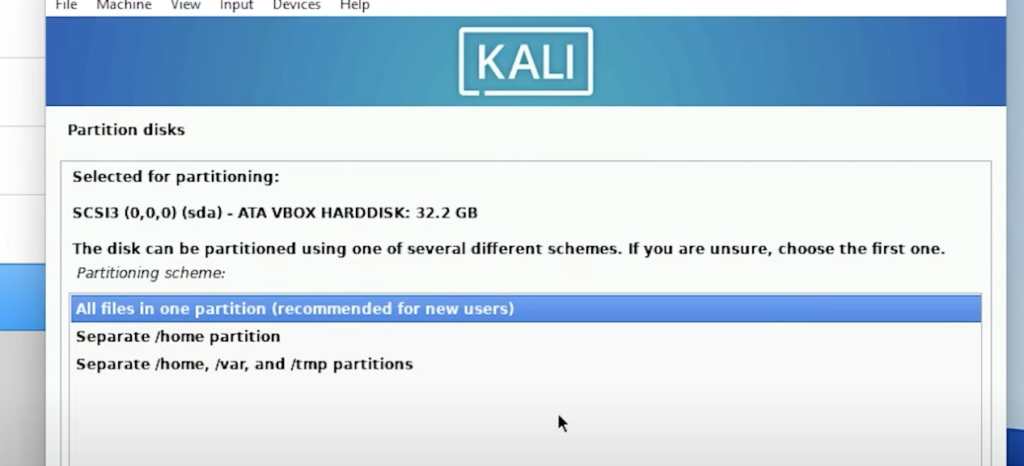
Step 23: Make sure all files in one partition is selected and click on continue.

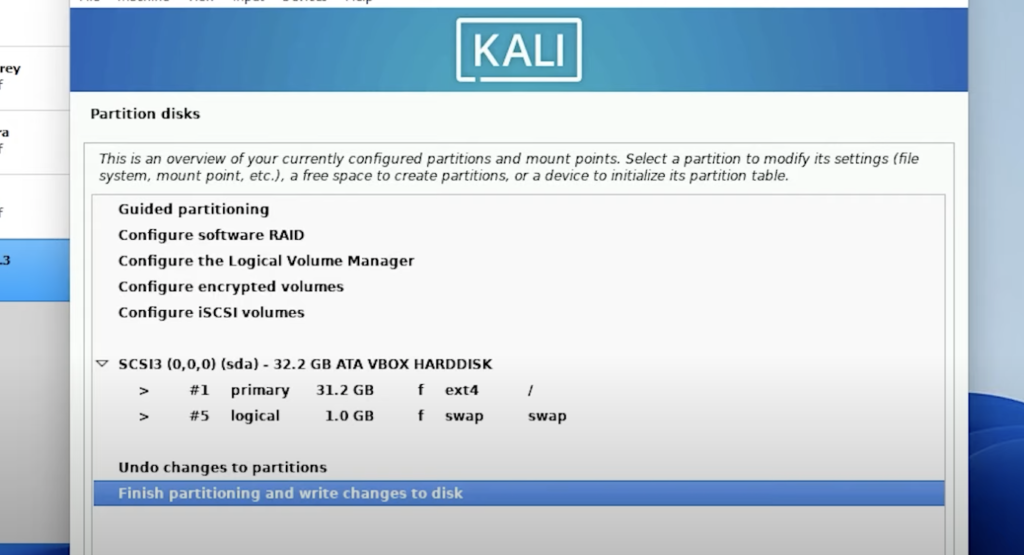
Step 24: Click on the finished partitioning and write disk changes and click on continue.

Step 25: Confirm the changes and click on continue.
Now, it will start the installation process.
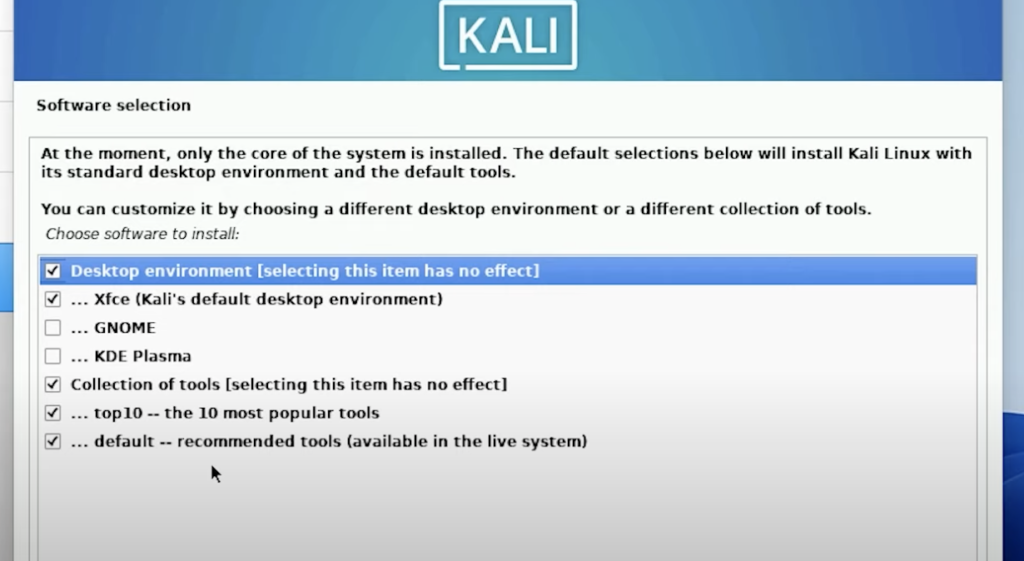
Step 26: For software selection, leave all the option as default and click on continue.

Step 27: In the install GRUB boot loader, selecy yes and click on continue.
Step 28: Select your virtual drive and click on continue.
Step 29: Enter you details and log in to Kali Linux virtual machine.
Congratulations! You’ve just completed the installation of Kali Linux 2022.3 In VirtualBox on Windows 11.
Conclusion
So Kali Linux 2022.3 has been installed inside VirtualBox on a Windows 11 PC. I hope you found this article useful.
You can watch the detailed video tutorial here: