When it comes to installation
With your preparations done
In a worst-case scenario,
For entire disclosure of this video is for educational purposes only.
The pitch:
Step Six: Configure Your PC BIOS Settings
Well done! You have created and safely removed the installer. This part is quite easy. Now you’re ready to boot up but before that, you’ll need to do a few settings into your PC BIOS firmware.
To get into BIOS settings, switch off the macOS virtual machine and restart your computer. When starting up that the logo appears on the screen, press the BIOS key that is Del for Gigabyte – Asus – Evga motherboards.
Once you enter into BIOS, goto Save & Exit tab and selecting the Load Optimized Defaults. This will set the settings to default just like new.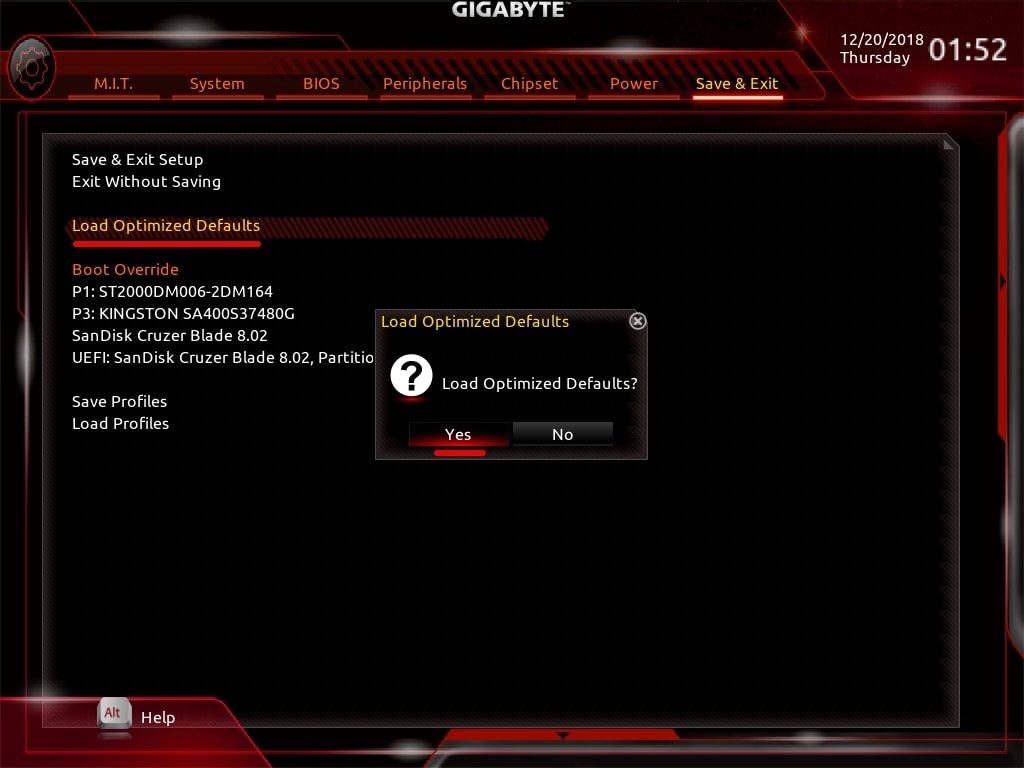
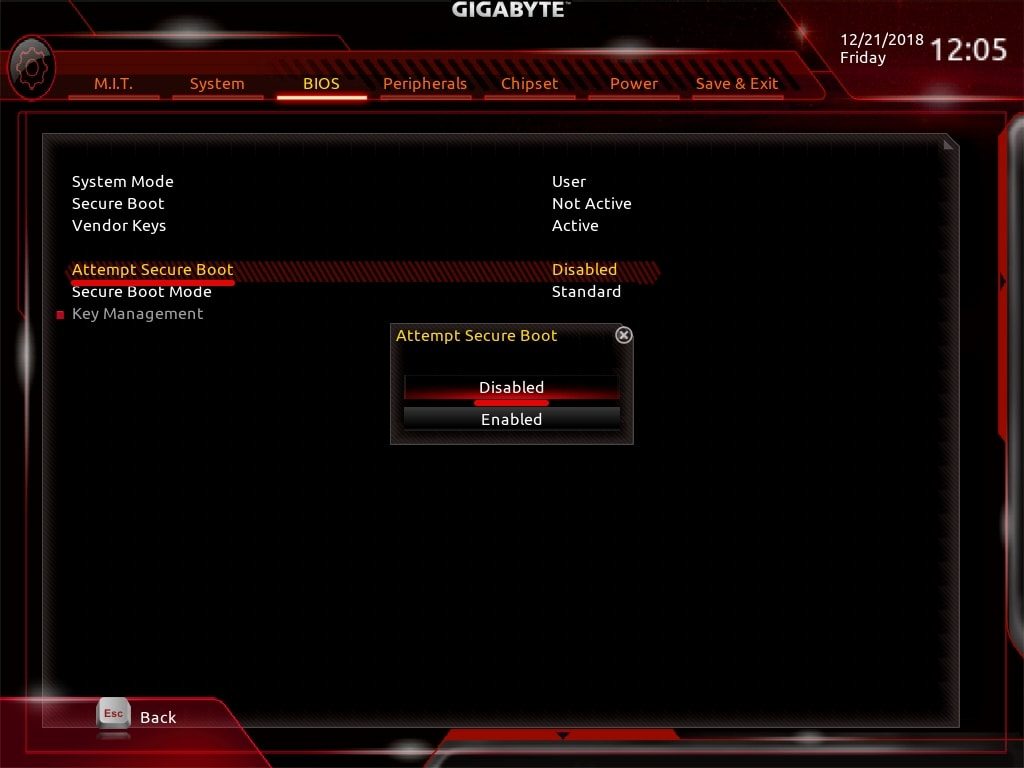
From the menu, this time, choose and Disable Secure boot (Seriously).
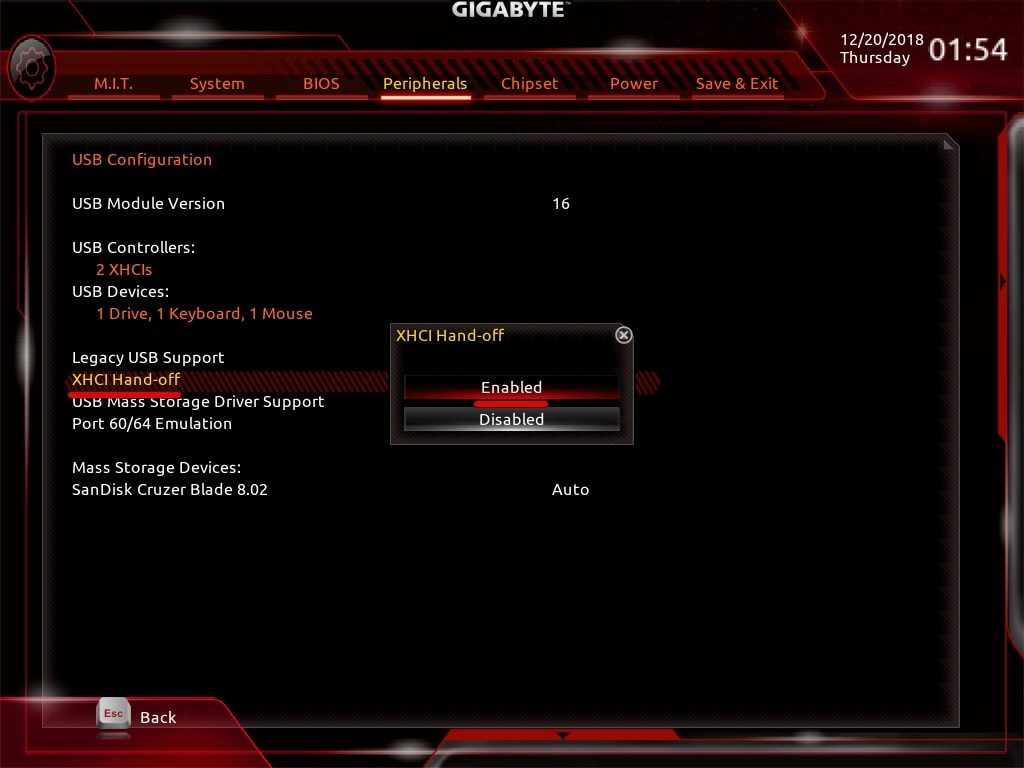
Next up, switch to Peripherals tab and enable XHCI Hand-Off.
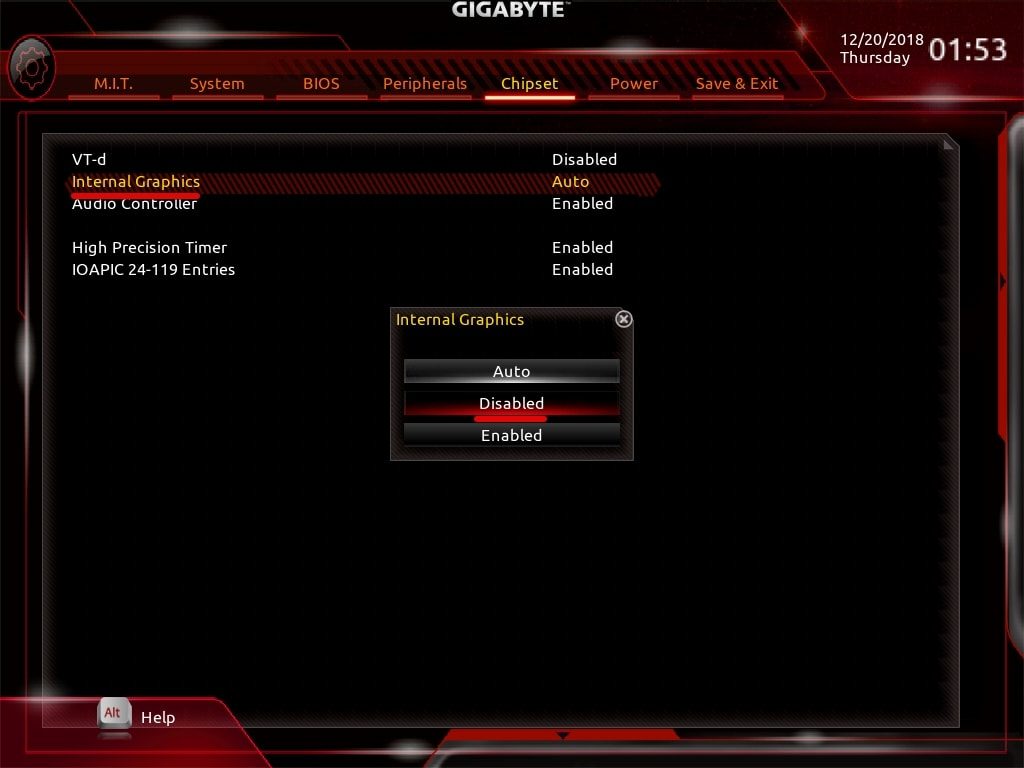
Navigate to the Chipset > VT-d > Set to Disabled.
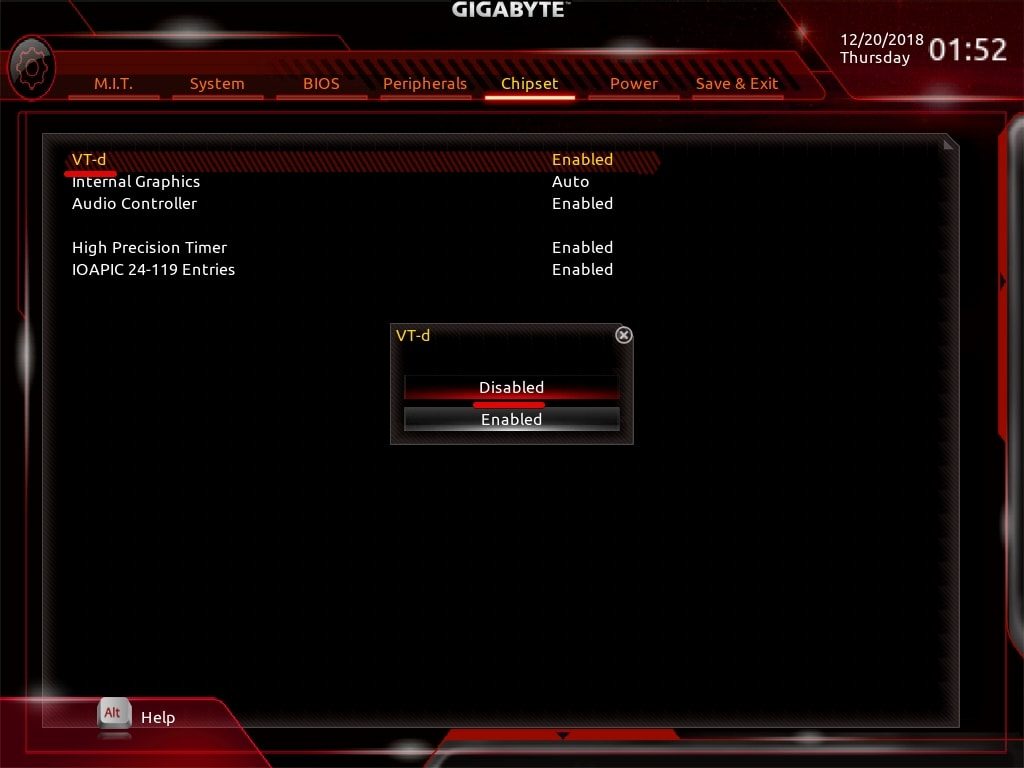
By default, the Internal Graphics will be set to Auto, to disable it, head over on and press enter then choose Disabled.
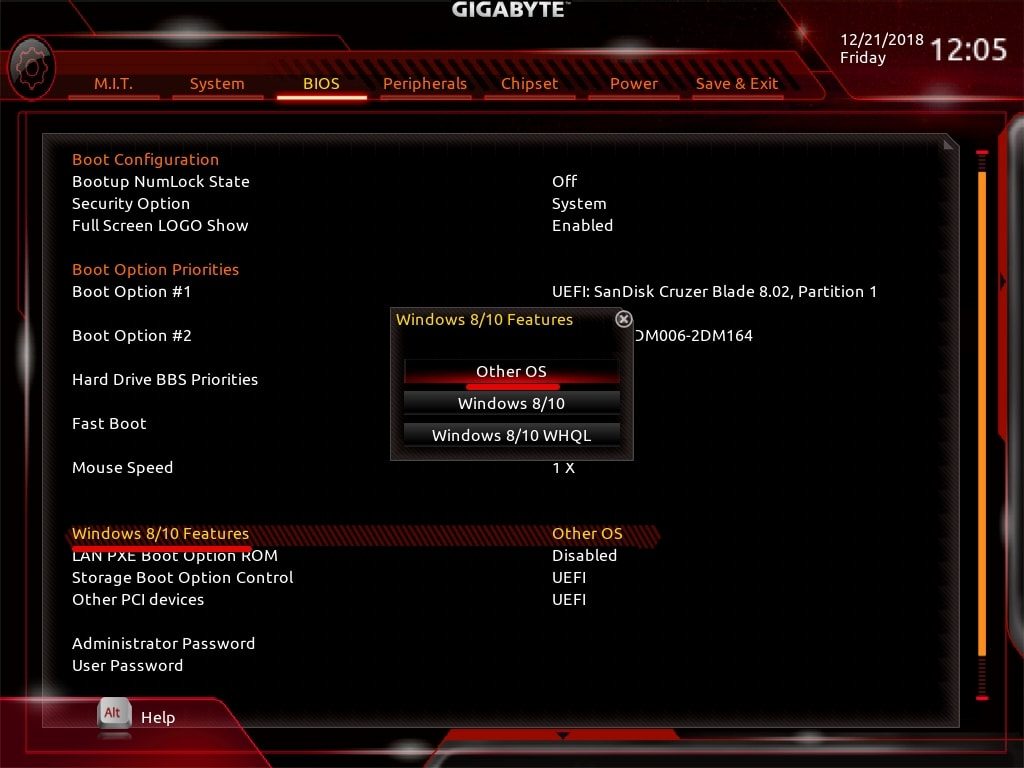
The Storage Boot Option Control is significant, set it to UEFI.
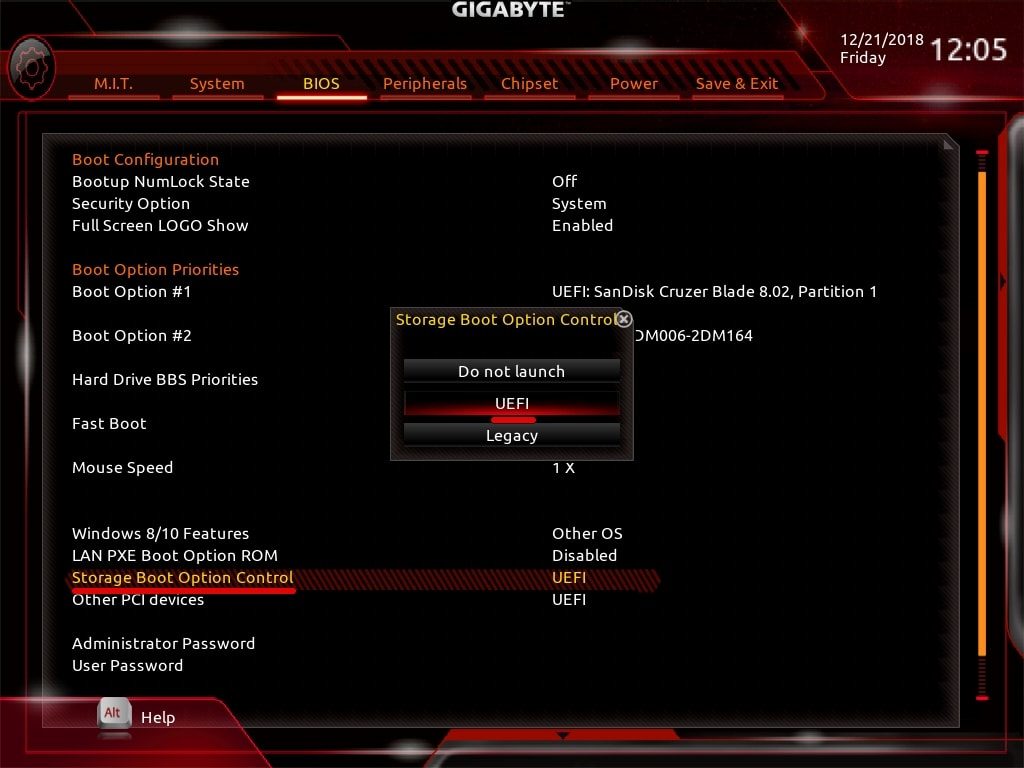
Change the OS to Other OS.
