• About us
  • Contact us
  • Privacy Policy
GEEKrar
  • Home
  • Virtual Machines
    • VMware
    • VirtualBox
  • Mobile
    • Android
    • iOS
  • News
    • Windows (Microsoft)
    • iOS (Apple)
  • Discord
  • Windows
  • Mac
  • THE FORUM
No Result
View All Result
  • Home
  • Virtual Machines
    • VMware
    • VirtualBox
  • Mobile
    • Android
    • iOS
  • News
    • Windows (Microsoft)
    • iOS (Apple)
  • Discord
  • Windows
  • Mac
  • THE FORUM
No Result
View All Result
GEEKrar
No Result
View All Result
Home VMware

How to Take and Use Snapshots on VMware

Ali by Ali
April 21, 2025
in VMware
0
Take and Use Snapshots on VMware

Take and Use Snapshots on VMware

15
SHARES
211
VIEWS
Share on TwitterShare on Facebook

While you use virtual machine for testing out apps, programs, and things, there’s always a chance of something go wrong. When you set up and configure Mojave completely, you may probably test and try some interesting things out. Those things can go wrong at some point, so it’s good to have backups. However, if you have performed back up before and try to restore it later, you may know how long and space taking it is to do, but when it comes to backup your virtual machine on VMware, it’s hard to beat snapshot. Here is How to Take and Use Snapshots on VMware

VMware and VirtualBox both allow you to take snapshots of a virtual machine. What a snapshot does is basically creates or captures a current copy of your virtual machine from backing up your files to your settings and configurations. So when you are in problem, you can restore the snapshot of the virtual machine which will fall you back exactly to the checkpoint where you had taken the snapshot with everything you had there including apps. This is perfect for testing and doing everything you want, and if something goes wrong, you can simply revert the snapshot to solve it very quickly.

You can create multiple snapshots regularly or set up the automatic backup feature to save your time and progress. When you have a snapshot, you can play around or try different operations. No matter what you do, even installing bad things that hurt, all you have to do is just roll back to the snapshot that will restore to the saved state of the virtual machine as it was before. Snapshots work with every virtual machine running on VMware Workstation or Player. The process is not very long and also it is very simple and even not a little bit complicated. So let’s get started. Here is How to Take and Use Snapshots on VMware.

Table of Contents

  • Taking Snapshot of macOS Mojave
  • Restoring Snapshot of macOS Mojave
  • How to Take Snapshot Automatically

Taking Snapshot of macOS Mojave

Snapshot is a great way to backup or save your current virtual machine state which you can restore to the state later. There’s a very simple trick to this that you don’t need to download anything but only install within VMware. This method works with every virtual machine including macOS.

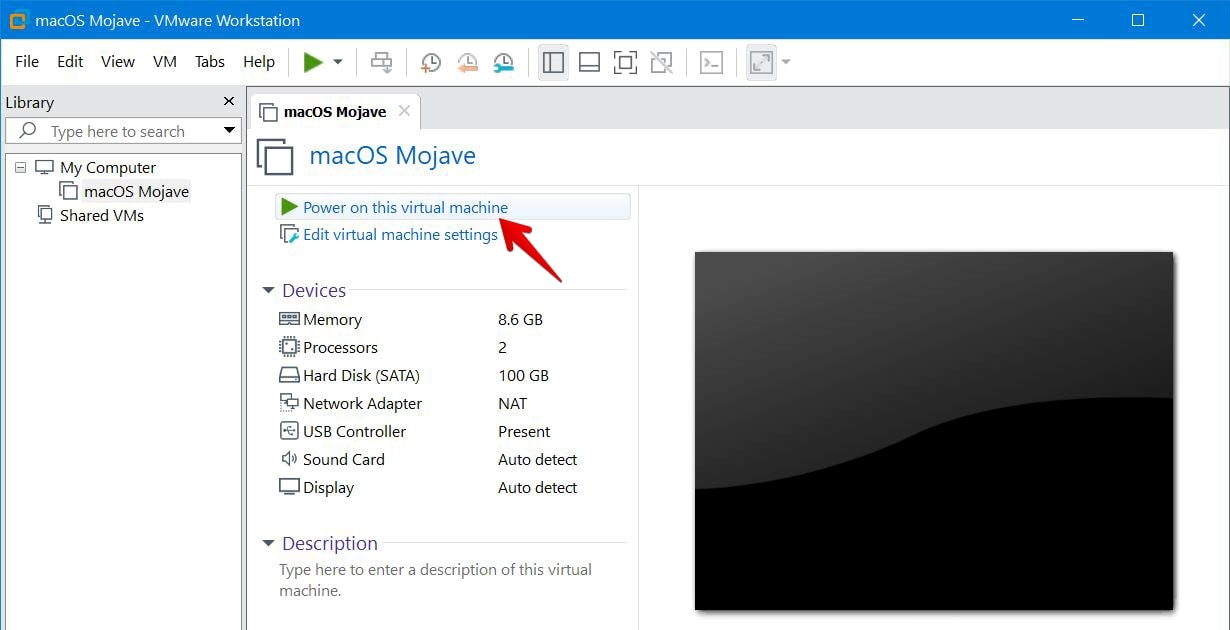
To create a snapshot, you will need to use the snapshot option from a running virtual machine window. First, open VMware and choose the virtual machine then power on the virtual machine.

Power on this virtual machine

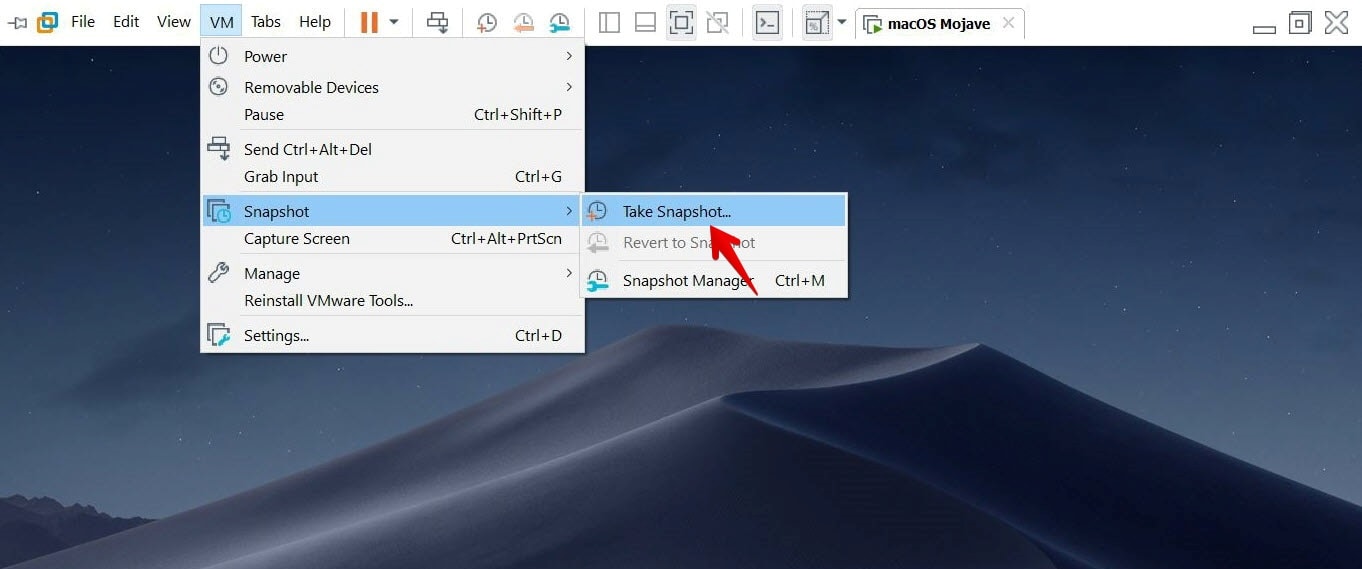
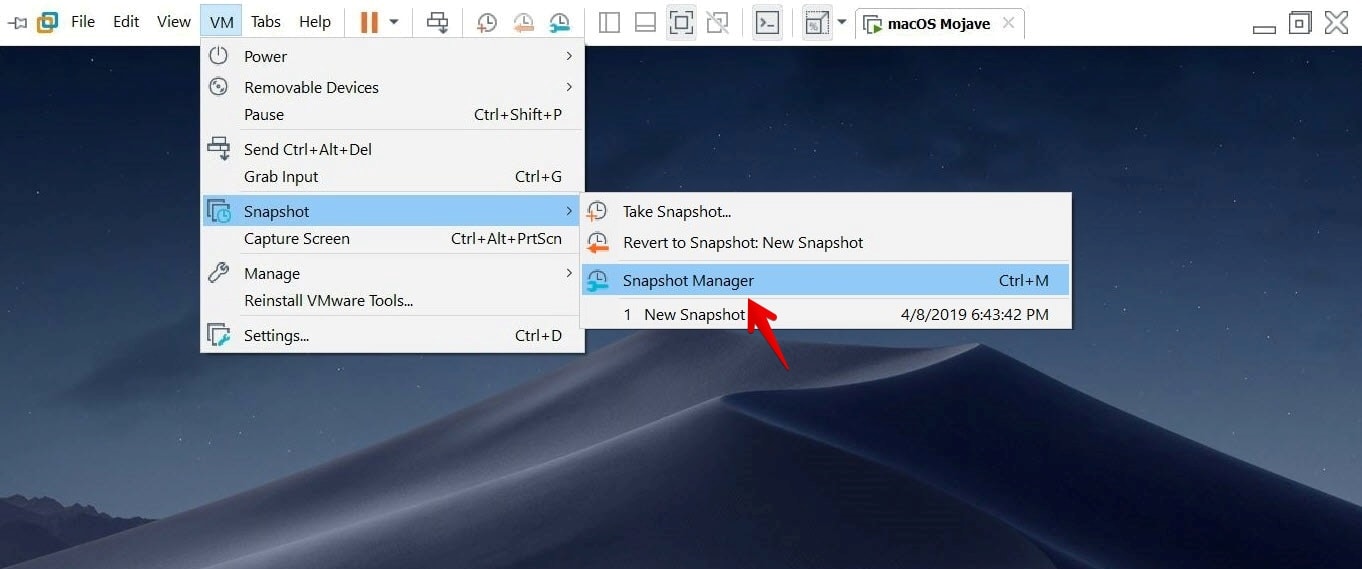
From the virtual machine window, hover your mouse at the top of the window and from the menu choose VM > Snapshot > Click Take Snapshot.

Take Snapshot
Take Snapshot

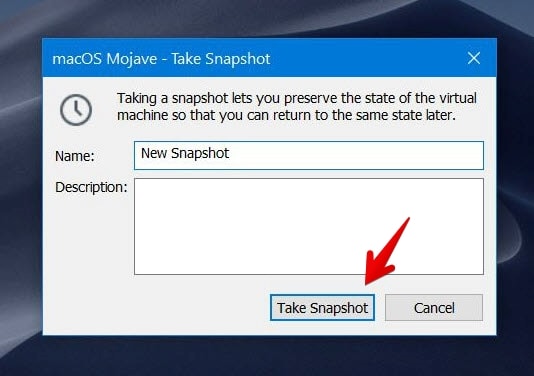
In the snapshot wizard, give a name to your snapshot and click Take Snapshot.

Taking a Snapshot
Taking a Snapshot

As soon as you click the Take Snapshot button, this will begin snaping which may not take long unless you have large files. When the process finished, the snapshot is successfully created without any problem. Keep in mind that the snapshots are stored on your Windows computer, so be careful not to mess with that.

Restoring Snapshot of macOS Mojave

When you have a snapshot, you can easily load into it to get you back to the prior state of your virtual machine. This is mostly used when you are in trouble or something goes wrong.

As this is only possible when the virtual machine is on, so switch on the virtual machine.

Power on this virtual machine

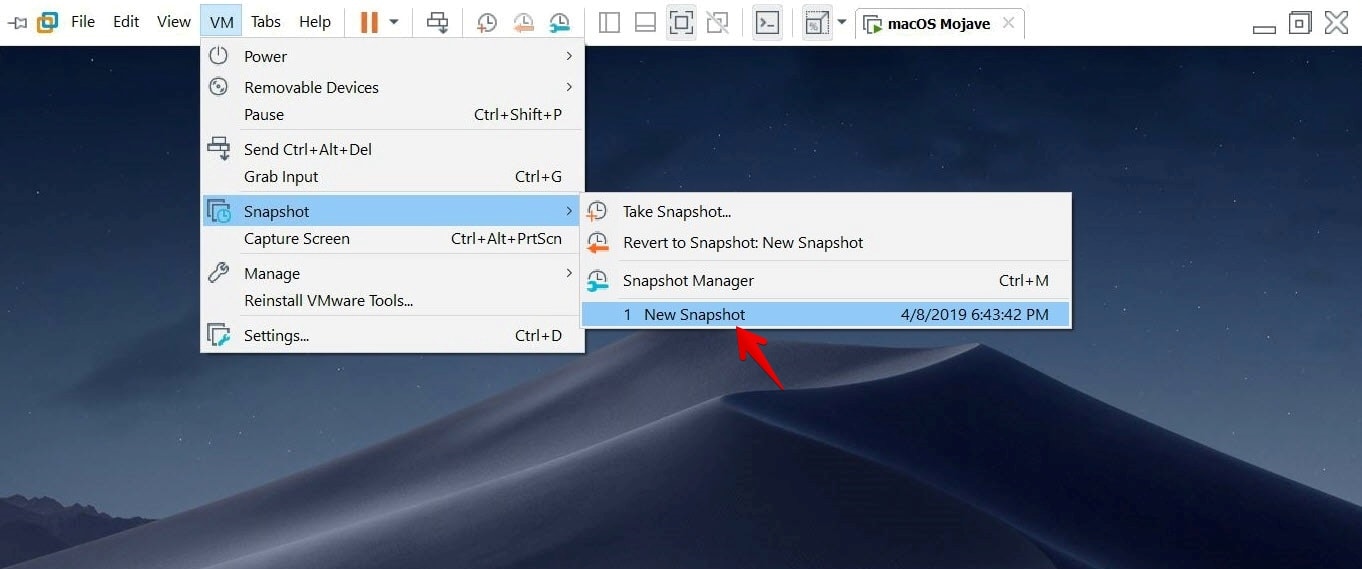
After that, from the top menu, click on VM > Snapshot and here you can choose which snapshot to revert to, click on one of them. In my case, I have only one snapshot which is the “New Snapshot” so I will click on that.

Revert to Snapshot
Revert to Snapshot

There will be a prompt asking you if you’re sure you want to restore this snapshot. Press Yes to restore everything.

Restore Snapshot
Restore Snapshot

During restoring the snapshot, the virtual machine will restart twice.

Restoring
Restoring

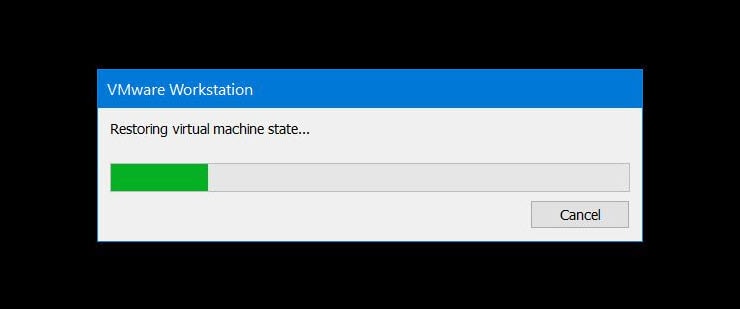
Once the process completed, you will be automatically to the previous state.

Restored Virtual Machine

After it’s done, you should see your files on their place where you had left.

How to Take Snapshot Automatically

While you can always create snapshots or delete manually from the snapshot manager, however, you can also set to take a snapshot automatically to maximize your backup.

To do that, go to VM > Snapshot > Open Snapshot Manager.

Snapshot
Snapshot

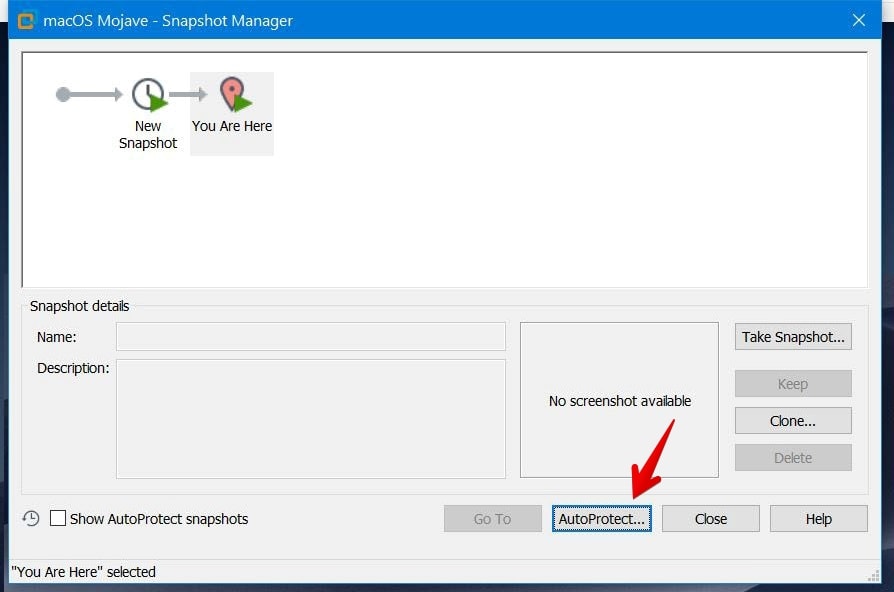
When the Snapshot Manager opened, click on AutoProtect…

Snapshot Manager
Snapshot Manager

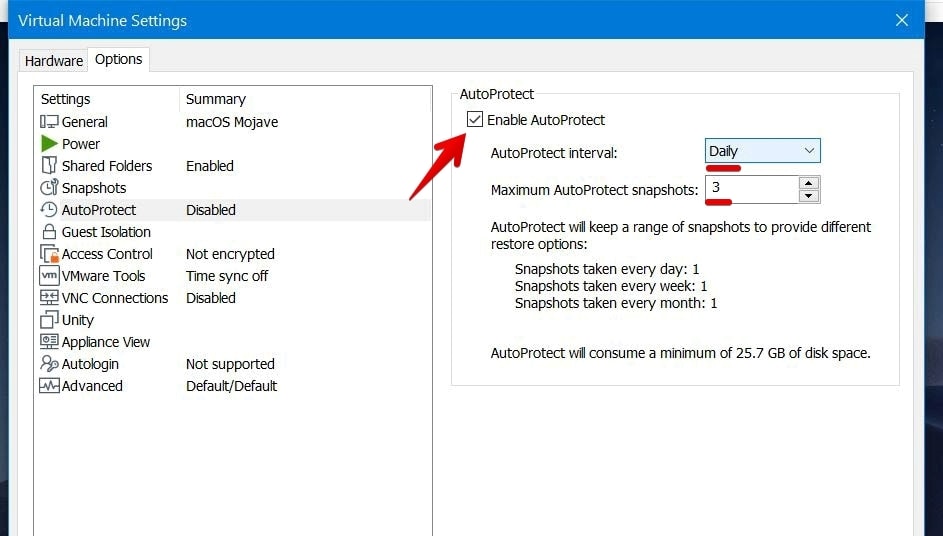
Next, we’ll move over to the virtual machine settings where you can configure the AutoProtect tab.

In order to enable, click “Enable AutoProtect” and choose the period how you want the snapshot to be taken. You can choose half-hourly, hourly, daily for the period and type down the number of snapshots that it should take. For instance, if you select 3 snapshots, it will take one snapshot every single day and once a week and once a month. When you are done, click Ok and it will be all set.

Also, it’s worth mentioning that this feature will take and use a minimum of 25 GB of your Windows computer storage.

Virtual Machine Settings

And you are to the finish line. If there’s something remaining, let me know from the comments down below.

Tags: Create SnapshotHowtomacOS MojaveSnapshotTake macOSTake macOS MojaveTake SnapshotUse SnapshotVMware
Previous Post

How to Install macOS Unlocker for VMware Patch Tool

Next Post

Video: How to Install Ubuntu on VMWare

Ali

Ali

Next Post
Video: How to Install Ubuntu on VMWare

Video: How to Install Ubuntu on VMWare

Leave a Reply Cancel reply

Your email address will not be published. Required fields are marked *

  • Trending
  • Comments
  • Latest
Download macOS Ventura ISO file

Download macOS Ventura ISO file

October 28, 2024
How To Bypass Mega Download Limits (2025 Update)

How To Bypass Mega Download Limits (2025 Update)

March 22, 2025
Download macOS X Lion 10.7 ISO and DMG Files

Download macOS X Lion 10.7 ISO and DMG Files

October 28, 2024
macOS High Sierra

Install MacOS High Sierra On VirtualBox 2024 (Easy Method)

April 10, 2025
How to Fix The CPU has been disabled by the guest OS

How to Fix The CPU has been disabled by the guest OS

253
Install macOS Catalina on VirtualBox

Install macOS Catalina on VirtualBox on Windows PC: 2025 Guide

124
Install macOS Catalina on VirtualBox on AMD Systems

How to Install macOS Catalina on VirtualBox on AMD Systems | 2025

86
Install macOS Catalina on VMware on Windows PC

Install macOS Catalina on VMware on Windows PC: 2025

82
Create macOS Sequoia bootable USB on Windows

Create macOS Sequoia bootable USB on Windows

April 29, 2025
Install macOS Big Sur on VMWare Windows 10

Install macOS Big Sur on VMWare Windows 10: 2025

April 29, 2025
macOS Unlocker for VMware

Install macOS Unlocker for VMware Workstation/Player 2023

April 29, 2025
Fix macOS Mojave Screen Resolution(HiDPI) on VMware

Fix macOS Mojave Screen Resolution(HiDPI) on VMware

April 29, 2025

Recent News

Create macOS Sequoia bootable USB on Windows

Create macOS Sequoia bootable USB on Windows

April 29, 2025
Install macOS Big Sur on VMWare Windows 10

Install macOS Big Sur on VMWare Windows 10: 2025

April 29, 2025
macOS Unlocker for VMware

Install macOS Unlocker for VMware Workstation/Player 2023

April 29, 2025
Fix macOS Mojave Screen Resolution(HiDPI) on VMware

Fix macOS Mojave Screen Resolution(HiDPI) on VMware

April 29, 2025
Facebook Twitter Youtube
GEEKrar

We are a team of skilled writers, editors and tech enthusiasts that help you how to get tech into work, pros and cons, explain hows and whys, hacks, and fixes of new modern tech.

Browse by Category

  • Android (24)
  • Discord (5)
  • Downloads (15)
  • Featured (17)
  • Internet (507)
  • iOS (26)
  • Linux (4)
  • Mac (150)
  • News (398)
    • iOS (Apple) (266)
    • Windows (Microsoft) (101)
  • Reviews (5)
  • Tech (21)
  • Virtual Machine (31)
  • VirtualBox (80)
  • VMware (66)
  • Windows (88)

Recent News

Create macOS Sequoia bootable USB on Windows

Create macOS Sequoia bootable USB on Windows

April 29, 2025
Install macOS Big Sur on VMWare Windows 10

Install macOS Big Sur on VMWare Windows 10: 2025

April 29, 2025

© 2022 geekRAR.com

We use cookies on our website to give you the most relevant experience by remembering your preferences and repeat visits. By clicking “Accept”, you consent to the use of ALL the cookies.
Do not sell my personal information.
Cookie settingsACCEPT
Manage consent

Privacy Overview

This website uses cookies to improve your experience while you navigate through the website. Out of these, the cookies that are categorized as necessary are stored on your browser as they are essential for the working of basic functionalities of the website. We also use third-party cookies that help us analyze and understand how you use this website. These cookies will be stored in your browser only with your consent. You also have the option to opt-out of these cookies. But opting out of some of these cookies may affect your browsing experience.
Necessary
Always Enabled
Necessary cookies are absolutely essential for the website to function properly. This category only includes cookies that ensures basic functionalities and security features of the website. These cookies do not store any personal information.
Non-necessary
Any cookies that may not be particularly necessary for the website to function and is used specifically to collect user personal data via analytics, ads, other embedded contents are termed as non-necessary cookies. It is mandatory to procure user consent prior to running these cookies on your website.
SAVE & ACCEPT
No Result
View All Result

© 2022 geekRAR.com

Go to mobile version