• About us
  • Contact us
  • Privacy Policy
GEEKrar
  • Home
  • Virtual Machines
    • VMware
    • VirtualBox
  • Mobile
    • Android
    • iOS
  • News
    • Windows (Microsoft)
    • iOS (Apple)
  • Discord
  • Windows
  • Mac
  • THE FORUM
No Result
View All Result
  • Home
  • Virtual Machines
    • VMware
    • VirtualBox
  • Mobile
    • Android
    • iOS
  • News
    • Windows (Microsoft)
    • iOS (Apple)
  • Discord
  • Windows
  • Mac
  • THE FORUM
No Result
View All Result
GEEKrar
No Result
View All Result
Home VMware

How to Share Your PC’s Files with macOS Mojave on VMware

Ali by Ali
April 28, 2020
in VMware
1
Drag and Drop Files

Drag and Drop Files

23
SHARES
335
VIEWS
Share on TwitterShare on Facebook

Virtual machines are a great way to test, penetrate and try an operating system, an app or software. These virtual machines are in a safe-sandboxed separated environment that doesn’t have access to your computer’s files. While you can download files from the internet, but there are still things you would want to share with your virtual machine like personal or work files. Here is How to Share Your PC’s Files with macOS Mojave VMware

By default, virtual machines including Mojave does not have access to your computer’s files system. If you want to share your files, you are to choose from two ways or you can also choose both. If you have used VMware before, you may know the benefits of VMware Tools, which has a special feature specifically for sharing files between your computer and virtual machines that makes sharing files incredibly simple and smooth. This feature, as simple as by its name, will let you directly share files via drag and drop files from your computer to the virtual machine or vice versa. When you do share, you will be able to straightly access from the virtual machine. This feature is integrated into VMware by default that you do not have to download. How to Share Your PC’s Files with macOS Mojave on VMware

Another way you can share files with virtual machines is to set up shared folders. These folders are particularly shared between your computer and the virtual machine so you can access those files in the shared folder from the virtual machine. The files you will access will be shared like a network file share. This method works for sharing files with every virtual machine even with VirtualBox—but the drag and drop feature will only work with virtual machines running on VMware.

Use Drag & Drop to Share Files with macOS Mojave

With VMware, you can directly share your computer’s files with Mojave by dragging and dropping from the virtual machine to your computer or vice versa. To use this feature, first, you will need to install VMware Tools in the virtual machine. This tool, is integrated into VMware beforehand so you will only need to install it on the virtual machine. The process is pretty straightforward, here’s how to do it.

  • Related: Install VMware Tools on macOS Mojave on VMware

After the VMware Tools installation finished, select a file you want to share and drag and drop from virtual machine to your computer or vice versa. When you do, you will see the file appear on the virtual machine. It is this simple, so enjoy sharing.

Drag and Drop Files
Drag and Drop Files

Use Shared Folders to Share Files with macOS Mojave

Shared folders are another great way to share your PC’s files with macOS Mojave. Whether you drag and drop or share files via shared folders, in both cases, you must install the effective VMware Tools within your virtual machine. In this case, you will need to complete the VMware Tools installation before you get started. This is no separate installation which you can do it from the following instruction guide.

  • Related: Install VMware Tools on macOS Mojave on VMware

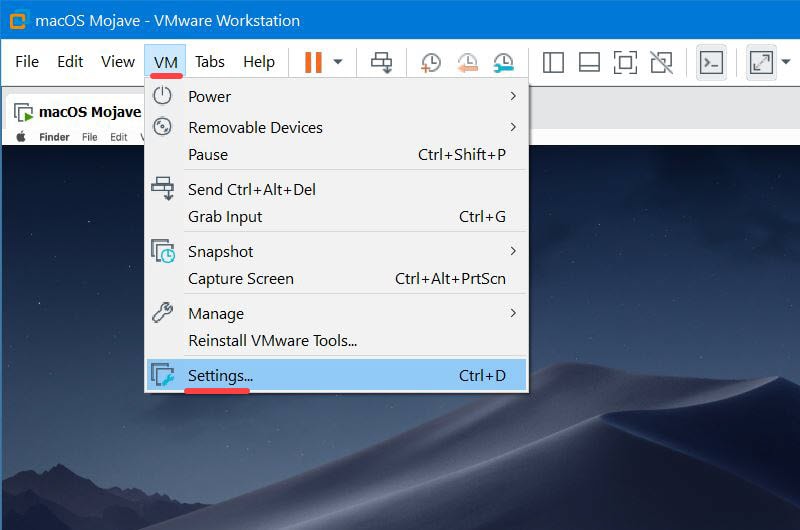
Go ahead and from virtual machine navigate to VM > Settings. To set up and work properly, the virtual machine should be up and running.

Open VM
Open VM

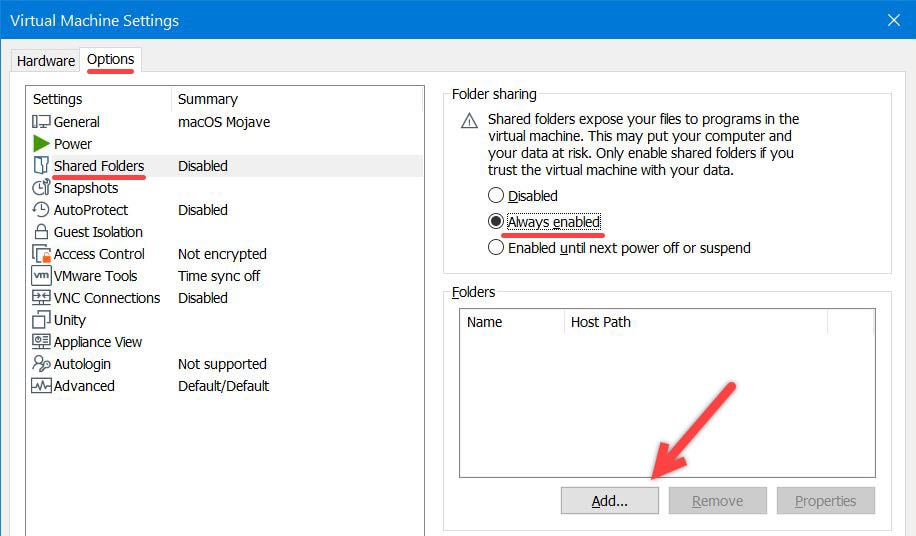
In the Virtual Machine Settings, select the Options tab and then select the Shared Folders from the options. By default, Shared Folders are always disabled, however, you can enable it by clicking on Always enabled. If you don’t want that, go for the next option “Enabled until next power off or suspend”. After that, click on the Add button to create a new shared folder.

Virtual Machine Settings

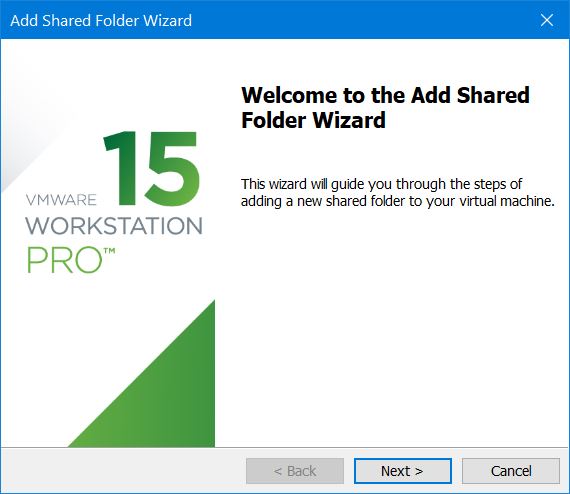
On the Add Shared Folder Wizard, simply click Next.

Add Shared Folder Wizard

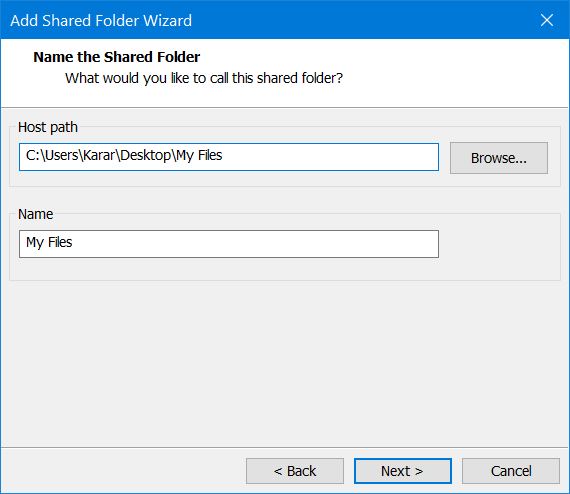
On the next screen, specify the folder you want to share with the virtual machine by browsing and selecting the file. It will automatically appear whatever the file name that has. When you are done, click Next.

Name The Shared Folder

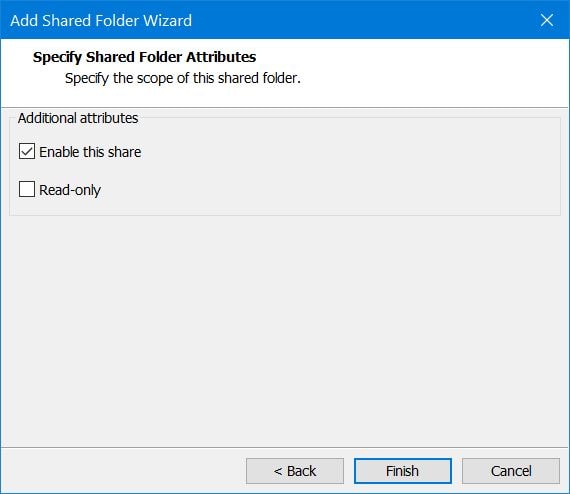
By default, the Enable this share option will be selected and also the virtual machine will have read-write access for the files and also. If you don’t want that, select the Read-only option to let the virtual machine only read files not edit or modify. When you are done, click Finish.

Specify Shared Folder Attributes

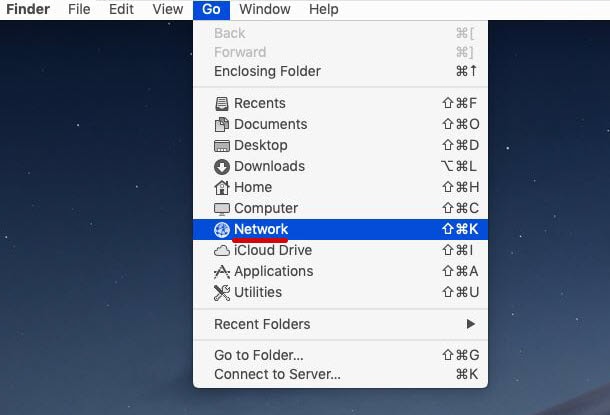
To access the files from the virtual machine which is Mojave in this example. Open the virtual machine and from the top left corner click on Go and select Network for the drop-down list.

Go
Go

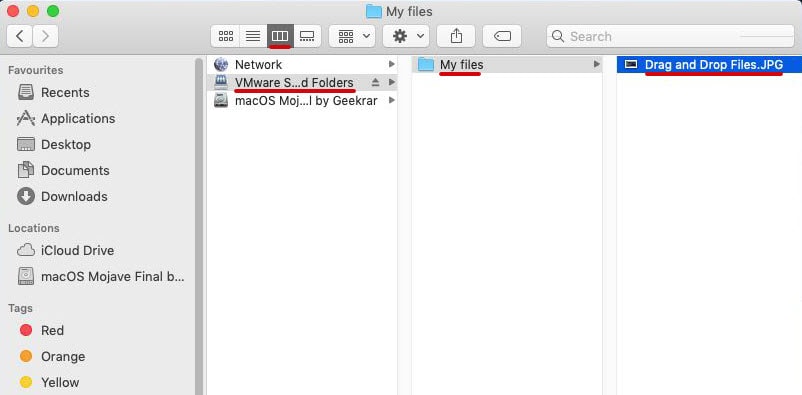
The “Network” window will now appear, click on the “show icons in a list” icon from the shot. Go ahead and click on VMware Shared Folders. You will see the files and folders you had shared with. The files are fully accessible and editable, so you can edit, copy, paste and do anything you want.

Network
Network

If you add, delete, update or make any changes to the shared files from your actual host computer, it will quickly appear on the virtual machine with the changes without you do anything further. Here is How to Share Your PC’s Files with macOS Mojave VMware

If you have multiple virtual machines you want to share files with, you’ll need to set up file sharing individually for each one. As you can use the same shared folders with multiple virtual machines, it’s good to be careful that none of the virtual machines should be compromised, which could actually end up damaging your files or even the virtual machine badly, so take care.

With that there are other ways you could do to share your files but, these are the convenient way we’ve got for you.

Tags: macOS MojaveShare files with MojaveVMware
Previous Post

How to Install VirtualBox Extension Pack

Next Post

How to Backup & Restore Your macOS Mojave Virtual Machine

Ali

Ali

Next Post
Backup & Restore Your macOS Mojave Virtual Machine

How to Backup & Restore Your macOS Mojave Virtual Machine

Comments 1

  1. Regan says:
    4 years ago

    Open the virtual machine and from the top left corner click on Go and select COMPUTER for the drop-down list.

    COMPUTER not Network

    Reply

Leave a Reply Cancel reply

Your email address will not be published. Required fields are marked *

  • Trending
  • Comments
  • Latest
Download macOS Ventura ISO file

Download macOS Ventura ISO file

March 31, 2023
How To Bypass Mega Download Limits (2023 Update)

How To Bypass Mega Download Limits (2023 Update)

March 31, 2023
Download macOS Monterey ISO Release Candidate (v12.0.1)

Download macOS Monterey ISO Release Candidate (v12.0.1)

March 31, 2023
Bypass Mega download limits

How To Bypass Mega Download Limits 2022 (Alternative Method)

March 17, 2023
How to Fix The CPU has been disabled by the guest OS

How to Fix The CPU has been disabled by the guest OS

125
Install macOS Catalina on VirtualBox

Install macOS Catalina on VirtualBox on Windows PC

118
Install macOS Catalina on VirtualBox on AMD Systems

How to Install macOS Catalina on VirtualBox on AMD Systems

82
Install macOS Catalina on VMware on Windows PC

Install macOS Catalina on VMware on Windows PC

81
Short Strangle Option Strategy: Complete Guide

Short Strangle Option Strategy: Complete Guide

May 22, 2023
How to avoid clicking on a malicious website

How to Identify and Avoid Malware on the Web: A Step-by-Step Guide

May 17, 2023
Download Deezer Music Without Premium Using Tunefab Deezer Music Converter

Download Deezer Music Without Premium Using Tunefab Deezer Music Converter

May 15, 2023
Best Tool to Convert Youtube Music to MP3 — Tunefab Youtube Video Conveter

Best Tool to Convert Youtube Music to MP3 — Tunefab Youtube Video Conveter

May 15, 2023

Recent News

Short Strangle Option Strategy: Complete Guide

Short Strangle Option Strategy: Complete Guide

May 22, 2023
How to avoid clicking on a malicious website

How to Identify and Avoid Malware on the Web: A Step-by-Step Guide

May 17, 2023
Download Deezer Music Without Premium Using Tunefab Deezer Music Converter

Download Deezer Music Without Premium Using Tunefab Deezer Music Converter

May 15, 2023
Best Tool to Convert Youtube Music to MP3 — Tunefab Youtube Video Conveter

Best Tool to Convert Youtube Music to MP3 — Tunefab Youtube Video Conveter

May 15, 2023
Facebook Twitter Youtube
GEEKrar

We are a team of skilled writers, editors and tech enthusiasts that help you how to get tech into work, pros and cons, explain hows and whys, hacks, and fixes of new modern tech.

Browse by Category

  • Android (24)
  • Discord (5)
  • Downloads (13)
  • Featured (14)
  • Internet (250)
  • iOS (26)
  • Mac (100)
  • News (429)
    • iOS (Apple) (283)
    • Windows (Microsoft) (117)
  • Reviews (4)
  • Tech (21)
  • Virtual Machine (25)
  • VirtualBox (75)
  • VMware (66)
  • Windows (86)

Recent News

Short Strangle Option Strategy: Complete Guide

Short Strangle Option Strategy: Complete Guide

May 22, 2023
How to avoid clicking on a malicious website

How to Identify and Avoid Malware on the Web: A Step-by-Step Guide

May 17, 2023

© 2022 geekRAR.com

No Result
View All Result

© 2022 geekRAR.com

We use cookies on our website to give you the most relevant experience by remembering your preferences and repeat visits. By clicking “Accept”, you consent to the use of ALL the cookies.
Do not sell my personal information.
Cookie settingsACCEPT
Manage consent

Privacy Overview

This website uses cookies to improve your experience while you navigate through the website. Out of these, the cookies that are categorized as necessary are stored on your browser as they are essential for the working of basic functionalities of the website. We also use third-party cookies that help us analyze and understand how you use this website. These cookies will be stored in your browser only with your consent. You also have the option to opt-out of these cookies. But opting out of some of these cookies may affect your browsing experience.
Necessary
Always Enabled
Necessary cookies are absolutely essential for the website to function properly. This category only includes cookies that ensures basic functionalities and security features of the website. These cookies do not store any personal information.
Non-necessary
Any cookies that may not be particularly necessary for the website to function and is used specifically to collect user personal data via analytics, ads, other embedded contents are termed as non-necessary cookies. It is mandatory to procure user consent prior to running these cookies on your website.
SAVE & ACCEPT
Go to mobile version