


Windows Defender is a free Antivirus and Malware protection solution that’s provided by Microsoft for free. In comes preinstalled with the Windows 10 operating system with many of its features automatically enabled. Overall it is a useful application that has been used by millions of users around the world.
With that said, some users find the protect level either too high, intrusive, or annoying, with frequently prompting users to take actions on legitimate transactions. Many of these notifications are incredibly irritating. If you want to install an alternate antivirus application, you may find Windows Defender battling other applications for PC resources, and in turn, slowing down your computer’s performance. Even if you toggle off your control panel settings after an update, reboot, or maybe installing a different application may trigger windows to re-enable the feature.
Thankfully we have a permanent way to disable the Windows Defender features not to run again unless you want it. These instructions require you to use GPEDIT. GPEDIT is a group policy tool that we will be editing permission for users in Windows. Once these changes are made, they can only be changed by reversing them in the group policy tool.
Related: How to Create Bootable USB for Kali Linux on Windows
Table of Contents
How to permanently disable Windows Defender
Requirements
- Ensure you are logged in as Administrator of PC or have admin privileges
Follow these steps to disable Windows Defender
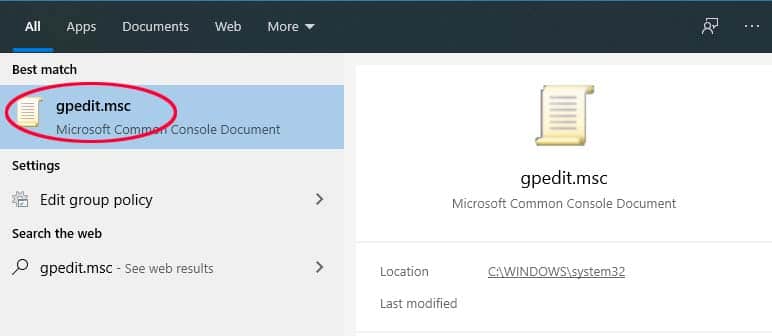
- Click on start and in the Search type ‘gpedit.msc’

- In the Start Window, the icon for gpedit will appear, click on it. This will open the Group Policy Editor.
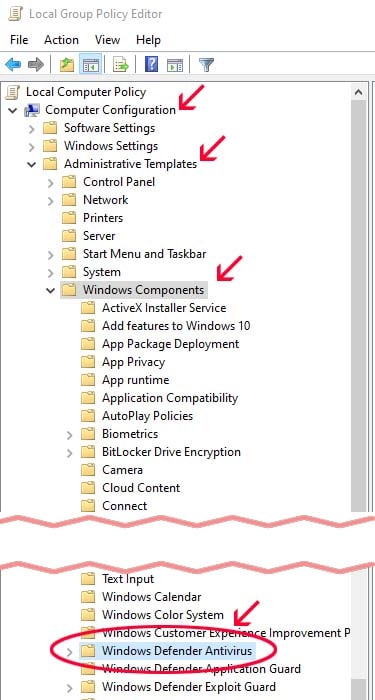
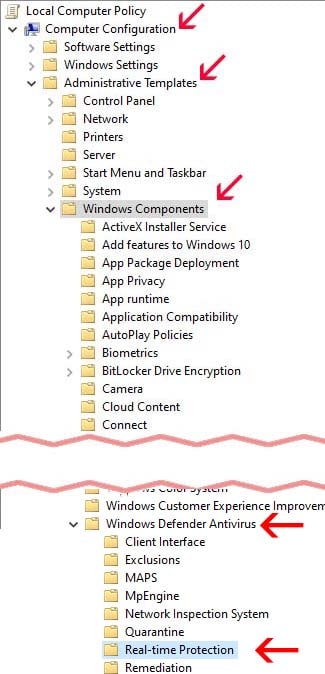
- In the Editor, we need to navigate to the below path in the menu on the left:
Computer Configuration > Administrative Templates > Windows Components > Windows Defender Antivirus
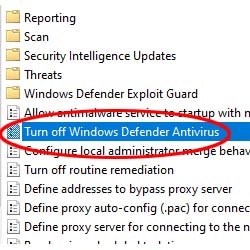
- On the right side, double-click the Turn off Windows Defender Antivirus policy.
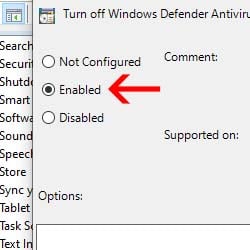
- Select the Enabled option, then click Apply and OK
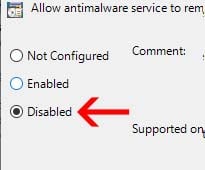
- Below select Allow antimalware service to remain running always policy, and double click to open it.

- Select the Disable option, then click Apply and OK
- Now in the left menu Browse to the sub menu the following path:
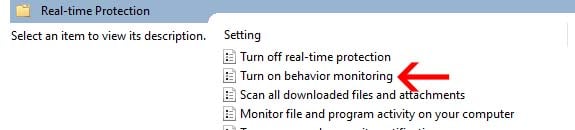
Computer Configuration > Administrative Templates > Windows Components > Windows Defender Antivirus > Real-time Protection
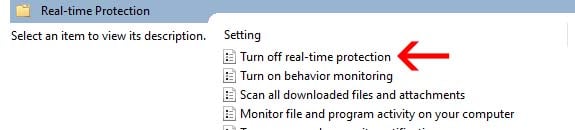
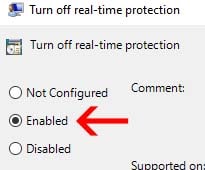
- On the right side look for Turn off real-time protection policy, and double click to open it.
- Select the Enable option. Then click Apply and OK
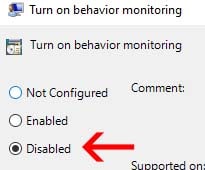
- On the right side look for turn on behavior monitoring policy, and double click to open it.
- Select the Disabled option. Then click Apply and OK
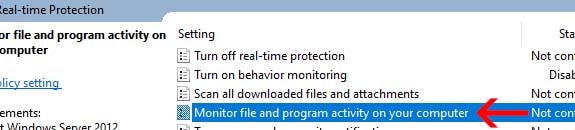
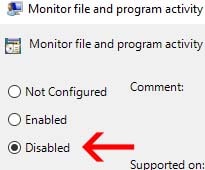
- Now on the right, double-click the Monitor file and program activity on your computer policy.
- Select the Disabled option. Then click Apply and OK.


Summary
You have now completed the steps to disable Windows Defender permanently. If you ever want to enable Windows Defender, you just need to follow steps 4, 6, 9, 11, 13 and select the option “Not Configured.” Once done, restart your computer, and the changes will be made.
Because we are showing you how to disable Windows Defender does not mean it’s not useful. There are many ways you can infect your PC without knowing. We highly recommend always using some form of protection when using new applications or going online. These steps can be useful for those performing basic functions on a PC or if you just want to install an entirely different form of protection.
YouTube Video tutorial
We have created a step by step video tutorial of the above steps, and posted it on YouTube.
