


No matter whether you’re a true Mac or Linux user, you’ve always considered of giving a try to Windows. Windows is undeniably the most used operating system ever on the planet earth. It’s pretty well, and it’s actually preferable by the most user. Not only that but it’s also really different from a macOS interface. It has quite excellent features which are not found in most of the other operating system like being more customizable. Here is How to Install Windows 10 on VirtualBox on macOS Mojave.
Beside that, Windows allows you to install more programs and it’s similar to like a free open source which actually isn’t. But like I said, it’s similar to it. On the other hand, a macOS allows you to mostly take advantage of its default apps and apps from the App Store. However, it’s a bitter truth that macOS is not only a bit complicated to understand and use but also it’s unlikely to allow you most programs which are available on Windows. Like these, there are a lot of things which is better on Windows, but that doesn’t make macOS fell behind as it has its own advantages.
While Windows is mostly known for its easy environment and macOS is popular for its tight security, but it’s never easy to really choose one side. But think about if you could access both of them within a single computer of your. Sounds great? Let’s make it more interesting with this tiny point.
Just like Windows users, even if they aren’t a top-fan of macOS operating system, despite that, they will always consider a tiny vicinity for Windows. In this case, even if you’re not well interested in Windows though, despite all those things you might have read silly things about Windows, despite those, you’ll still be thinking of giving it a try. But I know, it might not be possible for you to entirely and permanently migrate to Windows, but here’s we’ve brought the solution for you.
In this article, we will explain and walk you through every single step to how to Install Windows 10 on VirtualBox on macOS Mojave with shots until you’ve entirely done it. However, it’s worth noting that you could do this on every macOS version. More importantly, you can do this on macOS Mojave installed on a virtual machine whether VMware or VirtualBox. If that’s what makes you interested, you’re good to go since we’ve covered you up with everything you’ll need. Here’s how to accomplish with how to install macOS Mojave on VMware.
- Install macOS Mojave on VMware on Windows PC
If you’d prefer VirtualBox not VMware for some reasons, there’s no U-turn, because we’ve covered you up all.
What You’ll Need
In order to proceed, there are a few things you’ll need.
- Windows 10 ISO Image file — The first thing you’ll need to download is the Windows ISO image file from the Microsoft website. It’s actually similar to what you’ll require with an actual installation on a system.
- VirtualBox — Virtual machines are great and so VirtualBox is. Whatever operating system you are using, we can install and use VirtualBox. The good thing is, it is entirely free for use and also it supports installing macOS. When you’re done with the download, you may install it that is quite easy without much difference from other program installation. When installing, if you encountered system extension block error, you may fix it by allowing the app from system preferences > security & privacy > Allow VirtualBox from there.
With the right things, you could install any operating system you want. There is nothing more required. In terms of the system requirements, you don’t need a high-end computer. Instead, you’ll need a running system with primary things which I guess you’re already complying with those things. However, the more resources you’ll have, the better the experience will be. So let’s get started.
Install Windows 10 on VirtualBox on macOS Mojave
With a little difference, the Windows installation is pretty much similar but that’ll be definitely easy. Running Windows on VirtualBox is no different than running any other application, which makes it much easier to install, configure and set up everything that is way easier than fiddling from boot camp. With the necessary components you’ve collected, you’re all ready to move into.
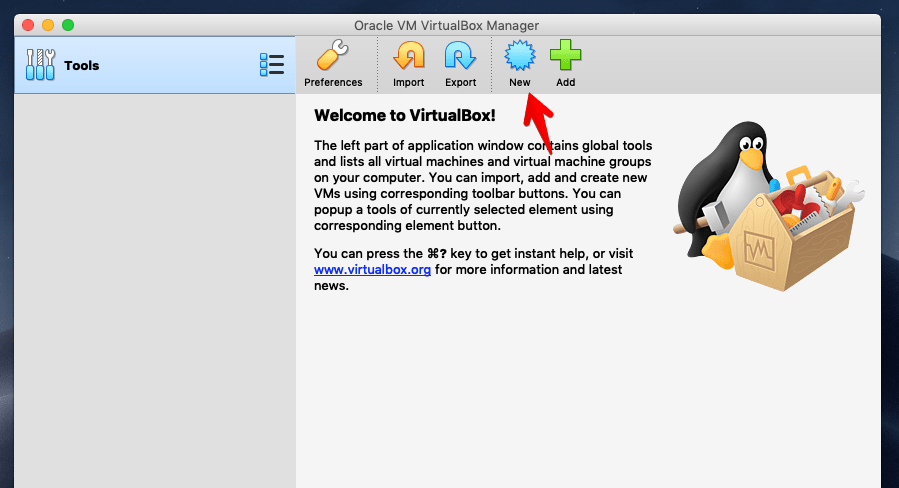
First off, open VirtualBox and straightly click on New.

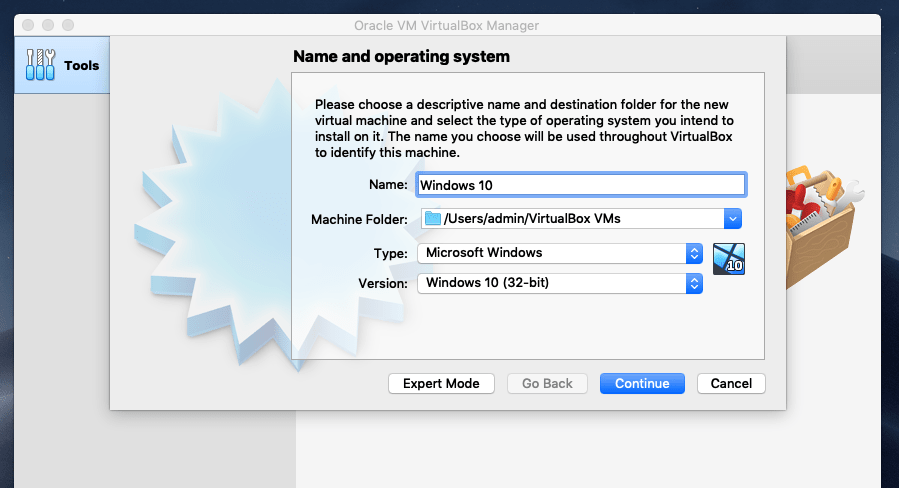
Give a name to the virtual machine, specify where to place the VM and select Windows 10 as the system type and its version Windows 10 32 or 64-bit, then click Continue.
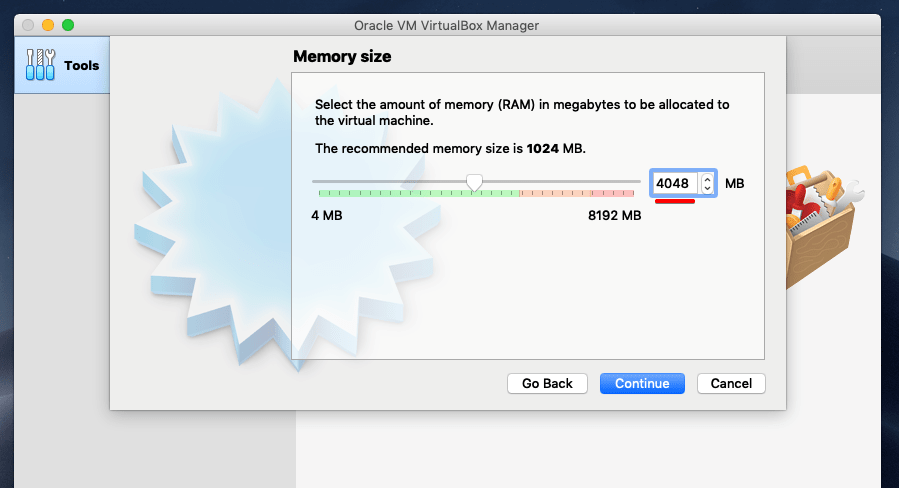
Next, allocate a good amount of memory size then click Continue. We recommend assigning 50 – 65% memory of your system.
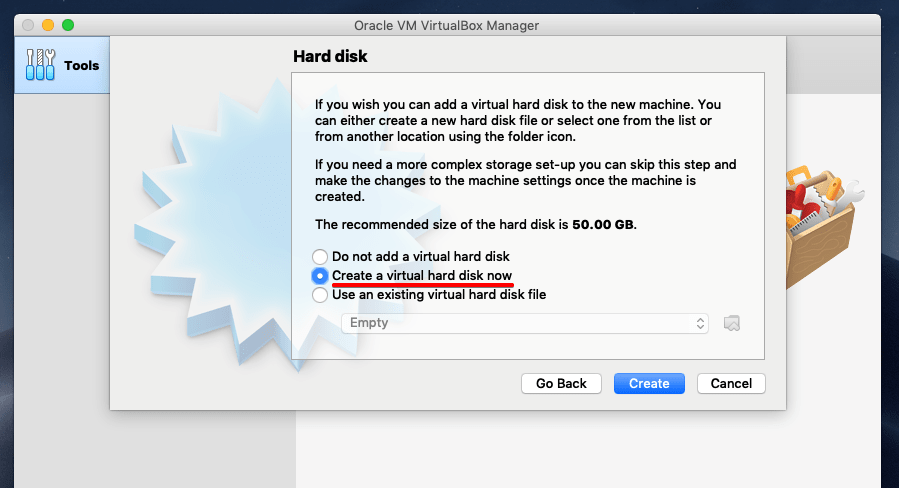
Now select Create a new virtual hard disk now and click Continue.

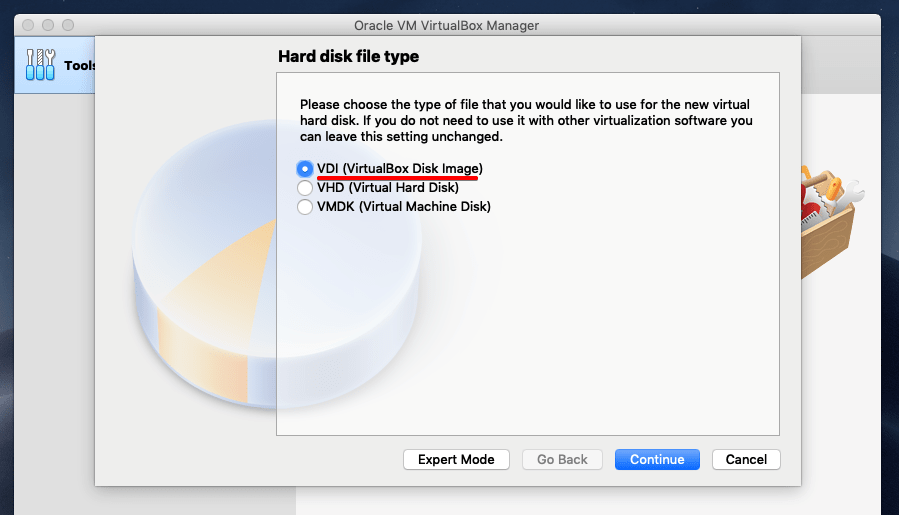
Select the hard disk file type by default and click Continue.

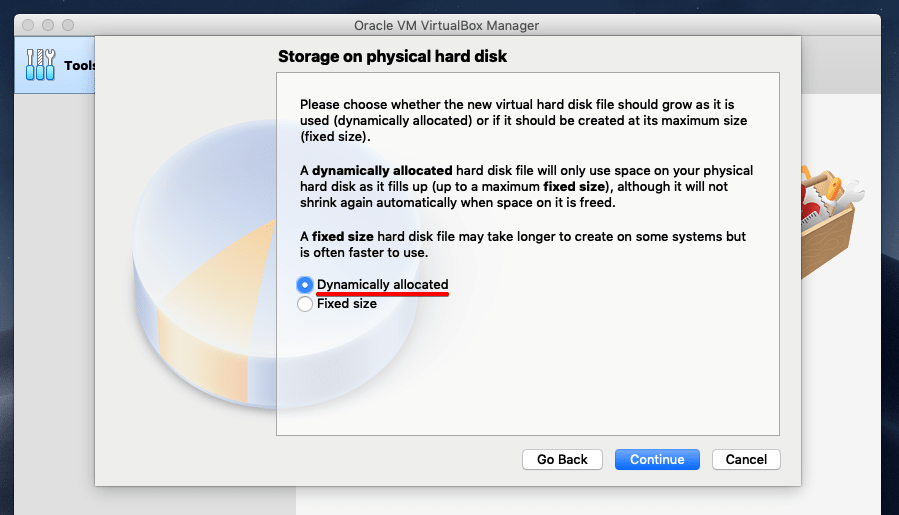
The dynamically allocated hard disk expands up to the specified disk space, select it and click Continue.

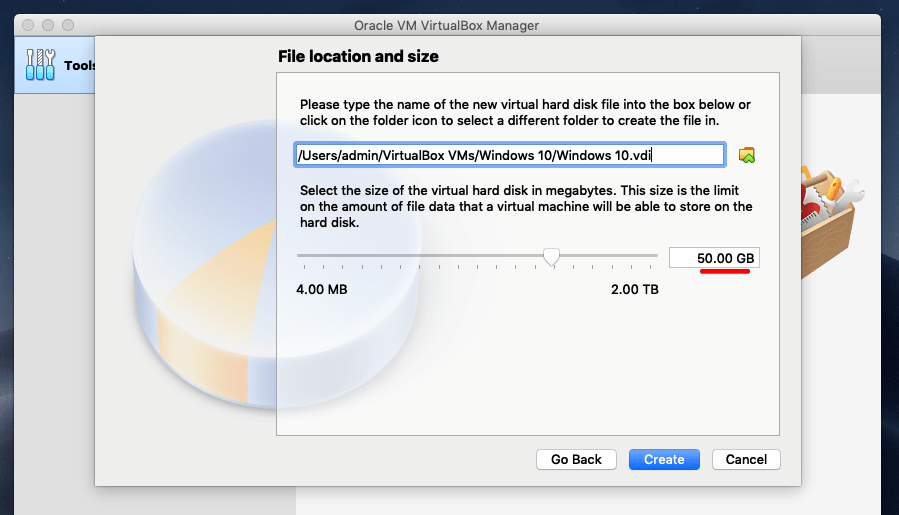
In this window, select the virtual machine location and also the size of the hard disk you want to create then click Create. This will immediately create the virtual machine.

With the machine created, on the VirtualBox screen, Start the virtual machine.

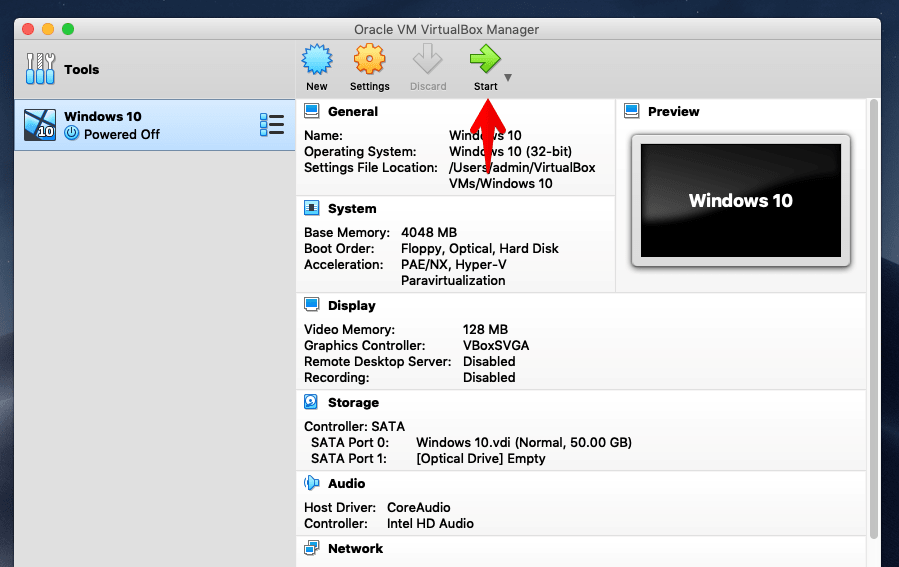
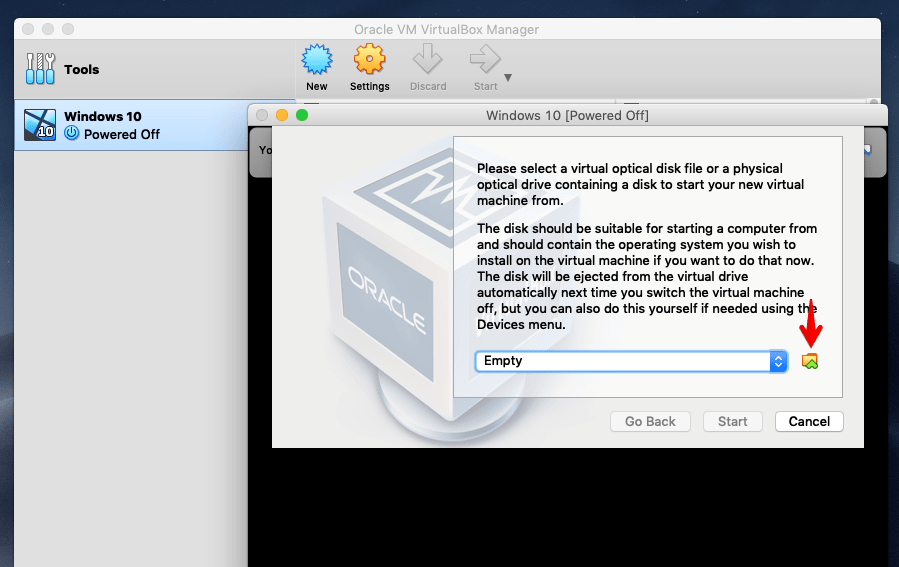
Now click on the folder icon to browse and select the Windows ISO image file. If you encounter a “Failed to open a session for the virtual machine”, you may go check out this.

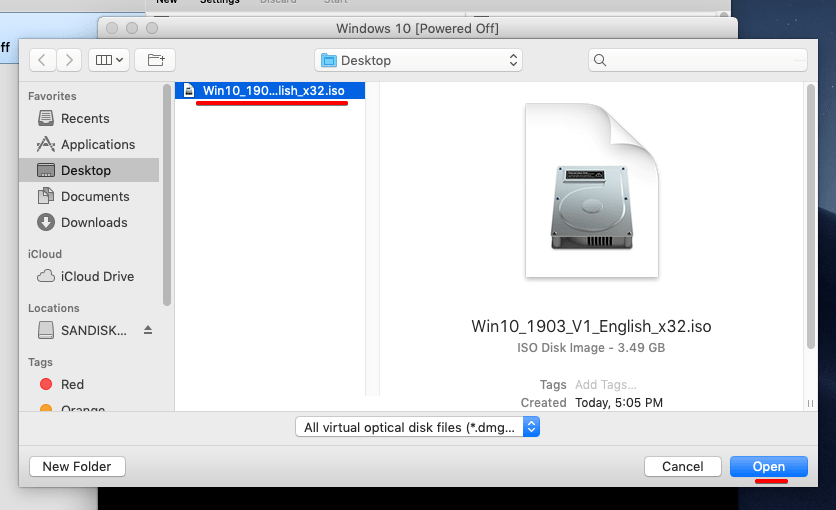
A window will appear, browse the Windows 10 ISO image, and select it then click Open. Make sure you choose the 32 or 64-bit image you had chosen when creating the virtual machine.

The VirtualBox screen is there, go ahead and click Start. You’re all set!


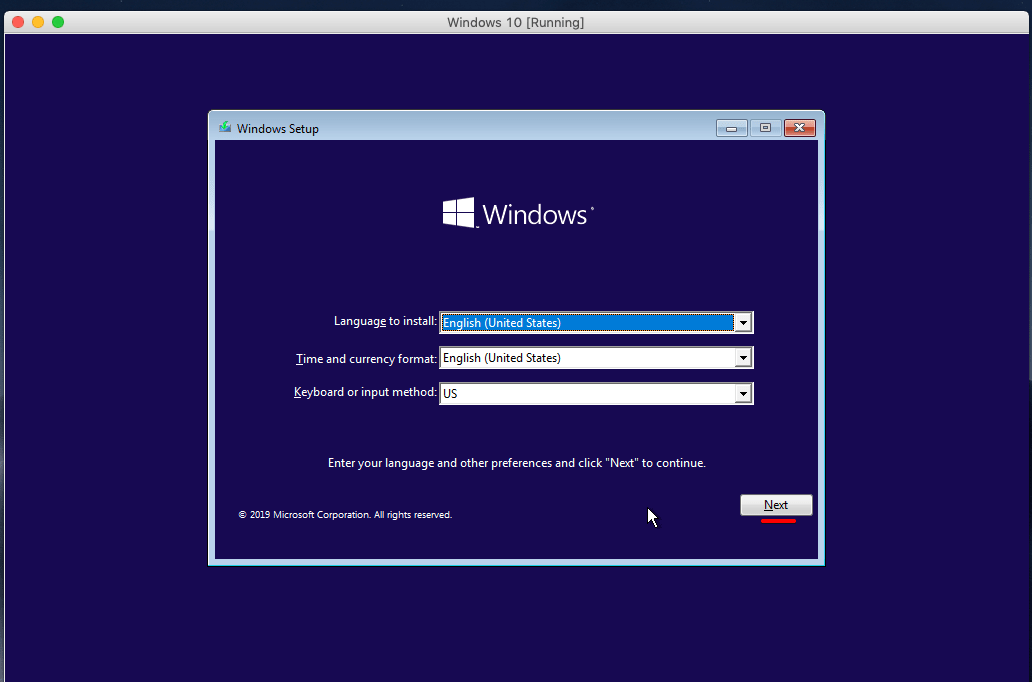
When you’ve done that, you’ll straightly boot into the Windows installation. On the Windows Setup, select the language, time and currency with keyboard and click Next.

Next, click Install Now.


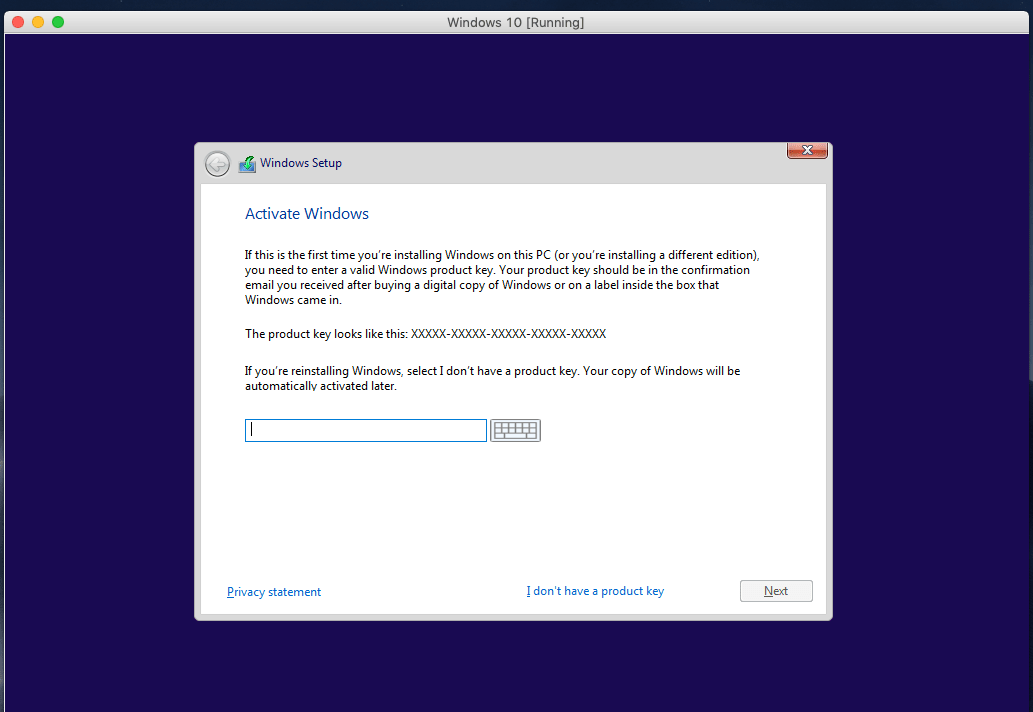
Now enter the product key and click Next. If you don’t have a product key or just want to try, you may click I don’t have a product key, it won’t prevent you.

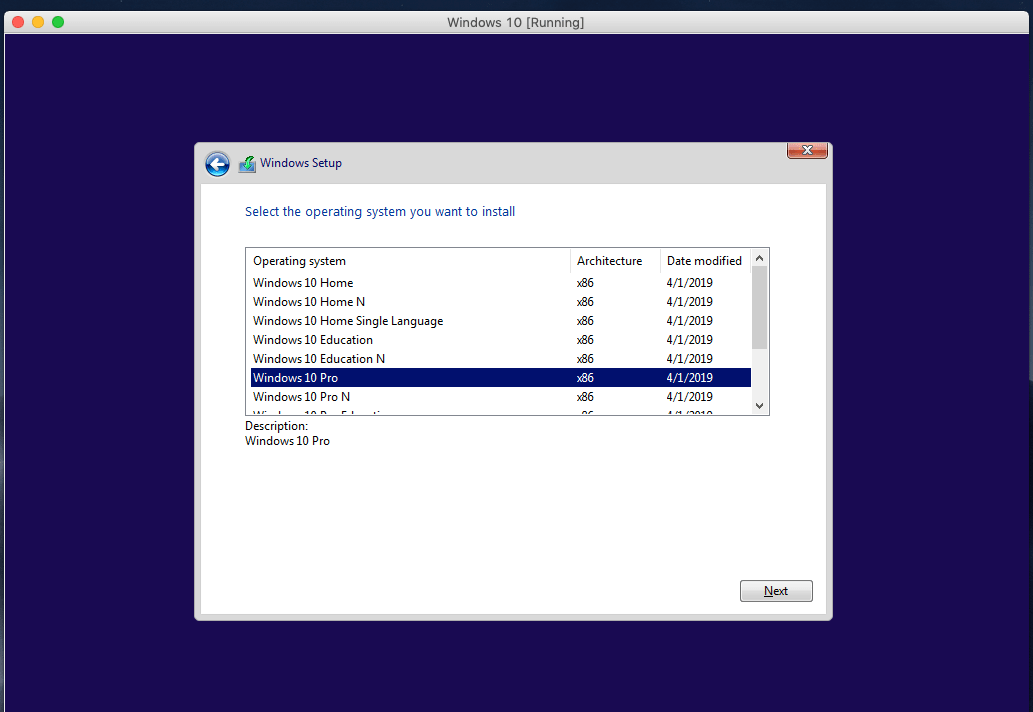
In this screen that appears, select the edition of the Windows 10 you’d like to install and click Next.
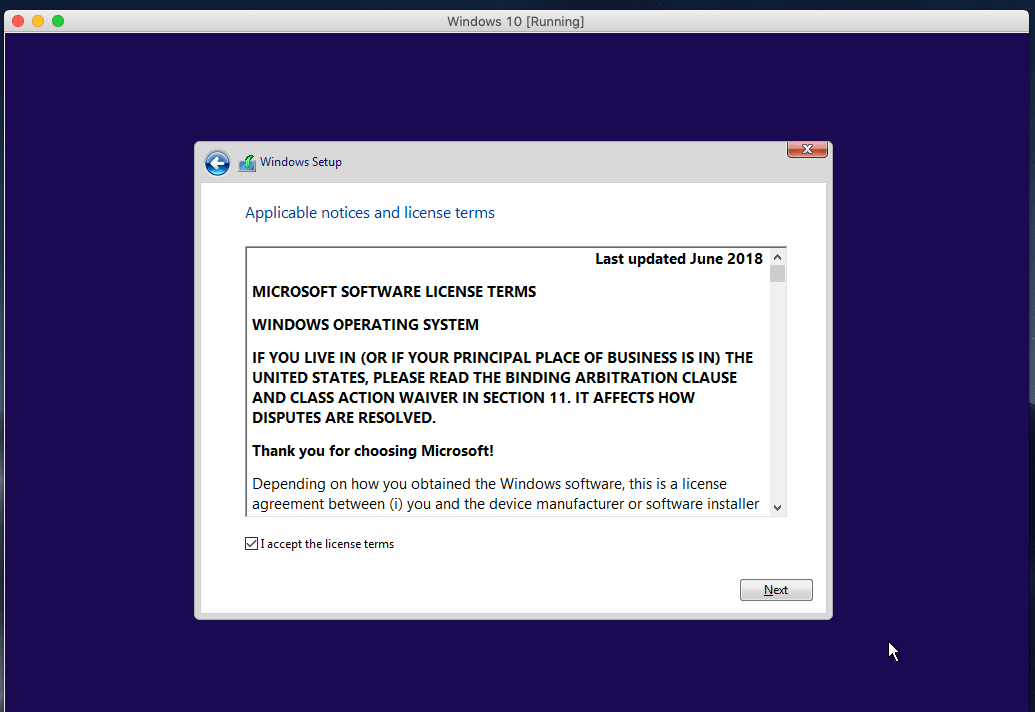
Give some time reading the license, or if you don’t care, click I accept the license terms and then click Next.

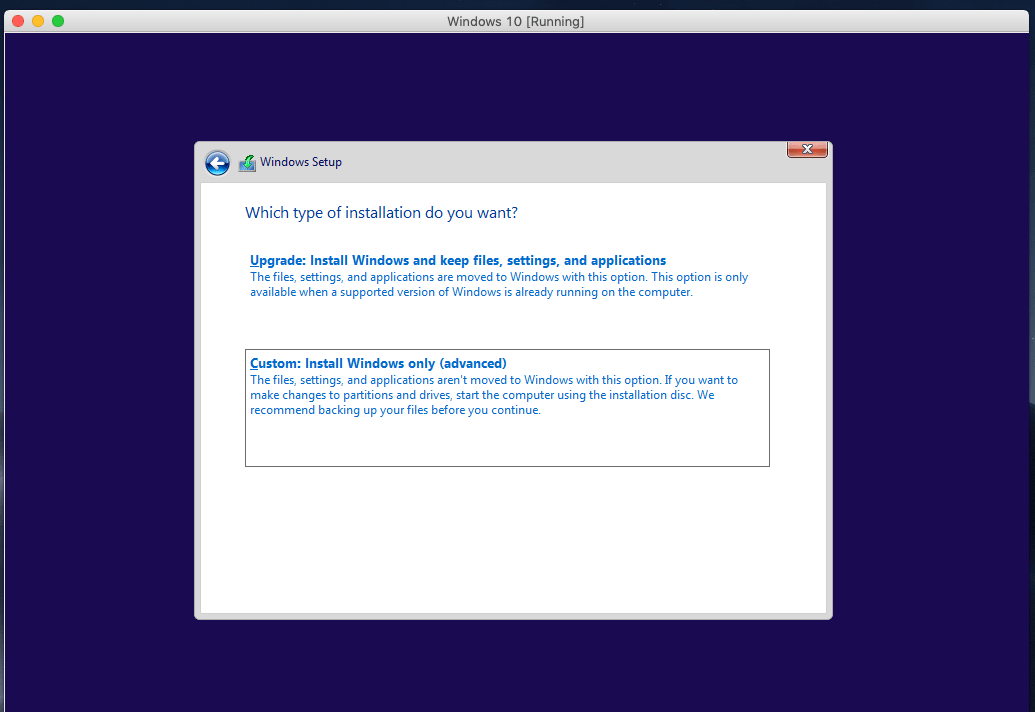
For the installation type, since we want to install, select Install Windows only (advanced).

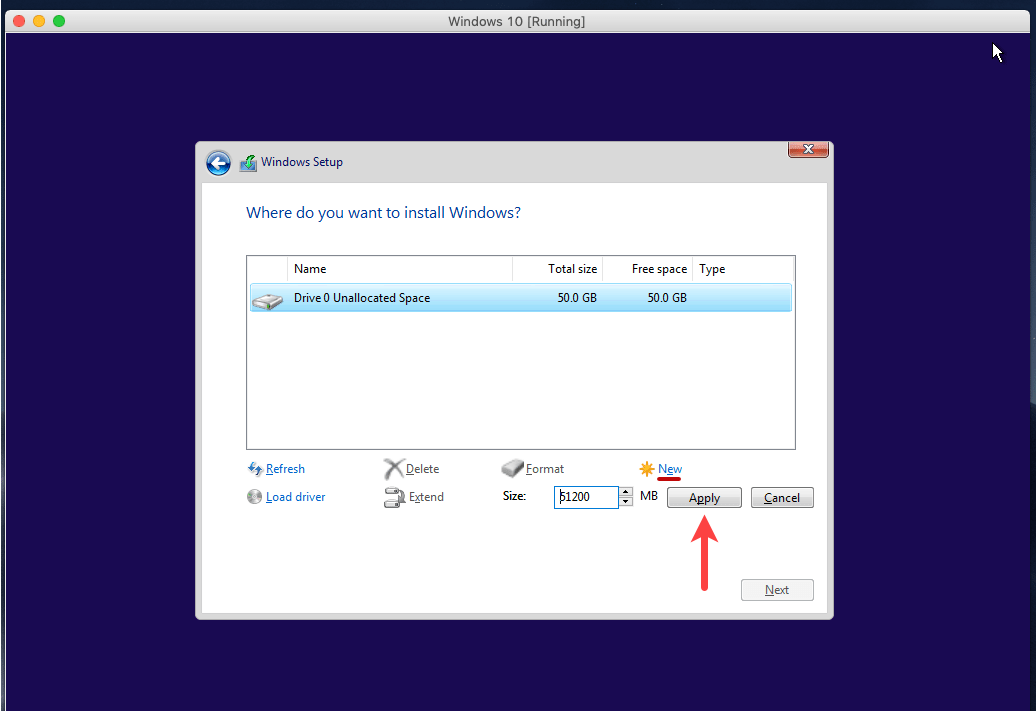
In order to install, you’ll need to create a partition. Since we’ve one disk, click on New then click Apply and at the end click Next. If you’re asked for creating a partition, accept it.

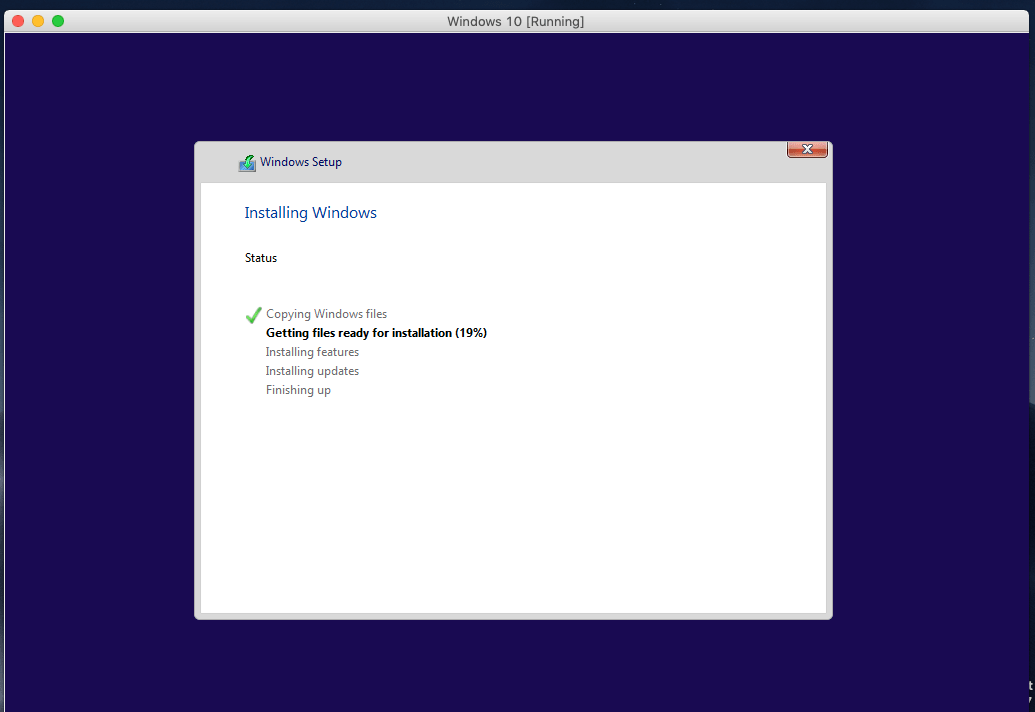
After you’ve done, it will install Windows. Just sit back and relax. It will take some time and it will restart several times.
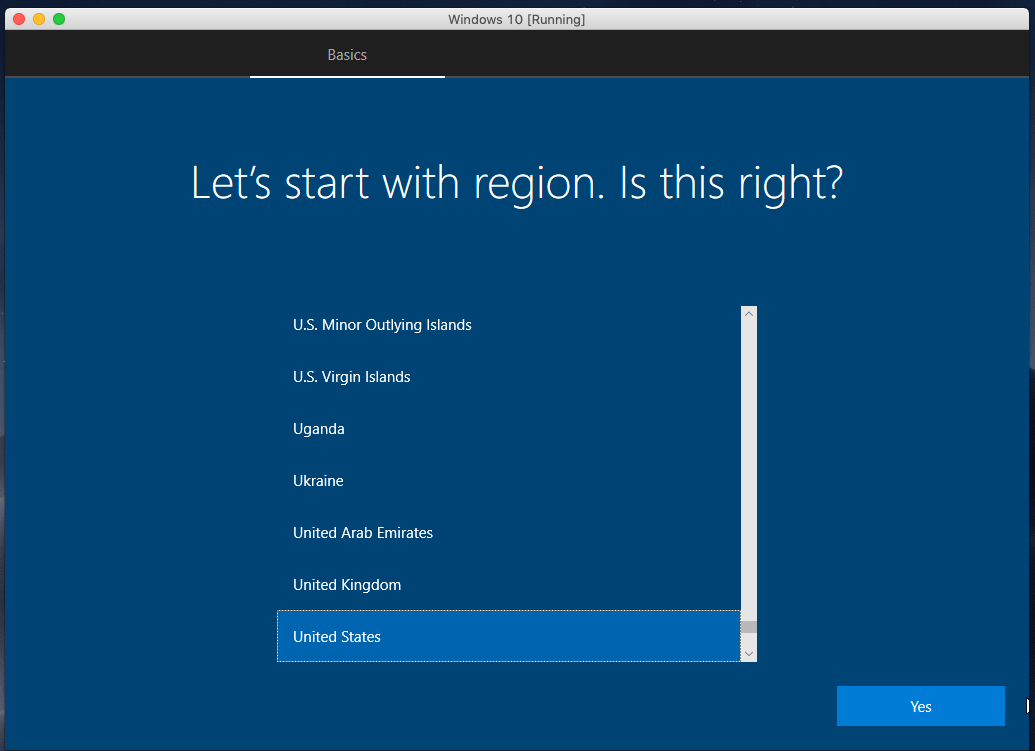
With that, you’re right into Windows, select your region and click Yes.

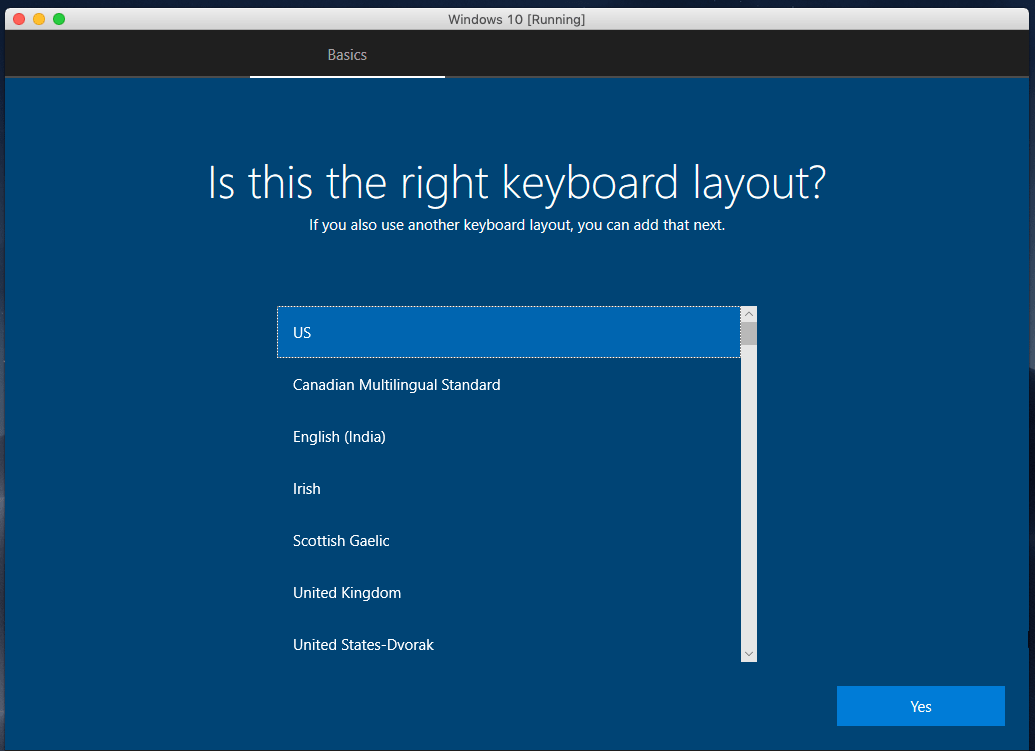
Now choose your keyboard layout and click Yes.

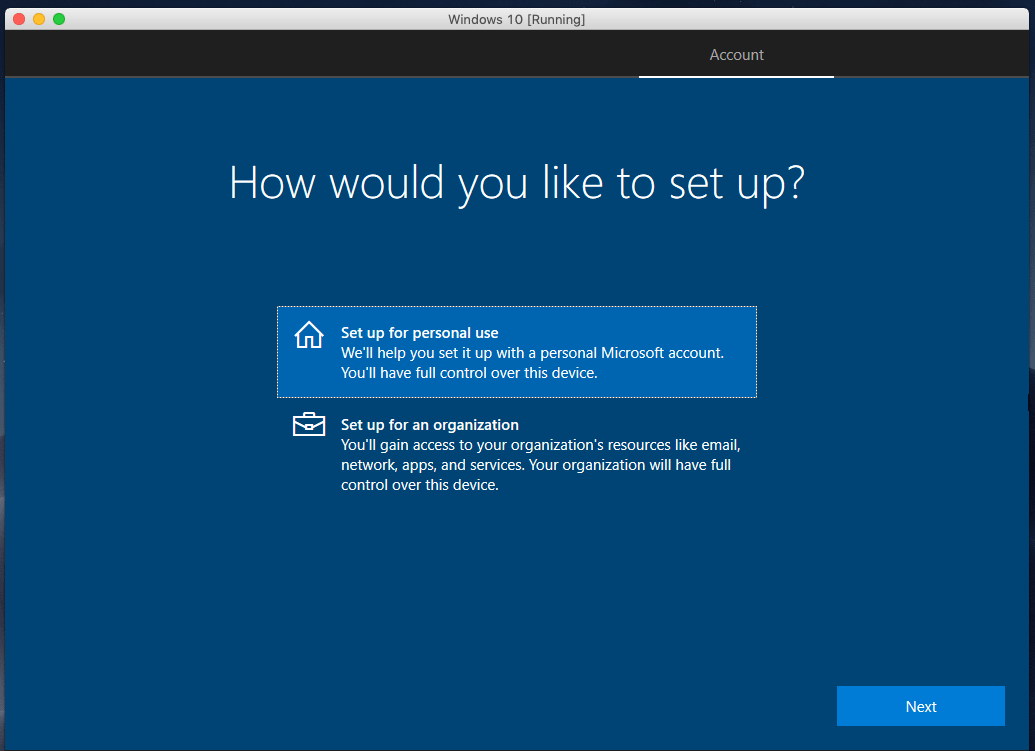
While we’re using for personal use, select Set up for personal use and click Next.

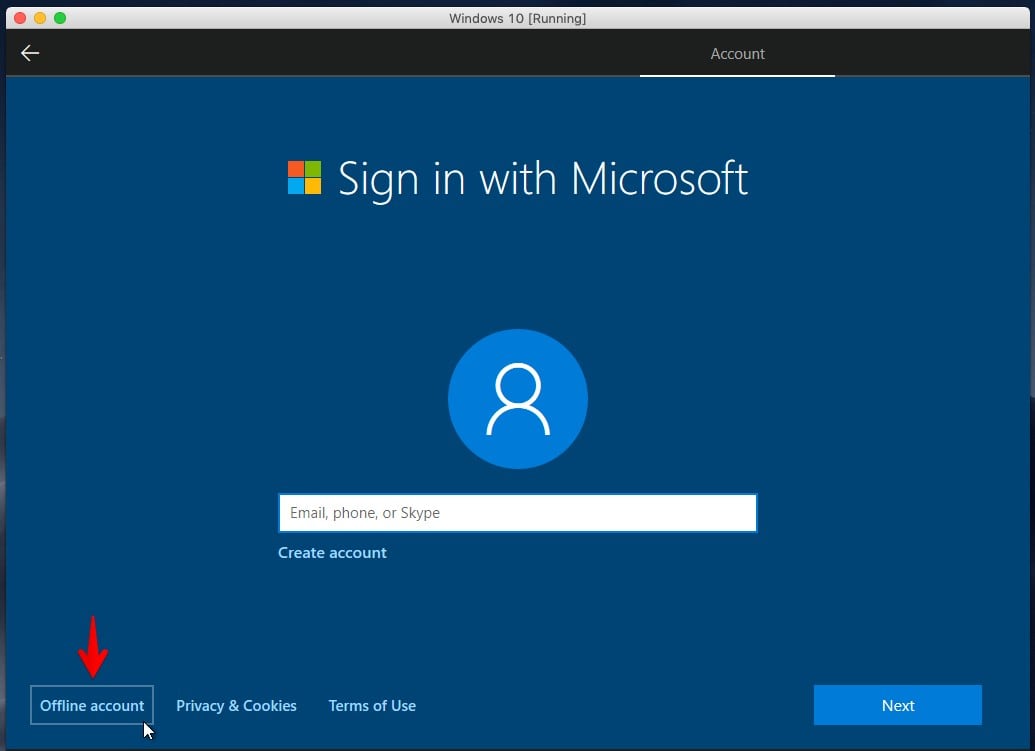
If you’ve a Microsoft account, sign in otherwise, click on the Office account to create a local account

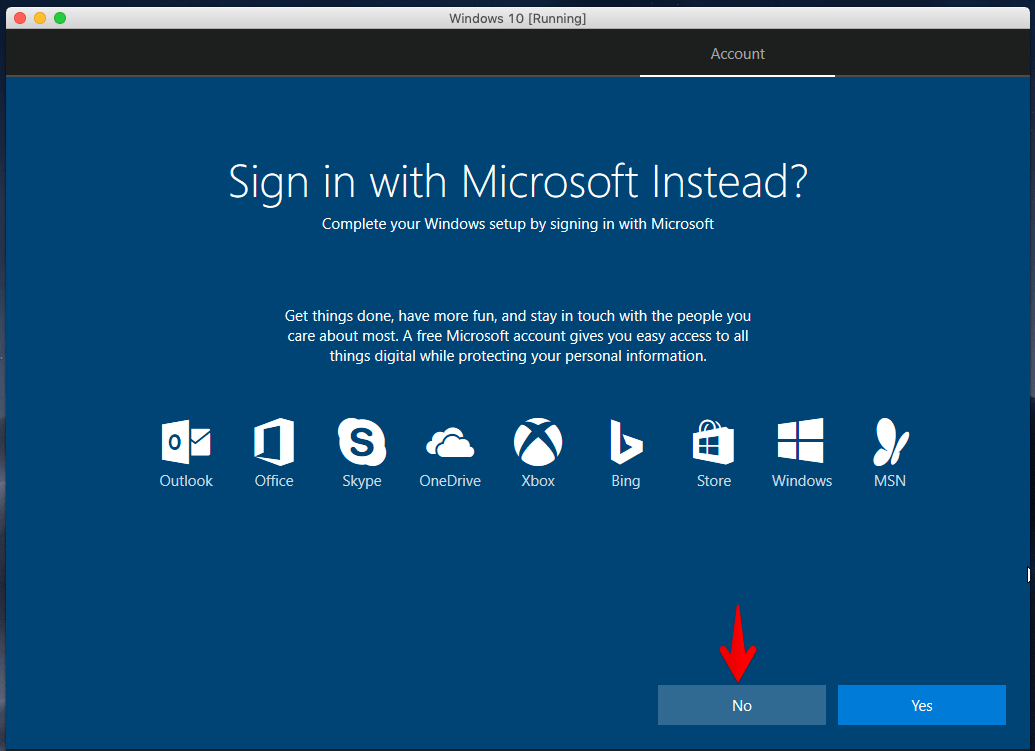
Microsoft recommends signing in with Microsoft, ignore that and click No.

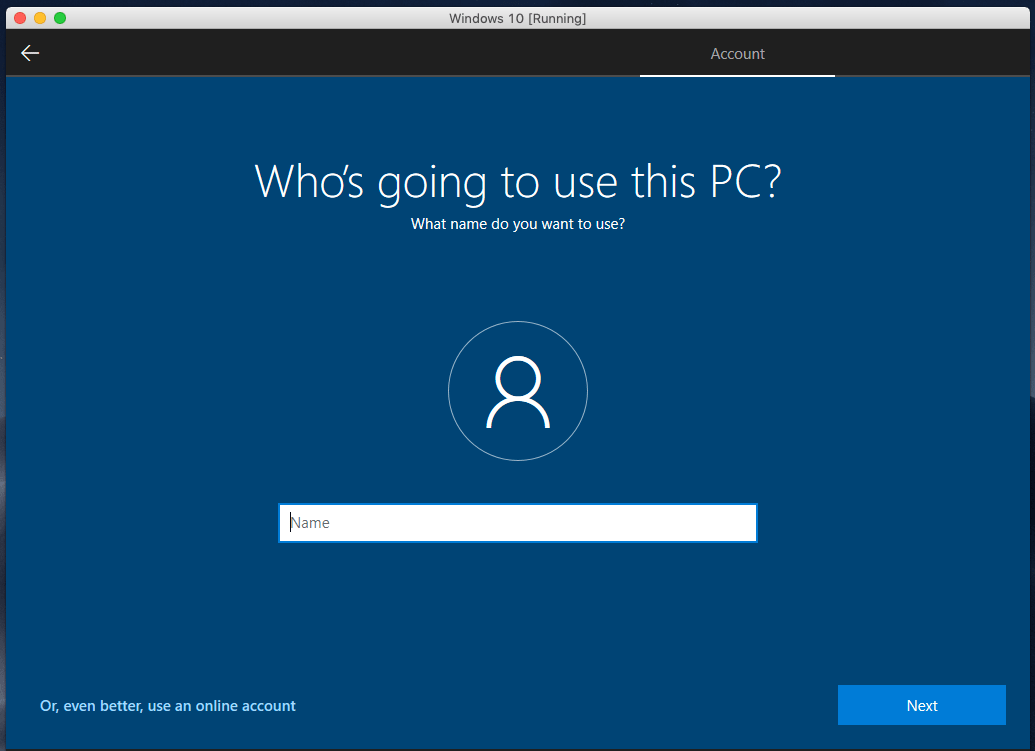
Type your name and click Next.

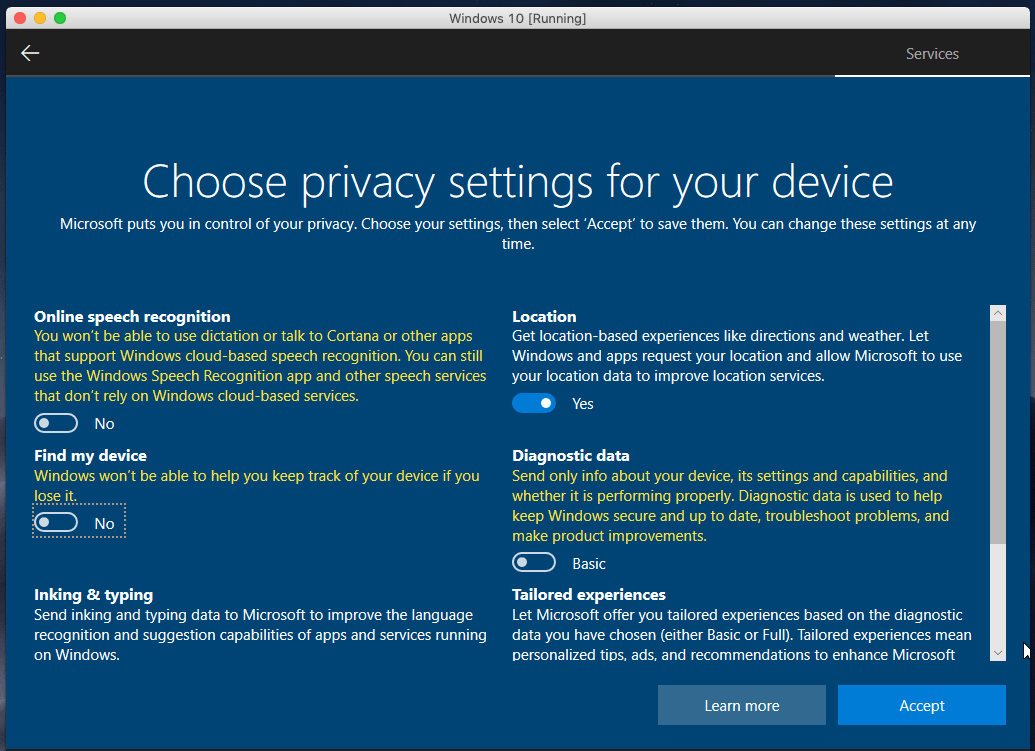
On the next screen, you’ll be asked some more things which you can select or deselect, whatever you prefer. On this window, choose privacy settings the one you’d like and click Accept.
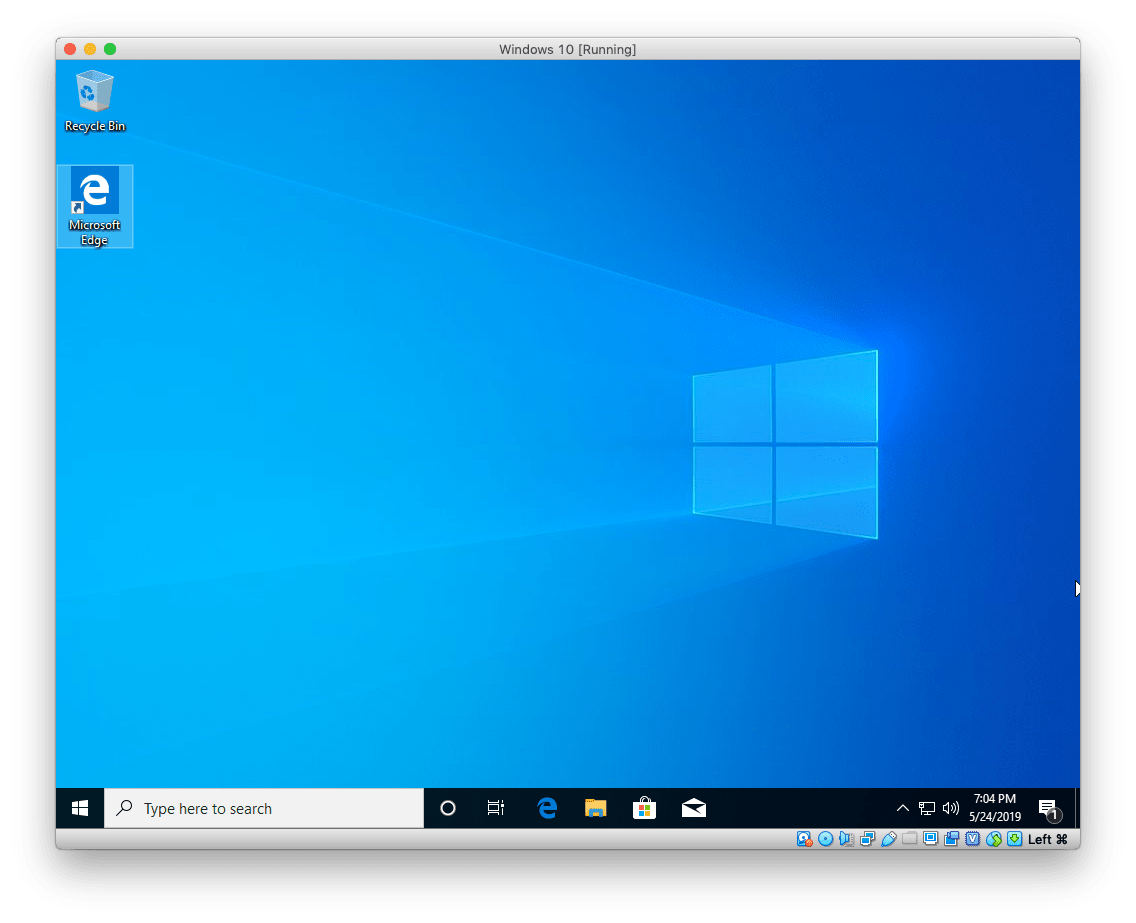
Finally, you’ll have the gorgeous Windows 10 newest version installed.

With that, the installation process finishes. If you’ve something to tell us, we’re happy to know it.