


Installing macOS Catalina on VMware requires which works for macOS Catalina VMware Unlocker. We’ll explain it down. After macOS Catalina, which is the 10.15 version of Apple’s operating system was rolled out on the event. With all those things, those fabulous features will definitely be into the macOS Catalina which is almost out. In this post, we show how to Install macOS Catalina on VMware on Windows with macOS Catalina ISO which is different from install macOS Catalina on VMware. In this post, we’ll show how to Install macOS Catalina on VMware on Windows PC.
This installation is done completely with macOS Catalina ISO. So here’s how to do it. This update like no other update is one of the most powerful plus plenty of features, improvements to the old features, and updates to all over the corner. The Catalina is out now with a slew of new features and improvements from killing iTunes into three apps to the new Sidecar feature and a lot more. Let’s see how to install macOS Catalina on VMware on Windows PC.
Table of Contents
Install macOS Catalina on VMware on Windows PC [New Method]
While Mac users were likely had access to and have still but that’s the entire case for them. What’s the tremendous news for Windows users is that those updates are not limited to single device owners (Macs), Windows users can still download macOS Catalina VMware & VirtualBox file and download macOS Catalina ISO For VMware & VirtualBox file and install macOS Catalina on VMware on their Windows PC. This up to update post will instruct on how to install macOS Catalina on VMware on Windows PC in a recent new method.
For installing macOS Catalina, we’ll need to install macOS Unlocker for VMware. The macOS Unlocker for VMware patches VMware and allow us to install macOS Catalina on VMware. This macOS Unlocker or macOS Catalina VMware unlocker works well for VMware Workstation or Player of the latest version. As I mentioned, installing VMware without patching it can’t be installed. Instead, VMware Unlocker or VMware macOS Unlocker for macOS will work pretty well. We’ve provided Unlocker for VMware on macOS and also show you how to install macOS Catalina on VMware on Windows PC.
VMware Workstation
For this process, we’ll use VMware Workstation which is the most popular virtual machine app. That is in two modes of VMware Workstation Pro and VMware Workstation Pro. Now if you’re planning to use VMware Workstation Pro for more than 30 days, you’ll do require a license key. These two modes don’t have huge difference except a few. With that, there’s no difference in the installation of it and Install macOS Catalina on VMware on Windows PC.
What this app does is, it uses a virtual machine with all its own virtual hardware to install and run an operating system entirely separate from the actual operating system. With VMware, you can create not only create a virtual machine but manage it. Within the VMware, there are probably huge rooms of features and updates. This includes installing VMware Tools which is pretty useful that enhances the performance, quality of the display and more. And that’s only a tiny part and there’s definitely more to do. For this process to work, we need VMware Unlocker Patch Tool (Unlocker for VMware).
Step One – Create or Download macOS Catalina ISO For VMware & VirtualBox
Installing macOS Catalina requires a copy of download macOS Catalina ISO VMware & macOS Catalina ISO VirtualBox file whether macOS Catalina VMDK. While we did install macOS Catalina on VMware with the macOS Catalina VMDK file, now we’ll install the macOS Catalina with macOS Catalina ISO file For VMware & VirtualBox. The macOS Catalina ISO file can be either created or obtained that both are easy to do.
In this method, we’ll use which we’ve download macOS Catalina ISO For VMware & VirtualBox to install and run macOS Catalina on VMware. Since the process is different from installing macOS Catalina with the virtual machine image (VMDK) file, we’ve separated installing macOS Catalina ISO VMware and macOS Catalina ISO VirtualBox file in this section.
Download macOS Catalina ISO File
ALTERNATE LINKS:
macOS 10.15.3 Catalina Final ISO (19D76) January 28, 2020
macOS Catalina ISO 10.15.7 February 2, 2021 (geekrar forum)
- Installing Catalina is pretty easy, but that’s not the case with downloading. This process seems very easy which should require a few clicks, that’s correct but matters where you’d catch up the file. That’s what makes it difficult. So we’ve cut you to the chase and straight to the point, download macOS Catalina ISO For VMware & VirtualBox from here .
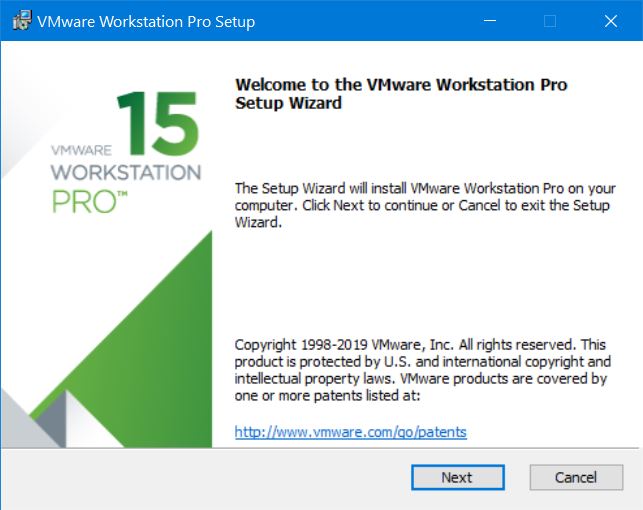
Step Two – Install VMware Workstation Player or Pro
The VMware Workstation is necessary to install macOS Catalina on VMware. Like we explained the VMware Workstation that how it works, installing it is pretty easy but before that, let’s download it. From the BIOS, watch out if the Intel VT-x hardware acceleration options are enabled.
Once that’s done, go ahead accomplish with the installation which is a matter of a moment.

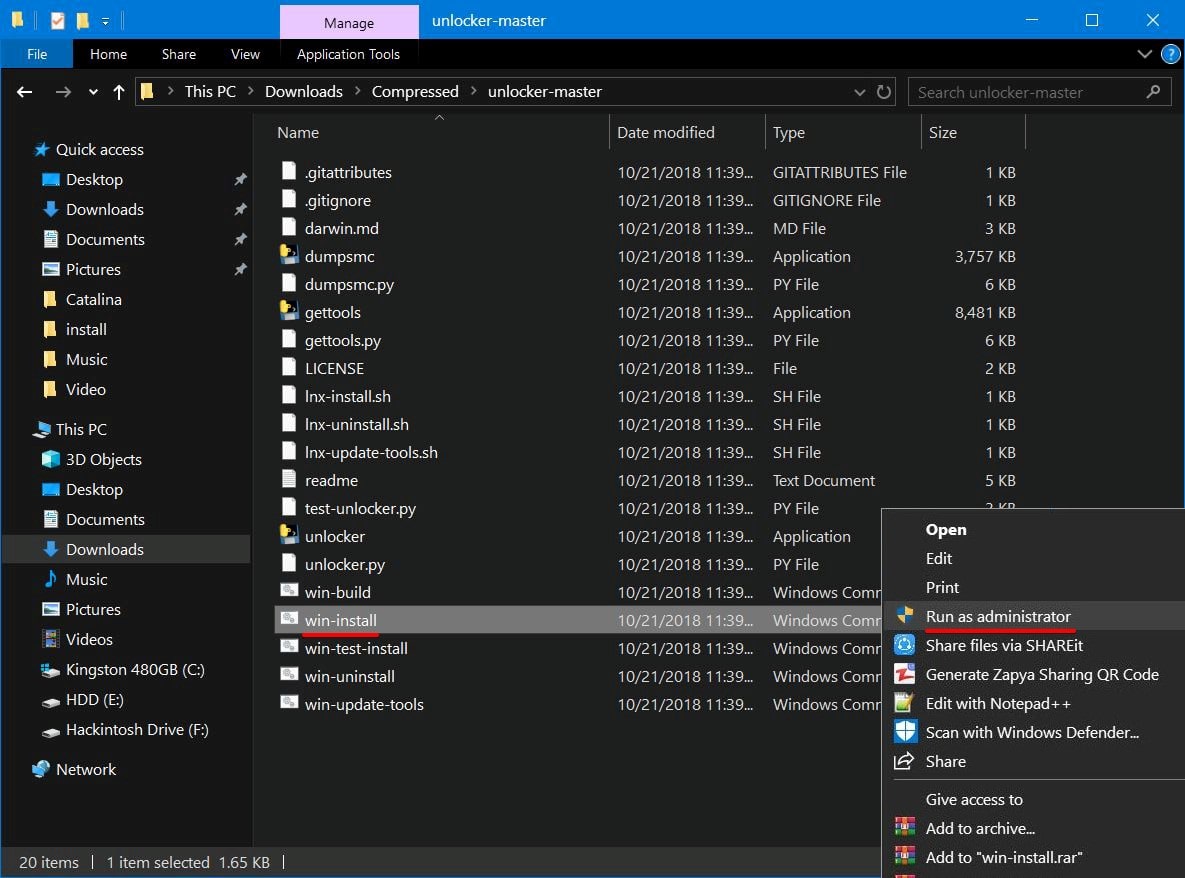
Step Three – Install macOS Unlocker for VMware
With the VMware installed whether its VMware Workstation Player or Pro, without opening it, open the VMware Patch Tool. What this patch does is, it will switch the VMware to install macOS Catalina and install macOS Mojave or High Sierra.
Note: Before installing the patch tool, it’s important to take note down that the VMware should be closed.
Go ahead and open the VMware Unlocker tool and right-click on win-install and Run it as Administrator. This is no different from previous versions we’ve done.

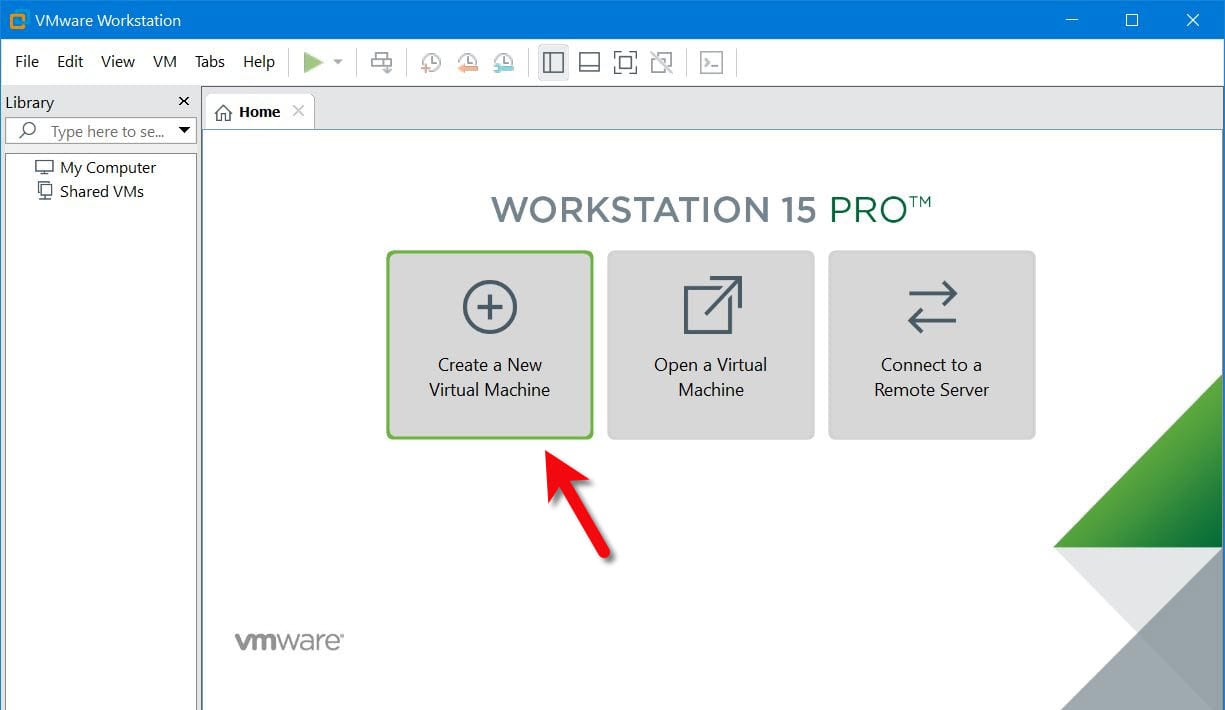
Step Four – Create A New Virtual Machine
And that makes all things set. Start with creating a new virtual machine on VMware.
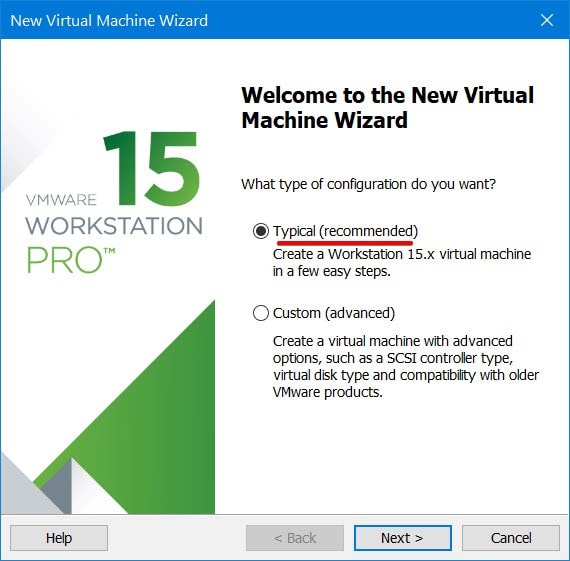
So open up VMware Workstation and click Create a New Virtual Machine (Ctrl+N).

Now select the Typical (Recommended) option for the installation and click Next.

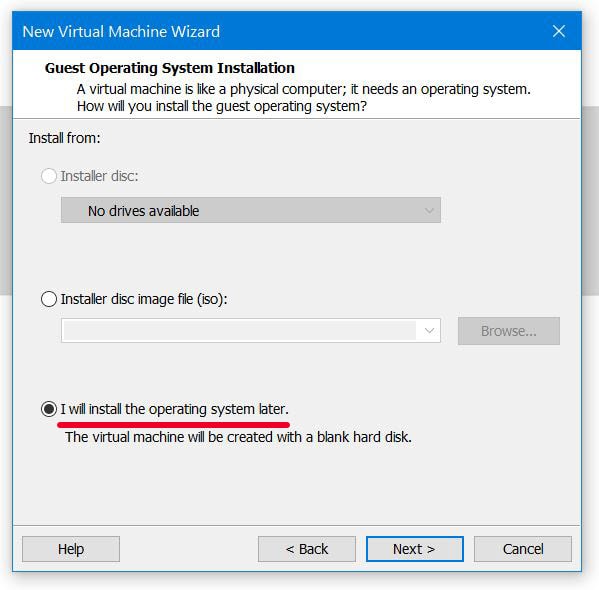
When this screen pops up, select I’ll install the operating system later and click Next.

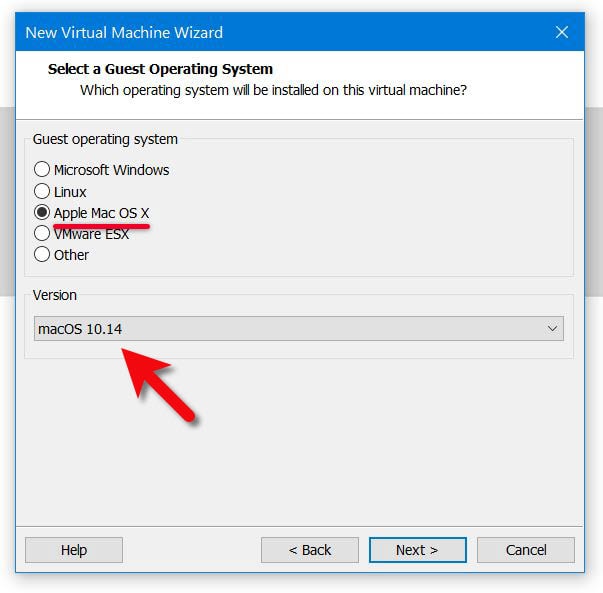
Then select macOS and macOS 10.14 for the version and hit Next. If there’s no macOS option on your screen, chances are there that the Patch tool is not installed correctly.

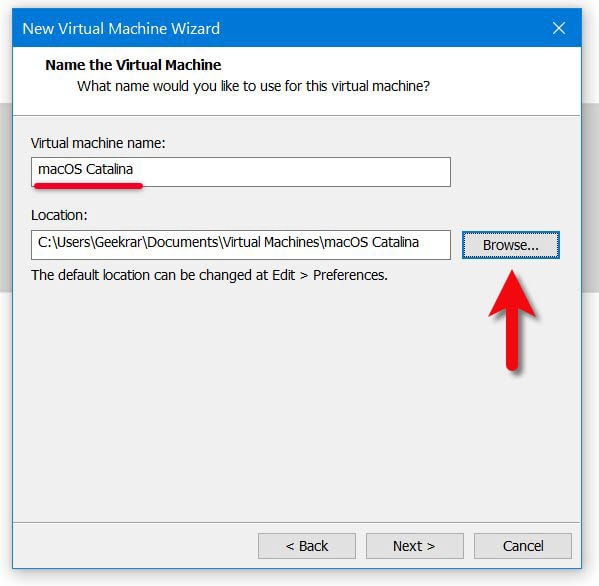
In this order, enter a name and a location where the Catalina virtual machine files should be stored then hit Next.

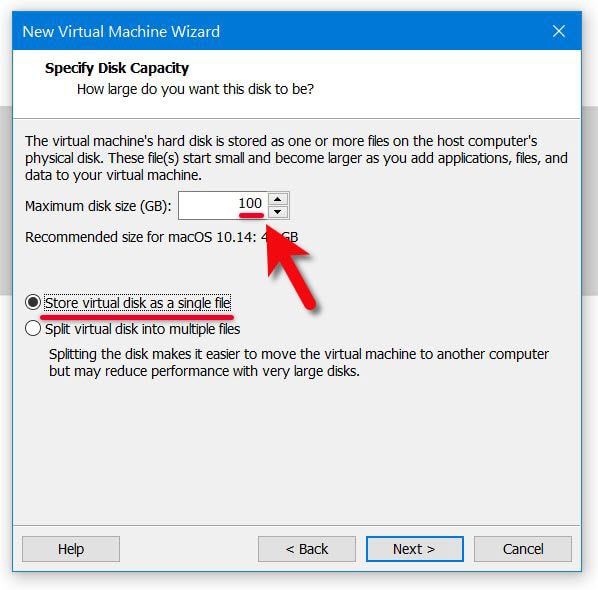
The disk size is insanely important, specify 100GB or more and select Store virtual disk as a single file then hit Next.

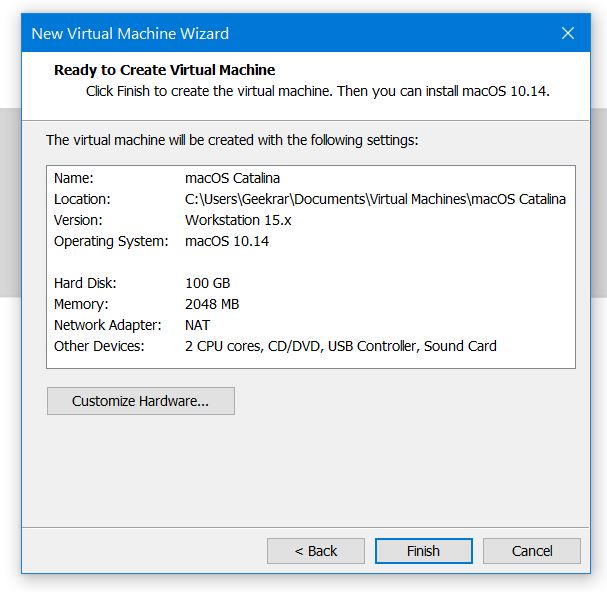
On the finish line, check if everything is okay and click Next.

Step Five – Configure The Virtual Machine
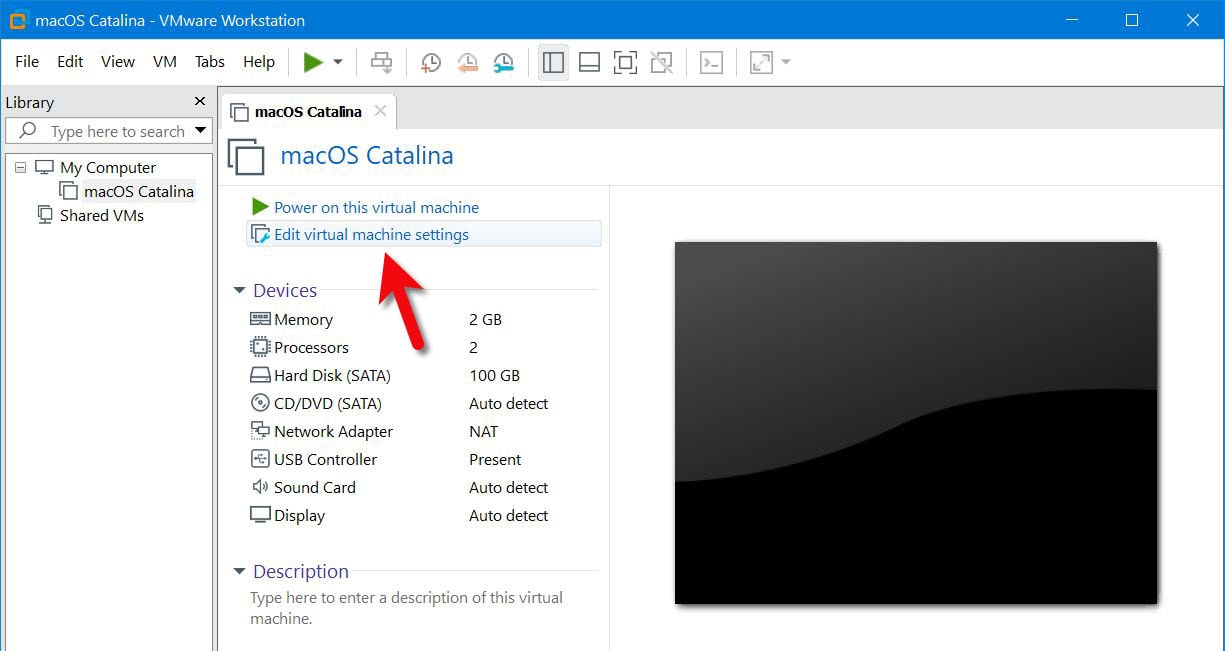
For installing macOS Catalina, we need to edit some settings of the virtual machine.
For this purpose, open the virtual machine settings.

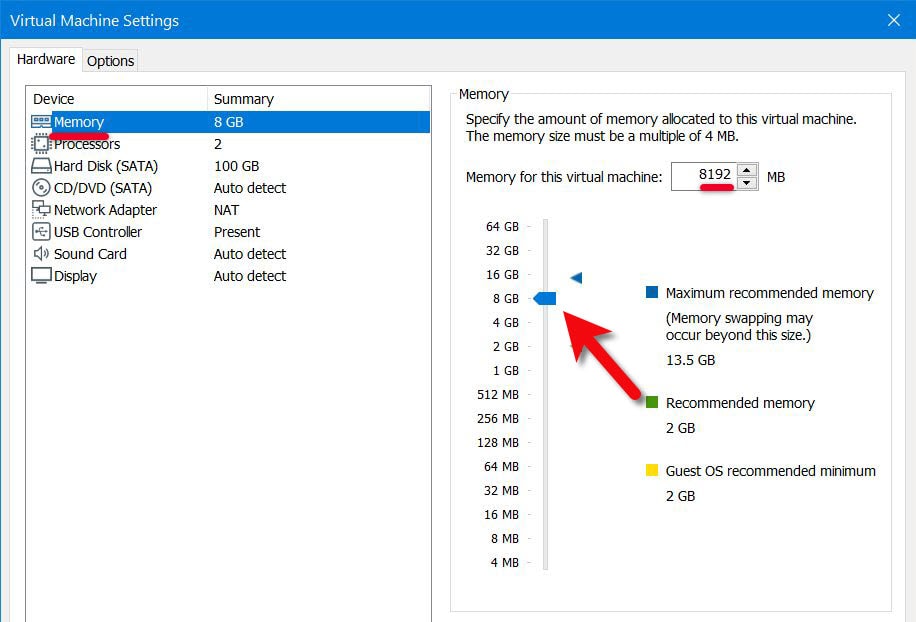
On the virtual machine settings, set up 50% of your computers RAM that would be 8GB if there’s 16GB of RAM in your system.

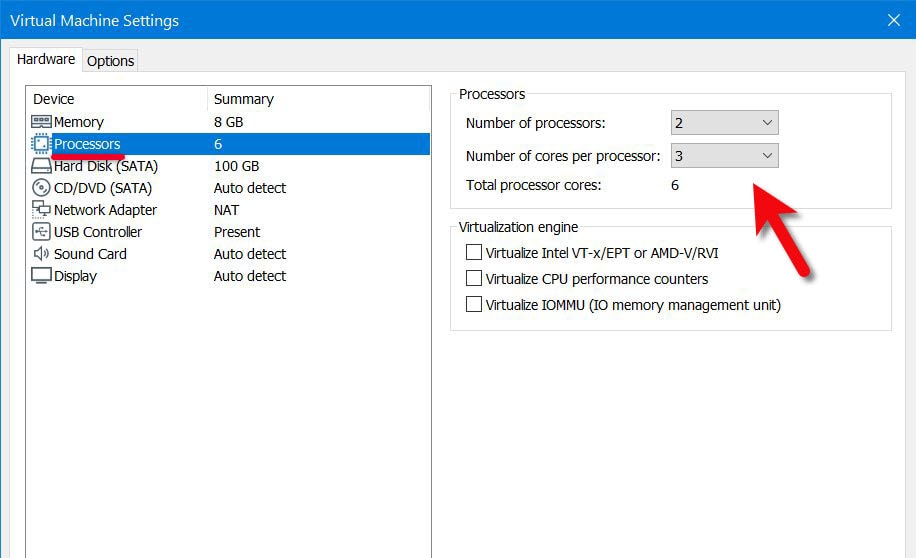
Navigate to the next tab which is processor and set up 50 – 80% of your system’s processor.

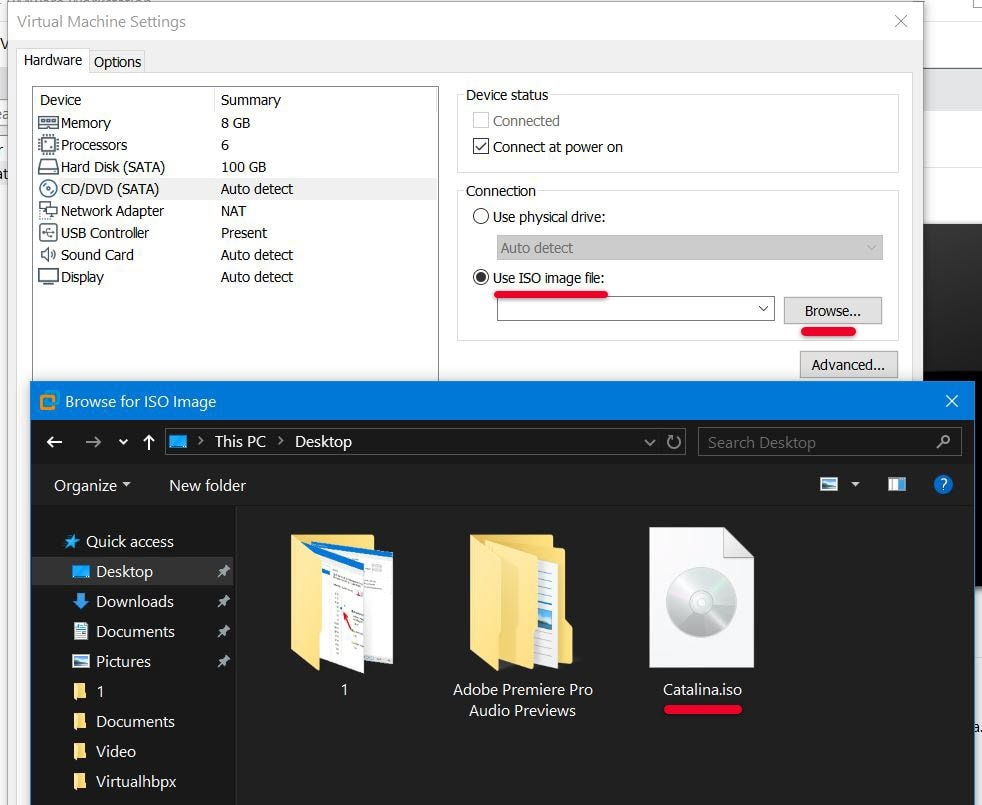
Next head to the CD/DVD tab, there, select use an ISO image file and browse the macOS Catalina ISO file and select it.

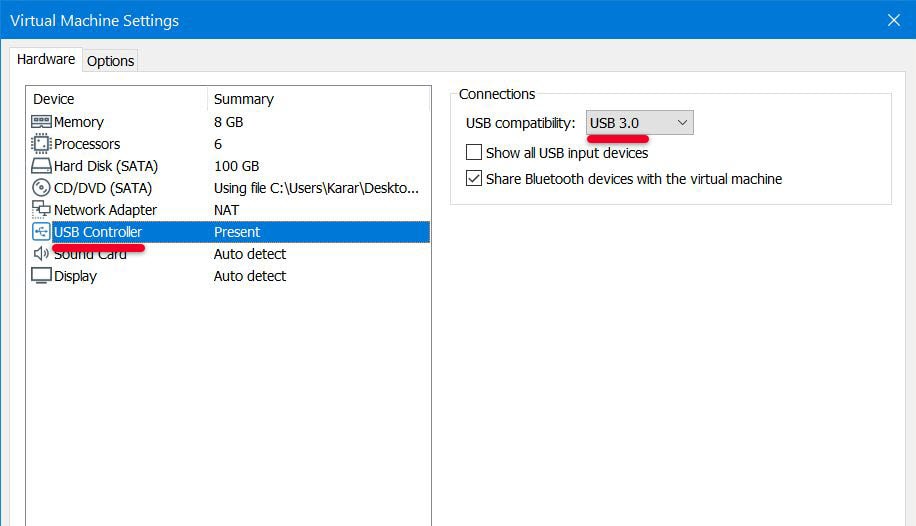
Jump to the USB Controller and select USB 3.0 for the USB Compatibility.

Step Six – Insert Config Key For VMX File
Great! The settings are near to end, so accomplish with it.
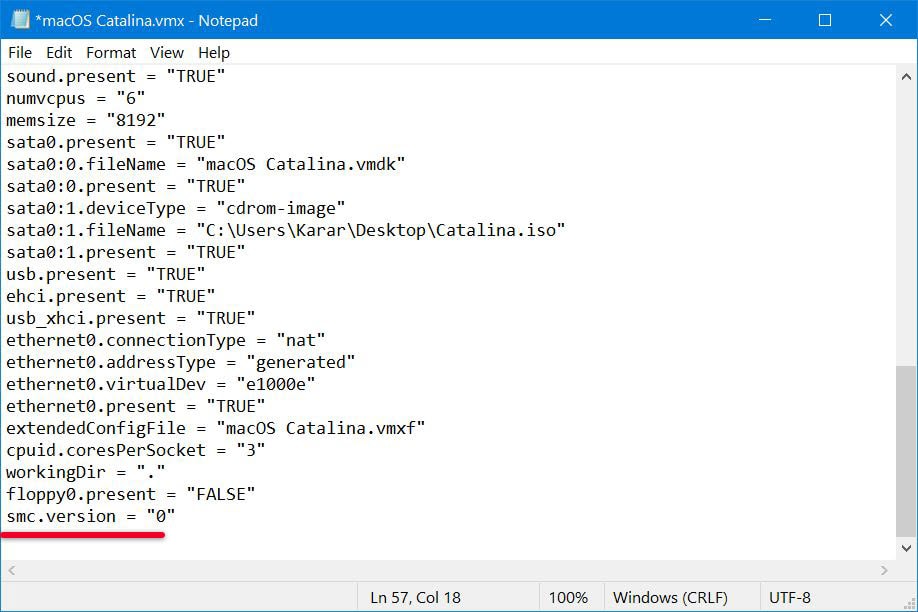
Now close the virtual machine (seriously) and head over to the virtual machine files where you had stored them and right-click on the macOS Catalina VMX file and open with Notepad.

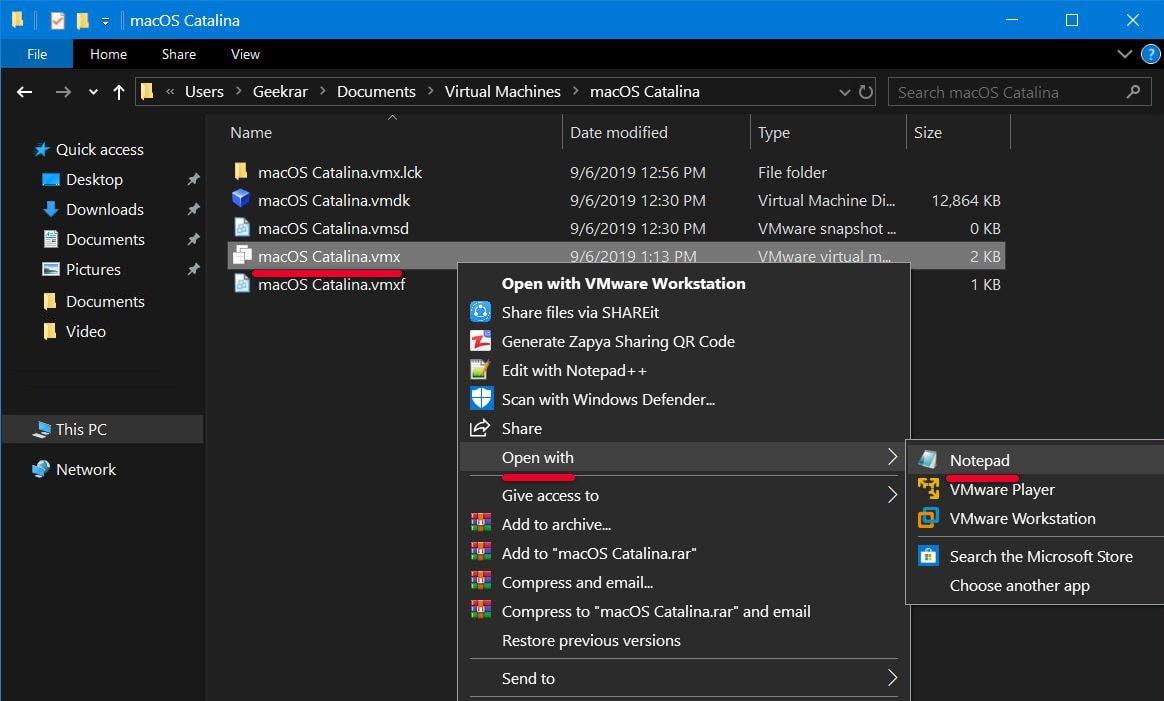
Next, scroll to the end and copy and paste this command then press Ctrl+S.
smc.version = “0”

Step Seven – Install macOS Catalina on VMware
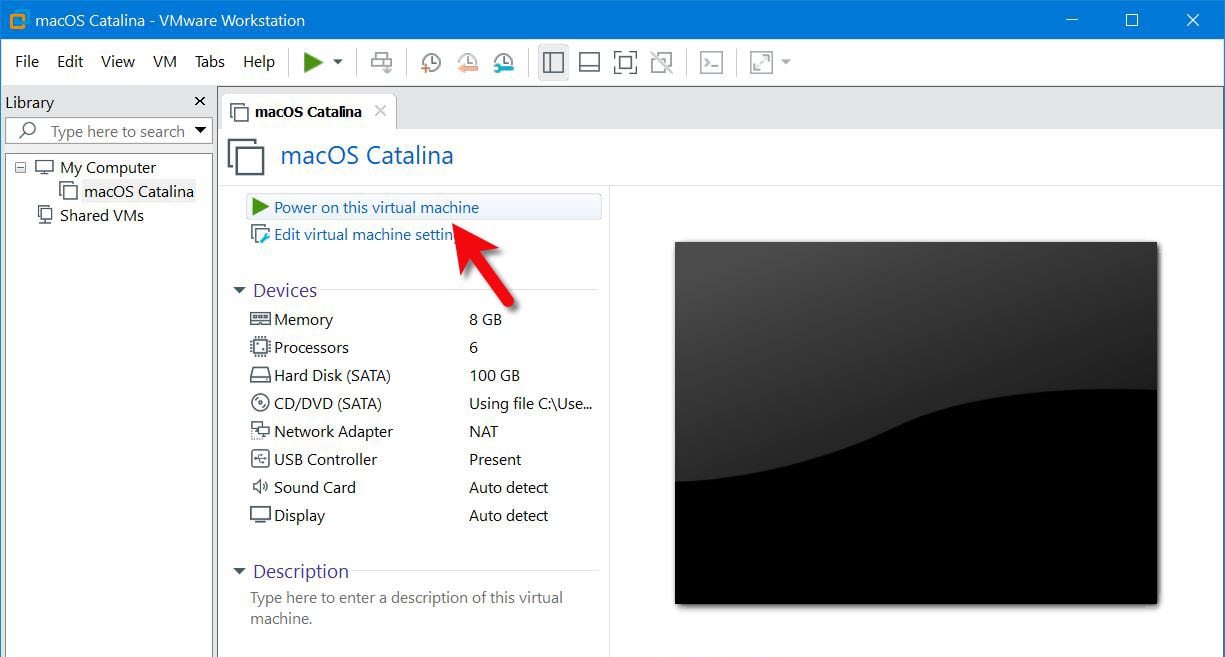
That done, we’re ready to install macOS Catalina.
Start by switching macOS Catalina on that will take a couple of minutes.

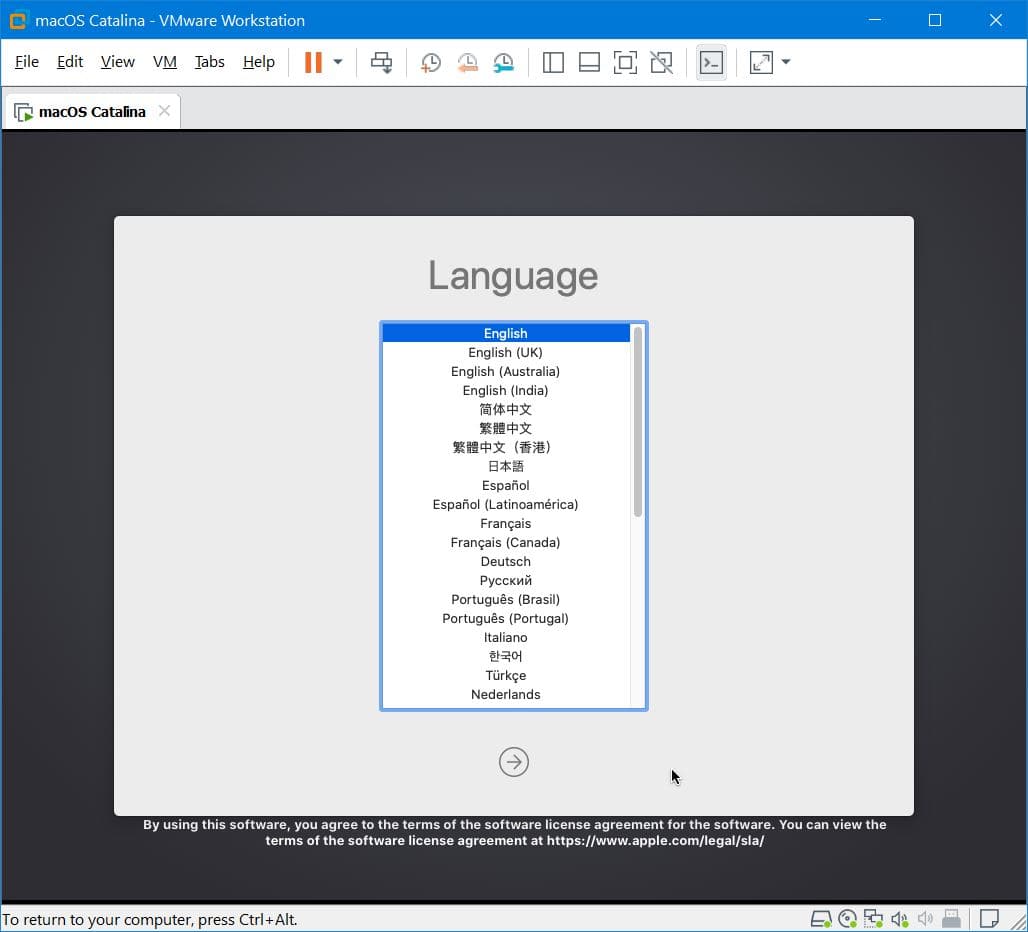
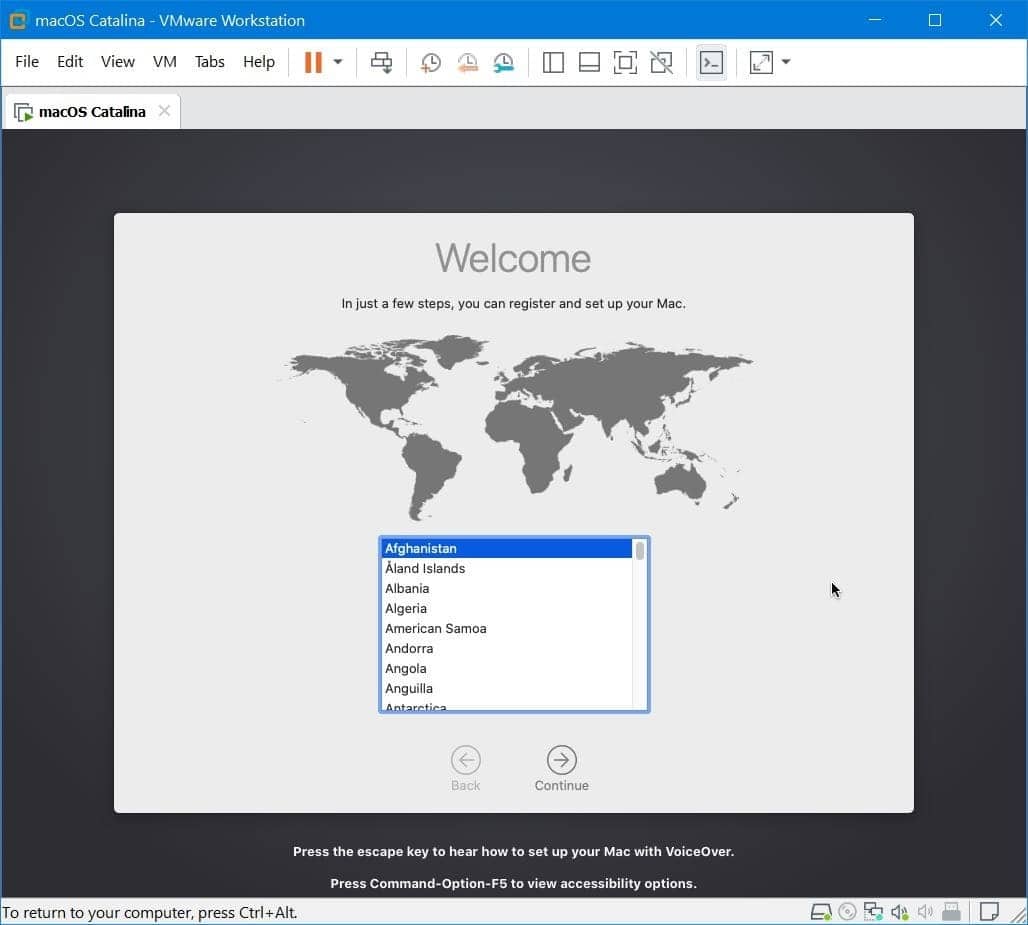
Next up, switch the macOS Catalina on and wait for it to boot. When it’s up, select your language and click Continue.

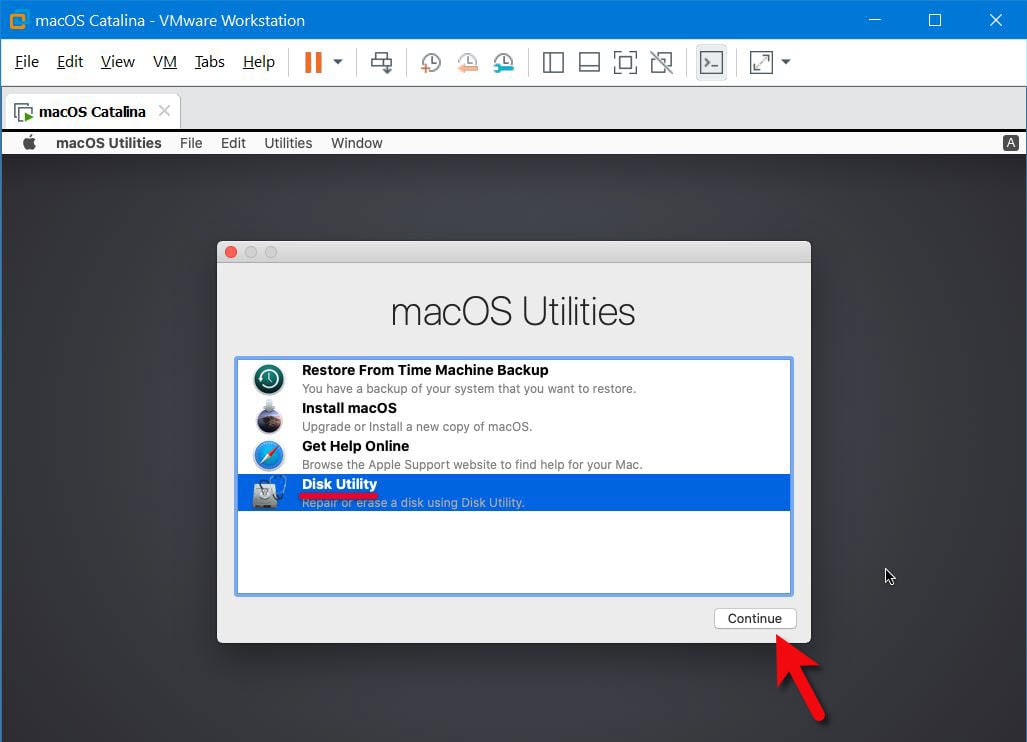
Next, select Disk Utility and click Continue.

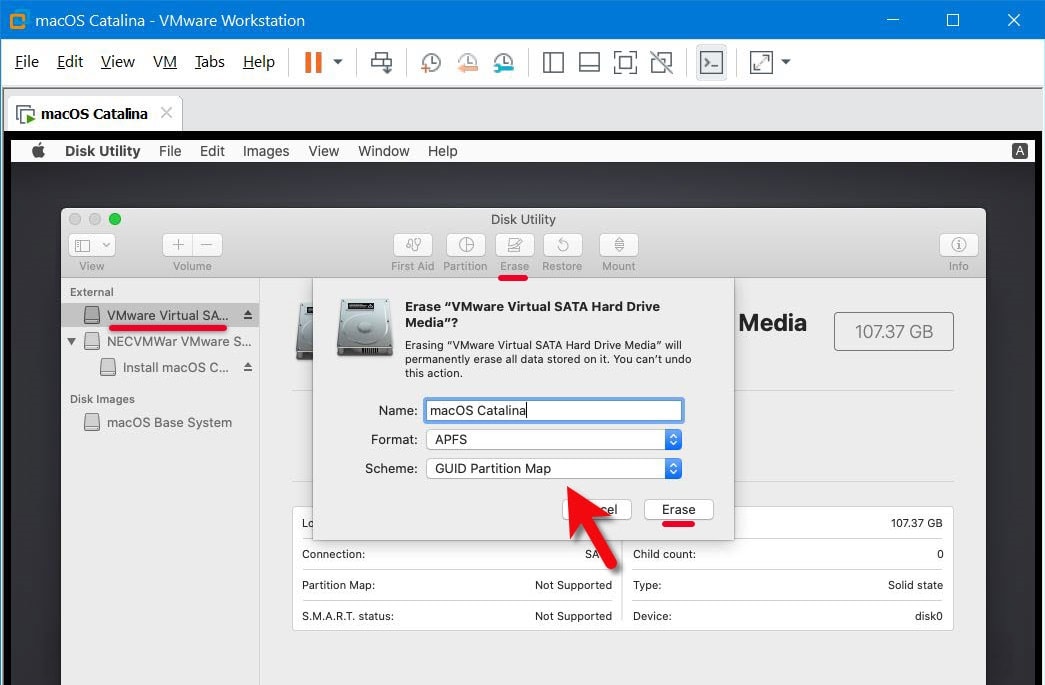
On the Disk Utility, select the VMware Virtual Disk and click Erase then do it like the shot.

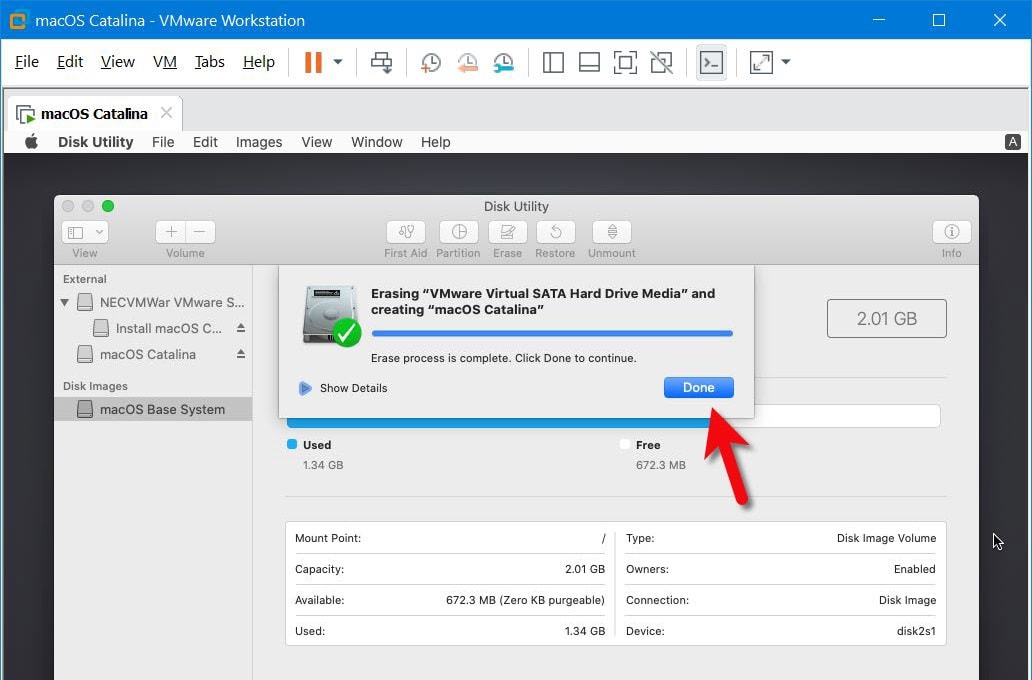
When you’re done, click on Done and close the Disk Utility.

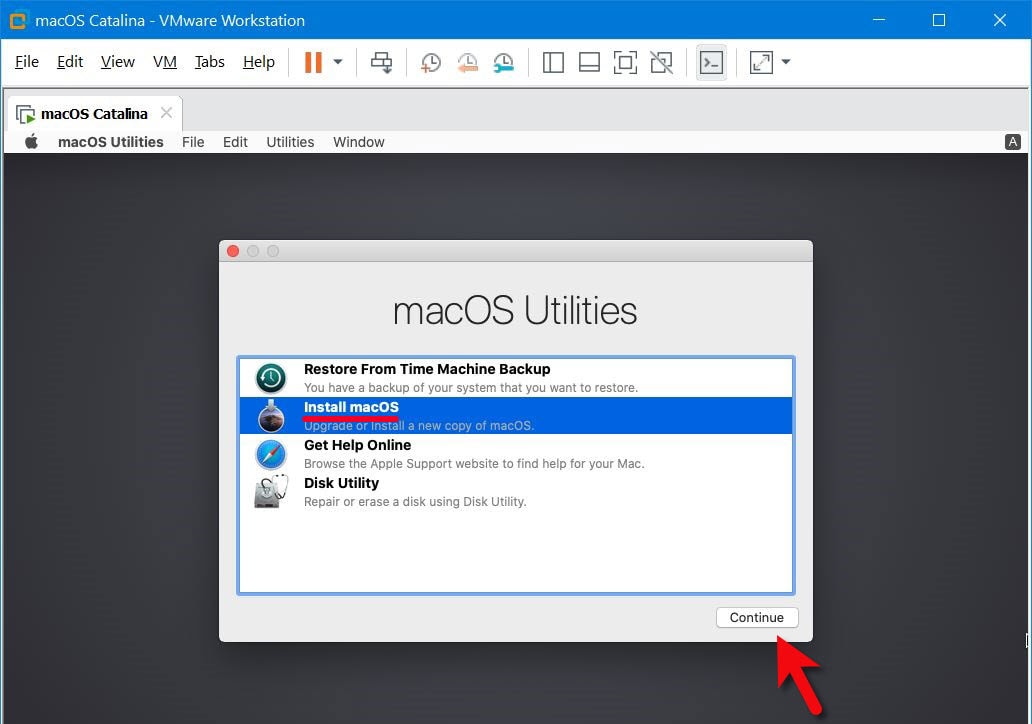
Once that’s done, select Install macOS and Continue.

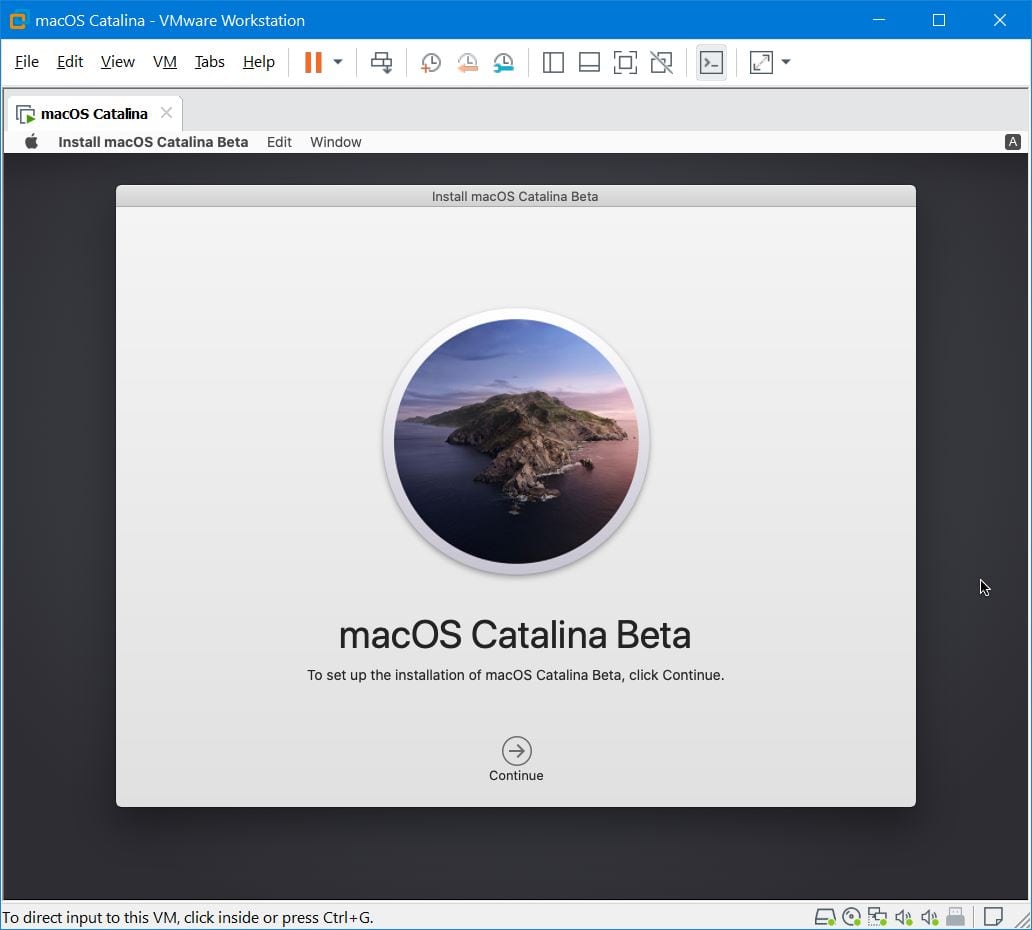
Simply Continue.

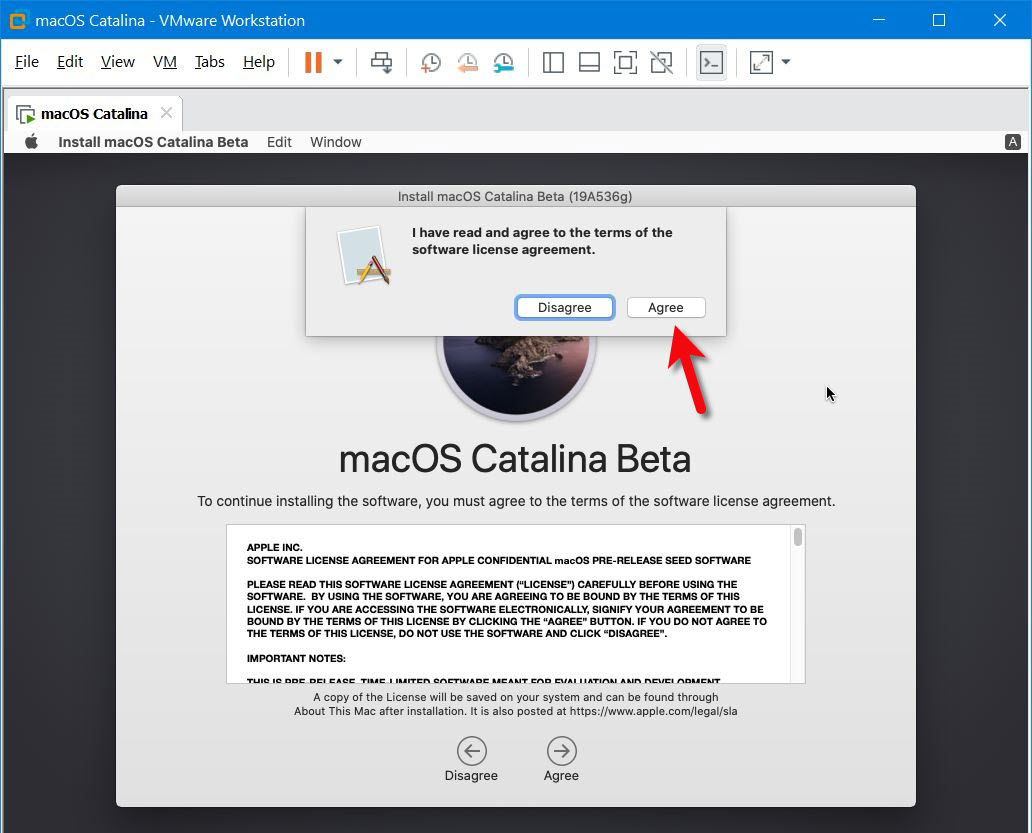
Agree with terms and conditions by clicking on Agree.

The time has come, select the Vmware disk and click Install.

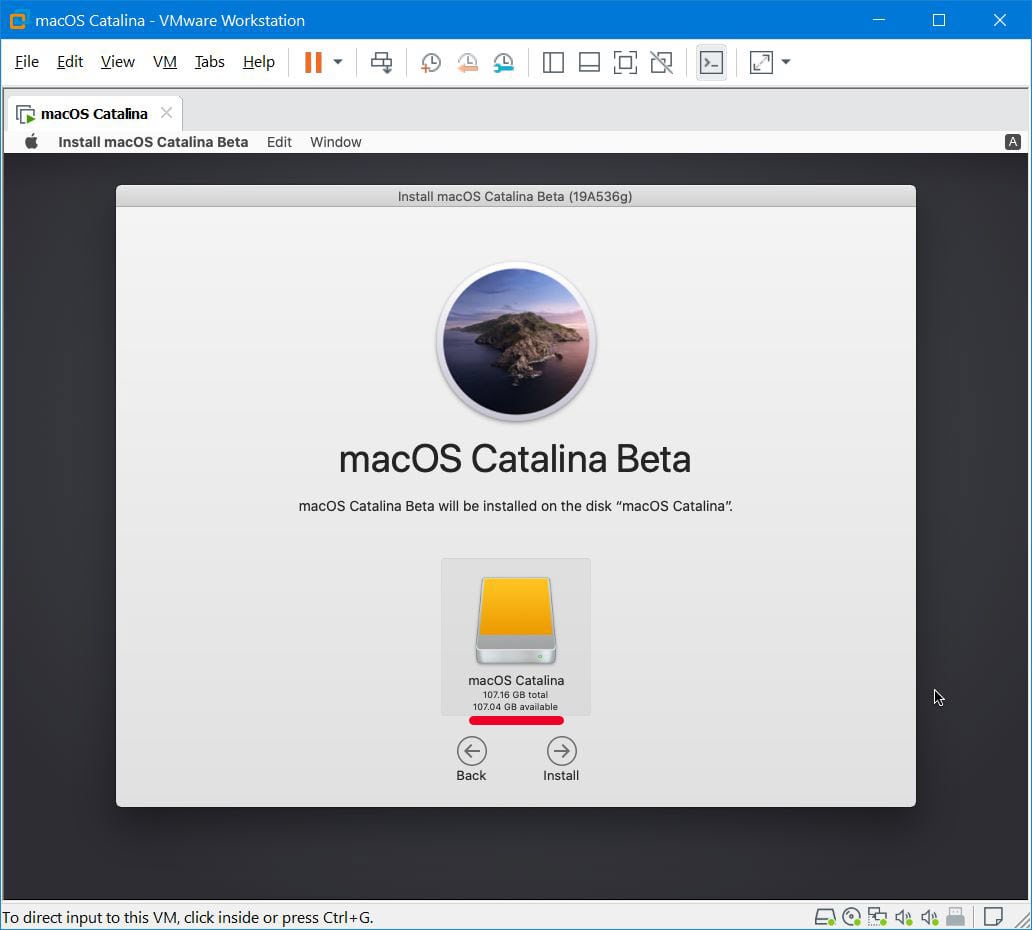
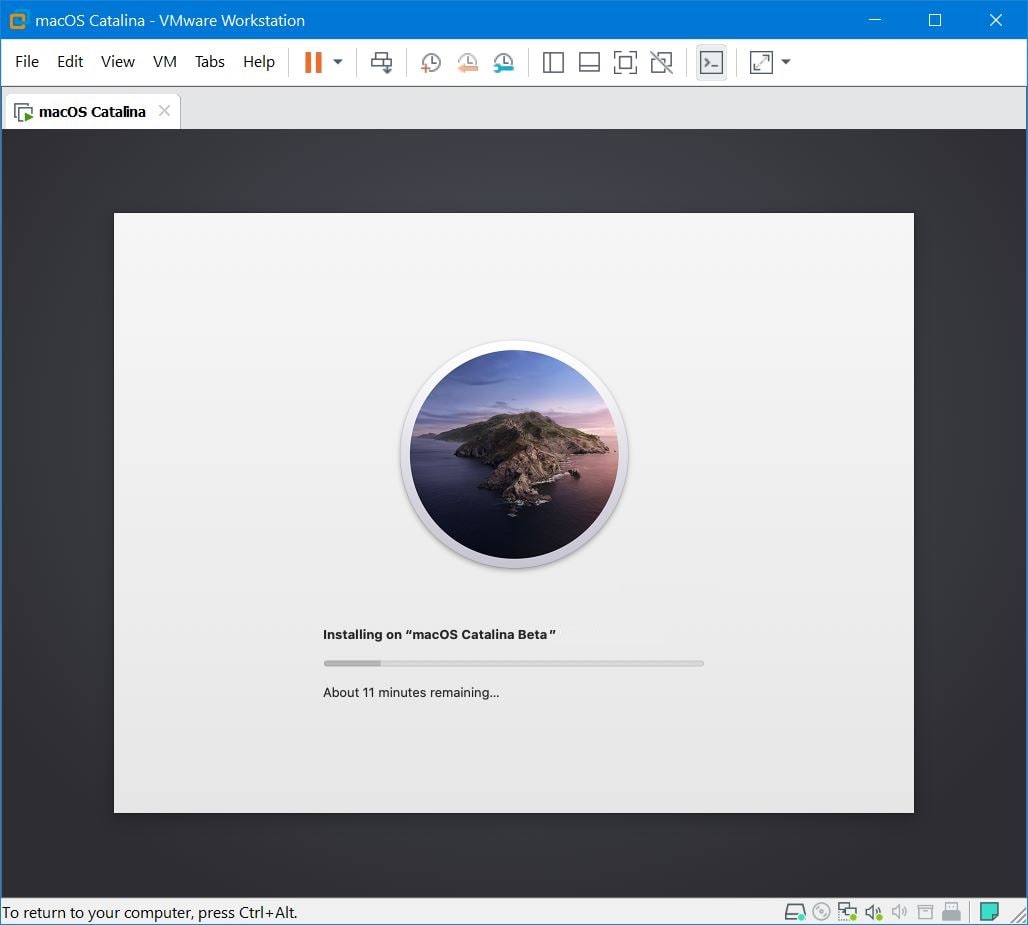
That will install the macOS Catalina on the specific disk, so when it’s done, the virtual machine will reboot.

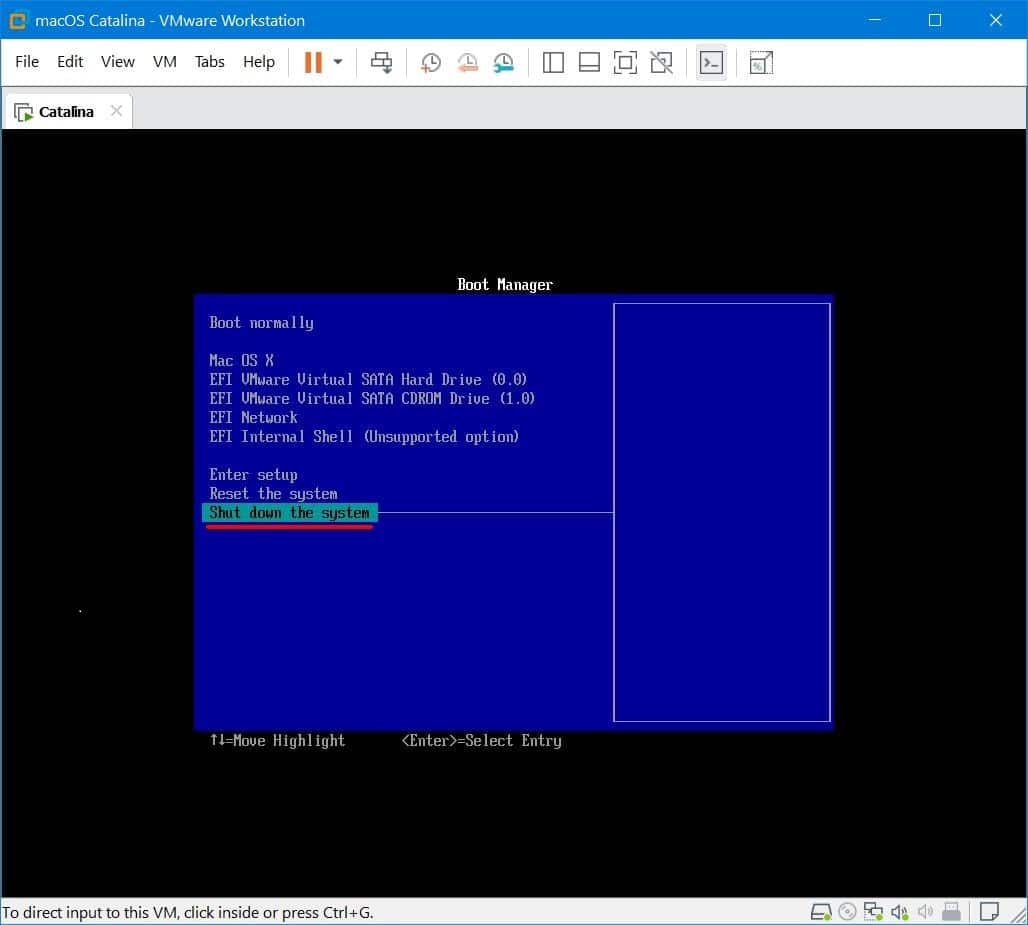
Then shut down the screen with the down arrow key and hit Enter.

Goto virtual machine settings then from the Options tab change the operating system back to macOS 10.14 then hit OK.


Then switch on macOS Catalina back on.

That done, the Welcome screen will appear so from here set up your Mac like normal.

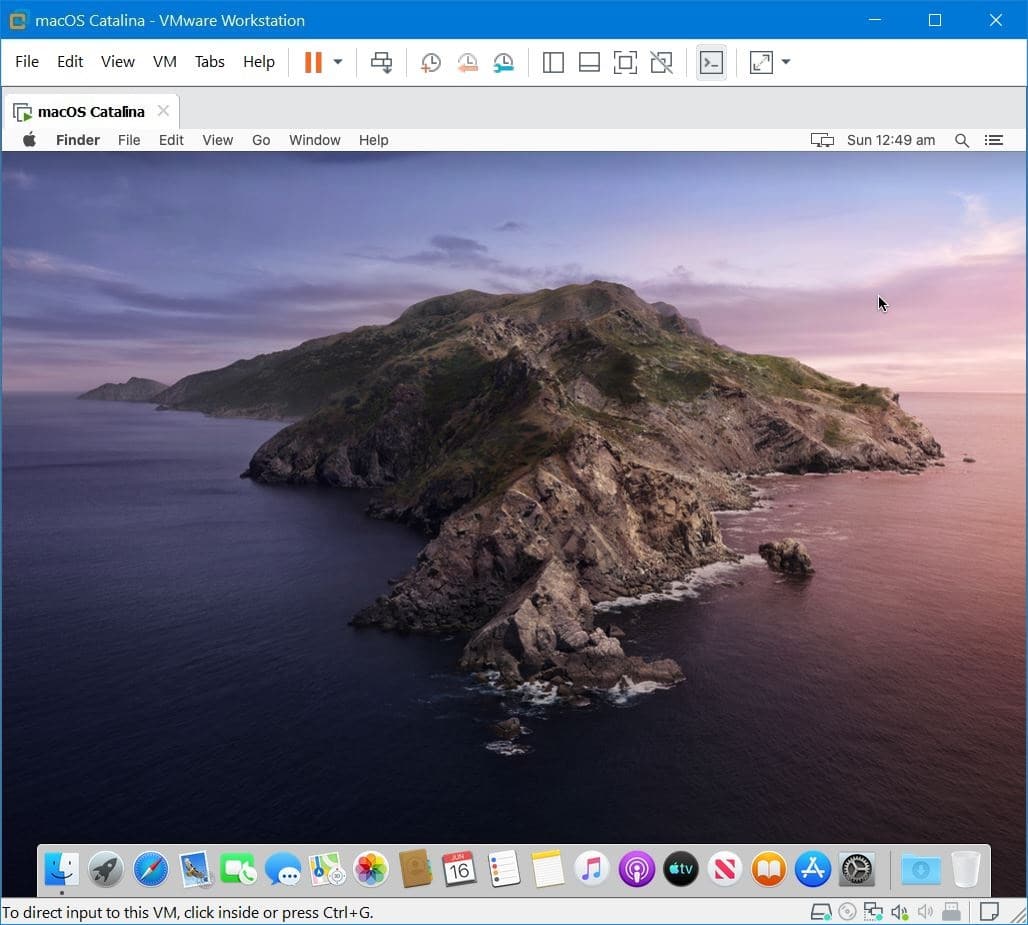
Once that’s done, the macOS Catalina will be successfully installed on VMware on Windows PC.

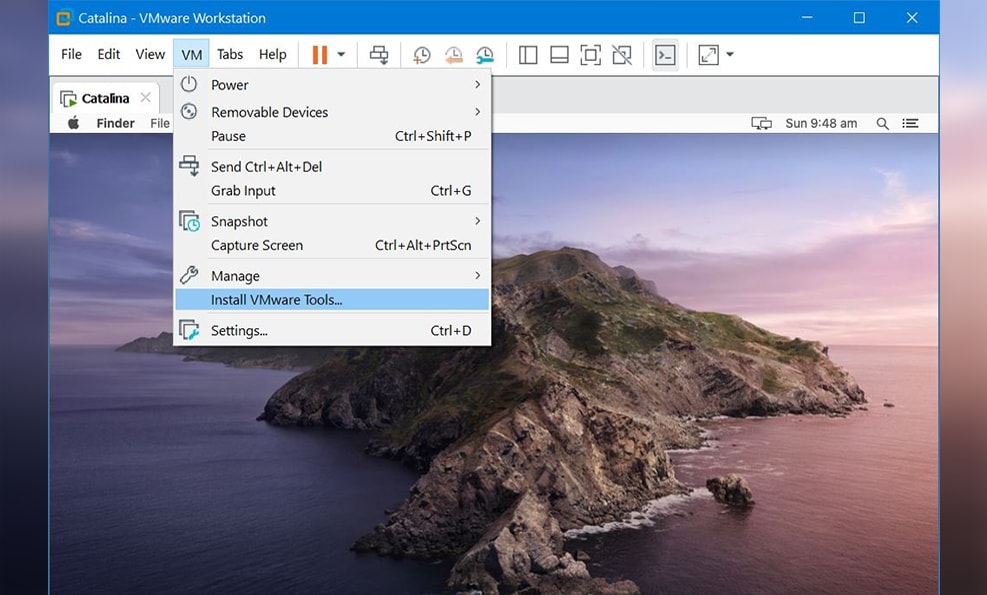
Step Eight – Install VMware Tools on macOS Catalina
Coming to this place we’ve done everything except installing the VMware Tools which is super useful. This will make many features that will make Catalina more pleasant. Here’s how to do it.

That makes this post to the end but not completely. There’s always some more to do. This includes taking a snapshot and speeding macOS Catalina more.
So if there’s some problem or issue, you can always fix it from the instructions.
And that’s all to there it is. When its done, you can always update your macOS Catalina to the latest version.
If there’s something remaining or would like to add, let us know in the comment down below. That’s was how to Install macOS Catalina on VMware on Windows PC.
Install macOS Catalina on VMware on Windows PC – Video
https://youtu.be/qiXklLp03z8
Related Searches to it:
- macos catalina vmware image
- macos catalina vmware image download
- macos catalina iso vmware
- mac os catalina iso download
- vmware catalina black screen
- catalina vmdk
- macos catalina virtualbox
- catalina vmware file