


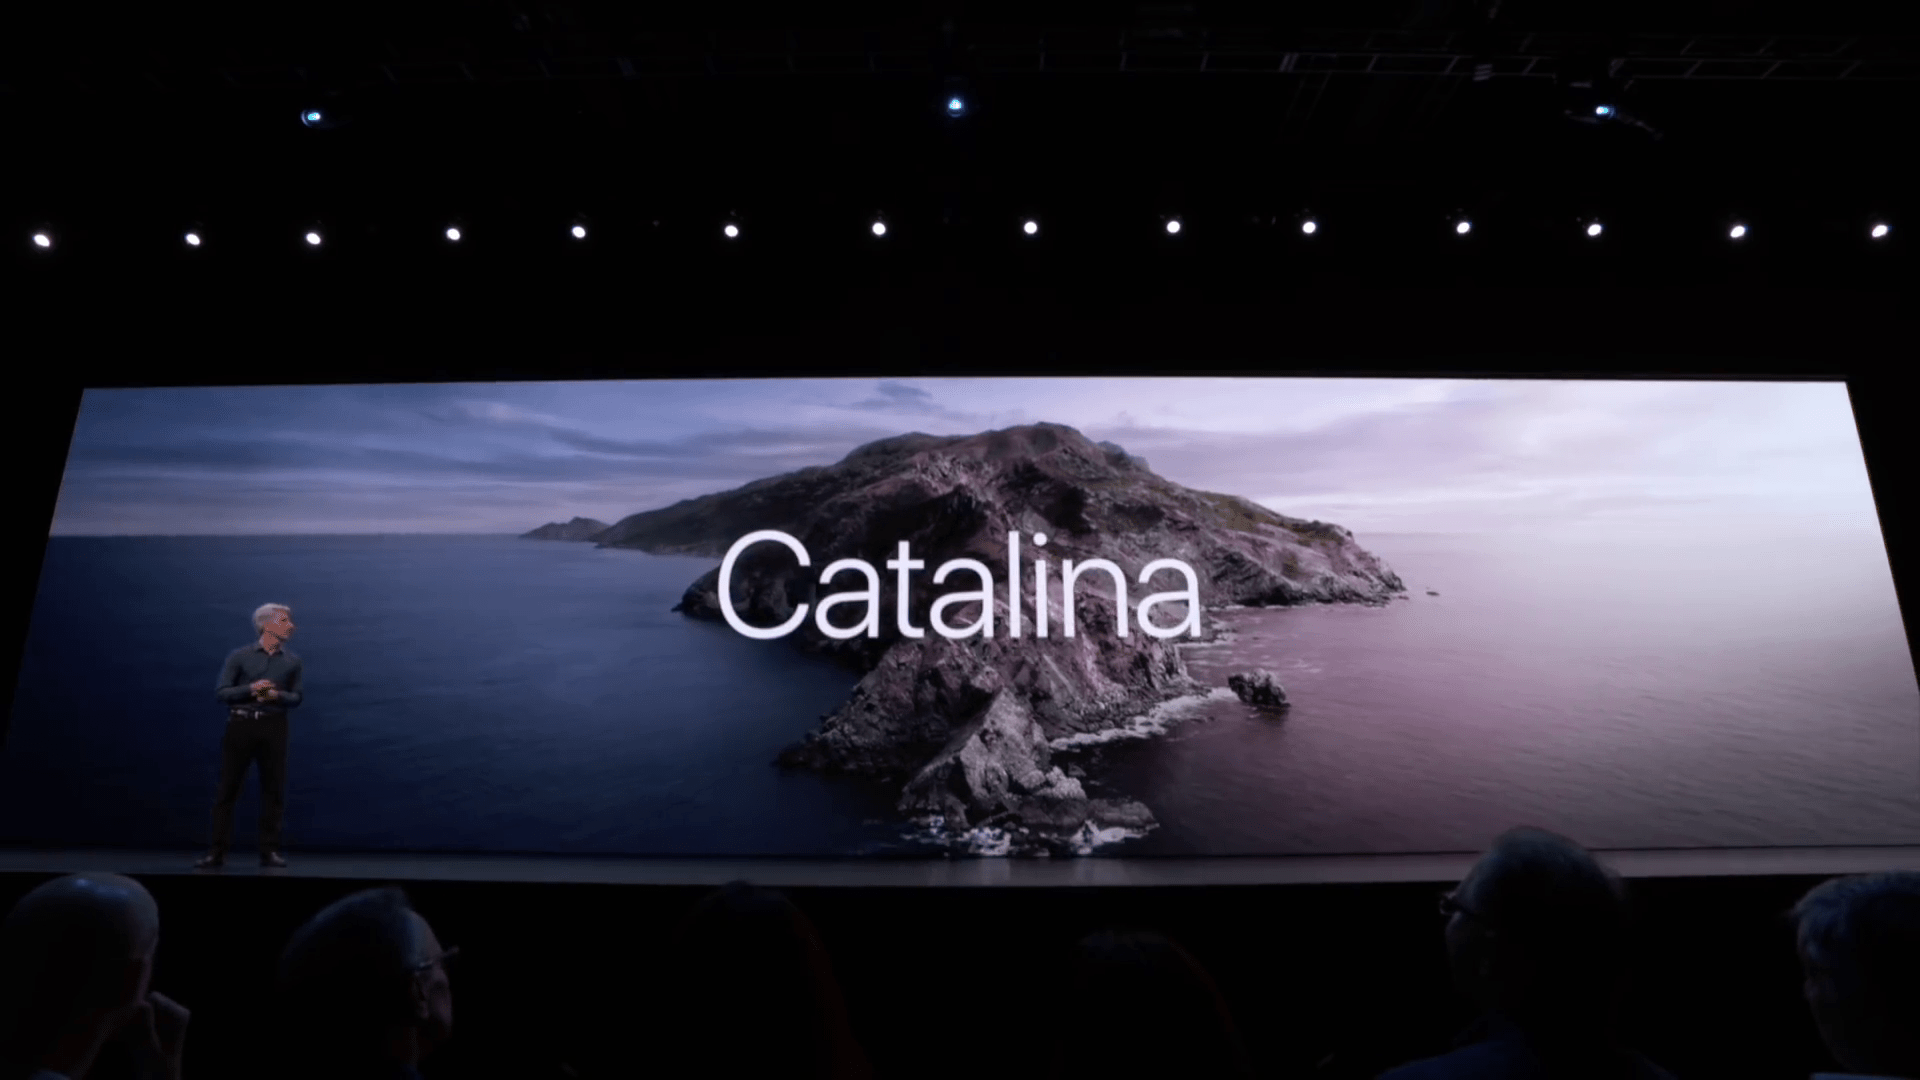
On the morning of 3rd June, Apple kicked off its 2019 annual developer conference with all the new stuff Apple has been working on for the last year will be front and center. The keynote was significantly exciting mostly for software but a little for hardware lovers. While WWDC is one of the most important and significant events with the biggest update to Mac, iPhone, iPad, Mac Pro, Apple Watch and Apple TV. In this post, we’ll install macOS Catalina on VirtualBox on Windows PC.
With all those things updated, the biggest update to macOS is the more exciting new version of macOS which is popular by macOS Catalina. With the new version of macOS – Catalina arriving on Mac’s, it’s fine to some Windows users wanting it within their computer. While Catalina works perfectly on Mac, but when it comes to installing it on Windows, it’s not the case. If you’re would like to install Catalina on a Mac, all you do is enroll in the developer program and download it. Once you’ve the installer file, you will straightly boot into and install Catalina in your Mac.
Instead, if you’re willing to install macOS Catalina on VirtualBox on Windows PC, first of all, you’ll need to download macOS Catalina VirtualBox image, (not from App Store or Apple’s developer program, they don’t work with virtual machines) which is pretty difficult to figure out. Getting a copy of the Catalina VirtualBox installer is even very tricky. If you Google, you’ll find some broken or corrupt files or download links that are completely rubbish. Even searching deep and more and more won’t help you out.

In terms of installing Catalina on Windows, there is no such question. Even Catalina is now risky to install but you have the perfect option which is a virtual machine. The virtual machines solve almost all questions and make riskiness faraway. It will completely work separate from your actual operating system without harming a single thing. If there’s some problem at some point, you’ve two solid options whether to delete the virtual machine or use the snapshot that is pretty easy. That’s the best option to try everything up without taking a risk.
Excited about Catalina, but don’t want to wait until fall? The public beta is now available to try on your Windows PC; here’s how to install macOS Catalina on VirtualBox. If you want to install macOS Catalina on VirtualBox worth of new features to play with, the Public Beta of Catalina VirtualBox image gives you access right now.
Table of Contents
Install macOS Catalina on VirtualBox on Windows PC
Whether you would like to install macOS Mojave on VirtualBox or would like to install macOS Catalina on VirtualBox, we are with you. In this tutorial, we’ll walk you through how to install macOS Catalina on VirtualBox on your Windows PC.
- Related: Install macOS Catalina on VirtualBox on Windows PC [New Method]
What You’ll Need
This process requires some necessary tools that are very easy to get at this point. We’ve prepared the things for you that you won’t have to dig around. These images are straightforward to obtain. They are securely created, compressed, uploaded to two powerful servers. All you’ve to do is click on the images and acquire those.
- VirtualBox — This virtual machine app makes the process quite easy. With VirtualBox, it’s pretty easy to understand everything, and not only that but is easy to install and use it. There’s nothing more you’d need that VirtualBox needs to run with. All of its components are integrated into it. The nice thing is, it supports installing macOS no matter which version, unlike VMware. But still, there’s a simple trick which we need to do.
Join us on Patreon and support us for making better content.
macOS Catalina Final Version (19A602) 15 Oct 2019 (Recently Uploaded)
Finally, when you’re done, you’ll need to extract the files into a single folder.
Before we get to the important part, one last thing before we jump in: make sure the Intel VT-x is turned on for Intel users. If you’re an AMD user, you could definitely ignore this.
Done downloading things? Good. Now it turns to Install macOS Catalina on VirtualBox on Windows PC which is pretty simple.
- Related: Install macOS Catalina on VirtualBox on Windows PC [New Method]
Step One: Install VirtualBox on Windows
The first thing you need to do is start the VirtualBox installation with the setup.exe from the VirtualBox setup files.

The installation part is simple, with a few clicks you’ll end up installing it.

At the end, start the VirtualBox from the installation and click Finish.

Step Two: Set Up A New Virtual Machine
Speaking of installing Catalina, you’ll need to set up a new virtual machine in order to install macOS Catalina.
From the VirtualBox, click on New.

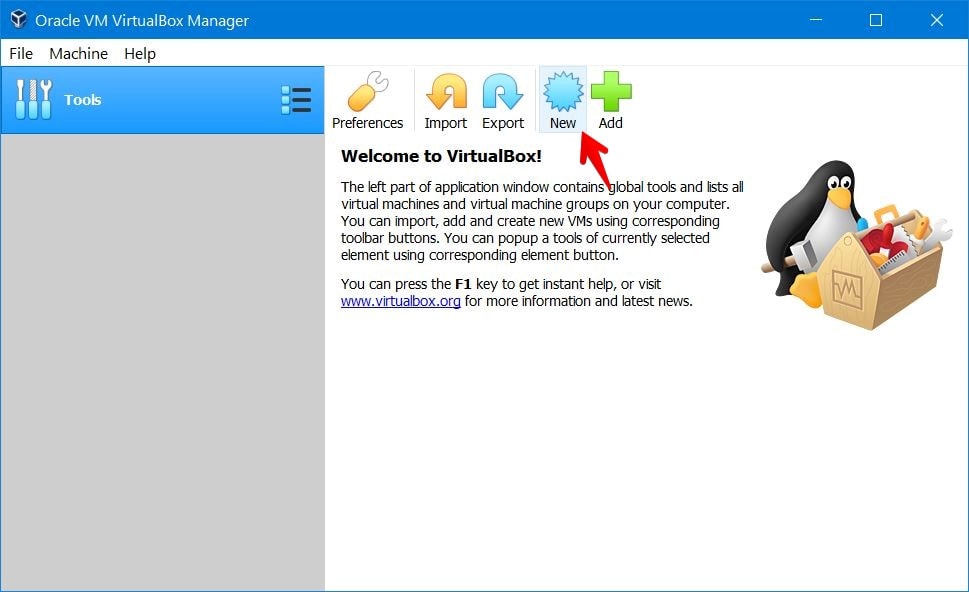
Now choose Expert Mode from the bottom.

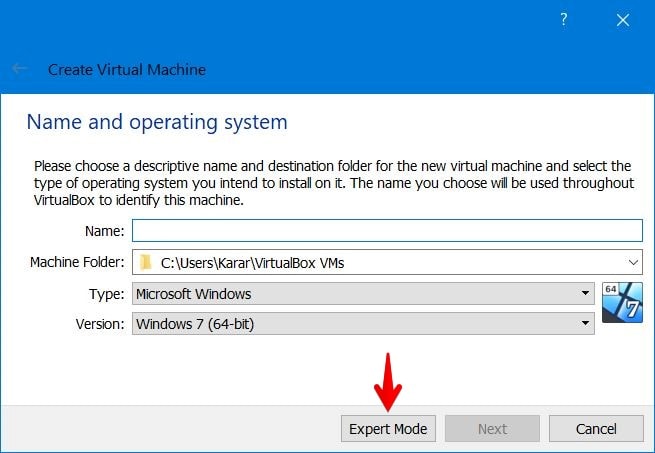
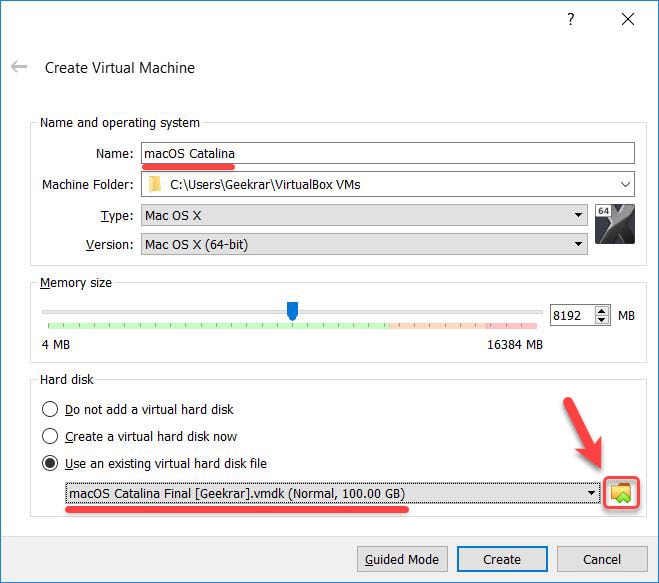
For the Name & operating system, write down the name of the virtual machine. In my case, I will write down “macOS Catalina”. Select “Mac OS X” for the Type and Mac OS X (64-bit) for the version.
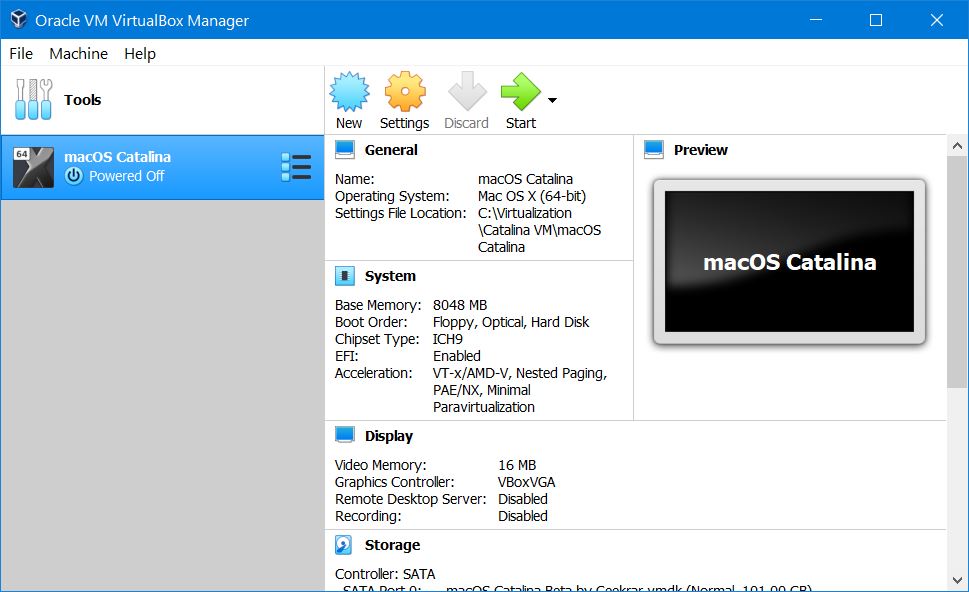
For Memory, I recommend you to go with the 50-50 rule which is to assign 50 to 60% of your computer’s memory for the virtual machine. For Hard Disk, select Use an existing virtual hard disk file and choose the macOS Catalina’s extracted VirtualBox image which is Catalina’s VMDK file. In the end, click Create. Here’s the preview of how it looks like.

With the virtual machine created, simply close the VirtualBox (Important!). If you didn’t, you would likely end up with EFI Internal Shell. Here’s how to fix EFI Internal Shell on VirtualBox.

Done all that? Alright, here’s what else you need to do.
Step Three: Configure macOS Catalina Virtual Machine
Install macOS Catalina on VirtualBox on Windows PC will essentially work straightforward similar to a Mac, and devotes most of your Windows power and its graphics card to running Catalina. How much ever you allocate, it will get more thirsty of power. The more you allocate, the better the performance. That is what makes the experience better and better. So note this!
The virtual machine won’t work without configuring. We need to do some quick configuration from the virtual machine settings. From the top of the window, click on Settings.


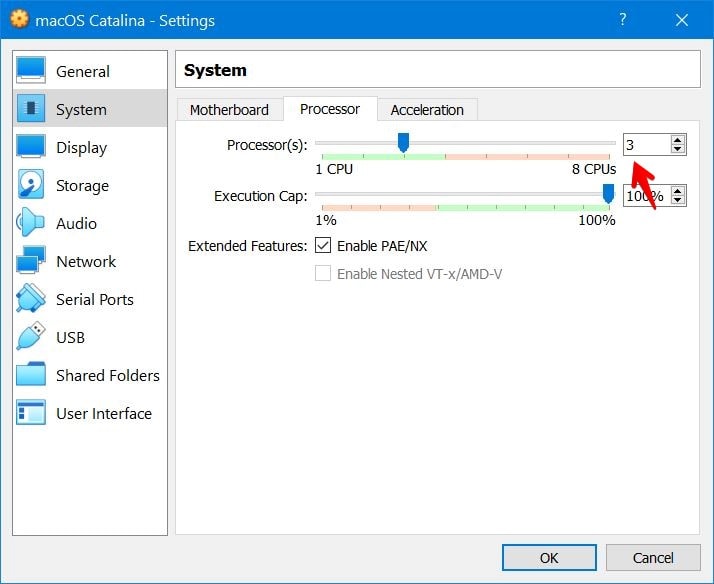
Now select the System tab and click on Processor. Increase the processor to 2 at least or more (Seriously, otherwise, the virtual machine won’t boot).

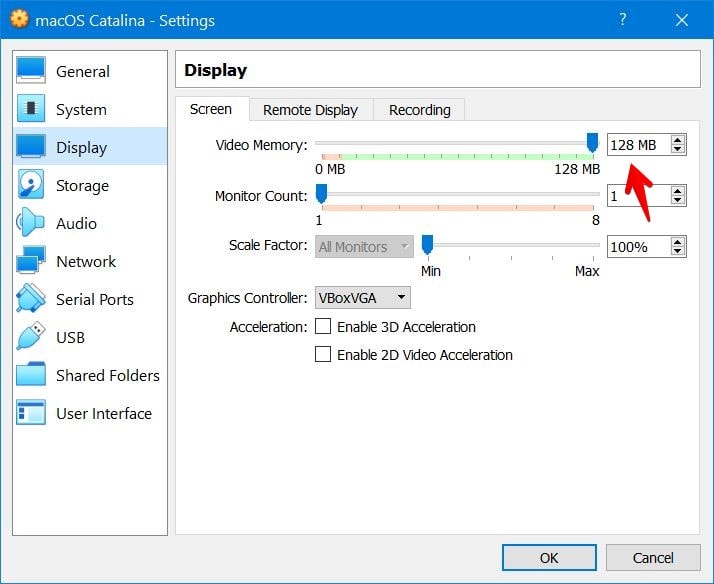
Under it, click the Display tab. Increase the video memory to the highest which is 128 MB. When you’re done, click OK.

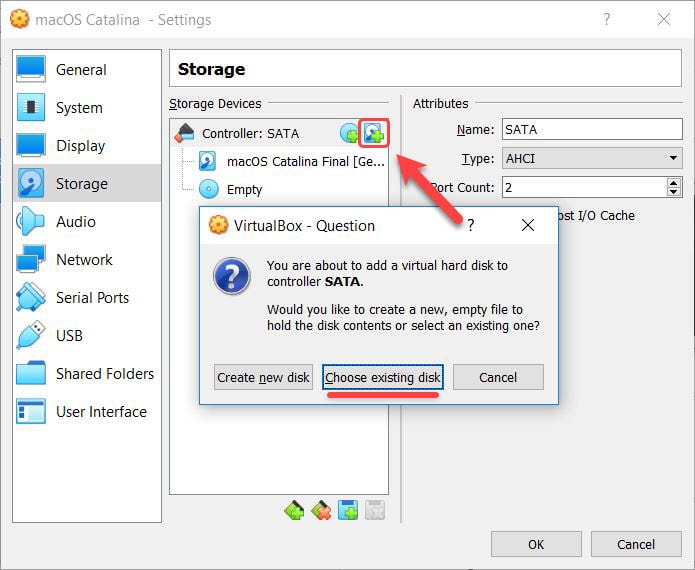
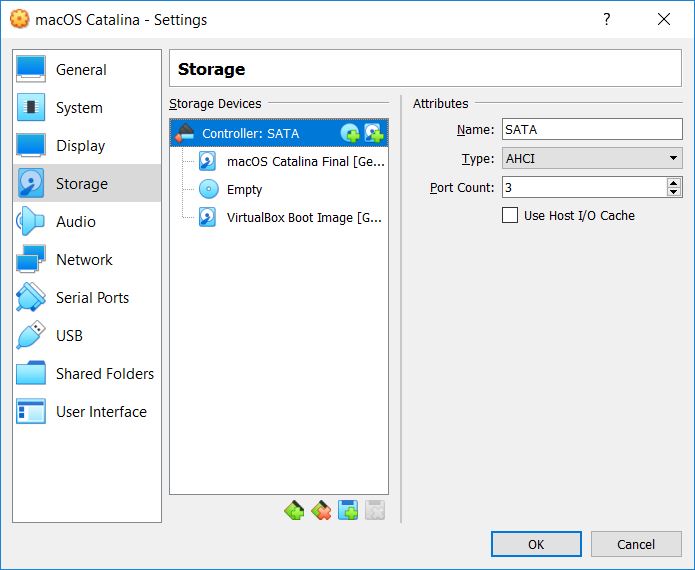
Next head to the storage tab and click on the hard disk plus icon at then choose existing disk on the pop up that appears.

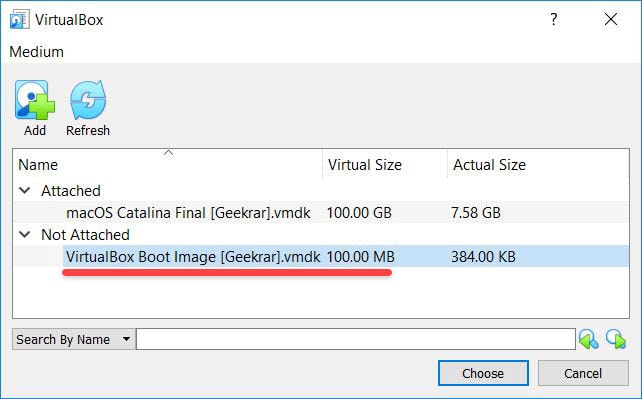
Now first click on Add button and choose VirtualBox Boot Image by Geekrar.
If the top one didn’t work, here’s another one.

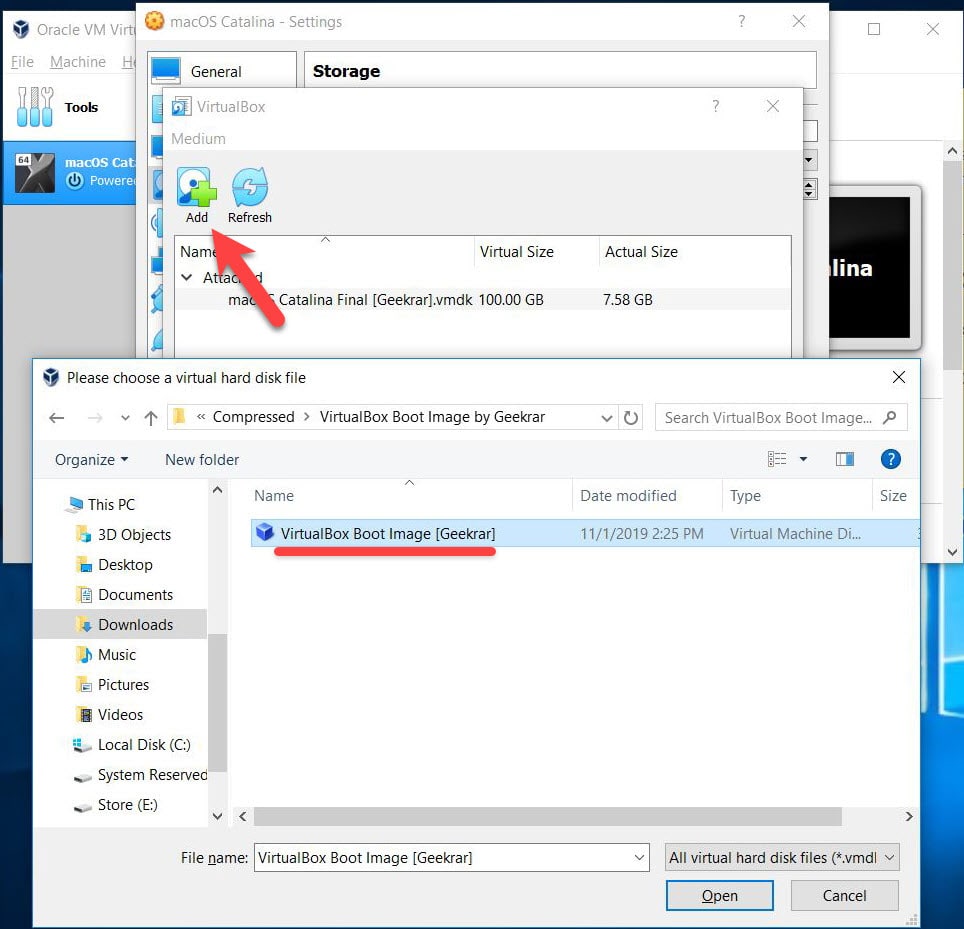
When that’s added, click choose.

When done, click OK on the virtual machine settings.

Step Four: Install VirtualBox Extension Pack
The virtual machine is nearly finished configuration. In order to work mouse and keyboard, you’ll need to install the VirtualBox extension pack. Here’s how to do it.
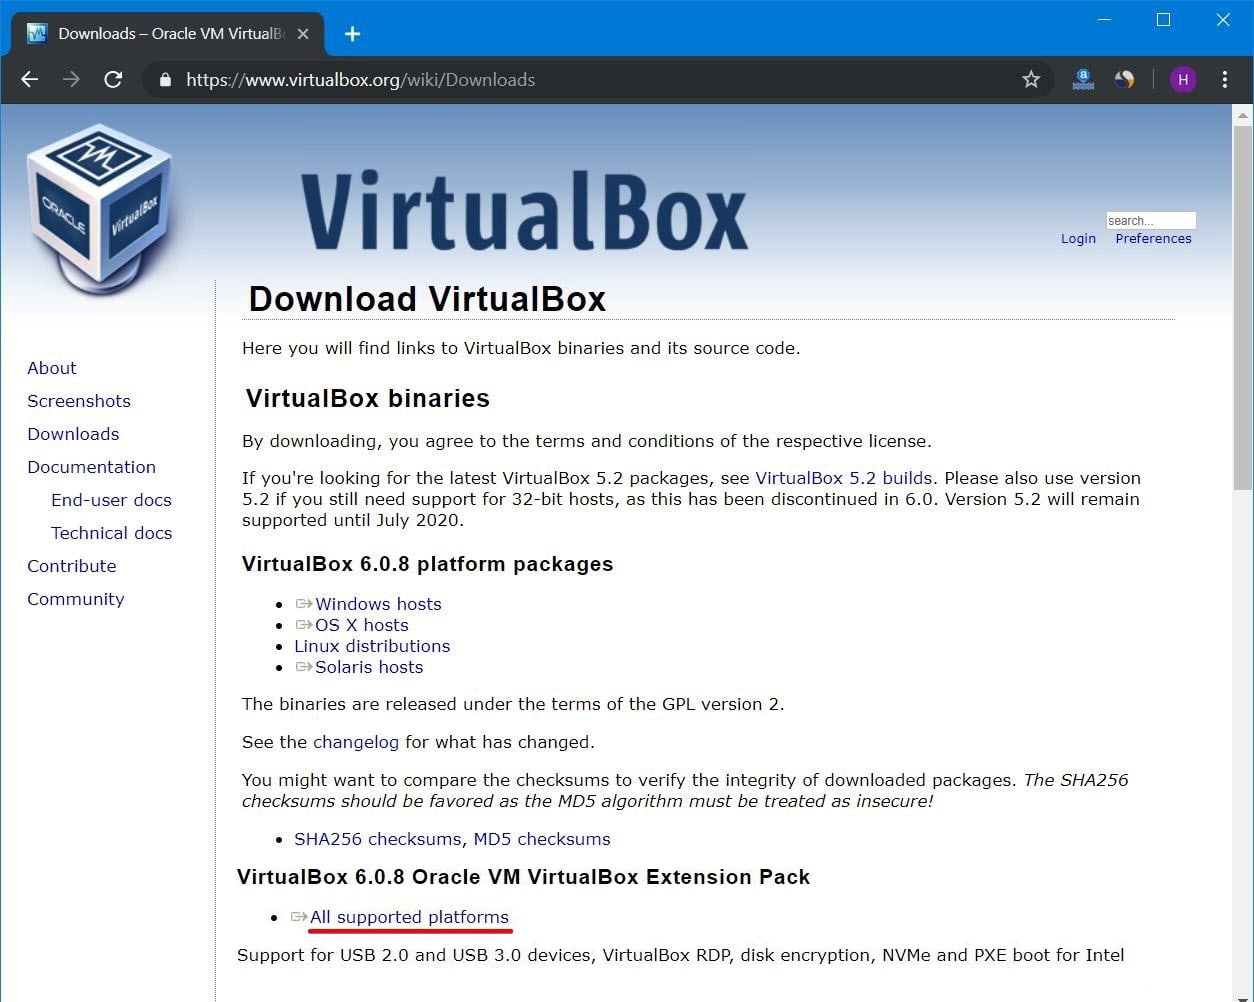
Go to the VirtualBox downloads page and scroll down for the VirtualBox extension pack. Click on the All supported forms to download it.

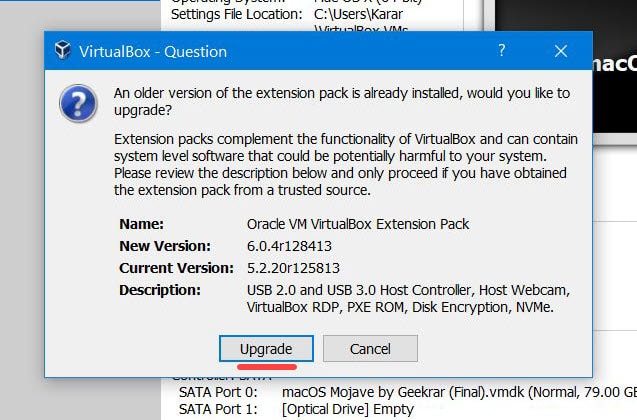
When it’s finished, open it. It will pop up the extension installing a window, click on Install. It will immediately upgrade the VirtualBox extension. If you haven’t installed yet, you need to Install VirtualBox Extension Pack.

Step Five: Apply Commands on VirtualBox
Once you’ve accomplished those, there are some commands which you need to apply in order to run macOS Catalina.
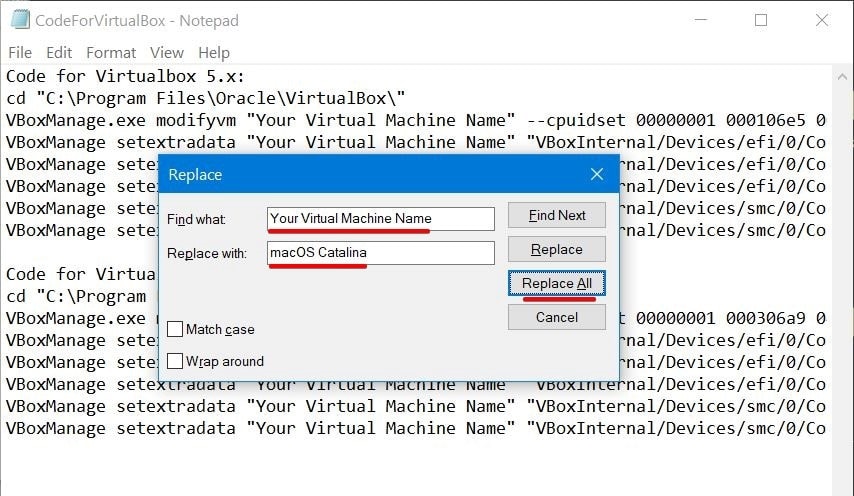
Open the commands and press Ctrl + H. When the window popped up, write “macOS Catalina” (your machine name) in front of Find What and write “Your Virtual Machine Name” in front of Replace with.
Note: If you’ve an AMD Ryzen or AMD Radeon, you need a different command. This won’t work for you. Here’s how to install macOS Catalina on VirtualBox on AMD system.
cd "C:\Program Files\Oracle\VirtualBox\"
VBoxManage.exe modifyvm "Your Virtual Machine Name" --cpuidset 00000001 000106e5 00100800 0098e3fd bfebfbff
VBoxManage setextradata "Your Virtual Machine Name" "VBoxInternal/Devices/efi/0/Config/DmiSystemProduct" "iMac11,3"
VBoxManage setextradata "Your Virtual Machine Name" "VBoxInternal/Devices/efi/0/Config/DmiSystemVersion" "1.0"
VBoxManage setextradata "Your Virtual Machine Name" "VBoxInternal/Devices/efi/0/Config/DmiBoardProduct" "Iloveapple"
VBoxManage setextradata "Your Virtual Machine Name" "VBoxInternal/Devices/smc/0/Config/DeviceKey" "ourhardworkbythesewordsguardedpleasedontsteal(c)AppleComputerInc"
VBoxManage setextradata "Your Virtual Machine Name" "VBoxInternal/Devices/smc/0/Config/GetKeyFromRealSMC" 1

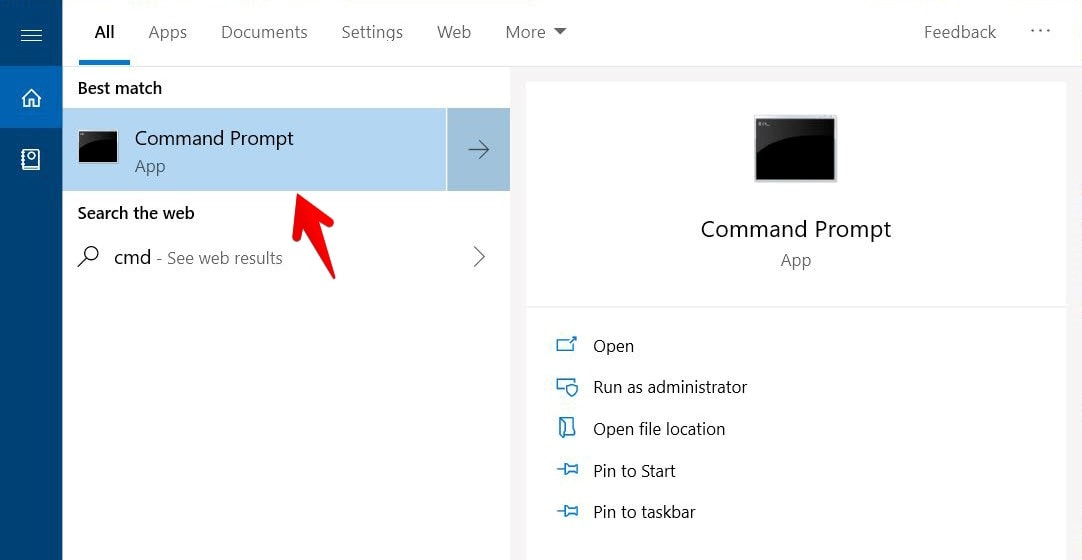
Now open up Command Prompt (CMD) without administrator privileges.

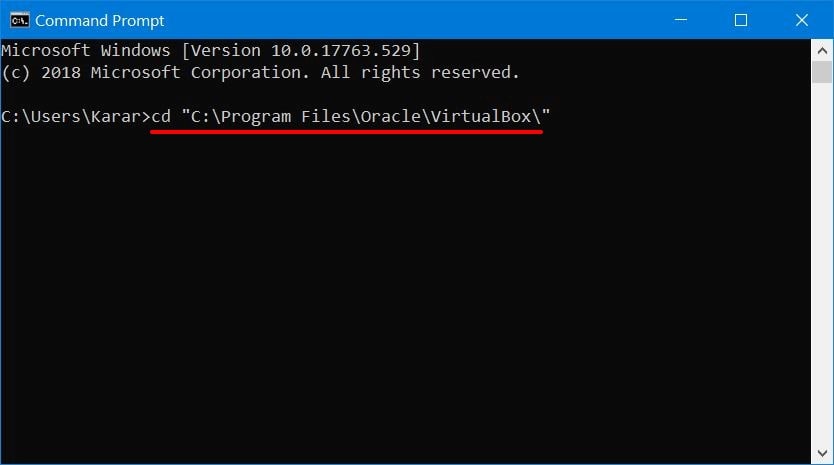
First, copy and paste the first line of the commands.
cd "C:\Program Files\Oracle\VirtualBox\"
VBoxManage.exe modifyvm "Your Virtual Machine Name" --cpuidset 00000001 000106e5 00100800 0098e3fd bfebfbff
VBoxManage setextradata "Your Virtual Machine Name" "VBoxInternal/Devices/efi/0/Config/DmiSystemProduct" "iMac11,3"
VBoxManage setextradata "Your Virtual Machine Name" "VBoxInternal/Devices/efi/0/Config/DmiSystemVersion" "1.0"
VBoxManage setextradata "Your Virtual Machine Name" "VBoxInternal/Devices/efi/0/Config/DmiBoardProduct" "Iloveapple"
VBoxManage setextradata "Your Virtual Machine Name" "VBoxInternal/Devices/smc/0/Config/DeviceKey" "ourhardworkbythesewordsguardedpleasedontsteal(c)AppleComputerInc"
VBoxManage setextradata "Your Virtual Machine Name" "VBoxInternal/Devices/smc/0/Config/GetKeyFromRealSMC" 1

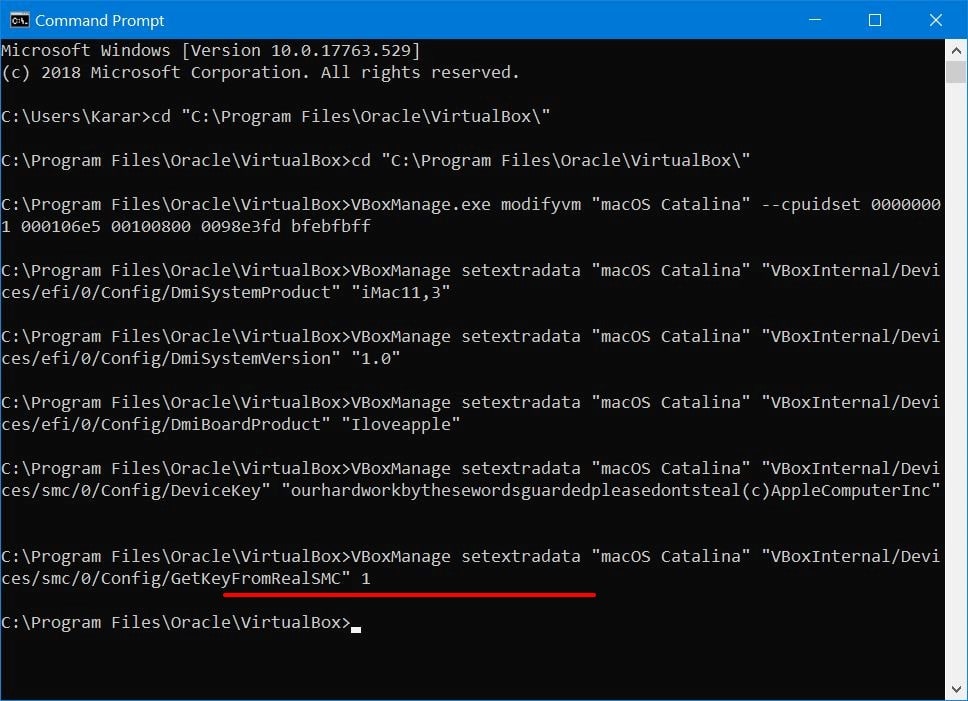
Then, copy and paste all the remaining part of the commands.

Step Six: Install macOS Catalina on VirtualBox on Windows PC
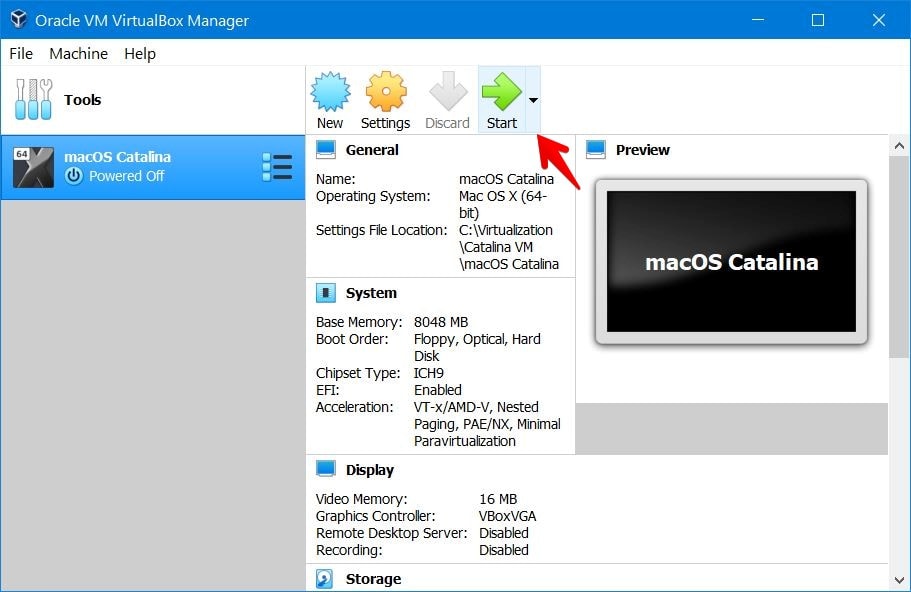
The time has come to succeed with the installation war. Start Install macOS Catalina on VirtualBox on Windows PC. Now fire up VirtualBox and click Start.

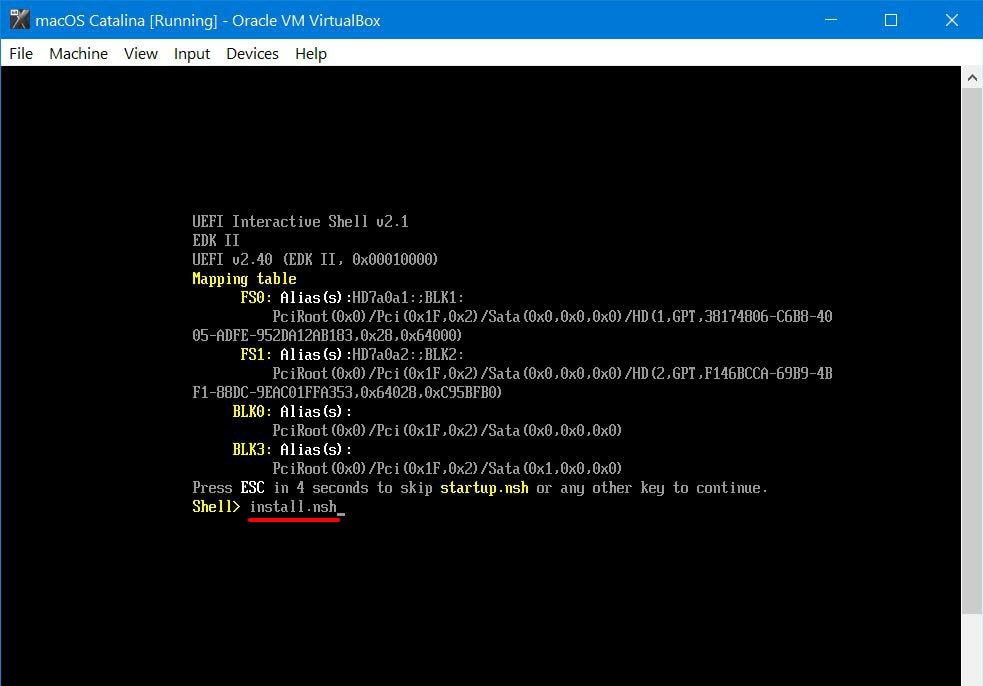
Once the booting finished, press ESC to skip startup.nsh. Now type “install.nsh” and hit Enter. This will definitely take a while.

The installation will begin in a moment that will look like this.

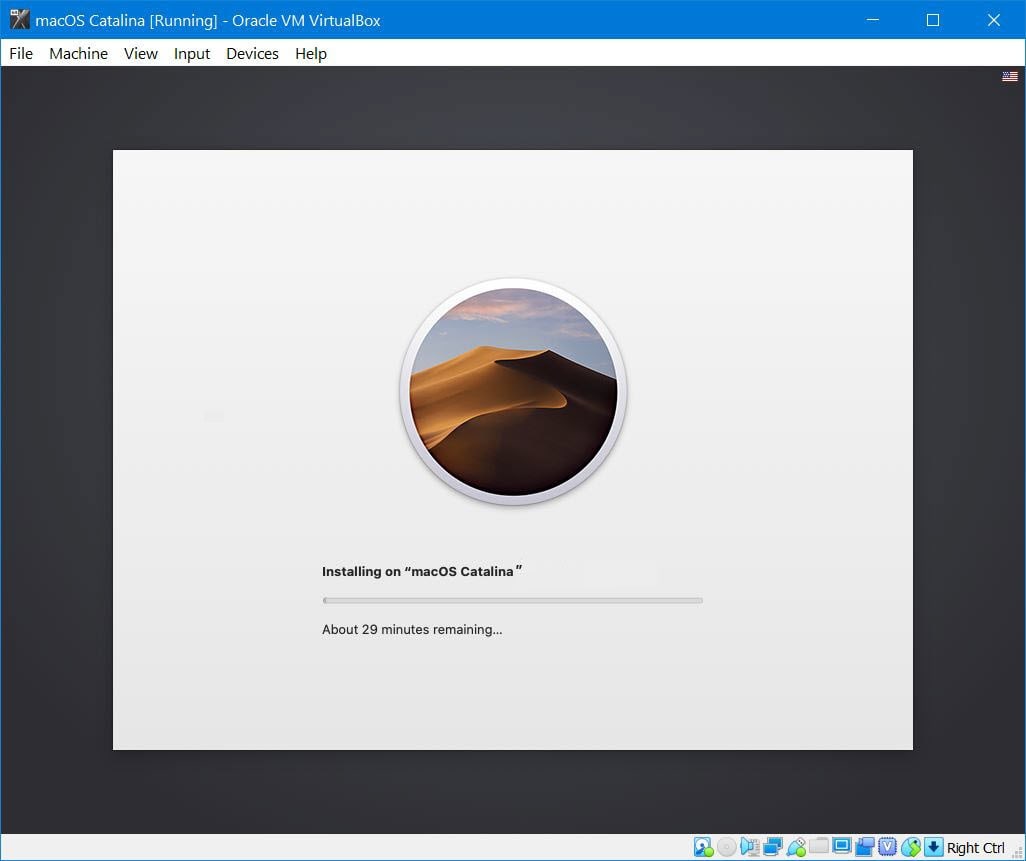
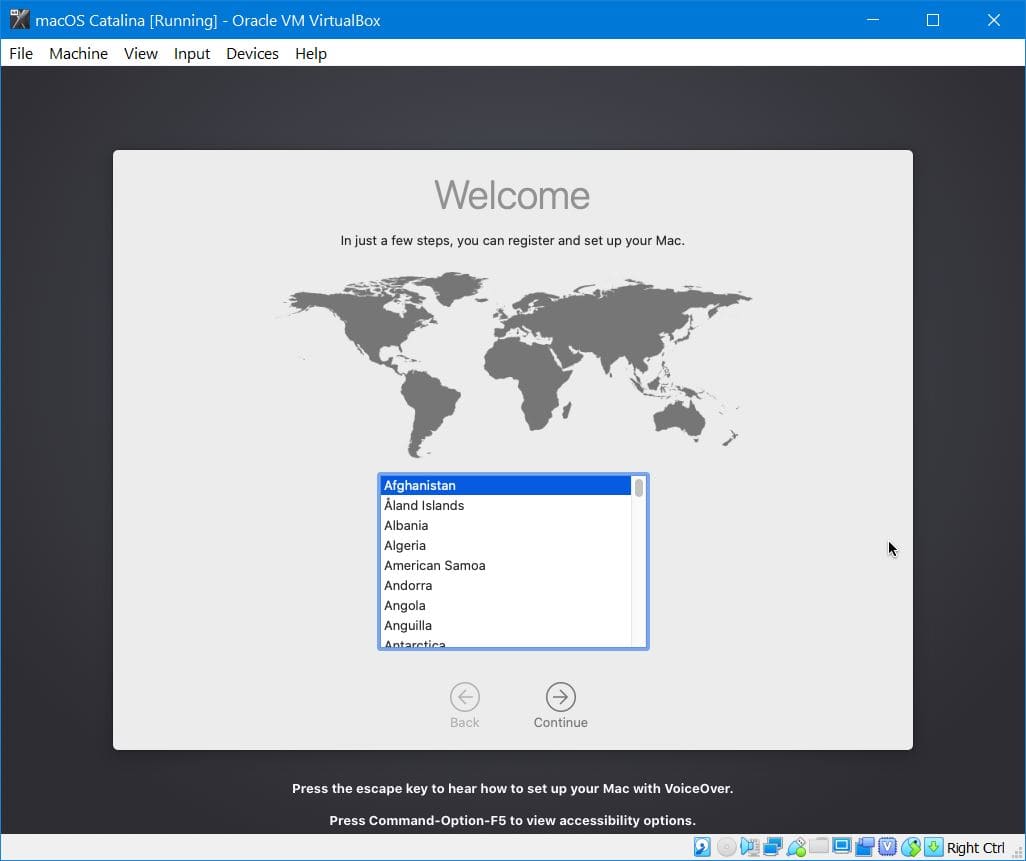
After this, it will restart with hundreds of lines of codes appearing. Don’t worry, that’s fine. When the machine boots up, you’ll figure out the Welcome screen. There you go! Choose where you are located and click Continue.

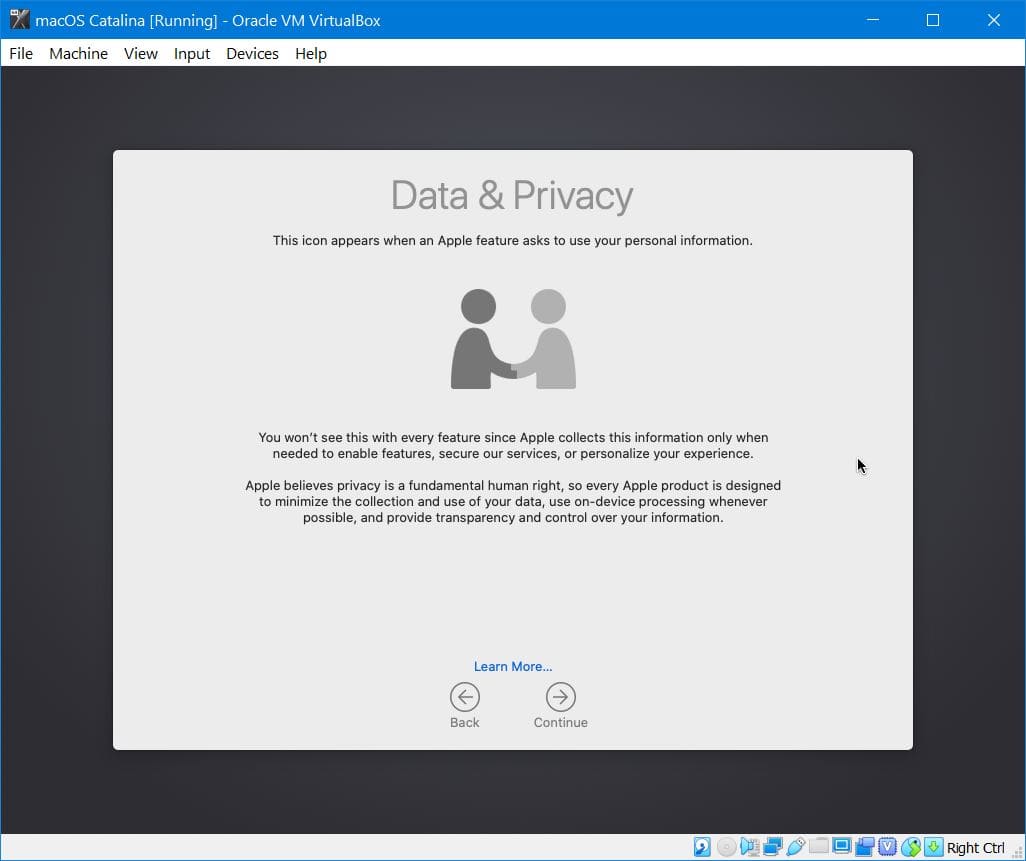
Great! From now, whenever you use an Apple feature, Apple might collect some information of you, simply Continue. There’s no risk in it.

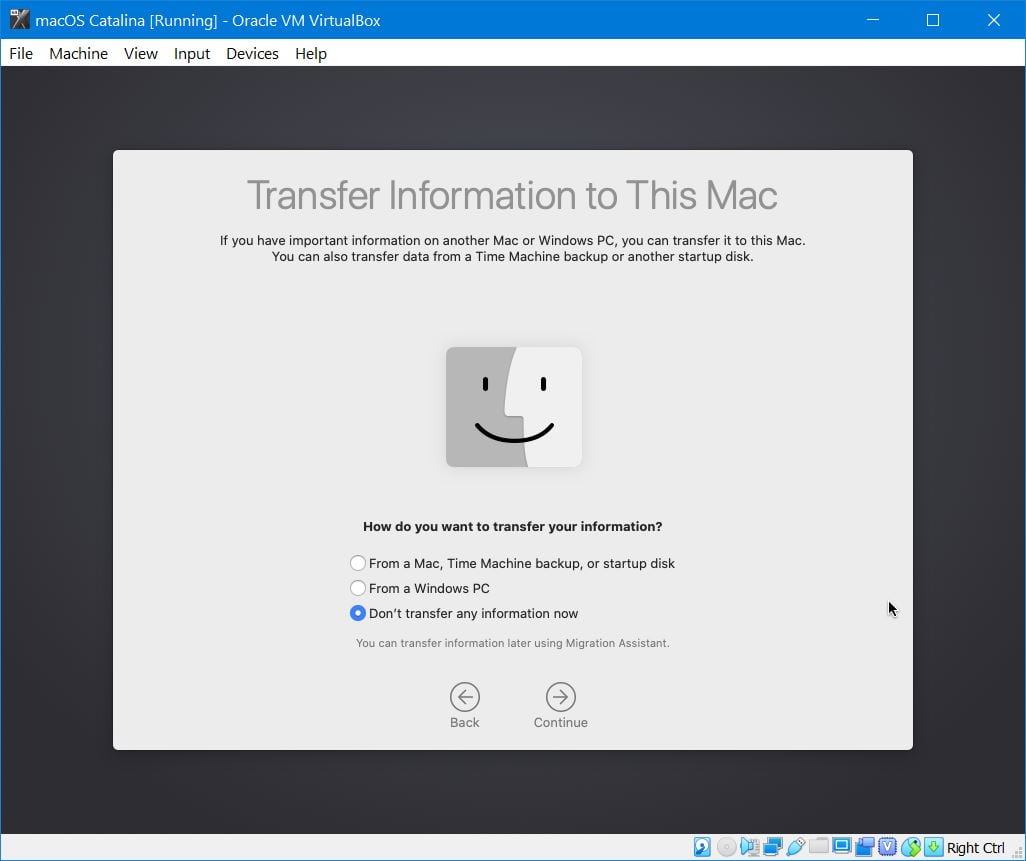
Next, if you would like to make your information here, you’re free to go. In my case, I’ll use the Don’t transfer any information now.

The sign in option is there. If you have an Apple ID, use it to sign in there. Next, you’ll be asked for your credential, type it and click Continue.

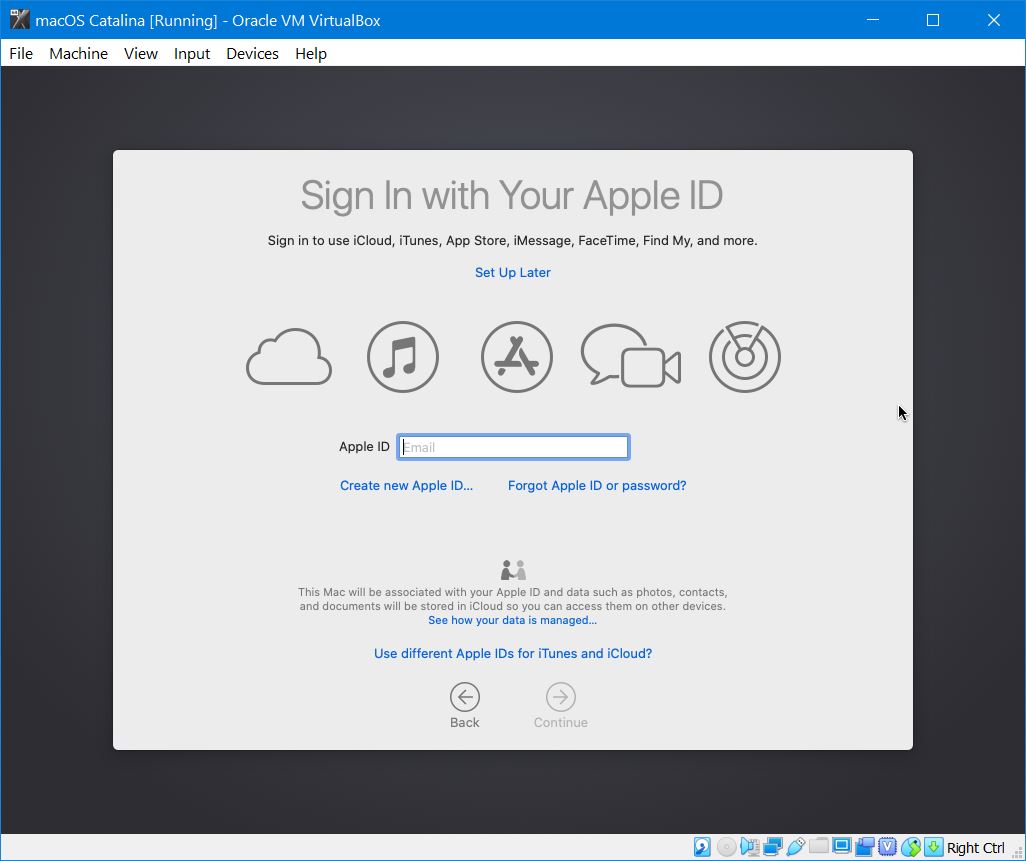
Since I’ve signed in with my Apple ID, Apple recommends using two-factor authentication.


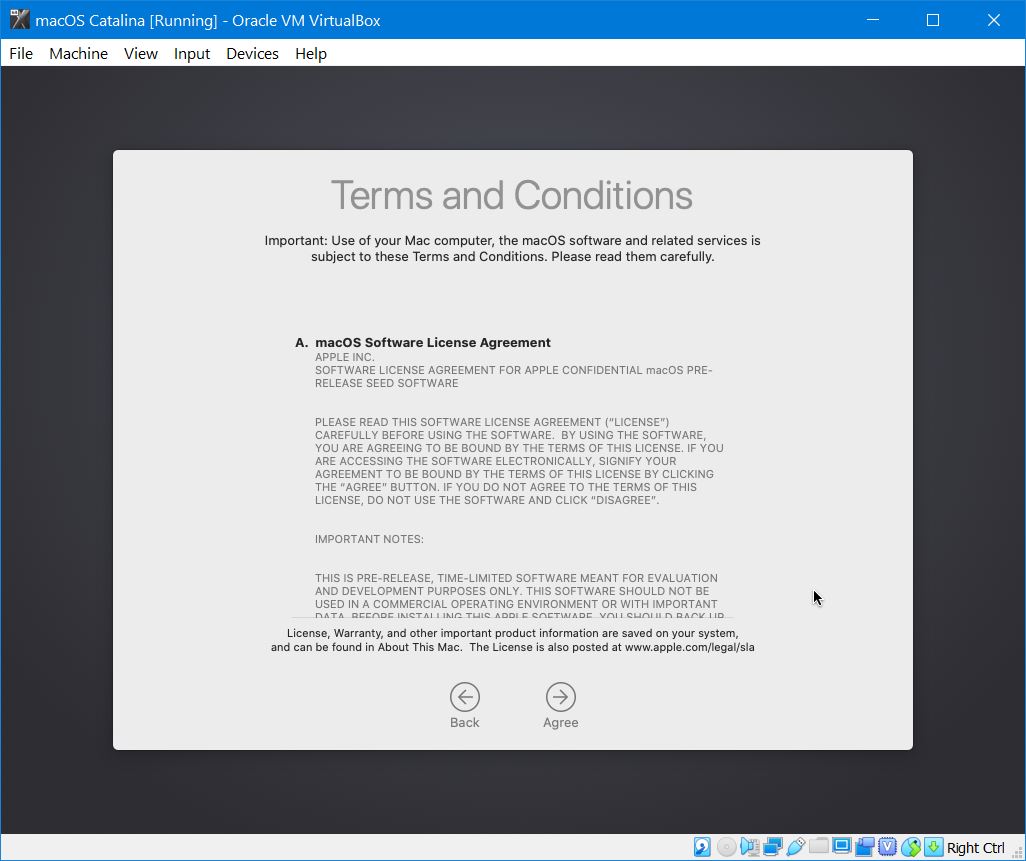
The use of the macOS Catalina points to the terms and conditions. Click Agree and continue with the installation.

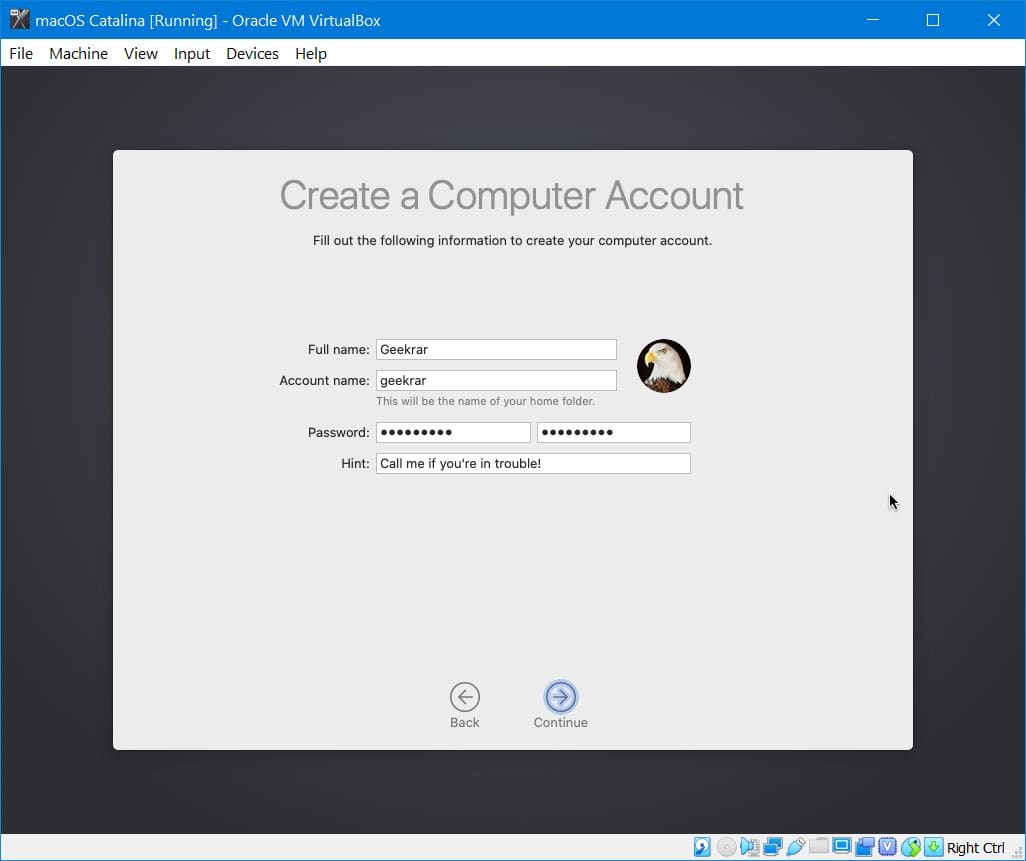
Create your account with the following details and Continue.

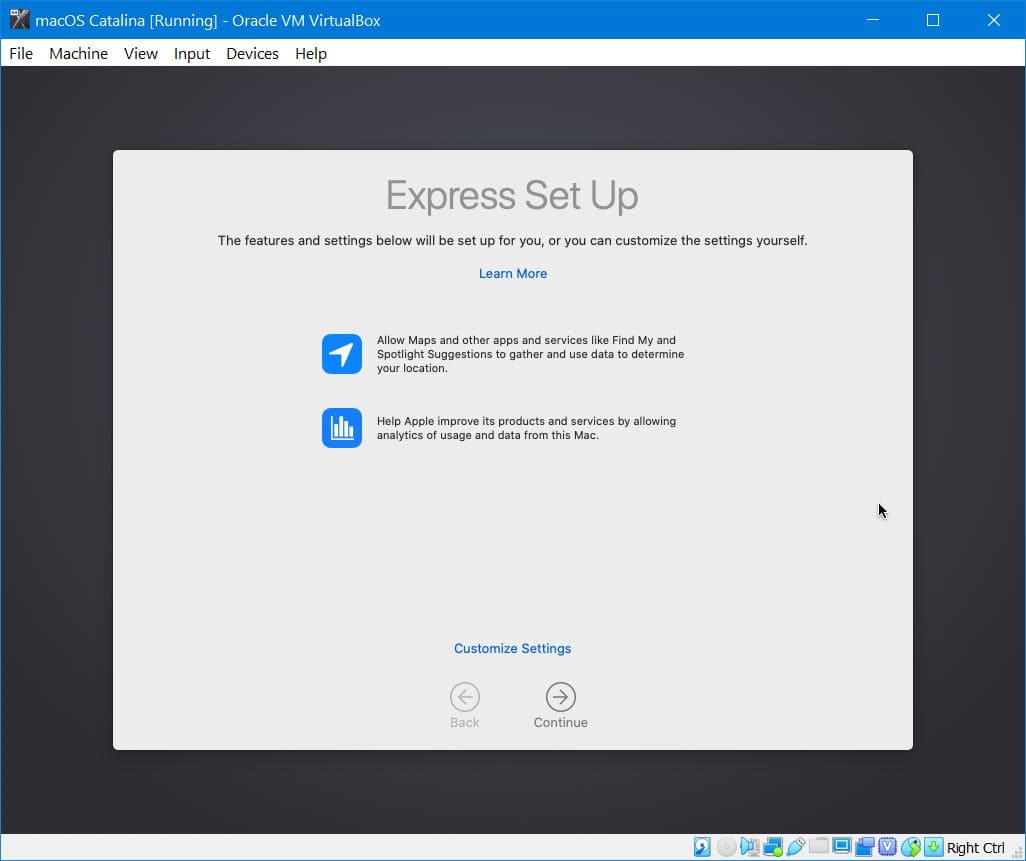
There are some useful features which will be set up for you, Continue with it.

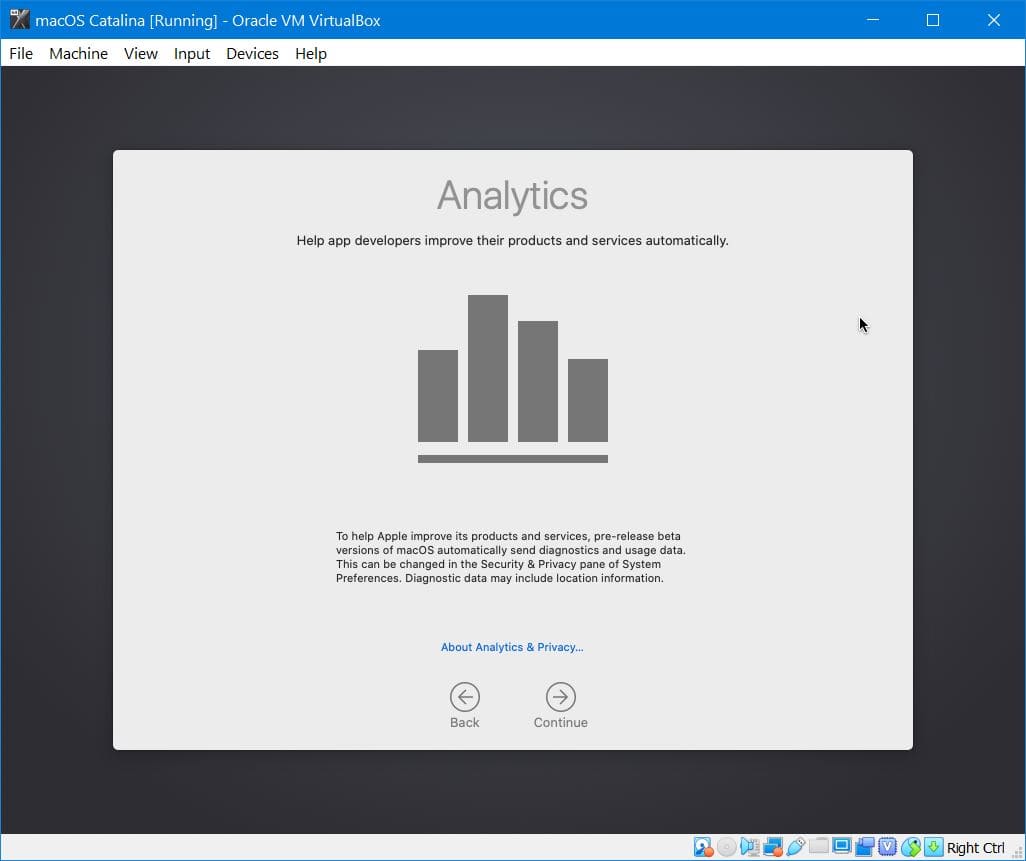
Apple might receive some information about the software, Continue with it. This can be changed from the System Preferences later.

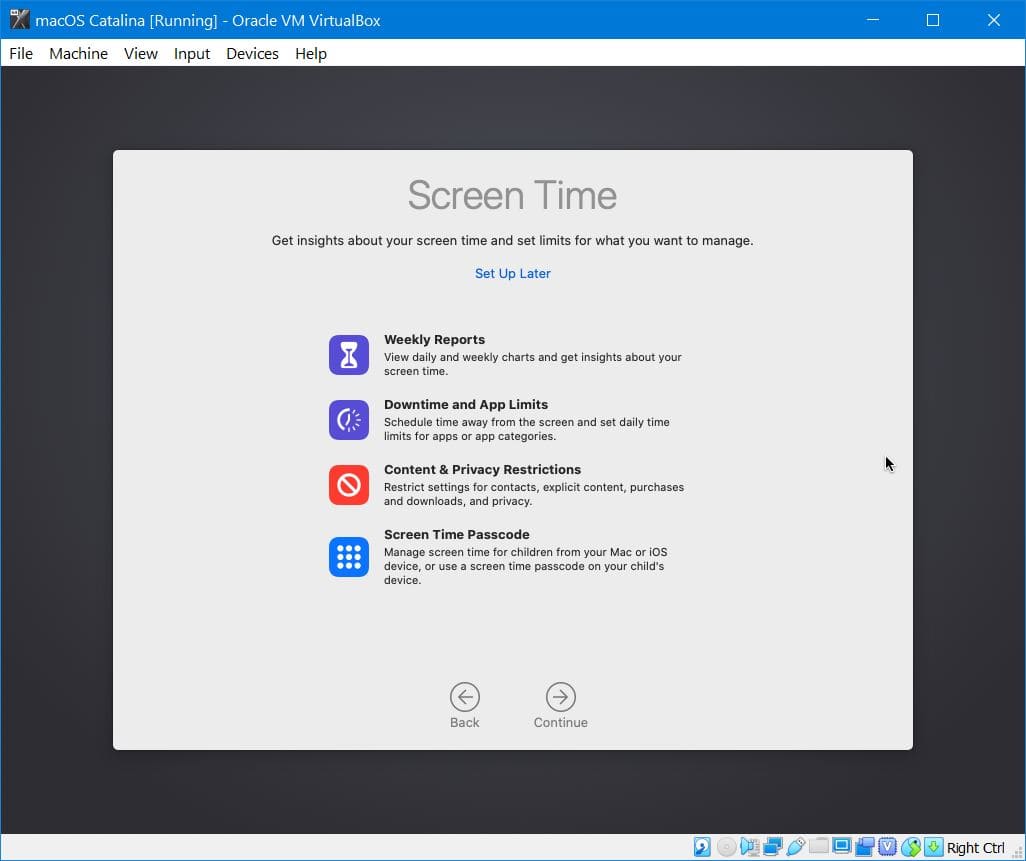
Wonderful! The new screen time feature is under your hands, Continue with it.

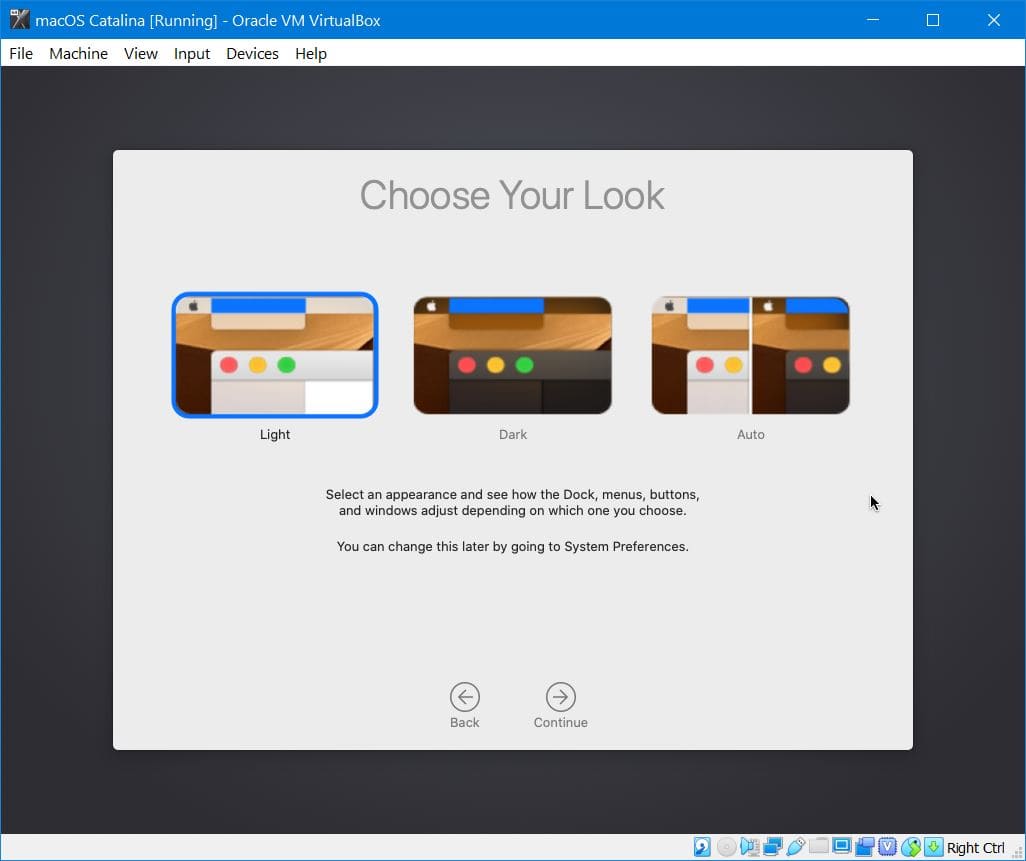
Select your desired interface which looks the best to you and click Continue.

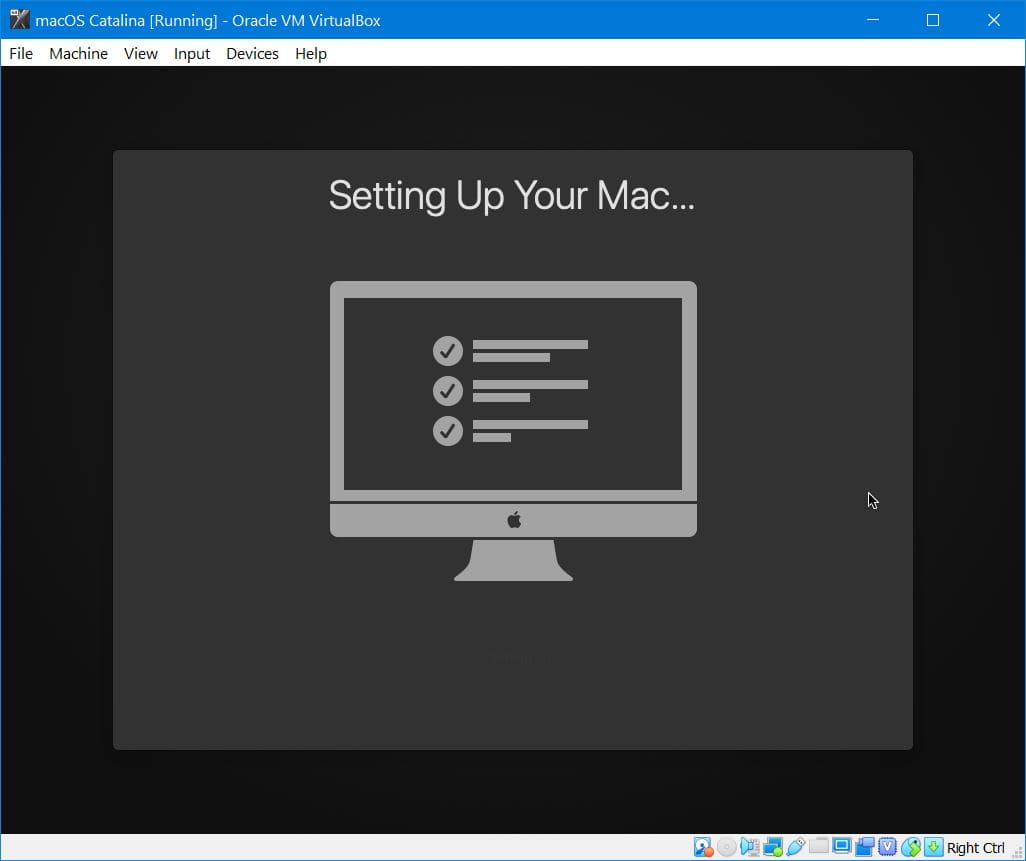
Once you’ve done the settings, your Mac will begin setting up.
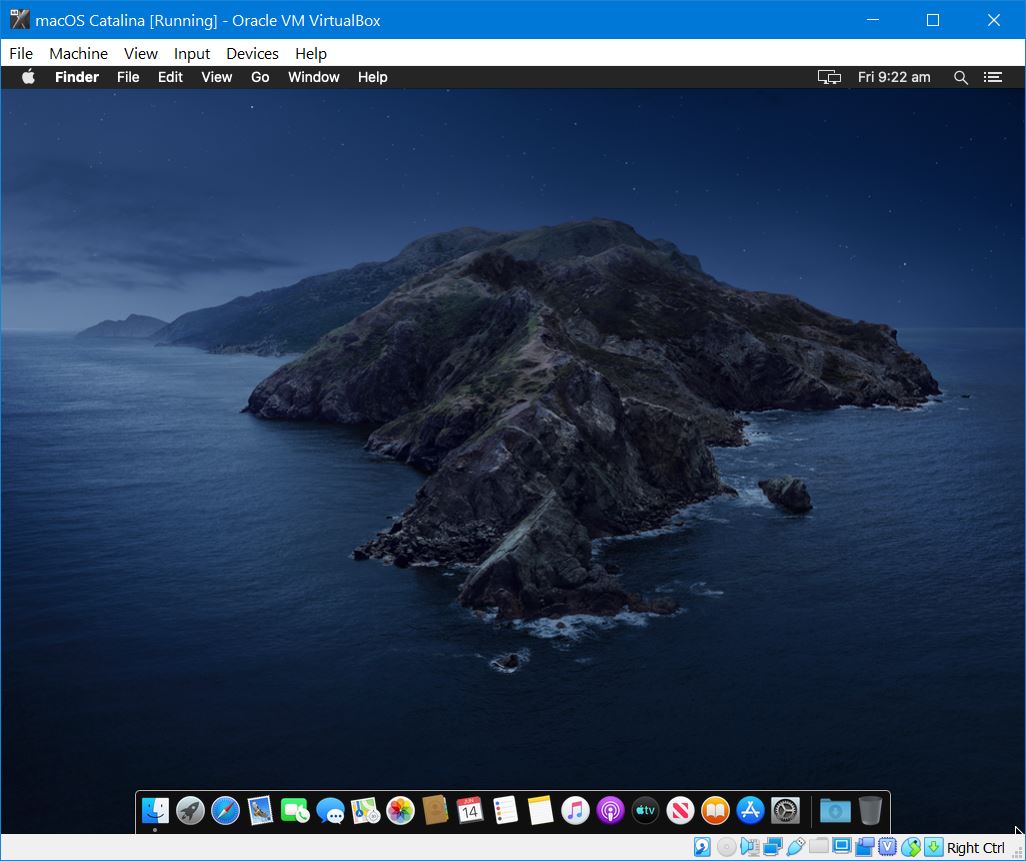
When it’s finished, you’ll see the newest version of macOS which is macOS Catalina. The dark mode of Catalina is super stunning. Here’s a quick look at what we expect to see.

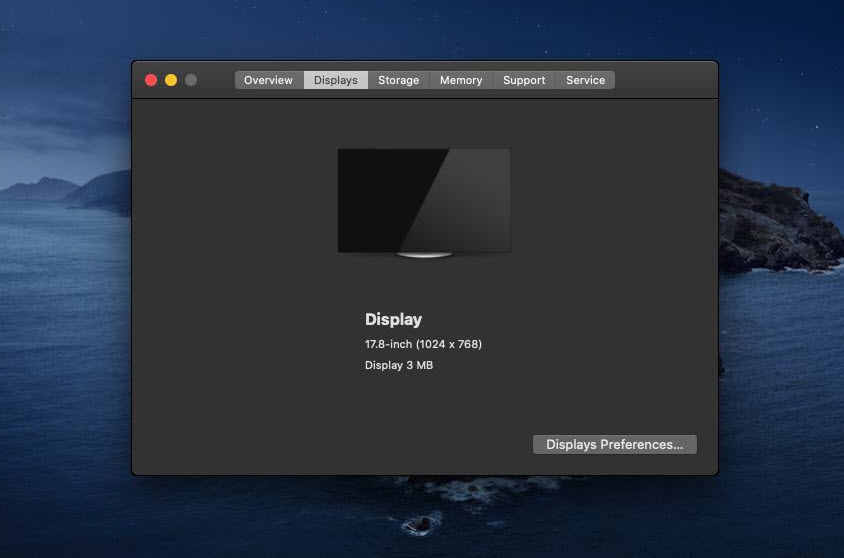
Optional Step: Fix macOS Catalina Small Screen Resolution
With all the things done, you will likely notice a small resolution when you turn into a full screen. Here’s how to fix macOS Catalina screen resolution.

With the assigned resources, you should now do speed experience a speed surf of Catalina. Here’s how to speed up macOS Catalina or Mojave on Virtual Machine.
One More Step: Take A Snapshot
We recommend taking a backup of your virtual machine and when something goes wrong, you may simply switch to backup. This is really easy on VirtualBox.


From now, you can surf, try new apps and features, develop apps on XCode and even install Windows on Catalina. Including these, there’s plenty of things you could do. While running macOS on VirtualBox mightn’t be the best, but however, it’s the most convenient and cheapest way to try and even work. It’s worth giving a try! Now that you’ve done all these, there’s nothing more you’ve to do. This isn’t probably perfect experience for trying out Catalina on an actual computer, but with virtual machine, you’ll experience nearly the most similar experience. That way, whenever a new version is dropped, you don’t need to wait for us to upload an image, instead, you can directly update your macOS to the latest version.
However, if there were some issues with slow performance, you can always speed up slow running macOS Catalina.
That’s the end line of Install macOS Catalina on VirtualBox on Windows PC. If you’ve some questions, suggestions or ideas for improvement, we are here to know.
VIDEO: Install macOS Catalina on VirtualBox on Windows PC
