

The next version of macOS which is macOS Catalina is out for a while now. What makes this update so important is it’s improved and better features and all the new things. This method is different from the other ones and it’s completely done with macOS Catalina ISO. In this post, we’ll install macOS Catalina on VirtualBox with macOS Catalina ISO. This update certainly comes with plenty of new incredible features and some powerful updates such as improved security, update old apps and features, and more. So there’s probably new stuff to explore and try out. That’s particularly possible when Catalina is installed. Here’s how to Install macOS Catalina on VirtualBox on Windows PC.
While Macs are straightly supported by Apple, they can install macOS Catalina and previous versions in whatever stage. Similar to macOS Catalina which is still evaluation, Mac users are able to try out quickly now and later. Though macOS has been installed on Mac and is done now. The best news is, Windows users can still install macOS Catalina and Mojave and previous versions on their Windows PC. In this post, we’ll show how to Install macOS Catalina on VirtualBox on Windows PC with macOS Catalina ISO. Doing that, trying all those features will be under your hand which is done as easy as switching a button on. Here’s how to Install macOS Catalina on VirtualBox on Windows PC.
Table of Contents
VirtualBox
For those who are unfamiliar, VirtualBox is the perfect virtual machine app which has all the required things packed up. How this app and most virtual machine app works is it creates a sandboxed-separated environment that can be installed another operating system there which will work and functions completely separate from the actual operating system. This virtual machine app makes the process quite easy.
With VirtualBox, it’s pretty easy to create, customize, manage, and do all the other things needed for a virtual machine. After those are done, there isn’t much more left to do, all there is needed is to proceed with a few prompts of the installation. So when it’s installed, the operating system will run and operate completely fine with all the components that include the internet, hard disk, and all to there it is. Now how to Install macOS Catalina on VirtualBox on Windows PC.
Install macOS Catalina on VirtualBox on Windows PC [New Method]
One of the benefits of the VirtualBox is, it supports installing macOS officially without installing patches like VMware Workstation. With that, it also accepts installing VirtualBox extension and installing VirtualBox Guest Tool which makes running virtual machine perfectly nice. So there’s no need to install patch like Unlocker for VMware.
[button-yellow url=”https://www.geekrar.com/download-oracle-vm-virtualbox-install-on-windows/” target=”_Blank” position=”Center”]Download VirtualBox [/button-yellow]
Step One – Create or Download macOS Catalina ISO File
Whatever operating system you would like to install, you would probably need the OS installer file. That’s the case in this spot. Whether you’d like to install on Mac or on Windows, you’ll need the macOS Catalina VMDK or macOS Catalina ISO For VMware & VirtualBox file. There are two different ways to download macOS Catalina ISO For VMware & VirtualBox. This can be either created or downloaded from the links we’ve provided which is pretty easy. Whichever way you choose, we’ve covered you up with both. Let’s do how to Install macOS Catalina on VirtualBox on Windows PC.
To create a macOS Catalina ISO file, simply click the link below and follow out on the steps.
For download macOS Catalina ISO For VMware & VirtualBox file without creating one, you’re good to get one from the following link. This is simple. With macOS Catalina ISO, how to Install macOS Catalina on VirtualBox on Windows PC.
macOS Catalina Final Version (19A602) 15 Oct 2019 (Recently Updated)
- Installing Catalina is pretty easy, but that’s not the case with downloading. This process seems very easy which should require a few clicks, that’s correct but matters where you’d catch up the file. That’s what makes it difficult. So we’ve cut you to the chase and straight to the point, download macOS Catalina ISO For VMware & VirtualBox.
[button-yellow url=”https://www.geekrar.com/download-macos-catalina-iso-for-vmware-virtualbox/” target=”_Blank” position=”center”]Download Now[/button-yellow]
From the BIOS, watch out if the Intel VT-x hardware acceleration options are enabled.
Step Two – Install Oracle VirtualBox on Windows
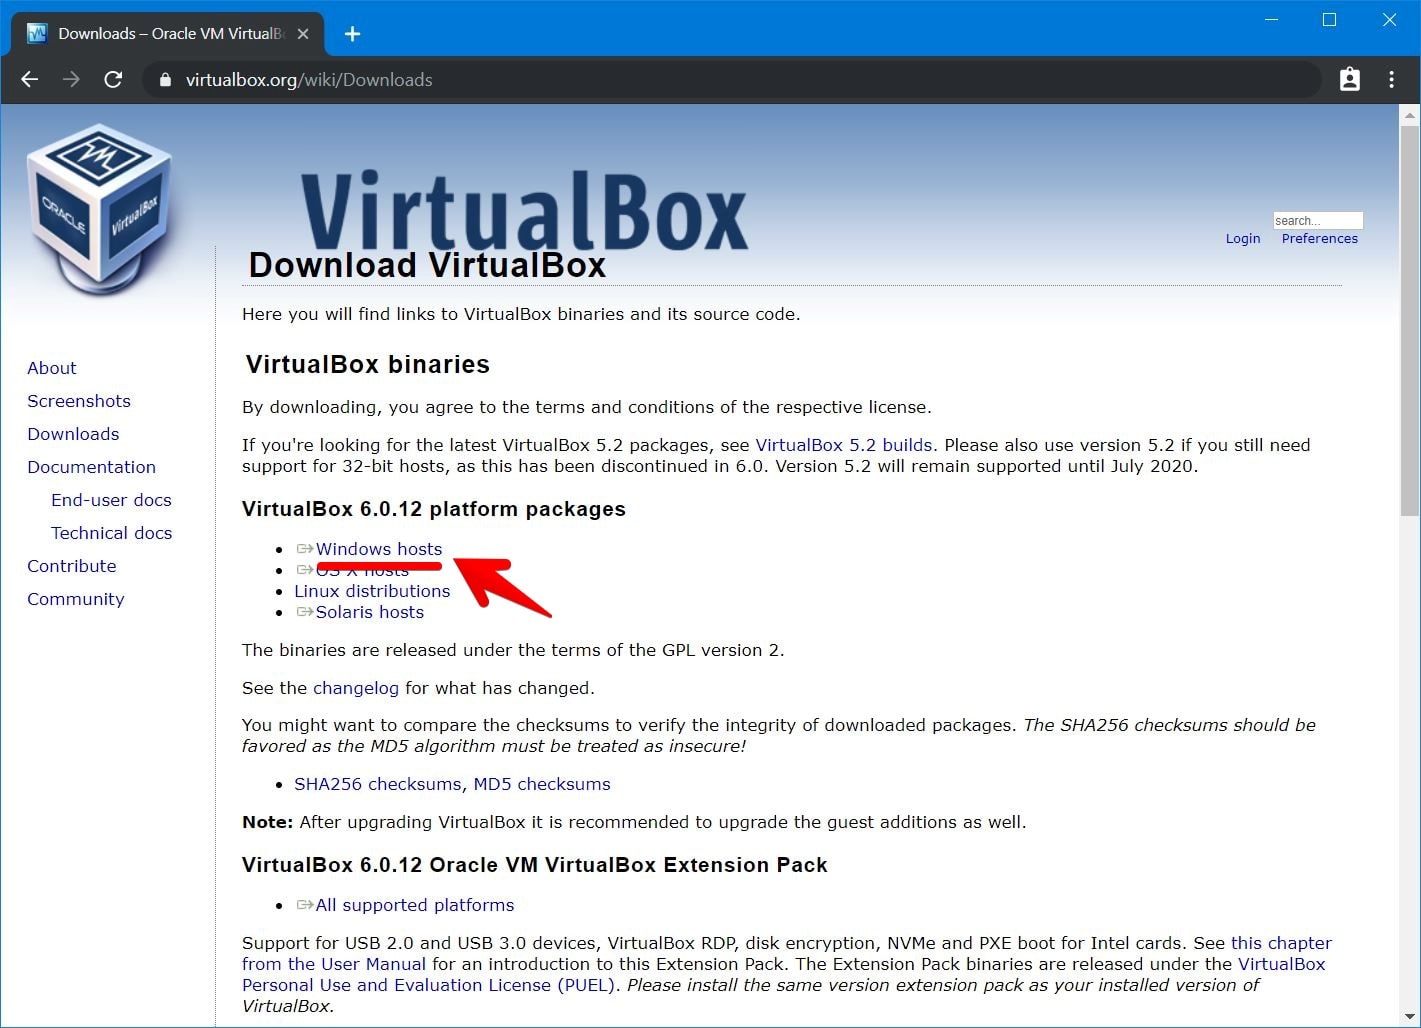
The next step to accomplish is installing VirtualBox which requires the setup file that can be obtained. From the VirtualBox official website, click on Windows hosts and let it download.

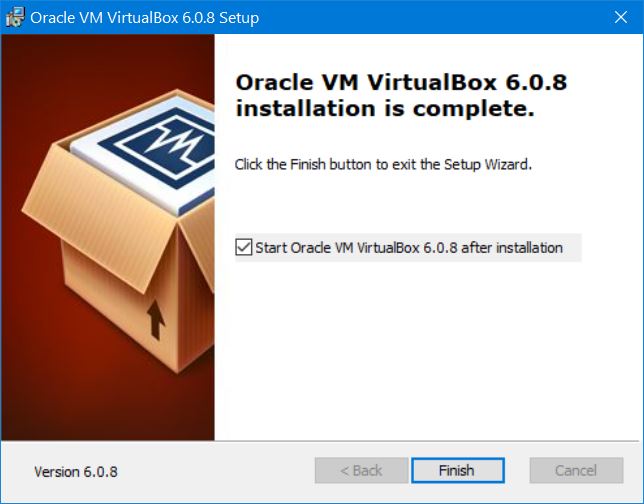
Once that’s done, open up VirtualBox setup and process it and let it install.

Step Three – Install VirtualBox Extension Pack
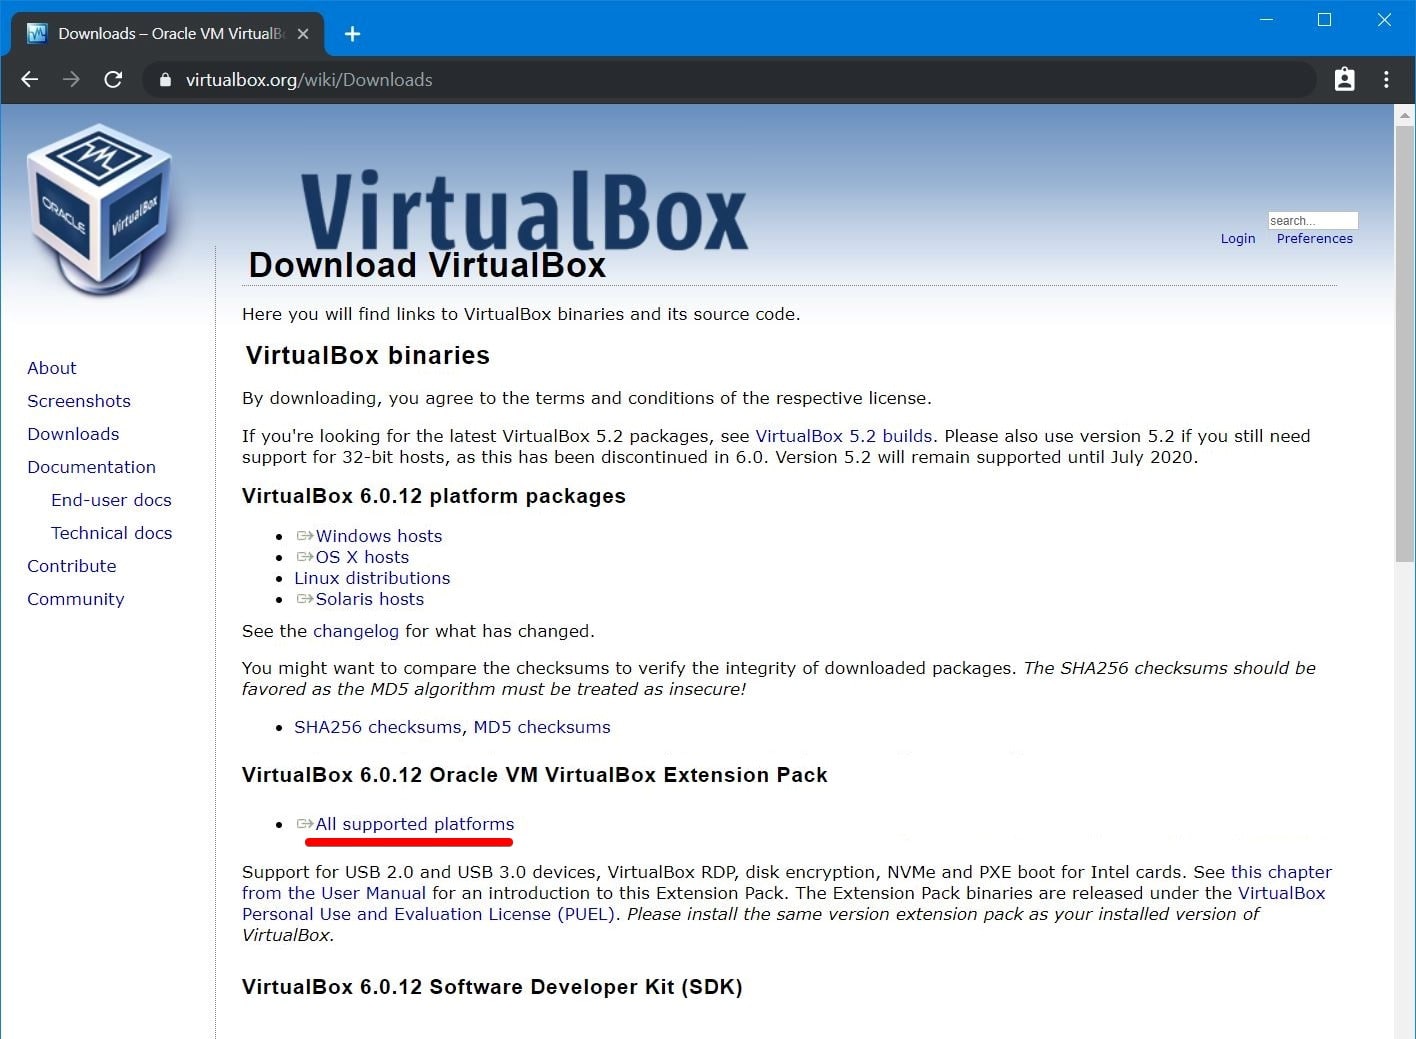
In terms of installing macOS Catalina, we need to install VirtualBox Extension Pack which will enable mouse and keyboard working fine. Head over to the VirtualBox download window and click on All supported platforms.

When it’s there, open it with VirtualBox and when it prompts on the VirtualBox, click Install.

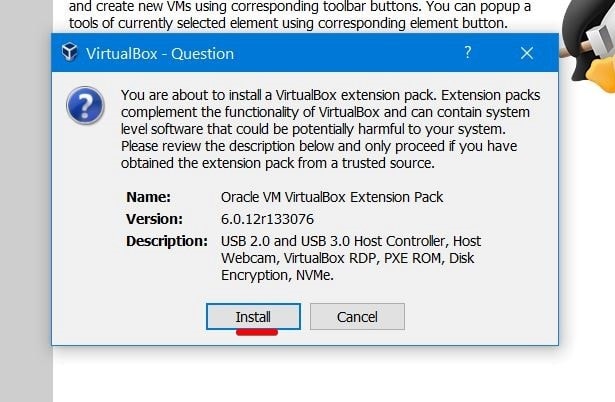
Agree with terms and conditions and let it install. When it’s done, click OK.

After it’s done, you’re good to go!
Step Four – Create A New Virtual Machine
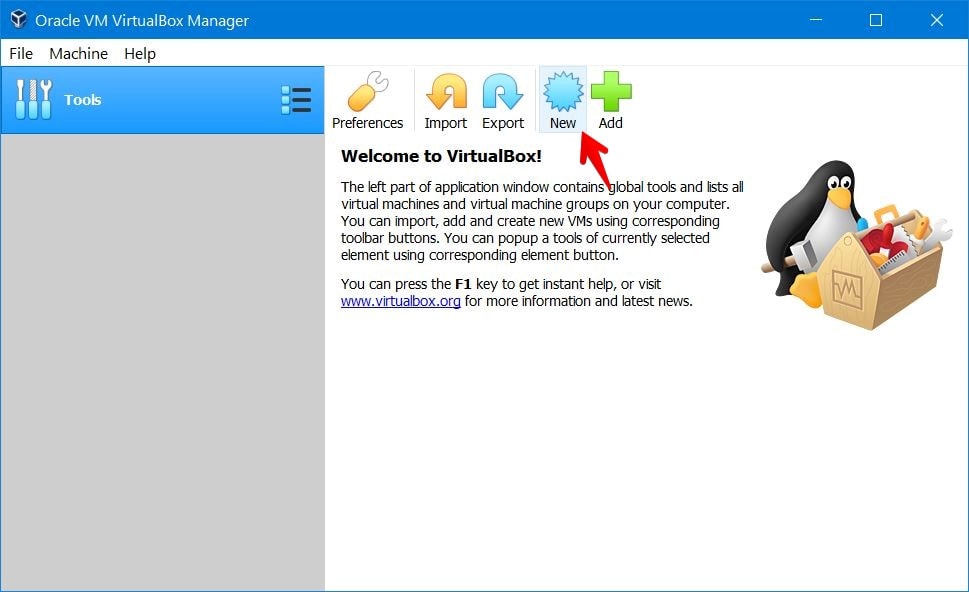
Installing macOS Catalina on a virtual machine requires setting up a new virtual machine once you’ve installed VirtualBox.

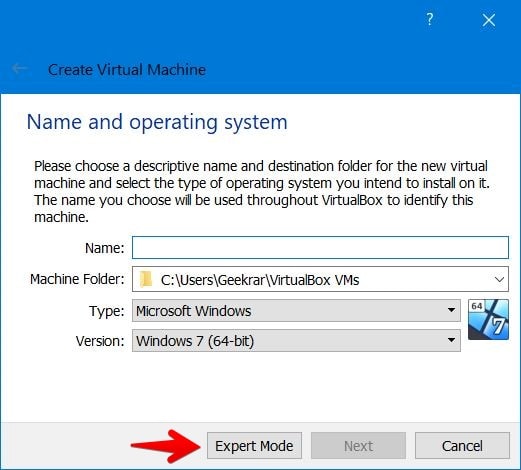
Then click on Expert Mode from the end of the window.

Now enter “macOS Catalina” for the name and specify a place to store the machine files. Then set up 50 – 60% of your system’s memory and select Create a virtual hard disk now for the hard disk and click Create.

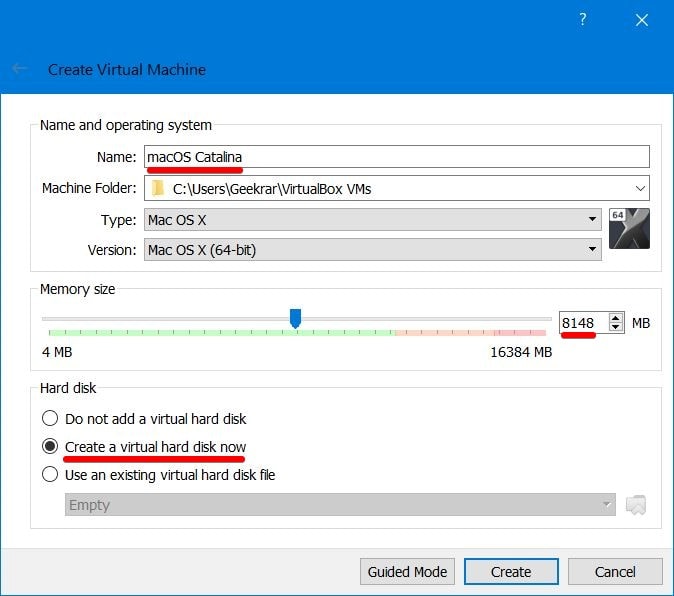
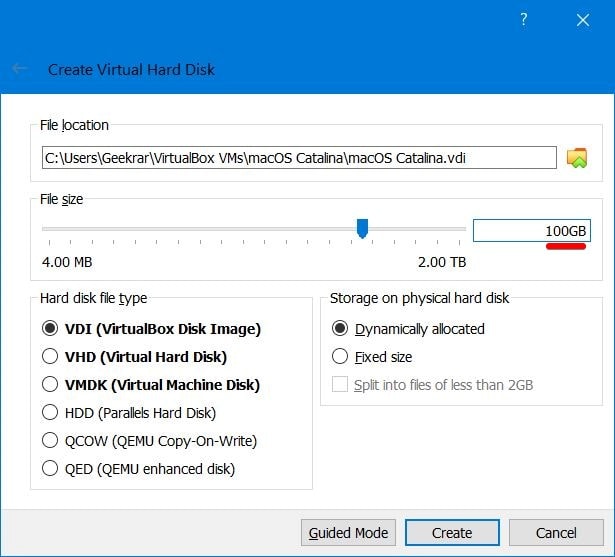
In this screen, type “100GB” and hit Create.

Step Five – Set up Virtual Machine Settings
Setting up macOS Catalina settings is what makes the installation work. These settings are the most important settings that empower and eventually install macOS Catalina. If one or more of these settings are not similar to what we’ve shown, the macOS Catalina will probably fail to boot. If this happens or happened to you, make sure you set these settings correctly.
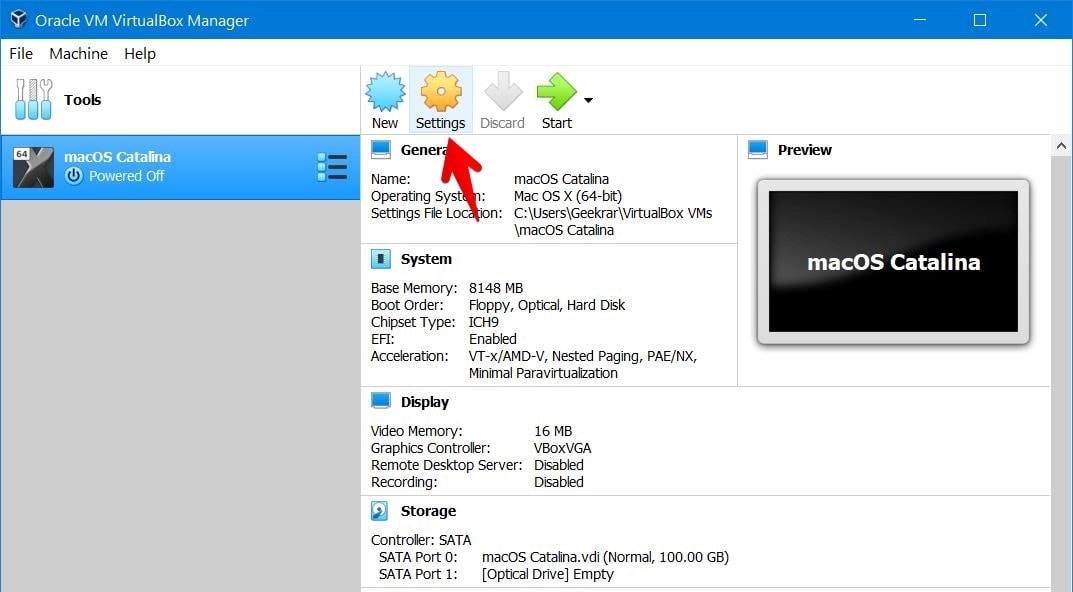
Navigate to the VM settings from the top.

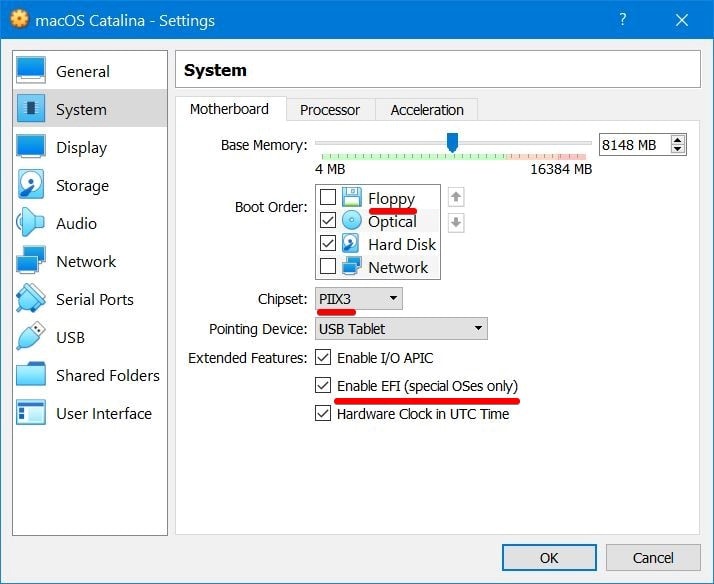
On the virtual machine settings, click on System and uncheck floppy then change the chipset to PIIX3.

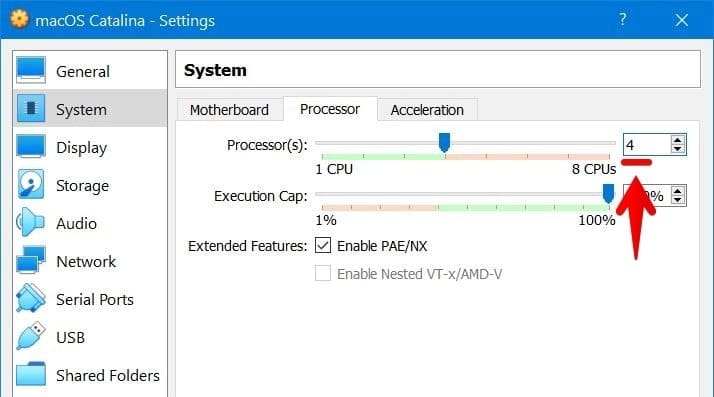
When that’s done, head over to the next tab which is processor and increase the number of processors to assign 50 – 60% processor of your system.

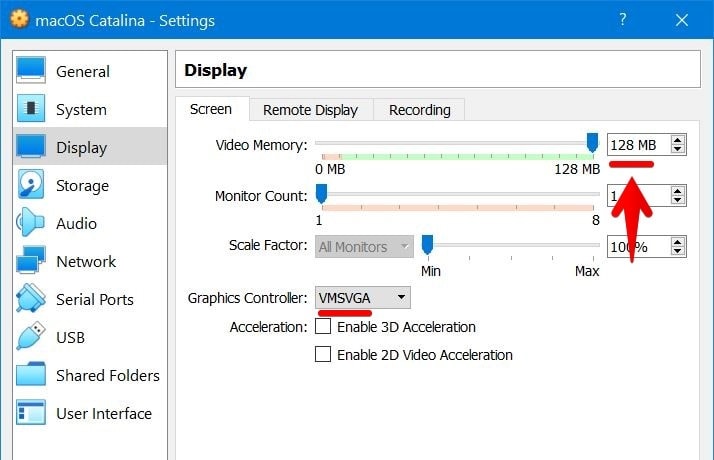
Now from the Display tab, increase the video memory to the end and change the graphics controller to VMSVGA.

Next to the Storage tab, click on the Empty disk there then click the disk with a down arrow icon and select Choose Virtual Optical Disk File.

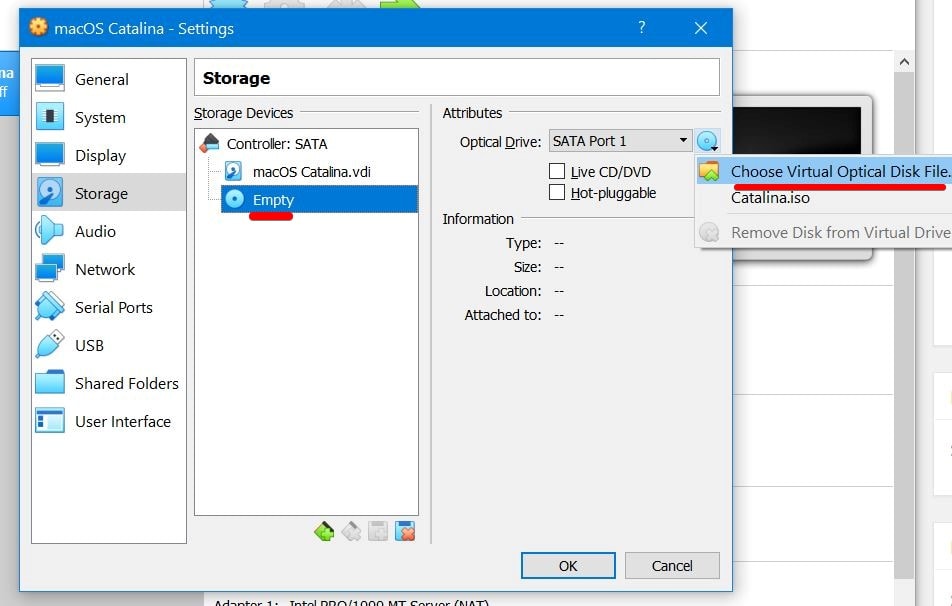
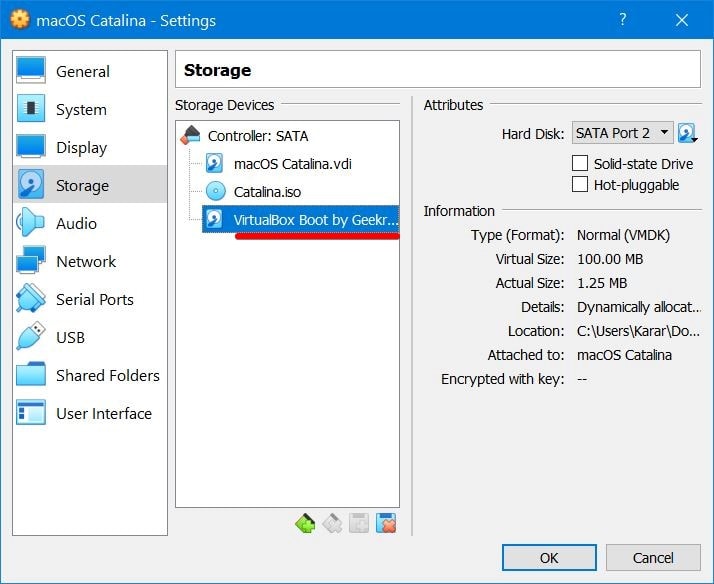
Browse the macOS Catalina ISO For VMware & VirtualBox file and select it. That done, click on the Controller: SATA and click on the small disk plus icon and select Choose Existing Disk.

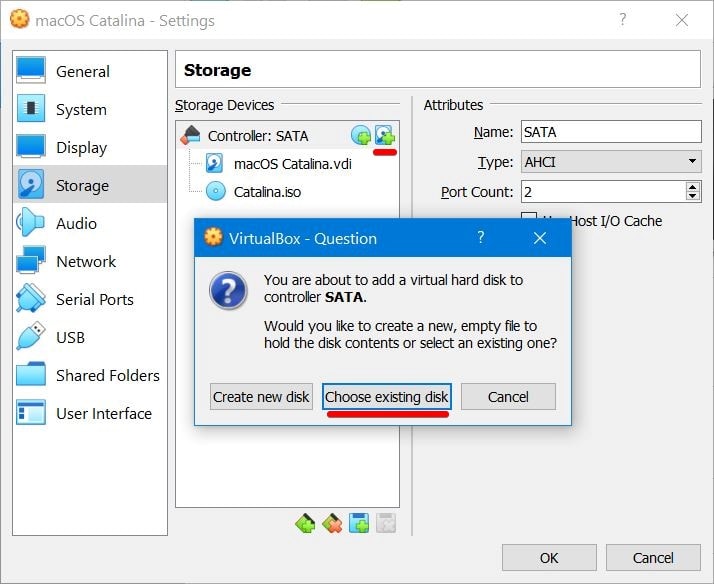
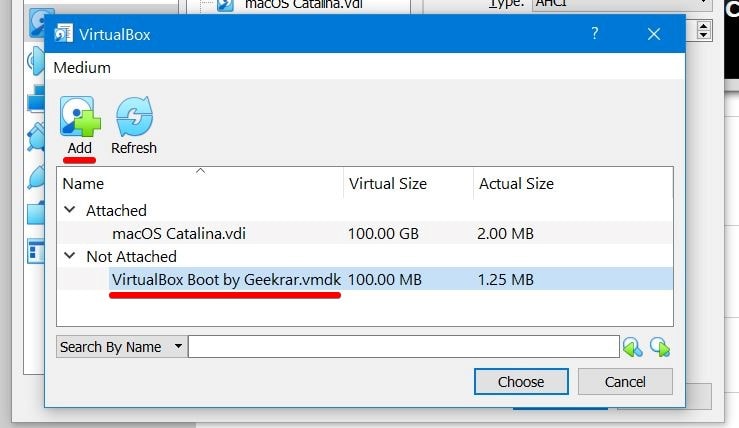
Click on Add then choose the VirtualBox Boot Image.
If the top one didn’t work or there is some problem, here’s another one.

After it’s done, it will look something like this.

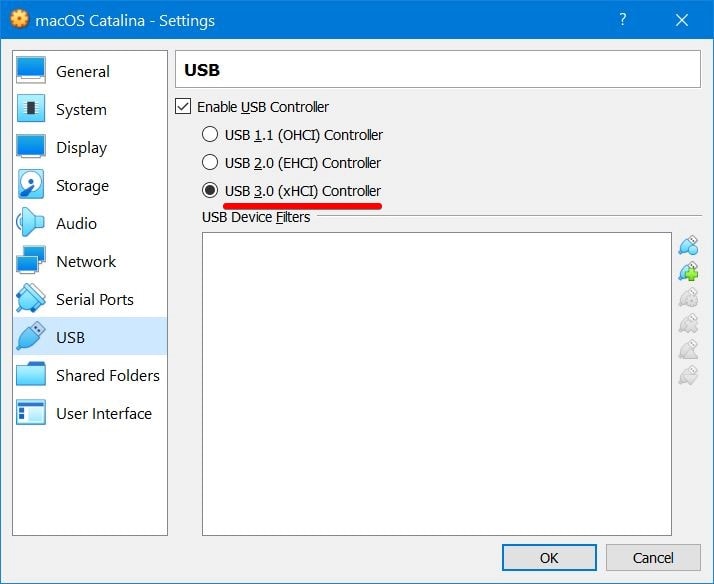
Now select the USB tab and select USB 3.0 (xHCI) Controller then click OK on the settings window.
Step Six – Apply Commands on Command Prompt
The settings of the virtual machine are near to end. With this step done, the installation part will probably begin.
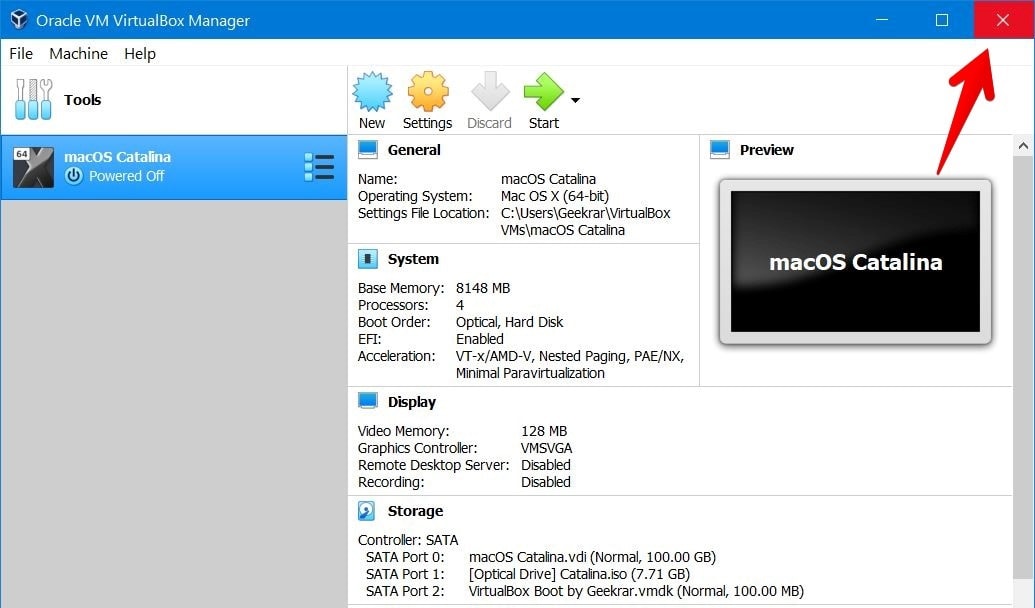
At this point, close the VirtualBox from the exit button.
Note: If the VirtualBox isn’t closed, the commands mightn’t work which will end up failed to install.

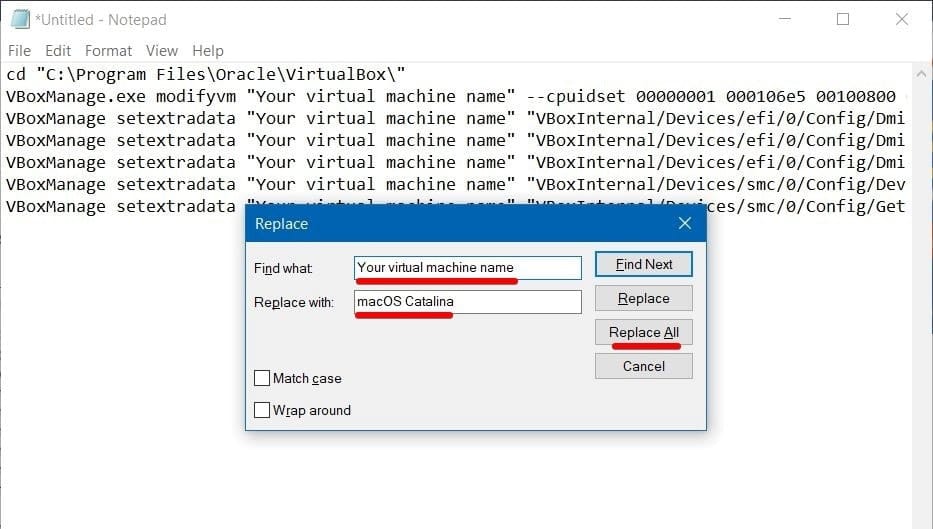
Next, copy and paste this command on the Notepad and press Ctrl+H. Now type in “Your virtual machine name” in the Find What then type “macOS Catalina” in replace with tab and click Replace All.
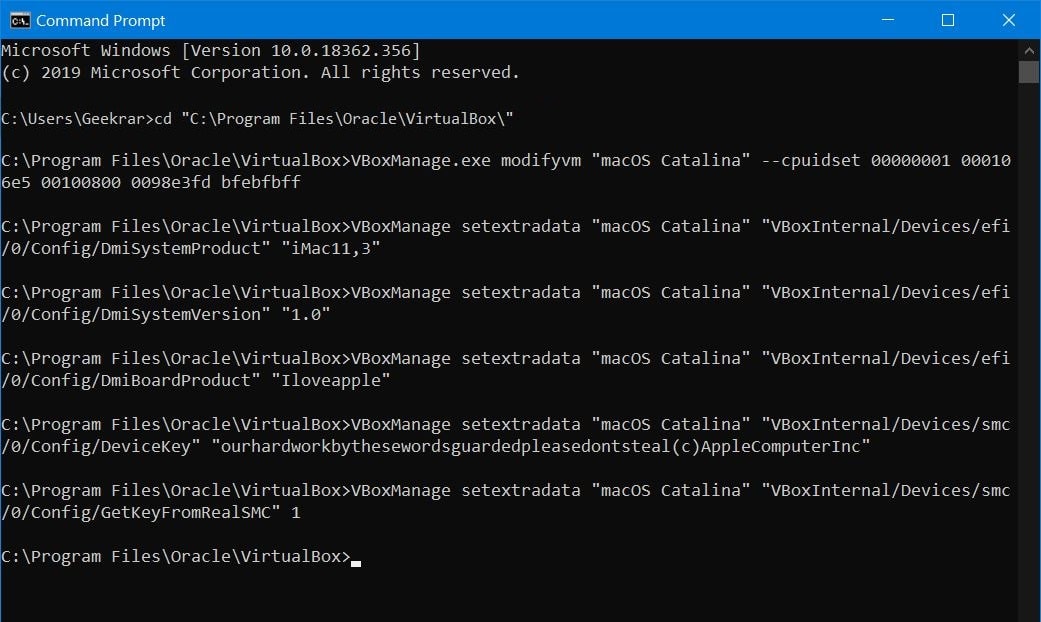
cd "C:\Program Files\Oracle\VirtualBox\"
VBoxManage.exe modifyvm "Your Virtual Machine Name" --cpuidset 00000001 000106e5 00100800 0098e3fd bfebfbff
VBoxManage setextradata "Your Virtual Machine Name" "VBoxInternal/Devices/efi/0/Config/DmiSystemProduct" "iMac11,3"
VBoxManage setextradata "Your Virtual Machine Name" "VBoxInternal/Devices/efi/0/Config/DmiSystemVersion" "1.0"
VBoxManage setextradata "Your Virtual Machine Name" "VBoxInternal/Devices/efi/0/Config/DmiBoardProduct" "Iloveapple"
VBoxManage setextradata "Your Virtual Machine Name" "VBoxInternal/Devices/smc/0/Config/DeviceKey" "ourhardworkbythesewordsguardedpleasedontsteal(c)AppleComputerInc"
VBoxManage setextradata "Your Virtual Machine Name" "VBoxInternal/Devices/smc/0/Config/GetKeyFromRealSMC" 1

After that, open Command Prompt simply without an administrator.

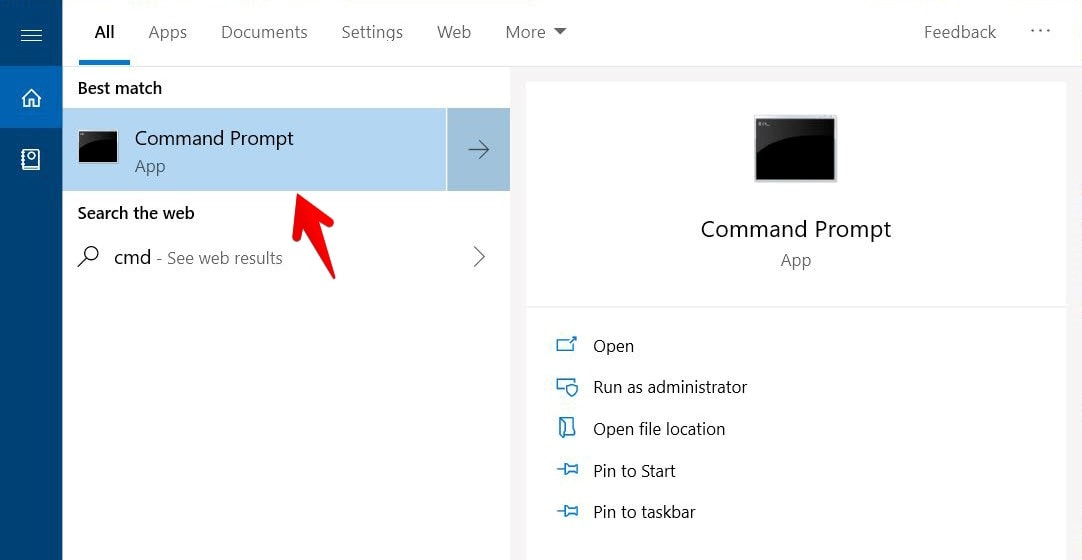
On the Command Prompt appeared, copy and paste the first line of the command first, then paste all of them.

With that out of the way, you’re completely ready to install macOS Catalina on VirtualBox on Windows PC.
Step Seven – Install macOS Catalina on VirtualBox
Now there’s nothing that would stop you from installing macOS Catalina. The installation is easy.
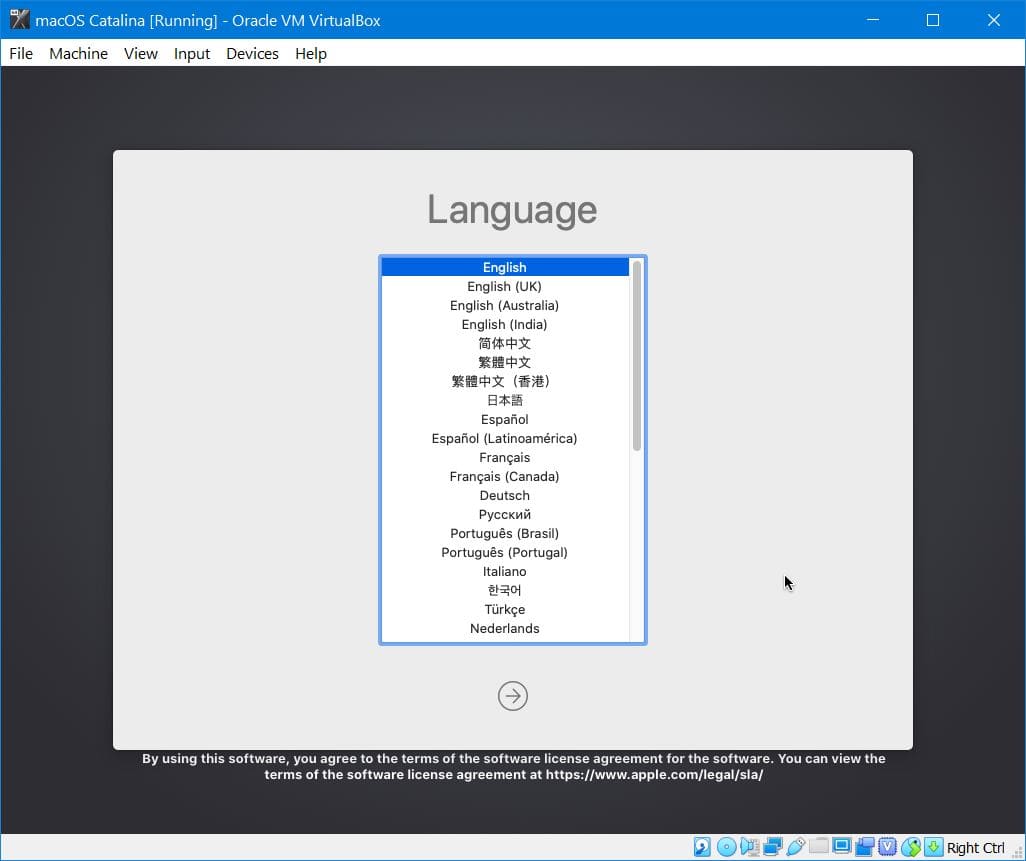
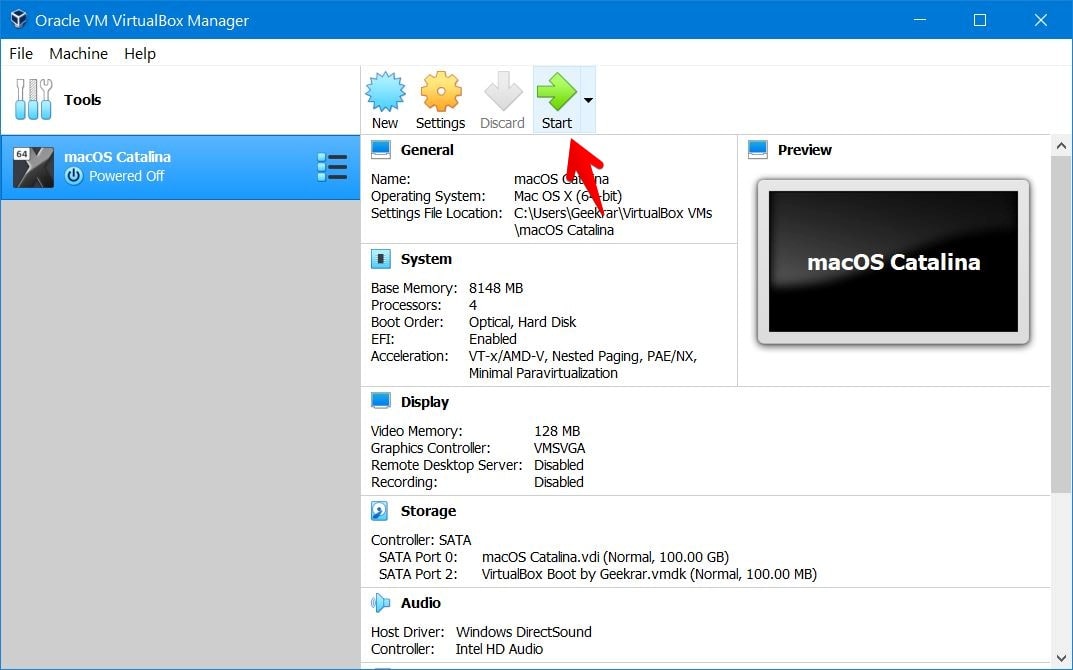
Fire up VirtualBox and click Start on the macOS Catalina. It will take some time to load up.


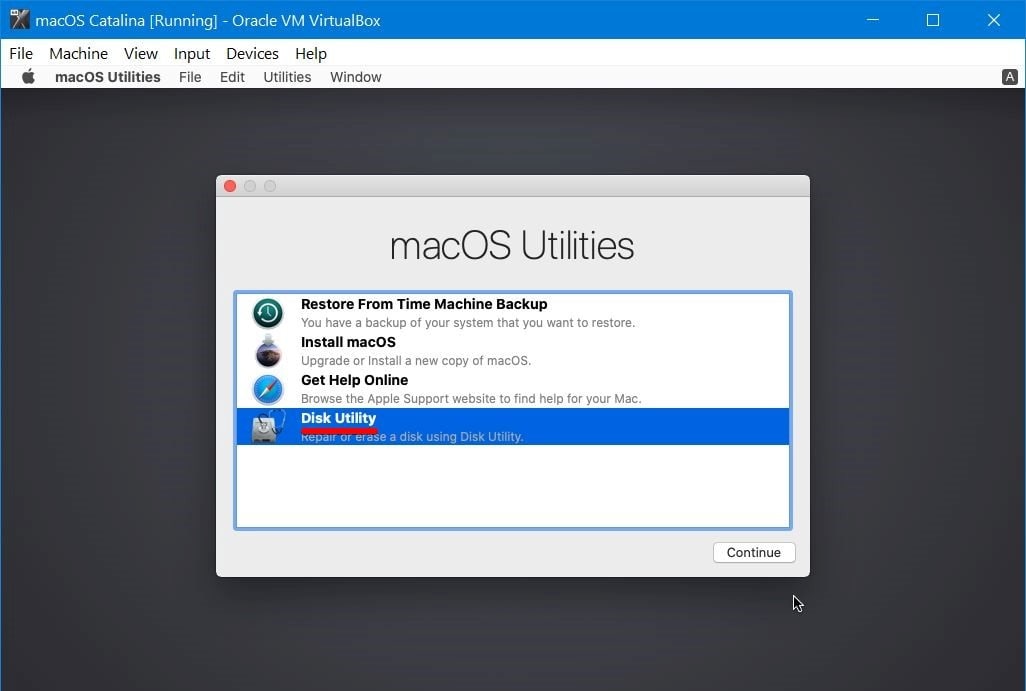
When it’s up, Continue with this window.

There, select Disk Utility and Continue with it.

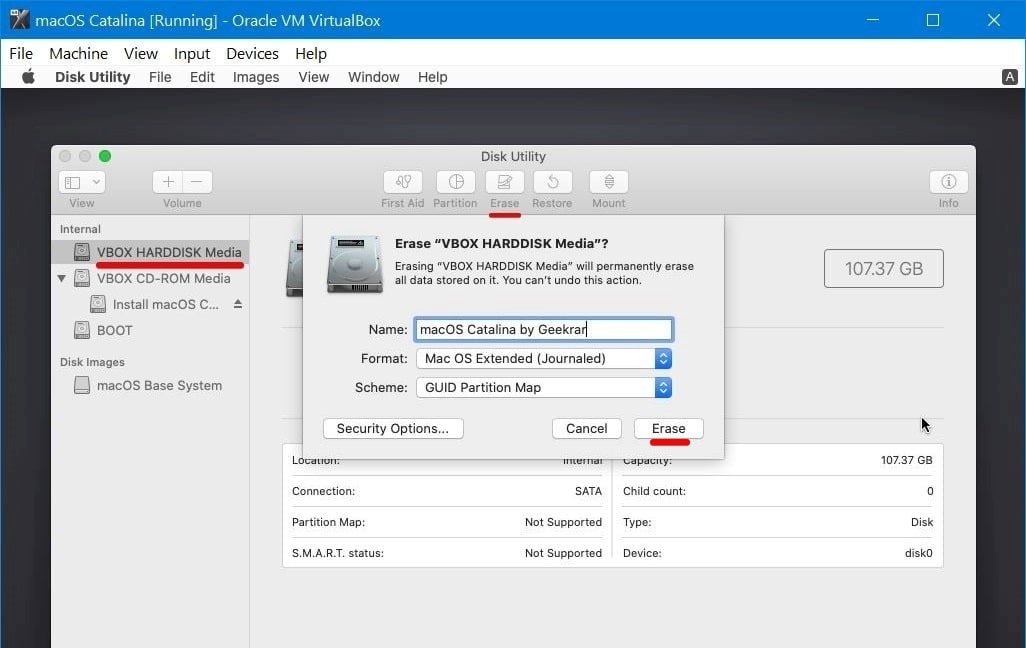
Then select the VirtualBox Virtual Disk that is “Vbox HardDisk Media” and click Erase then name the virtual disk and click Erase.

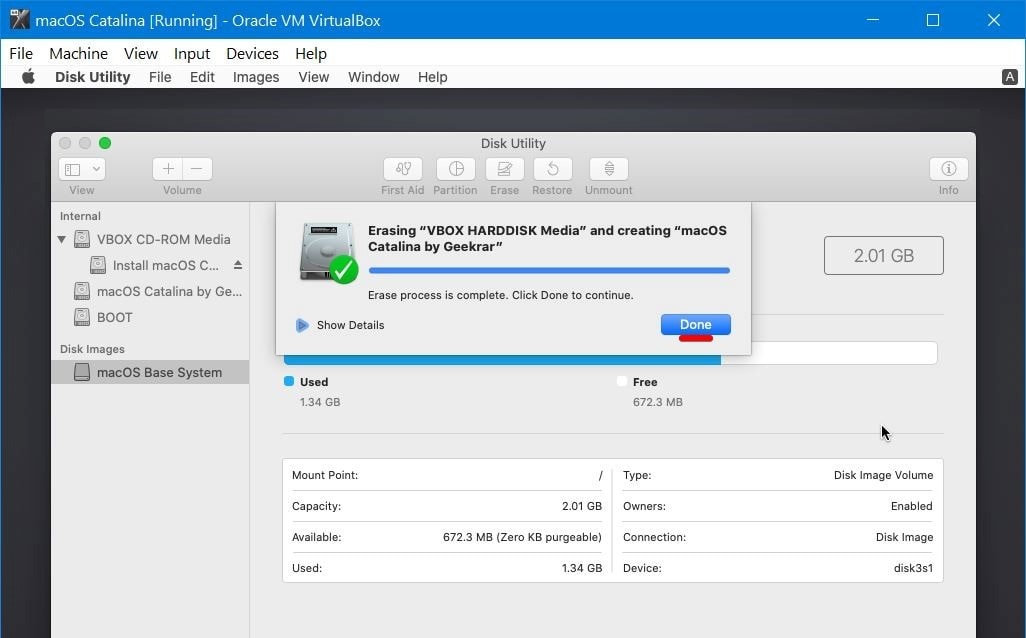
Once that’s finished, click Done.

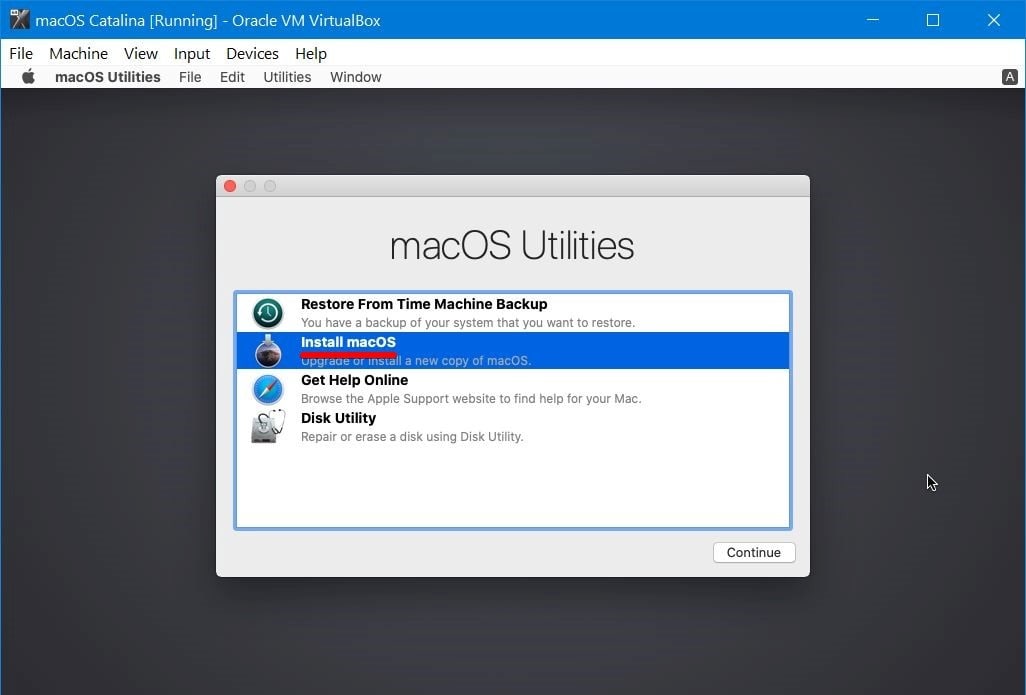
After then, close the window of the Disk Utility and select Install macOS then click Continue.

Continue with it simply.

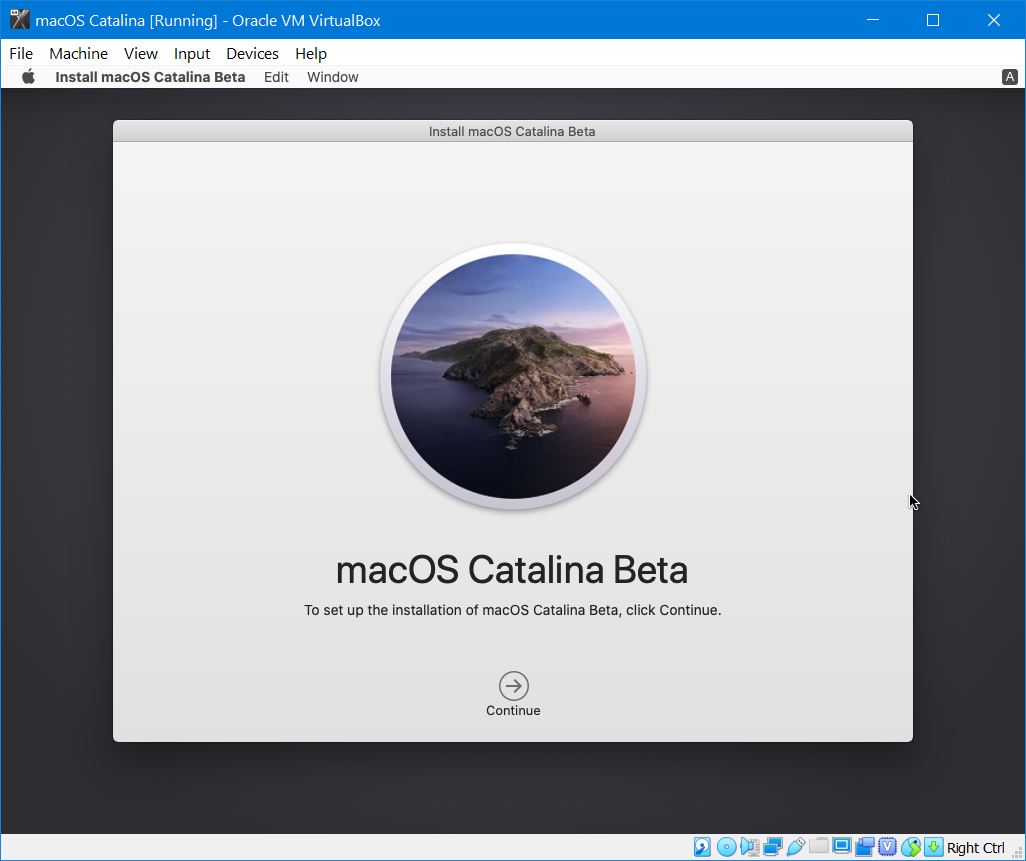
Next up, agree with terms and conditions.

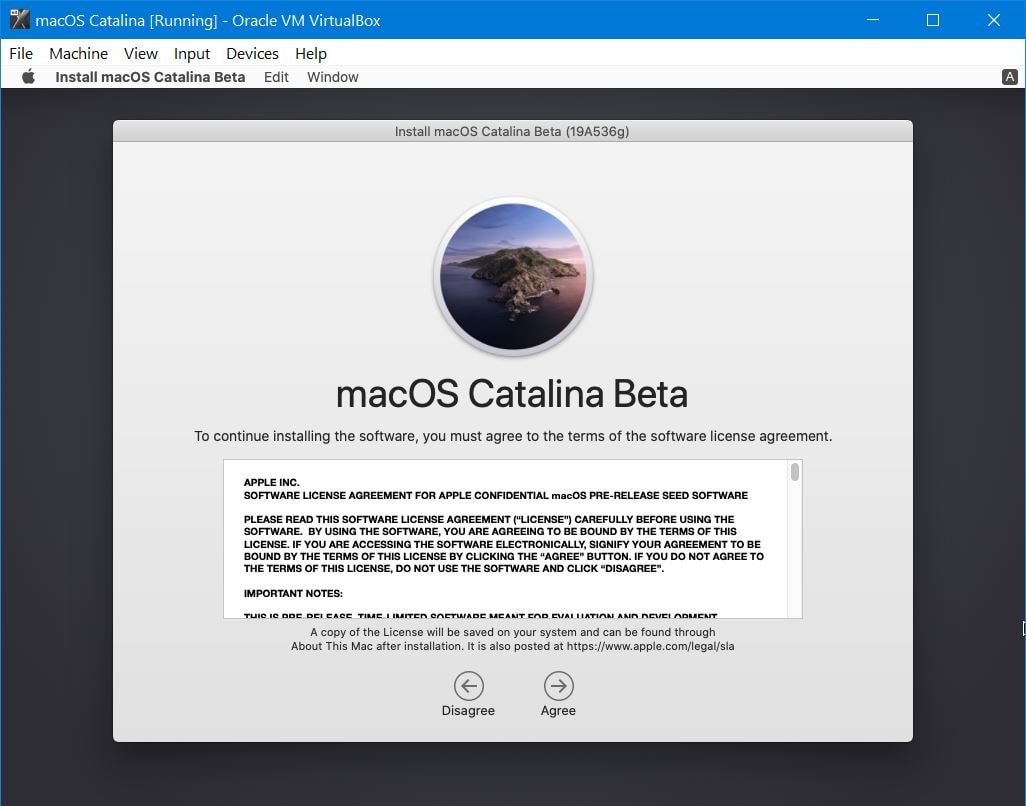
Select the disk and click Install. The installation will begin now which will take a few minutes.


After the installation is completed, it will reboot so when it’s up again, shut down the virtual machine.

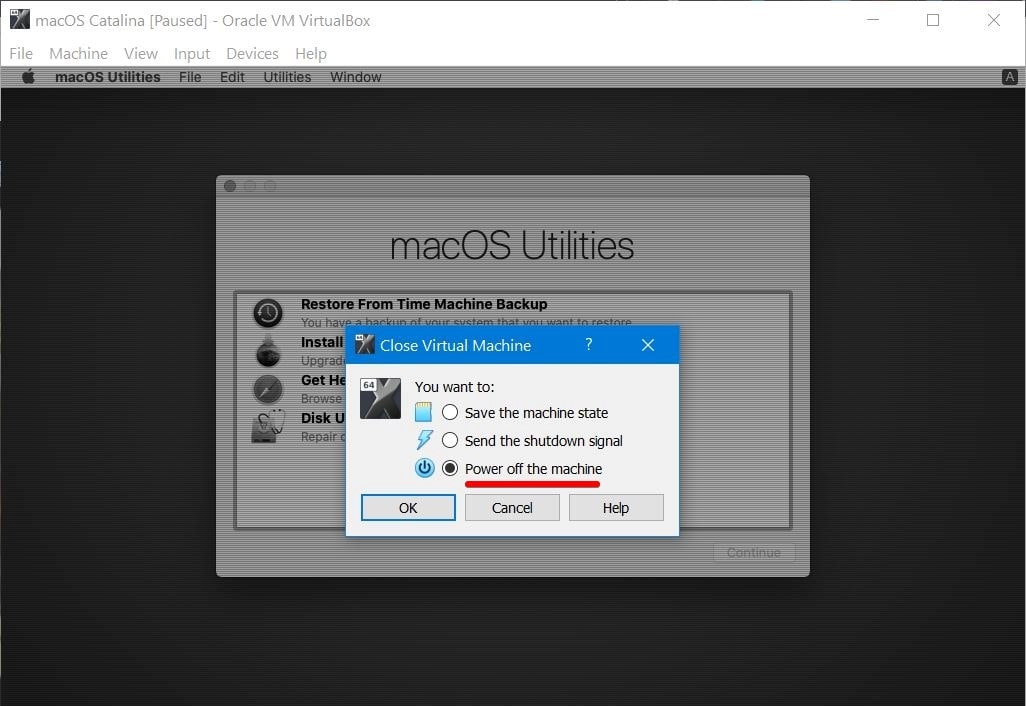
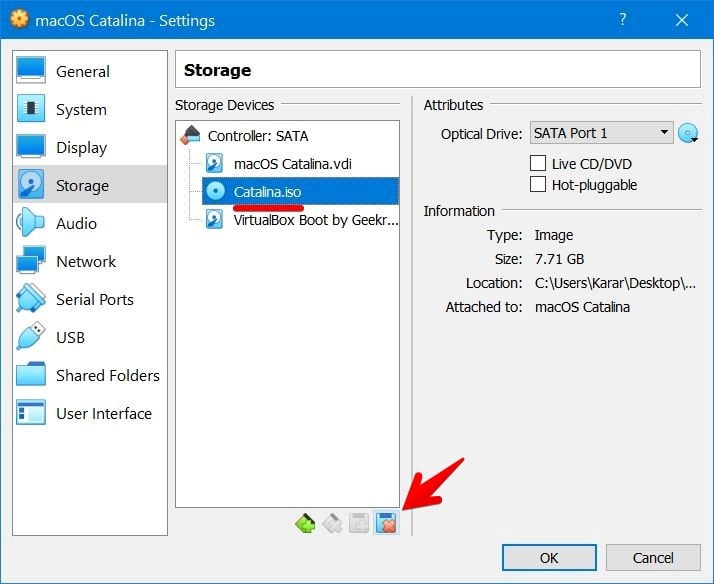
Goto virtual machine settings then Storage and remove the Catalina.iso file then click OK.

Once that’s done, start the virtual machine.

Now before 5 second press the Esc button immediately, then type “install.nsh” and hit Enter.

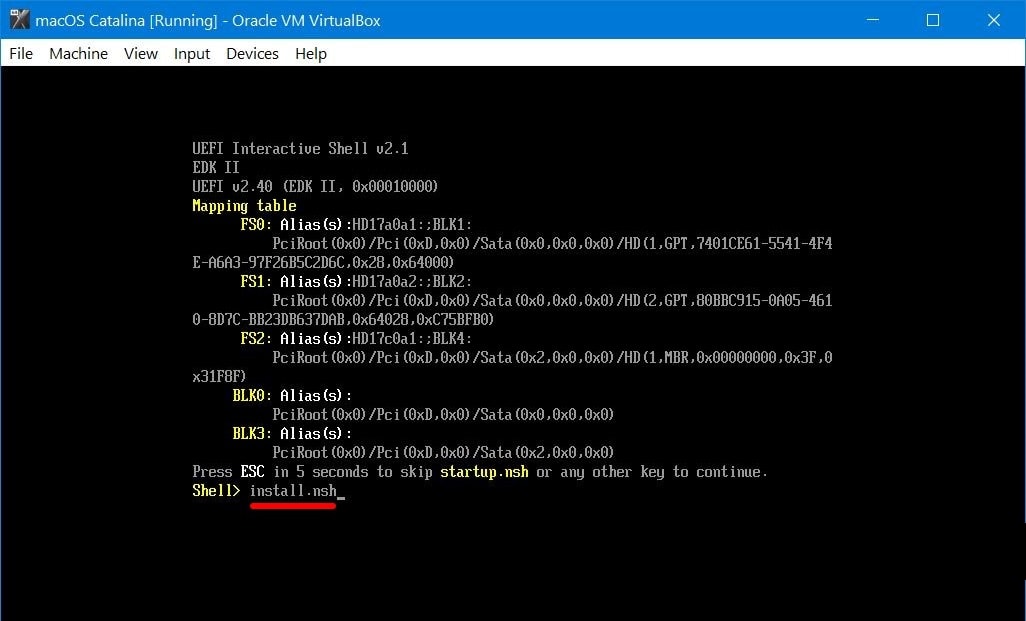
The macOS will be installing then.

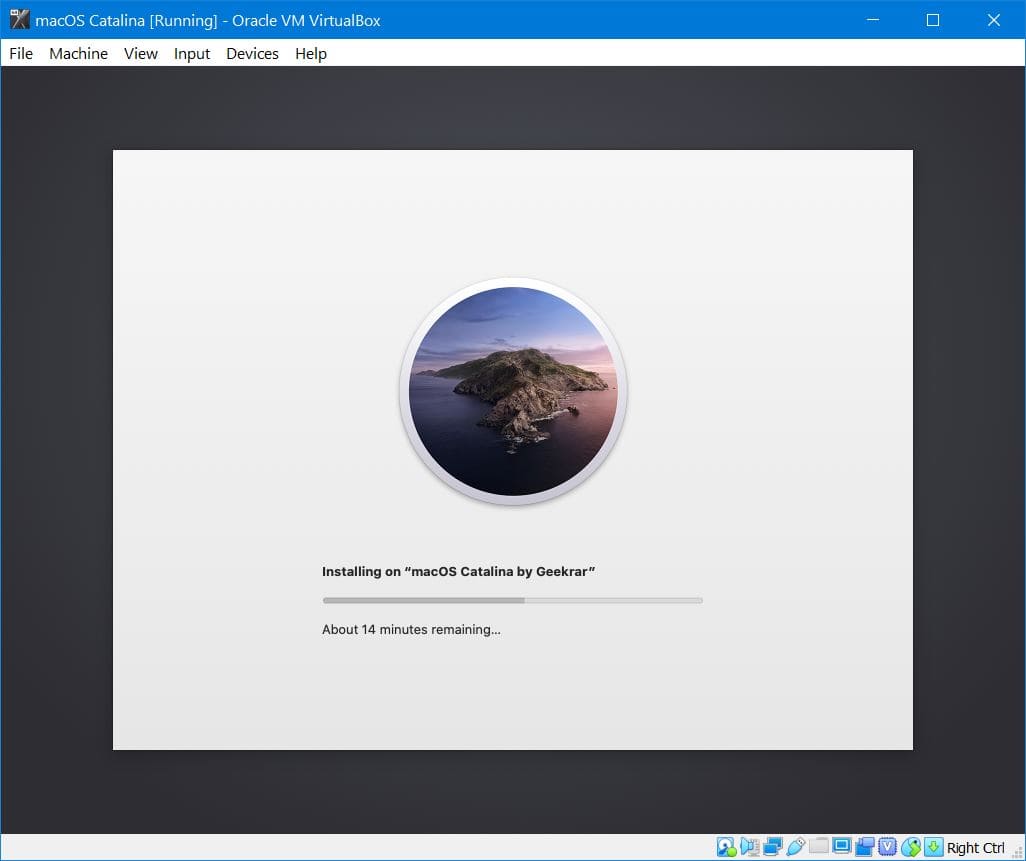
When it’s finished, it will reboot so there’s nothing to do more. Wait for it to start and it will be on Welcome window.

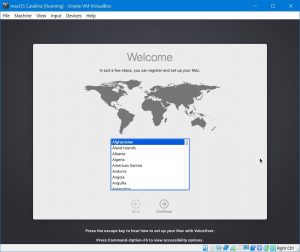
When that’s there, set up Mac like normal and at the end, you’ll eventually see the macOS Catalina desktop window. This will be the actual Mac running macOS that will be able to do the entire work, that includes whether creating a bootable USB or whatever. There’s no huge difference between a real Mac and virtual machine running on your Windows system.

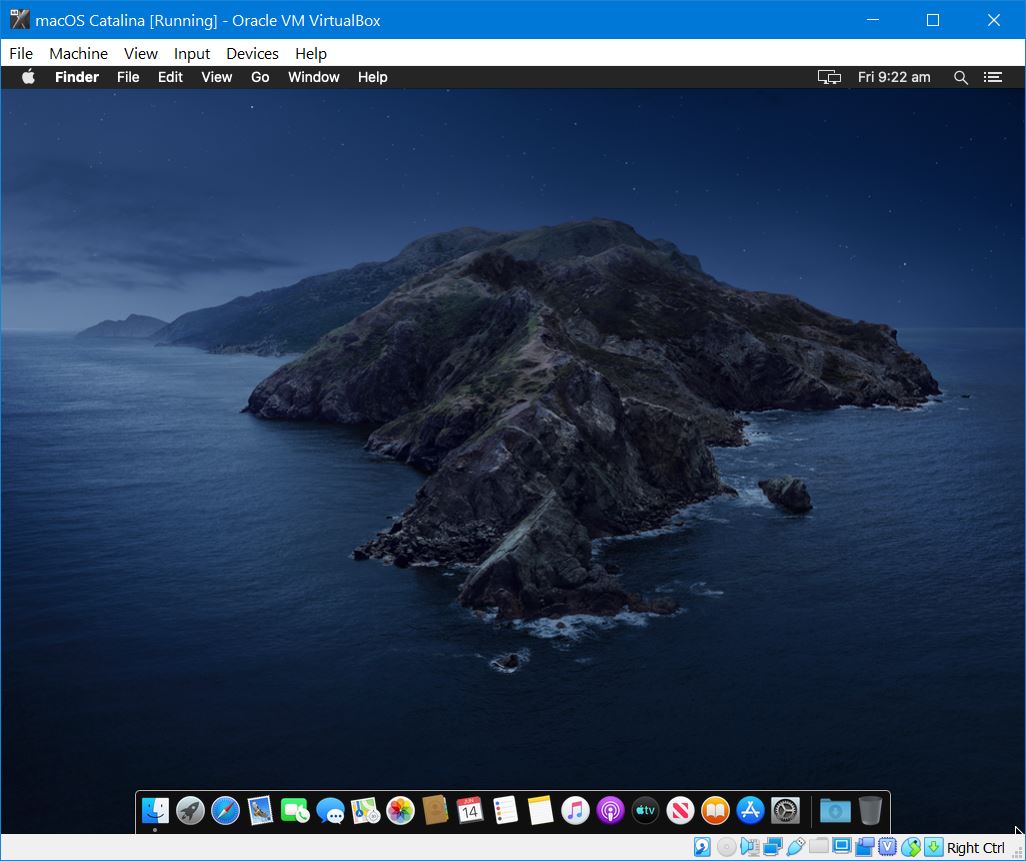
The only thing is, it now requires to fix the resolution which is pretty easy.

The nice thing is when that’s installed, you can update macOS to the latest version and take a snapshot which is able to restore back to the point. If there’s some speed issue, you can always speed up macOS Catalina.
That’s it. If there’s some problem or issue, put it down in the comments form.
Install macOS Catalina on VirtualBox on Windows – Video
https://youtu.be/-dylDY04W3A
Searches Related to it.
- macos catalina vmware image
- macos catalina vmware image download
- macos catalina iso vmware
- mac os catalina iso download
- vmware catalina black screen
- catalina vmdk
- macos catalina virtualbox
- catalina vmware file