This guide will show all the steps to install macOS Big Sur on VMware Workstation Pro on Windows PC. We walk you through each step with screenshots and have a video to walk you through it visually. Since issues come up with compatibility, check out our forum. The GEEKrar forum is a great place to post questions or find a fix to frequently occurring problems.
Table of Contents
So, What is Big Sur?
macOS Big Sur is the 17th OS release from Apple for Mac systems computers and is the successor of macOS Catalina. This macOS was officially released to the public on November 12, 2020, and is available for a series of Mac computers found here. This OS can be installed virtually as we are in this guide.
What you need for this installation:
– Windows 10
– 4 GB RAM
– 80 GB of disk space
– VMware Workstation Pro
– Big Sur ISO image file (link)
– VMware Unlocker (link)
Please Note: All image files are created only for educational purposes. Any misuse of any files is not our responsibility.
How to Install Big Sur on VMWare Windows 10
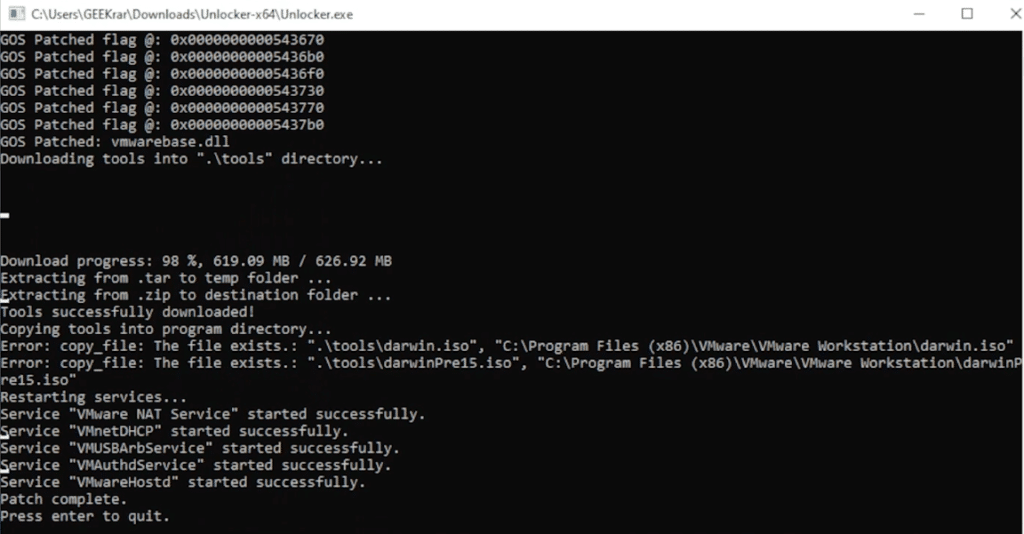
Run VMware Unlocker
Before we begin to install Big Sur on VMWare Windows 10, we need to have VMware Workstation Pro unlocked. By default, VMware cannot install any macOS because the features are locked. To unlock it, first, make sure VMware is completely shut down. Next, check the task manager to ensure no processes are running. When you have confirmed that, open the VMware unlocker file you’ve downloaded. Right-click ‘Run as Administrator,’ and the program will automatically execute, download, and install the necessary files. The process can take serval minutes, but there will be a prompt when complete.

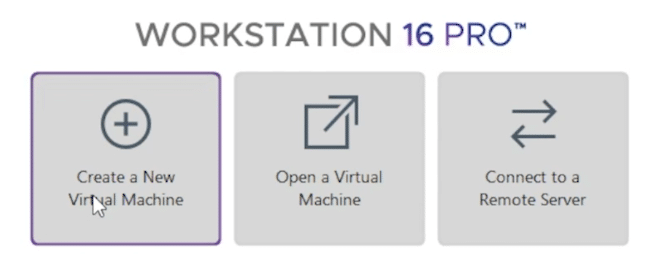
Create Virtual Machine for macOS Big Sur
Open VMware Workstation Pro, and select the option to ‘Create a New Virtual Machine’.

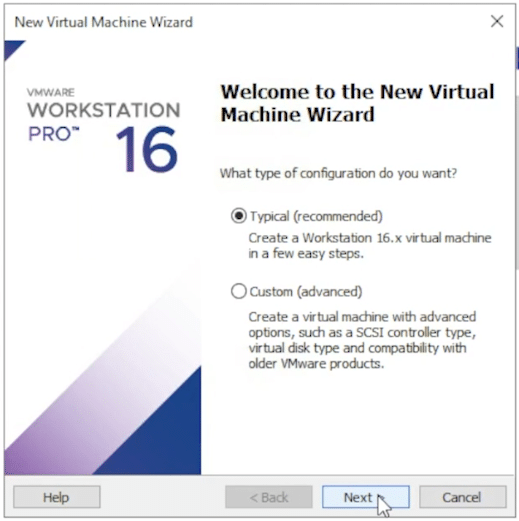
At the wizard, select the ‘Typical’ option, click next

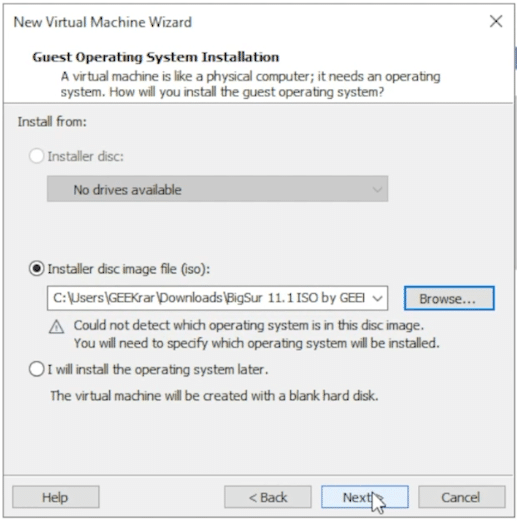
At the Guest Operation System Installation window, select ‘Installer disc image file’ and click Browse. Find you downloaded Big Sur ISO image file. Then click Next.

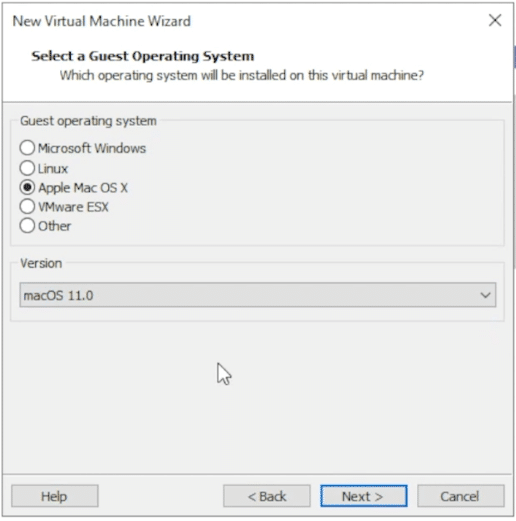
In the Guest operation system list, select Apple Mac OS X. Then choose the version ‘macOS 11.0’ in the drop-down list.
If this does not appear, you will need to repeat the VMWARE UNLOCKER STEP.

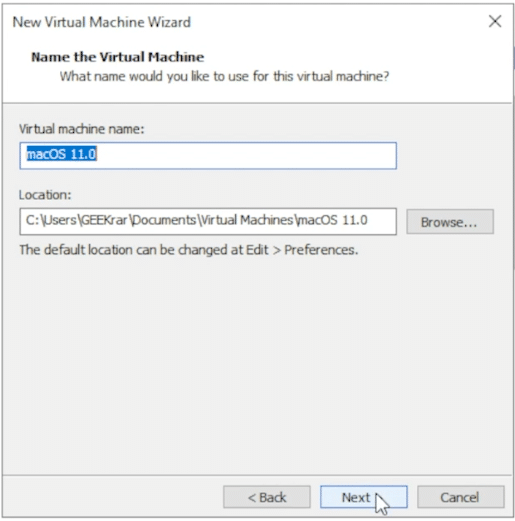
In Name the Virtual Machine, you can provide your own name for the virtual machine, and select a location to store if you don’t like the default.

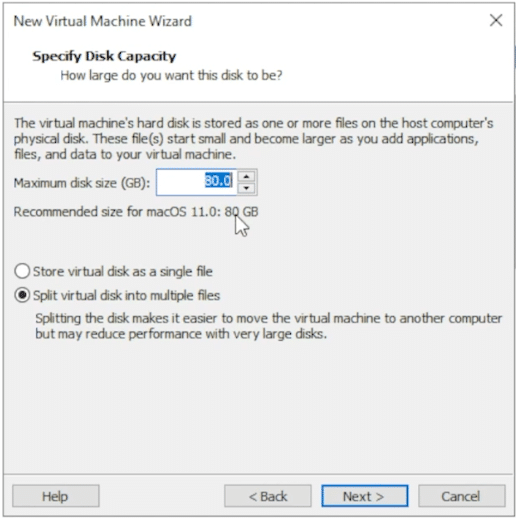
Next we need to Specify Disk Capacity. 80GB is the minimum amount you should have, but if you are planning to install a lot of applications, you can increase accordingly.

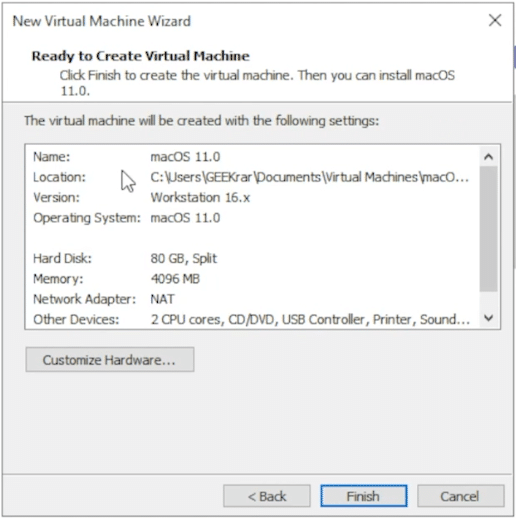
At the last window, you can confirm your details entered, then click on Finish.
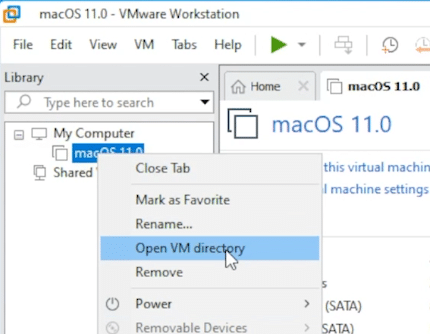
To Edit the VMX file, right click on the virtual machine we just created on the left side, and select “Open VM directory”

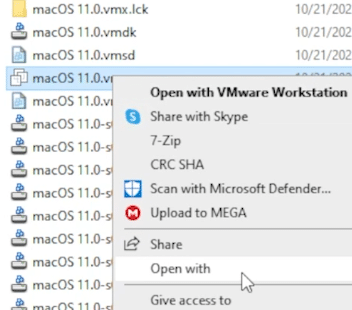
When the folder opens it should automatically select the VMX file. If not, ensure you choose the file “[VirtualMachineName].vmx”. Right click on this file, select “Open With”, and choose Notepad.

Scroll down to the bottom of this text file, and insert the below lines of text
smc.version = "0"
smbios.reflectHost = "TRUE"
hw.model = "MacBookPro14,3"
board-id = "Mac-551B86E5744E2388"
It should look like the below.

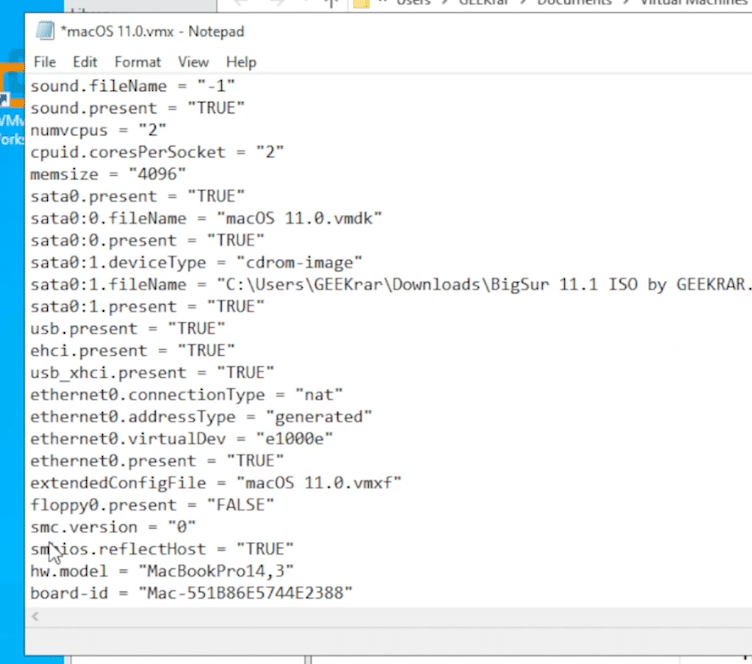
Now Click on the File menu, and Save. You can now exit Notepad.
Edit Virtual Machine Settings (optional, but recommended)
To get the best performance out of Big Sur, we need to tweak the default settings.
Open up VMware, and select the virtual machine we just created. Next, select the “Edit virtual machine setting.”
Under the memory option, increase this to 8GB or more (if available)
In Processors, under “Number of cores per processor,” Select 4 or more (if available).
Begin setup of Big Sur in VMware
Once we begin we will need to have the Big Sur ISO file handy. Locate yours now or downloaded it here.
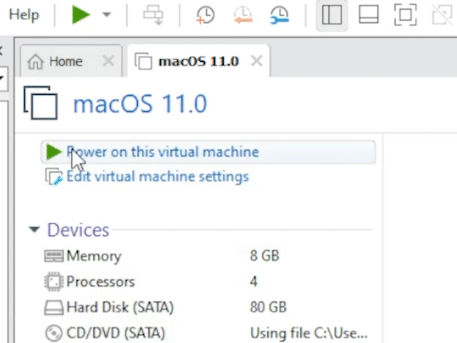
At the main VMware window, then click the ‘Power on this virtual machine’ button.

The operating system Big Sur in VirtualBox will begin to load. This step will take a few minutes. A prompt will pop up, select a language to continue when it’s done.
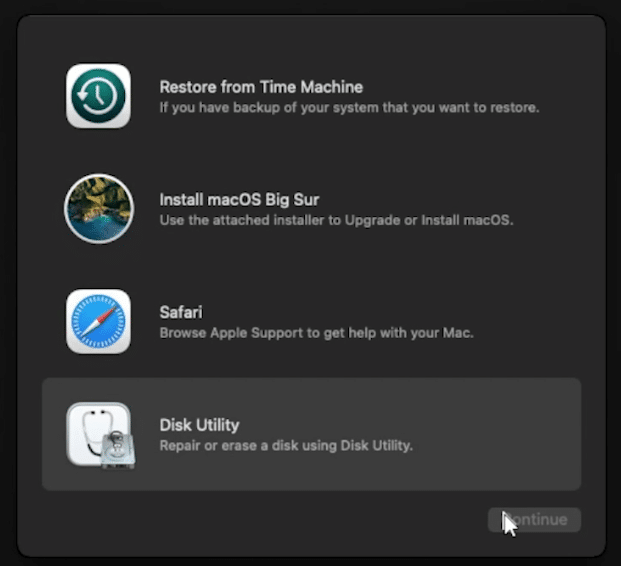
We will prep the drive for installation and format the drive to allow the Big Sur installation. Click on ‘Disk Utility,’ then continue.

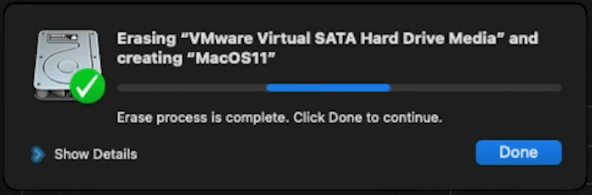
Select the ‘VMWARE Virtual SATA Harddrive’ option on the left and then ERASE icon at the top in the Disk Utility window.


Provide a label, leave the other options as default, and click Erase in the Name field. This will format the drive for macOS. Once complete, click on ‘Done,’ and you can close out of the Disk Utility window.

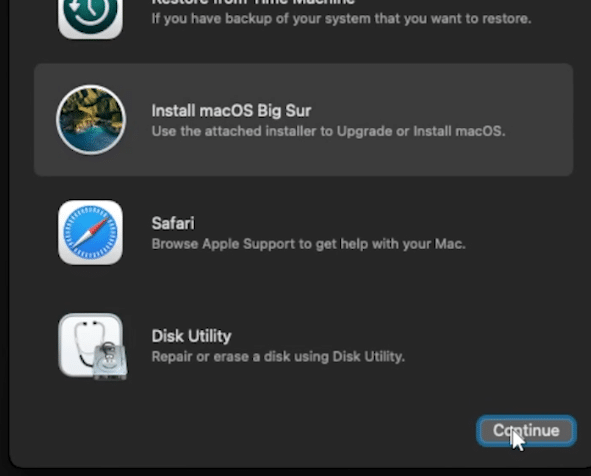
Now we are ready to start installing Big Sur. Click the option that says ‘Install macOS’ and click on the ‘Continue’ button.

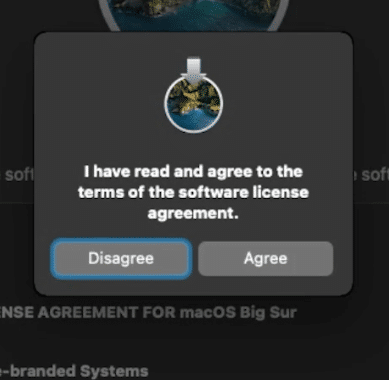
You will be prompted twice for the terms and agreement. Click on ‘Agree’ for both.

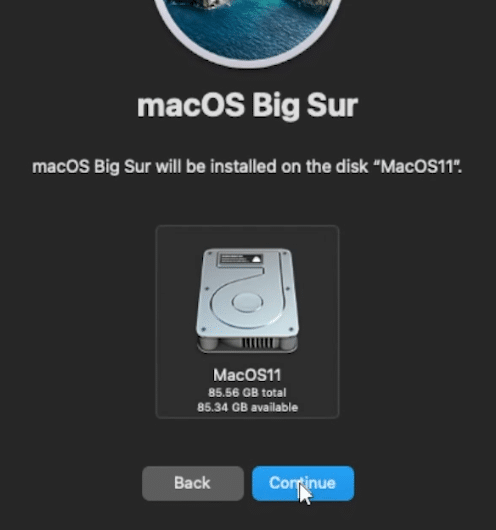
Select a drive, it should be the only one available, and click on Continue.

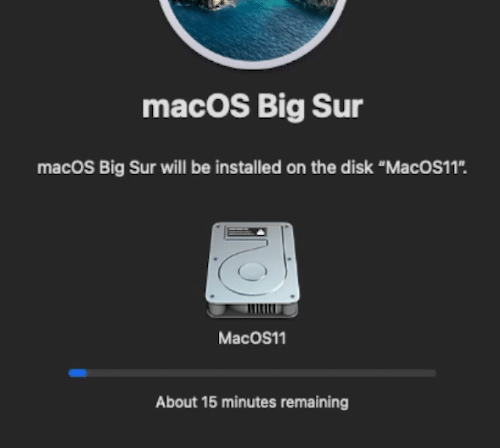
The macOS Big Sur is going to copy over and installed. This process will take 15-30m to complete.

Once the files have been copied over, wrap up the installation with some customization details. Select Your Country or Region will prompt you to select your location, then click Continue.


For the Written and Spoken Languages, you can leave the default settings. Click the customize option at the bottom left, to change anything or click on Continue.
Click on Continue for Accessibility, Data & Privacy, and Migration Assistant options.
At the Sign In with Your Apple ID, select the option ‘Set Up Later’. Then the bottom left and ‘Skip’ when prompted.


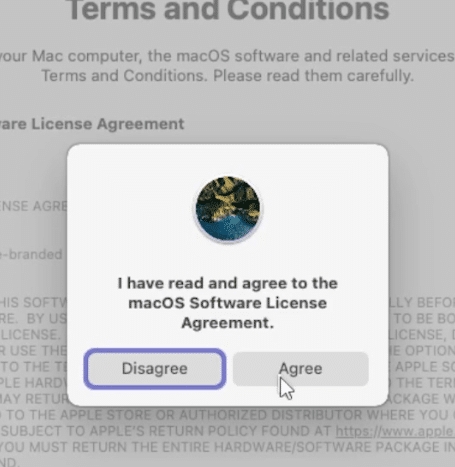
At Terms and Conditions, you will be prompted twice. Select ‘Agree’ both times to proceed.

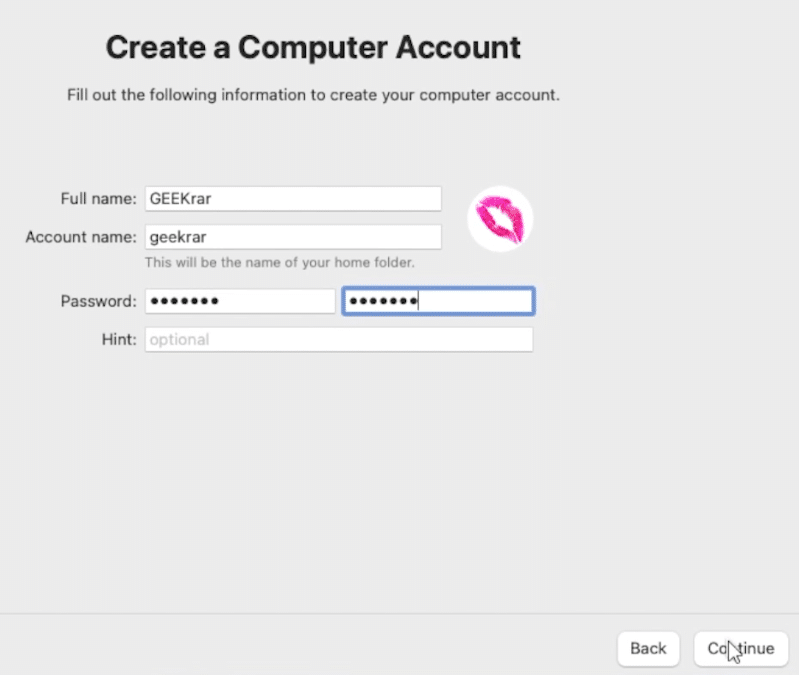
At the Create a Computer Account window, provide a username and password for your user profile and click on Continue.

Next, for Express Setup, Analytics, and Screen Time, we can click Continue. Your virtual machine will complete its setup and reboot. After starting, a login screen will appear—type in the password you have assigned when creating the user profile.
Lastly, a prompt for a Feedback Assistant will appear. Again, you can either continue with it or close it out.

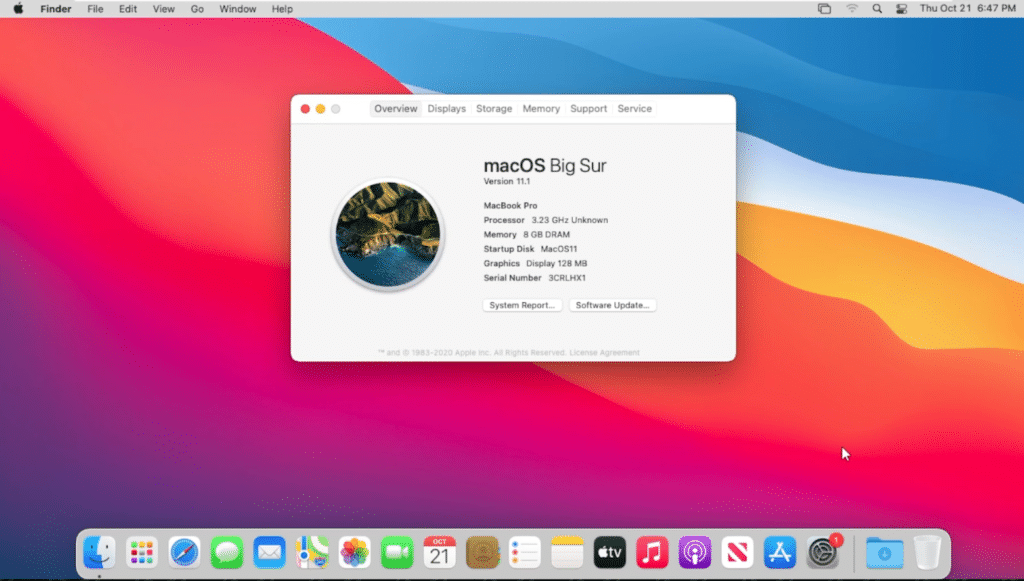
Now, you will see the Big Sur desktop for the first time. The installation is complete! You can begin using the desktop and install any applications you’d like.
VIDEO: Install macOS Big Sur on VMWare Windows 10
Here is a visual walk through of all the above steps. This video is posted on our GEEKrar Guides YouTube Channel. You can subscribe to get the latest content.