


Let’s look at an easy way to install Android apps via APKs in Windows 11 using the WSATools tool.
Updated: 11.11.2021. The WSATools tool is again available in the Microsoft Store.
Updated: 09.11.2021. The WSATools tool has been removed by Microsoft from the Microsoft Store app store. You can also follow the instructions to run Android apps using Android Debugging Bridge (ADB) or download an alternative Google Play Store client called the Aurora Store.
The WSATools tool makes it as easy as possible to install third-party Android apps that are not sideloaded in the Amazone Store for Windows 11 using APKs. The WSATools app is developed by independent developer Simone Franco, the purpose of the application is to simplify the process of installing Android applications without the need for complex commands or additional applications such as ADB tools.
Although the WSATools app shortens the process of installing third-party Android apps to a few clicks, you still need to install and configure the Windows Subsystem for the Android platform.
In this tutorial, you’ll learn how to use the WSATools tool to quickly install unpainted Android apps on Windows 11.
Table of Contents
Install Android apps in Windows 11 via APKs using WSATools
To use WSATools to install share-only applications, there are several pre-configuration steps. First, you need to install the Windows subsystem for Android if it is not already installed. You will then need to install WSATools, enable developer mode in WSA, after which you can use WSATools to install the Android app.
Step 1. Enable the Virtual Machine Platform
First of all, virtualization must be enabled on the device in the BIOS/UEFI settings. If virtualization is enabled, proceed to the next step, which is to enable the virtual machine platform.
To enable the virtual machine platform in Windows 11, follow these steps:
- Open the Start menu and search for “Turn Windows features on or off.” Open the app that appears.
- Enable the “Virtual Machine Platform” option and click on the OK button.

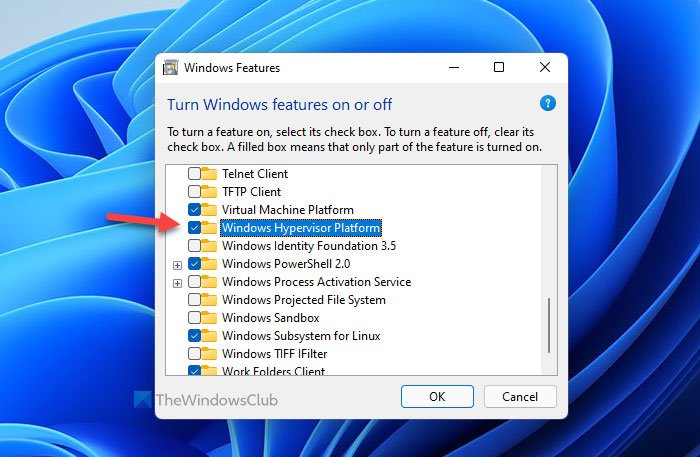
- Restart your computer.
Step 2. Install the Windows subsystem for Android
You may think that installing Windows Subsystem for Android is complicated, but it is not. Installation is as simple as possible and boils down to two steps, downloading the file with the extension .msixbundle with the largest size and installing it using a single command from Windows Terminal (Administrator).
Quick instructions for installing Windows Subsystem for Android
- Open the link: link generator from the Microsoft Store
- On the opened site insert the link:
https://www.microsoft.com/en-us/p/windows-subsystem-for-android/9p3395vx91nr
- In the form of the site where the link was inserted, specify the following add-ons: URL (link), Slow, and click on the button with a tick.

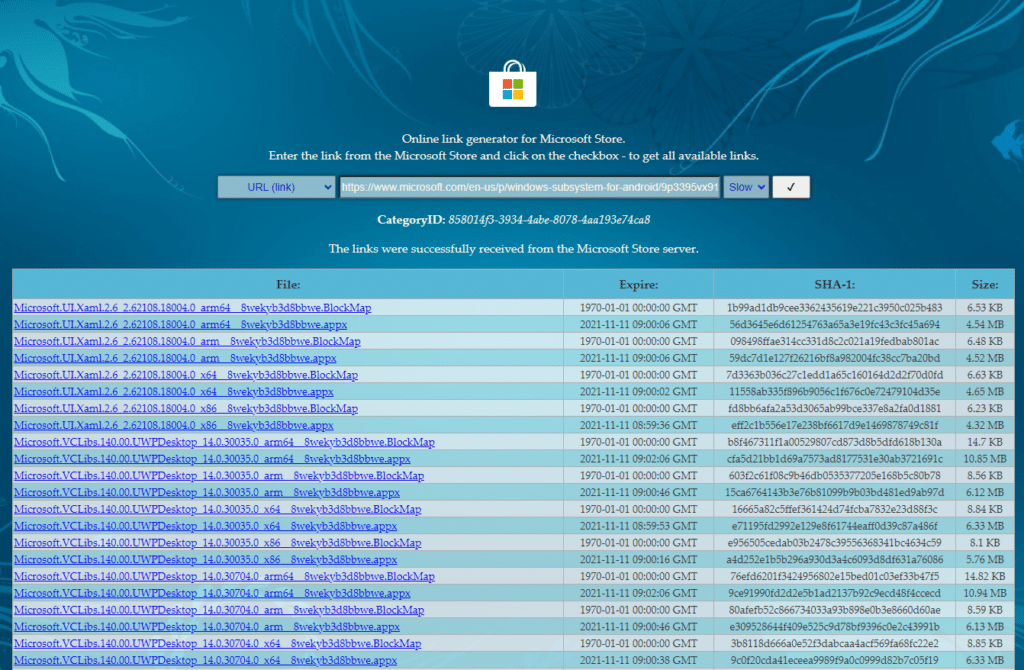
- From the list we download (by clicking on the file name) a file with the extension .msixbundle and a size of more than 1 GB. The version of the file may differ from the example shown in the screenshot.
- Open Windows Terminal as administrator (right-click on the Start menu, select the Windows Terminal (Administrator) application from the list).
- In the Terminal, execute the following command:
Add-AppxPackage -Path "complete_path-msixbundle" [see screenshot below for referrence].

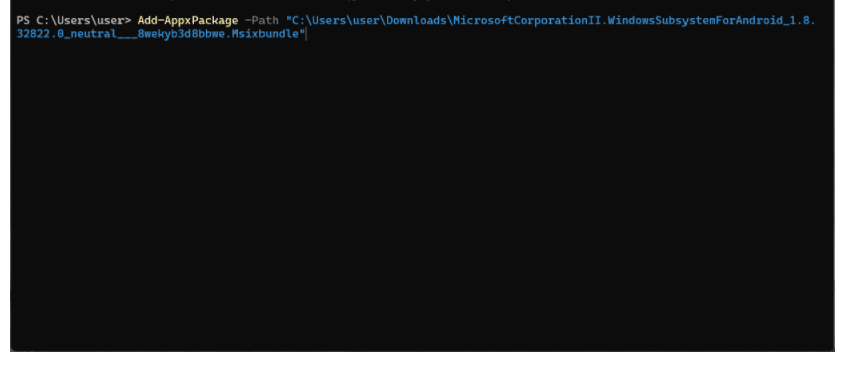
Note: There are several ways to install the msixbundle file, including several ways to install it through Terminal. One of the ways: in the Terminal insert the command Add-AppxPackage -Path, open the folder in which the .msixbundle file is saved, and right-click on it – select Copy as path. Then in the Terminal paste the copied path and press the Enter button to execute the installation command.
- The Windows Subsystem Settings for Android app appears on the Start menu.
Step 3. Installing the WSATools Tool
To install the WSATools tool on Windows 11, follow these steps:
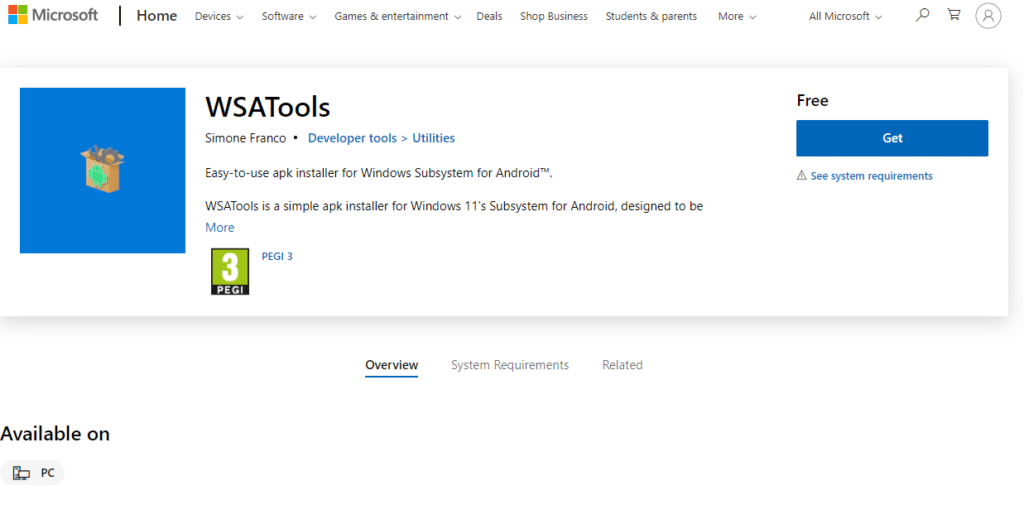
- Open the WSATools page and click the Get button
- In the Microsoft Store application that opens, click the Get button.

- The WSATools tool is available in the list of applications on the Start menu.
Once you complete these steps, the tool will be installed and allow you to install unpublished, almost any Android apps on a Windows 11 device.
Step 4. Install sideloaded, third-party Android apps on Windows 11
To install Android apps, follow these steps:
- Open the Windows Subsystem Settings app for Android and turn on Developer Mode.

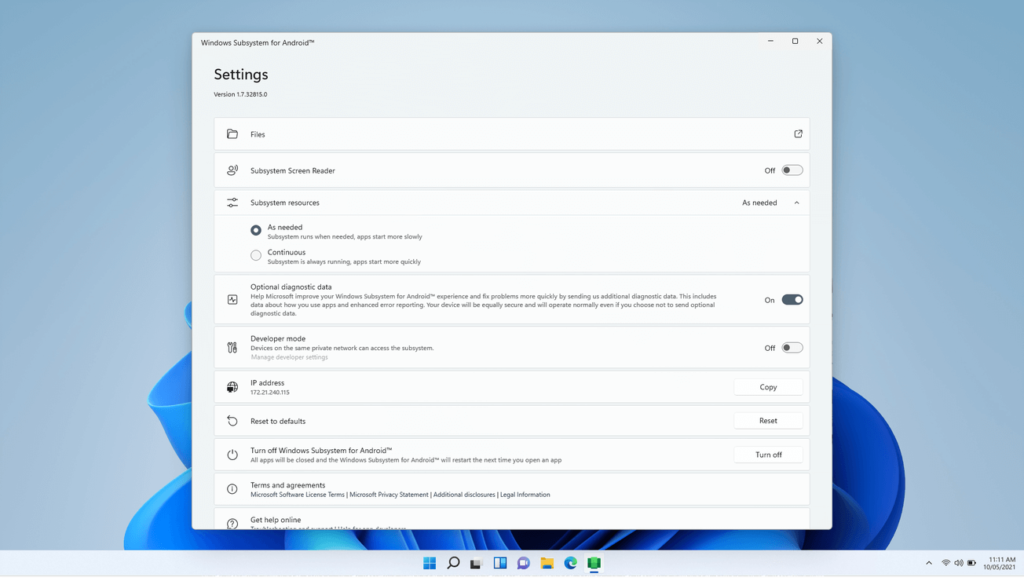
There, click the Manage Developer Settings option to enable WSA.
- Open the WSATools app from the Start menu to install Android apps.
- Click the Select an APK button.
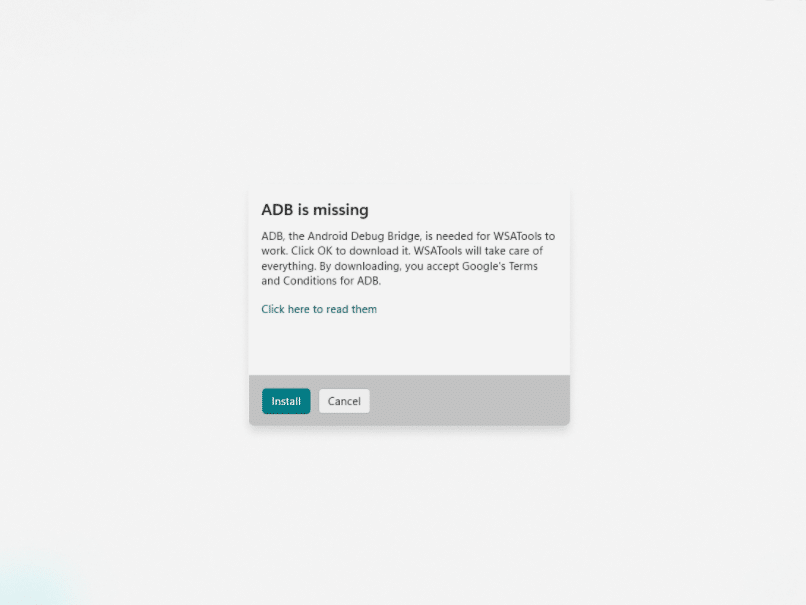
- In the next window, click on the “Install” button to install the ADB (Android Debug Bridge) tools. Specify the folder where the ADB tools will be installed, such as at the root of drive C.

Specify the APK file to install the desired application and click the Install button.

Note: Download the APK file of the desired application or game from a trusted source.
- Projects supported by the community are available in third-party forums (XDA, 4PDA, etc.).
- Open source application APKs are often found on GitHub repositories or on third-party sites such as F-Droid.
- Finally, there are third-party resources with APKs, such as the Mirror APK and APKPure.
- The application is available from the Start menu. You can also uninstall the installed Android application from the Start menu.
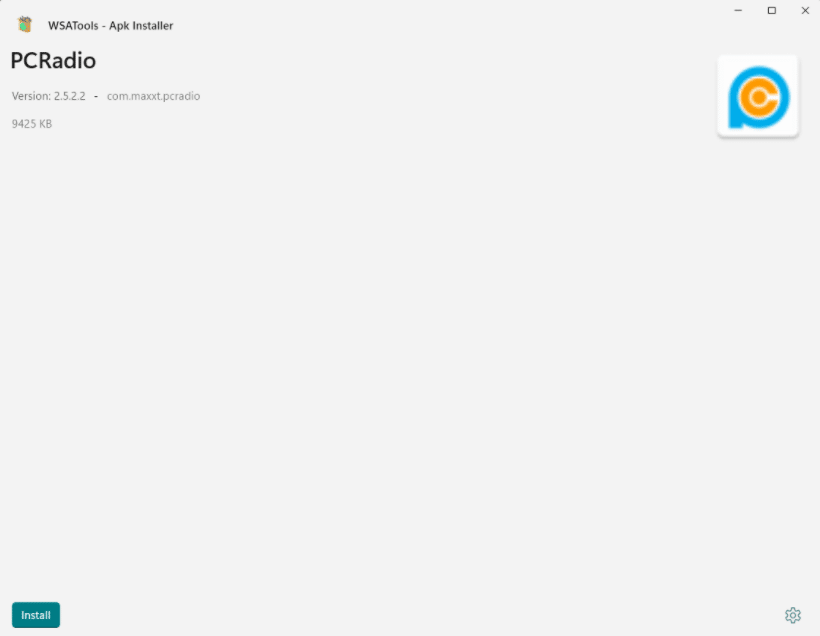
As an example, the PCRadio application was installed. A native music control panel was available for the application.
If the installation hangs, close the WSATools application and try the installation again.
Since the Windows subsystem for Android comes without Google Play Store services, this means that you won’t be able to install all apps, but only apps that don’t require Google Play Store services.