


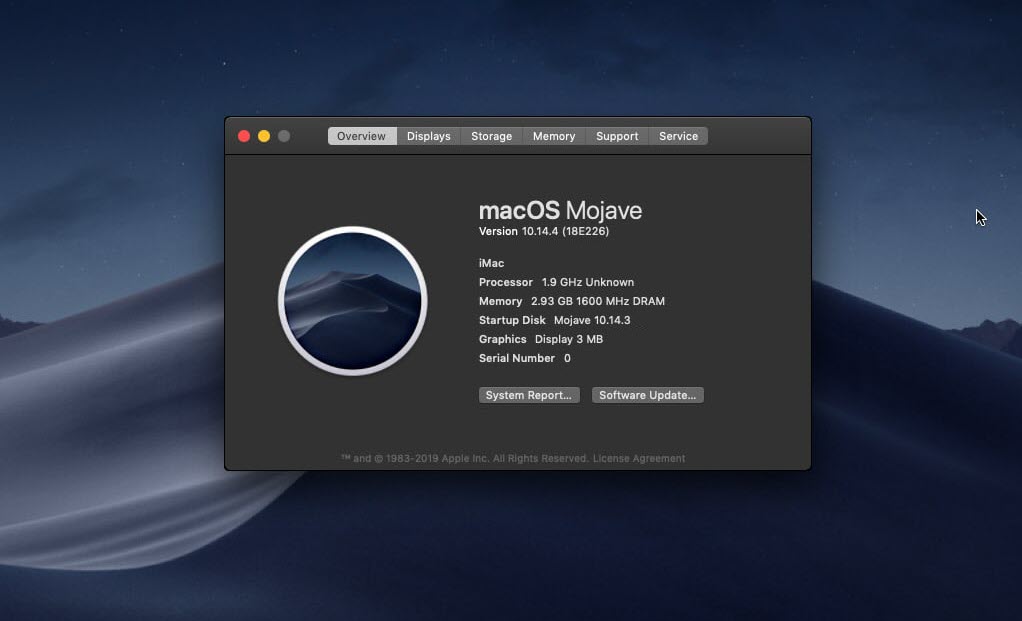
When macOS Mojave was officially released, since it was new, it had lots of bugs and problems. There were plenty of issues that some of which we dug in an attempt to fix those even until now. By the time more and more users install and use it on their Macs or on a virtual machine VMware or VirtualBox, Apple realized the problems it had with it. Here’s how to Update macOS Mojave To The Latest Version on VirtualBox.
In order to fix those, what Apple did was releasing several updates. But one of the problems was a huge part of the users that couldn’t even update their Mac. However, you can fix it with the instructions we’ve provided for you. When you fixed that, you may still don’t be interested to know how to Update macOS Mojave To The Latest Version on VirtualBox, or maybe you don’t fix the problem. This may be because this doesn’t seem important to you and take some time to fiddle with it. But that is not basically the case.
A software update is a free download for an application or operating system which primarily provides fixes for features and options that have a problem. The most important part is, it will fix and improve security to protect from loopholes, faults, glitches that are vulnerable to your computer. Other than that, an update may also provide new features, better performance, more options. If you want to be protected and out of problems importantly, you may want to update your computer to the recent version. Start with how to Update macOS Mojave To The Latest Version on VirtualBox.
Which One to Choose – The APFS or HFS Image
When it comes to updating your Mac specifically installed on VirtualBox, there’s a scenario surrounding. There are two types of images you can use to install Mojave on VirtualBox. The APFS (Apple File System image) and the HFS (Hierarchical File System image). The question is, which one you should use whether the APFS or HFS image to update your Mojave better. Let’s break this down.
While previous versions of macOS still use and support HFS file systems, from previous versions to High Sierra. As long as VirtualBox supports it, you can use HFS images to install or update macOS, High Sierra or previous versions on VirtualBox smoothly. But since APFS is the newer version of macOS file system, it isn’t compatible with the prior version of macOS which doesn’t work with the previous version of macOS. However, the HFS version works faster and smoother than the APFS version.
With Mojave release, Apple released the new APFS for Mojave and maybe newer version. If you are running Mojave on VirtualBox, APFS will not work since VirtualBox doesn’t support it. But you can fix it with a bootloader, here’s how to Update macOS Mojave To The Latest Version on VirtualBox. In this post, I’ll show how to Update macOS Mojave To The Latest Version on VirtualBox.
How to Update macOS Mojave To The Latest Version on VirtualBox
Whether you’ve installed Mojave with HFS or APFS image, you can, however, update Mojave. Since HFS works faster and is supported by VirtualBox, you can update easily and more reliable. But if you are using an APFS for some reason, you can also update Mojave but in the least tricky way. Don’t worry, we’ll show you both ways how you can do it. Here’s how to update your macOS to the latest version on Virtualbox. So let’s see how to Update macOS Mojave To The Latest Version on VirtualBox.
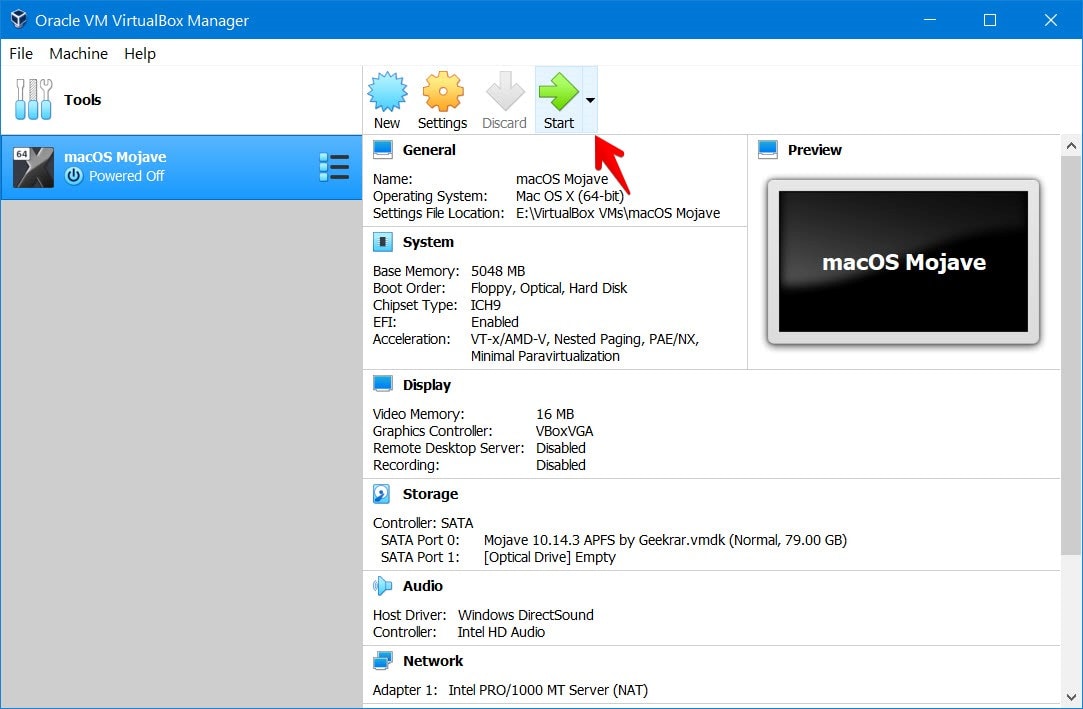
Go ahead and switch on the Mojave from VirtualBox.

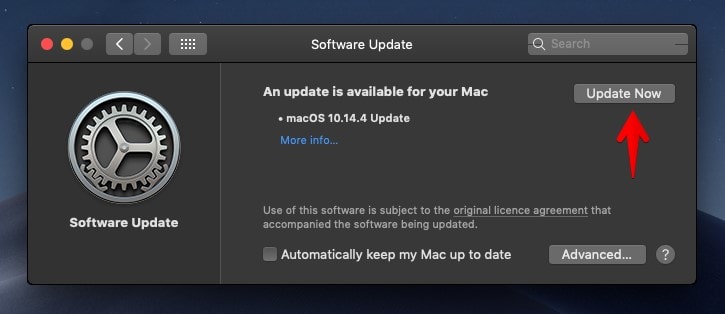
Now open System Preferences from the desktop menu and click on Software Update.


On the Software Update, you’ll likely see the Update Now click on it.

This will ask you to download and restart the Mac, click on it.

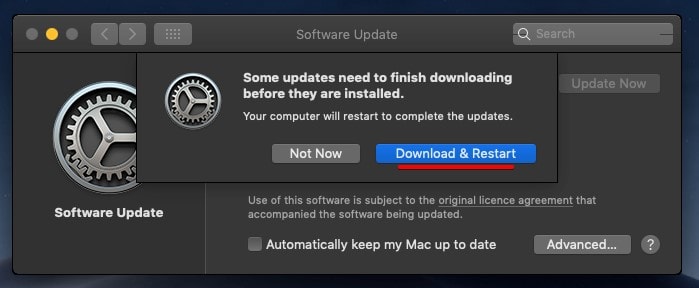
This will download first and then reboot your Mac which will take longer than usual loading on the Apple logo. That will end up with only a black screen. Just switch off the Mac and download the following file.
Bootloader Update Image: This will fix the stuck on the black screen with a simple step.
Goto Settings of the macOS machine then Storage and click on the add virtual disk button.

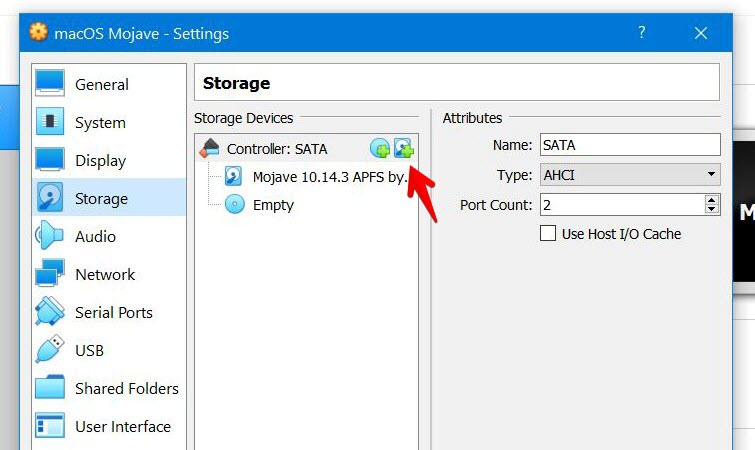
In this tab, and click choose existing hard disk.

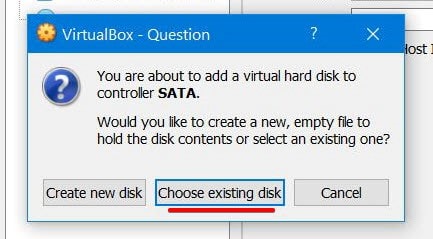
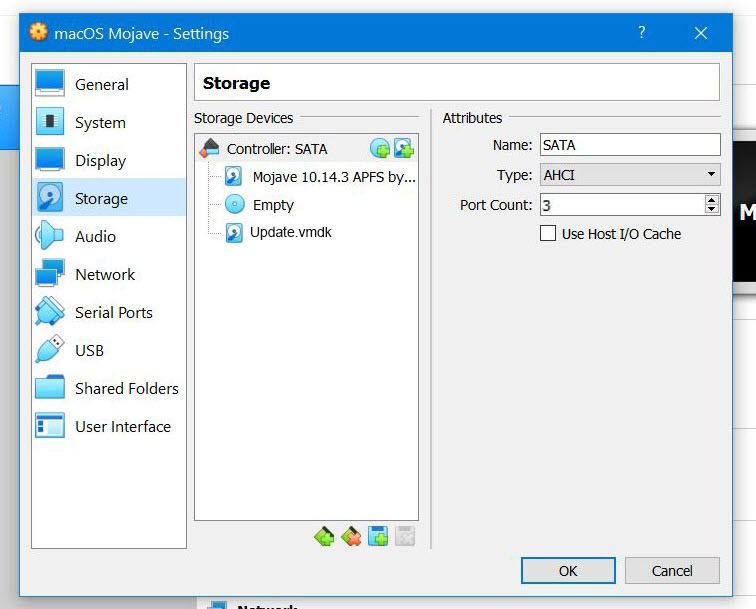
From the browser, choose the image file you’ve downloaded.
Once you’ve done, click Ok on the VM settings window.

Now it’s time to fix the issue. To do that, Start the machine and press ESC key to skip the startup.nsh

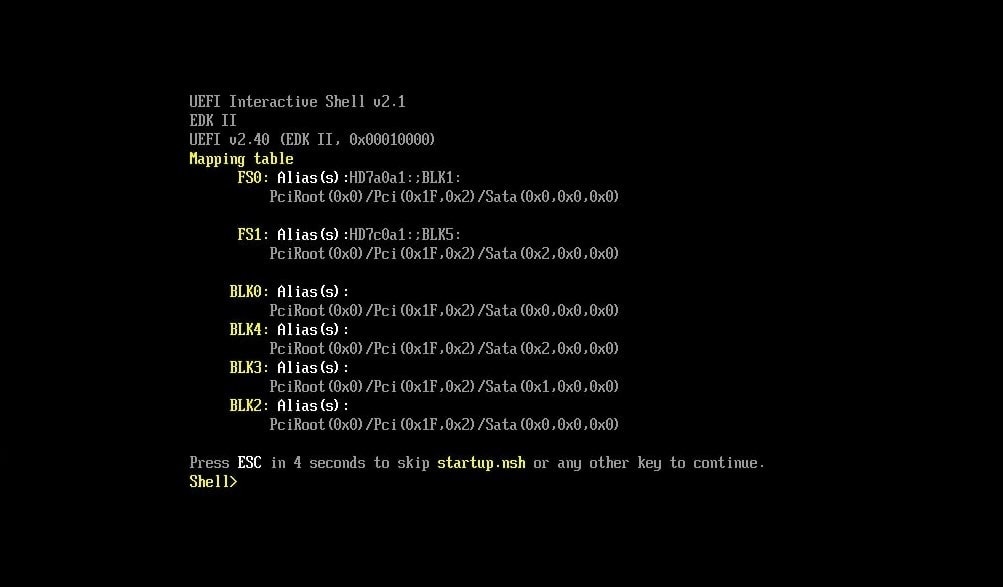
Now type fs1:\update.nsh then hit Enter to boot up the machine with the installer image.

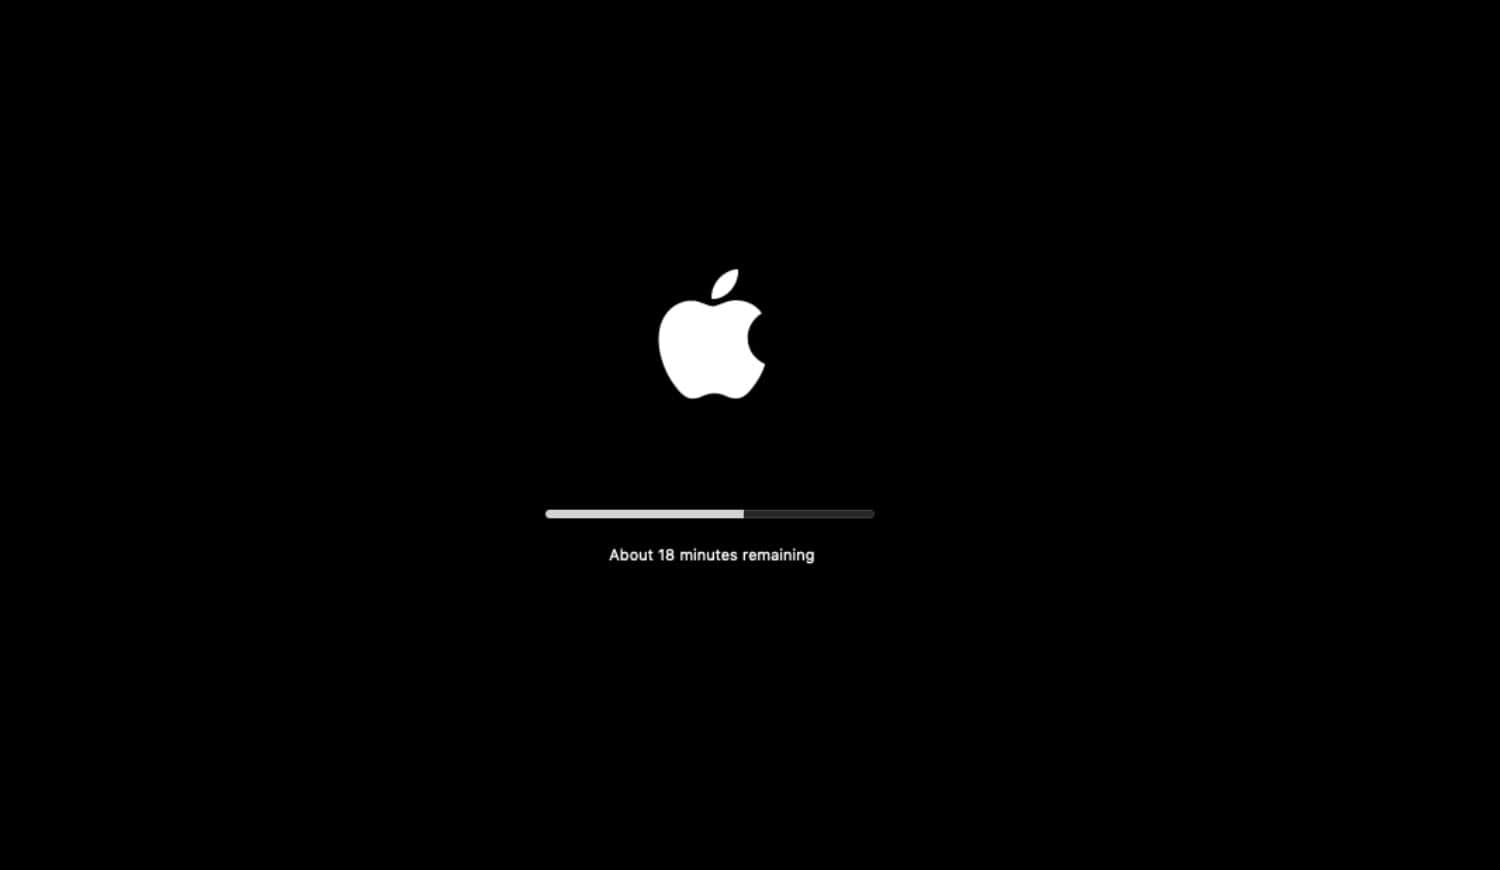
The updating will begin and just sit back and relax. It will take much longer as much as 15 – 30 minutes. It may be sooner if you’ve assigned more resources.

When it’s done, you’ll boot straightly into the usual booting process. Sign in to your account and you’ve eventually updated to the latest version of macOS Mojave successfully.
After you’re done with updating, you can remove the Bootloader Update file from the machine. Now, you can use Mojave without any problem. You can also update your macOS machine to the coming update without the disk.
That should be all that’s needed. And you’re all set! That was all about how to Update macOS Mojave To The Latest Version on VirtualBox. If you’d like to tell us something we’re good to hear from you, let us know in the comments down below.