


While macOS Catalina is still in preview mode and even when it’s released, there will be probably some issues, as of now not one but lots of problems with every part of it. These problems are usually with every operating system when they are newly rolled out. In terms of fixing them, first of all, they are out of our approach, even if we could be do something, the problems are more than what we can offer to fix. Second, they are out of scope except which we’ve provided the instructions for. That’s only the single side of the scenario. Here’s how to Update macOS Catalina To Latest Version on VMware & VirtualBox.
The other side is that these problems won’t be there all the time. By the time more and more Mac users and non-Apple users will install Catalina on a virtual machine or on their actual Macs, more and more problems will be recognized and send to Apple. In result, Apple will send a software update that will solve those problems. This will solve most of the problems even those which you had problem with, doesn’t matter you did something to solve it or not. Besides fixing those problems, there are huge things which a software update does.
One of those important reasons for updating your Mac is a security vulnerability. While Apple is widely popular for its security but it needs more and more updates for strengthening it. Including these, there is a range of updates to improve the new and previous apps and features. For example, Apple improves the photos and fixed bugs and compatibility issue with SwiftUI in XCode 11 with the fifth release of macOS Catalina update. Let’s see how to Update macOS Catalina To Latest Version on VMware & VirtualBox.
Table of Contents
How to Update macOS Catalina To Latest Version on VMware & VirtualBox
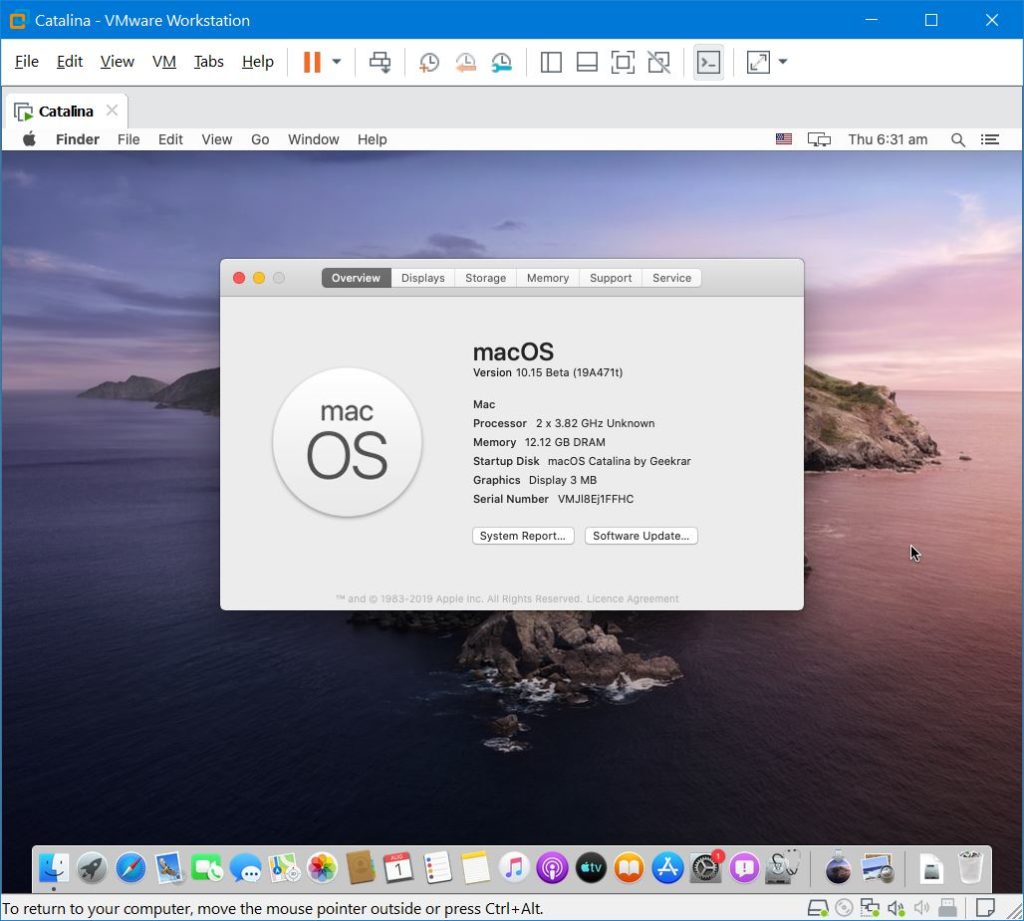
While there isn’t much difference between running Catalina on an actual Mac and running Catalina on a virtual machine like VMware and VirtualBox. So there’s no difference between updating macOS Catalina on a Mac and Catalina running on a virtual machine but for Windows users, since they are a beginner to it, it might be a little difficult. So let’s get started with how to Update macOS Catalina To Latest Version on VMware & VirtualBox.
Step One – Update VMware Workstation To The Latest Version
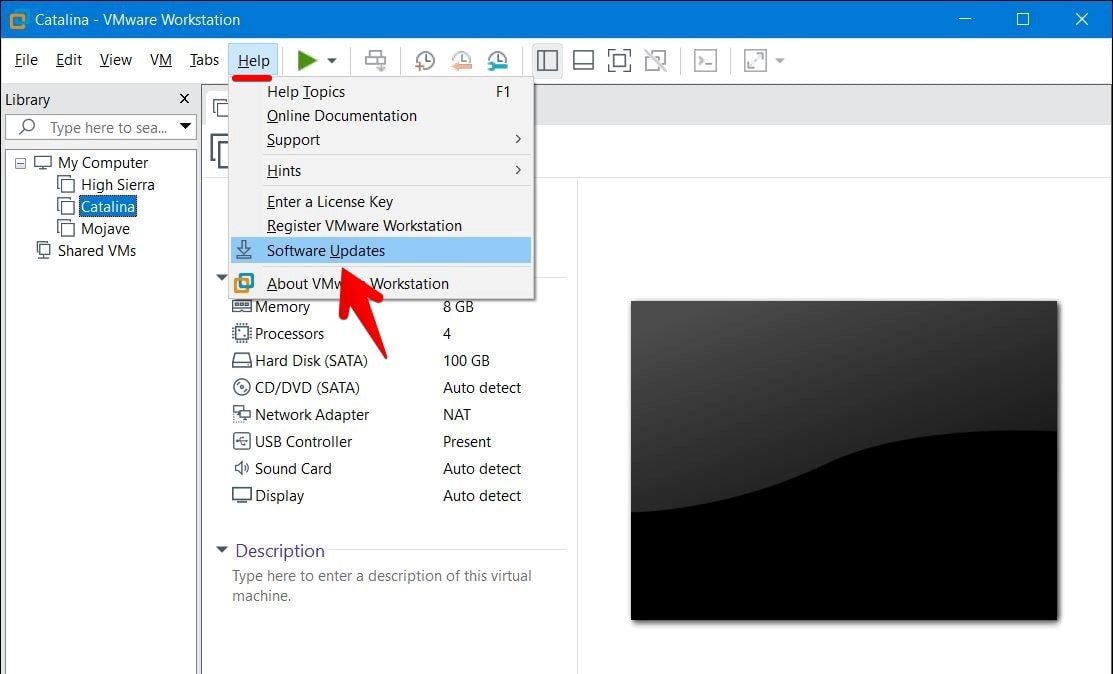
First of first, for updating macOS, we’ll need to update VMware Workstation. That can be VMware Workstation Player or VMware Workstation Pro. There are two ways to update VMware Workstation and Player. First, it can be done from inside VMware. The next one is possible from the VMware website link. Both are easy, so we’ll do it both way. In this post, I’ll show how to Update macOS Catalina To Latest Version on VMware & VirtualBox
First, open VMware Workstation Player or Pro then click on Help and click on Software Updates.

Then click on Check for Updates. It will search for updates.

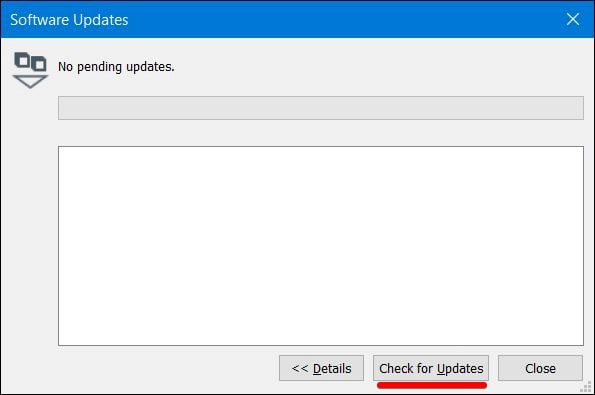
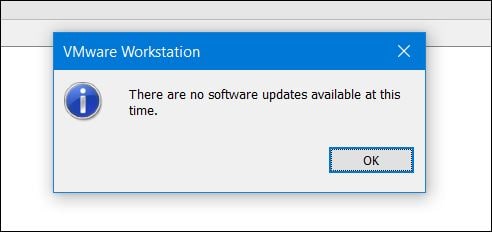
If there’s an update, you may update it from there. If this is the latest version, you’ll see this message.

Next Method To Update VMware
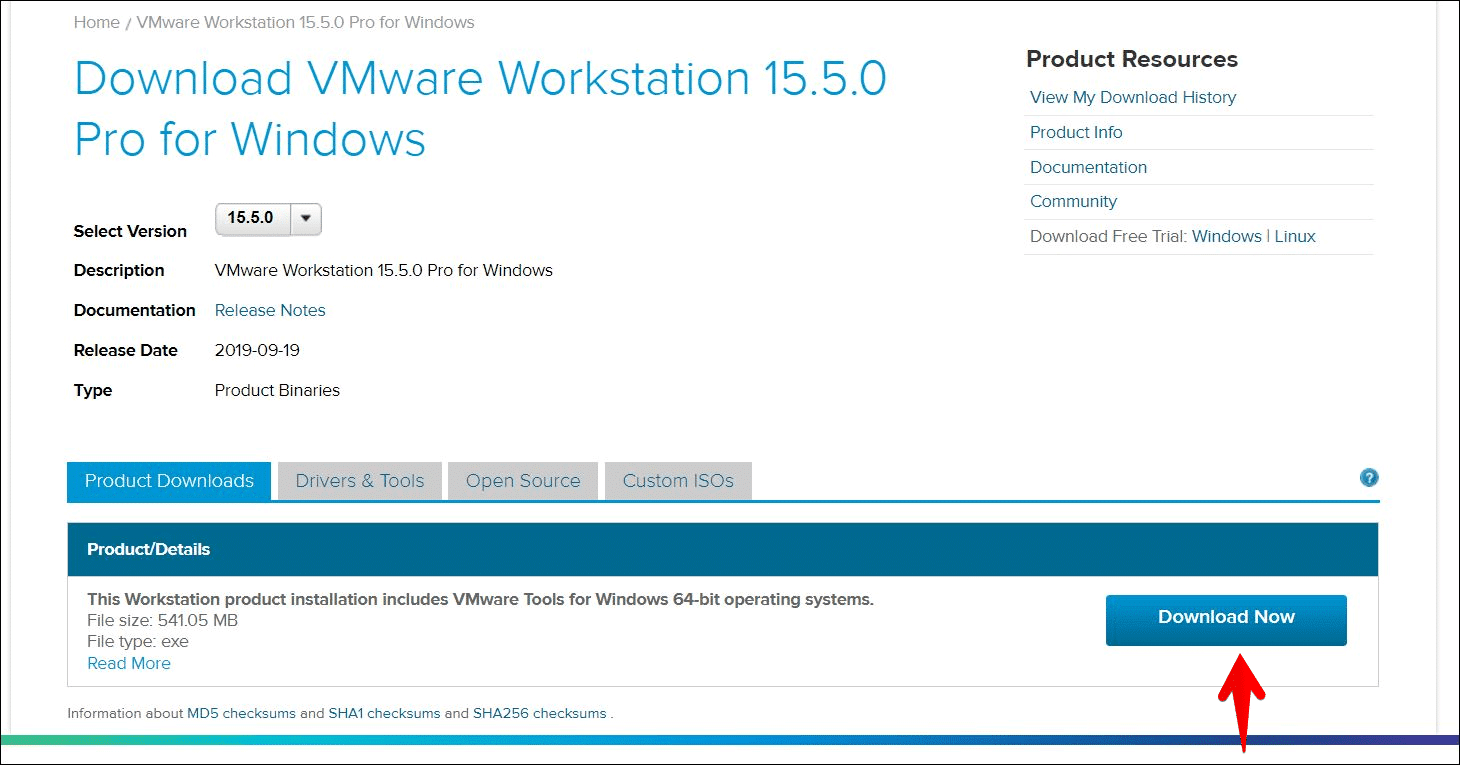
To update VMware, visit the VMware Player link, and download it from there.

If you’ve VMware Player then visit this and download from this link.

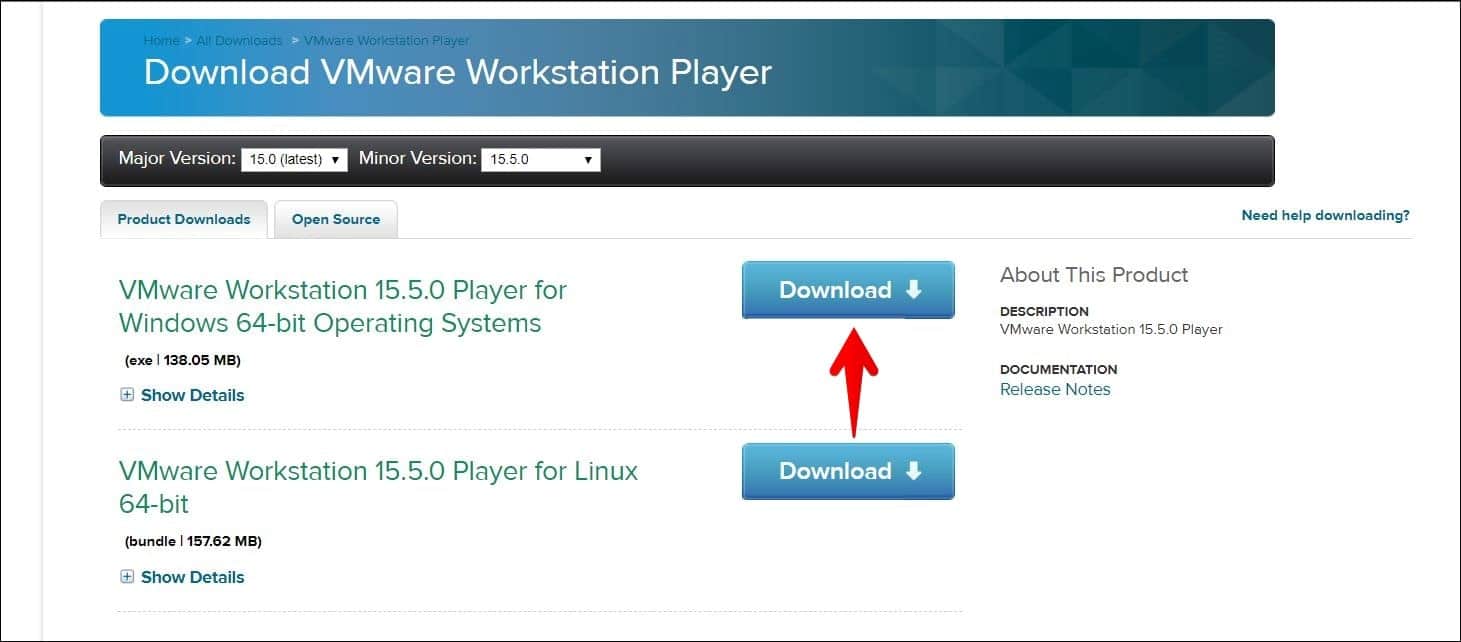
After its there, open the setup and proceed with the installation.
Step Two – Modify macOS Catalina Settings in VMX
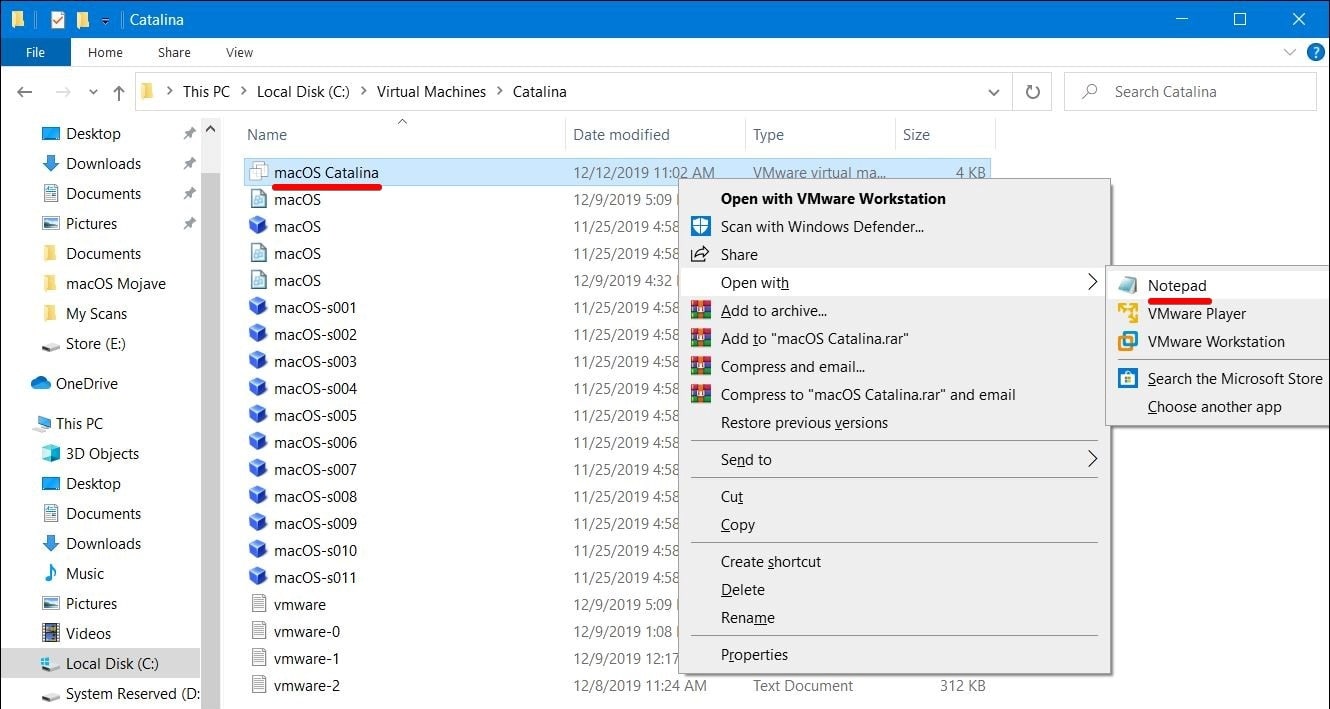
The next step to how to Update macOS Catalina To Latest Version on VMware & VirtualBox. Now, for setting up its settings, we need to access the macOS Catalina files 📂 then navigate to the point where the VMX file is there. There, open the VMX file with Notepad and modify its settings.
Head over to the macOS Catalina files and open VMX file with Notepad.

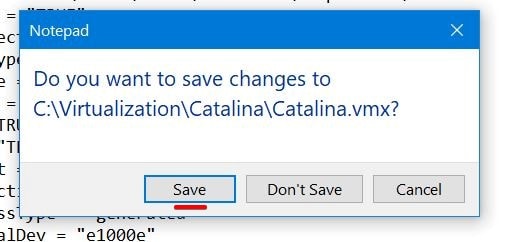
When its there, open it up and scroll down and change guestOS = “darwin18-64” to guestOS = “darwin19-64” . This changes the version.

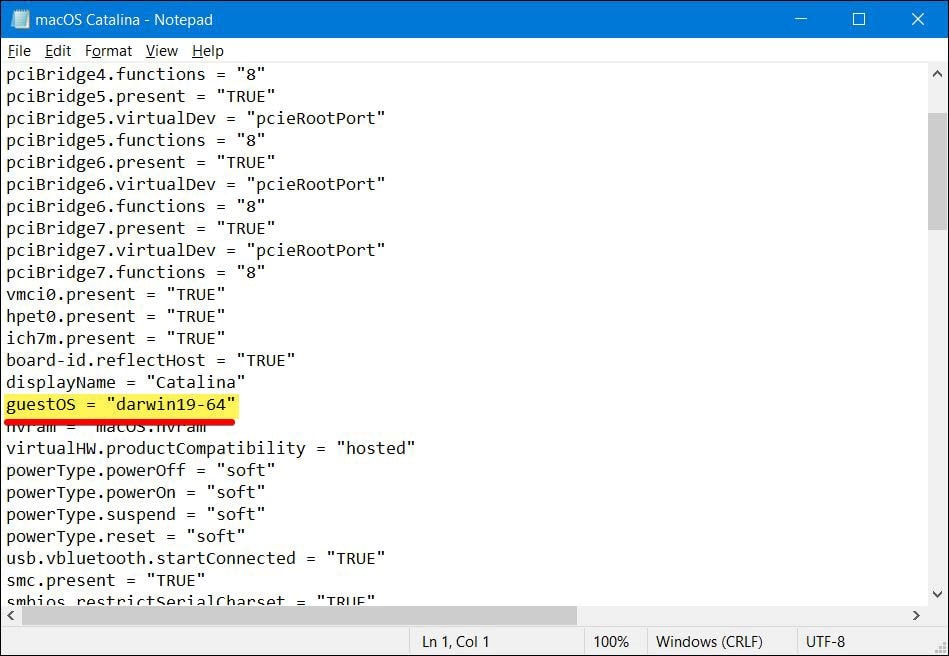
Then click on Close and click Save.

The macOS Catalina is now modified and will support Catalina.
Step Three – Update macOS Catalina
Once that’s done, switch on macOS Catalina.


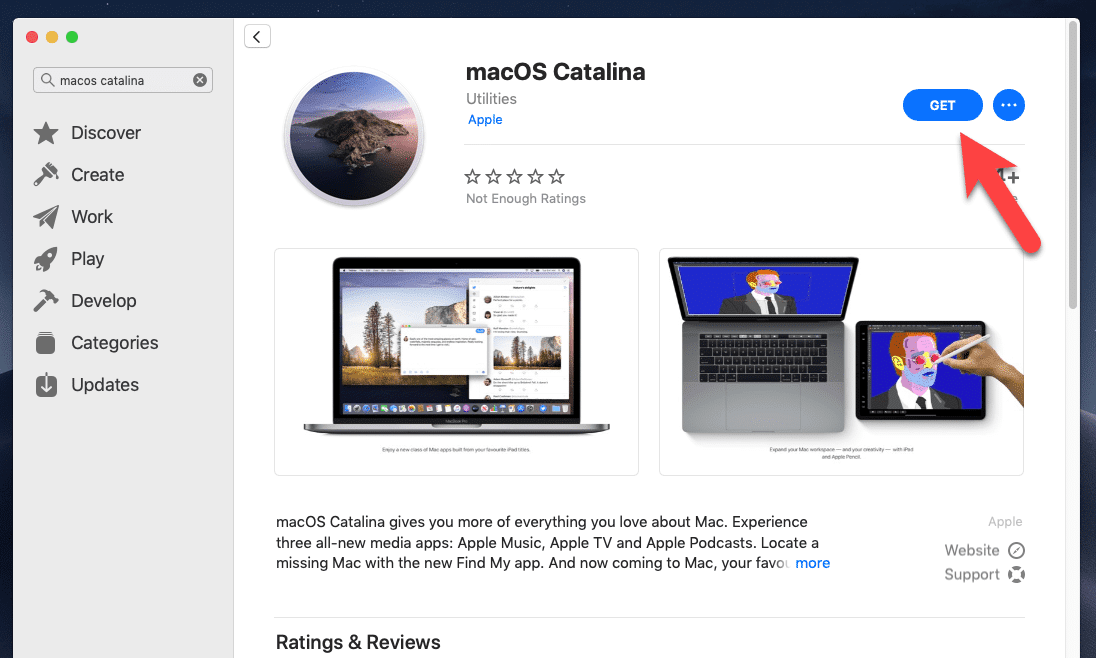
When the macOS Catalina is up, open App Store, search for macOS Catalina, and click on Get.

How to Update macOS Catalina To The Latest Version on VirtualBox
So when you’ve installed macOS Catalina on VirtualBox and is now running Catalina fine, you can update macOS Catalina to the latest version. Before everything, switch off macOS Catalina. Now here’s how to Update macOS Catalina To Latest Version on VMware & VirtualBox.
Step One – Add Disk
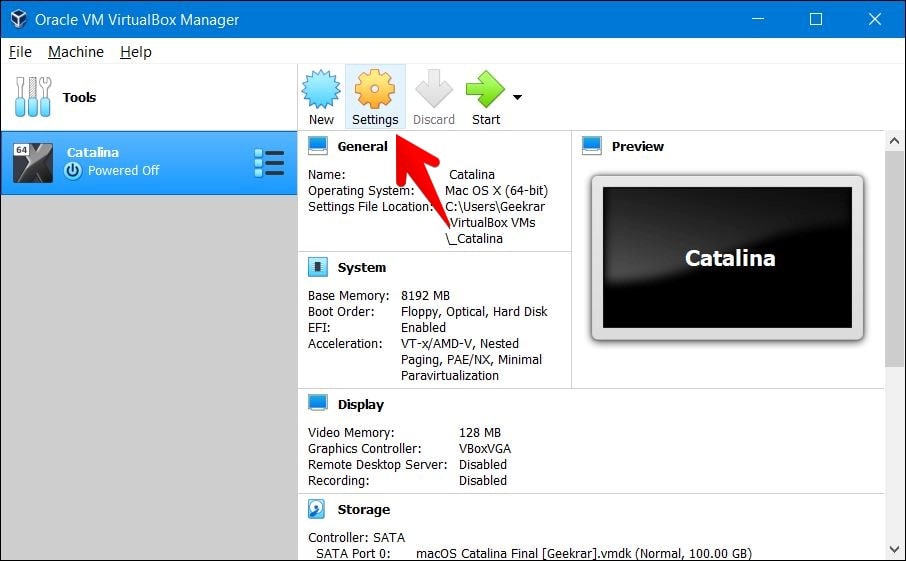
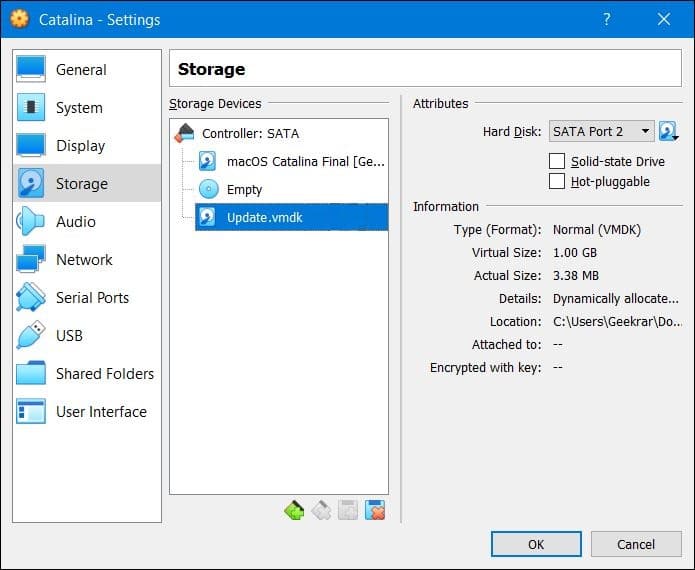
First off, open the macOS Catalina settings.

Next, select Storage then click on the disk icon and select Choose existing disk.

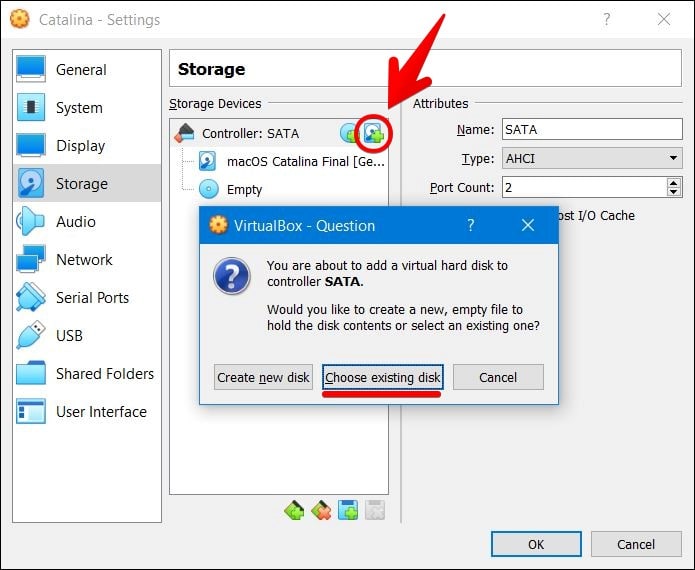
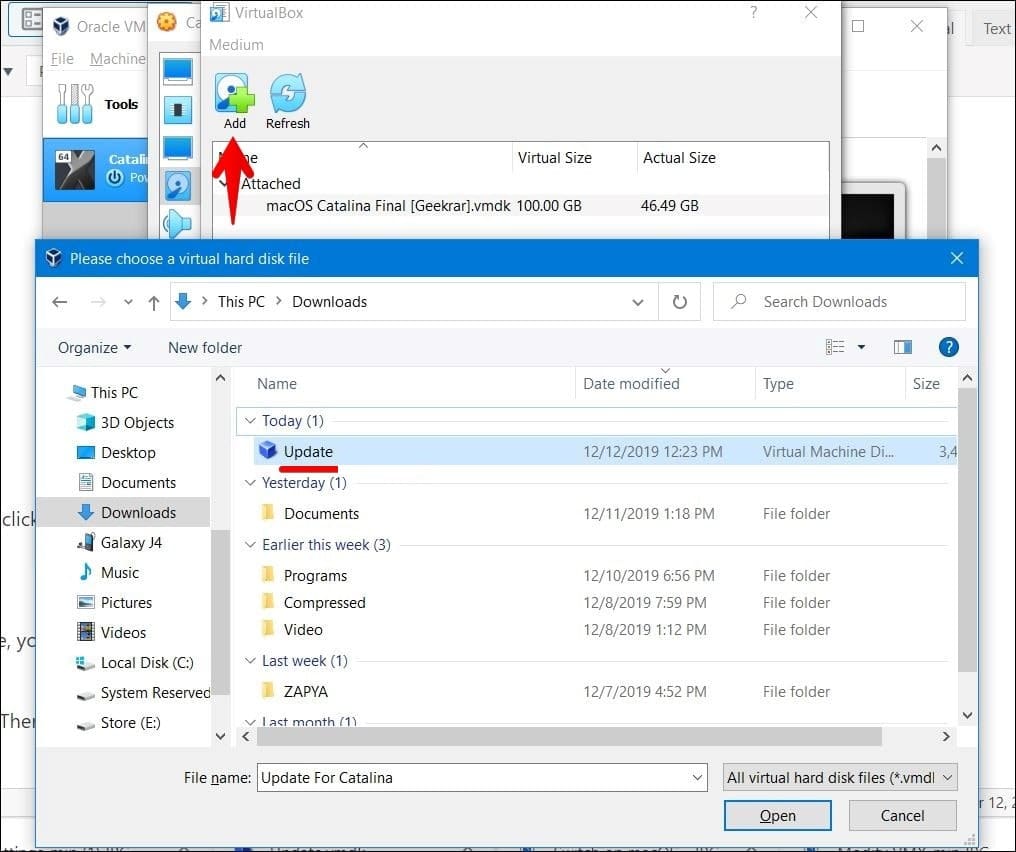
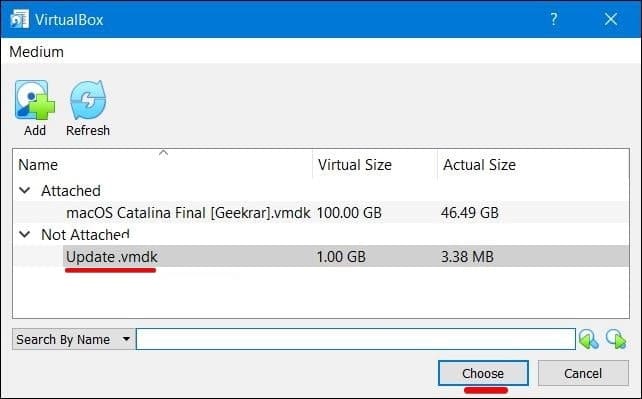
Click on Add then choose the Update for Catalina disk and click Open.

Then Choose it and click on Choose.

In the end, click on OK.

Step Two – Update macOS Catalina
The macOS Catalina is now ready to update. For this update, we’ll need macOS Catalina or macOS Mojave file from App Store.
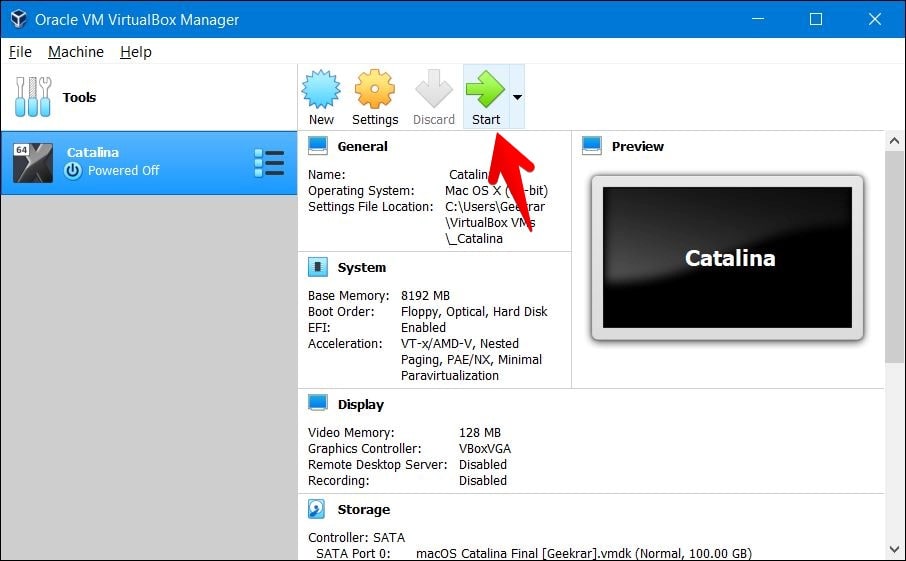
First, fire up VirtualBox and start macOS Catalina.

Then navigate to the App Store and Get macOS Catalina.

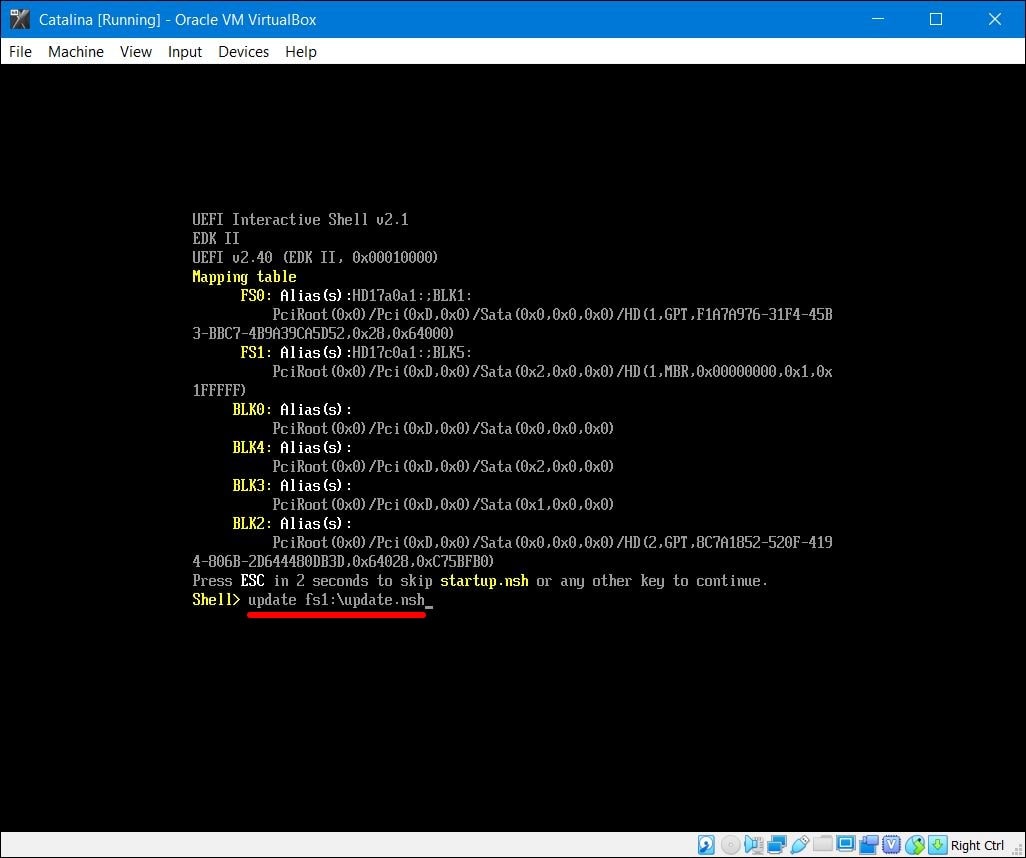
Once its there, continue with it and let it install. Once done, click Restart. For installing, it will reboot. When rebooting, on this window, press the Esc key and write down Fs1:\update.nsh and hit Enter.

With that done, it will entirely update the macOS Catalina, you’ll have the latest version of macOS Catalina.
And that’s it to how to Update macOS Catalina To Latest Version on VMware & VirtualBox. There are no more steps to do. If you’ve some questions, suggestions or ideas, we are happy to hear.