


You can remove pending updates in Windows 11 by clearing the contents of the “Download” folder in the “SoftwareDistribution” directory, which contains the files needed by Windows Update to install new updates.
In Windows 11, updates may not be installed due to errors, compatibility issues, or corrupted updates. CAB files. Suppose the cumulative update during installation causes problems, or you have information that the update\patch is causing problems. In that case, you can remove the pending updates to re-download the files or prevent the system from installing them.
In this guide, you’ll quickly learn How to Remove Downloaded and Pending Updates in Windows 11.
How to Remove Downloaded and Pending Updates in Windows 11
To remove pending Windows 11 updates, follow these steps:
Step 1: Open File Explorer in Windows 11 using the icon on the taskbar or by pressing the keyboard shortcut Win+E.
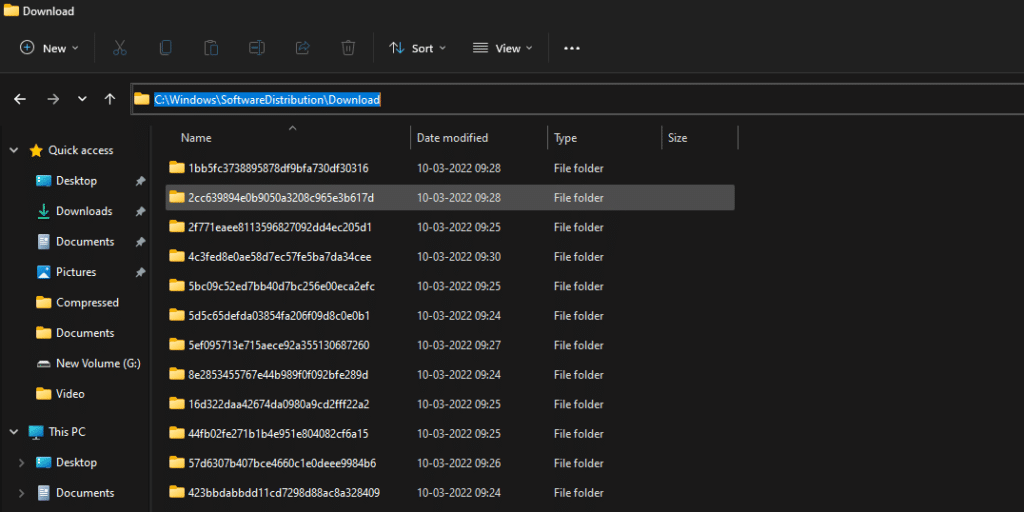
Step 2: Copy and paste the following path into the address bar of File Explorer and click Enter.
C:\Windows\SoftwareDistribution\Download

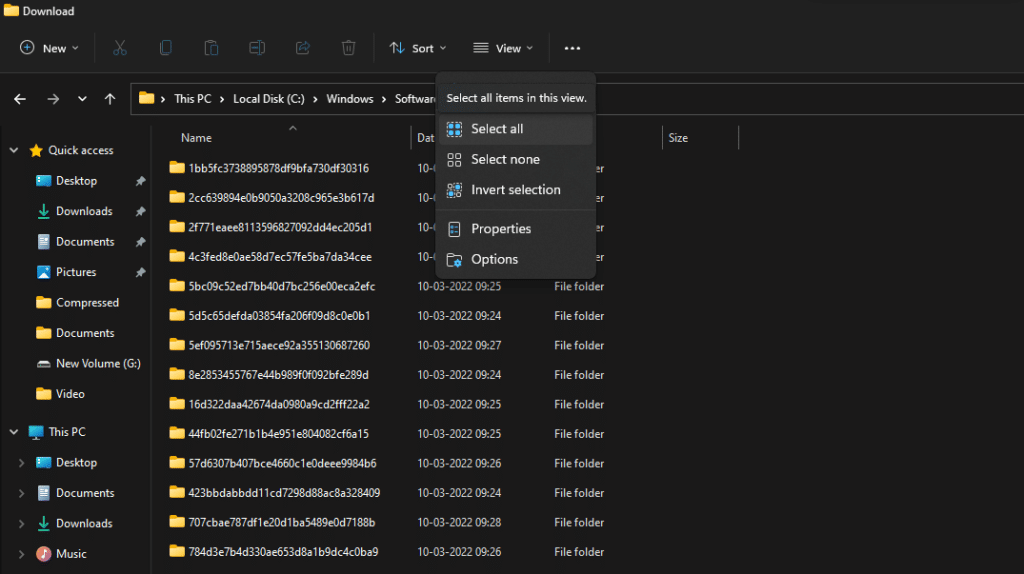
Step 3: In the “Download” folder, highlight all folders and files by pressing the keys Ctrl+ A or select the “Select All” option from the “Details” menu (three dots).

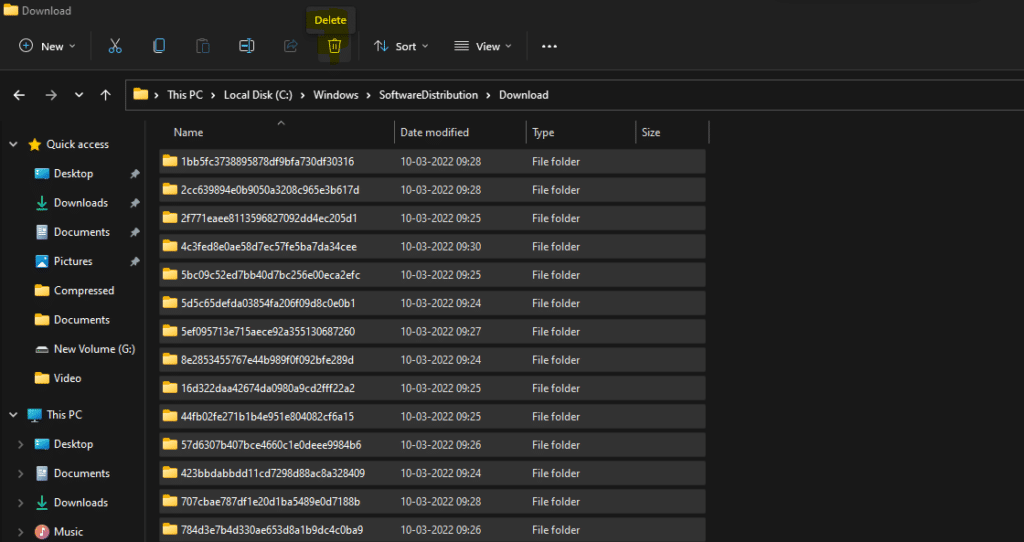
Step 4: After that, click “Delete” to uninstall the pending updates in Windows 11.

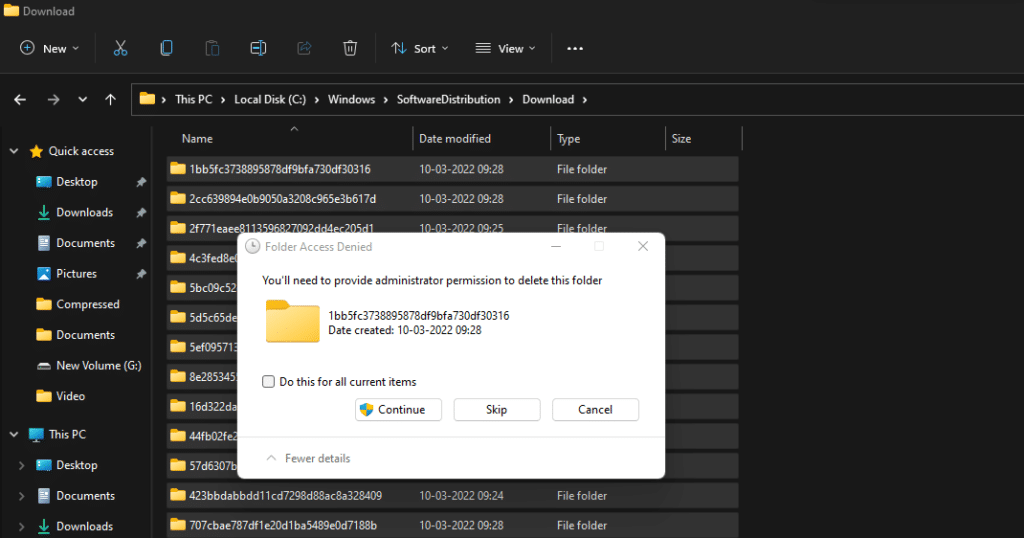
Step 5: If you get a request for permission to delete files, check the “Do this for all current items” checkbox and click “Continue.”

All! After completing these steps, the available update files will be deleted from your device.
If you need to block a specific update after deleting the files, use the Show or Hide Updates tool to prevent Windows Update from re-downloading packages.