Windows Server 2016 installation is one of the key tasks in the network. As an administrator, you should know how to install and configure Windows Server. To start administrating your network, you need first to install Windows Server.
Planning your installation before you start is a good idea. You should make sure you have the installation media, backup plan, and any other resources needed for installation. There are steps to follow when installing a Windows server, including downloading/installing the Remote Server Administration Toolkit.
Below, we will discuss a detailed guide on How to Install Windows Server 2016:
Table of Contents
Preparation
Windows Server editions provide specific sets of features, and to the best of our knowledge, we believe you should purchase the edition that best suits your needs. For instance, if you need a system with high availability and clustering capabilities and customized connections for web-based applications, we recommend Windows Server 2016 Datacenter Edition.
There are many aspects you should take into consideration when determining how many virtual machines you need for your network. You can’t predict what will happen in the future, so consider these considerations while setting up your Windows server.
Install Windows Server 2016: Step by Step Guide
Preparing the installation medium (DVD, USB flash drive, etc.) and starting the installation process can help you download and install Windows Server 2016. If you don’t have the software, here’s a link to download it from the Microsoft website.

Now you create a bootable drive. Here is a complete guide: Create a Bootable USB Flash Drive | Microsoft Docs
Step 1: Insert your Windows Server 2016 media and boot from it (that you created above). When the Setup page appears, choose your language, time format, and keyboard before clicking Next.
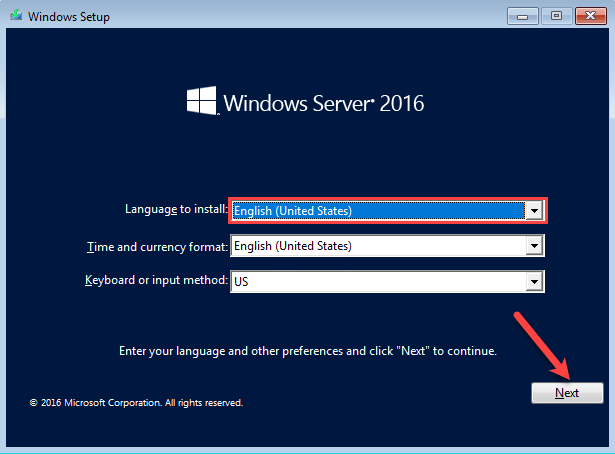
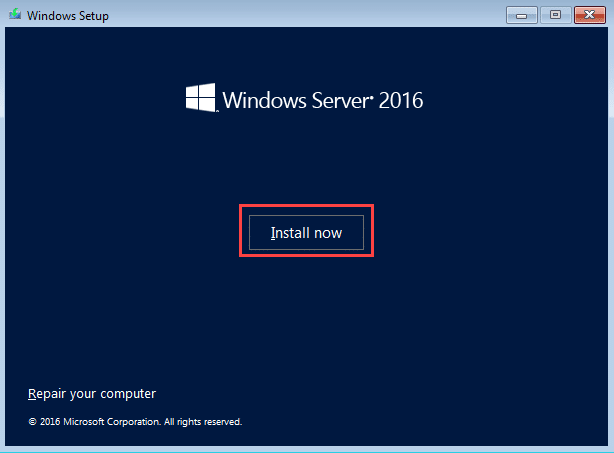
Step 2: Now, click the Install Now button to start the installation process. Check the below screenshot for reference.
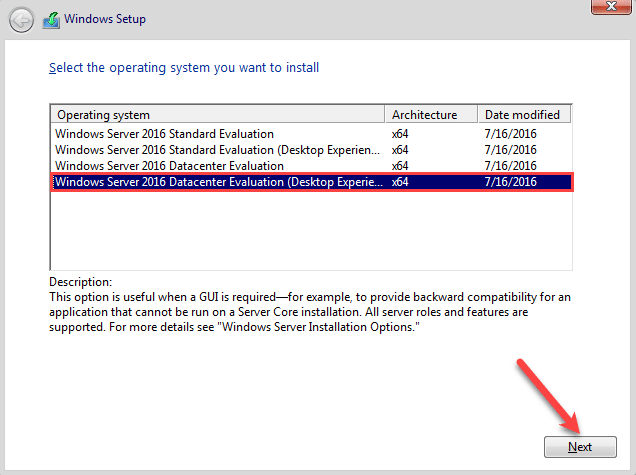
Step 3: Select the appropriate Windows Server version that meets your organization’s needs, then click Next. Make sure to choose an appropriate edition of Windows Server.
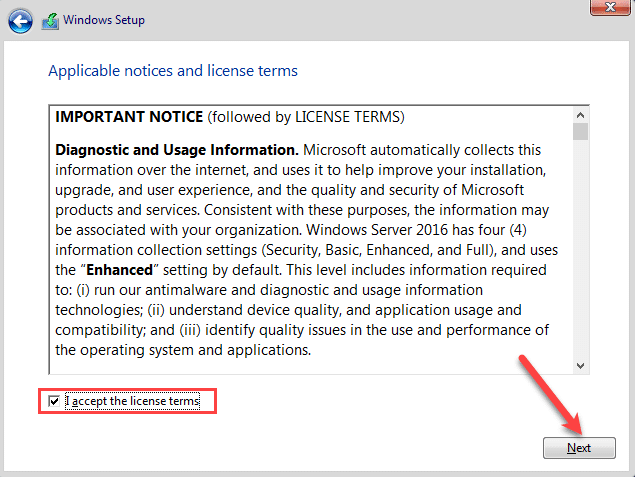
Step 4: Accept the terms and conditions and click Continue.
Step 5: Select the Custom: Install Windows only (advanced) option for a clean installation. A clean installation is often used as a term to denote an upgrade. You might have retained settings and apps from the previous Windows version when upgrading your Windows server on the new installation. On the other hand, a clean installation will not retain anything from the old version of Windows, which means it will be freshly installed.
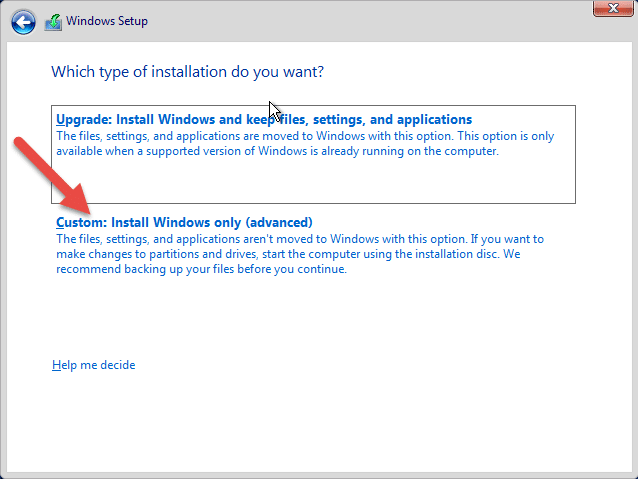
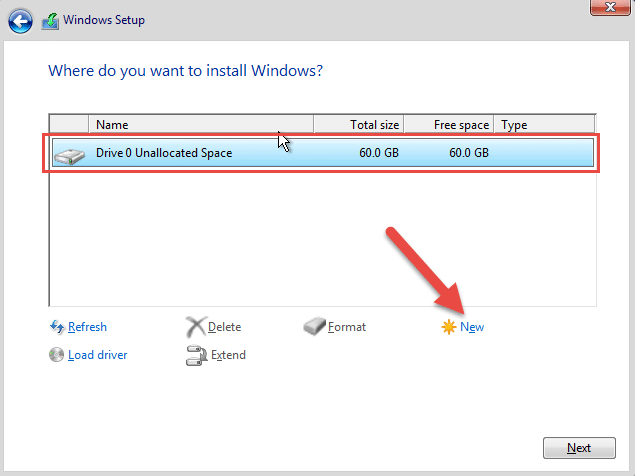
Step 6: Please select the hard drive you want to install the Windows server on. You can then click on “New” to give it partitions.
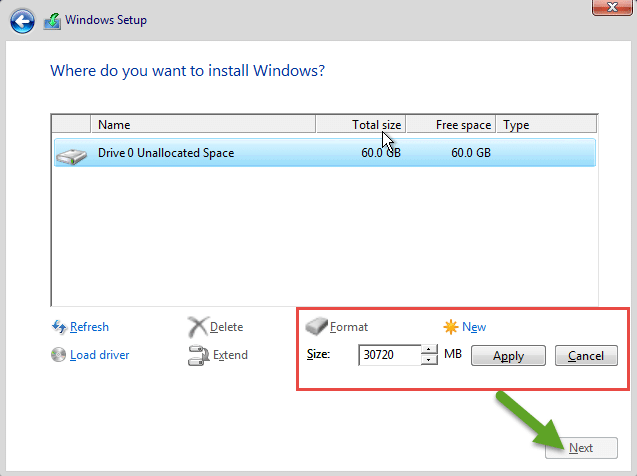
Step 7: Specify the size of the drive in MB and press the Apply button. A warning appears which asks you to give permission to system software to create a drive for System files. Click on the OK button. If you want to add more drives, do this process again.
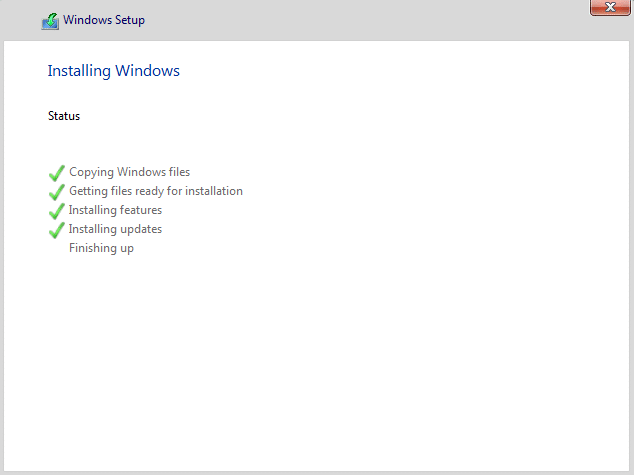
Step 8: Clicking Next will initiate copying all your files from an external drive to the internal drive. Please be patient, as this may take a bit of time. Note that your computer may need to be restarted several times to complete the copy.
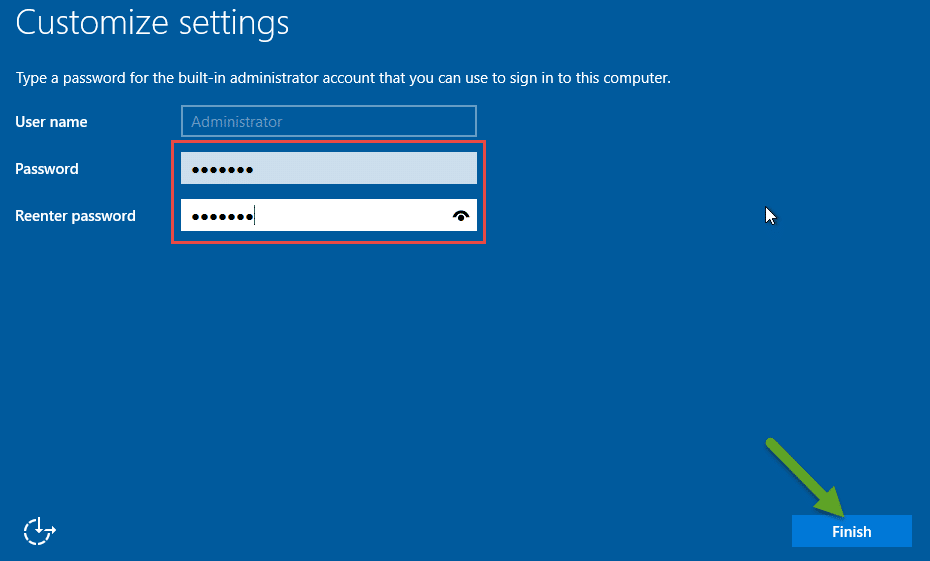
Step 9: When you finish copying all of the files from one place to another, it’s a good idea to make sure everything went saved. To do this, finalize your task by entering two versions of a strong password in the box and then clicking on ‘Finish.’ Be sure that your user name is administrator.
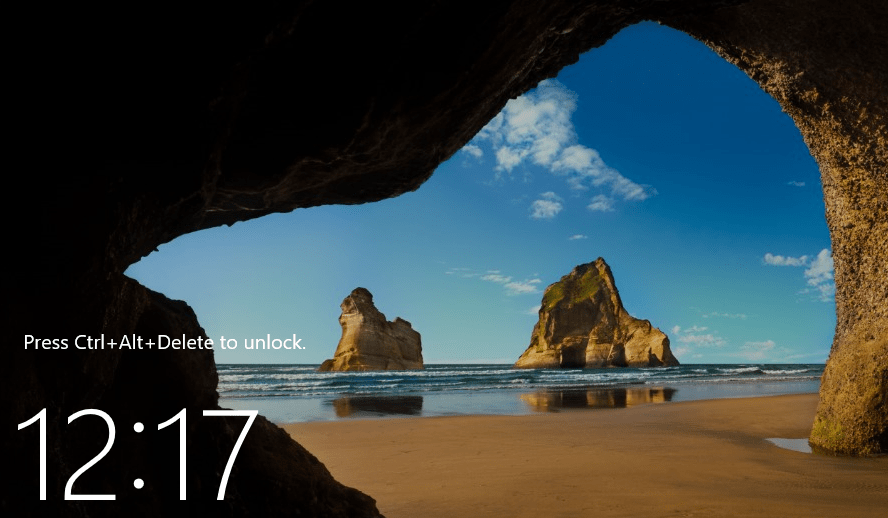
Step 10: Press Ctrl+Alt+Delete to make the login screen accessible and type in the administrator name in the box below, followed by your password. Press Enter on your keyboard when you’ve finished.
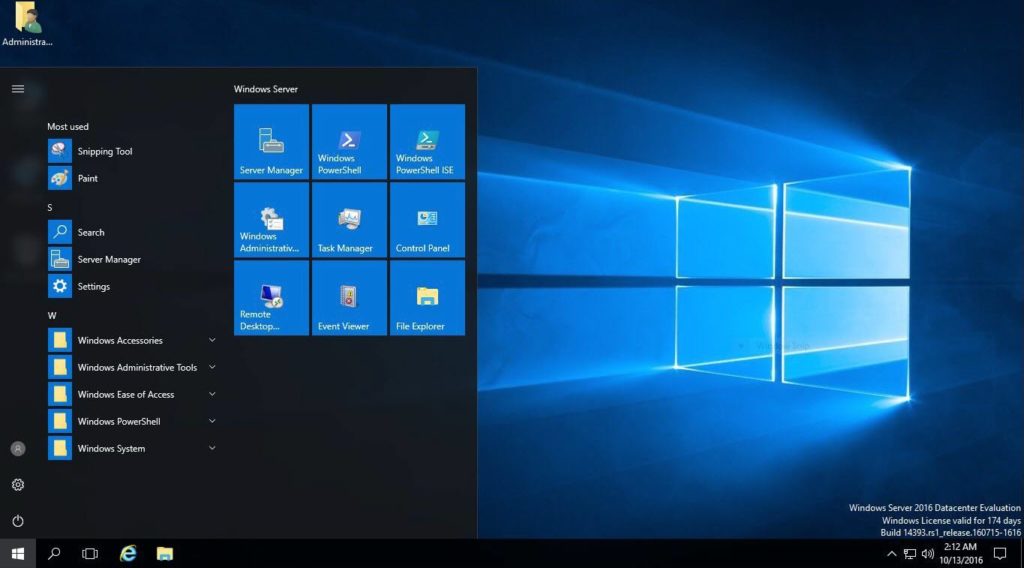
Step 11: After logging in, you will see the following screen. Windows Server 2016 is ready to use.
Conclusion
I hope this guide on How to Install Windows Server 2016 was easy. Now that we’ve configured the Windows Server 2016, it’s ready for business. While installing Windows Server, you won’t be able to change editions, for example. If you want to do a clean install again, just leave a comment below, and I’ll get back to you promptly!

