

Windows is awesome. Ever since I’ve started using computer, I’ve used Windows and it’s constantly updating every month and every year but what’s new, is, Windows 10 and particularly Windows 10 2020 May update is out. Just like every update, this Windows 10 update offers high performance over search, smart changes to Cortana, updates to Cloud and a few more. Without these, Microsoft has made so many effective and powerful updates before this which were whether asked by users or were required. Here’s how to Install Windows 10 on VMware Workstation Pro.
If you’re a Windows user, you would probably update to it. That’s the latest version and everyone does and wants that. But if you’re a developer, security administrator or app or software builder, you wouldn’t risk your computer and particularly your Windows operating system. In this case, you would probably want somewhere else to test and try out those. But assuming there’s no other option except another computer with Windows. This is where the magic happens.
Whether you want to install Windows 10 for working with the update, testing apps or trying something you wouldn’t do on your operating system, here’s how to install Windows 10 on VMware Workstation. VMware is a software that allows users to use numerous operating systems within a single computer. VMware is making new updates and the latest update is known as VMware Workstation Pro 15. In this post, I’ll show how to Install Windows 10 on VMware Workstation Pro.
Having two operating systems in a single computer is really cool. And that can be within Windows, macOS, or Linux. But you need to follow different methods and you need different tools for it. You can install and use different operating systems within different operating system . Like Windows users can install macOS Catalina and work with both Windows and macOS at the same time. But for this process (for installing two operating systems) only the device or the computer itself isn’t needed. It is correct that the final process will be on one computer or device. But while installing two operating systems in a single device, we’ll also need some tools, installer files, and some more small things and files. One of the most important and popular tools for installing Windows 10 and any other operating system, is VMware Workstation Pro or VMware Workstation Player.
First, when you buy a Mac, it has macOS running in it but other brands have Windows installed in it. But you can use software to install Windows 10 or install macOS with VMware, VirtualBox, or Dual Boot, Hackintosh. With these methods and software, you can install Windows 10 with the easiest and safest way to install Windows 10 with VMware Workstation or VirtualBox. Here’s how to install Windows 10 on VMware Workstation Pro.
Table of Contents
What is VMware
VMware is a software that utilizes virtual machine. VMware is a famous app, that creates and runs virtual machines. VMware allows you to use many operating systems. The computer or device that VMware is running on is known as the host machine. And the second or that operating system that is installed on VMware is guest machine.
The feature which VMware uses is known as virtualization. Virtualization let us have two or more than two operating systems in a single device. Before VMware was successful, the user had a single computer with a single operating system. Users couldn’t use their space and install another operating system so users couldn’t have fun and couldn’t use any other operating system there.
We have two kinds of VMware. The first is Native and the second one is Hosted hypervisors. Native VMware runs on the host hardware. It runs on the actual hardware and one operating system can run on the hardware of a computer. Hosted Hypervisors run in the first operating system. For example, if you are using a Mac and macOS operating system but you want to install Windows 10. The second operating system will be inside the first operating system. I’ll now show how to Install Windows 10 on VMware Workstation Pro.
What is Hypervisor
A hypervisor is a virtualization layer that allows a number of operating systems to use and work on a single device. Each operating system or machine requires physical resources such as memory, CPU, storage, etc. In some simple words, a hypervisor is a virtualization layer that converts the physical hardware into virtual hardware. And controls the sharing sources between virtual hardware. examples for hypervisor is VMware ESXi, Microsoft hyper V, Citrix Xenserver, and the upcoming ones.
Difference Between VMware Workstation Pro and VMware Workstation Player
While it doesn’t have much difference but a few key differences. The process for both of them are the same and they both can install and run two or more than two operating systems in a single computer. But one of the significant differences between them is that VMware Workstation is paid and VMware player is free. Anyone can install VMware Player for free but VMware Workstation is not affordable for most users. Head to how to Install Windows 10 on VMware Workstation Pro.
VMware Workstation is a full-integrated Virtualization tool which will be running multiple systems at the same time. But VMware Player, on the other side, is only meant for running a single system. It can’t connect to an ESXi Server (vSphere) or make snapshot.
If you’d like to use VMware Workstation it will take a bit of money. But it is worth it. With VMware Workstation installing many operating systems is easier and it will run smoother and faster.
What You’ll Need
If you want to install Windows 10, you need some prerequisites for this process. You need to download and install these software.
How to Install Windows 10 on VMware Workstation Pro
After the downloading of VMware Workstation Pro completed, you need to install it for running that on your computer. For installing it double click on the setup file and it will open for installation. You might see a notice like this. And click Ok. So let’s how to Install Windows 10 on VMware Workstation Pro.

The welcome wizard of VMware Workstation Pro will show up and click on the Next button.
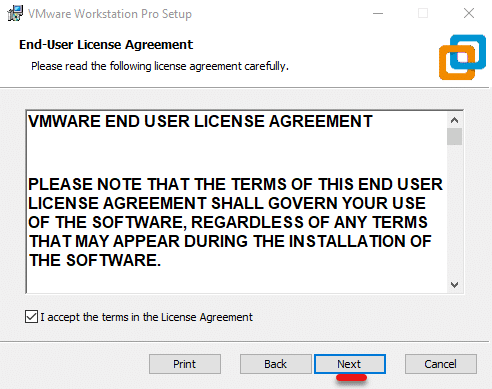
Accept the Terms in the License Agreement and click Next.

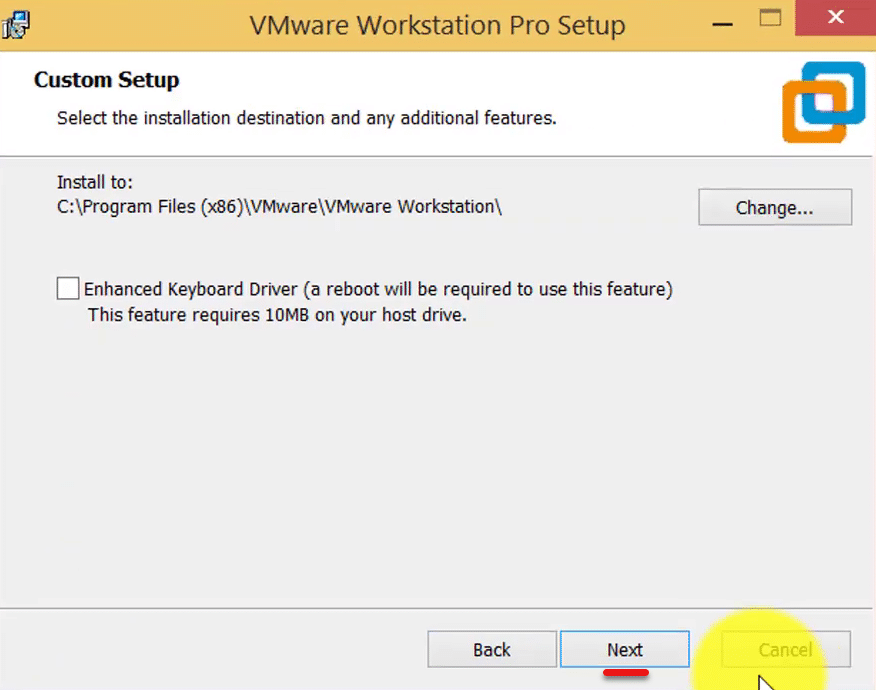
Choose where you want to install VMware on the disk and click Next.

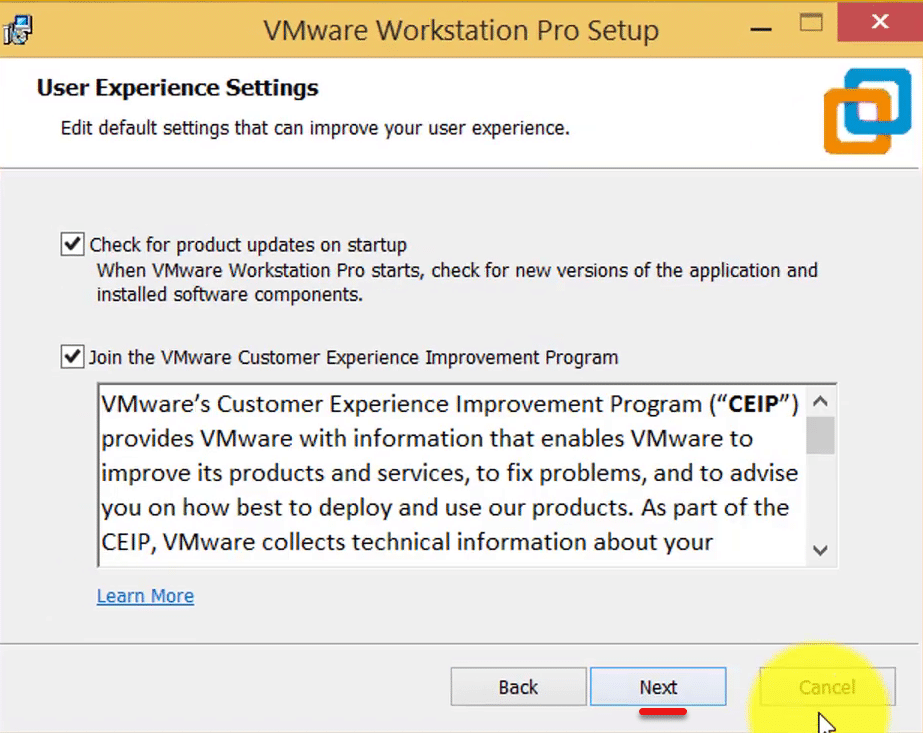
In Users Experience Setting, mark the options if you want and click Next.

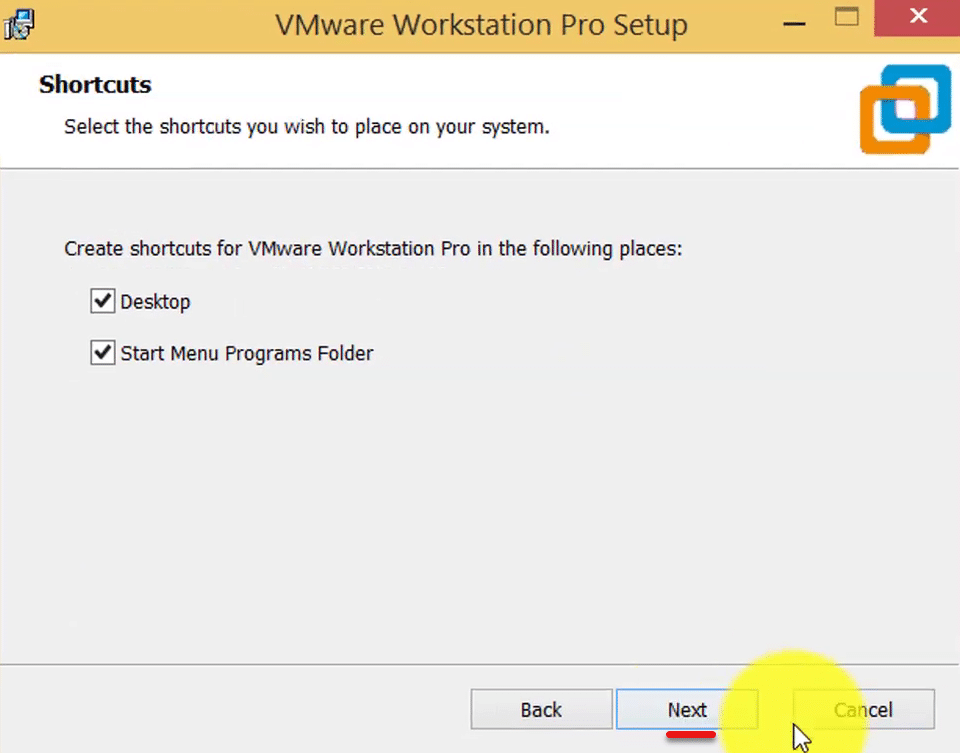
Select where the shortcuts should be installed. Select one or both of those and click Next.

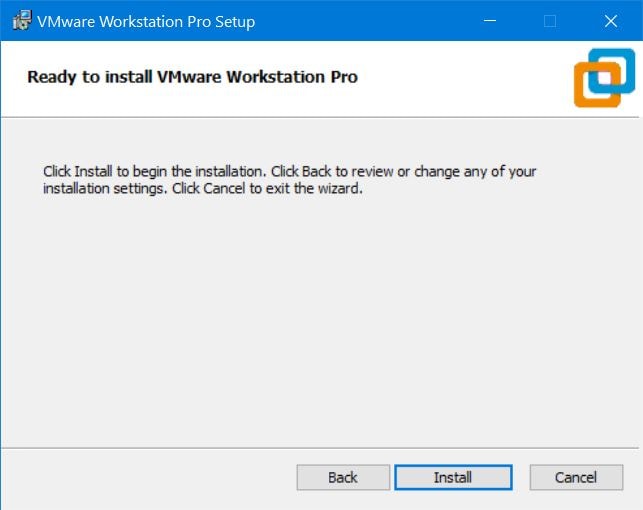
The setup is done so click on the Install button.

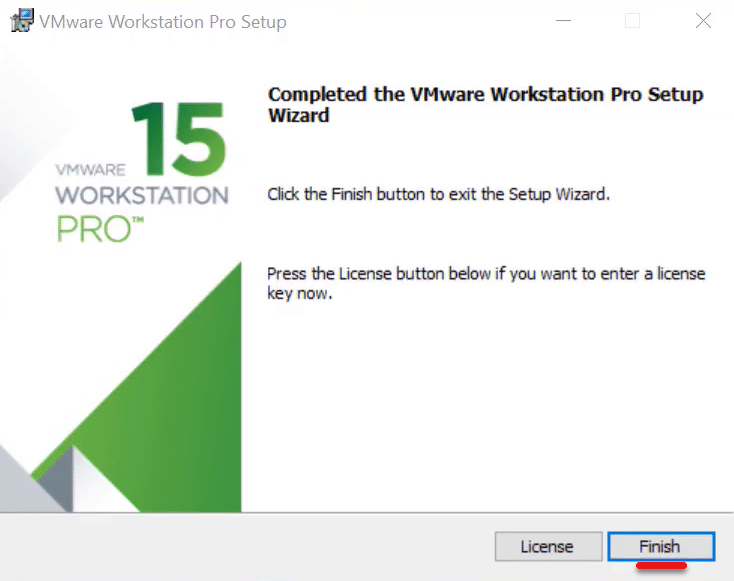
After the installation is done, a page will appear. Click on the Finish button to complete the process.

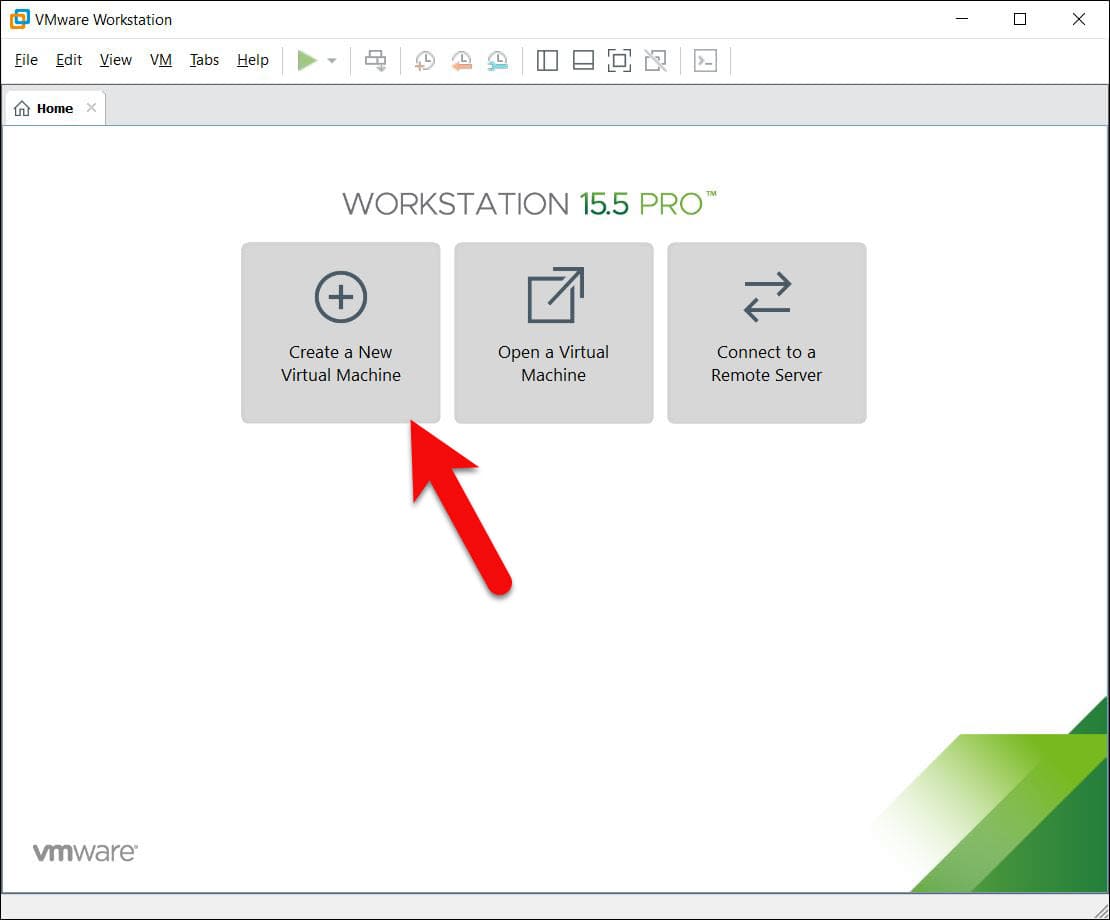
Create a New Virtual Machine
After the installation, from the home menu click on Create a New Virtual Machine.

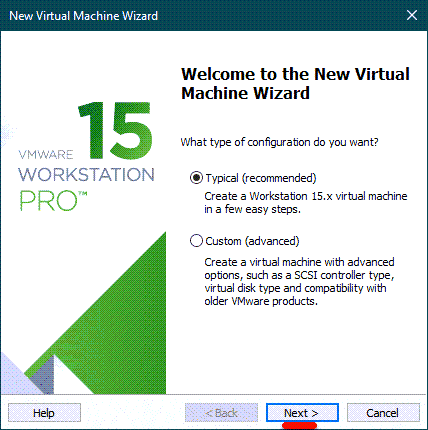
In the welcome wizard of VMware virtual machine select Typical(recommended) for the configuration and click Next.
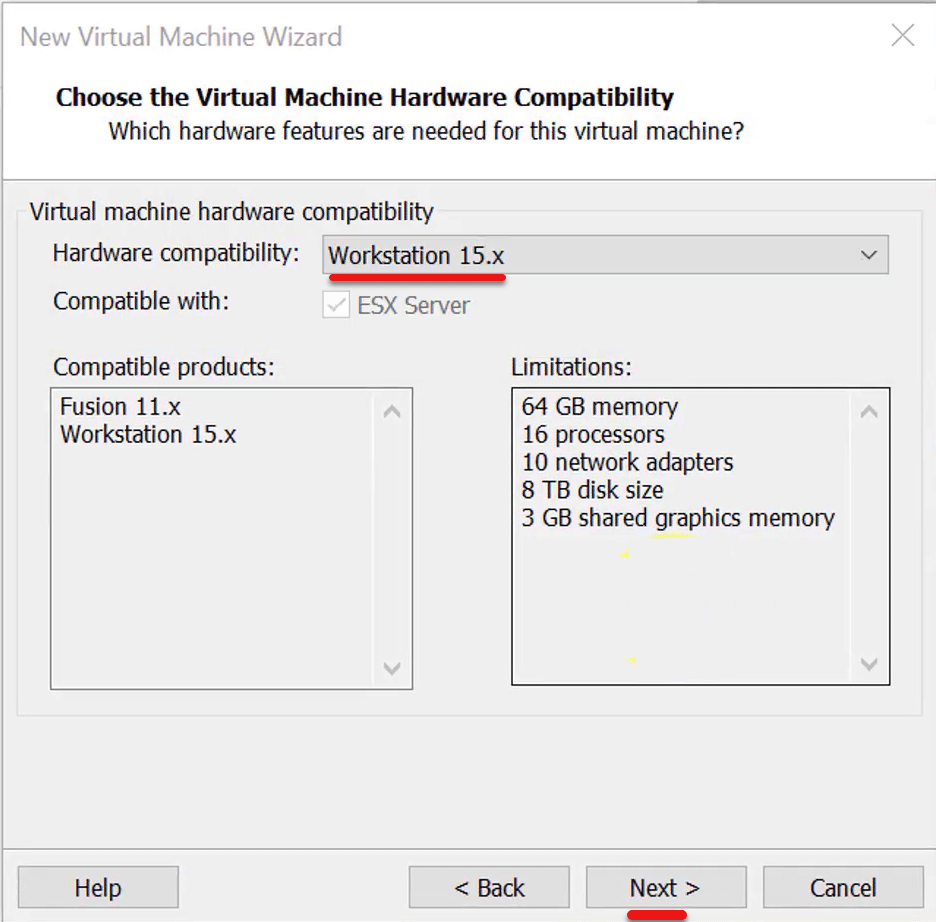
New virtual machine Wizard
On this page, select hardware compatibility. You can choose any of the options but I will select the latest version of Workstation. After the selection click Next.

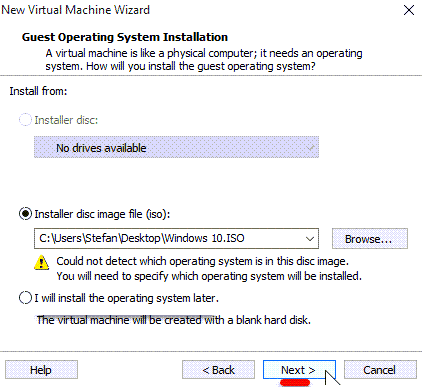
In the operating system installation window, select the Installer disc and then browse and select the Windows 10 ISO disc and click Next. If you have Windows 10 disc, insert it into the host computer. But if you don’t want to use disks simply select I will install the operating system later.

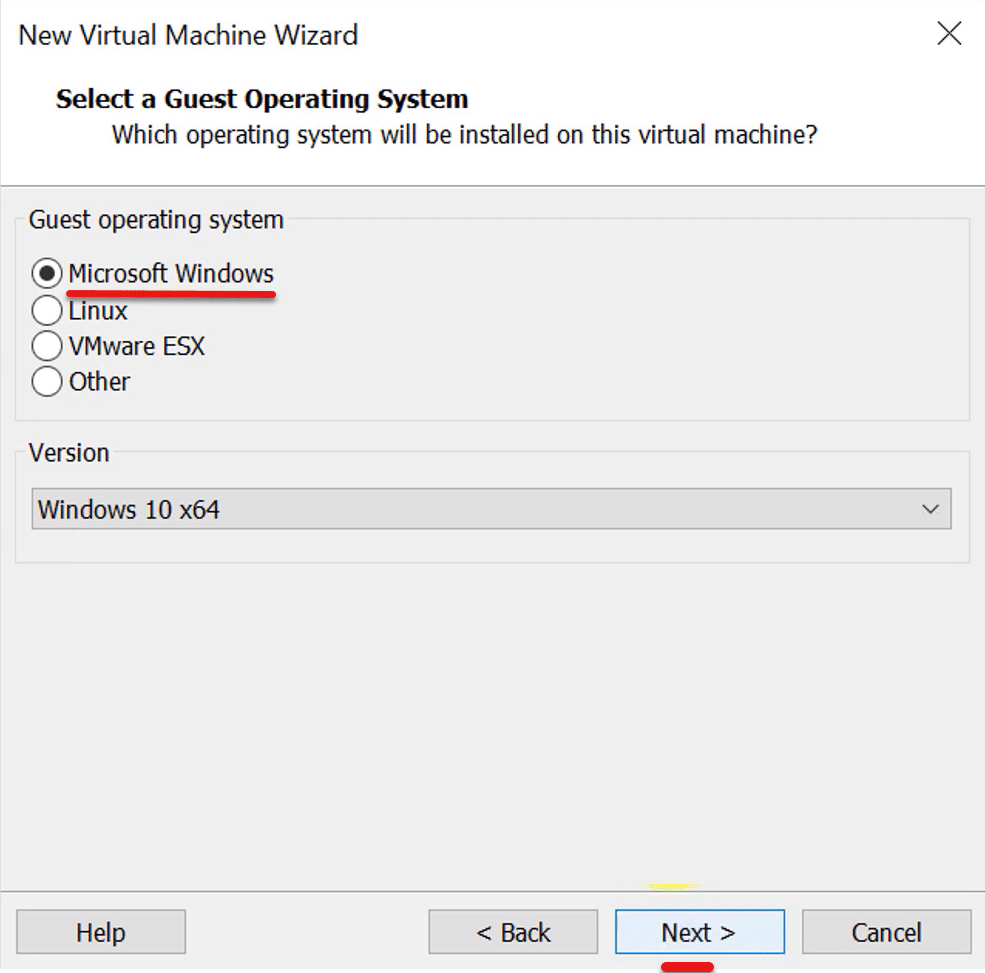
On this page, select Windows 10 as the guest operating system, and hit Next.

Give a name and location for your virtual machine or simply Next with the given name and location.
Virtual machine name
On the firmware, type select UEFI and Click Next.
Fireware Type
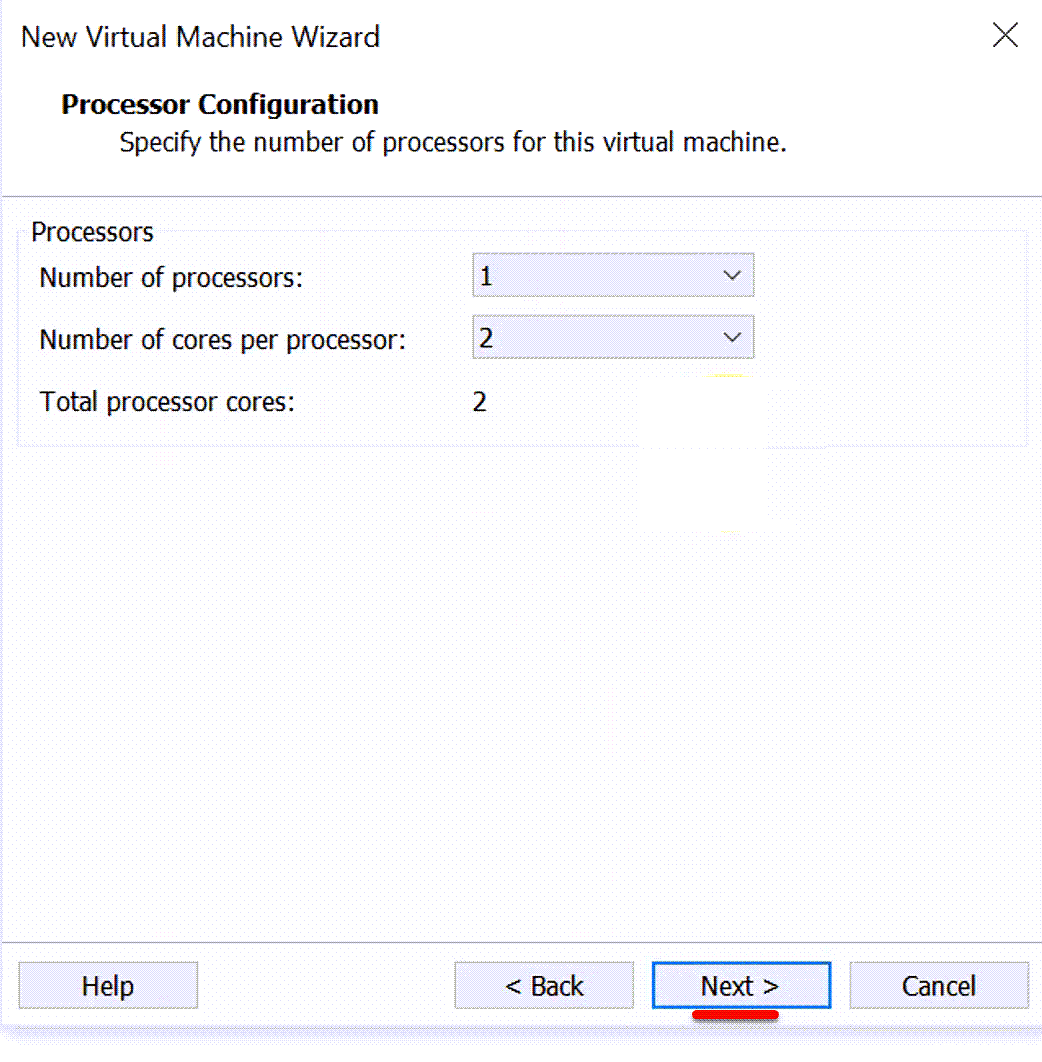
For processor configuration, we recommend typing one operating system but you can choose as required.

Choose the amount of memory so I’ll use 2GB memory size. But you can change that later. And click Next.
Memory for Virtual Machine
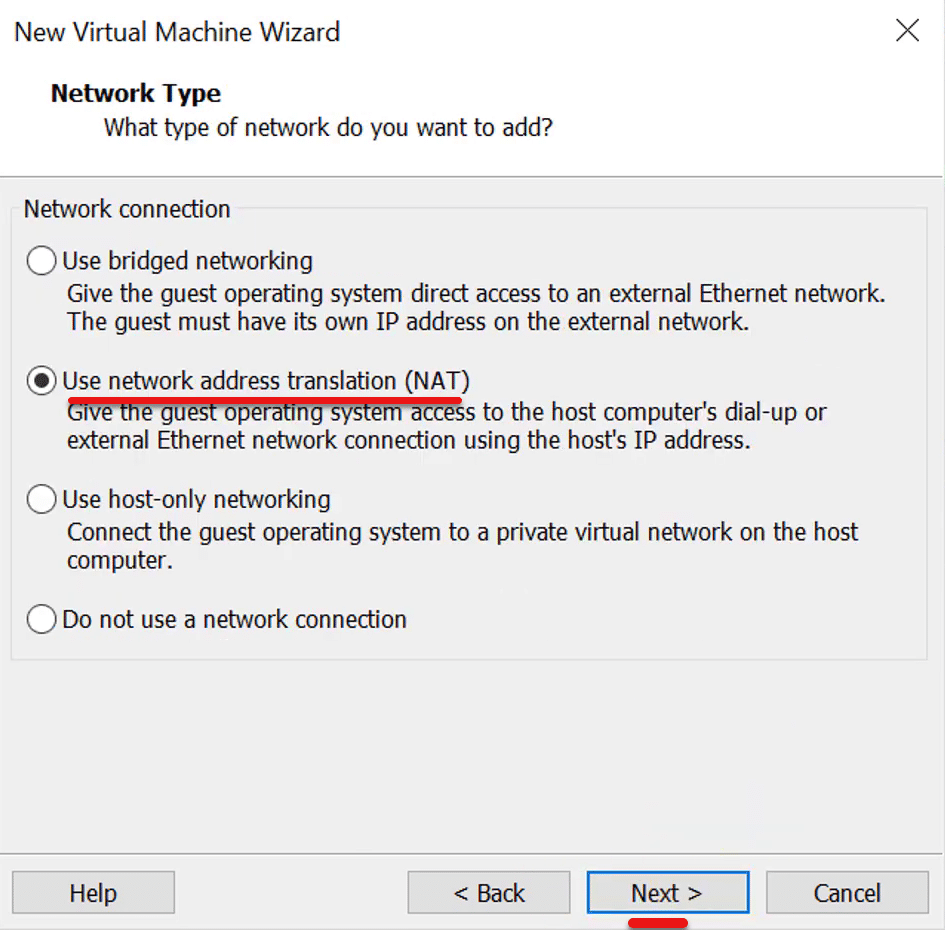
Choose how the virtual machine will be connected to the network. The best option to use is the Use Network Address Translation (NAT).

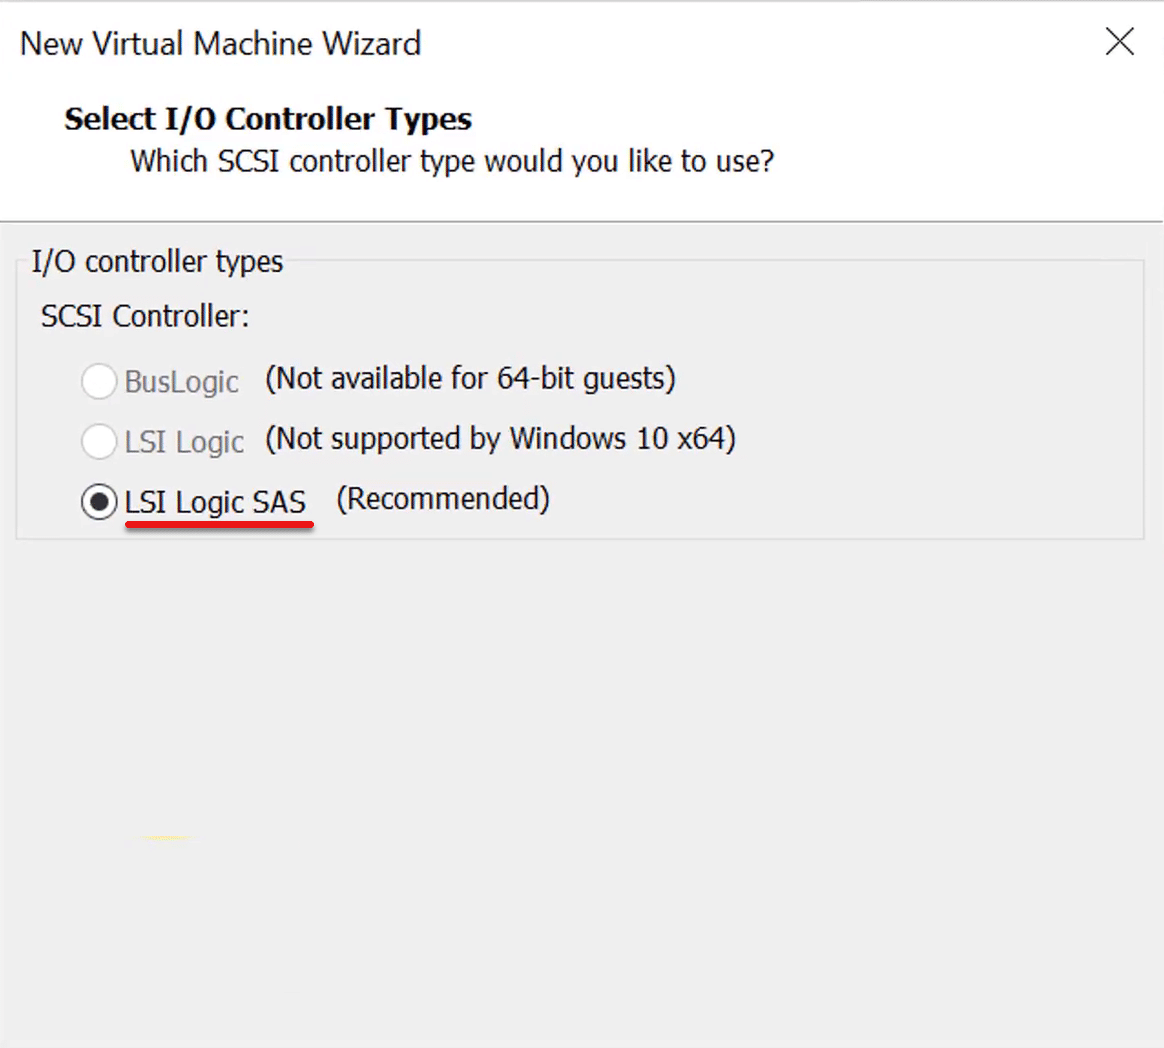
In select I/0 controller type, select LSI Logic SAS and click Next.

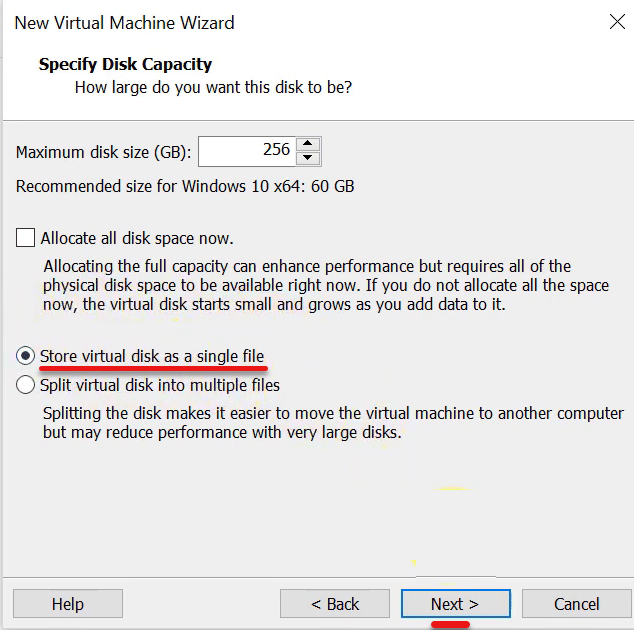
On this page, you’ll need to choose which disk do you want to choose. And click on Create a new virtual disk and click NextChoose the size for disk capacity at least 60 or more GB. From the options mark the first option which says Store Virtual disk as a single file. And click Next.

Enter the name for the virtual machine and browse it. At the end click Next.
Name for the virtual machine
After clicking Next you will see a summary of all the setup. Check that and click Finish.
Summary
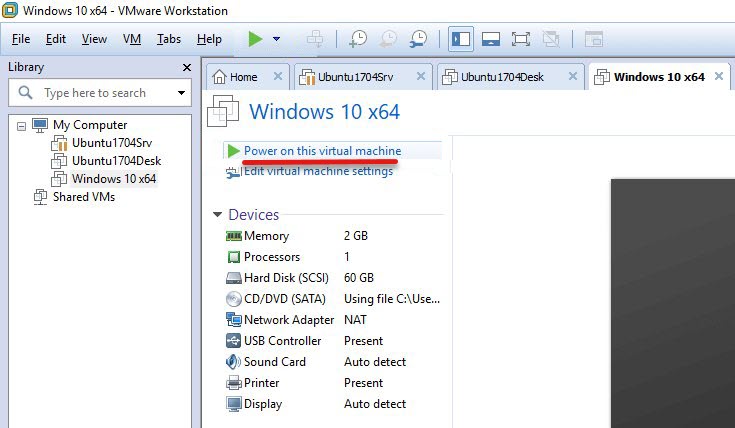
Now we have created our new VMware and it is ready to use.
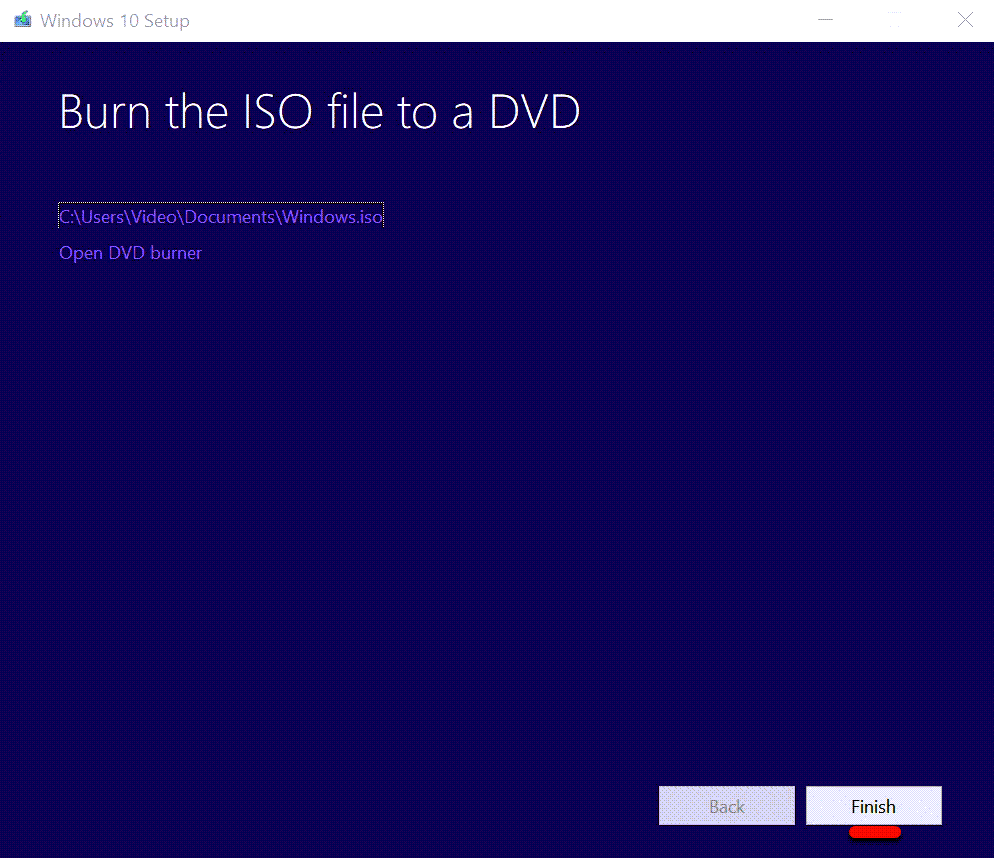
Create Windows 10 ISO
After the downloading of Windows 10 ISO setup, you need to create it. For creating double click on the file. The installation wizard will open.
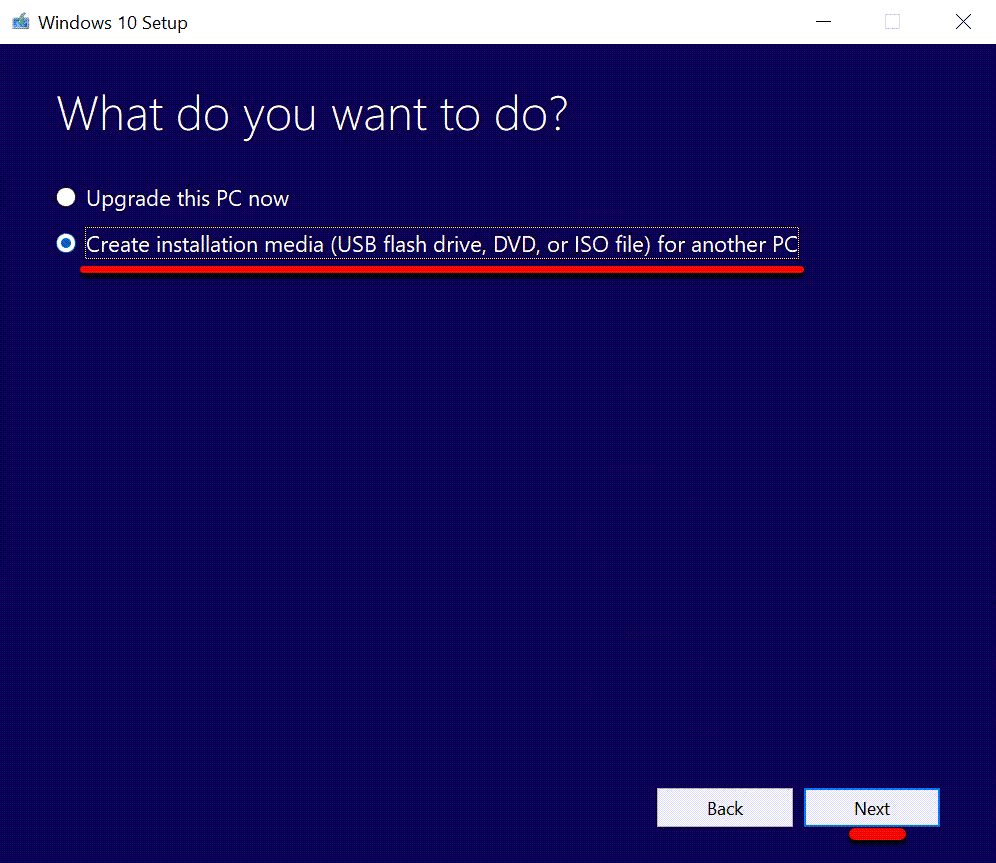
On the first page, select the second option which says Create installation media. And click Next.

Choose defaults and click Next.

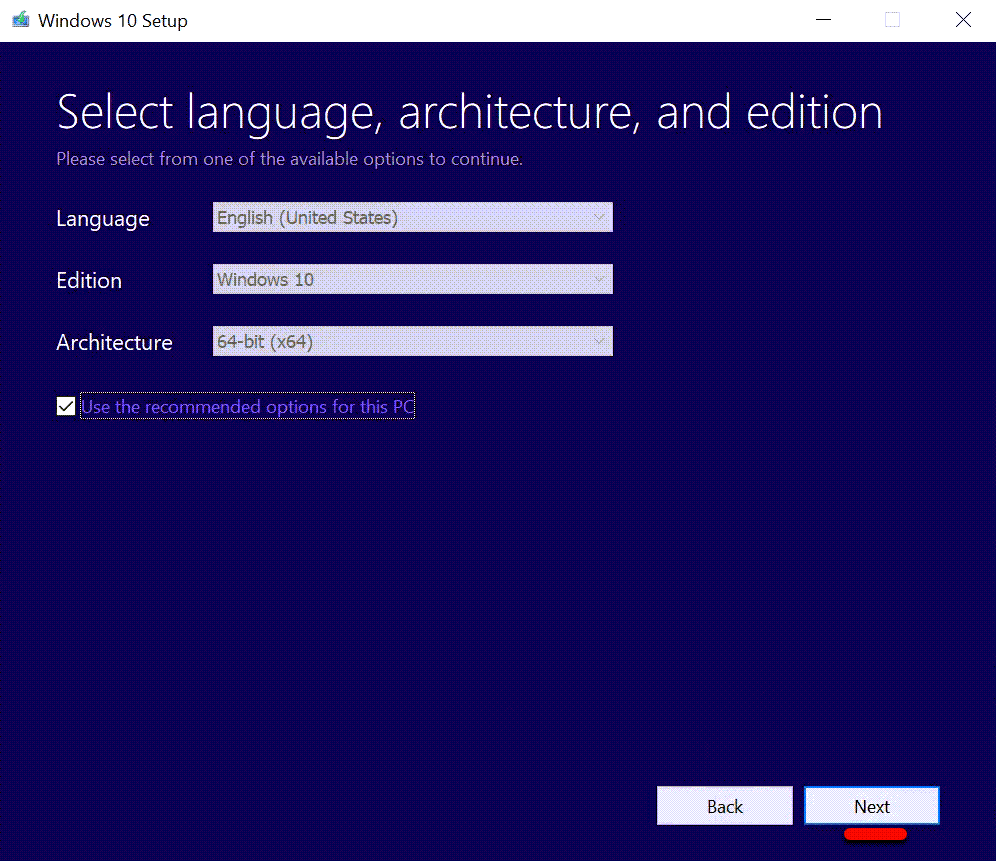
Select the ISO file for which media you want to use. And click Next.


After it is done click Finish and you are done with ISO file.

Install Windows 10 on VMware Workstation Pro
After the process of creating Windows 10 ISO. Switch on the machine with the Power button for booting your virtual machine.

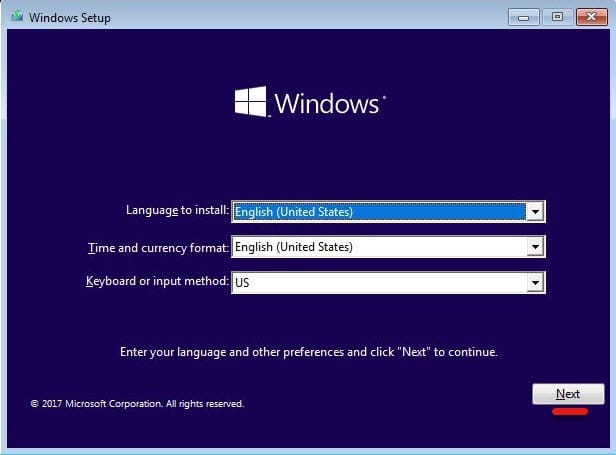
The installation process begins with the Windows set up. Follow the installation wizard and click Next.

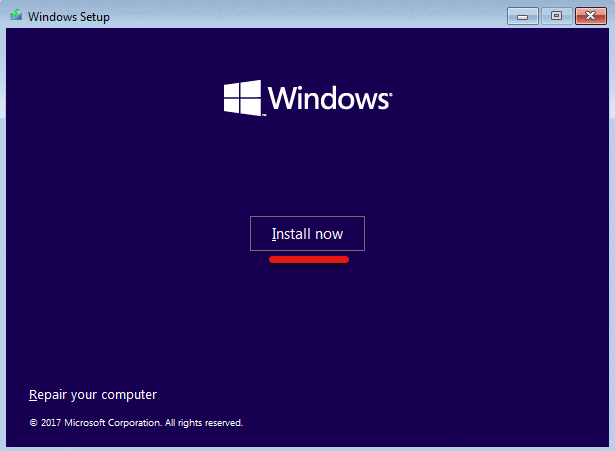
After the setup is done a window will appear with the option of Install. Click on the install button and it will start the installation.

On this screen, choose the type of installation you want. We recommend selecting the second option.
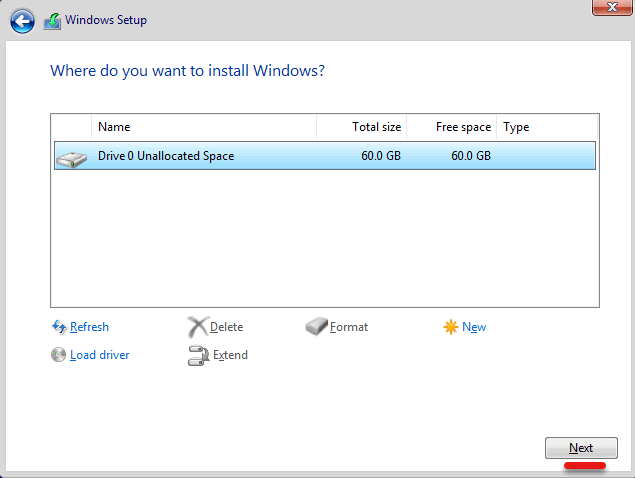
Select where do you want the Windows to install. Select the drive which has storage space. And click Next.

After this step, Windows will install and reboot and a page will appear asking your name and a password to create a new account.
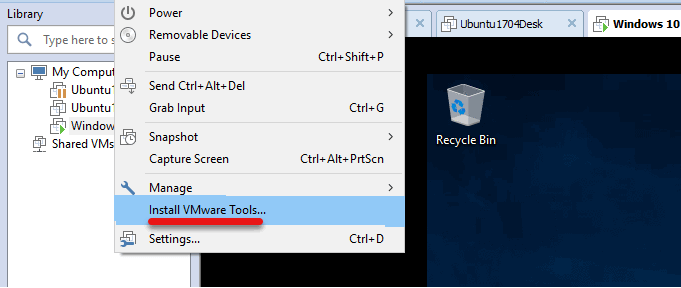
The installation process has now finished. After Sign-in, you need to install VMware tools. Click VM –> Install VMware Tools for installing VMware Tools.

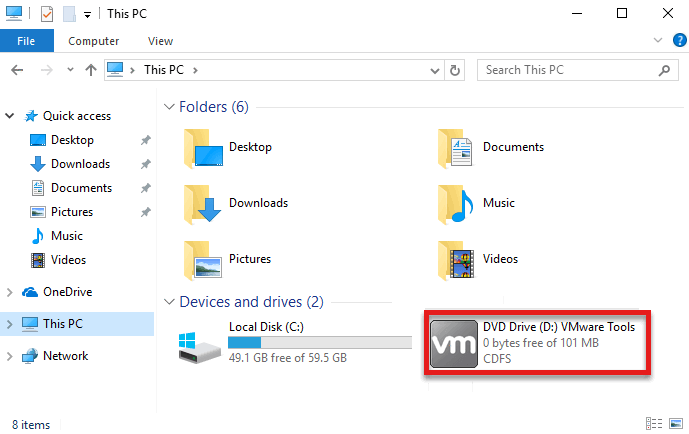
The virtual disk drive and its installer will be loaded in your Windows 10. If it didn’t launch, go to File Explorer and launch the installer. On the installer, click Next with it until its done. There’s no setting there so simply click.

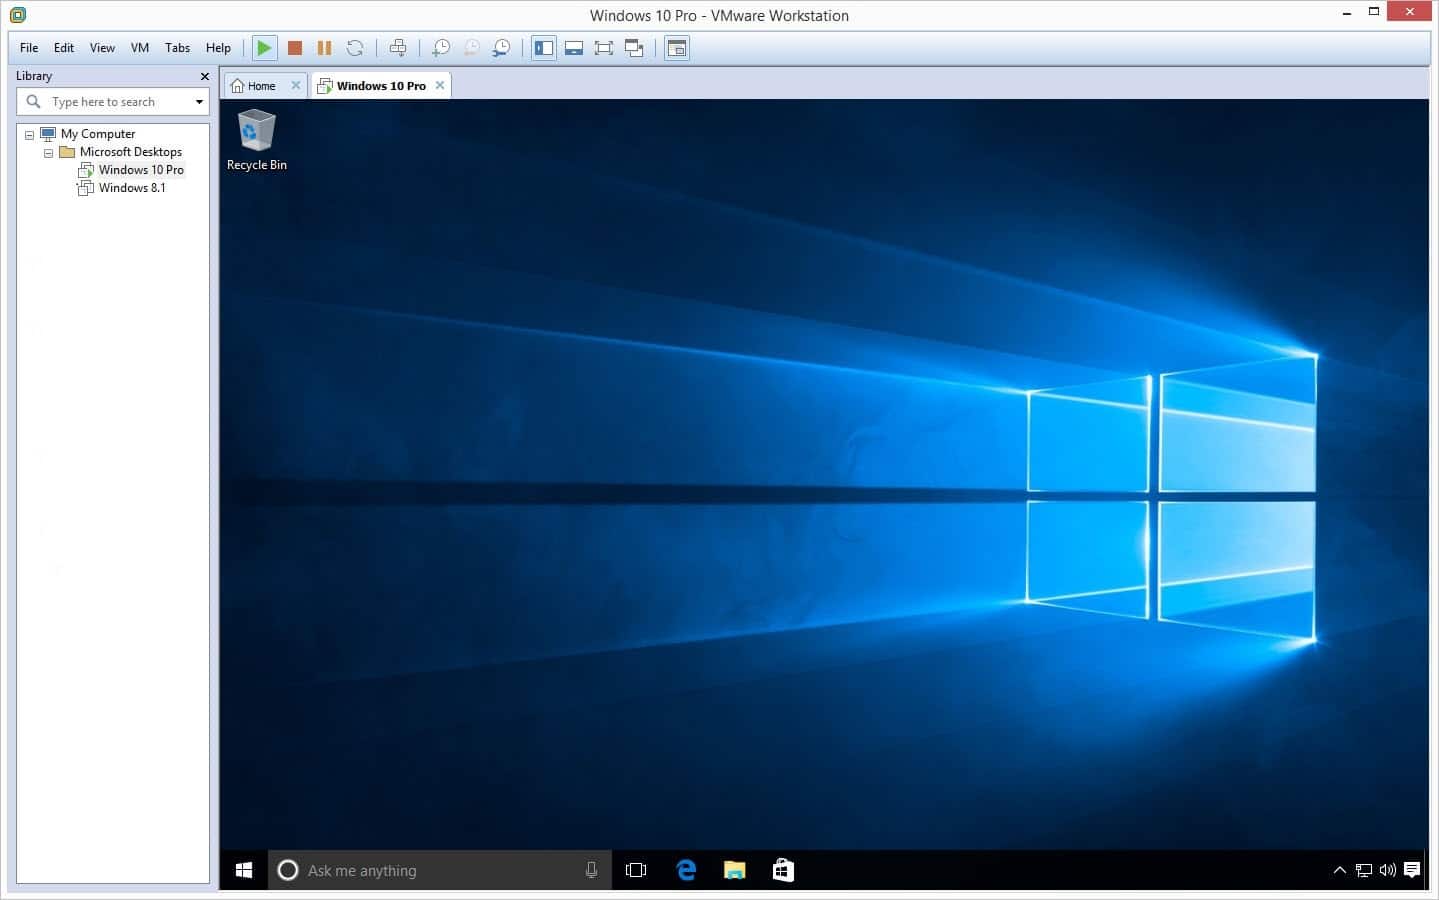
As the final results of the process, you will have your Windows 10 installed on VMware.

We hope you have learned some useful tips and tricks with this installation process. We will keep making new content, and videos and keep you updated. That was how to Install Windows 10 on VMware Workstation Pro. If you face any issues, errors or you want to install any operating system. You can mention it in the comment section below and consider it in our next post.