• About us
  • Contact us
  • Privacy Policy
GEEKrar
  • Home
  • Virtual Machines
    • VMware
    • VirtualBox
  • Mobile
    • Android
    • iOS
  • News
    • Windows (Microsoft)
    • iOS (Apple)
  • Discord
  • Windows
  • Mac
  • THE FORUM
No Result
View All Result
  • Home
  • Virtual Machines
    • VMware
    • VirtualBox
  • Mobile
    • Android
    • iOS
  • News
    • Windows (Microsoft)
    • iOS (Apple)
  • Discord
  • Windows
  • Mac
  • THE FORUM
No Result
View All Result
GEEKrar
No Result
View All Result
Home VirtualBox

How to Install Ubuntu in VirtualBox on Windows 11

Ruby Singh by Ruby Singh
October 26, 2022
in VirtualBox, Windows
0
How to Install Ubuntu in VirtualBox on Windows 11
43
SHARES
610
VIEWS
Share on TwitterShare on Facebook

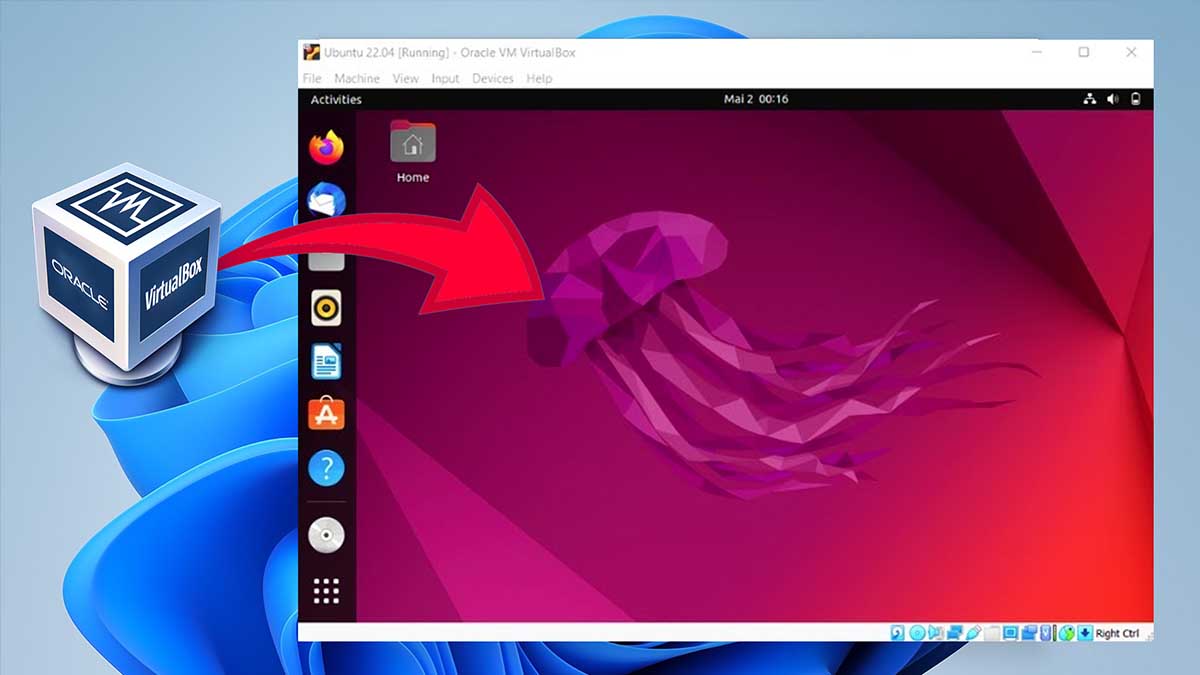
There are many reasons why people want to install ubuntu in a virtual box. But one of the most common reasons is that they want to use it simultaneously on multiple computers.

Installing Ubuntu in the virtual box is not difficult, but you need to ensure that your computer meets the minimum requirements.

Table of Contents

  • Install Ubuntu in VirtualBox | Step-by-Step Guide
    • Minimum Requirements
    • 1. Preparing the Virtual Machine
    • 2. Customize the Virtual Machine
    • 3. Starting the Virtual Machine
  • Conclusion

Install Ubuntu in VirtualBox | Step-by-Step Guide

This article discusses downloading and installing Ubuntu in VirtualBox on Windows 11.

Minimum Requirements

RAM: 4GB
25GB of free disk space
CPU: 2 cores
Ubuntu ISO image
VirtualBox and extension pack

1. Preparing the Virtual Machine

Step 1: Open your browser and go to Ubuntu.com, then go to the download section and click on Ubuntu desktop and it will automatically start downloading the Ubuntu ISO image.

Step 2: Once downloaded, download and install Virtualbox on your Windows PC. Here is a guide that you can use: How To Install VirtualBox 6.1 On Windows 10.

Step 3: Install the Virtualbox Extension Package. Use this guide: How To Install VirtualBox 6.1 On Windows 10.

Step 4: Open Virtualbox and click add a new virtual machine. Set the following parameters and click Next.

Name: Ubuntu 22.04
Type: Linux
Version: Ubuntu (64-bit)

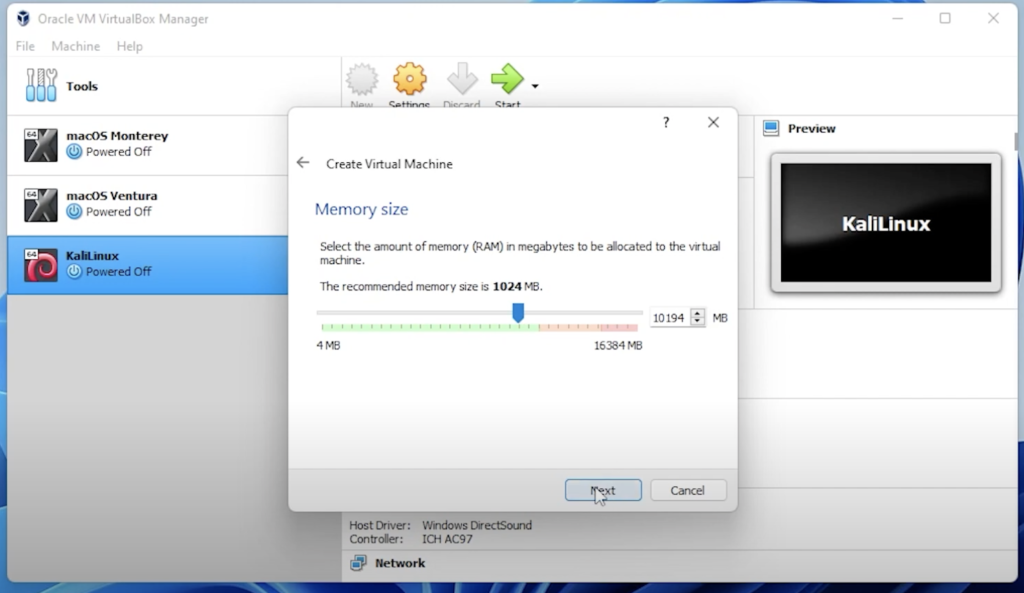
Step 5: In the memory size, select 10GB and click Next.

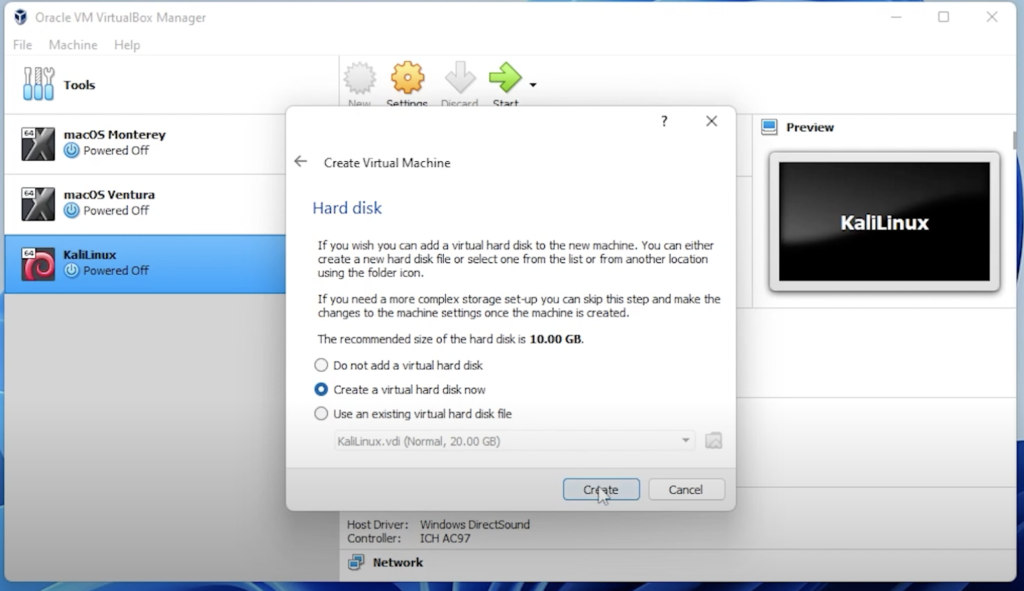
Step 6: Select Create a Virtual Hark Disk File and click Create.

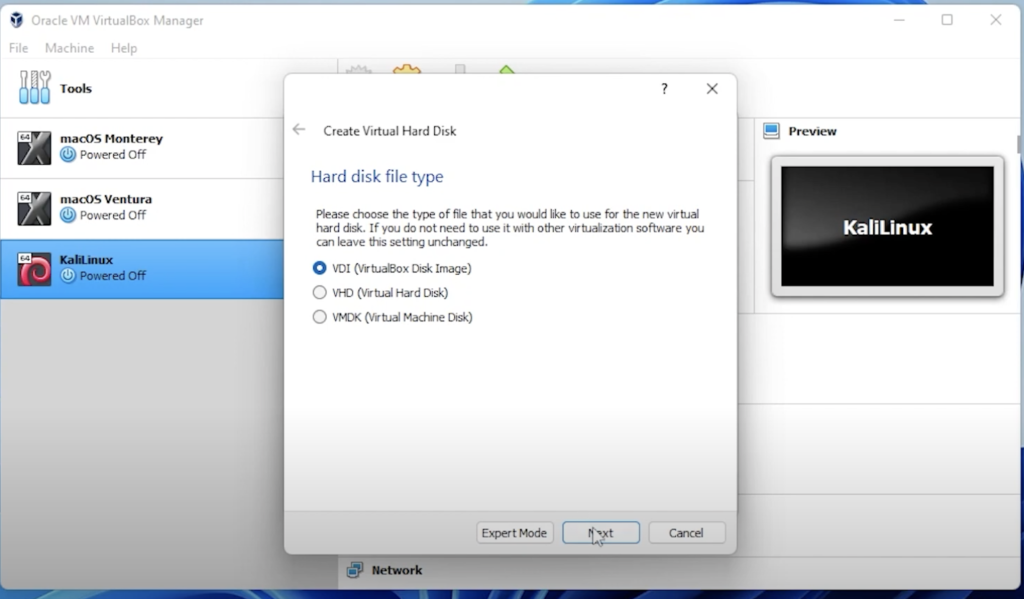
Step 7: Select VDI (Virtual Disk Image) and click Next.

Step 8: Select dynamically allocated and click Next.

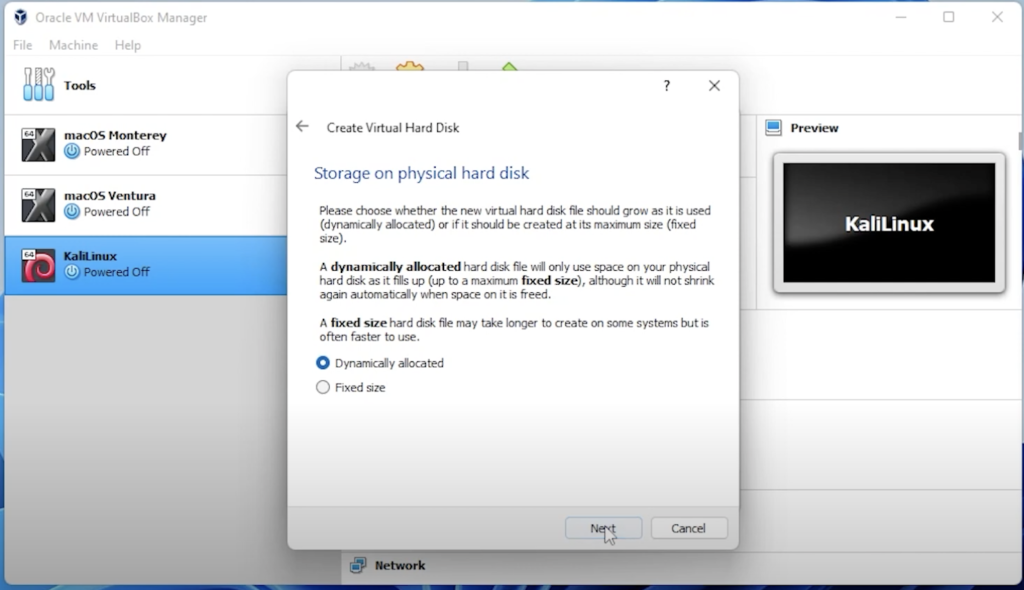
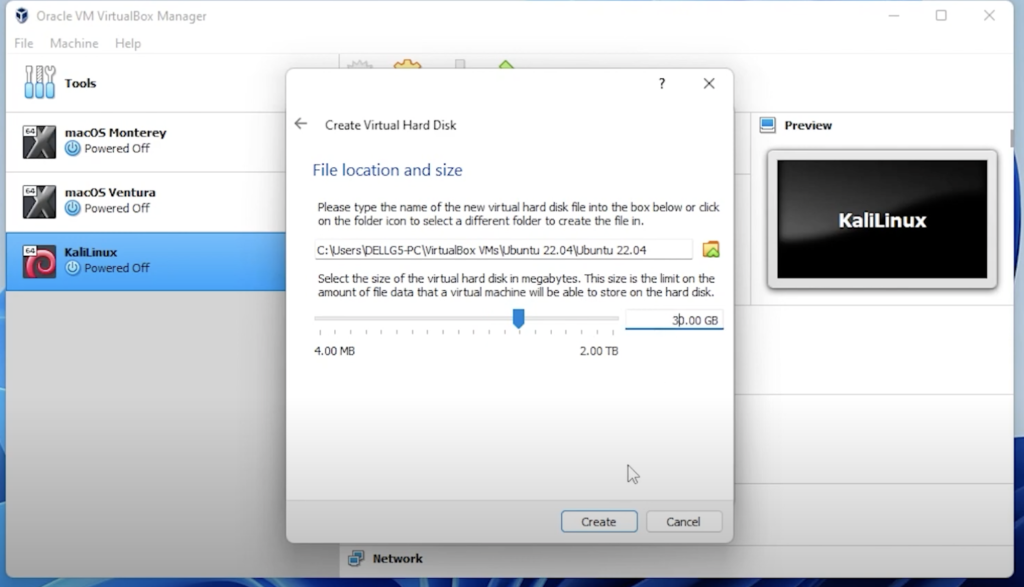
Step 9: For the hard disk space, select 30GB, and then click on Create.

2. Customize the Virtual Machine

Step 10: Click on the Ubuntu virtual machine, go to the settings button, and then go to the system and increase the processor to 8 GB.

Step 11: Click on display and set up the display for 128 GB.

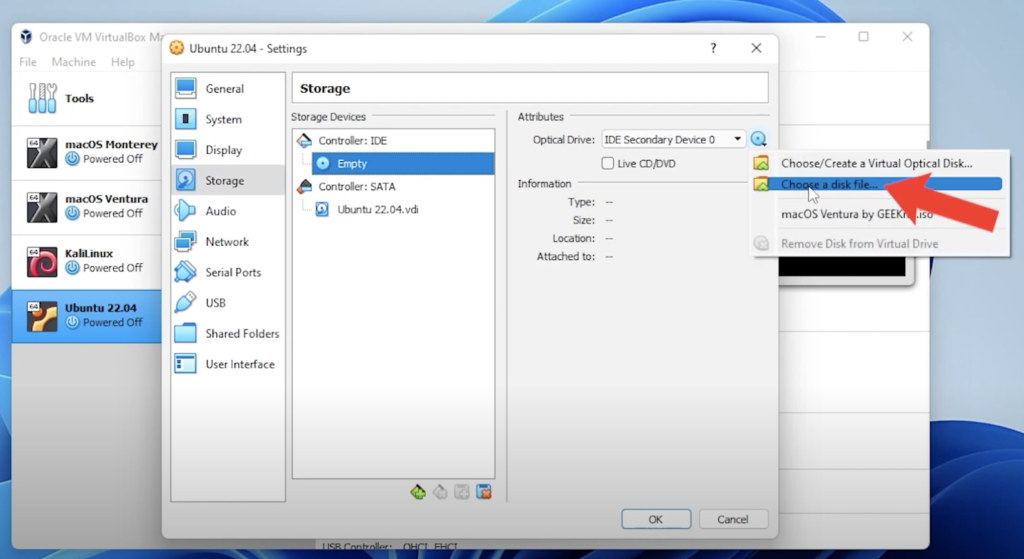
Step 12: Click on Storage, and inside Storage, you want to select the empty disk, then click on the little disk on the right-hand side. Choose a disk file; this is where you need to go to your Downloads folder, where you’ve downloaded the ISO image file, select the ISO image file, and then click on open.

3. Starting the Virtual Machine

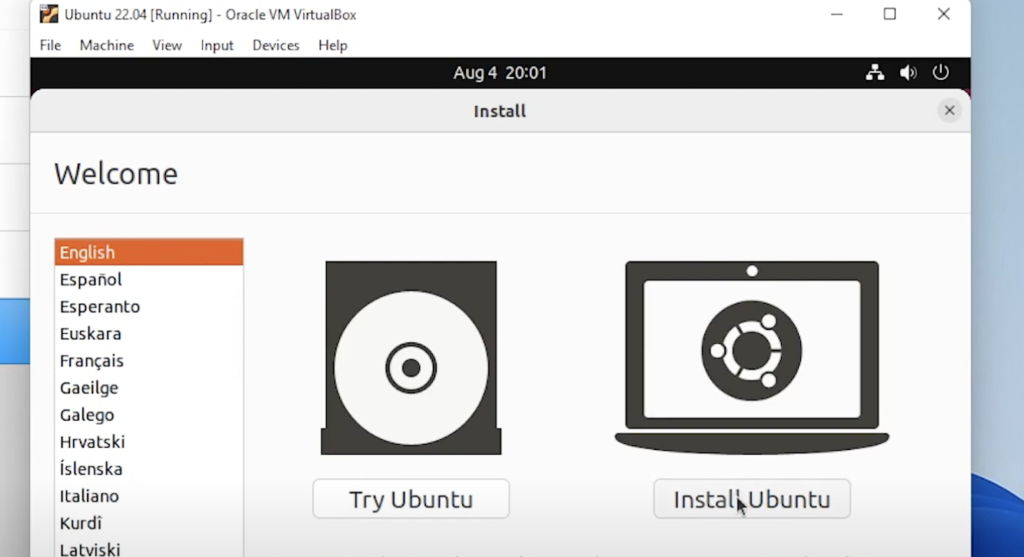
Step 13: Go to VirtualBox Manager, ensure that Ubuntu is selected, and click on the Start button. Click on the first option and start the installation.

Step 14: Select the language of your choice and click on Install Ubuntu.

Step 15: Select the keyboard layout and click on continue.

Step 16: Leave the update and other software as default and click on continue.

Step 17: Click on erase disk and install Ubuntu for installation type and click on install now.

Step 18: Enter your location and click on continue.

Step 19: Enter your details and click on continue.

Now it will start installing the system.

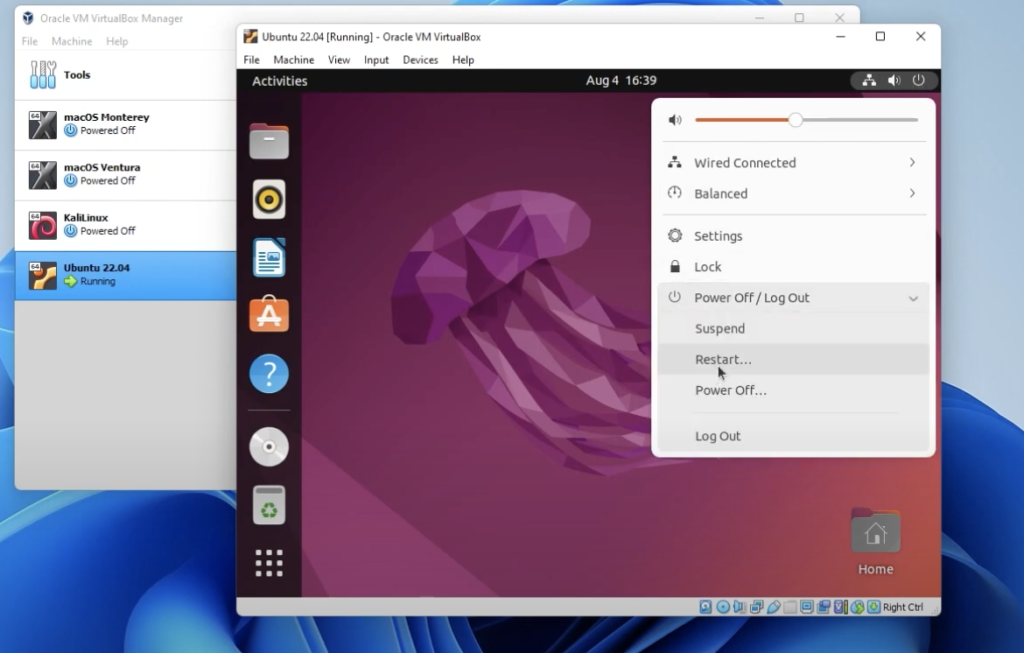
Step 20: Once the installation is complete, click on restart now.

Step 21: Enter your password and log in.

Step 22: You will get prompts to log in to your online accounts or turn the location on. Once all of this is done, you’re on your Ubuntu desktop.

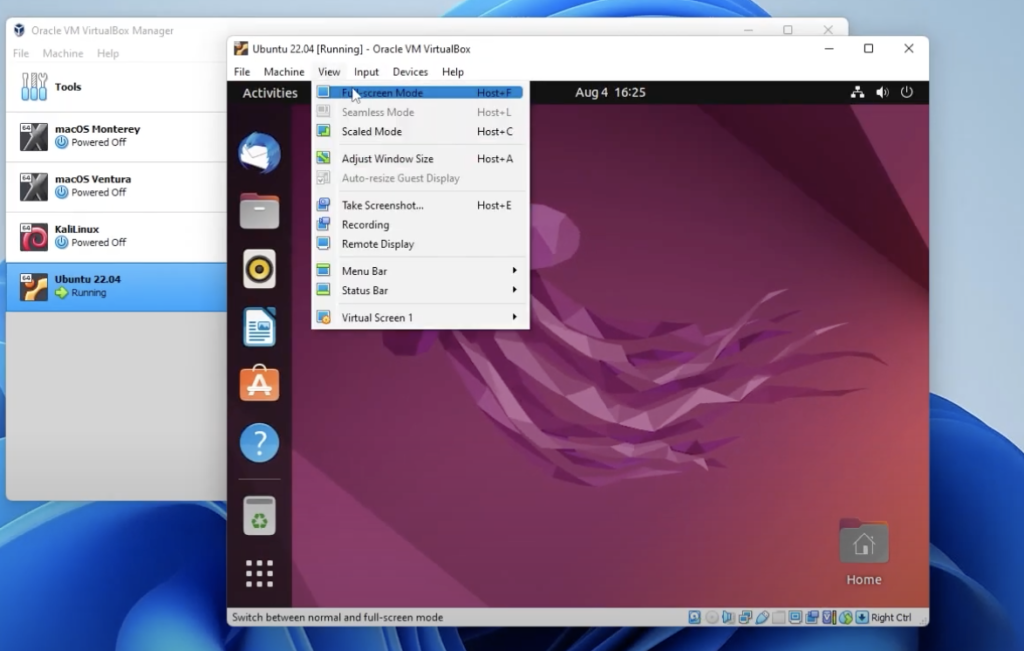
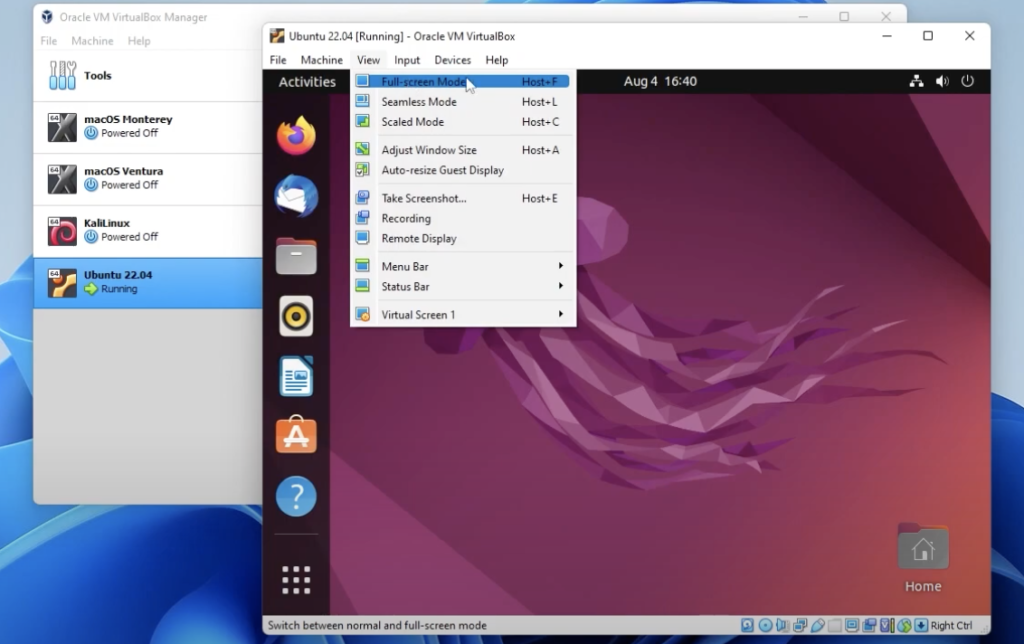
Step 23: To make your screen to full size, go to the menu, then go the view and click on to full screen mode.

Step 24: Open up your application and click on terminal. Type in your first command, which is, ‘sudo apt update’ and hit enter. Then its going to ask you for password, which is the one you used to log in to Ubuntu an then hit enter. Then type in your net command, ‘sudo apt install -y build – essential linux – headers -$ (uname -r)‘ and hit enter. Once done close the terminal.

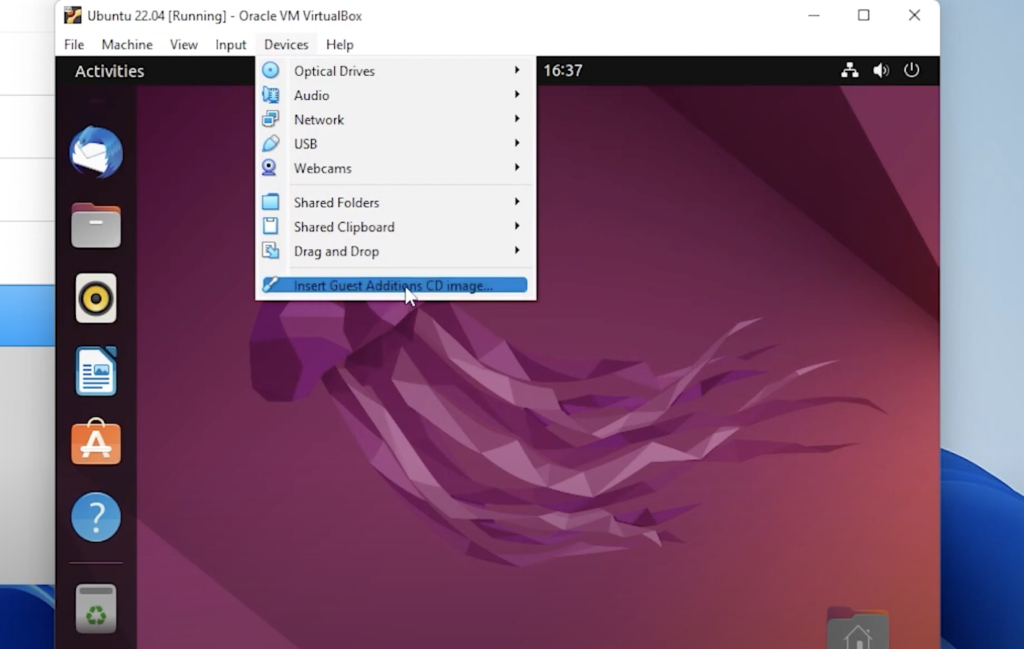
Step 25: Go to device and click on insert addition CD image.

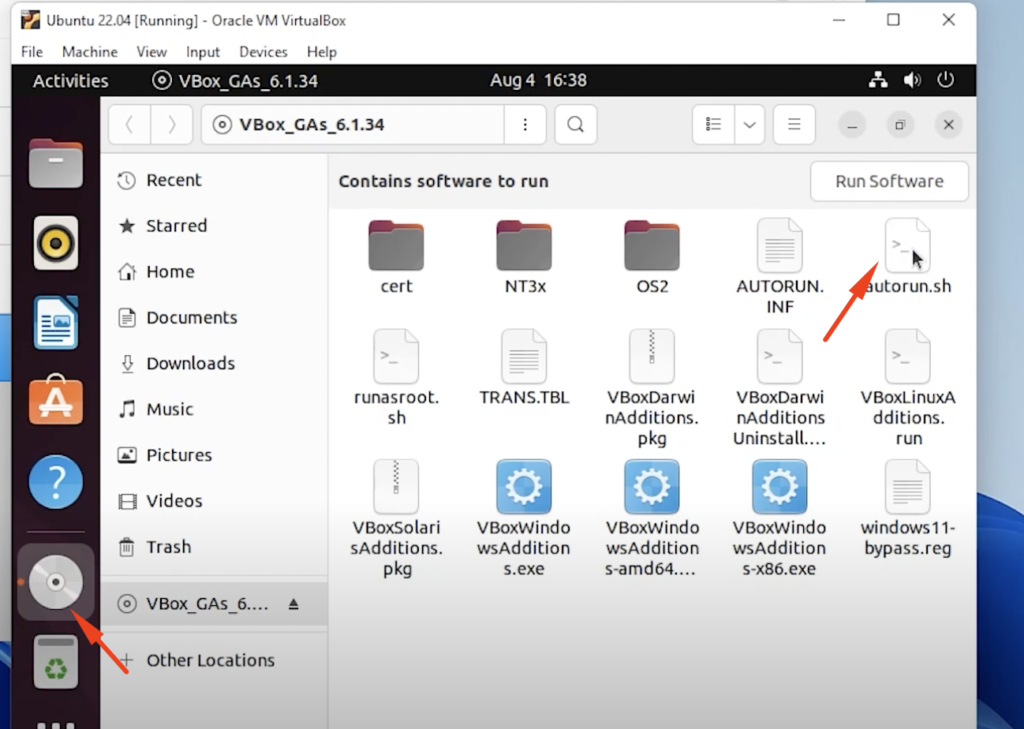
Step 26: Double click on the disk on the left side and you will fine a file named autorun.sh, right click on this file and then click on run as program.

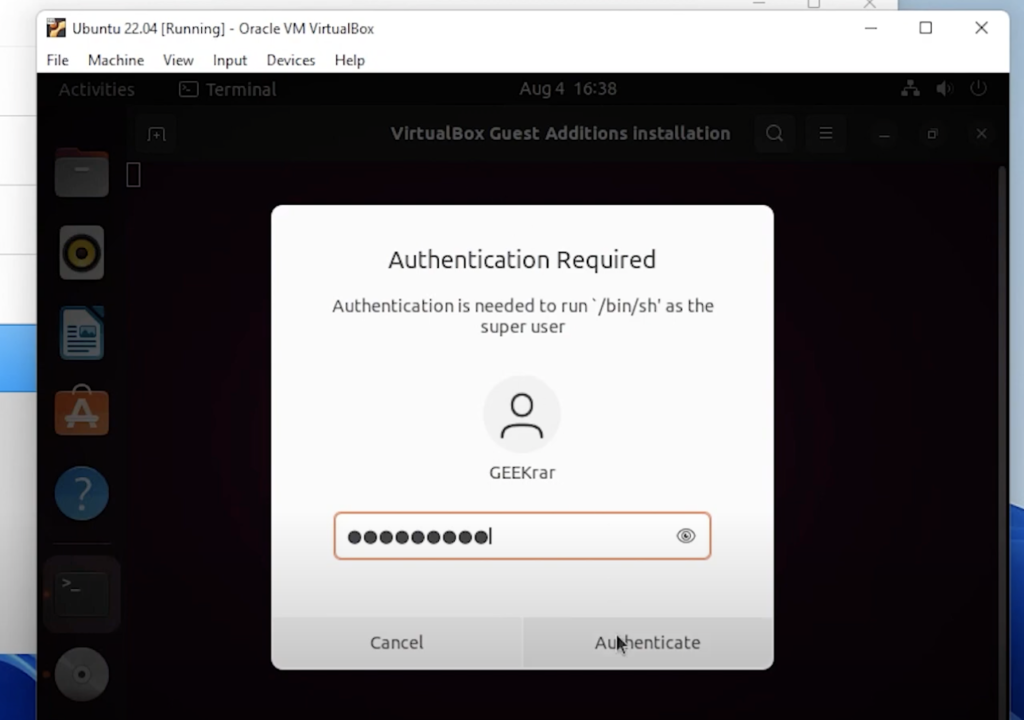
Step 27: Enter your password and click on authenticate.

Step 28: Once the installation is complete, hit the enter key to close the window.

Step 29: Close all the windows that are open and restart the system.

Step 30: Login to your system, then go to view and click on full screen mode and then click on switch and you have a full screen.

Congratulations! You’ve just completed the installation of Ubuntu 22.04 In VirtualBox on Windows 11.

Conclusion

So Ubuntu 22.04 has been installed inside VirtualBox on a Windows 11 PC. I hope you found this article useful.

You can watch the detailed video tutorial here:

Previous Post

How to Install Kali Linux 2022 In VirtualBox on Windows 11 PC

Next Post

Leveraging the Rights Apps to Make Money: Top Money-Making Apps 2022

Ruby Singh

Ruby Singh

Next Post
Leveraging the Rights Apps to Make Money: Top Money-Making Apps 2022

Leveraging the Rights Apps to Make Money: Top Money-Making Apps 2022

Leave a Reply Cancel reply

Your email address will not be published. Required fields are marked *

  • Trending
  • Comments
  • Latest
How To Bypass Mega Download Limits (2021 Method)

How To Bypass Mega Download Limits (2021 Method)

March 17, 2023
Download macOS Ventura ISO file

Download macOS Ventura ISO file

January 18, 2023
Download macOS Monterey ISO Release Candidate (v12.0.1)

Download macOS Monterey ISO Release Candidate (v12.0.1)

August 27, 2022
Bypass Mega download limits

How To Bypass Mega Download Limits 2022 (Alternative Method)

March 17, 2023
How to Fix The CPU has been disabled by the guest OS

How to Fix The CPU has been disabled by the guest OS

120
Install macOS Catalina on VirtualBox

Install macOS Catalina on VirtualBox on Windows PC

118
Install macOS Catalina on VirtualBox on AMD Systems

How to Install macOS Catalina on VirtualBox on AMD Systems

82
Install macOS Catalina on VMware on Windows PC

Install macOS Catalina on VMware on Windows PC

81
How to Upgrade Kali Linux to Kali Linux 2023.1

How to Upgrade Kali Linux to Kali Linux 2023.1

March 21, 2023
What’s Great and New with Kali Linux 2023.1

What’s Great and New with Kali Linux 2023.1

March 21, 2023
Legally Download Windows 7 ISO – Official Microsoft Links

Legally Download Windows 7 ISO – Official Microsoft Links

March 17, 2023

How To Remove Adobe Flash

March 17, 2023

Recent News

How to Upgrade Kali Linux to Kali Linux 2023.1

How to Upgrade Kali Linux to Kali Linux 2023.1

March 21, 2023
What’s Great and New with Kali Linux 2023.1

What’s Great and New with Kali Linux 2023.1

March 21, 2023
Legally Download Windows 7 ISO – Official Microsoft Links

Legally Download Windows 7 ISO – Official Microsoft Links

March 17, 2023

How To Remove Adobe Flash

March 17, 2023
Facebook Twitter Youtube
GEEKrar

We are a team of skilled writers, editors and tech enthusiasts that help you how to get tech into work, pros and cons, explain hows and whys, hacks, and fixes of new modern tech.

Browse by Category

  • Android (24)
  • Discord (5)
  • Downloads (13)
  • Featured (13)
  • Internet (229)
  • iOS (26)
  • Mac (100)
  • News (428)
    • iOS (Apple) (283)
    • Windows (Microsoft) (117)
  • Reviews (4)
  • Tech (21)
  • Virtual Machine (25)
  • VirtualBox (75)
  • VMware (66)
  • Windows (86)

Recent News

How to Upgrade Kali Linux to Kali Linux 2023.1

How to Upgrade Kali Linux to Kali Linux 2023.1

March 21, 2023
What’s Great and New with Kali Linux 2023.1

What’s Great and New with Kali Linux 2023.1

March 21, 2023

© 2022 geekRAR.com

No Result
View All Result

© 2022 geekRAR.com

We use cookies on our website to give you the most relevant experience by remembering your preferences and repeat visits. By clicking “Accept”, you consent to the use of ALL the cookies.
Do not sell my personal information.
Cookie settingsACCEPT
Manage consent

Privacy Overview

This website uses cookies to improve your experience while you navigate through the website. Out of these, the cookies that are categorized as necessary are stored on your browser as they are essential for the working of basic functionalities of the website. We also use third-party cookies that help us analyze and understand how you use this website. These cookies will be stored in your browser only with your consent. You also have the option to opt-out of these cookies. But opting out of some of these cookies may affect your browsing experience.
Necessary
Always Enabled
Necessary cookies are absolutely essential for the website to function properly. This category only includes cookies that ensures basic functionalities and security features of the website. These cookies do not store any personal information.
Non-necessary
Any cookies that may not be particularly necessary for the website to function and is used specifically to collect user personal data via analytics, ads, other embedded contents are termed as non-necessary cookies. It is mandatory to procure user consent prior to running these cookies on your website.
SAVE & ACCEPT
Go to mobile version