Table of Contents
Introduction to Parrot OS for VirtualBox
This article will show you how to install Parrot OS for VirtualBox on a Windows 10 PC. Parrot OS, like Kali Linux, is a powerful tool used by many for ethical hacking. There is an assortment of tools included and built around the OS, making it very handy for power users.
While having Parrot OS running on a PC is great, you may not want to use it as your primary operating systems since the availability of popular daily apps is just not available on Linux based systems. Thus, many users who run the operating systems virtually find it better to install Parrot OS for VirtualBox.
Before we begin to install Parrot OS for VirtualBox, you will need VirtualBox installed. This article will show you how to download and install it on Windows 10 and add the extension pack.
Next, you will need a copy of Parrot OS ISO. This file is available for free on the official website. In this guide, we are installing the Parrot Security OS version with the MATE desktop. Below is a direct link for downloading the Parrot OS image and VirtualBox and extension.
Required Files to Download:
Once you have VirtualBox install and the Parrot OS image file downloaded, we can begin.
Install Parrot OS for VirtualBox – Complete Step by Step Guide
Creating the Parrot OS Virtual Machine
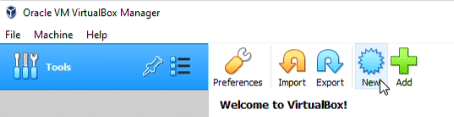
- The first step to install Parrot OS for VirtualBox is to launch VirtualBox and select the ‘New’ icon at the top.

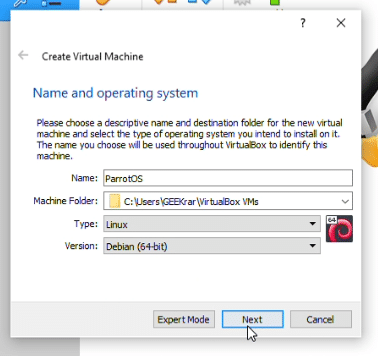
2. In the ‘Create Virtual Machine’ window, enter a relevant name in the first field called ‘Name.’ The ‘Machine Folder’ can remain as default, unless you want to store it on a different drive. ‘Type’ will be Linux, and ‘Verison’ is Debian (64-bit).

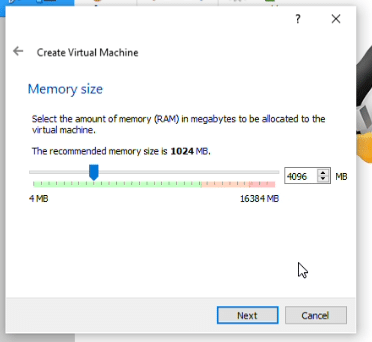
3. Memory Size, the minimum requirement for Parrot OS for VirtualBox is 2GB. If you can, I suggest using at least 4GB.

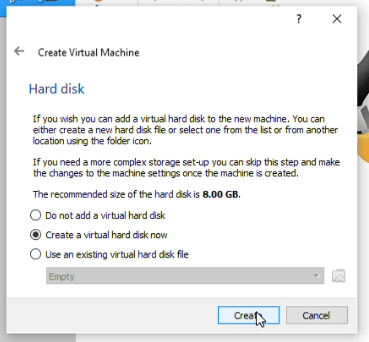
4. ‘Hard disk’, we will leave the default selection ‘Create a virtual hard disk now.’ Click ‘Create’

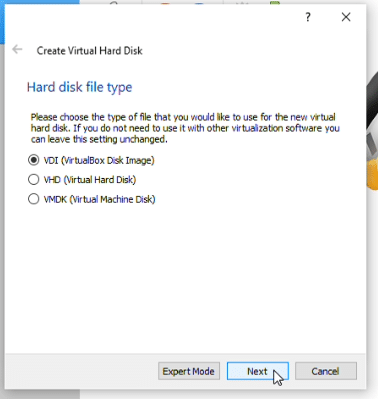
5. ‘Hard disk file type’, leave as ‘VDI VirtualBox Disk Image,’ and click on ‘Next.’

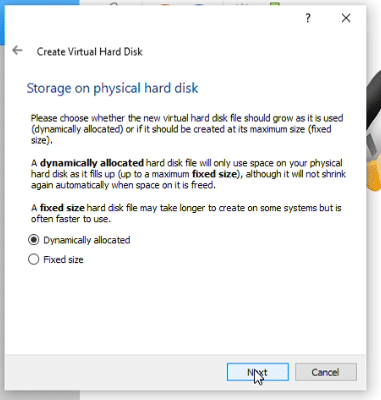
6. ‘Storage on physical hard disk’ keep this at ‘Dynamically allocated’ and click ‘Next.’

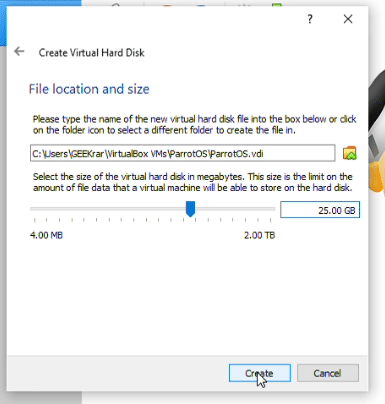
7. In the first field under ‘File location and size,’ we can leave the default selected folder unless you have a good reason to change it. Below is the disk space size 8GB as default. However, we are increasing this to 25GB to leave room for applications and additional tools to be installed later. Click ‘Create’

Now that the Parrot OS for VirtualBox is created, we need to make a few modifications to run smoothly.
Configuring The Virtual Machine for Parrot OS
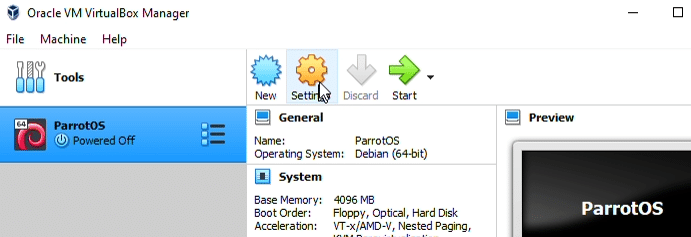
Click the ‘Settings’ icon at the top.

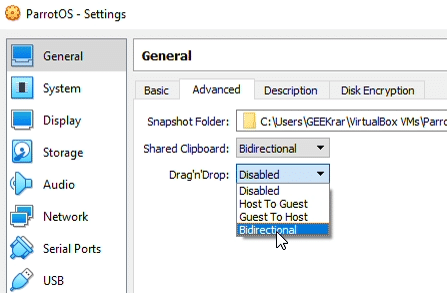
On the left side, select ‘General’ and then the ‘Advanced’ tab. Here, we want to make sure ‘Shared Clipboard’ and ‘Drag’n’Drop’ have the ‘Bidirectional’ option selected.

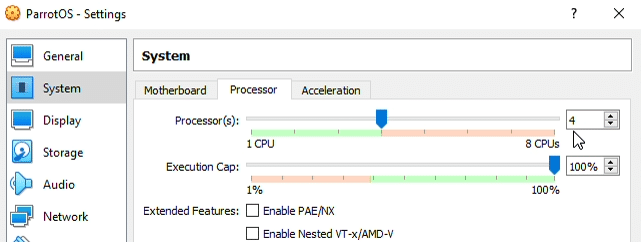
Next, under ‘System,’ select the ‘Processor’ tab. Below we want to have at least 2 CPUs available, and we’re going to select 4 CPUs.

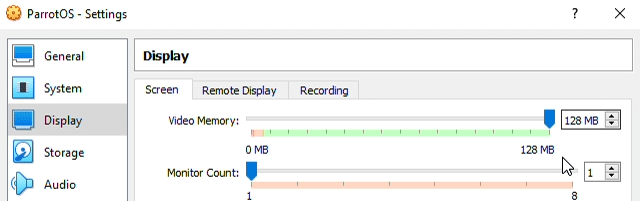
In ‘Display,’ under the ‘Screen’ tab, max the video memory to as much as you have available in the green space.

Under ‘Storage,’ navigate over to ‘Controller: IDE’ and click on the empty disc icon. Then over on the right, under ‘Attributes,’ click the disc icon next to ‘Optical Drive:.’ We can then select ‘Choose a disk file’ in the list. This is where you want to select your downloaded Parrot OS image file.

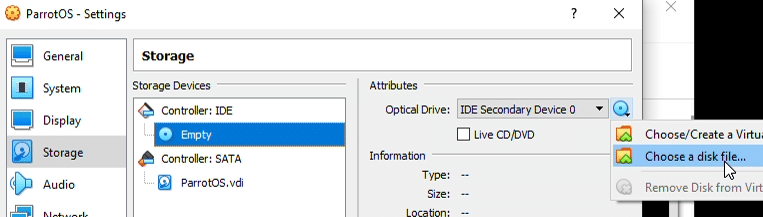
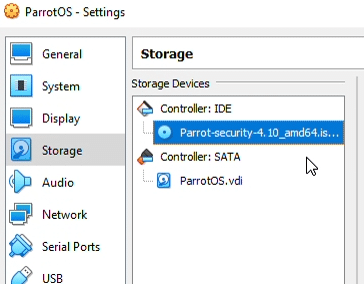
You should now see the image file loaded in the Storage Drives list

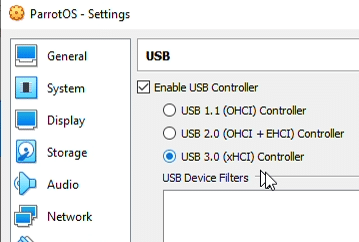
Last, Under USB, select ‘USB 3.0 (xHCI) Controller’ and click ‘OK’.

Now that our configuration for Parrot OS for VirtualBox is complete, we can launch it and move on to the operating system setup.
Operating System Setup for Parrot OS VirtualBox
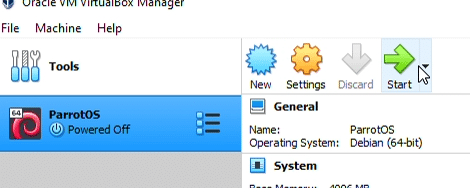
To Start the Parrot OS virtual machine, select it from the list on the side and click on the ‘Start’ button

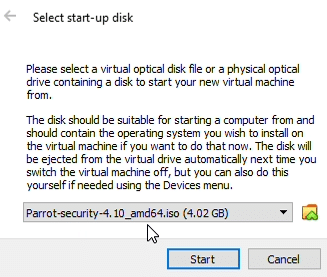
A prompt will pop up, ‘select a start-up disk.’ Ensure that the Parrot OS is picked in the drop-down list, and click the ‘Start’ button.

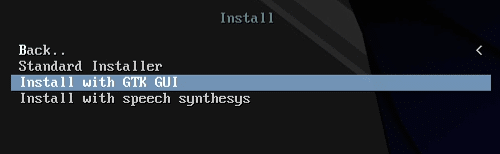
In the next list, we want to select ‘Install’ with your cursor keys and then hit enter


Here we want to select ‘Install with GTK GUI’ and hit the enter key.

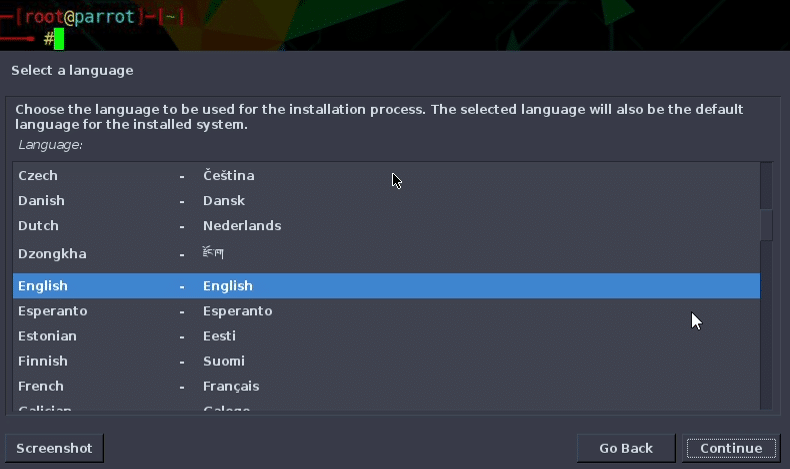
At the Select A Language window, choose your language and click continue.

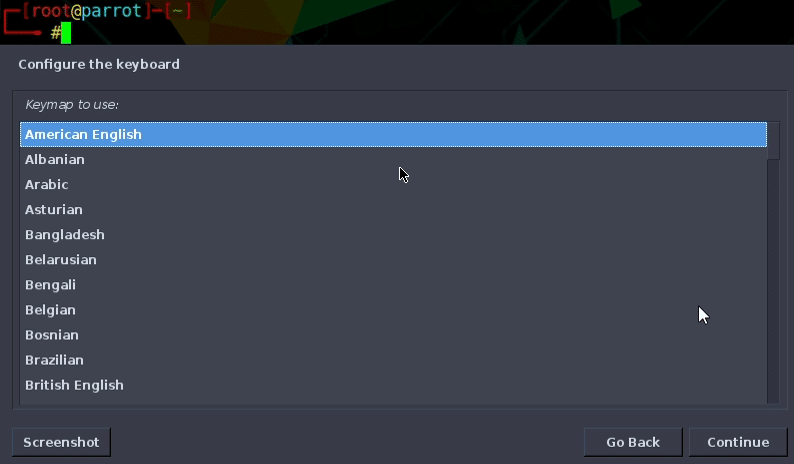
Select your keyboard preference and click on continue.

The loader will install components now, and once finished, and it will prompt you to set a ROOT password. The root account is an admin level account for your system and should have a secure alphanumeric password. Then click continue.


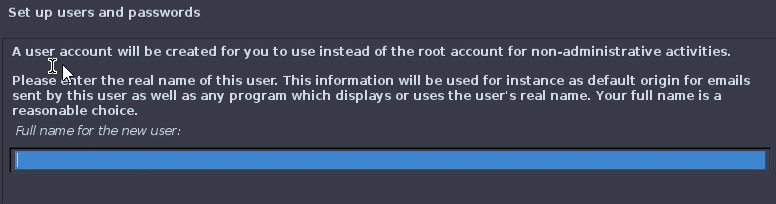
The next step is to create a username and a password. This user is used for regular daily tasks and is also the primary user account.
Again, select a username of your preference but a secure password, then click on continue.

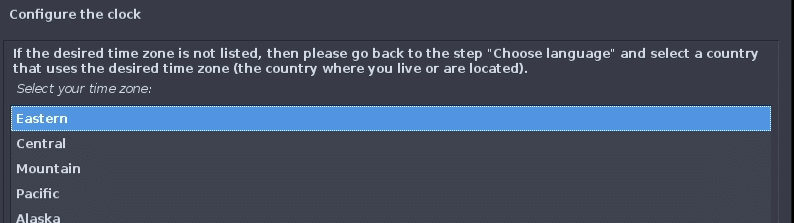
Configure the clock by selecting your time zone, and click continue.

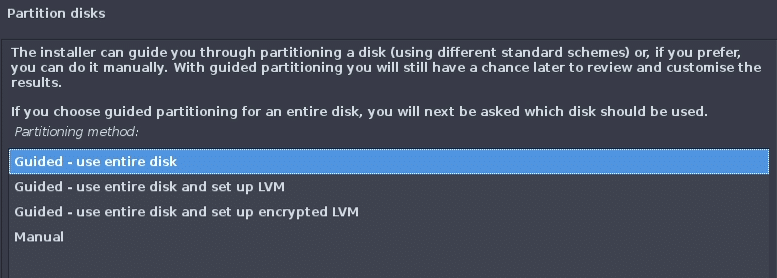
In Partition disk, select ‘Guided – use entire disk’

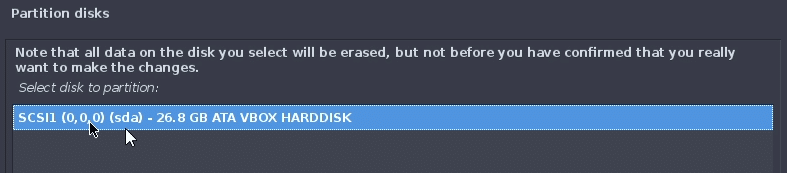
Next, select the only disk partition available

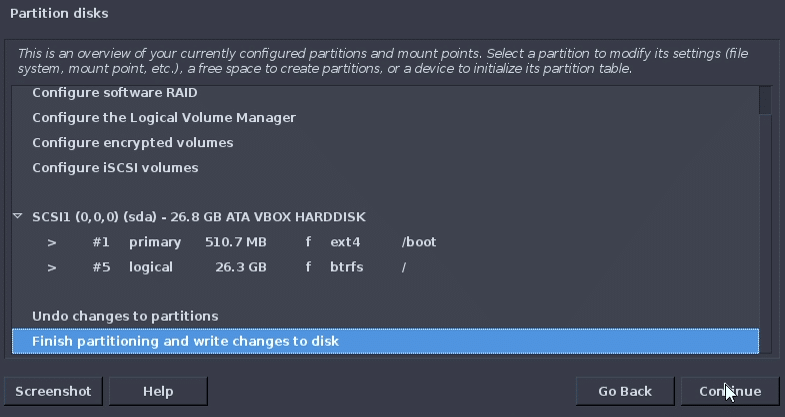
Next, select ‘Finish partitioning and write changes to disk’ and click on continue.

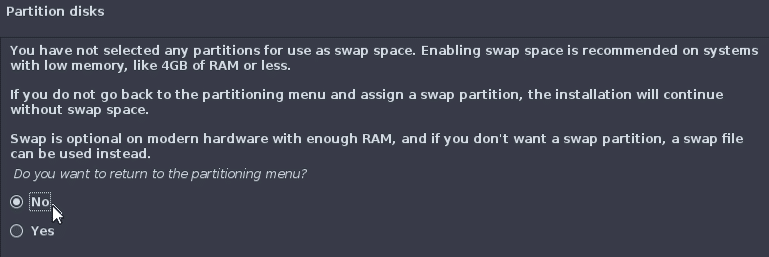
When asked ‘Do you want to return to the partitioning menu’ select NO
and click on continue.

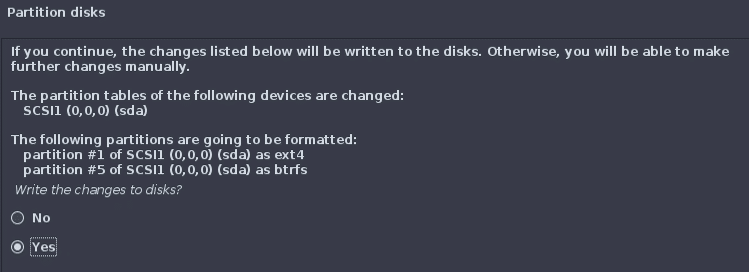
For ‘write changes to disk?’ select YES, and click on continue.

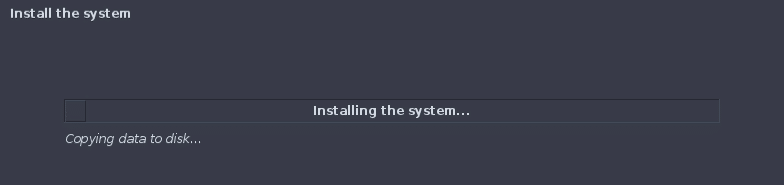
Now all data will start to copy over, and this may take some time.

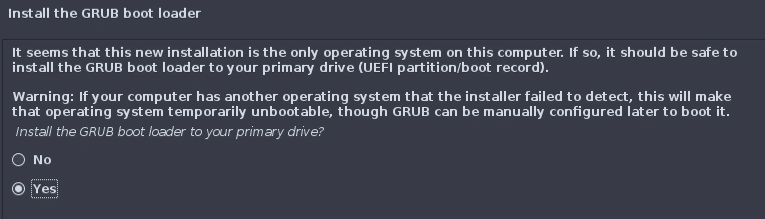
‘Install the GRUB boot loader’ select Yes and continue.

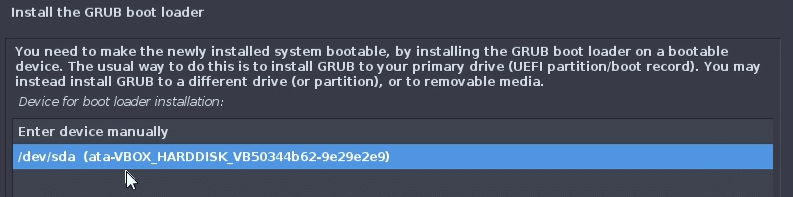
‘Install the GRUB boot loader’ is next. There should only be one active drive in the list, select it and continue.

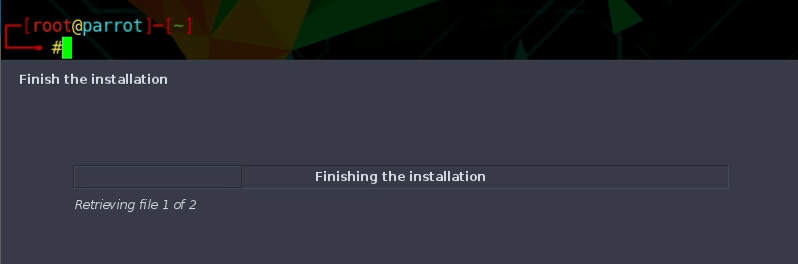
Now the the finishing touch will be copied over.

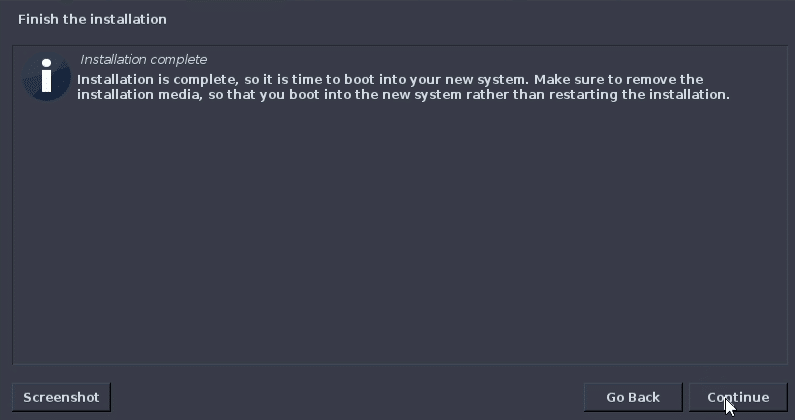
You will be notified that the installation is complete, and a reboot must take place. You can click on continue and let the virtual machine restart.

If you have any issues with the reboot, completely close and power down the virtual machine, and the start it back up.
Launch Parrot OS on VirtualBox for the first time
When booting up Parrot OS on VirtualBox for you first see a GRUN menu. By default, ‘Parrot GNU/Linux’ is select. We will keep this option and hit enter. If you do not select anything, it will automatically proceed with this option in five seconds.


Next the loading screen will appear as the operating system starts up.

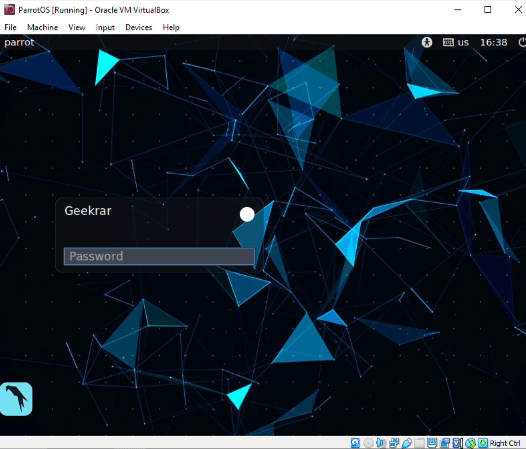
When complete, you should see a sign in screen where you will enter the username and password created during the setup.

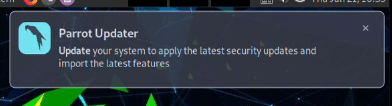
When you are first at the desktop there will be a prompt to make an update. This will ensure you have all the updated files on your system. Updates can take some time to preform, but we strongly suggest this done right after the installation.

Congratulations! You are now at the desktop of a complete installation for Parrot OS VirtualBox.

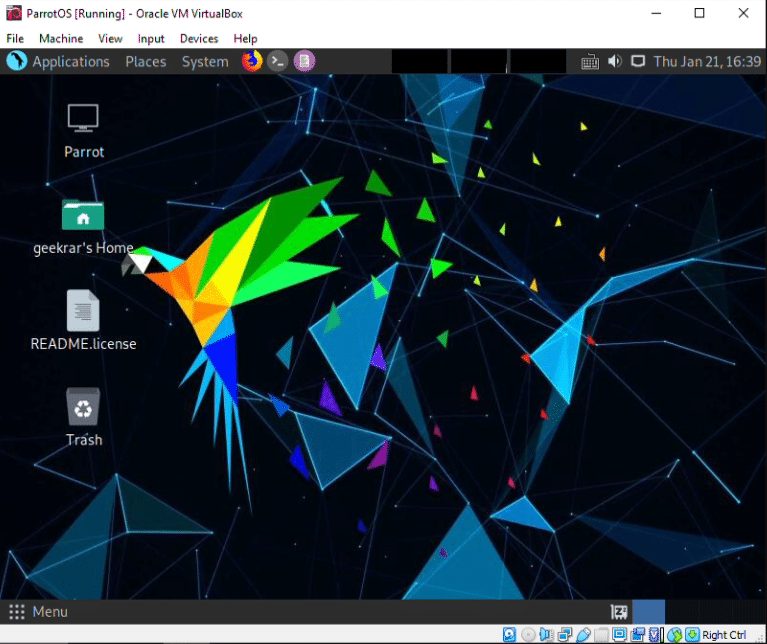
You can immediately start running tasks and using the tools provided in Parrot OS. One additional step is adding the Guest Additions package. This package will allow you to expand your screen size to full-screen mode and copy and paste files from your desktop directly to this virtual machine.
Visual Step by Step Guide – How to Install Parrot OS for VirtualBox