

In this post, we will show you the best and quickest way to Install macOS Monterey on VirtualBox on Windows – PC. We hope you will read all of this and give us your opinion.
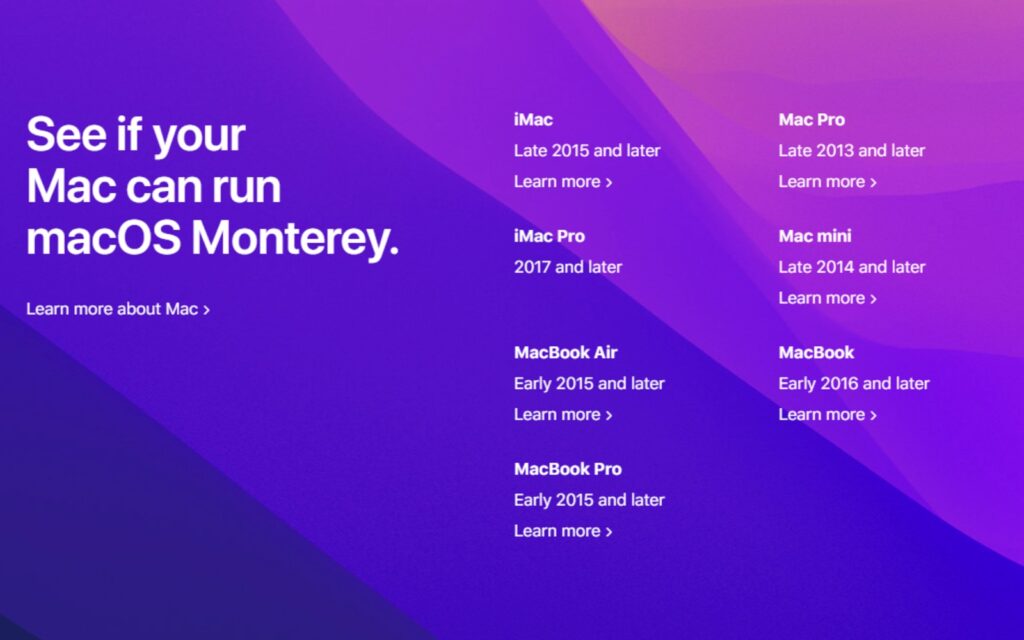
Monterey seems to be a drastic improvement and from what I can tell, it will be well worth the wait. According to Apple, only MacOS Monterey (macOS 12) supported devices are listed in this screenshot.
Ensure that virtualization is enabled by default in your BIOS. It should be listed as Virtualization, so remember to check and make sure it’s on. If it’s not on you will get the Failed to Open Session For The Virtual Machine error. You can read this guide- How to Enable Virtualization in Windows 11? Easy Guide
What you need for this installation:
– Windows 10
– 4 GB RAM (8 GB recommended)
– 80 GB of free disk space (150 GB recommended)
– CPU: 2 Cores ( 4 recommended)
– VirtualBox Windows and Expansion Pack (found here)
– macOS Monterey ISO file (found here)
– A VirtualBox command file (download here)
Conclusion: Many users are reporting their system virtual machines are slow when running Monterey, so using a SSD will be the best way to solve this problem for now. Ensure you max out the available RAM and CPU cores to help run smoothly.
Table of Contents
Install macOS Monterey On Virtualbox On Windows: Complete Guide
Please Note: All image files are created only for educational purposes. Any misuse of any files is not our responsibility.
Before you start installing Macos Monterey On Virtualbox On Windows. Download the following files.
- Download VirtualBox and VirtualBox Extension
- Download macOS Monterey (macOS 12) ISO Image
- Download command file
Once you have downloaded these files. Let’s start with the installation of macOS Monterey On Virtualbox On Windows.
Step 1: Install VirtualBox and Extension Pack
VirtualBox and the Extension pack are needed for a successful installation of macOS Monterey. You can follow this guide or watch the video tutorial to walk you through all the steps. The Windows 10 is used in this installation, but the steps are similar for Windows 11.
Step 2: Configure your Virtual Machine to Install macOS Monterey On Virtualbox On Windows
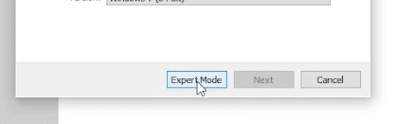
Here you will be creating the Virtual machine where the macOS Monterey will be booting from. Open the VirtualBox and click new, then select expert mode.
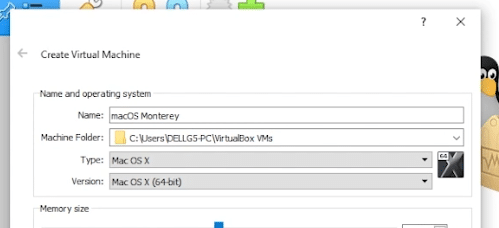
Provide a name for the virtual machine in the Name field, and you can leave the Machine folder location as the default path. The Type will be macOS OS X and the Version field below will be “macOS X 64-bit“. This should automatically populate.
Now we need to allocate RAM for the VirtualBox. I will go with 8 GB, which is recommended amount. Below in Hard disk, select create a virtual Hard disk now and click Create to generate the VM.
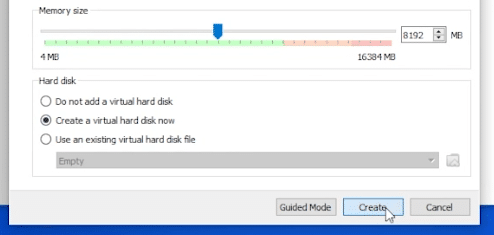
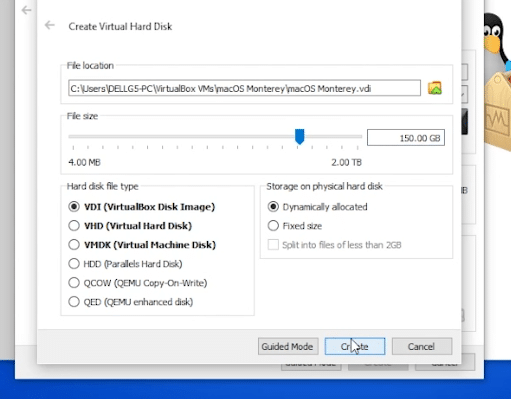
Next, specify the file location to save the Virtual Hard Disk, you can leave it as default. Provide the amount of storage for the virtual machine, we’re doing 150GB but the minimum amount is 80GB. Choose VDI (VirtalBox Disk Image) as the Hard disk file type, and for Storage on physical hard drive, leave it as Dynamically allocated. Then click the Create button to complete this step.
Step 3. Modify macOS Monterey Virtual Machine Settings
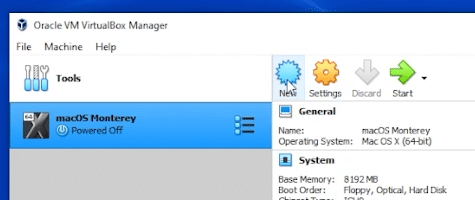
For this virtual machine to run properly the below set of instructions are critical to follow. Ensure you dont skip any of the options. After you create a Virtual machine, you’ll be back at the main page of VirtualBox.
Select the virtual machine we just created and click “Settings“.
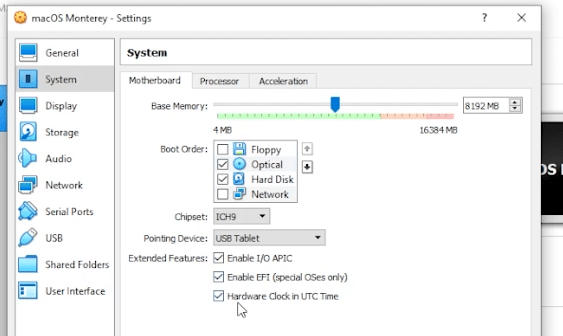
Go to the System tab, uncheck the floppy drive since its not being used. Then make sure that the Extended Features are selected. The other settings can remain as default.
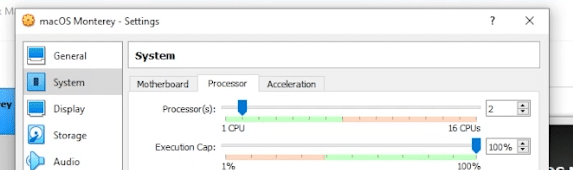
In the Processor tab, ensure you have at least 2 CPUs selected. The more you provide, the better, but stay within the green space.
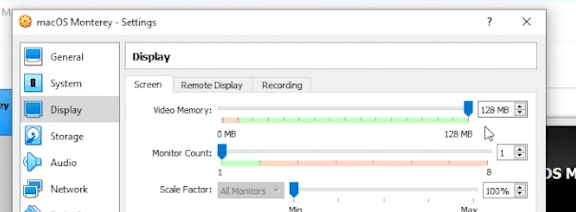
Select the Display menu below next, increase Video Memory to 128 MB and the rest remain as default.
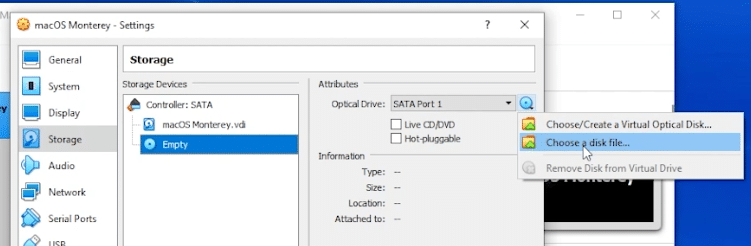
Click on the Storage menu. Click on the Empty disk icon, then on the right click on the CD icon and Choose a disk file.
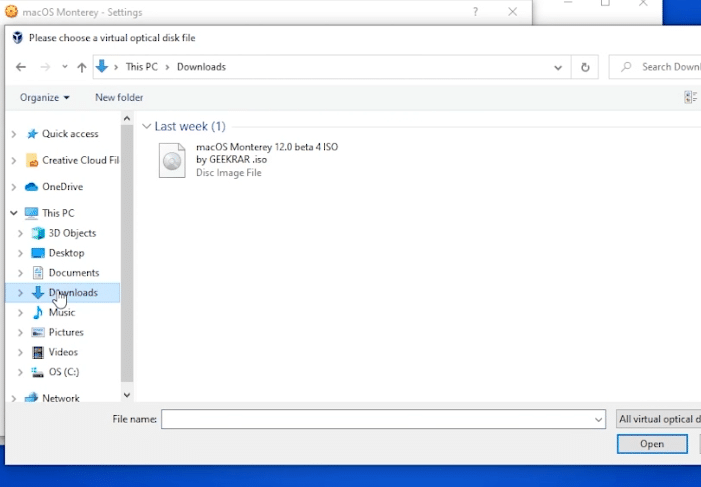
Locate your macOS Monterey ISO image file and click the Open button
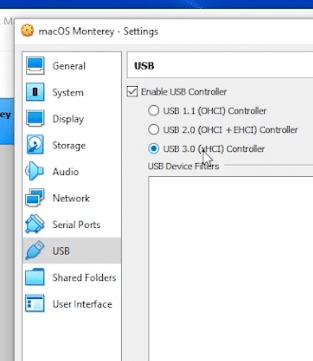
The last step is to go into the USB menu and enable USB 3.0. This allows the mouse and keyboard to run smoothly. This feature is activated after installing the VirtualBox Extension Pack. Click ‘Ok’ button and completely exit out of the Oracle VM VirtualBox Manager.
Step 4. Running VirtualBox Commands
This step is to convert the virtual disk we just created by using VirtualBox commands for macOS. Without these changes to the VituralBox configuration files, the virtual machine will boot up properly. To avoid this, run each individual command, one by one.
Caution: Ensure you know the name of the virtual machine before continuing.
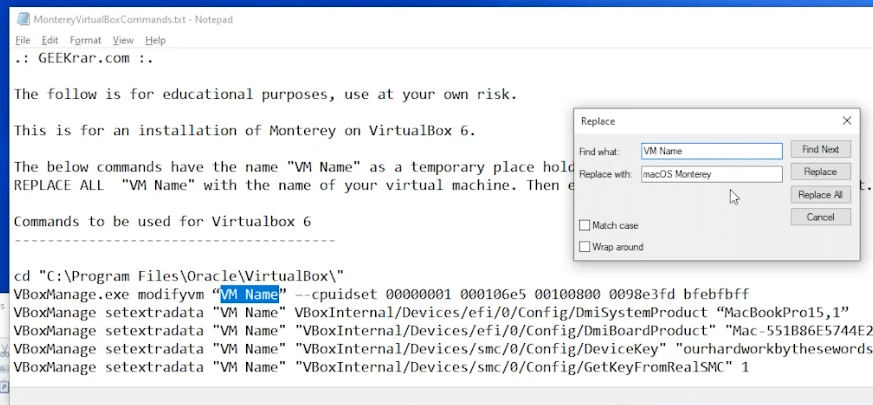
Copy VirtualBox Commands below, or download it from here for easy editing.
| cd “C:\Program Files\Oracle\VirtualBox\” VBoxManage.exe modifyvm “VM Name” –-cpuidset 00000001 000106e5 00100800 0098e3fd bfebfbff VBoxManage setextradata “VM Name” VBoxInternal/Devices/efi/0/Config/DmiSystemProduct “MacBookPro15,1” VBoxManage setextradata “VM Name” “VBoxInternal/Devices/efi/0/Config/DmiBoardProduct” “Mac-551B86E5744E2388” VBoxManage setextradata “VM Name” “VBoxInternal/Devices/smc/0/Config/DeviceKey” “ourhardworkbythesewordsguardedpleasedontsteal(c)AppleComputerInc” VBoxManage setextradata “VM Name” “VBoxInternal/Devices/smc/0/Config/GetKeyFromRealSMC” 1 |
Edit the commands in notepad. Select File, then Edit and then Replace. For the replacement field, change VM Name to that of the Virtual Machine Name you created. In my case, I called it acOS Monterey’
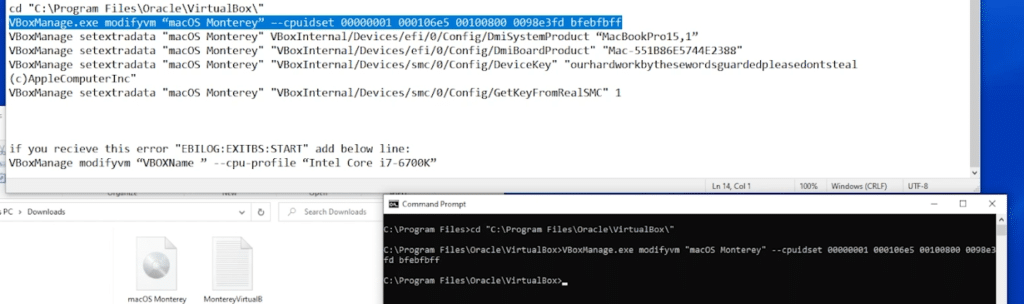
Next, open the command prompt (Start -> Run -> CMD). Run as administrator to make sure you have the file access needed. Now and copy and paste the following lines one by one. One more thing; if you get any error, double-check your inputs before restarting the process.
Step 5. Installing macOS Monterey on Virtualbox on Windows
All the preparations for macOS Monterey have been completed for VirtualBox. We can finally start the installation of the operating system.
Open the Oracle VM VirtualBox Manager, and select the virtual machine on the left, and click the start button. This will launch the virtual machine, and you will see a black screen with white text scrolling up.
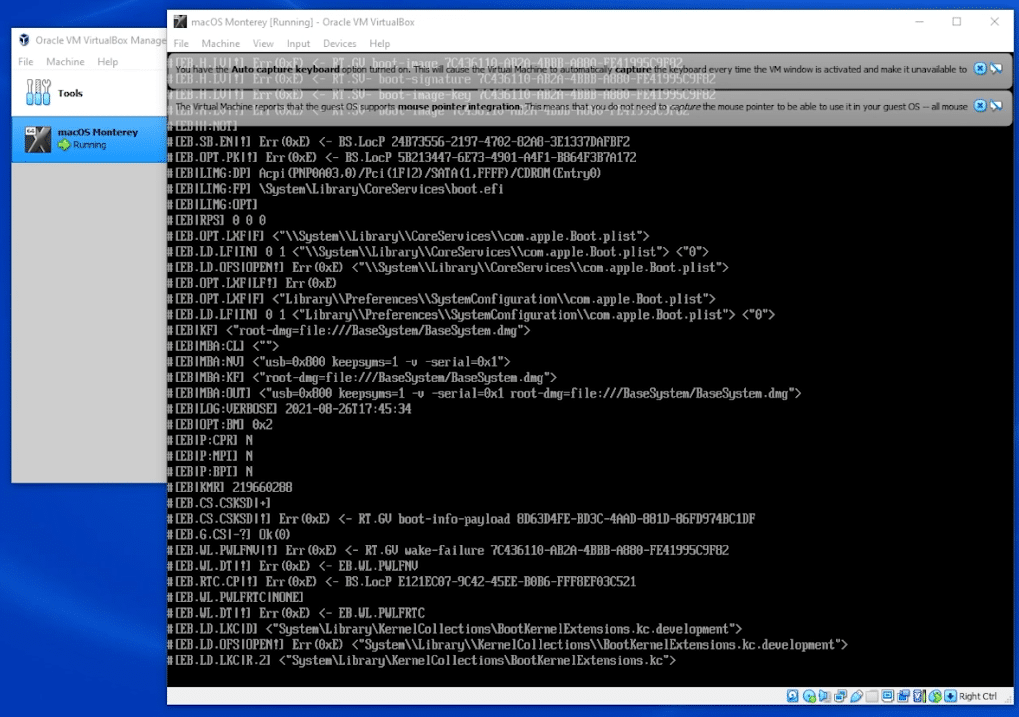
The initial start may take a few minutes to run. The first option you will be prompted is to choose your language of choice.
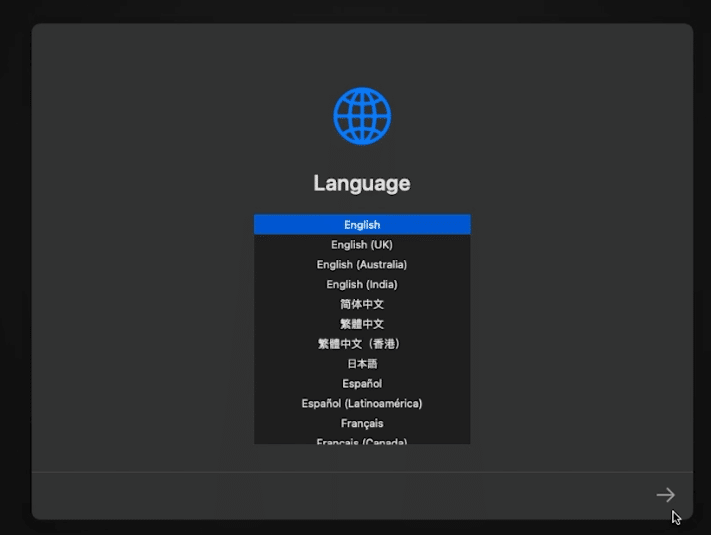
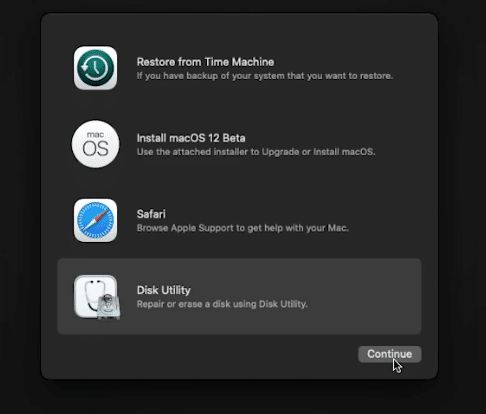
To install macOS Monterey (macOS 12) on your VM, you first have to partition the Storage. For that, you have to go to the Disk Utility and click Continue.
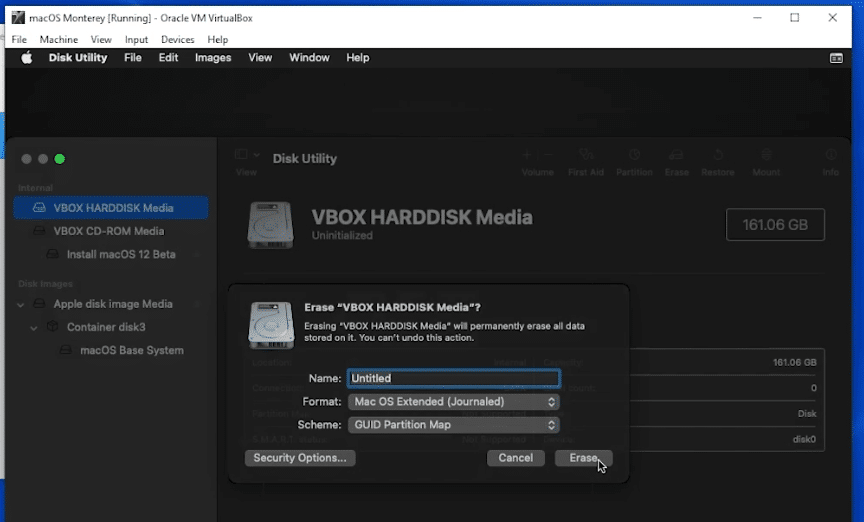
On the left select the VirtualBox hard disk media, then click the Erase button to the right. Name can be left as default, but select Mac OS Extended (Journaled) as the format. Click Erase.
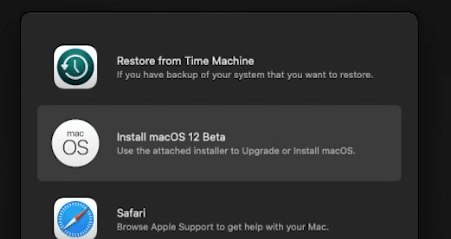
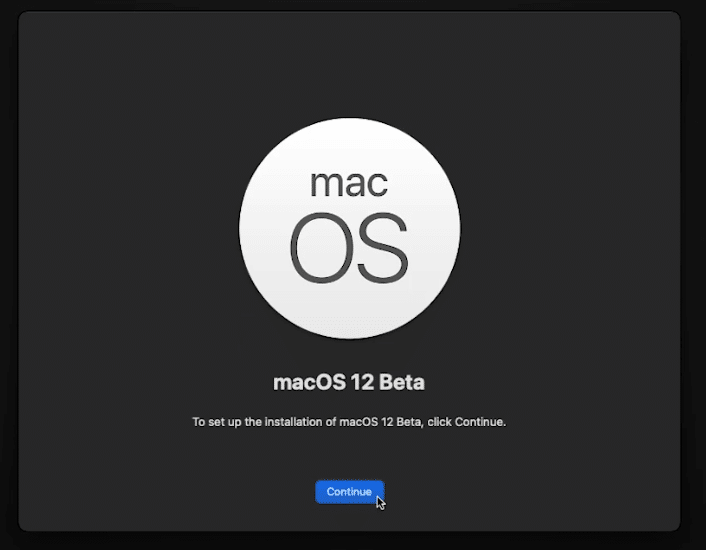
Quit Disk Utility, in the main menu select the Install macOS 12 Beta and continue.
From here on you can install macOS Monterey with your personalized settings.
A few things to note. iCloud services and Siri are not functional in VirtualBox. There are a few work arounds, but its very inconsistent. I do not recommend activating those feature when you install the operating system. For a complete walkthrough of all the steps, including the full installation of macOS Monterey, see the below video with all the instructions done step by step.


Everything I have tried, including using the non-beta version, reboots due to panic when I try to set up Monterey…
Im using AMD processor and I had error when I was booting machine:
ERR_CPUM_DB_CPU_NOT_FOUND
I fixed it by adding 2 more lines to cmd commands:
VBoxManage modifyvm “macOS Monterey” –cpu-profile “Intel Core i7-2635QM”
VBoxManage.exe setextradata “macOS Monterey” “VBoxInternal/Devices/smc/0/Config/GetKeyFromRealSMC” 0
First command doesn’t work
C:\Program Files\Oracle\VirtualBox>VBoxManage.exe modifyvm “MacOS Monterey” –-cpuidset 00000001 000106e5 00100800 0098e3fd bfebfbff
VBoxManage.exe: error: Could not find a registered machine named ‘“MacOS’
VBoxManage.exe: error: Details: code VBOX_E_OBJECT_NOT_FOUND (0x80bb0001), component VirtualBoxWrap, interface IVirtualBox, callee IUnknown
VBoxManage.exe: error: Context: “FindMachine(Bstr(a->argv[0]).raw(), machine.asOutParam())” at line 630 of file VBoxManageModifyVM.cpp
You need to replace the VM name with the name you have kept.
Thanks
after I unzip it I got a folder instead of a single iso file, how to solve it?
Use this file:
https://www.mediafire.com/file/4fcx0aeoehmbnmp/macOS+Monterey+by+Techrechard.com.iso/file
How can i combine 3 iso file into one?
Here:
https://youtu.be/mN-xGG2nhQY
Hi, Is some way to configure virtualbox to run Icloud services?
Thank You!
Hi, I have an AMD Ryzen 3 3200G desktop, on an Asrock A320-HD mobo, with 12 Giga of RAM, without external video card, it uses 2 Gigas of RAM to run the GPU of the Vegas 8 video card.
1 NVME HD 512 Giga Adata Gammix, with Windows 11 installed.
My ISO: macOS Monterey by Techrechard.com.iso version 12.1
Installation stopped at:
#[EB.CSR.F|!] Err(OxE) <- RT.GU csr-active-config 7C436110-AB2A-4BBB-A880-FE41995C9F82
#[EB|CSR:OUT] 0x00000000
#[EB.BST.FBS|+]
#[EB.BST.FBS|ADSZ] 0
#[EB.BST.FBS|KSSZ] 0
#[EB|SB:SBGMFNS] x86legacyap.im4n
#[EB|RH:pF] usr\standa1one\OS.dmg.root_hash
#[EB|RH:MF1
#[EB.LD.LF|IN] 0 1
#[EB.LD.OFS|OPEN!] Err (OxE)
#[EB.RH.LRH|P!] Err(OxE) <- EB.LD.LF
#[EB.BST.FBS|!] Err(OxE) <- EB.RH.LRH #[EB|LOG:DT] 2022-01-18T02:17:08
#[EB|LOG:EXITBS:START] 2022-01-18T02:17:08
What happened?
you’ll have to spoof the CPU. This is common with AMD processors. Try this out https://youtu.be/r2mboo9Xsvw
Hi, On a Linux host I run Virtualbox 6.1.30.
To install guest OS: macOS Mojave I need your virtualbox_boot_image-geekrar, otherwise the boot stops at the UEFI boot manager. Mojave installs and runs fine.
However, the installer of Monterey (macOS 12 beta4) constantly crashes with at different/random locations in the installer. The onscreen log says a panic has occurred.
Has anybody experienced this problem and know a workaround?
yes, the beta of monterey runs bad for a lot of people. try using the release canadiate. I just did in installation of it on vb (see here), and you can get a copy here.
VBoxManage setextradata “Type Your Virtual Machine Name Here” “VBoxInternal/TM/TSCMode” “RealTSCOffset””
put that in the code part to set up the virtual machine and it seems to fixe the proble on a win10/11 x 64
Yes, this does seem to solve the issue!