


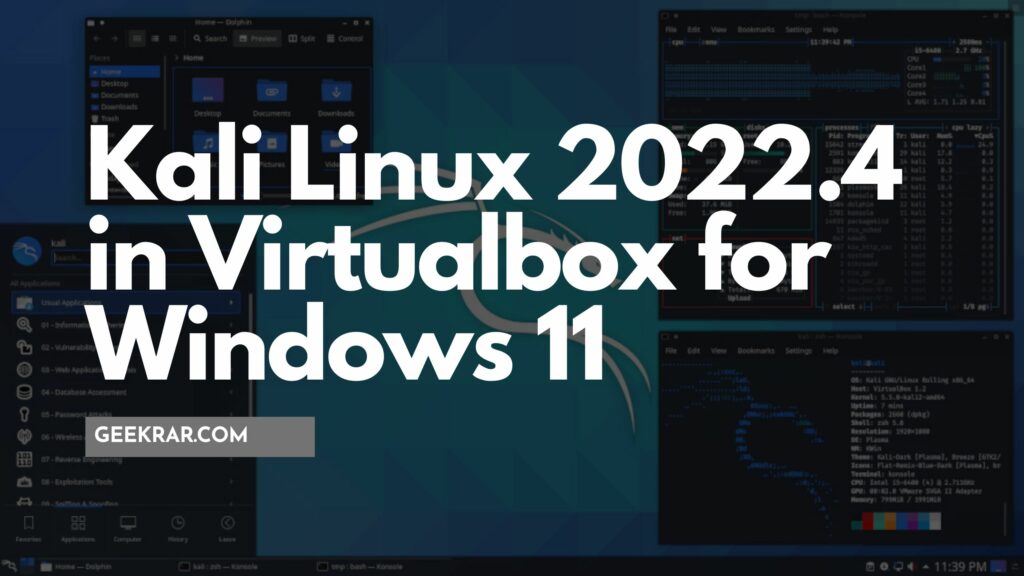
In today’s article, we will learn how to install Kali Linux version 2022 four in VirtualBox on a Windows 11 PC.
Kali Linux is a Debian-derived Linux distribution designed for digital forensics and penetration testing. It is maintained and funded by Offensive Security Ltd.
It comes preinstalled with numerous penetration-testing programs, including nmap (a port scanner), Wireshark (a packet analyzer), John the Ripper (a password cracker), Aircrack-ng (a software suite for hacking wireless networks), Burp Suite and OWASP ZAP (web application security scanners). Kali Linux includes over 300 open source tools, more than any other penetration testing distribution. It is the first such distribution to include all of the Metasploit Framework tools. The majority of the software it includes is free, while the rest can be downloaded from within the Debian package manager.
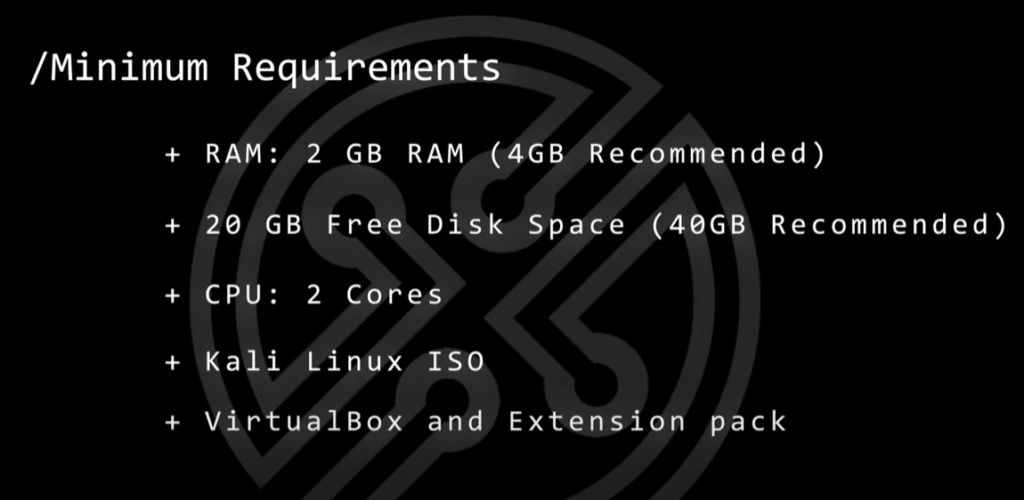
Before we get started, let’s take a look at the minimum requirements:
- The lowest that you can have is 2GB Ram. 4GB is recommended for proper installation.
- You can want at least 20GB of hard disk space.
- Two CPU cores and,
- Kali Linux ISO image file
- VirtualBox and the extension pack.

Now let’s install Kali Linux 2022.4 in Virtualbox for Windows 11.
Table of Contents
Install Kali Linux 2022.4 in Virtualbox for Windows 11
So I’m at the desktop of my Windows 11 PC.
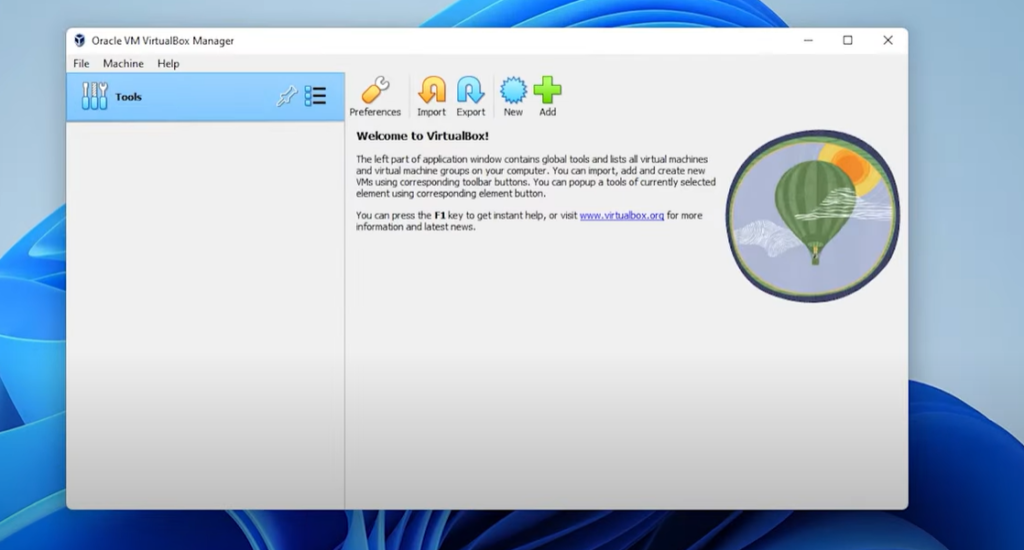
Step 1: Open up VirtualBox. This is VirtualBox version 7. If you haven’t installed this already, this is the latest version that’s out.

Step 2: So we have the Virtual Machine manager already open. What we need to do is get the ISO image file for Kali Linux. Go to this URL: Kali.org and click on the download link right over here and then we have the options for installer images in virtual machines.

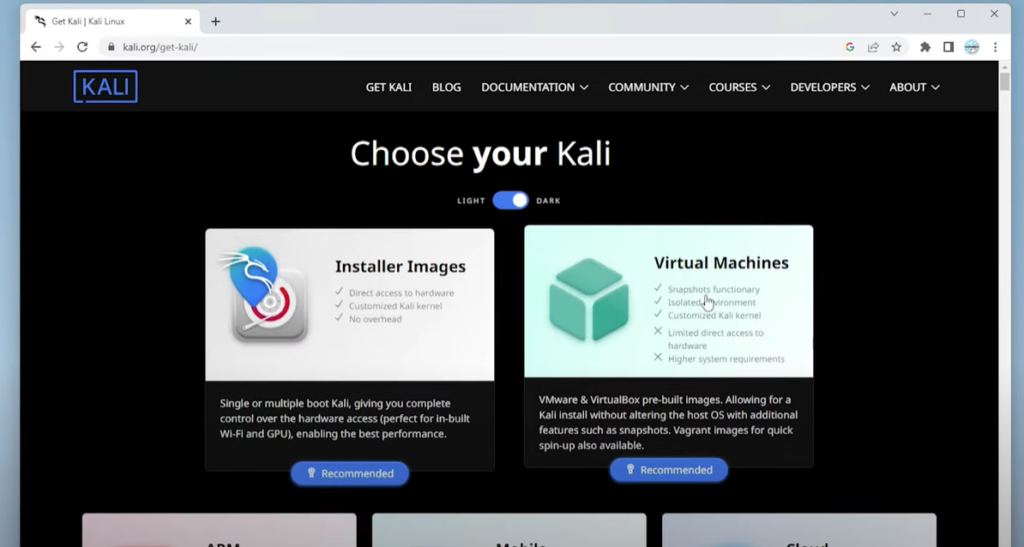
IMPORTANT: I get asked a lot, why don’t I use the virtual machine image? I have had a lot of issues getting this to run smoothly. That’s not to say that it doesn’t work. Maybe it’s something with my PC. But I’ve never had a problem using an ISO image. So that’s what we’re going to be doing today. I recommend using this step. If you want to go ahead and install the virtual image, go ahead and do that.
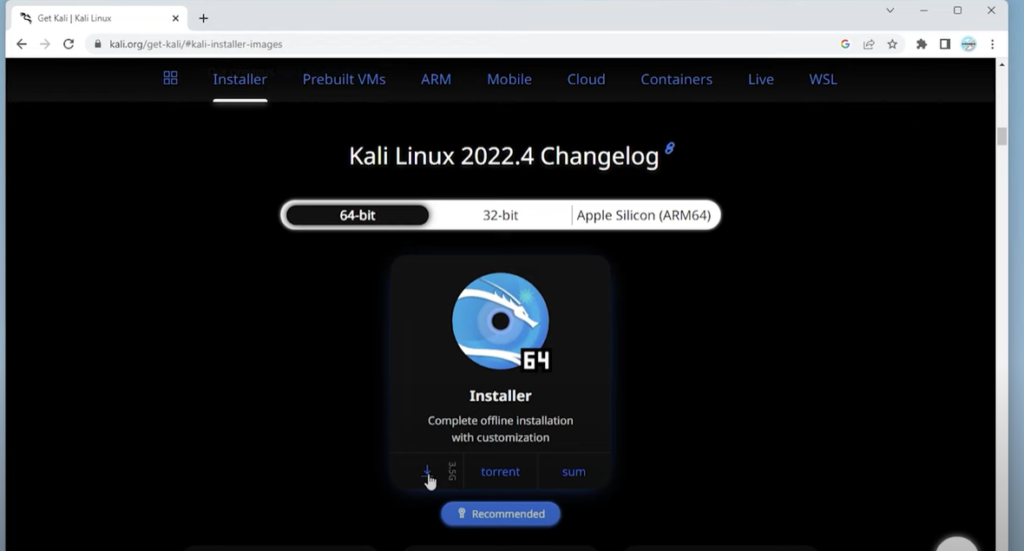
Step 3: So go ahead and click on this. It’s going to take us over to the Installer image section. And I’ll scroll down a bit here. And we have the latest version of Kali Linux, which is 2022.4. And I’m going to be downloading the 64 a bit. And you can see over here we have the installer image which is the ISO image file 3.5 GB. We’re just going to click on the link and let it download.

NOTE: All images that have been downloaded will be in my discord group. This is a private discord group that I have launched. Here is the link.
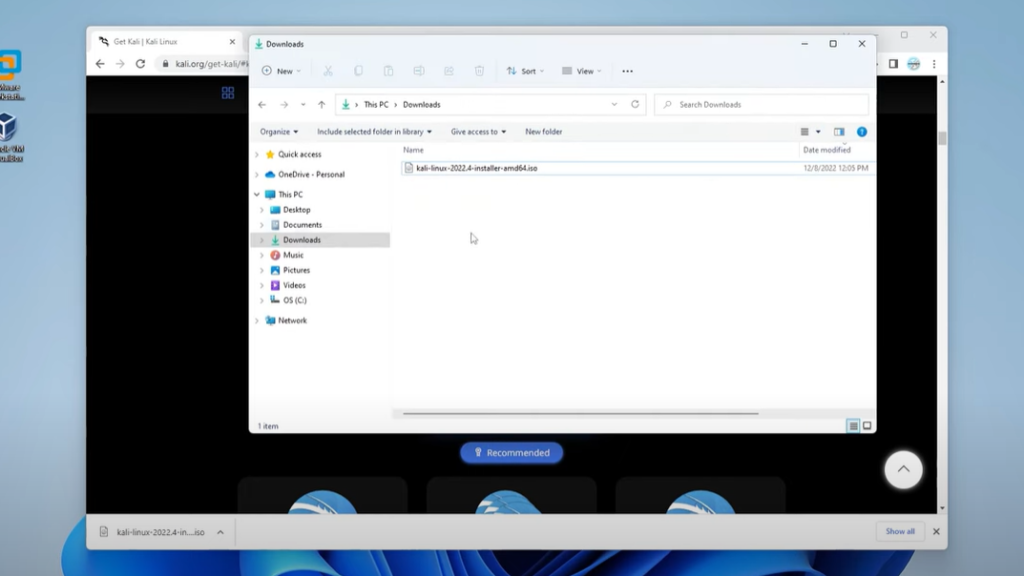
Step 4: Now the download is complete. So I’ll go to my Downloads folder folder right over here. You just want to make sure you know exactly where you downloaded it because we’re going to have to point to the folder in just a moment.
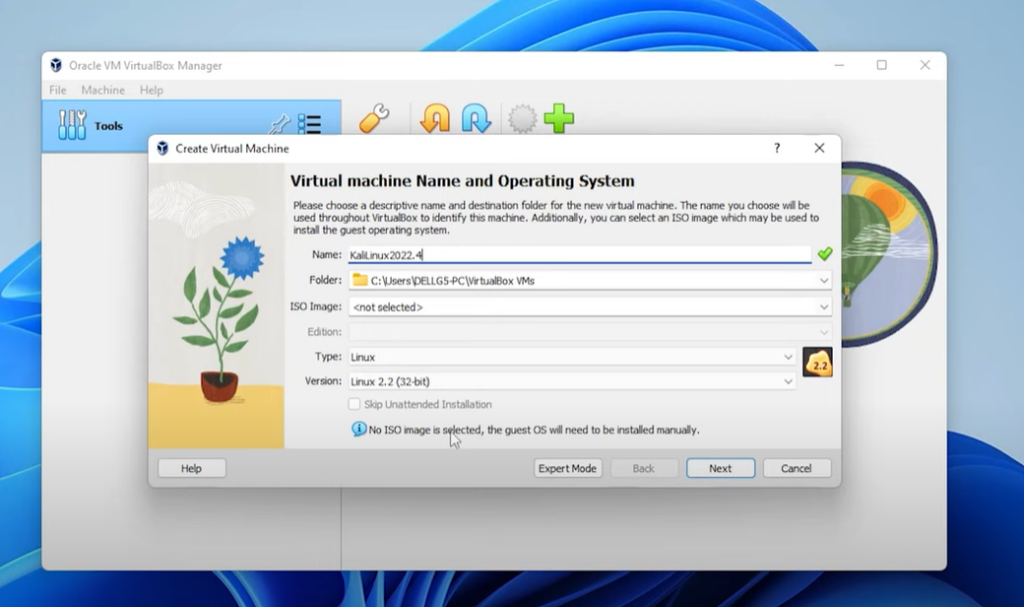
Step 5: Open virtual box manager. So the first thing we’re going to do is click on the new button because you’re creating a new image and we’re going to give it a name again. Just going to call it Kali Linux 2022.4. I’ll be leaving the folder as default. You can change that as well.

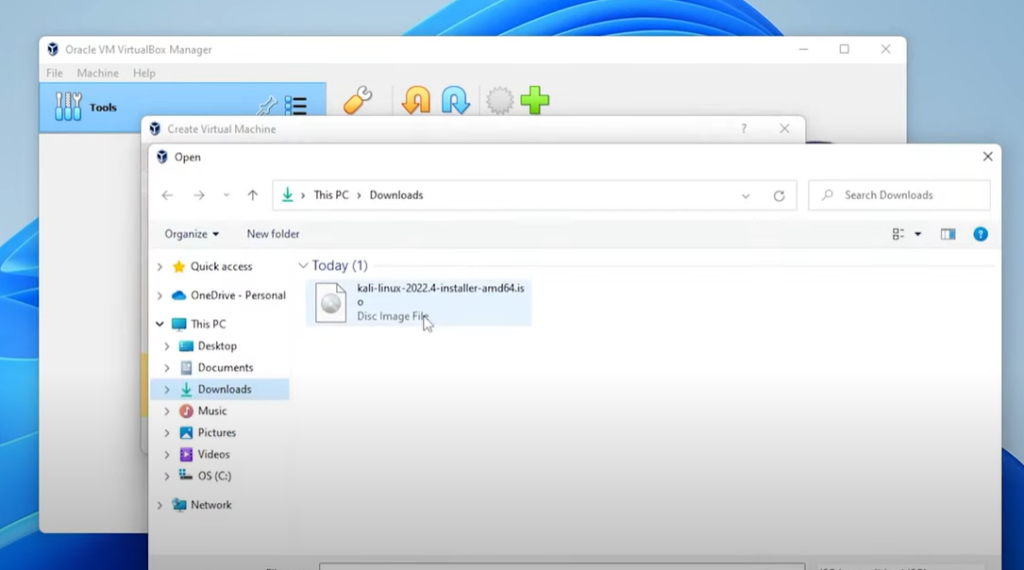
Step 6: Select the ISO image file. So click on the down arrow and click on the other button. And this is where you’re going to want to locate your ISO image file that you just downloaded in your Downloads folder. So go ahead and select that and then click on Open.

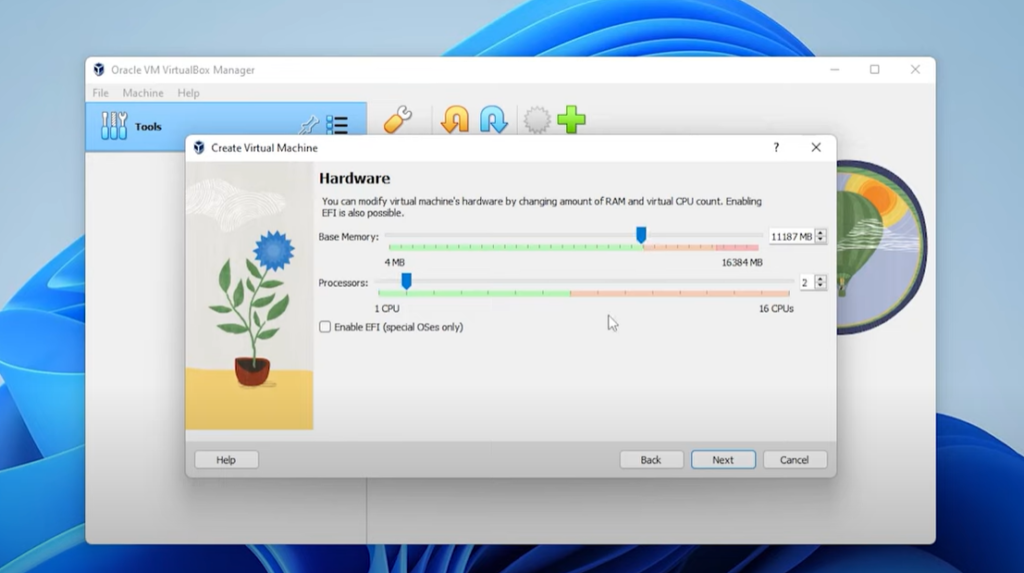
Step 7: Click on Next and for select at least 2GB Ram. Anything above this is going to be better and it’s going to run smoother. So I’m going to go ahead and max that inside this green space. And then for processors I recommend at least 2 CPU cores, but if you can max this out as well, it’s just going to run better for you.

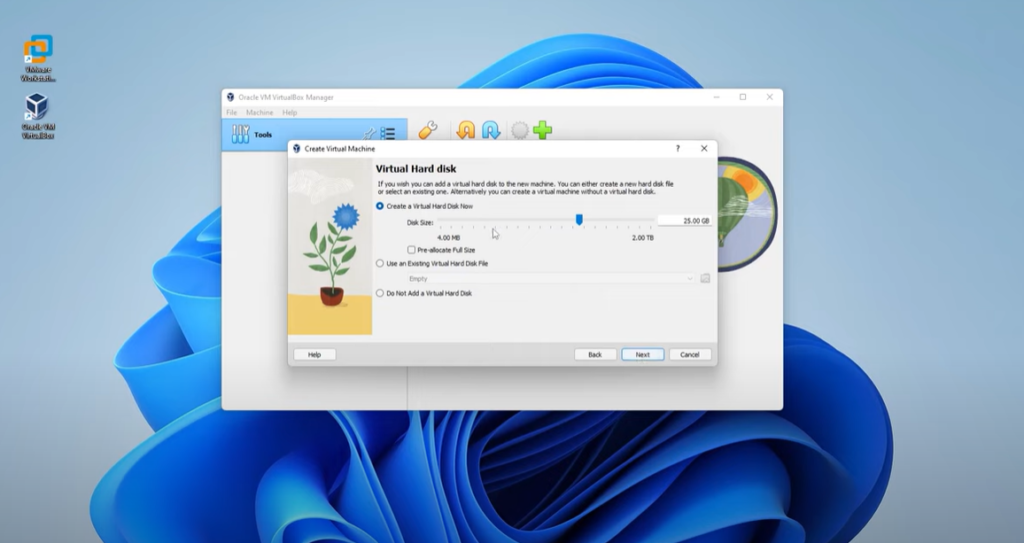
Step 8: Click on Next. For virtual hard disk space you’re going to need at least 20 GB. It has 25 as default, which is good.

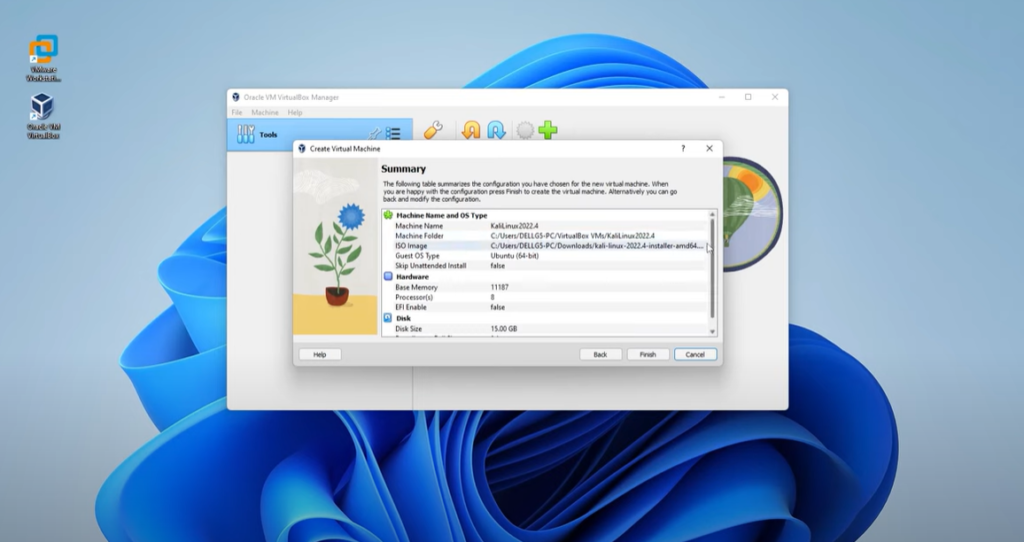
Step 9: Go ahead and click on Next and then we have a summary over here of everything that we have. This all looks good. We can go ahead and click on Finish.

Step 10: We’re just going to go into Settings and just do a few modifications. Click on the Settings button, then go to Display. The only thing that we’ll be adding in here right now is the video memory. We’re just going to max this out in the green space.


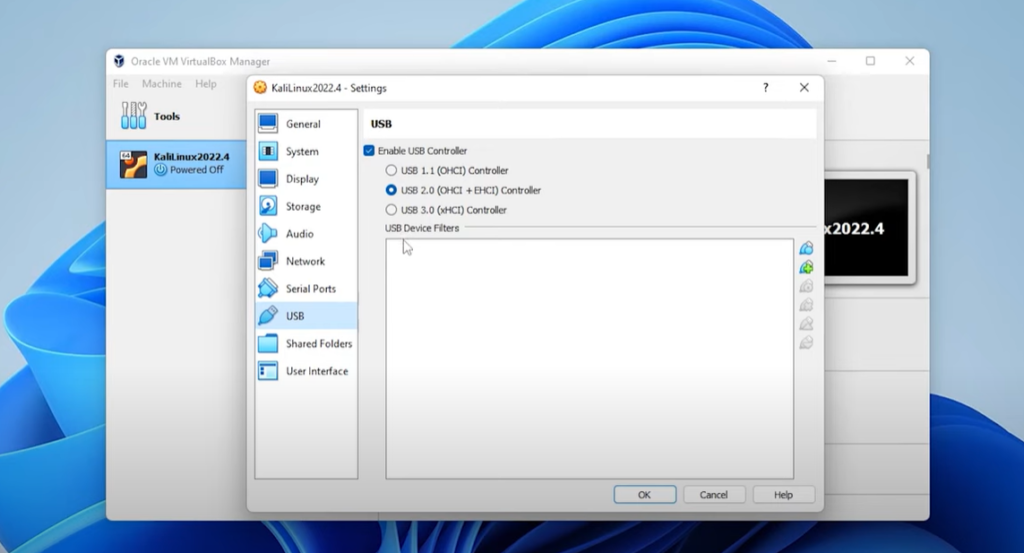
Step 11: And then if you go over to USB, some users, if you’re using different types of hardware like mouses and keyboards and you’re running into issues, you can select USB 3.0. I’m going to leave mine at 2.0 and then you can go ahead and click on OK.

Running Kali Linux 2022.4 in Virtualbox for Windows 11
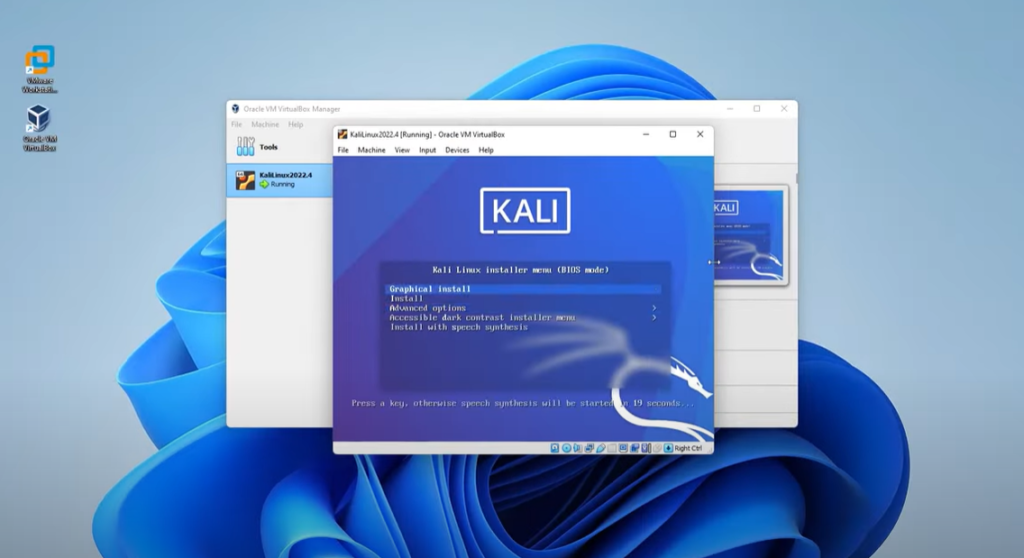
Step 1: And we’re ready to start the installation. So we want to make sure that the virtual machine over here is selected and then click on the Start button inside the menu. We have a bunch of options here. We’ll be selecting the graphical install so go ahead and select that and then hit Enter.

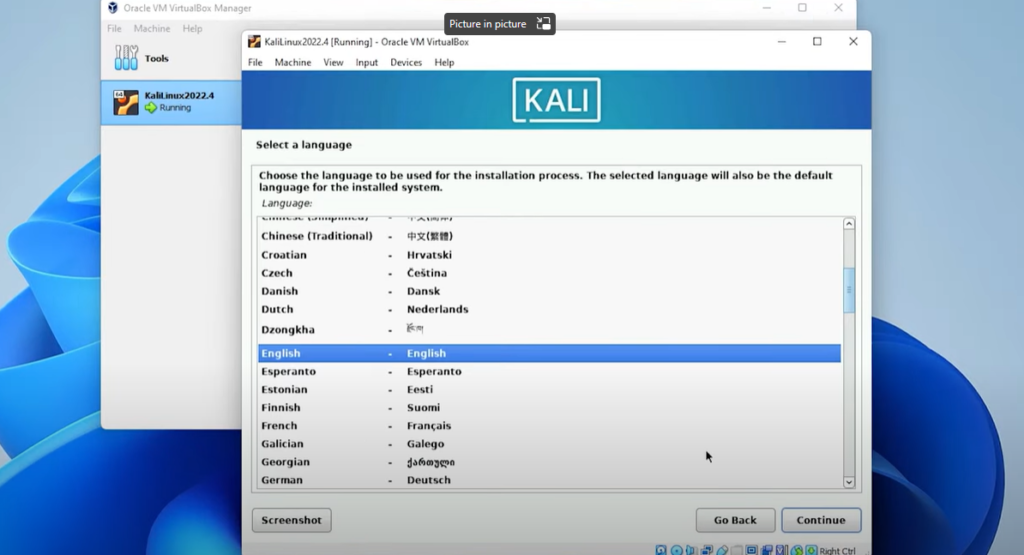
Step 2: And now we have the option to select the language. We’ll be leaving the default as English. We’ll be using mostly all default settings.
For the setup, click on Continue, select your location. I’m just going to leave mine as United States. Click on Continue and then American english is fine.

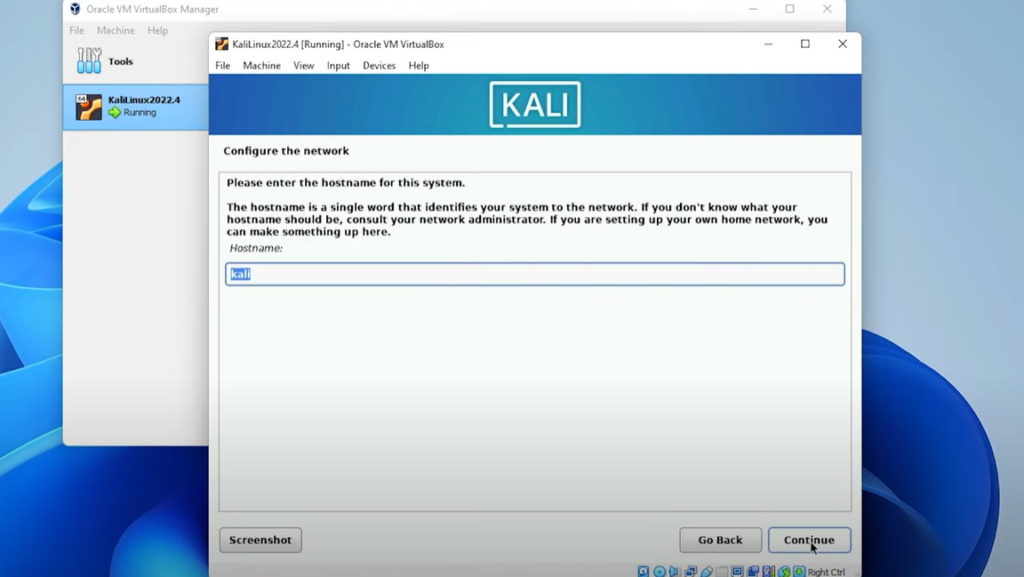
Step 3: For configuring the network, we have the hostname as Kali. You can change that to anything you want.

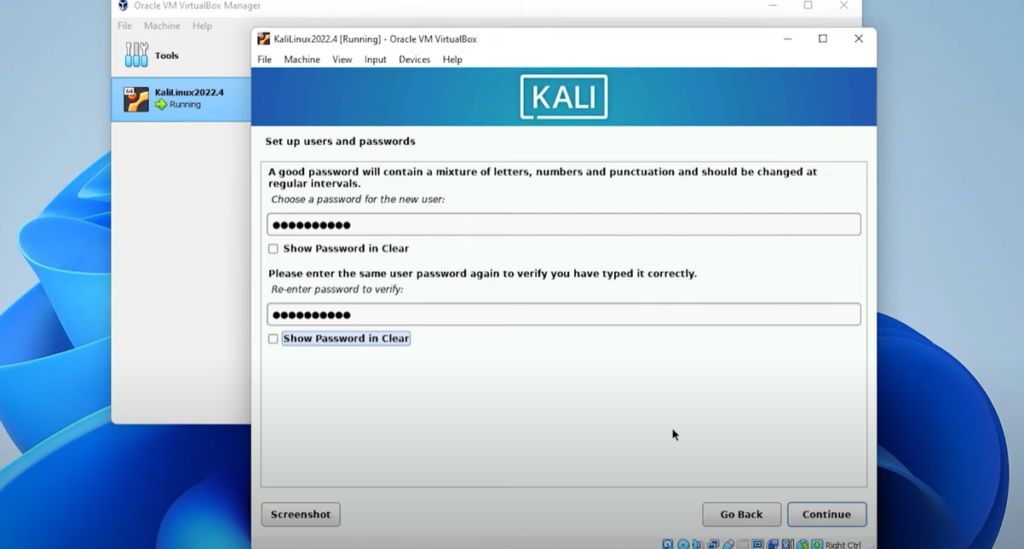
Step 4: I’ll be leaving everything as default. Click on Continue. For the domain name. I’ll be leaving blank. So for the full name, which is going to be any name that you want, and then click on Continue. Click on continue again. And now we can go ahead and type in a password. I always recommend having an alphanumeric password. Once you have that in there, you can go ahead and click on Continue.

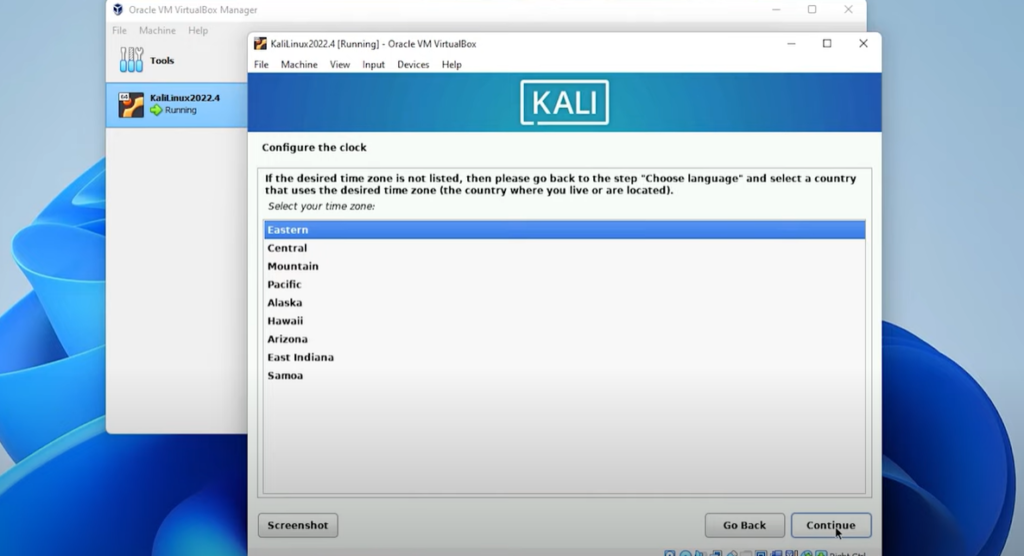
Step 5: Time zone is up next, configuring the clock. I’m going to leave mine in the Eastern time zone. Click on continue.

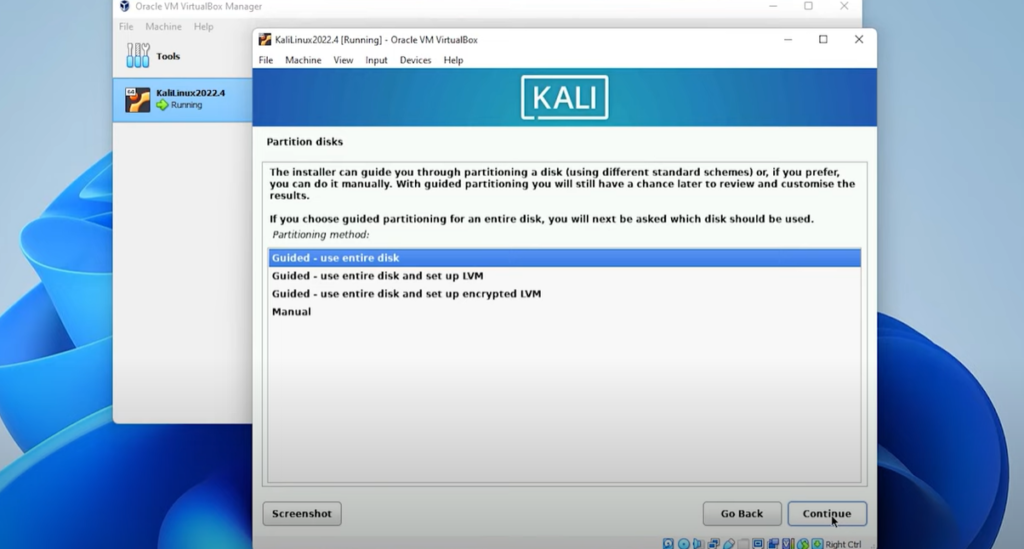
Step 6: Select Guided -Use entire disk. And we’ll have the default setting here.
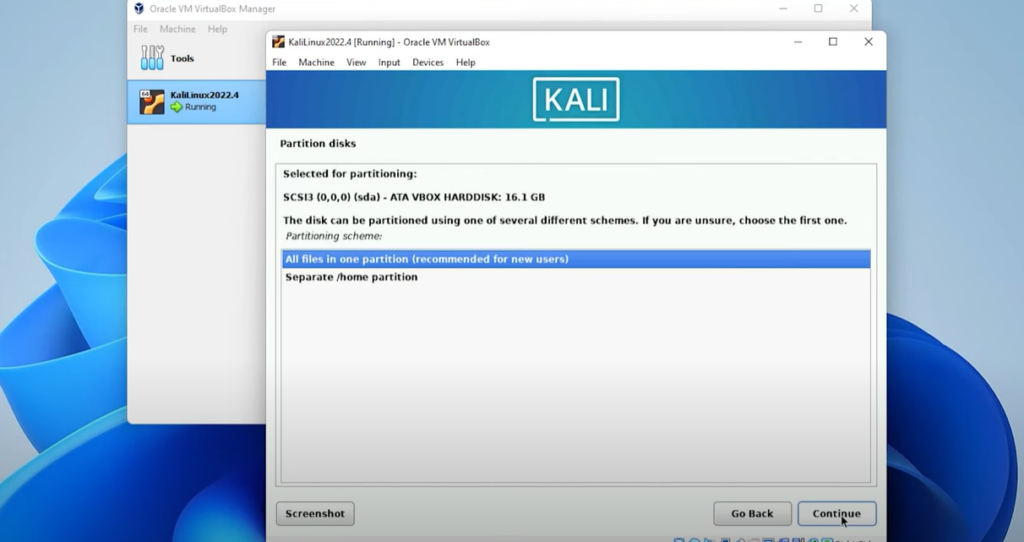
Step 7: Now select All files in one partition and click Continue.
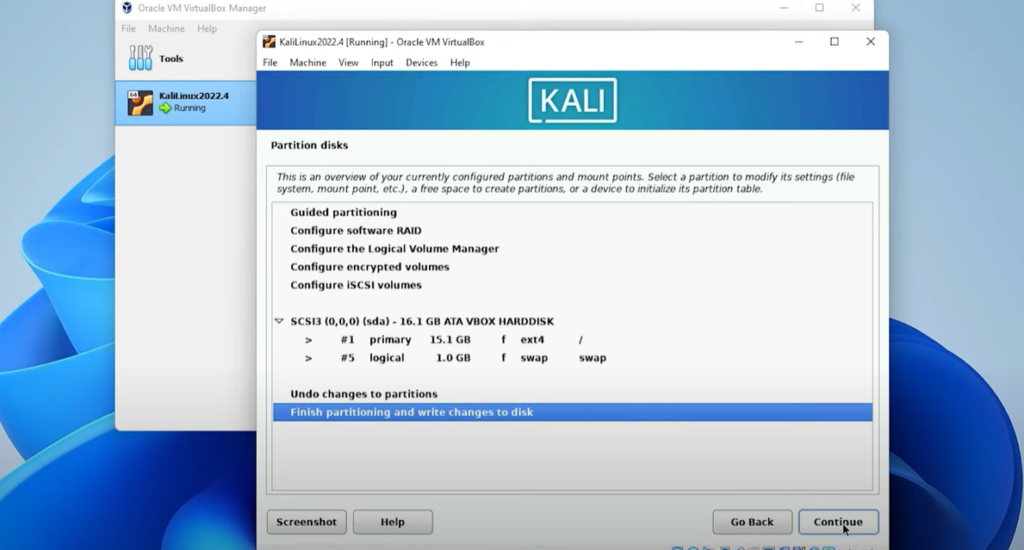
Step 8: And now we’re ready to finish partitioning and write Changes to Disk. We’ll make sure that’s selected and then click on Continue.
Step 9: Select Yes under Right Changes to disk and then click on Continue.
Step 10: And it’s going to go ahead and install the operating system. This might take a few minutes. What I’ll do is I’ll jump over to the next step.
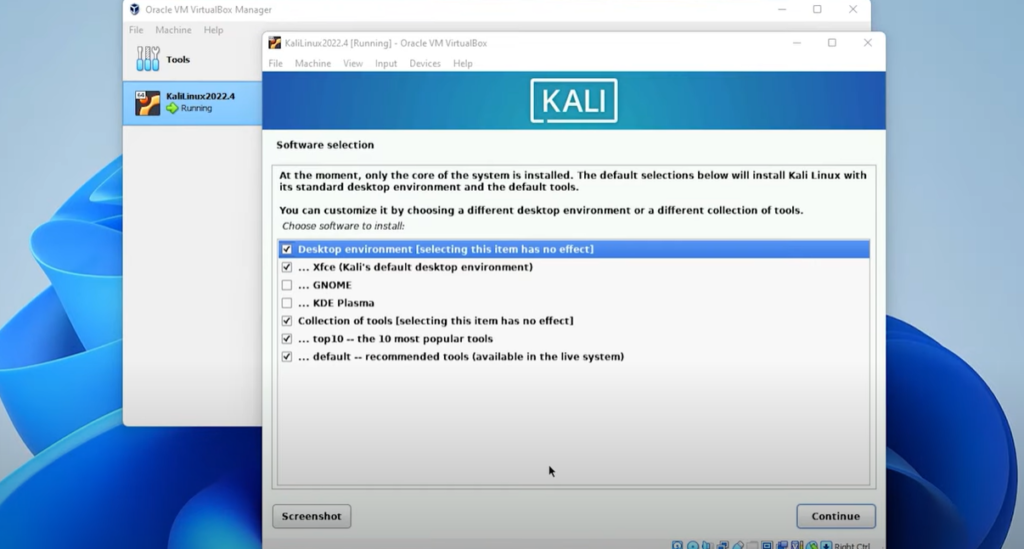
Now you get the option to customize your desktop environment. You can select whichever options you’d like. I’m going to be leaving my eyes default and then clicking on Continue.
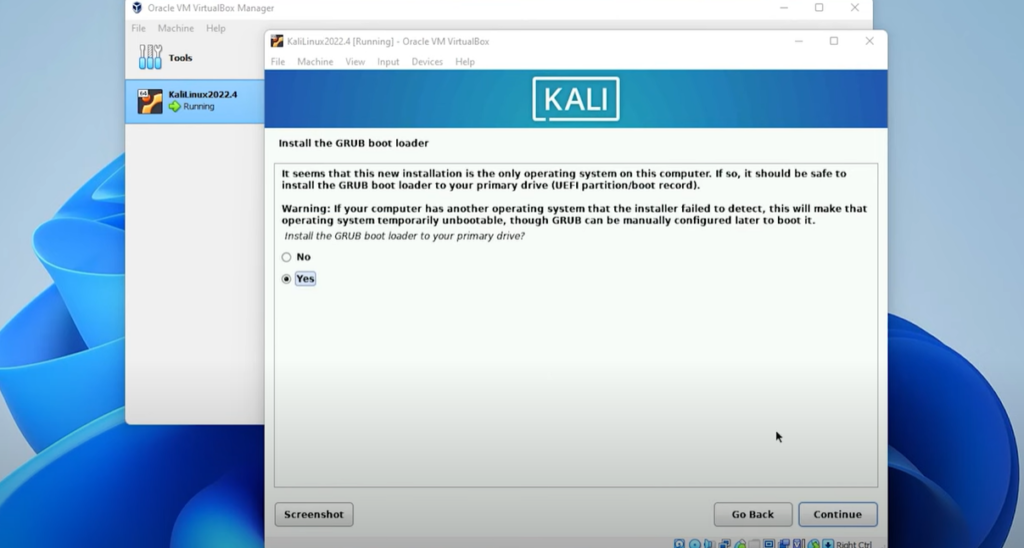
Step 11: And we’re at the last step right now is to install the grub bootloader. I’m going to be selecting yes over here and then clicking on Continue.

Step 12: And then we’re going to be selecting our Virtual drive on the list and then clicking on Continue.


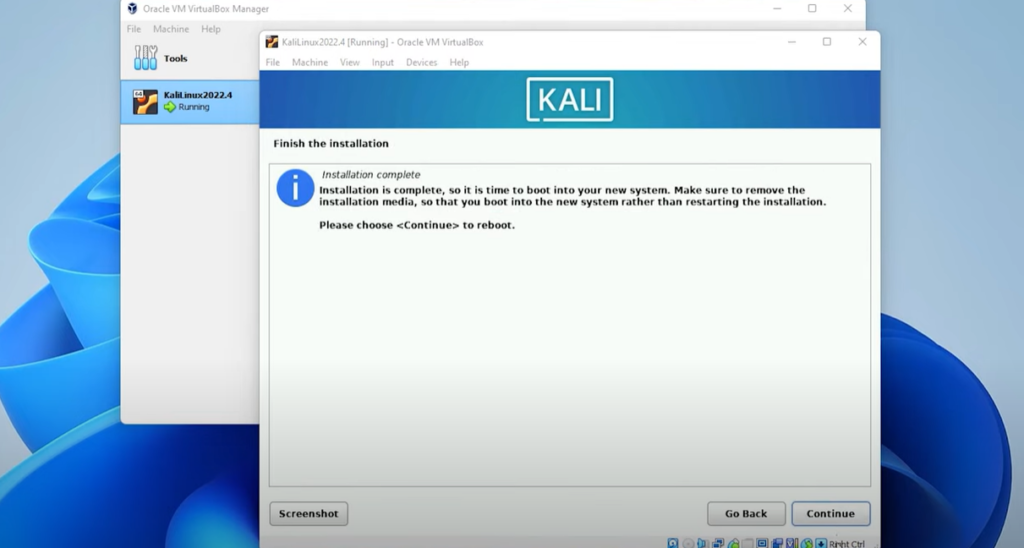
Step 13: The installation is now complete. We can click on Continue to reboot the virtual machine and what it will do is it’ll shut it down and then start it back up and we’ll be back at the login screen.
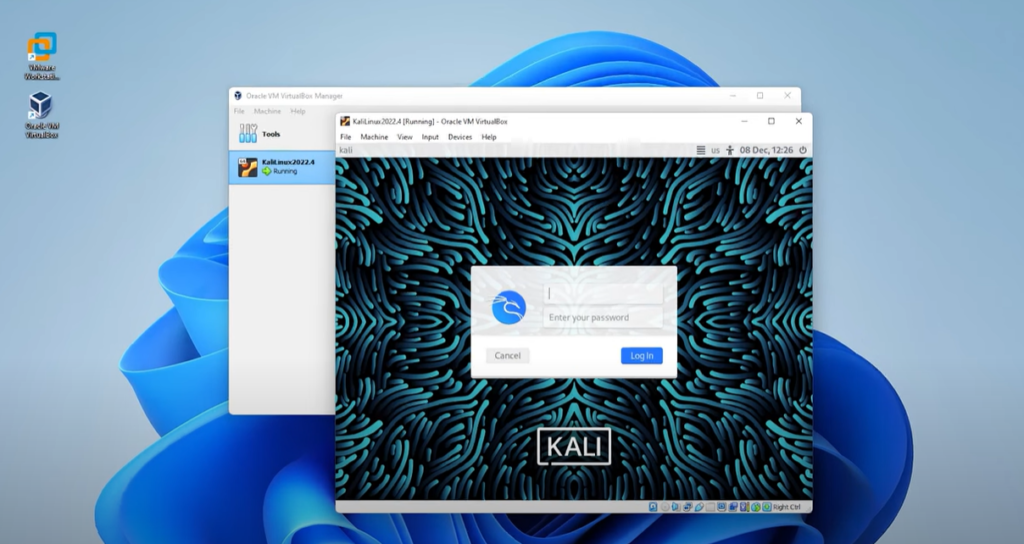
And we’re back at the login screen right now.
Step 14: This is where we’re going to type in our username that we created during the installation and the password, and it’s going to log us into the desktop.

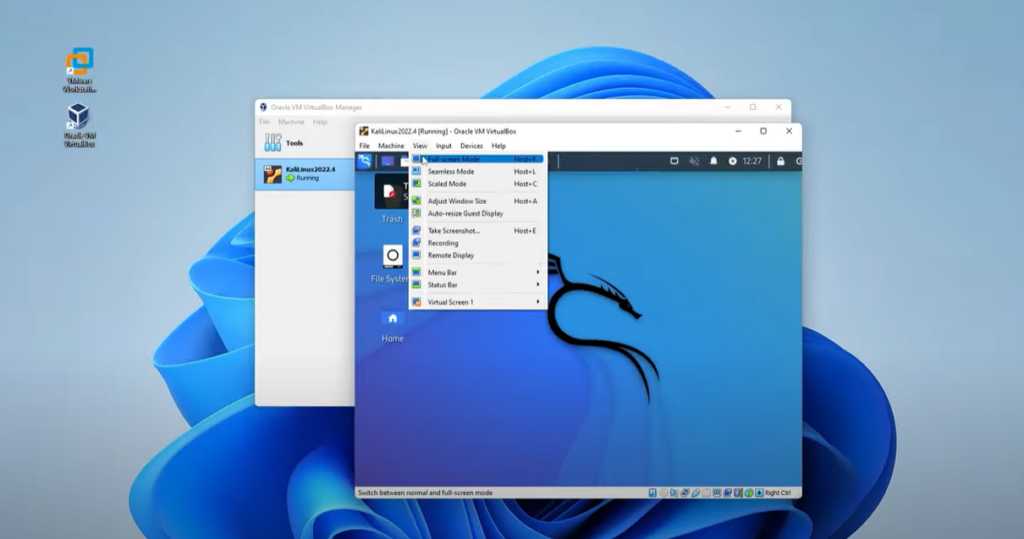
Step 15: And what I’ll do is I’ll just go over to the view menu at the top and then select Full Screen Mode. Click on switch. And now we’re in full screen mode.

Conclusion:
So we’ve just installed Kali Linux inside VirtualBox. You can go ahead and start using Kali Linux. Here is a complete video tutorial that you can use:

If you face any issues, please comment down below.