Installing macOS on Windows requires a couple of things, which contains the virtual machine program, obviously macOS Catalina file, but that’s not all what you’ll need. Even though we’ve accomplished the huge part of the process which is creating and providing those materials, still the small but a little difficult part is what needs to be done by you. That is installing macOS on your Windows PC. How to Fix “The selected virtual disk is incompatible with this workstation...”
Even with required those files, that should not ensure you a successful installation. Because there are lots of problems and errors that are likely to happen when installing macOS on Windows. This includes “This virtual machine requires AVX2 but AVX is not present. This virtual machine cannot be powered on”, “VMware Workstation unrecoverable error: (VCPU-0)”, “VMware Device Guard“. These are a small example of the errors that could happen. But still, there are far much errors than we could recognize.
One of those errors that happen when installing macOS is “The selected virtual disk is incompatible with this Workstation 12.x, 13.x virtual machine. Adding this disk would make this virtual machine incompatible with older VMware products.” This appears when you install a virtual machine and upgrade the workstation but don’t upgrade the hardware compatibility of the virtual machine. So let’s fix it.
Fix “This selected virtual disk is incompatible with this workstation (13 or x).x virtual machine”
While all of the virtual machines have a hardware version which shows the virtual machine supports, such as BIOS or EFI, number of virtual slots, and other hardware tools. So when you upgrade the workstation no matter whether it’s workstation pro or player, you need to change the hardware compatibility of the virtual machine. If you don’t so, it will pop up this error.
Upgrading to the latest version of workstation has its own benefits but if for some reason, you don’t want to upgrade, there’s an option. The solution to remain in the previous version of the workstation without changing the virtual machine hardware compatibility is upgrading the VMware Tools on the virtual machine. There are two ways you can accomplish it, we’ll do with the simpler one.
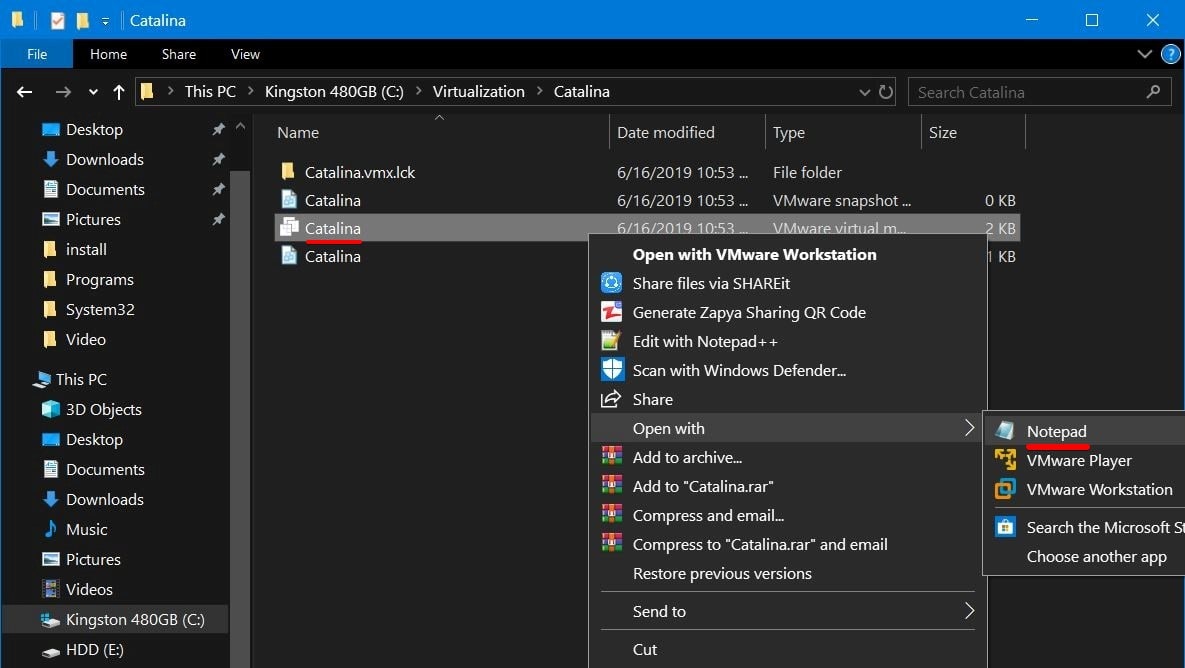
Head over to the virtual machines files and right click then open (VM Name).vmx with Notepad. In this particular example, since I’ve installed macOS Catalina, I’d use it to show you.
When the file opened, change the “16” to whatever hardware compatibility you want.
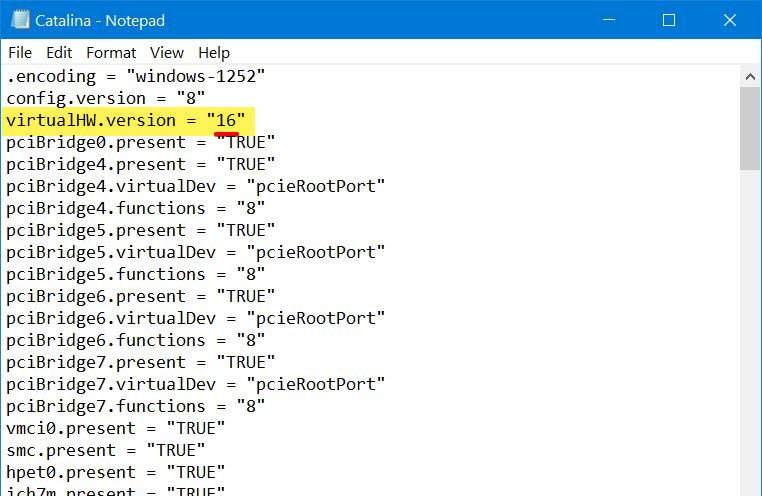
After you’ve done this, click exit and save it.
Now that it’s completely finished, open VMware and power on the virtual machine, it will successfully work.
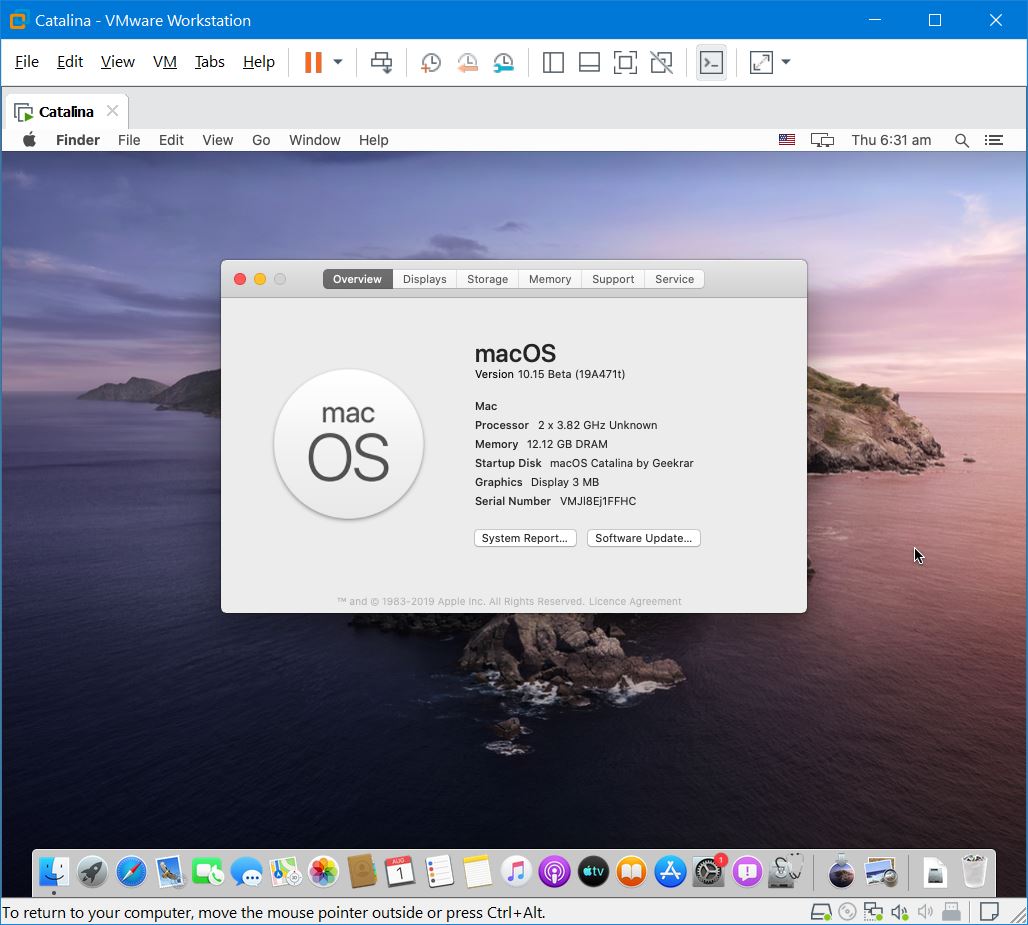
After it’s done, you may update your Catalina or other virtual machines to the latest version.
All done. If there’s some issue or you would like to change to another hardware compatibility version, you may do it from the text file. That’s it. If there’s something you’d like to tell us, I’m happy to hear.







Thank you, it worked for me
fantastic