


All right! After you’re basically done with the virtual machine configuration, everything should work great. But things don’t go always as expected. When you switch on the machine, you’ll see a lovely screen with an error that points to “The CPU have been disabled by default. Power off or reset the virtual machine”. Here’s How to Fix The CPU has been disabled by the guest OS
While Windows computer isn’t the default system to install macOS. The important thing is, Apple doesn’t support installing macOS on non-Apple hardware and is neither willing to do. But that’s not the only one who does this. Perhaps, when we use the patch for VMware, that is because, unlike VirtualBox, VMware Workstation Player doesn’t support installing macOS by default. In this case, when you try to install macOS on VMware without the patch, you’ll end up without installing.
Since installing macOS, whatever version isn’t the supported way, there will be likely problems messing around. Whether you’ve an Intel or AMD processor, you’ll probably need to play the tricky steps. But if you’re installing Mojave on an AMD system, you’ll need to pull off a few more steps including the actual steps which are for both processors. This is a tiny change but really matters. How to Fix The CPU has been disabled by the guest OS
There are several reasons which might cause the problem. The first one is that you may have not configured the virtual machine for your AMD system. While AMD systems are different from Intel ones, we will need to use the different config key for setting up correctly. The other reason that the error can pop up is if you’ve installed the VMware or VirtualBox while the Hyper-v is installed.
While this problem usually happens when installing macOS on VMware, so we will take a look at How to Fix The CPU has been disabled by the guest OS
Table of Contents
Change The VM Hardware Compatibility to 10.x
All the usual installing steps are important, but you need to perform some more steps in addition to them. The nice thing is, it’s all done from the vmx file. There are two ways you do get it done. The first way you could do it is from the VMware with the wizard. The other way you could do is from the vmx file. We’ll move with the easier one. This is simple as we have covered you with every step with shots. Here’s how to do it real quick. How to Fix The CPU has been disabled by the guest OS
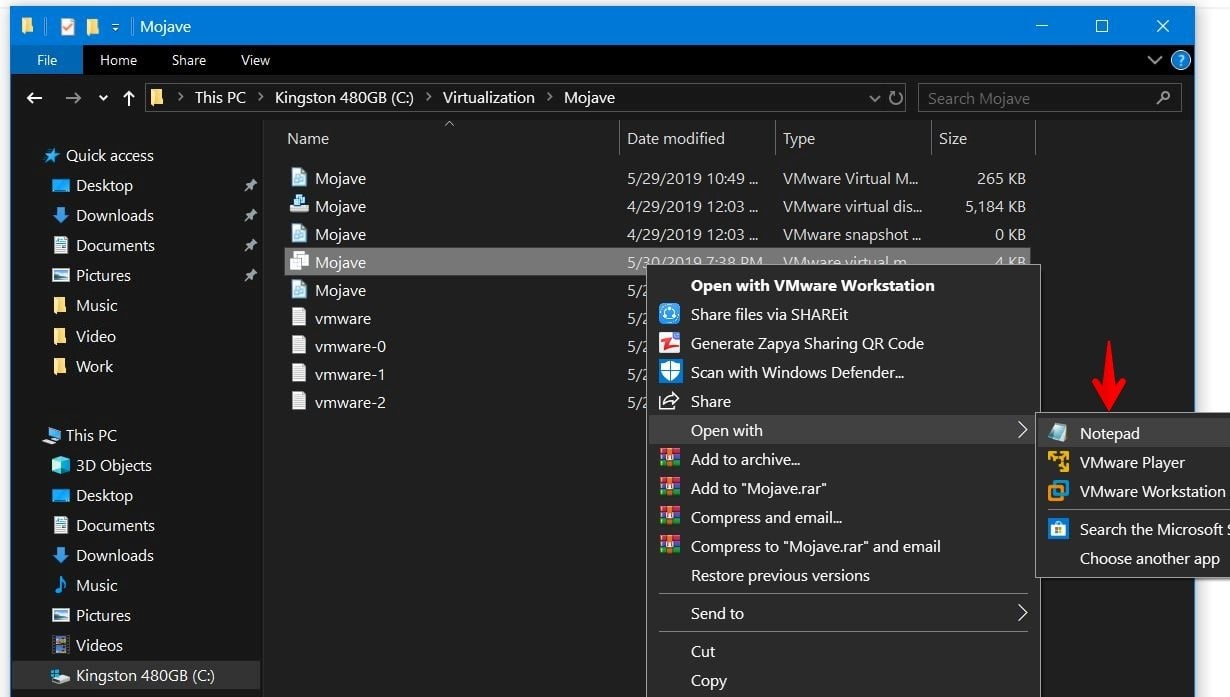
Go ahead and navigate to the virtual machine files. Now right click on the .vmx file and select Open with and choose Notepad.

When the file opened, change the version number to 10. It will change the virtual machine hardware compatibility to 10.

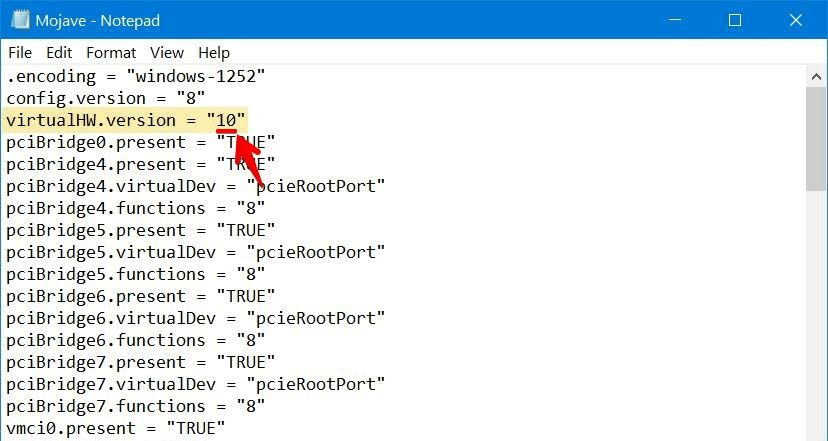
If you miss changing the hardware compatibility of the machine from VMware, you’ll likely encounter this problem.
Add The Config Key For The Virtual Machine (For AMD Systems Only)
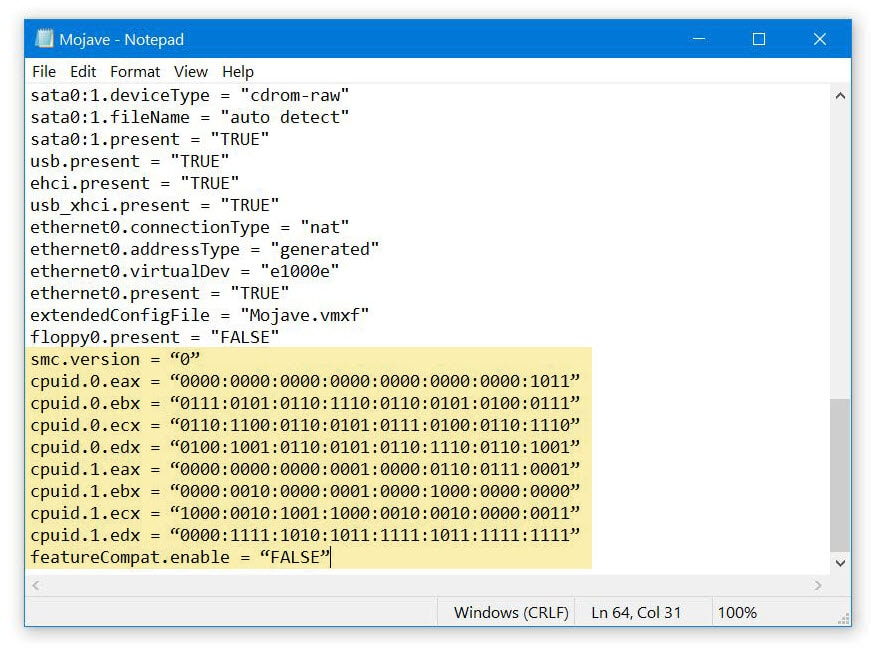
Now without closing the .vmx file, copy the following code and paste it at the end of all lines. If you’ve the config key smc.version = 0 already there, you may remove it and paste this in place of it. It should look like this.
cpuid.0.eax = “0000:0000:0000:0000:0000:0000:0000:1011”
cpuid.0.ebx = “0111:0101:0110:1110:0110:0101:0100:0111”
cpuid.0.ecx = “0110:1100:0110:0101:0111:0100:0110:1110”
cpuid.0.edx = “0100:1001:0110:0101:0110:1110:0110:1001”
cpuid.1.eax = “0000:0000:0000:0001:0000:0110:0111:0001”
cpuid.1.ebx = “0000:0010:0000:0001:0000:1000:0000:0000”
cpuid.1.ecx = “1000:0010:1001:1000:0010:0010:0000:0011”
cpuid.1.edx = “0000:1111:1010:1011:1111:1011:1111:1111”
featureCompat.enable = “FALSE”

When you’re done with it, simply save it.

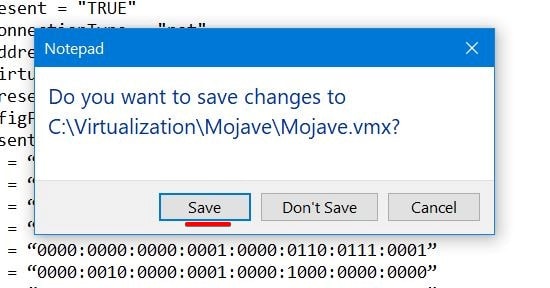
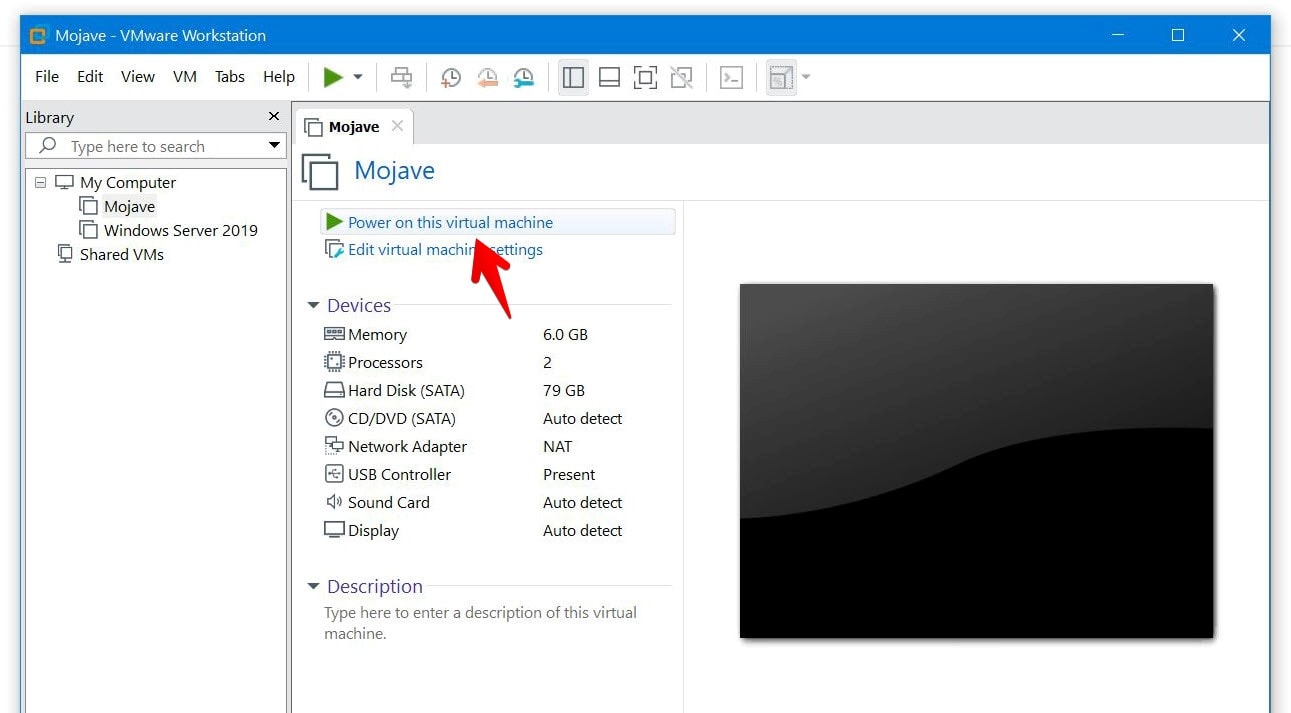
And you’re all set! All there’s left to do is switch the machine on and proceed with the installation.

That’s all well and good. Everything should work
Here are some important fixes given by one of our users @DOUG! Thanks man, so many people found this helpful so I have added your comment to the post for easier access…
Managed to get it working on VMWare 16.0 & a 3700X after looking at the vmware logs for a bit.
Several issues:
1) Ensure you are using normal double-quotes. When copying and pasting it’ll use pretty quotes but vmware will complain (not a valid boolean, etc.)
2) Disabling featureCompat.enable is only supported on hardware versions less than 9. Change that to TRUE (probably can just delete but haven’t tested that yet)
3) cpuid.ss & cpuid.ds are no longer supported on the cpus so need to be removed from the enabled features. Change cpuid.1.edx line to
“0000:0111:1000:1011:1111:1011:1111:1111”
4) With those changes I was then able to bump the virtualHW.version back up to 16.