


In this article, we will learn How to Enable Intel VT-X & AMD Virtualization on PC, VMware, VirtualBox.
Most computers today have hardware virtualization features, which have lots of benefits. For example, server consolidation means you can run ten server apps on one machine or testing & development. It can help us tackle OS testing & deployment by enabling virtualization, which improves system reliability. Virtualization also helps avoid system crashes caused by memory corruption caused by software.
Not only do we get these advantages, but setting up IO virtual machines on your PC is also made easier by this. That’s why I’m here to show you how to enable VT-X & AMD virtualization so you can run IO virtual machines on your PC, VMware/Virtualbox, and more!
Virtualization technology allows one to have more than one computer operating system on a single machine simultaneously. It is primarily used to run applications on any operating system while using the same hardware. This allows developers to test software on different platforms without needing additional equipment and enables business owners with diverse needs to use the software best suited for their needs.
Let’s directly move on to the guide: How to Enable Intel VT-X & AMD Virtualization on PC, VMware, VirtualBox.
Table of Contents
How to Enable Intel VT-X Virtualization on PC
We can enable Intel VT-X Virtualization on PC in 2 ways. First, from the UEFI Firmware settings, and the second one is from the BIOS menu directly.
From UEFI Firmware Settings
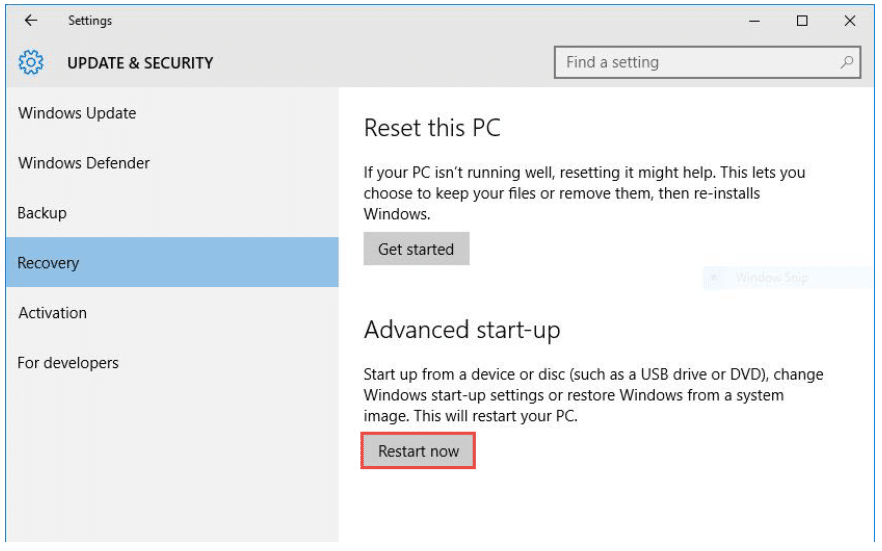
1.Click on Settings> Update & Security> Recovery to find the Restart Now option.

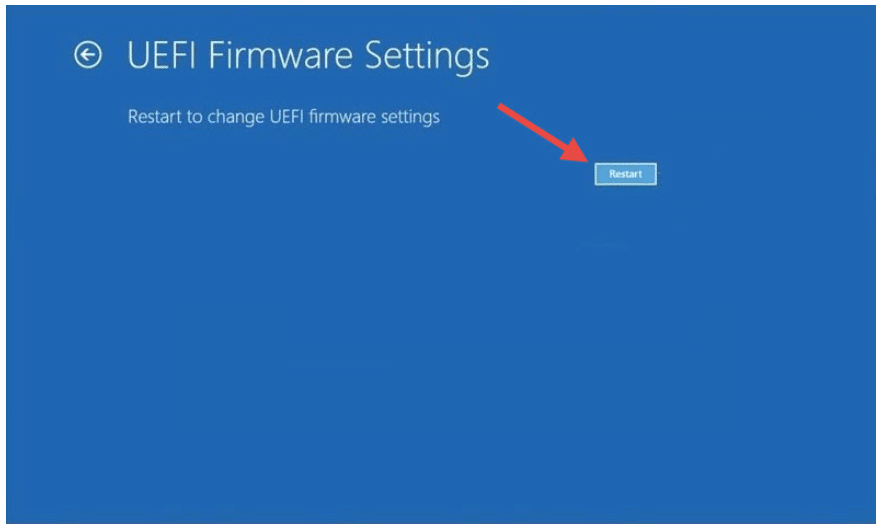
2. While restarting your computer, choose Troubleshoot> Advanced option> UEFI Firmware settings> click Restart.

Note: If you don’t have UEFI Firmware settings, then no problem. Check for VT-x virtualization in your BIOS or boot menu.
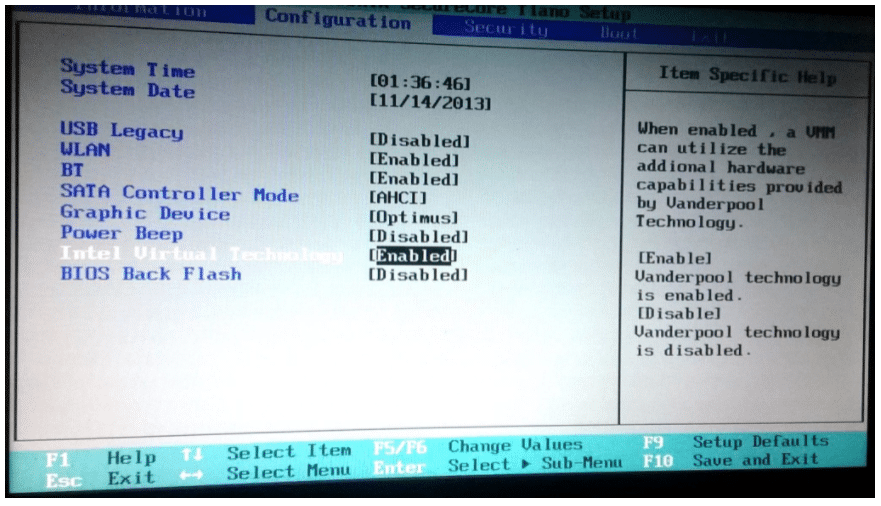
3. You will find Intel Virtualization Technology listed on the boot menu. Press F6 to enable it.

From BIOS Directly
1. Simply, restart your computer, and as the system boots, press one of the following keyboard buttons to enter the BIOS menu. The key will vary from brand to brand.
Here is the BIOS Key for your computer:
| Manufacturer | BIOS/UEFI Key |
| ACER | Del, F2 |
| ASUS | F9 |
| COMPAQ | F10 |
| DELL | F2 |
| EMACHINES | Tab, Del |
| HP | Esc, F10, F1 |
| INTEL | F10 |
| LENOVO | F1, F2 |
| SAMSUNG | F2 |
| TOSHIBA | F1, F2, F3 |
| SONY | F1, Esc, F12 |
| PACKARD BELL | F1, Del |
| NEC | F2 |
2. Once you are inside the BIOS menu. Go to System Configration> Intel Virtulization Technology.


3. Press the required keyboard button to enable this option.
Some settings might change if you are on Windows 11, here is a guide you can use to enable virtualization on Windows 11.
How to Enable Intel VT-X/AMD Virtualization on VMware
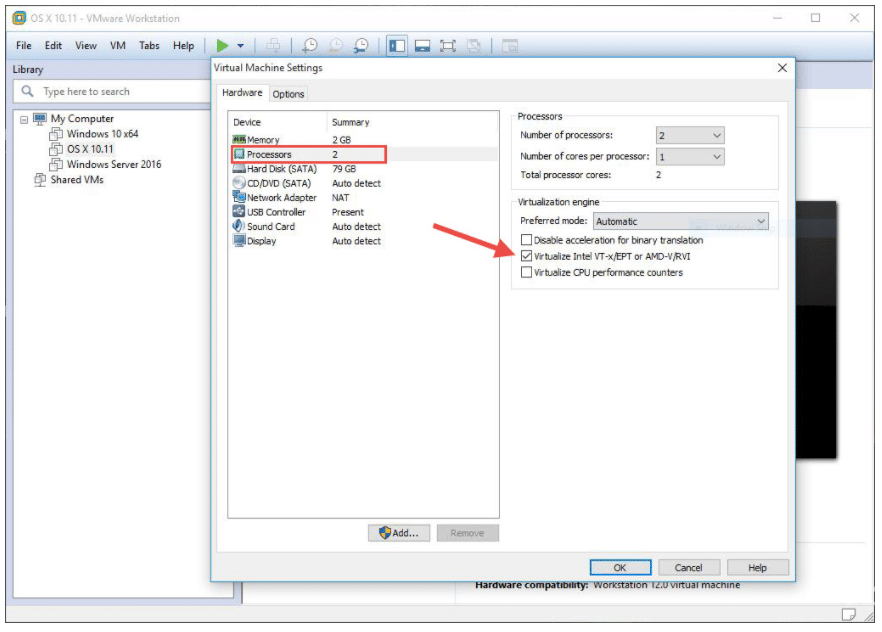
1. To enable Intel VT-X & AMD virtualization, open VMware and select the virtual machine you want to enable Intel & AMD virtualization for, then click on Edit virtual machine settings.

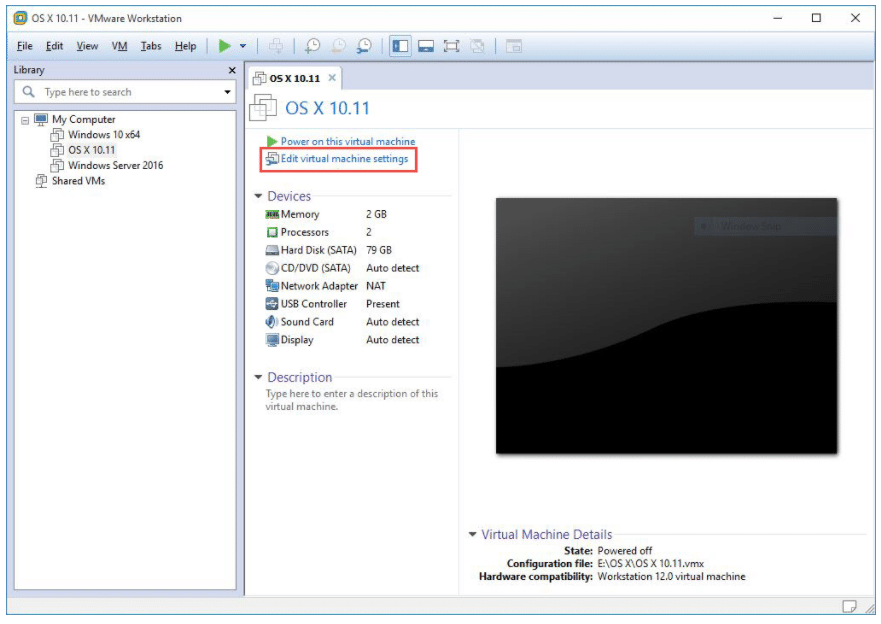
2. From the Processors screen, select Intel VT-X & AMD Virtualization and mark the option if desired. Remember to enable virtualization as well, or leave it on Automatic.

How to Enable Intel VT-x/AMD Virtualization on VirtualBox
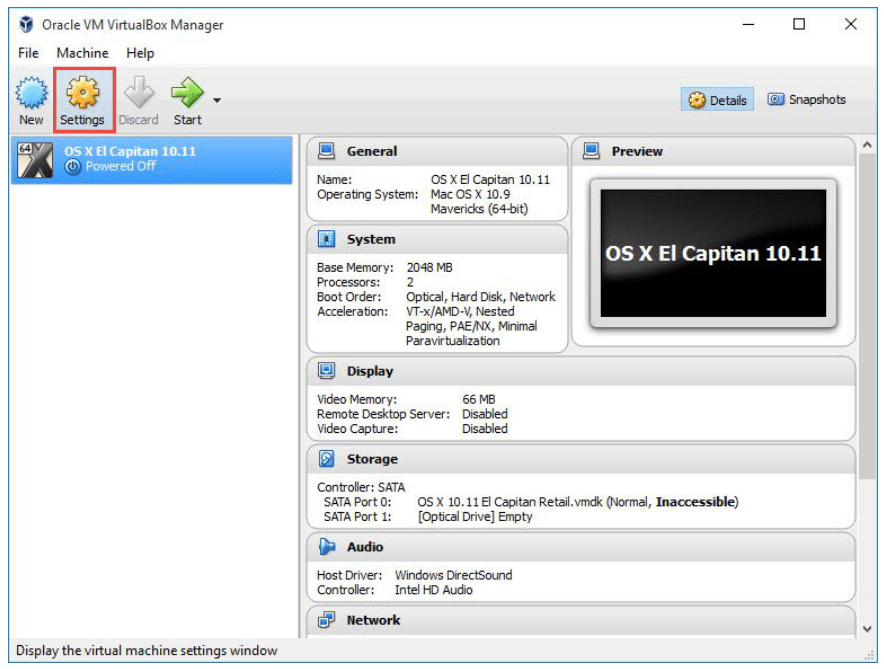
1. Open VirtualBox and select the virtual machine you want to enable Intel-AMD virtualization on, then click on Settings.

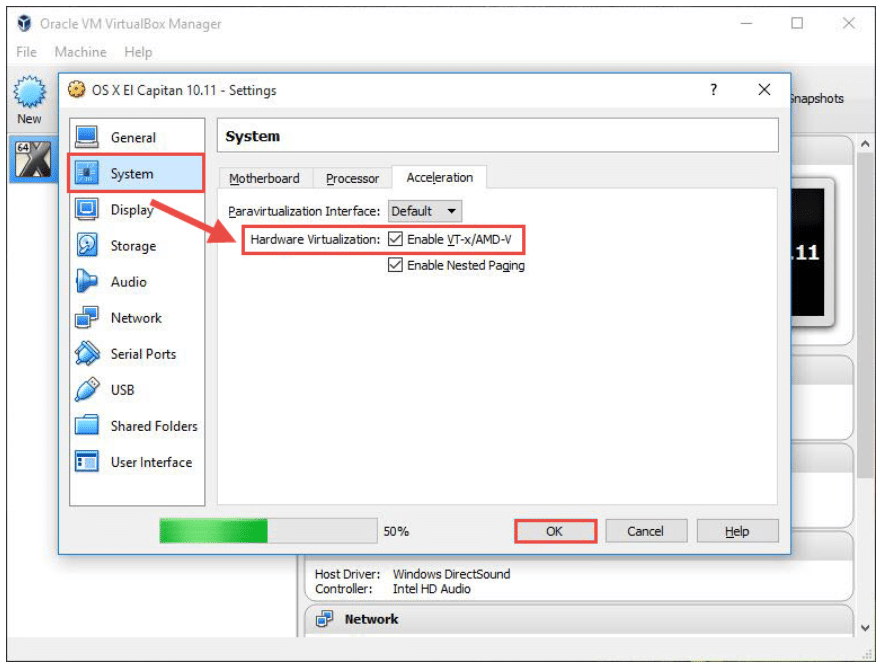
2. Here, click the System tab and select the Acceleration tab. Then you can enable Intel VT-x or AMD virtualization and click OK.

Conclusion:
I hope this guide on How to Enable Intel VT-X & AMD Virtualization on PC, VMware, VirtualBox was helpful. If you face any issues, please comment below. We will get back to you with a solution ASAP.
Happy Virtualization!