


Whether you want to reset your macOS password, diagnose startup or disk problems, downgrade to an older version of macOS, do a clean installation or re-install macOS, restore macOS from a previous backup, you will probably need to access recovery mode. How to Get Into Recovery Mode of macOS Mojave Virtual Machine.
As a macOS user, you may encounter different problems such as failure to start up or disk problems. This happens to a Mac user somewhat in different point at a time. And when it is the case, you have a super-secret option which is “Recovery Mode”. This is a very useful tool when it comes to solving problems when you are into any of those problems and have literally no option left.
This helpful tool, as known by its name, will importantly allow you to recover, restore or get you back from whatever problem you are into, to the direct solution without having access not even startup actually. This is really what you should know about even if you are not in the area of these problems. So here’s how to get into the lifesaving mode when you are into trouble. This method works for every version of macOS virtual machine except the file may differ.How to Get Into Recovery Mode of macOS Mojave Virtual Machine
Table of Contents
Get Into Recovery Mode of Mojave on VMware
While you use macOS, you may know pretty much about it. What you might not still know is that a macOS virtual machine works the very same of actual macOS. There is literally no difference between the ordinary physical Mac and the Mac on a virtual machine which includes installing, resetting, recovering and working with them virtually. This also includes getting into macOS virtual machine recovery mode which is the same for every version of macOS. Thankfully, that’s easy. Let’s get started. How to Get Into Recovery Mode of macOS Mojave Virtual Machine
What you’ll need
Before you go anything further, you should get done with the file which is the following.
- macOS Recovery Boot Image: In order to boot into recovery mode, you will need macOS recovery boot image which will boot up into the recovery mode. This image works for both the macOS virtual machines running on VMware or VirtualBox.
With those things, you are ready to get started.
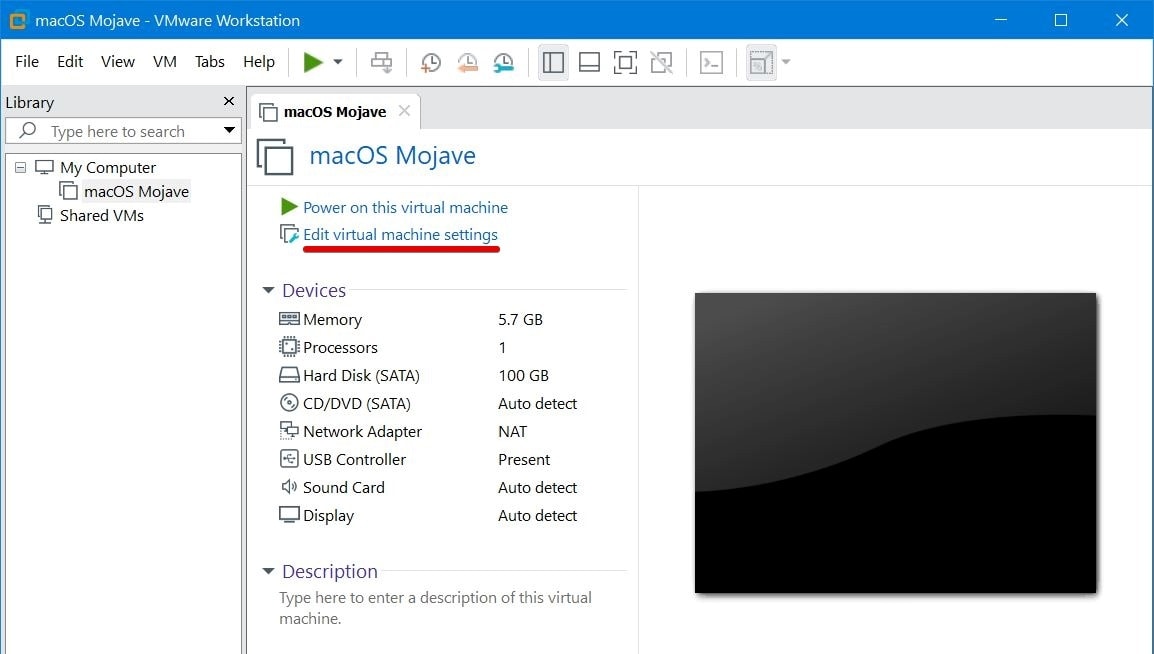
As usual with VMware, the settings we are looking for is the macOS Mojave virtual machine settings. Just click on it.

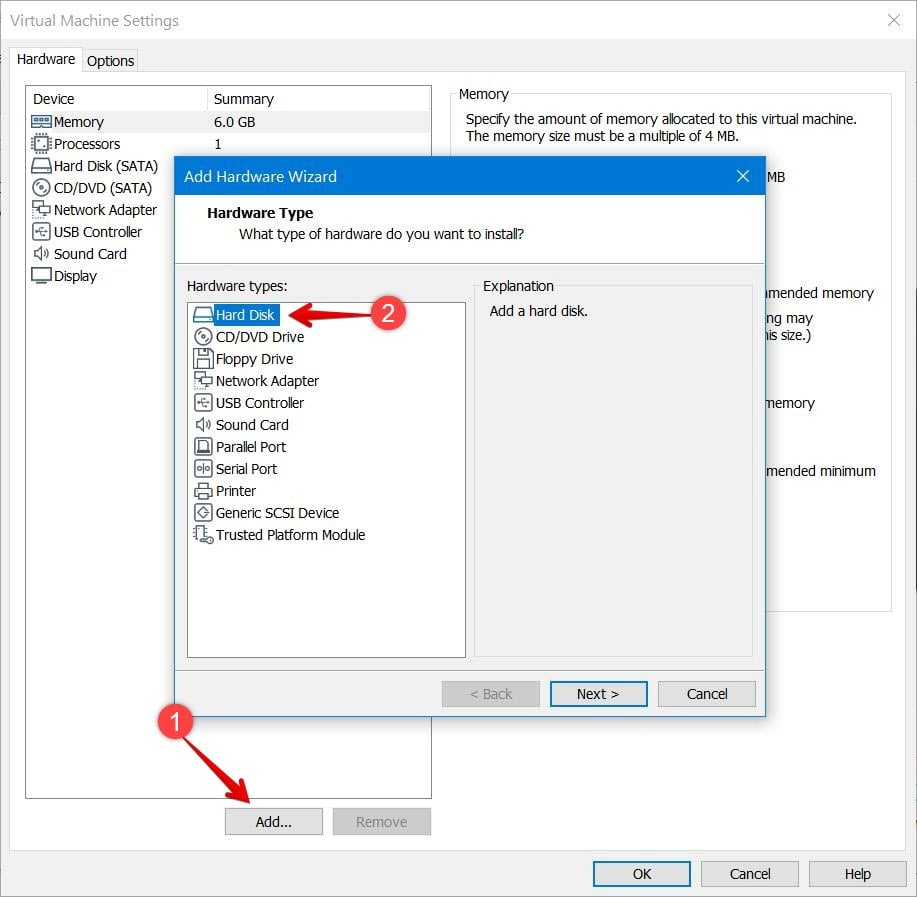
Now click on Add and on the Add Hardware Wizard click Next.

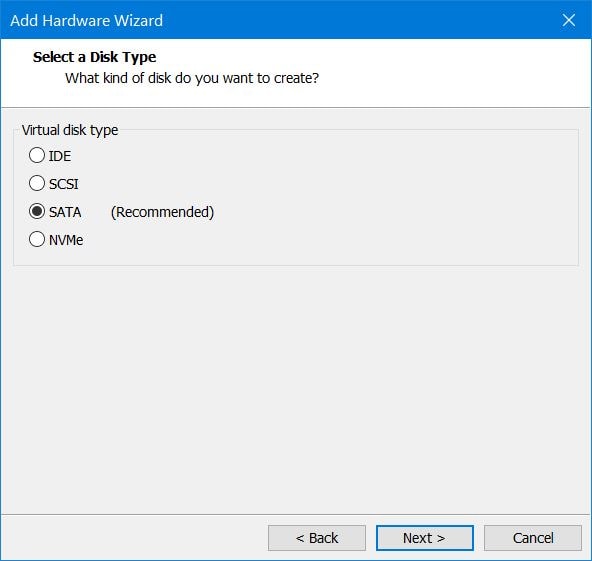
The Select a Disk type will now appear, prompting you to select a type of disk. Go ahead and simply Next.

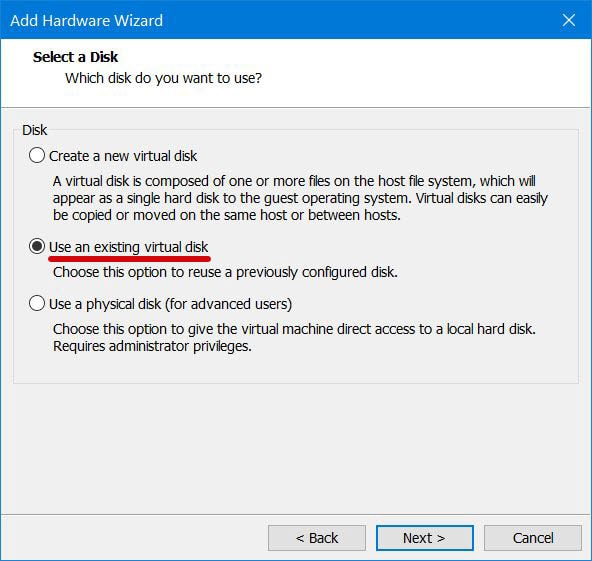
In the Select a Disk window, Use an existing virtual disk and click Next.

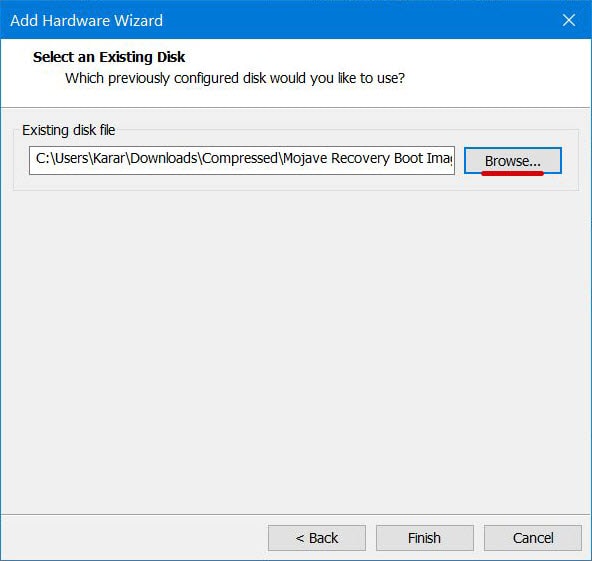
To choose the existing disk, browse the Mojave Recovery Boot Image and Finish with it.

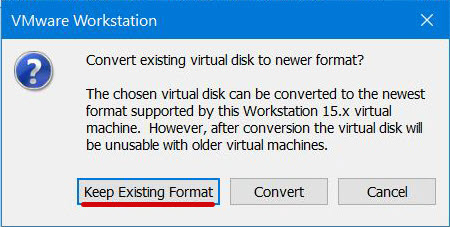
This will pop up a question asking you whether you want the existing format or convert. Select the Keep Existing Format and click on it.

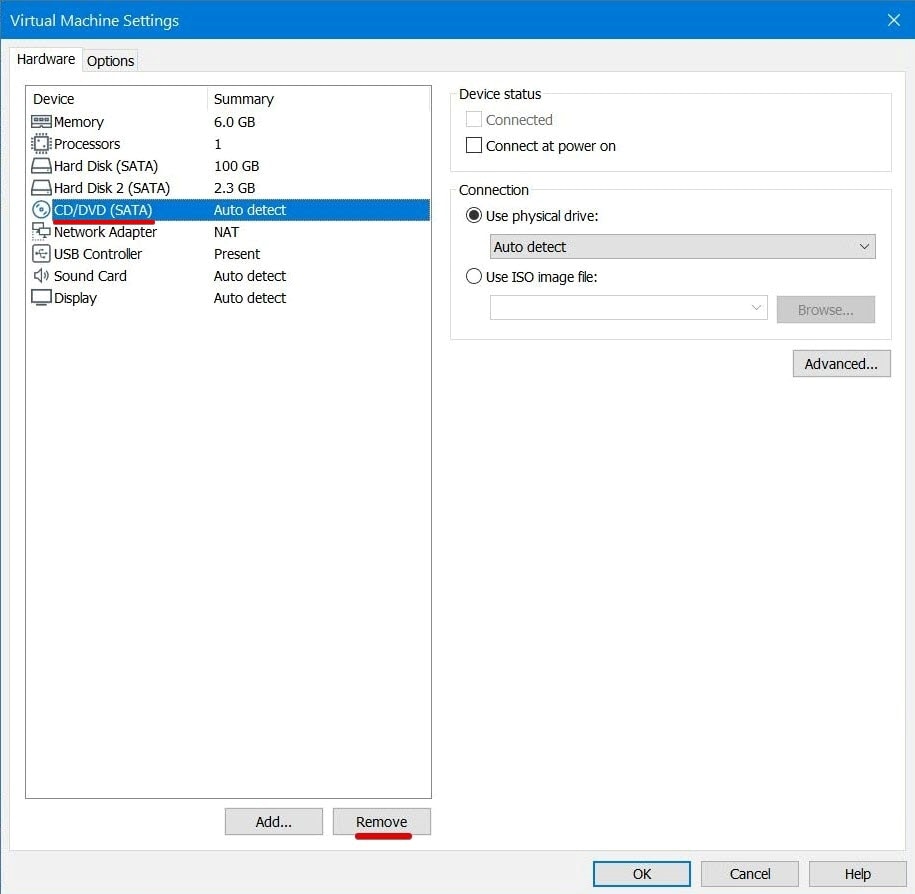
Next, select the CD/DVD and click on Remove. This will immediately delete the CD/DVD which you can add later.

At this point, select the primary disk and click on Advanced.

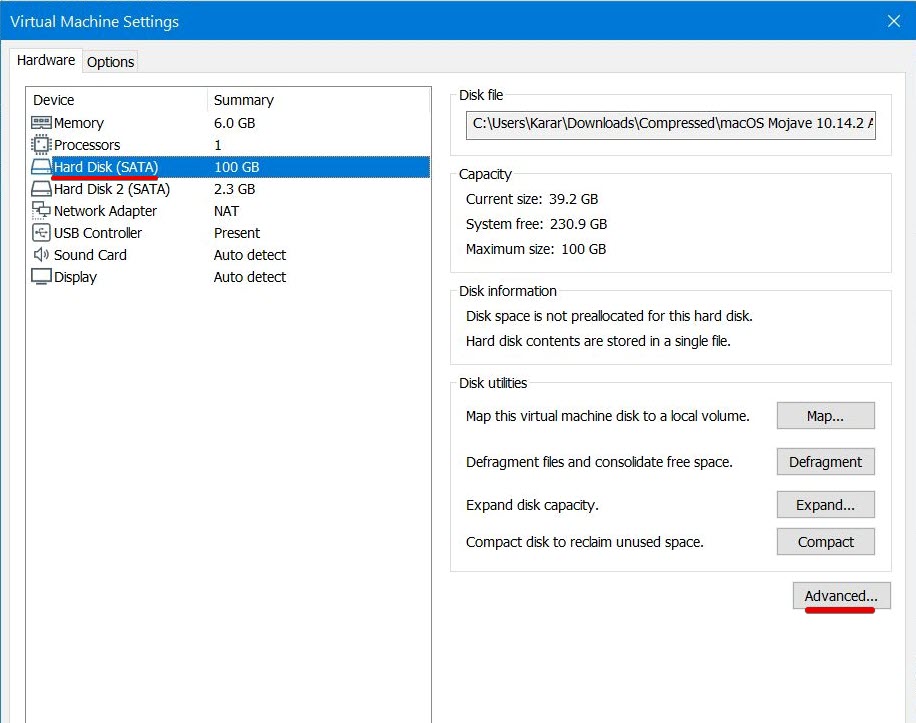
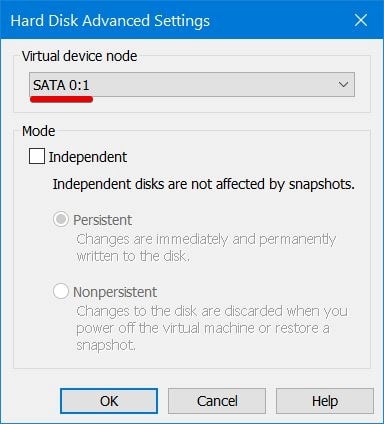
A menu will appear, allowing you to choose the Virtual device node options from the drop-down menu. Switch to the SATA 0:1 or 0:2 and click OK on the window.


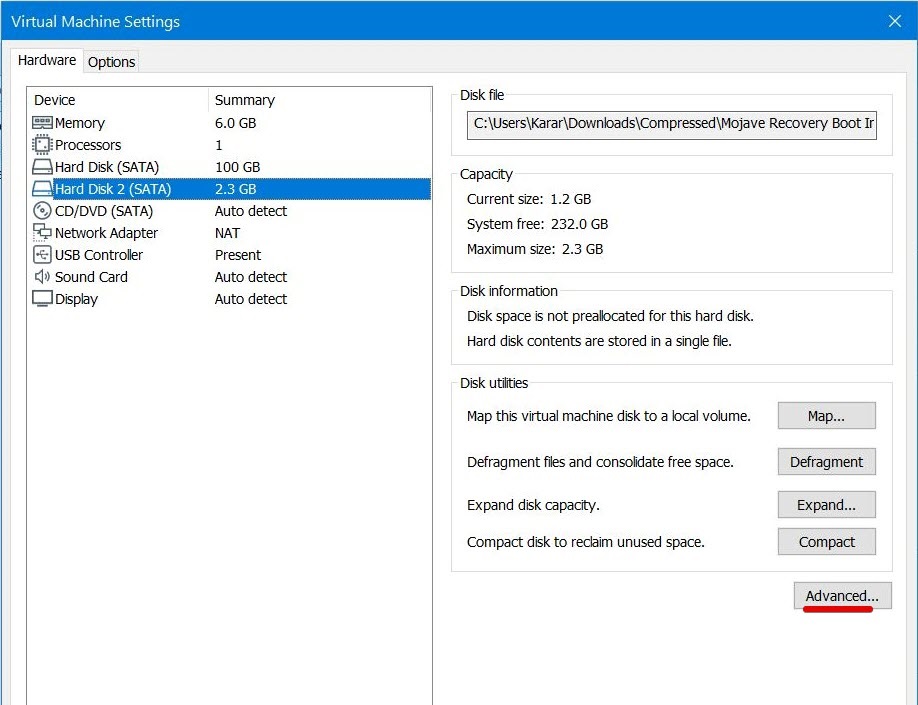
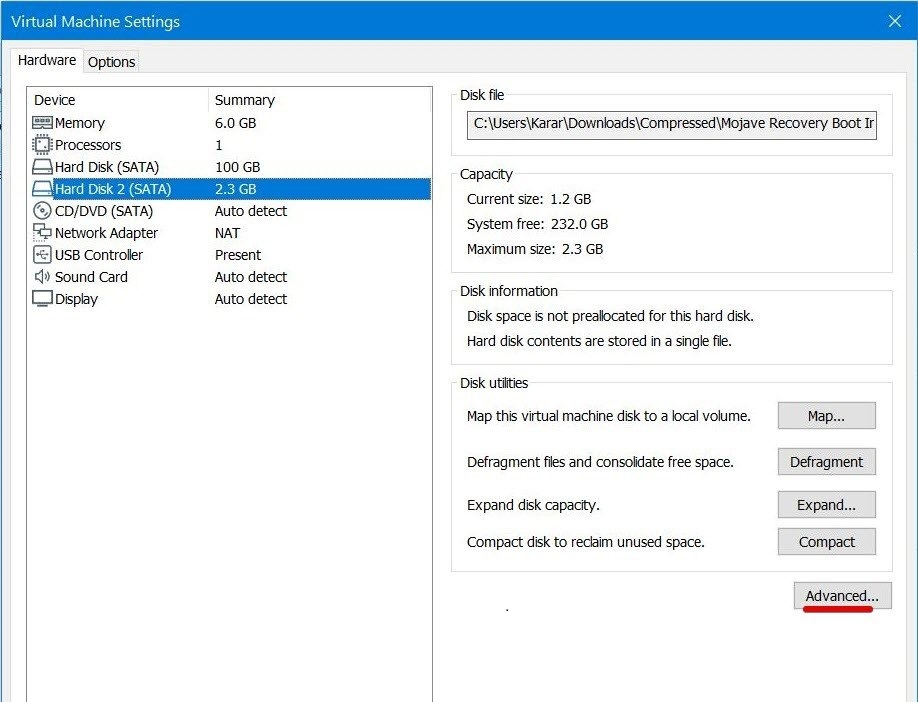
In this screen, select the Hard Disk 2 (SATA) and click on Advanced.

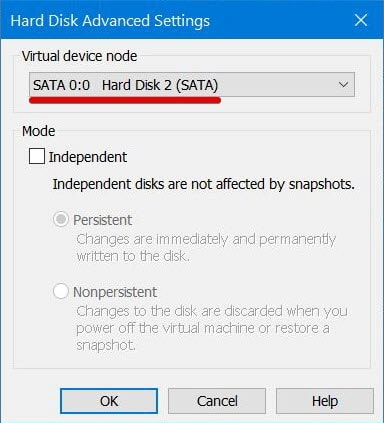
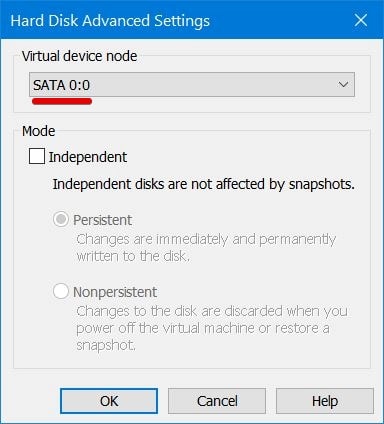
The next screen will show you the Hard Disk Advanced Settings dialogue box. Select the SATA 0:0 for the new hard disk and hit OK.
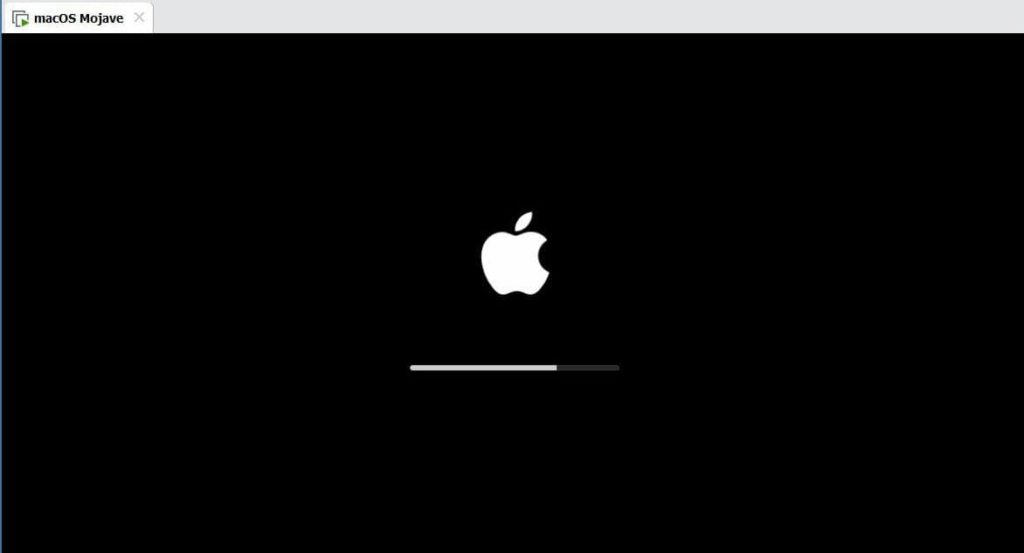
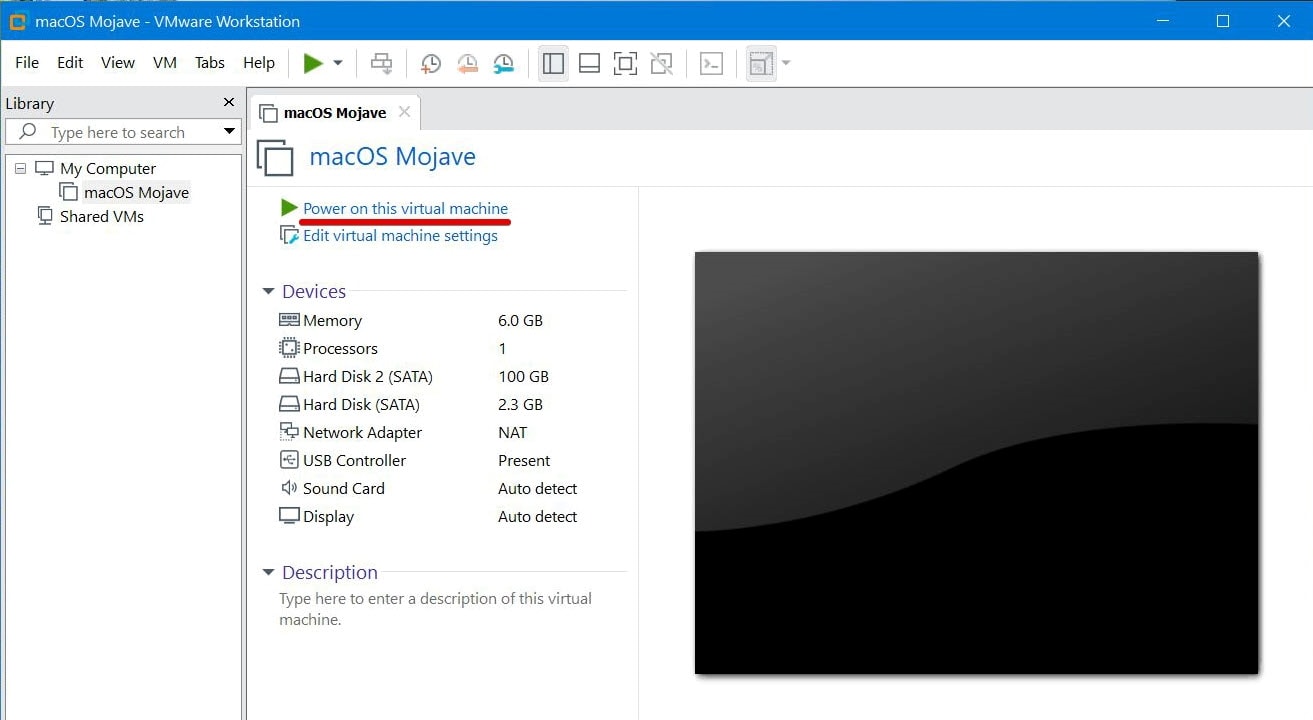
After it’s done, power on the virtual machine and let it boot up. This will directly boot you into the recovery mode as you have set up the recovery image as primary booting.

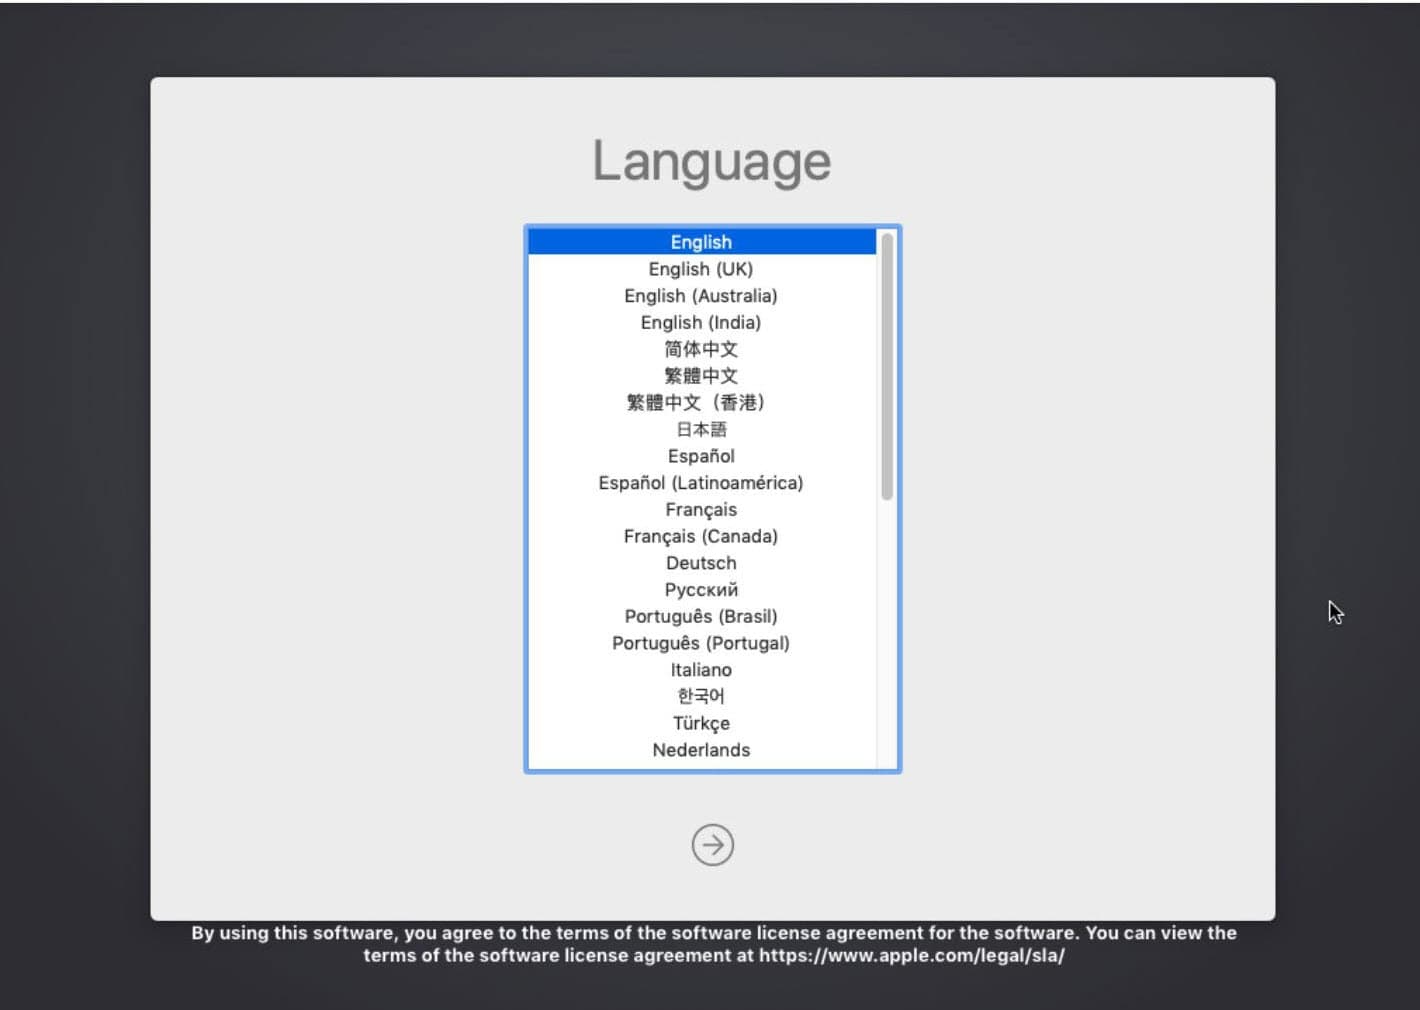
This brings up the Language screen that is prior to the recovery screen. You can choose your language and trigger the continue button.

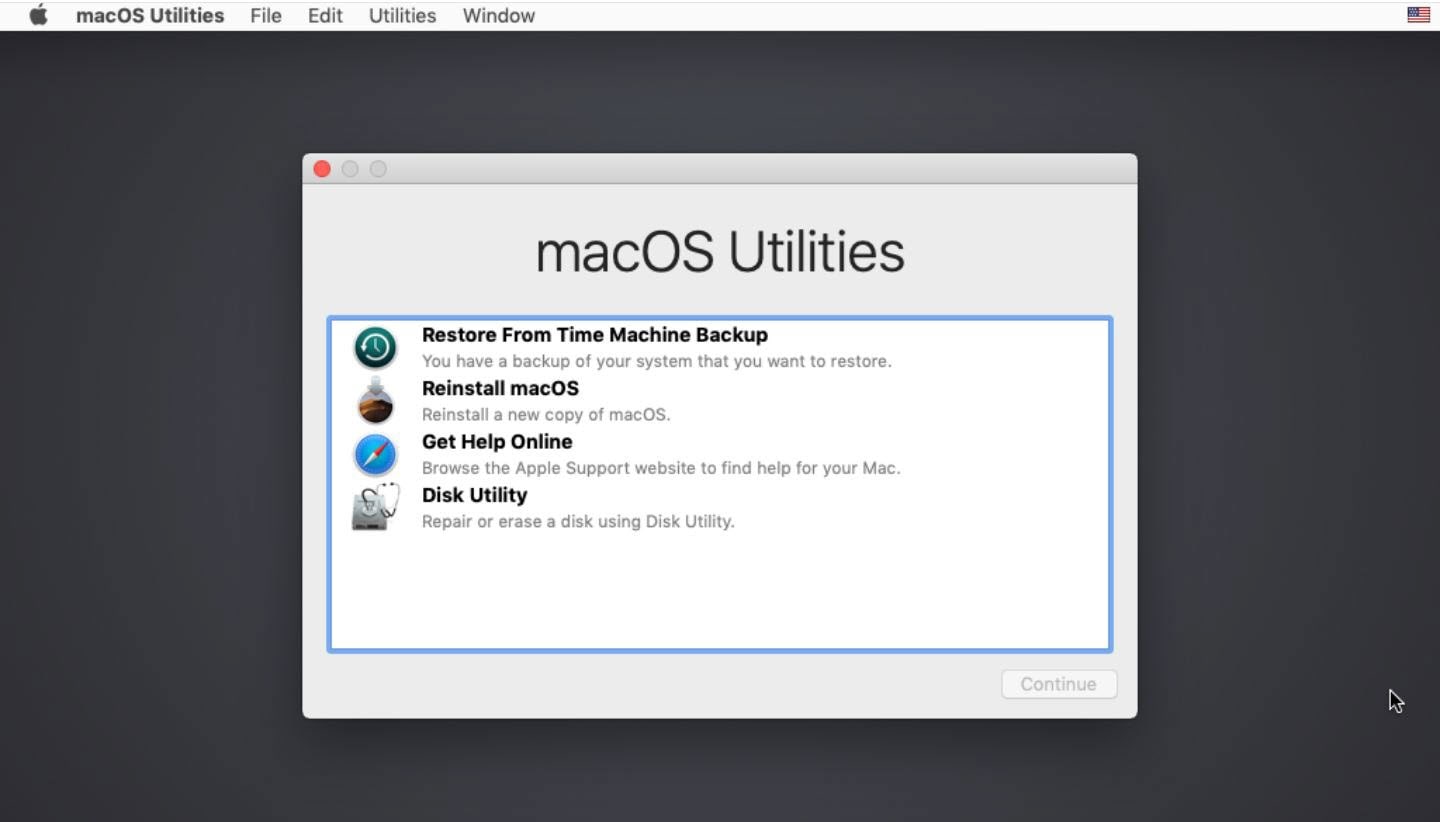
The next screen offers you quite different but useful options.
- Restore From Time Machine Backup: This is one of the most useful options that are available on every Mac which is used to restore macOS from a specific point where you had previously backed up. Also, you can restore from an external drive that was used for backup.
- Reinstall macOS: This option will let you reinstall macOS Mojave freshly without actually losing your files. This uses the same process as upgrading.
- Get Help Online: If you are the guy (or girl) who would like to go online, then you have the option to go with. This will indirect you to the official Apple support website which might help you.
- Disk Utility: This feature provides you repair, erase, troubleshoot your disks using Disk Utility which is available on every Mac regardless of it’s running anywhere.
Knowing that, choose the one that might help you better and continue going with it.

Get Into Recovery Mode of Mojave on VirtualBox
Getting into the recovery of Mojave on VirtualBox is not much different from the previous one. However, the recovery mode and the options and settings come up with the same as their is no difference between every Mac and your virtual machine.
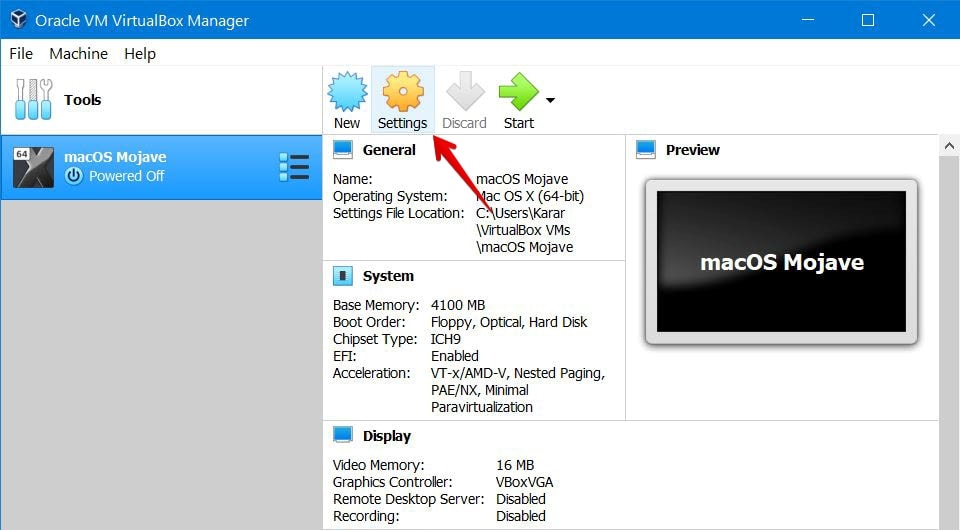
Start by opening VirtualBox and selecting the Mojave virtual machine. To set up things, click on the Settings at the top of the window.

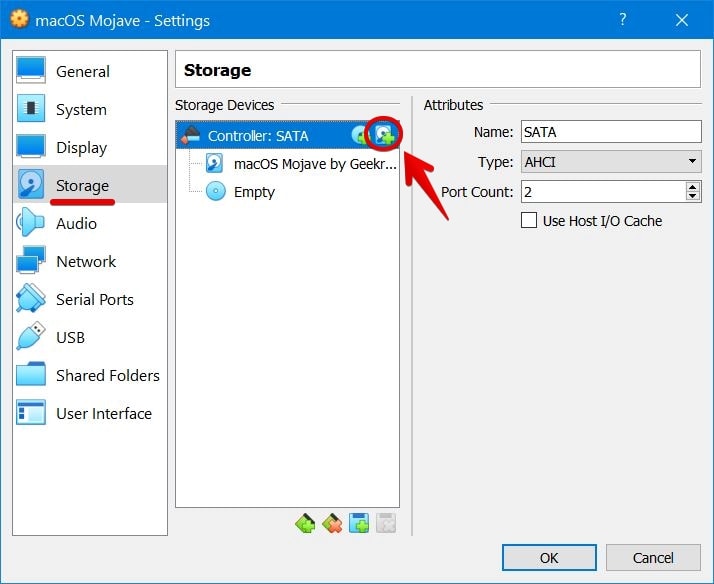
This will get you to the Settings window where you will need to select the Storage tab and click on the Add Hard Disk icon.

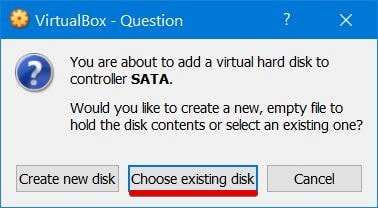
You’ll have to Choose existing disk option by clicking on it.

Next, click on Add.

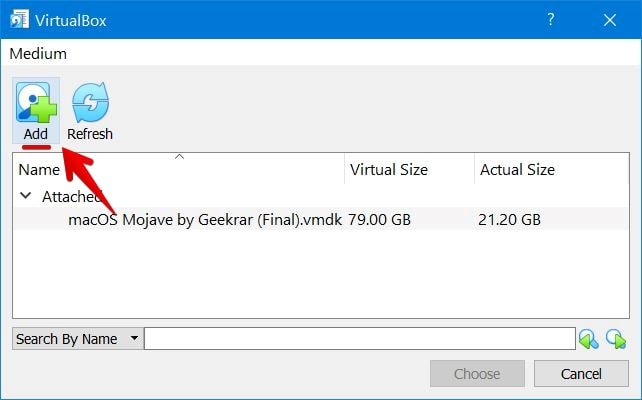
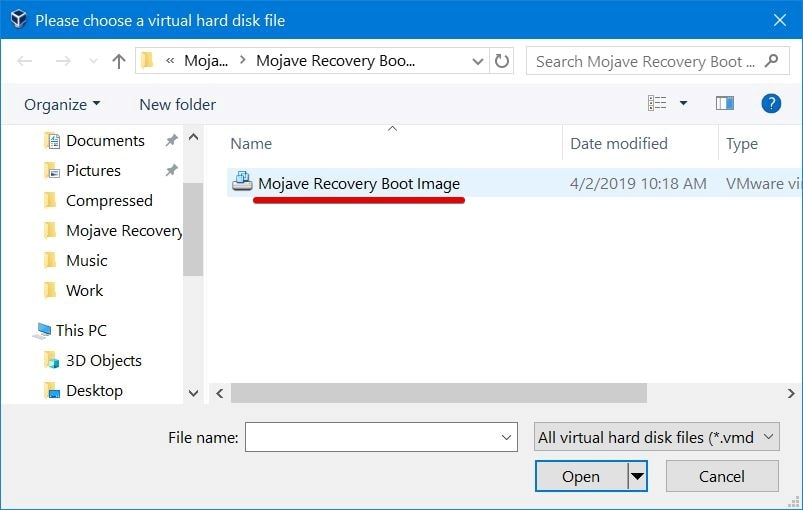
The next step is to choose the existing virtual disk file, browse the file and double-click on it.

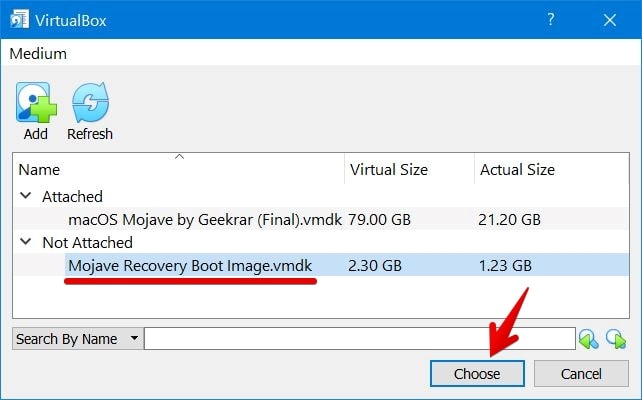
In the VirtualBox panel, click on the disk you added and click choose.

Now, without leaving the virtual settings tab, select the virtual machine primary disk that is (macOS Mojave by Geekrar) and switch the hard disk attributes to SATA Port 2 or 3. When you will change, you will see it dropping down from another disk.

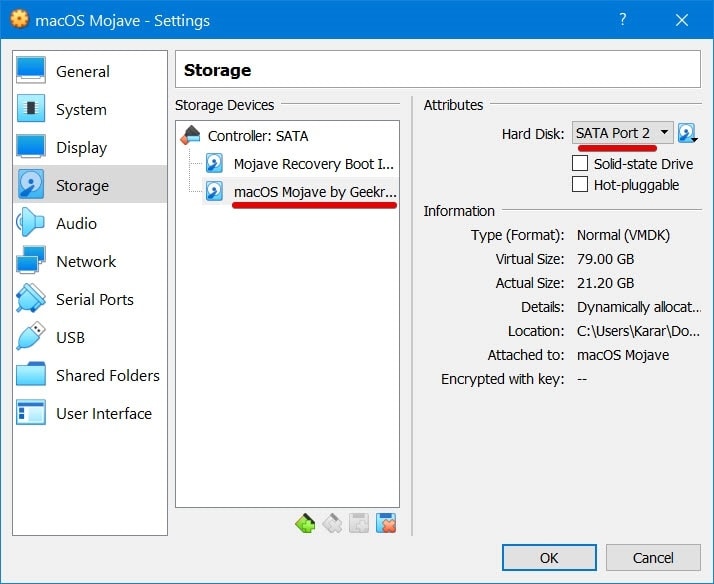
Lastly, select the Mojave Recovery Boot Image and tweak the attributes to SATA Port 0. When you’re done, click OK.


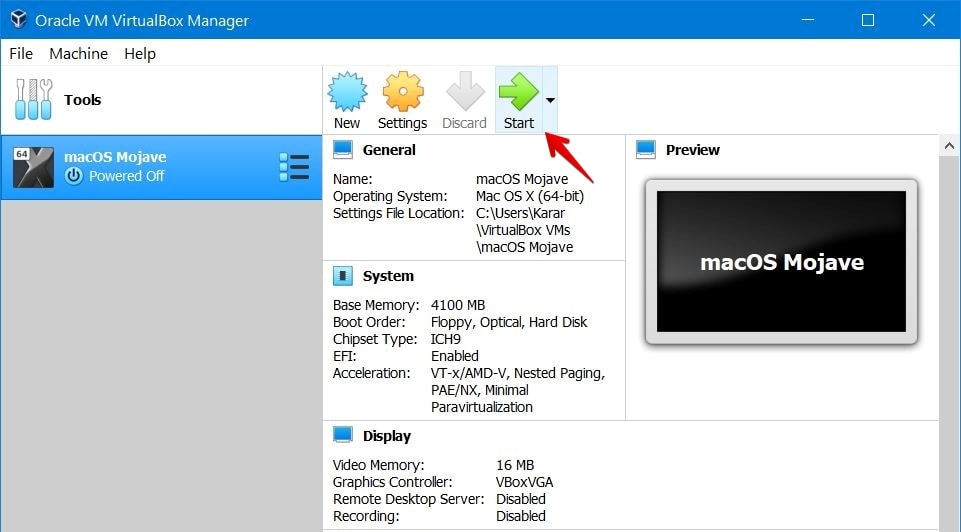
After you set up things, go ahead and switch on the macOS.

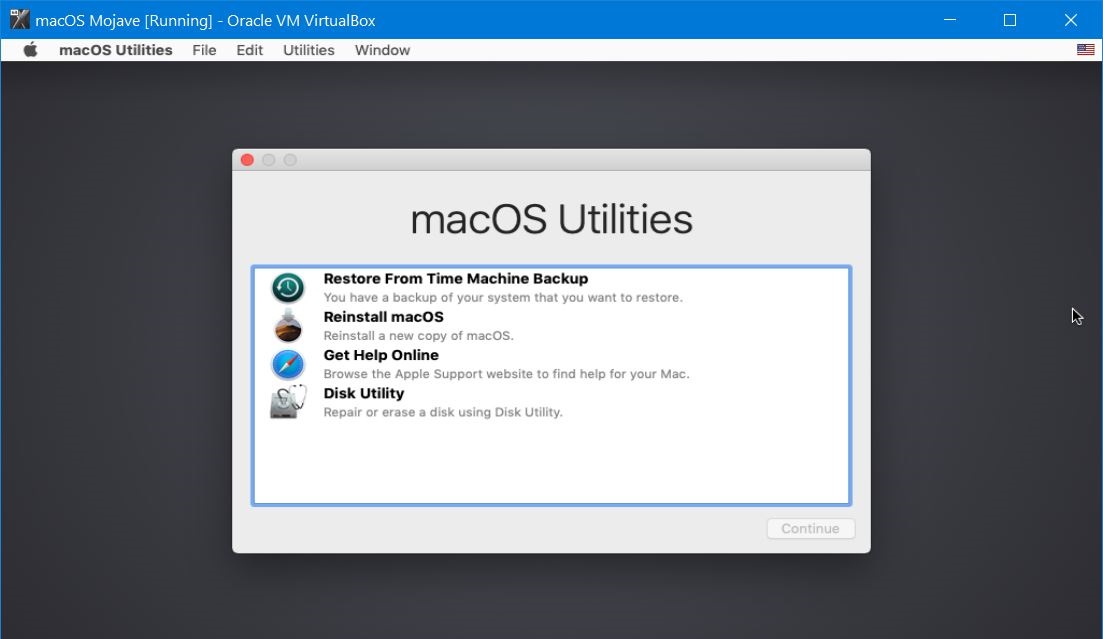
On the language splash screen, select your preferred language and Continue.


Ultimately, you are into the really important screen where you can do a few things. That you can restore from Time Machine from a backup, reinstall macOS without losing your files, get help online from Apple support, fix and repair disk problems using Disk Utility.

Get Back to the Normal Mode of macOS
With that done, you are out of the steps. The time that you are done with the recovery mode, you are good to go back to the normal mode. However, the instructions and steps are pretty much similar for doing it on VirtualBox so don’t panic.
To get back, the process is simple. Head to the virtual machine settings on the virutal machine app.

There, select the new Hard Disk 2 (SATA) or Mojave Recovery Image and click on Advanced.

Now switch the device node to the SATA 0:1 or SATA 0:2, the one which is not used by another device.

Here, select the primary Hard Disk that the macOS is installed on, and click Advanced.

In the disk settings window, switch the device node to the SATA 0:0 and you are completely done.

And not to forget, you can always delete the recovery drive and get back to the normal mode. The boot options are now completely configured, and you will boot up in normal mode when you switch on the virtual machine.
That was all for this one. If there’s something missing or not working for you, let me know in the comments.