


Virtualization Technology (VT) is the most effective feature when it comes to virtualization. Which enhances and optimizes virtual machines with hardware virtualization features. This feature provides specific supervision and support to the virtual machines in order to minimize virtualization overloads whether in memory, cache, I/O. However, most recent processors include hardware virtualization feature which is often disabled by default. The reason for the disabling is not pretty obvious, but that can be due to not to be used by malicious code for some security reasons. With that said, there are always some ways to enable it. Here’s how to enable Intel VT-x or AMD-V On BIOS or UEFI Firmware. You can also look at electronic components sourcing specialists.
In this case, if you want to run and work with virtual machines, you will need to switch and enable Intel VT-x in your computer. These features are already integrated into Intel or AMD CPUs and are ready to work. With those, if you have previously worked with virtual machines, you might have encountered with errors indicating disabled VT-x or virtualization features or something similar to that. Those errors appear mostly for the disabled virtualization feature and if it’s enabled, then, there might be some different problem such as Hyper-v installed. See the article on how to disable it. How to Enable Intel VT-x or AMD-V On BIOS or UEFI Firmware
- Related: How to Uninstall Hyper-v In Windows
This happens mostly with Intel CPUs, which is often disabled by default. On an AMD CPU, this feature is always enabled by default so there’s no BIOS or UEFI firmware. If you have a system with Intel CPU, this feature is often disabled which might be the reason for the errors. Here’s how to fix things up, so let’s get started. How to Enable Intel VT-x or AMD-V On BIOS or UEFI Firmware.
Turn on Intel VT-x From Your Computer’s BIOS
If you have a recent system with an Intel CPU, you are probably good to have this feature. In order to enable, you will need to access your system’s BIOS or UEFI as different PCs have different settings like older PCs has UEFI, while most modern PCs have BIOS. So, if your PC has BIOS, you will need to reach out to the BIOS settings and enable the feature from there. How to Enable Intel VT-x or AMD-V On BIOS or UEFI Firmware
On Intel systems with BIOS, save your work and restart the PC. When the first screen appeared at startup, press the BIOS key (which will appear at the screen). For most computers, the BIOS key is “Del” for delete button or “F2” key as your screen shows like “Press Del key to enter setup”. This is easy.


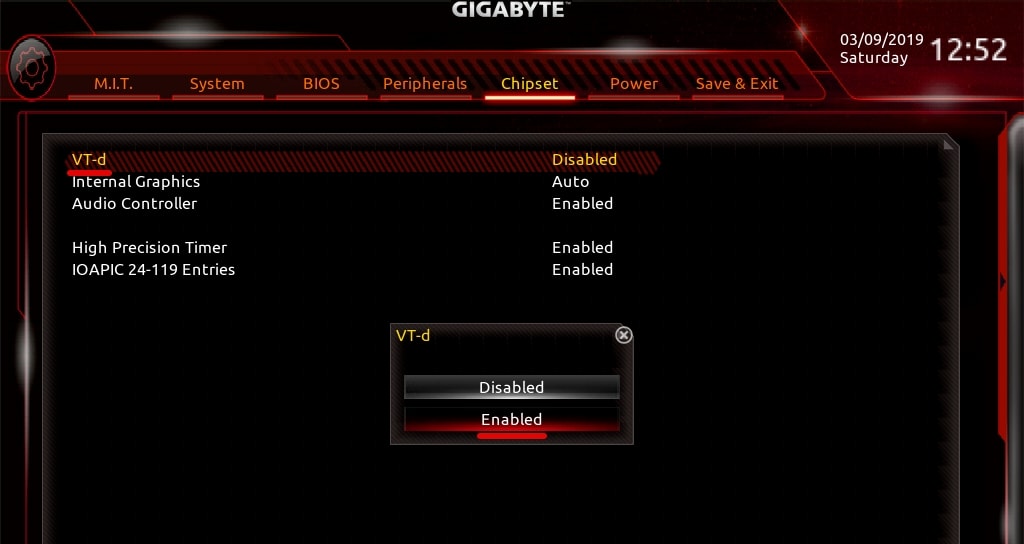
On BIOS settings, go to Chipset> VT-d > Enable it. If that option is not available for you, goto something similar to that like processor, configuration, chipset.

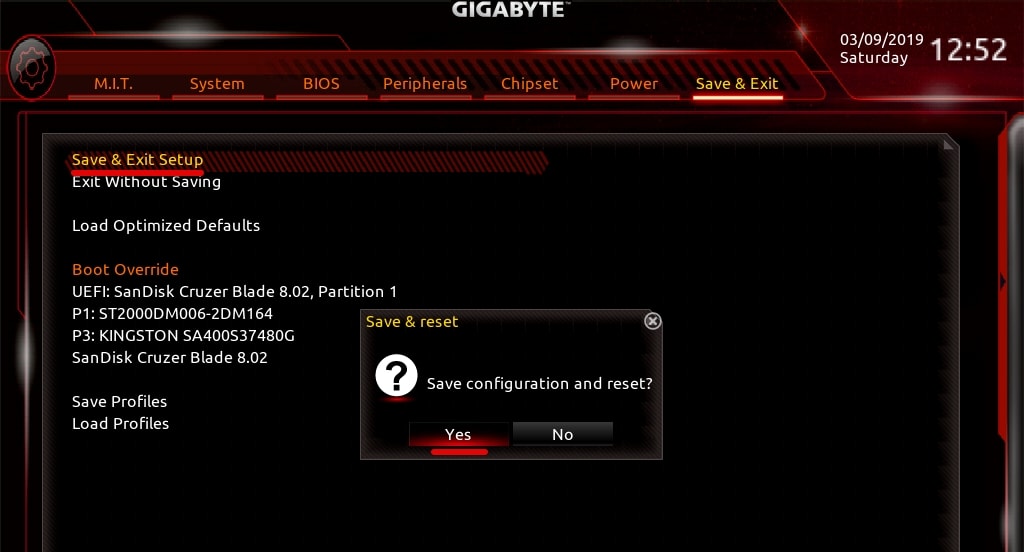
When done, go to the Save & Exit menu and hit enter then click Yes for saving the configuration. This will save the settings and reboot your computer so there’s nothing more left to do. All done! Just open your virtual machine and enjoy using it.

Enable Intel VT-x or AMD-V On BIOS or UEFI Firmware
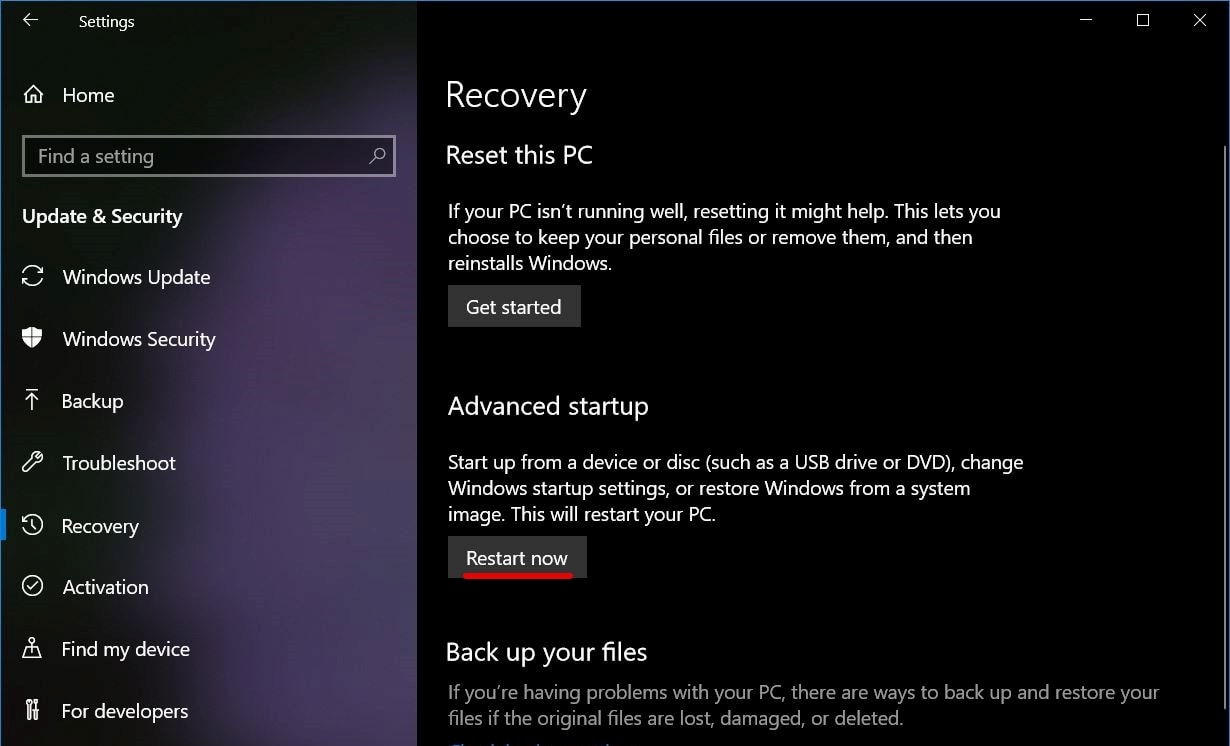
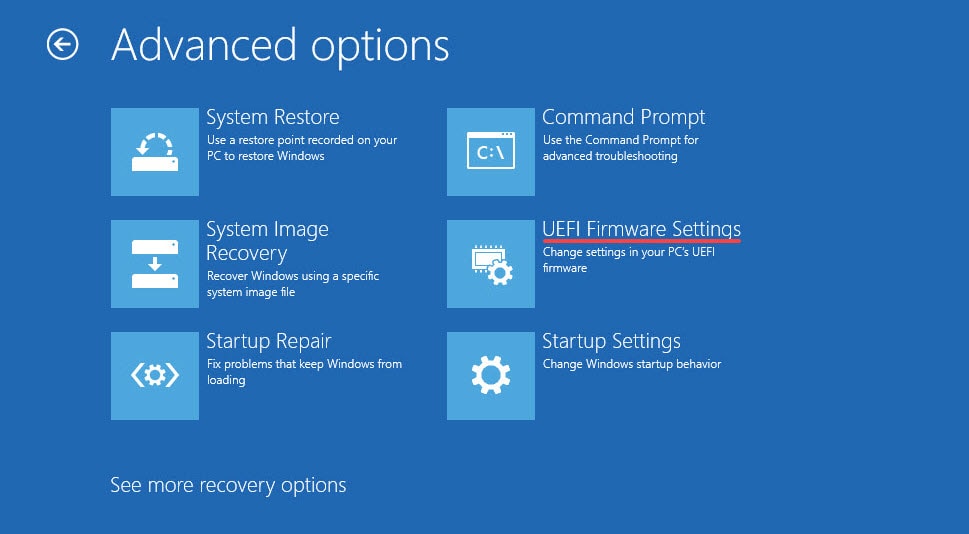
On Intel systems with UEFI, you have whole different to do. Goto Settings> Update & Security> Recovery> From the Advanced Startup click on Restart. This will restart your PC and enter you into advanced options like the shot.

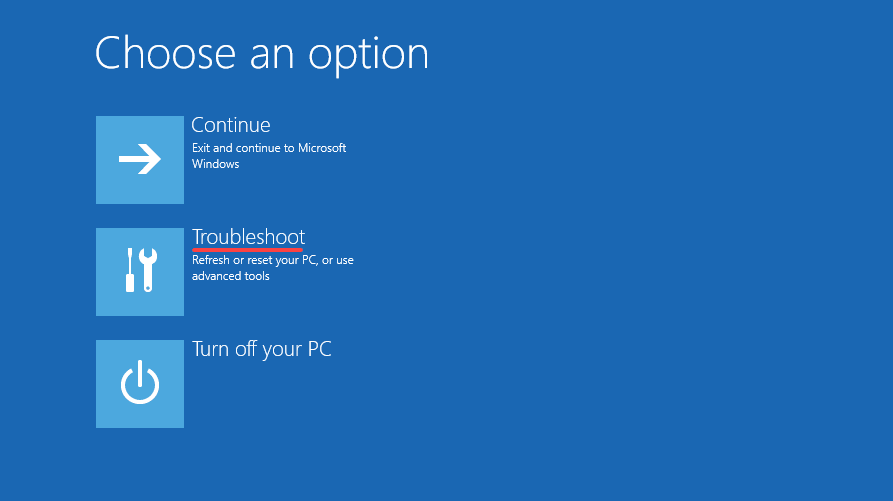
When restarted, you will straightly boot into the Firmware settings on choosing an option window. Select the Troubleshoot option.

From there, select Advanced options.


In this screen, select the UEFI Firmware Settings.

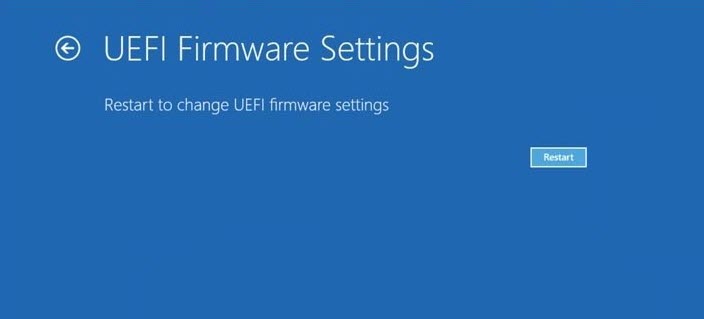
Next, click Restart. Your computer will reboot into the UEFI firmware settings.

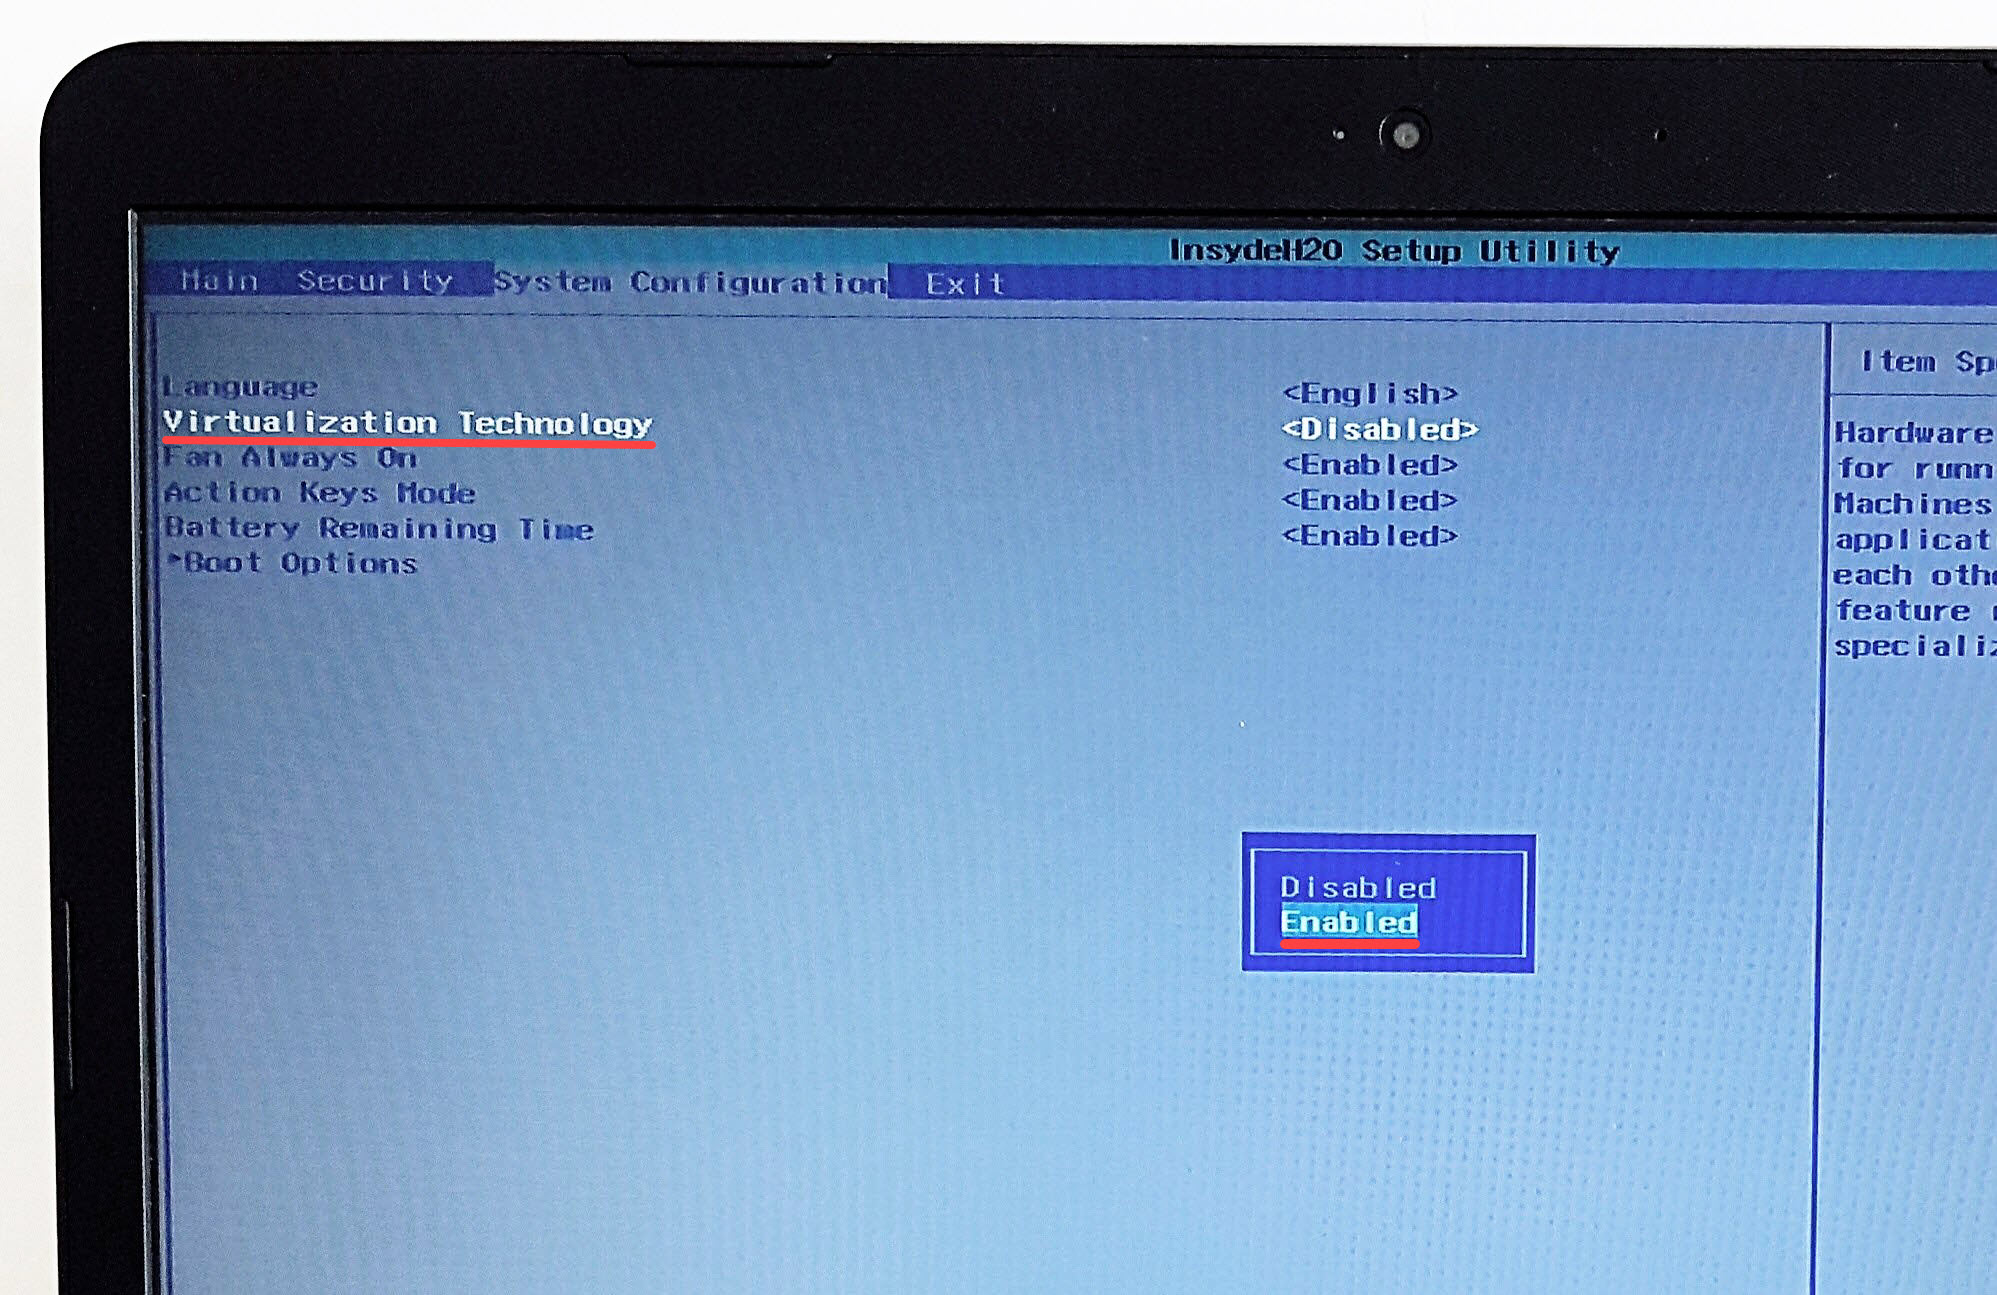
At this point, you will access directly into the UEFI Firmware settings. Here, you will see different options that are different for every computer. Now that you are into, you can look for things like or similar to Intel VT-x, Intel Virtualization Technology, Virtualization Extensions. If you didn’t find that, you can search and get into a few options which may seem that the option may be there.
Once you find that option, enable the option and select Save Exit to save the changes.

After the PC restarts, you can try using VMware or VirtualBox again.
That’s it. You can now happily enjoy virtual machines without interruption.