

So you have installed Mojave virtually on your computer, but you are not done with it and you’re still thirsty. All right, you have the next option left specifically the Hackintosh way to say, which is pretty handy that might do your thing. That’s pretty easy enough to install once you boot but not that simple with creating Hackintosh installer. This requires a little bit of your everything – including time, effort, courage and of course stickness to the instructions. And not to forget, you’ll have to go on your own risk in case if you go away from the instructions. But don’t worry, because you are not supposed to do it alone. In addition, you will not lose or do any sort of loss or damage take my word. Here’s how to Create macOS Mojave USB Installer on Windows.
With those, if you’ve decided to install macOS Mojave really aside from your existing operating system, you have proven your bravery, just saying this for fun. To accomplish that, first, you’ll need some things and importantly, an complete installer that won’t boot without. Just like you install any operating system, commonly Windows (if we take as example), you’ll basically need to create a installer in order to boot into then. The same goes here with installing Mojave, but the only difference is, you’ll need to fiddle up with things that matter. But don’t worry, you can do it with Windows.
While creating Hackintosh takes more of just creating a USB installer for Mojave. But one of the critical and the most important part comes down to the creation of installer for booting into. The down part is, you’ll need to have access to a real Mac, that’s what you assume actually. But that’s not the case if you have installed macOS Mojave on VMware or installed macOS High Sierra on VMware. Because they work the same as an actual Mac and that’s fine to do on this. And that’s what I do as well if you’re wondering. While this way works perfectly but things are little manual to do. The best part is, you will be able to create a customized thing that will work perfectly. But if you want to do it automatically via creating bootable USB installer on Windows which is fairly easy entirely on Windows if you haven’t checked out.
With that said, you may as far as know that Apple doesn’t allow installing macOS Mojave on no other hardware or computer but only Mac. And that’s what you can find it with their policy as well. Due to this, Apple makes it harder to install on any other computer (even creating an installer), but not impossible with the hard work of developers. With that said, let’s Create macOS Mojave USB Installer on Windows.
Table of Contents
How to Create macOS Mojave USB Installer on Windows
If you decided to keep consistent, you are ready at this point.
- A 16gig (or greater) portable drive or USB that does not include files (If includes, take a copy of your those important files beforehand). This process will wipe out the entire drive, so make sure you back up anything there is. The Mojave is around 6 gig, so to be on the bright side, it’s probably good idea to have at least 12 – 16 of free space for the booting. The drive can be of any size but not less than 16GB but beyond that, that’s good for you.
- An actual working Mac or macOS on VMware – This is great if you don’t own a Mac. If you have a real Mac, that’s okay, else you can install macOS on VMware and the steps are the same for the whole.
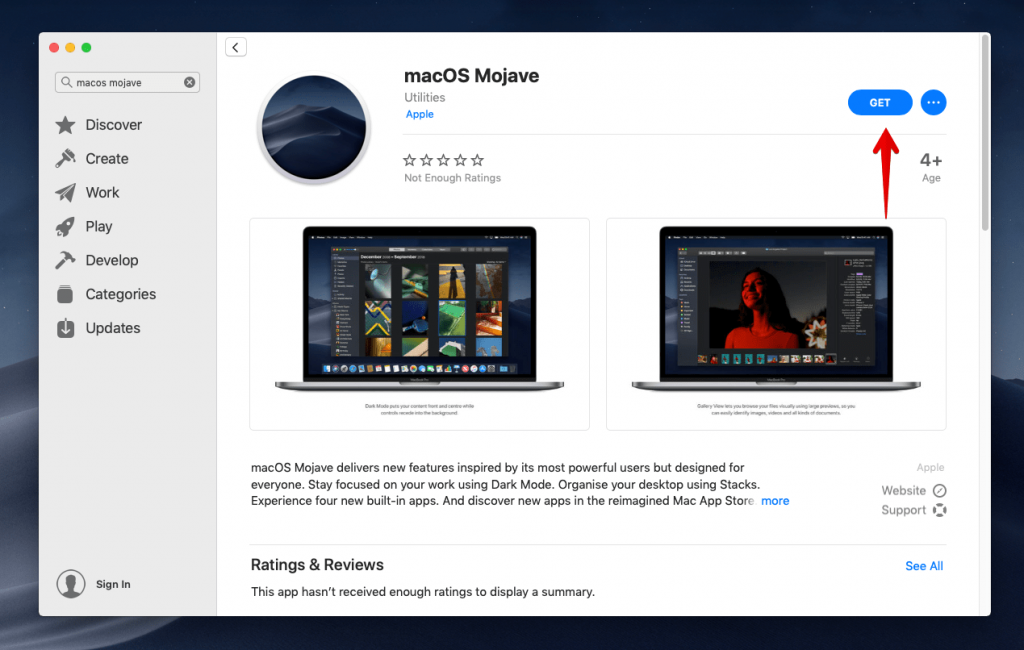
- The macOS Mojave installer image. To get the macOS 10.14 Mojave, you will need to simply go to App Store. Search for “macOS Mojave”, when the results appear, go with the official one and click on Get. Don’t Panic, we’ve got you covered.
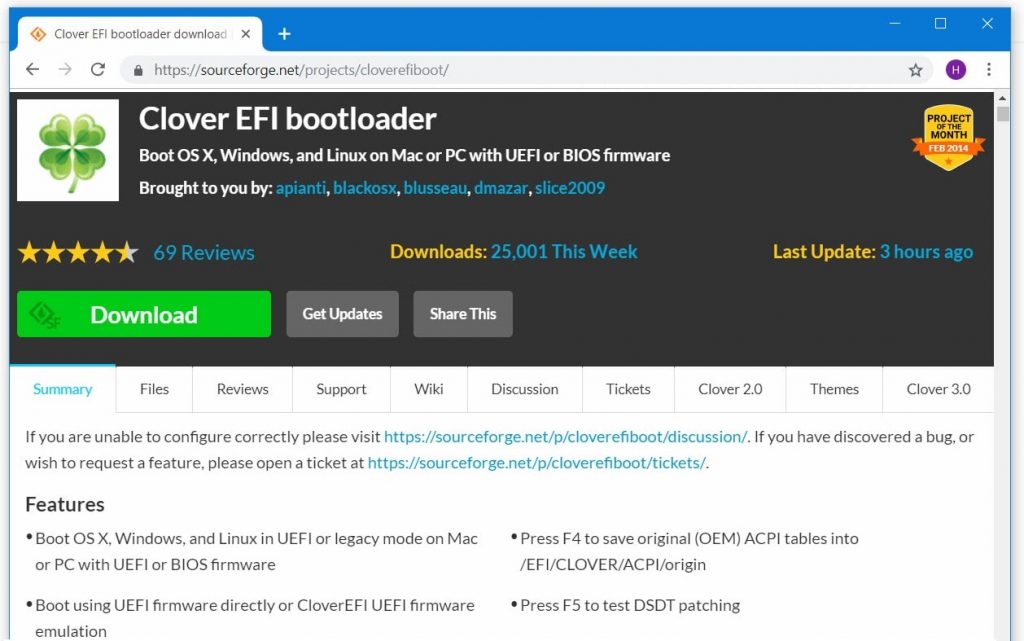
- The Clover EFI Bootloader that configures and boots into OS X with UEFI or BIOS firmware. To download it, simply head over to the website and click on Download. You will not need to join or sign in.
- FakeSMC.kext – GenericUSBXHCI.kext – Config.plist. The files are quite important to get. Download them and drag and drop them
Ready? Steady? Go. Here’s how to Create macOS Mojave USB Installer on Windows.
First: Install macOS on VMware on Windows
If you don’t own a Mac or want to do it on Windows, you will need to install macOS (Whatever version) on VMware or VirtualBox. However, we have covered you up with these. Here are some of the instructions you can follow. So start with Create macOS Mojave USB Installer on Windows process.
- Install macOS Mojave on VMware
- Install macOS High Sierra on VMware
You can install any of these and create your working macOS installer for Hackintosh.
Step One: Download macOS From App Store
Before anything you do, you will generally need a macOS installer which is officially available at the Mac App Store. Confused where to get that? Don’t overwhelm. Just fire up macOS Mojave or High Sierra you’ve installed on VMware.

Once you sign in, navigate to the App Store there and search for it (“macOS Mojave”). From the results, choose it and click on Get. This will open up settings and check for update, then you will be prompted to download the macOS Mojave, click Download.
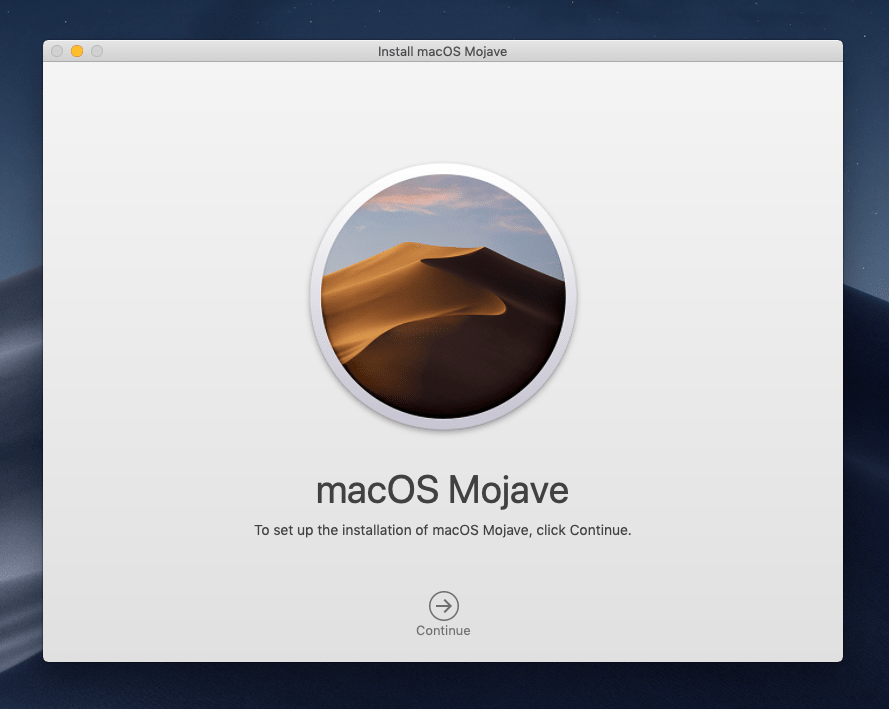
Once you are finished with downloading, the macOS Mojave installer will pop up. Don’t continue and close it.
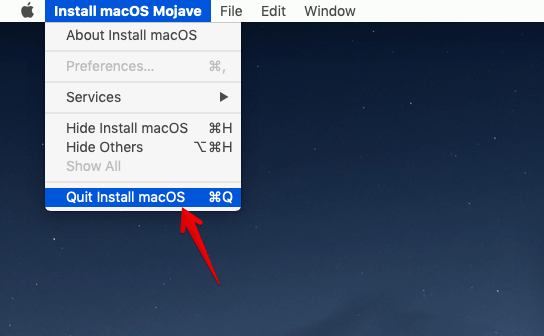
To end this, on the top left corner click on Install macOS Mojave and select Quit Install macOS like the shot.
Step Two: Insert & Erase The Installer Drive
The whole process goes on the portable drive, so you will certainly need at least a 12 – 16GB drive.
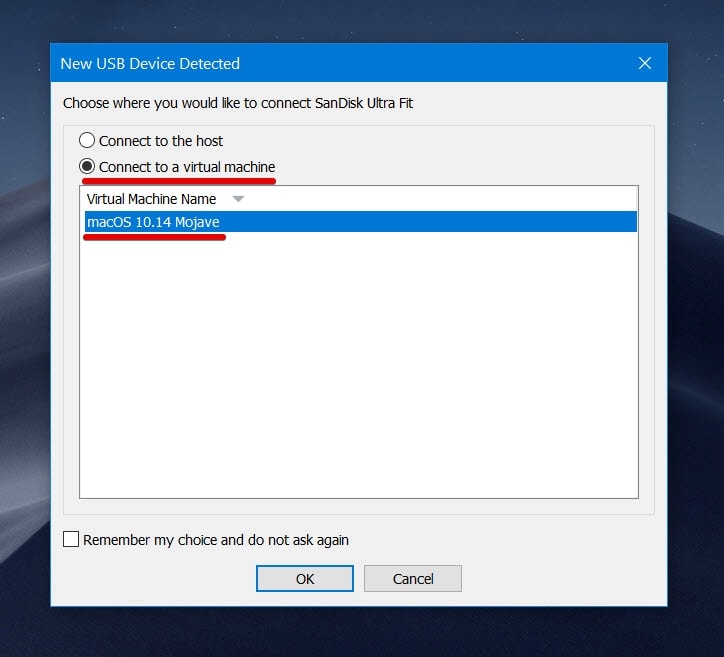
Now insert your portable drive or USB and you’ll be prompted to choose whether you want to connect the drive to the actual operating system or virtual machine. Select Connect to a virtual machine and from there, select the virtual machine whether its Mojave or High Sierra and click Ok.
However, you can also change this from the VMware menu from VM > Removable devices > Your Device > Select if you want to connect or disconnect from the virtual machine.
It’s crucial to note that make sure you follow the track and things as we go, otherwise, you may lose your installer stick.
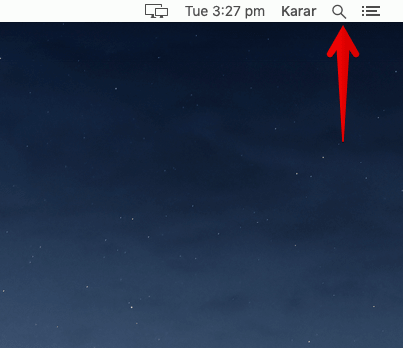
Next, push up Spotlight from the top right corner of the page by clicking on the search icon.
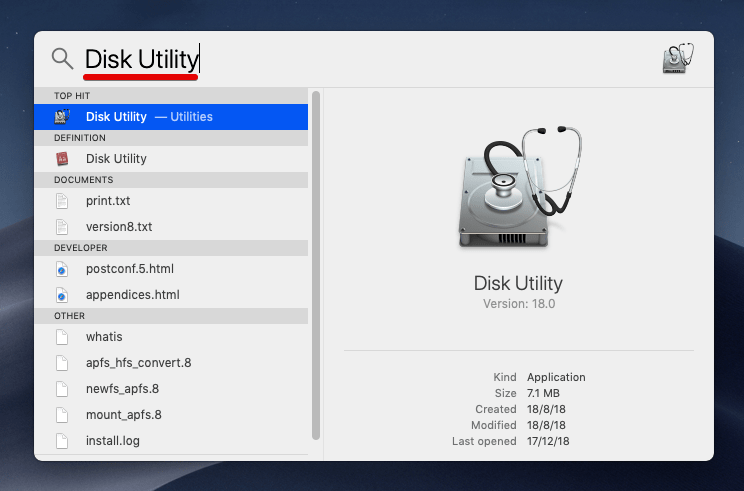
On the Spotlight, search Disk utility and hit Enter.
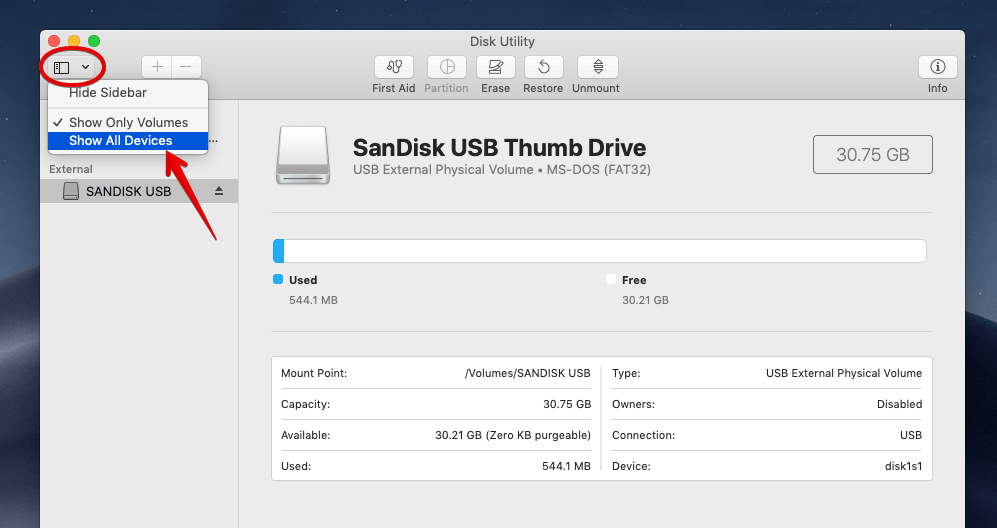
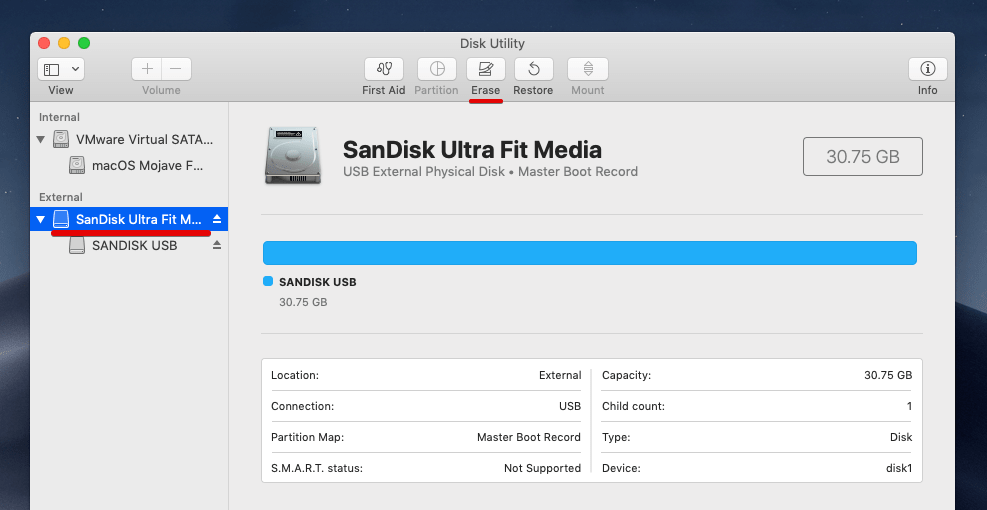
When the Disk Utility opened, click on the sidebar icon and select Show All Devices.
From there, choose the installer drive and click on Erase. Before you do, make sure you have backed up your important files, you will not be able to get them back once the drive is erased.
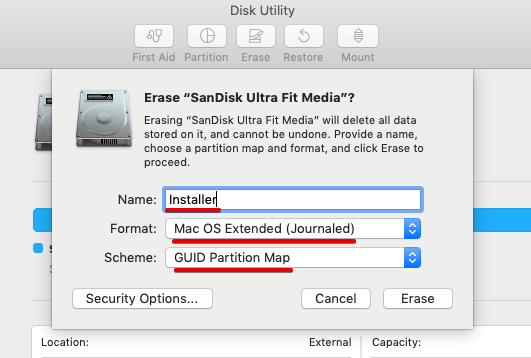
On this window that opens, name the drive “Installer” and format to macOS Extended (Journaled) and scheme to GUID Partition Map, it’s important.
Once that’s finished, click Done and close the disk utility window.

Step Three: Apply Commands on Terminal
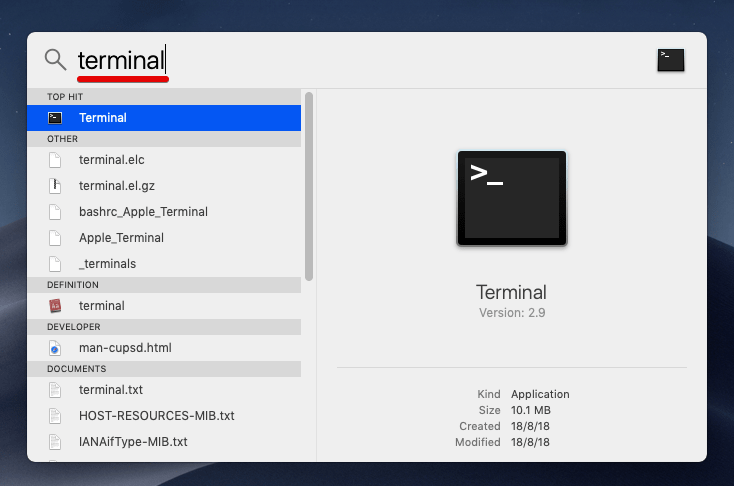
By this point, open Spotlight and type terminal, then hit Enter.
When the Terminal appears, copy and paste the command on it and hit Enter. You can simply do it by copying the command from here and on the terminal in the virtual machine, right click and click on Paste then Enter.
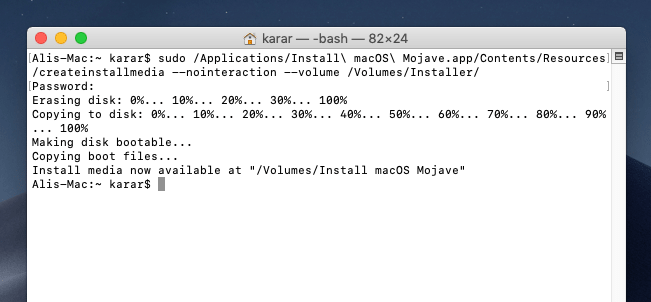
sudo /Applications/Install\ macOS\ Mojave.app/Contents/Resources/createinstallmedia --nointeraction --volume /Volumes/Installer/
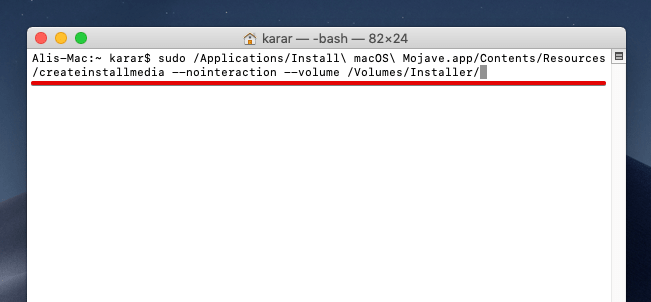
When you’re asked for your password, enter it. As you typing in, it will not show you up, but still you’re. This will take some time. As the result, it should look something like this.
Step Four: Create macOS Mojave USB Installer on Windows with Clover EFI Bootloader
Great – Now that you are essentially done with the commands, you are good to go.
When you have downloaded the Clover Bootloader, make sure you do if you don’t. Head over to the Clover EFI Bootloader download page and hit Download. It will start the downloading immediately.
With that downloaded, open it up and you’ll see the clover setup files.
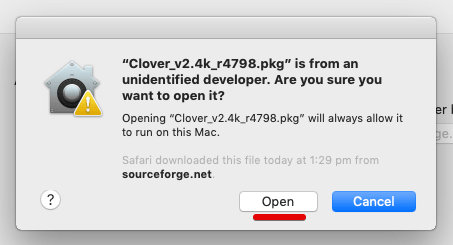
Double click on the Clover_v2.4k.pkg and let it open. But if you are doing this on VMware on Windows, you’ll likely see this error.
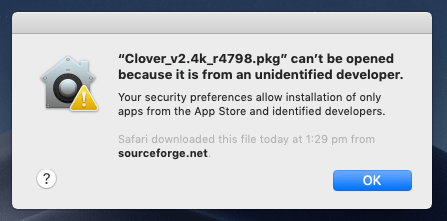
To solve this, navigate to Settings > Security & Privacy and click on Open Anyway.
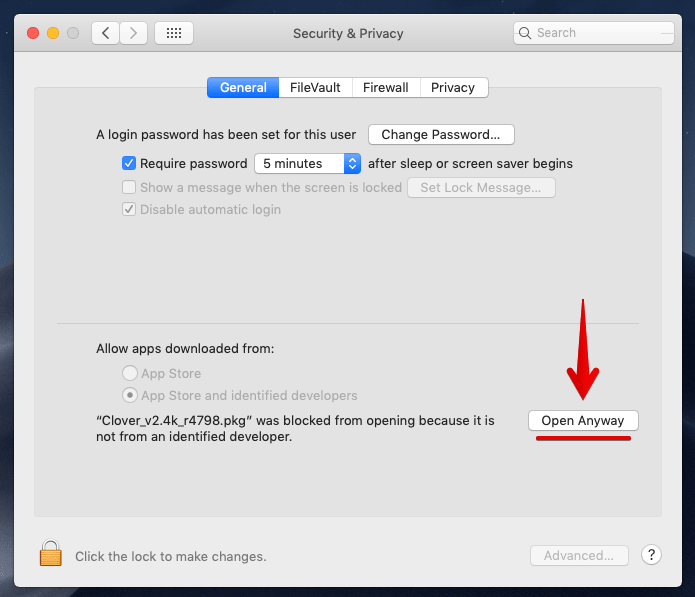
This will confirm if you are confident to do this, click Open.
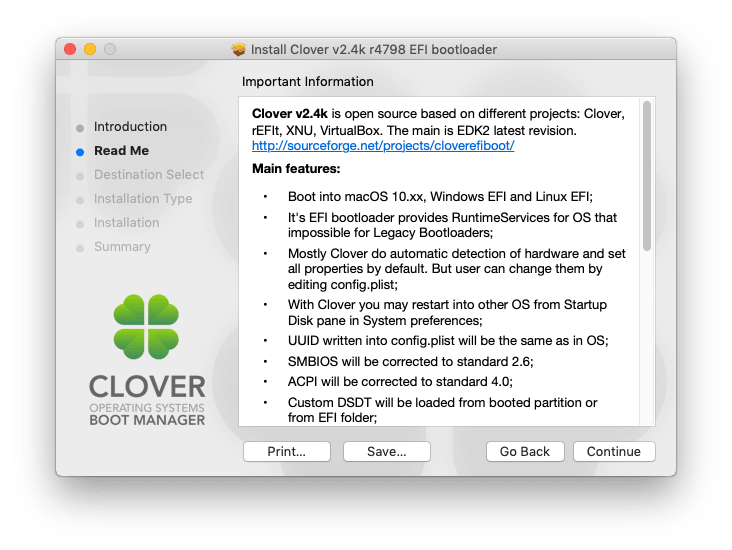
After you do that, the Clover will open with message that reminds the being secure of the software, Continue with it.
And you are on the introduction page of the Clover, simply Continue.

This page explains the feature and qualities of the program, go Continue.
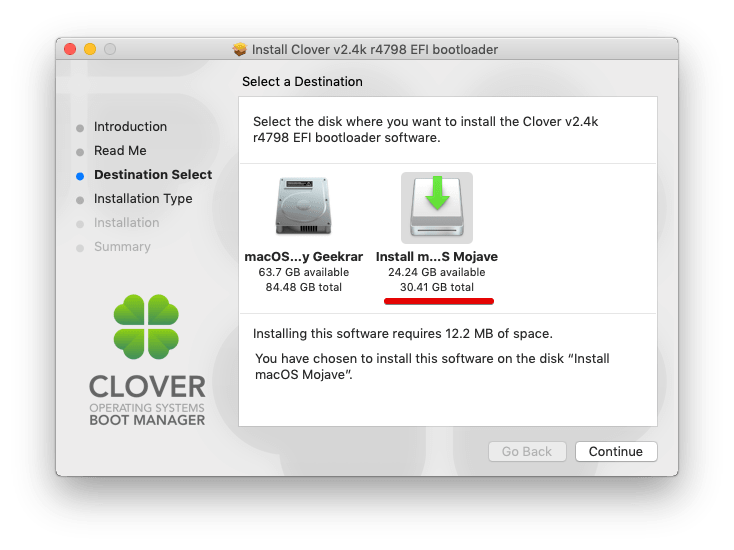
On this screen, you will need to specify the location to Install the software. To do so, pay attention at the bottom of the screen and click on Change Install Location since we don’t want this to be installed on the disk.
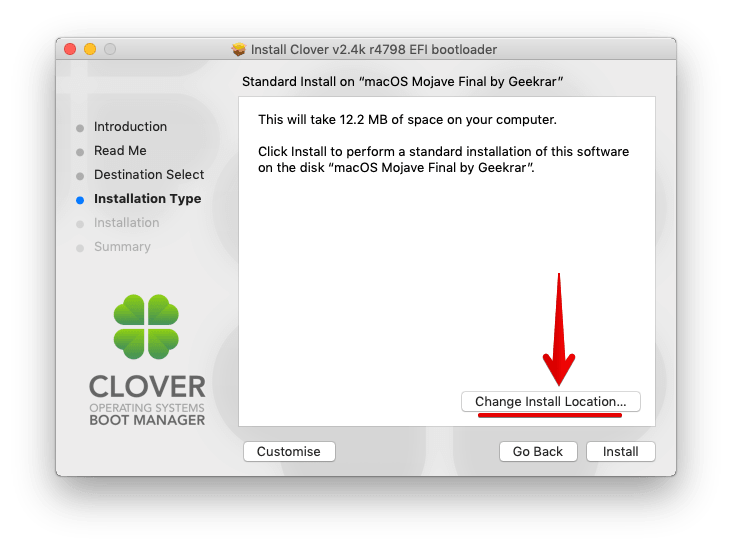
Select where you want to install and for this, you will need to choose the installer drive (USB) and Continue. The installer drive name will be Install macOS Mojave, so don’t get confused when you see it.
This time, press Customize for setting up some things.

The drivers are the important part of booting and install macOS so, make sure you have these options checked. If you don’t, check them and install it.
- Clover for UEFI Booting only
- Install Clover in the ESP
- UEFI Drivers: DataHubDxe – 64, FSInject -64, SMCHelper -64, VBoxHfs 64, ApfsDriverLoader -64, EnglishDxe -64, OsxAptioFix3Drv -64, PartitionDxe -64, UsbKbDxe -64, UsbMouseDxe -64
- FileVault 2 UEFI Drivers: All of the drivers

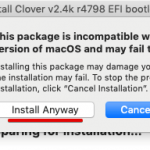
After you do that, you will be prompted to enter your credential, do that. Later than, you will be warned of the package incompatibilty, don’t worry it won’t damage as it says in the dialog box, click Install Anyway and you’re done.
At the time of installing, you may be asked various times for your password, so be calm and enter it when requires.
 And you are near to the finish line. The installation has passed fairly great, and you do not need to do anything, just Close.
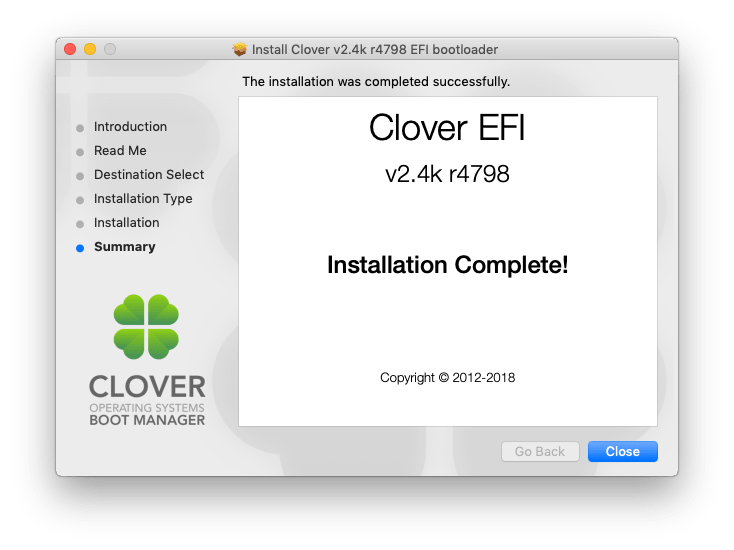
Before closing, you may be asked whether you want to keep the Clover files or remove, simply keep them.
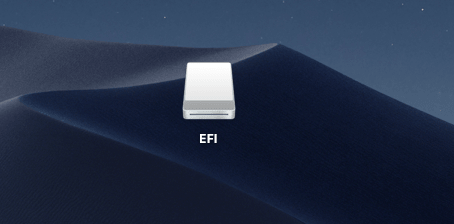
The installer drive will eventually rename to EFI, appearing on the screen. It should look something like this.
Step Five: Install The Necessary Kexts
Comes to installing the kexts part that boots into macOS. Give it a go.
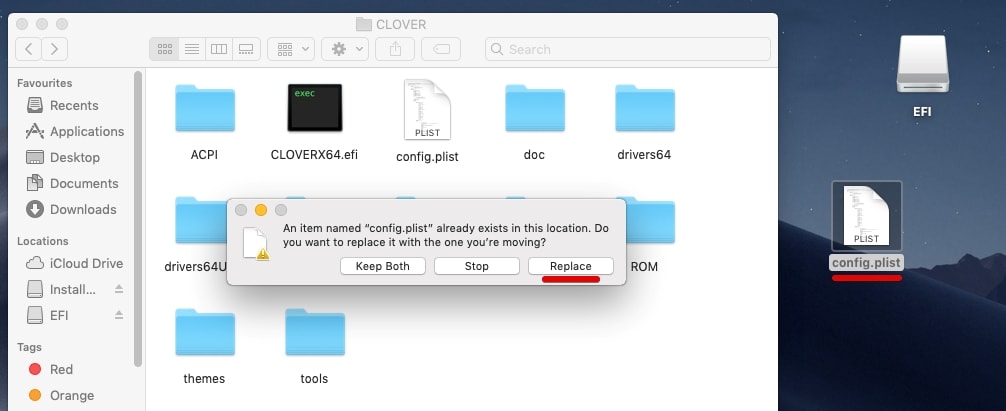
Goto EFI (Installer) then Clover from the screen. At here, drag and drop the config.plist file on the EFI Clover window. The prompt will appear as what you want to do with it, press Replace button.
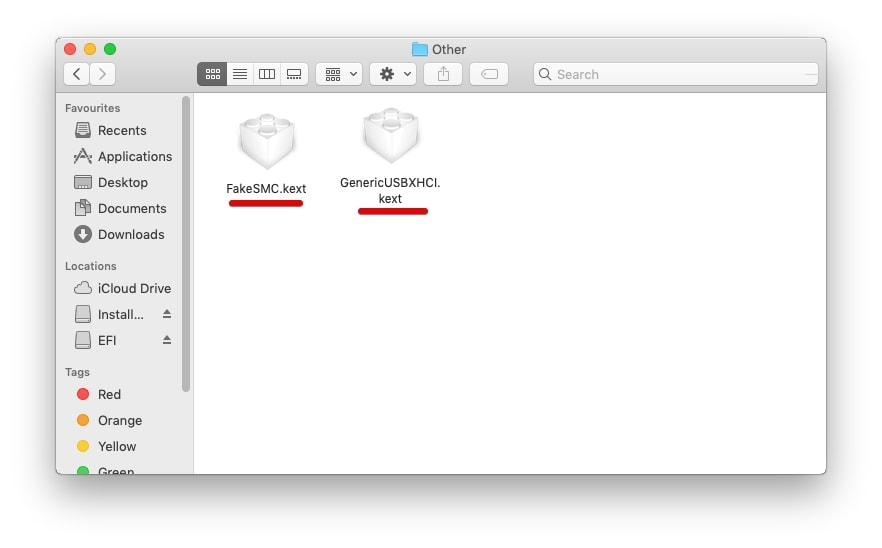
Now navigate to EFI > Clover > Kexts > Other > Drag and drop the necessary kexts. You only need the kext that are shown below.
Step Six: Remove The Installer Safely
With that all done. The macOS installer has been created successfully and things should go fine.
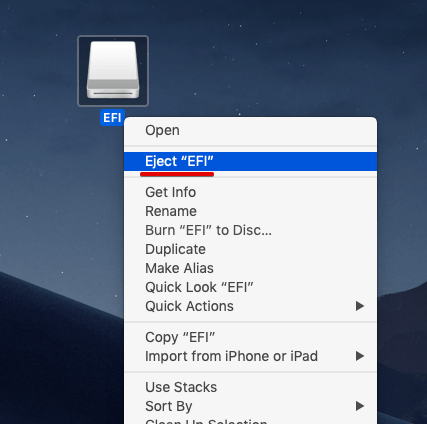
Now to remove the drive safely, right click on the drive and Eject it.
NOTE: If you don’t eject the drive for safe removal, you may lose the drive.
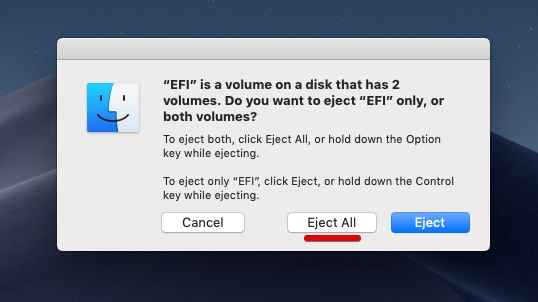
On the dialog box that pops up, select Eject All to eject the installer from both volumes.
Congratulations on making this up to end, you’ve come a long way. You can gladly step forward into Hackintosh(ing) your PC with this installer tool. And even troubleshoot if you ran into problems, it works great. Good Luck, go for it.


Hi. MacOS Mojave was not found in the apple store. How to to get it? Thank you.
Hi, I created step by step your boot usb, but when I try to setup the MacOS , it’s enter to restart cycle
Hii, Clover is restarting system when i click on clover boot
step 3 fails…
Hi can you upload a copy of MACOSX either installable or installed as R-Drive image? Please
Hi. I have followed the steps. I got to the bootloader screen but once I press install Mac OS I am getting blank screen. Do you know what might be the cause? Thanks in advance
Me too, just getting a blank screen
hi, were you able to make a successful hackintosh? Please tell me so I can know which source you used.
Thank you