


Gone are the days of dinosaur, when you used to do things with CD/DVDs that some of them might actually work. That’s what used to be back in the school days, and is no more useful. Because that’s pretty simple now with a quick, handy, portable drive. Whether you’re looking to install from scratch, upgrade or repair your existing operating system, you have the best bet to go with. Here’s how to Create Bootable USB installer for macOS Mojave Windows.
Ultimately, the greatest version of macOS is here. If you’re planning to perform a fresh install of macOS Mojave on your working computer alongside Windows specifically dual-boot on your hackintosh system, you’ll obviously need a bootable USB installer. Assuming you’ll actually need to access to a macOS machine, you’ll not need it here this time. This is convenient if you’ve access to an Apple computer. Or else, if you don’t have that opportunity, it’s somewhat slightly tricky though. But, for that, you are not supposed to do it alone, because we’ve all caught you up. So let’s get right into it.
Table of Contents
What you’ll need
Before you go any further, you’ll need a few things.
- A 16GB (or larger) USB stick that doesn’t care erasing. The installation file for Mojave is about 6GB, so you’ll need a portable stick that is at least 12GB or typical 16GB is also correct. It’s worth noting that a USB 3 is rapidly faster than typical USB 2 and work quicker than the typical old USB 2 one. If you don’t have one, you can get from Amazon or eBay, if you’d like to.
- Access to at least one working Mac with access to the Mac App Store. If you don’t have access to the specific machine, you’re not alone. This is possible with macOS Mojave on VMware or macOS Mojave on VirtualBox in Windows that works great. This works on your PC similar to present Mac and worth giving a try.
- A copy of macOS Mojave installation file that is available on App Store. When you’ll install macOS Mojave on your Windows, you’ll have quite access to your true Mac with everything. Since then, you’ll be able to download and do creating your bootable things there.
- The USB creator Tool (Unibeast 9.0): This tool allows you Create Bootable USB installer for macOS Mojave Windows with the installation file you’ve downloaded. All you’ve to do is just sign up and download.
- The AIO-Post-Installation Utility (Multibeast) that enable you boot from the stick when installing. As well as, it includes a set of useful drivers and customization options.
Apart from these requirements, you’ll need some time, approximately (an hour or more) mostly depending on your internet connection. An internet connection of course, if that’s fast its quicker for you and a computer that is least powerful, capable to run the virtual machine. Now Create Bootable USB installer for macOS Mojave Windows.
How to Get macOS Mojave Installation Files
When you’ve installed macOS Mojave on your Windows, you’re all set!
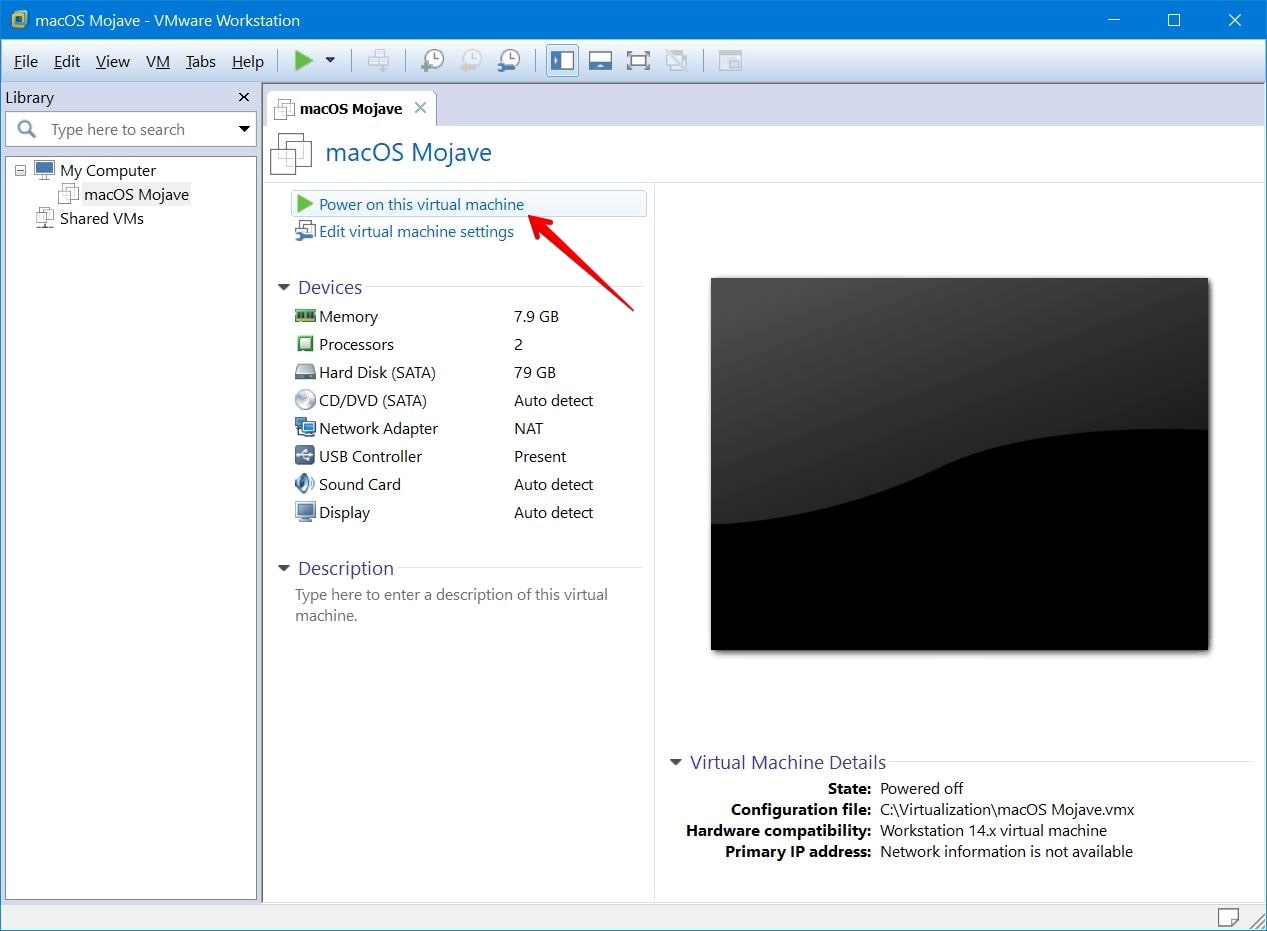
Navigate to VMware and play the macOS Mojave virtual machine.

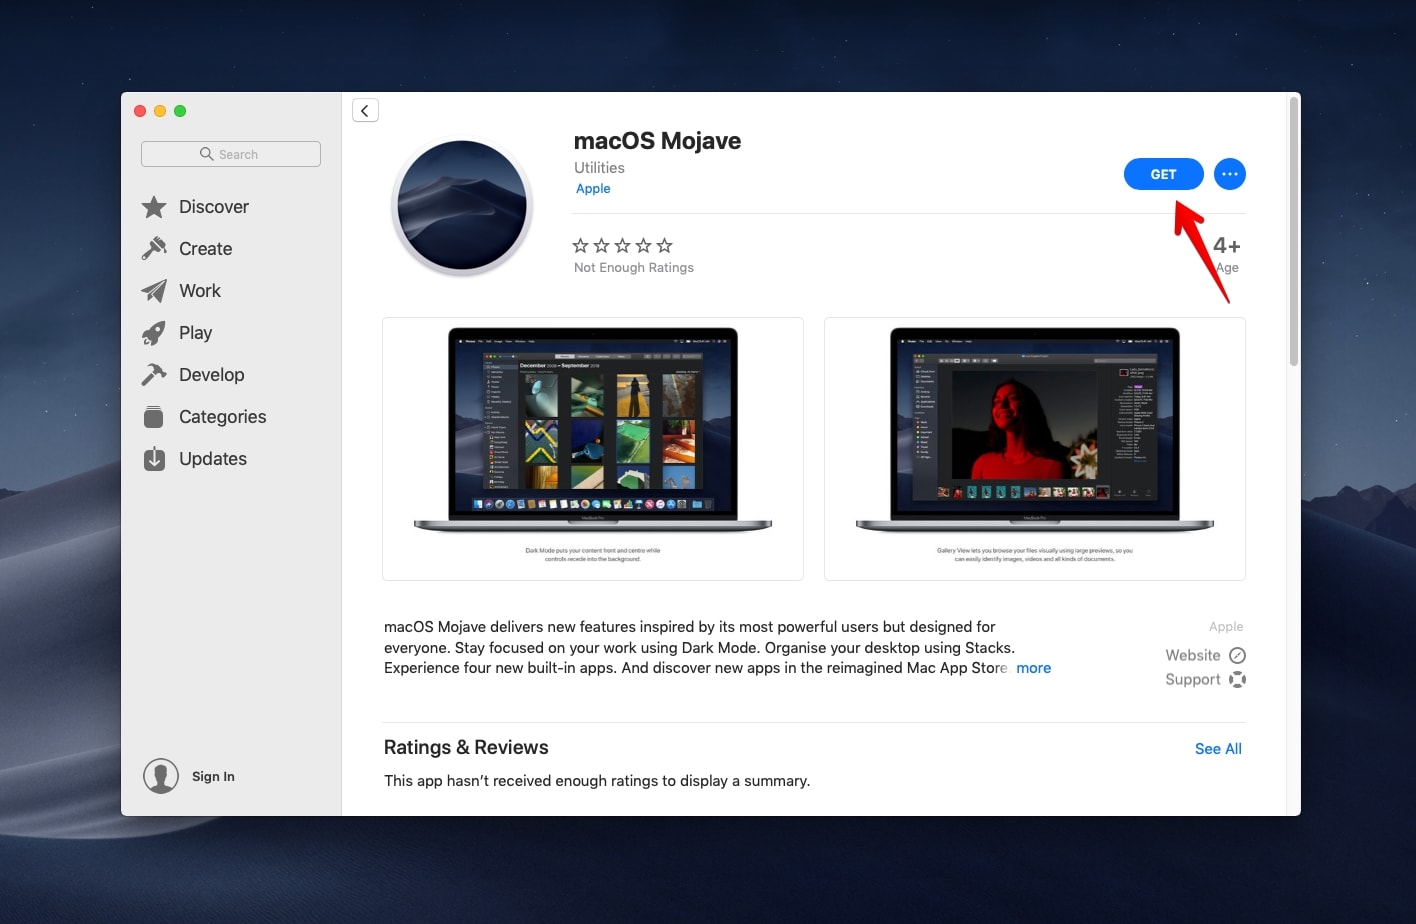
Once you’ve signed in, head to the App Store that is available on the dock on the screen and search for macOS Mojave.
On this screen, click Get and wait for it. Make sure you’ve a consistent internet connection and power connected to your computer. It will take a while, so take a cup of coffee and chill.

Next, when you’ve downloaded the installer file, go ahead and download the boot tool.
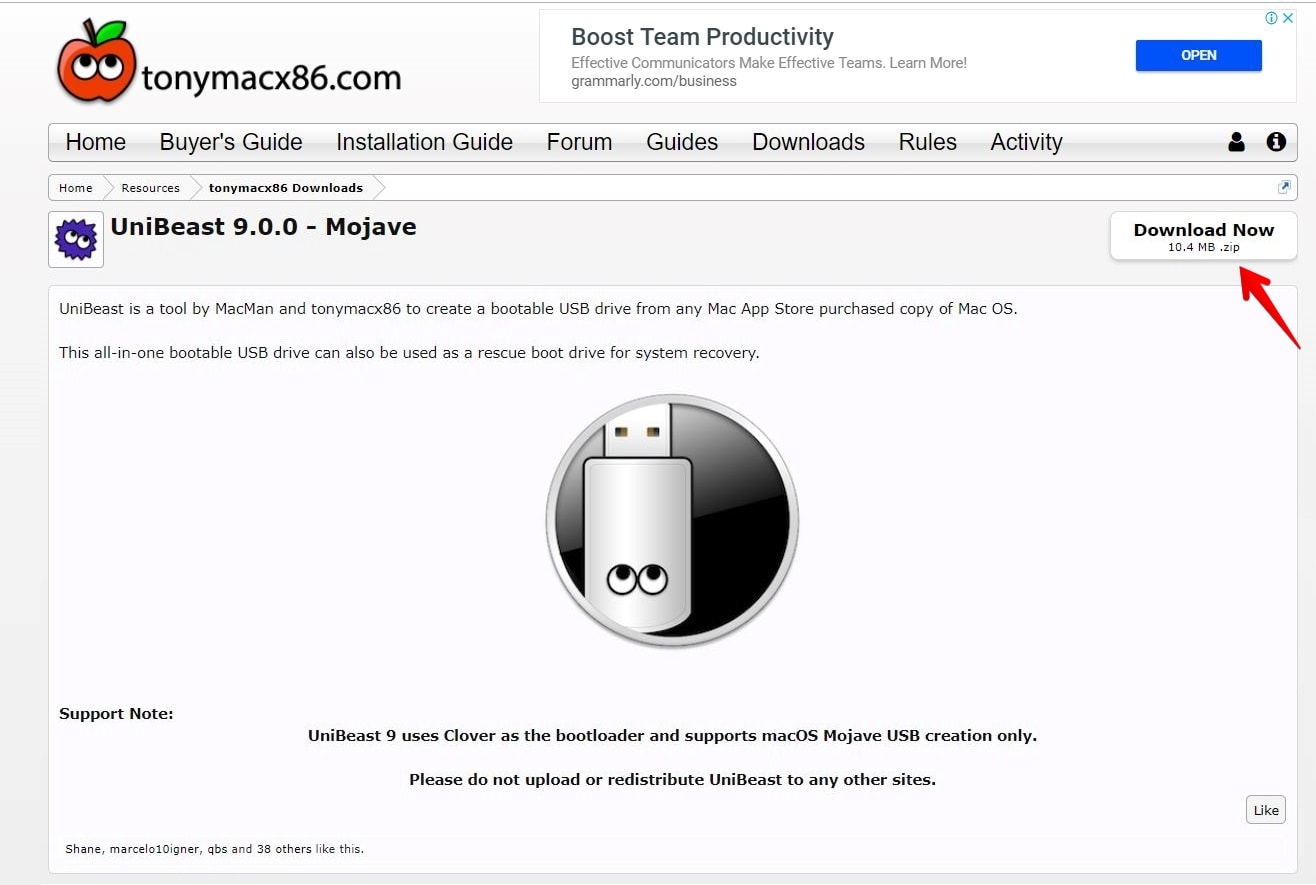
Go to Unibeast 9.0 and sign up, after that, click Download Now, no need to install. Also, you can download it on macOS Mojave with Safari as well.

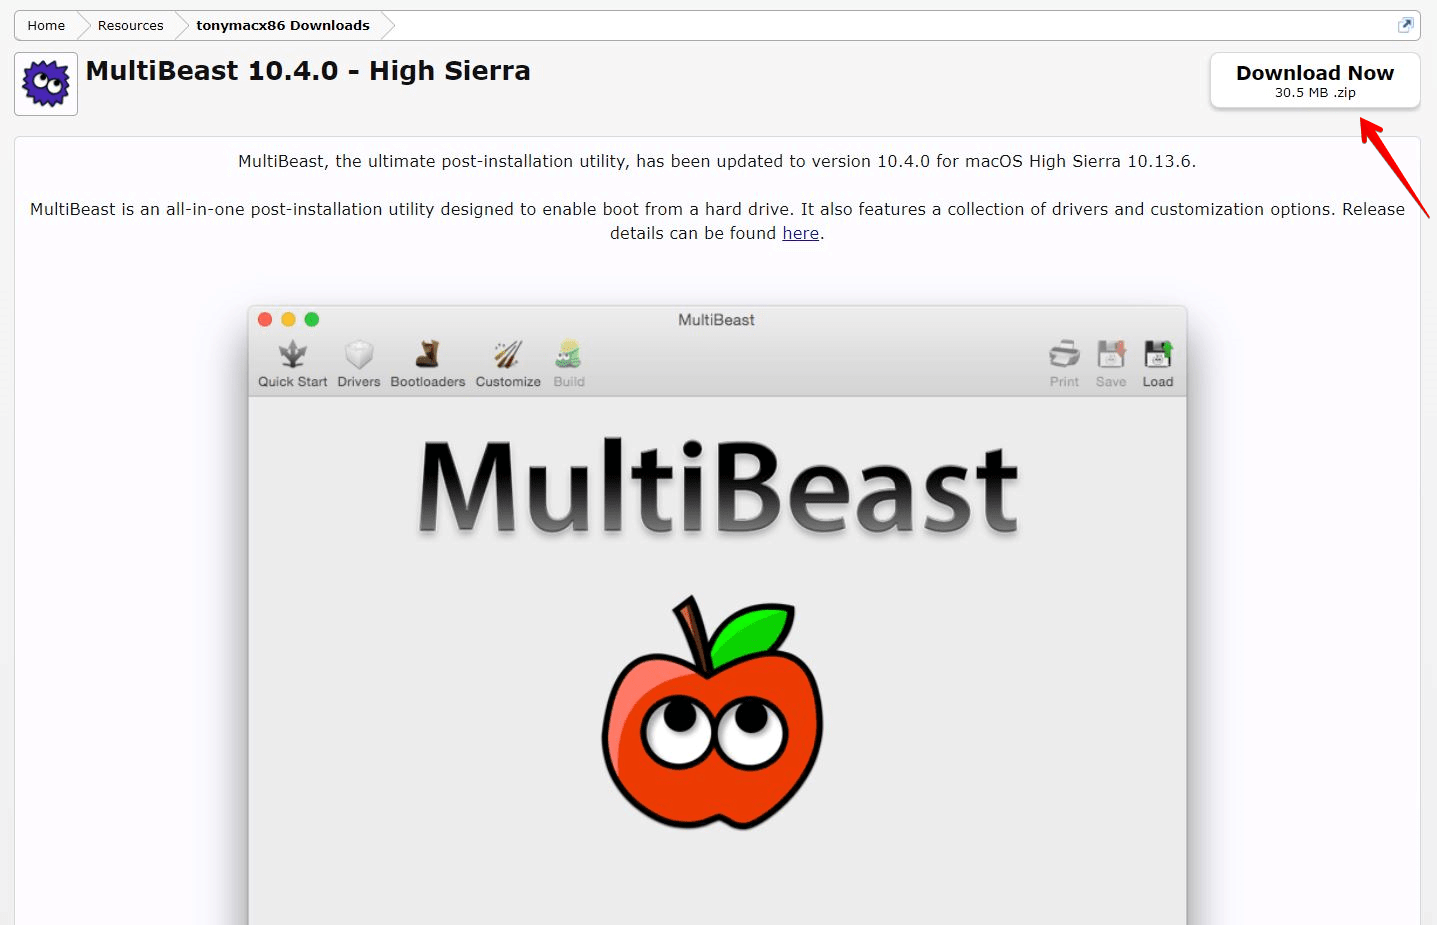
At the time of writing this, the MultiBeast was unpleasantly not the updated version for Mojave, but it will work properly. However, I will update it when the newer version is available.
Go to MultiBeast and click on Download Now if you are signed in.

Once you’ve those things ready, you’re good to get started.
Create Bootable USB Installer for macOS Mojave
When it comes to Create Bootable USB installer for macOS Mojave Windows, the process is assumed to be tough enough. With the right tools and on the path, you’ll be able to do it even if you are beginner. However, there are more than a way for doing this, not only on Mac but also Windows, (which we will cover some, at least one more method). The process for using the tool is straightforward and is entirely the same as previous versions of macOS, so we’ll be using the Unibeast Tool for this process. Where anything differs, we’ll just note.
At the very First, turn on the virtual machine and sign in.
When you do, plug in your USB stick and click on the Spotlight icon at the top.

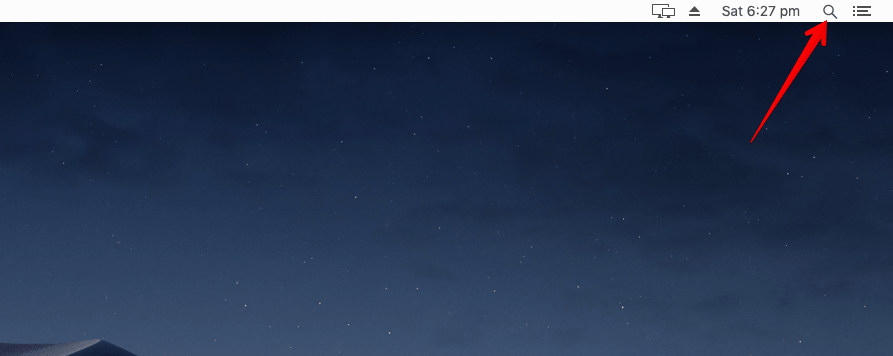
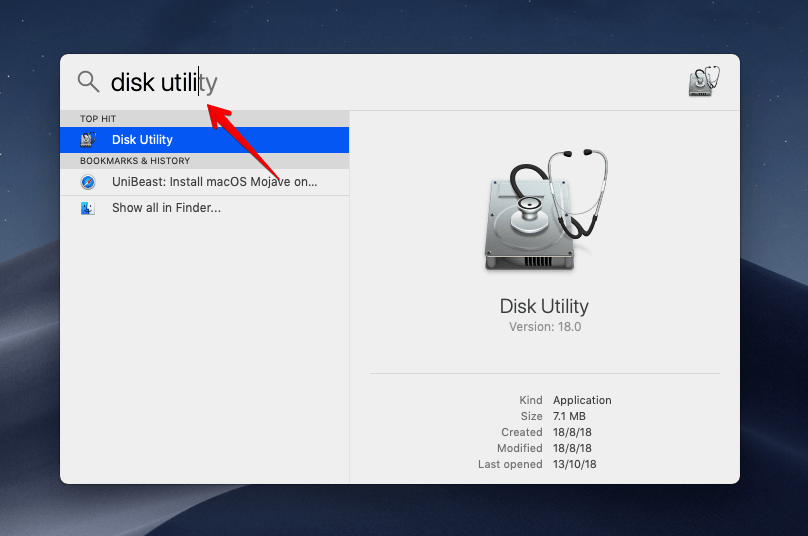
This opens the Spotlight window, that will be empty, first opened. Write down ‘disk utility’ and click on the very first result or simply hit Enter.

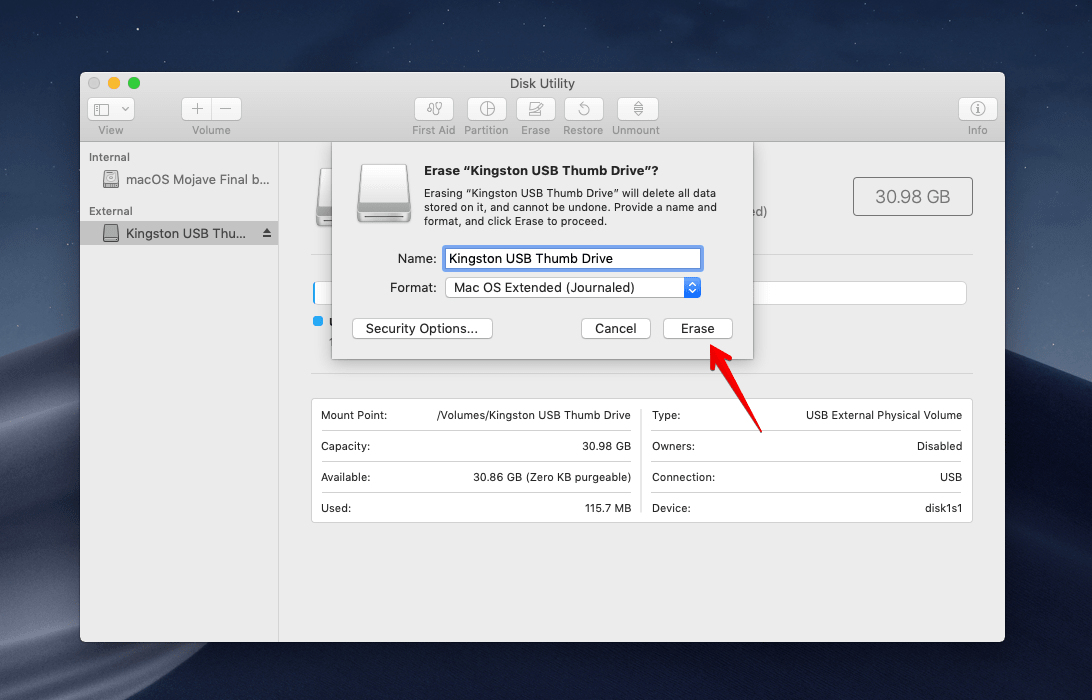
On the Disk Utility, click Erase.

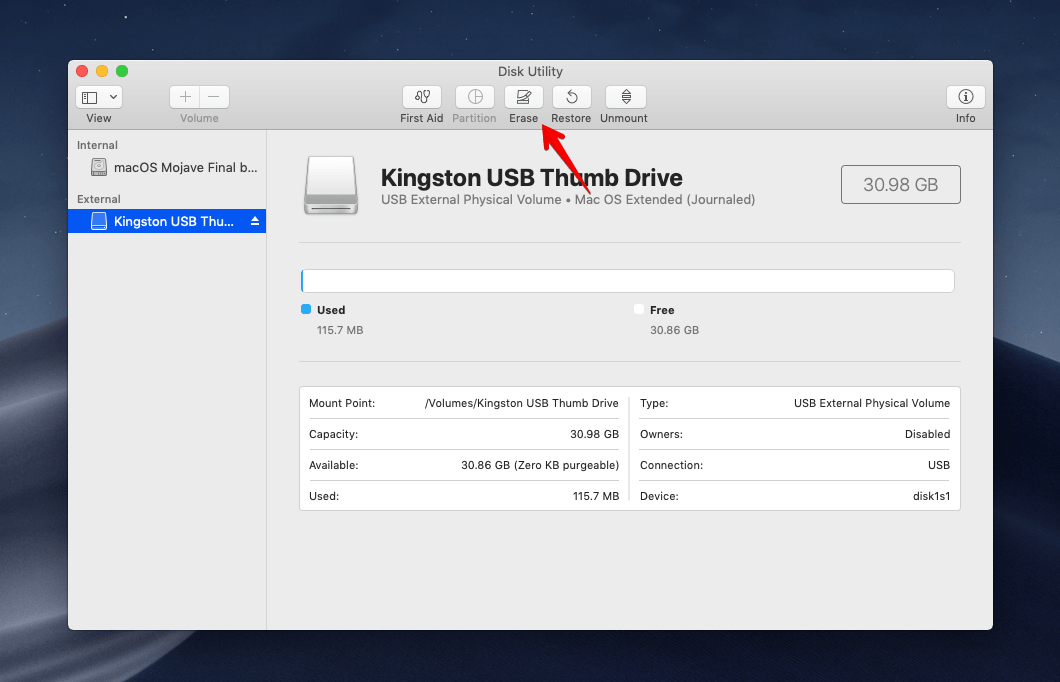
Name your USB stick and select macOS Extended (Journalted) as Format then click Erase.

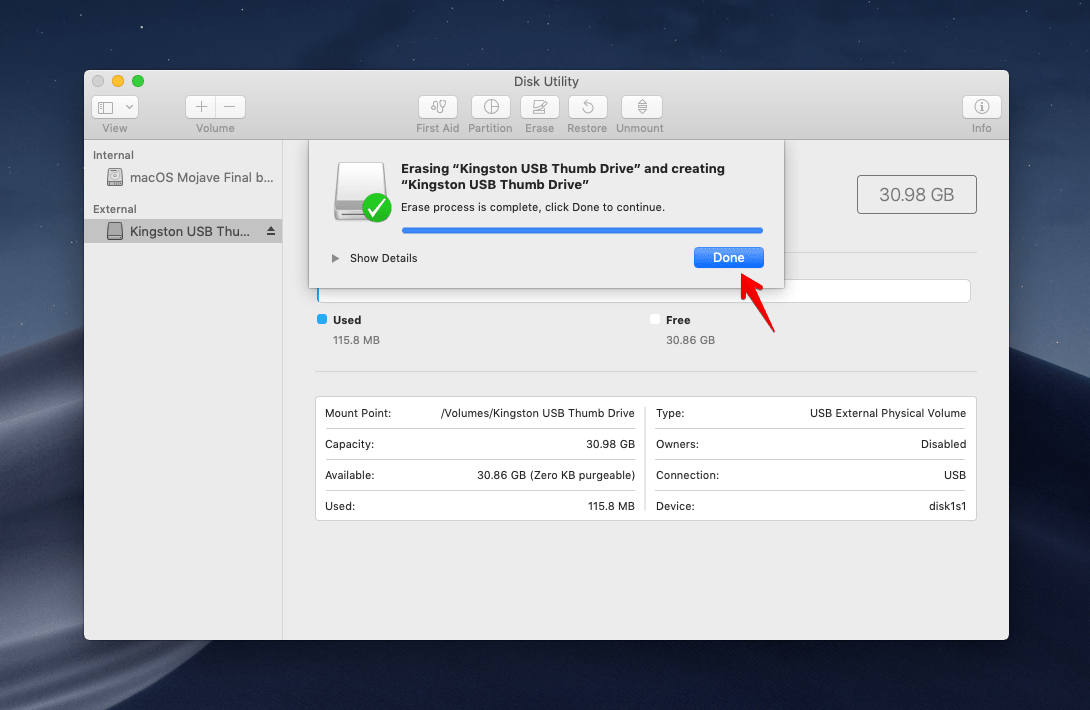
Once it’s done, click on Done and close the window.

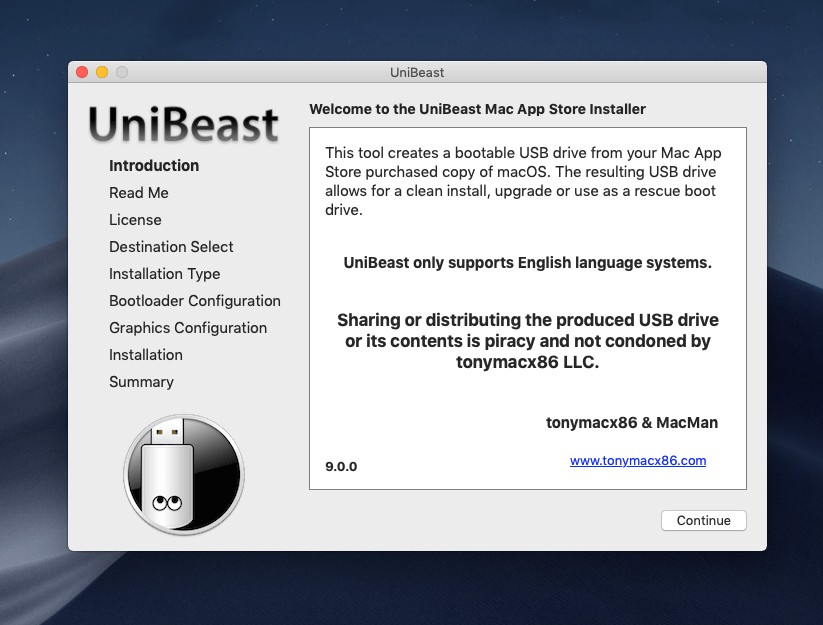
Now head to Unibeast and open it up. If you have it on your Windows computer, just drag and drop it on your macOS Mojave machine, it will work fine.
When the UniBeast opened, on the first page, you don’t have to do anything, simply Continue.

Continue the process.


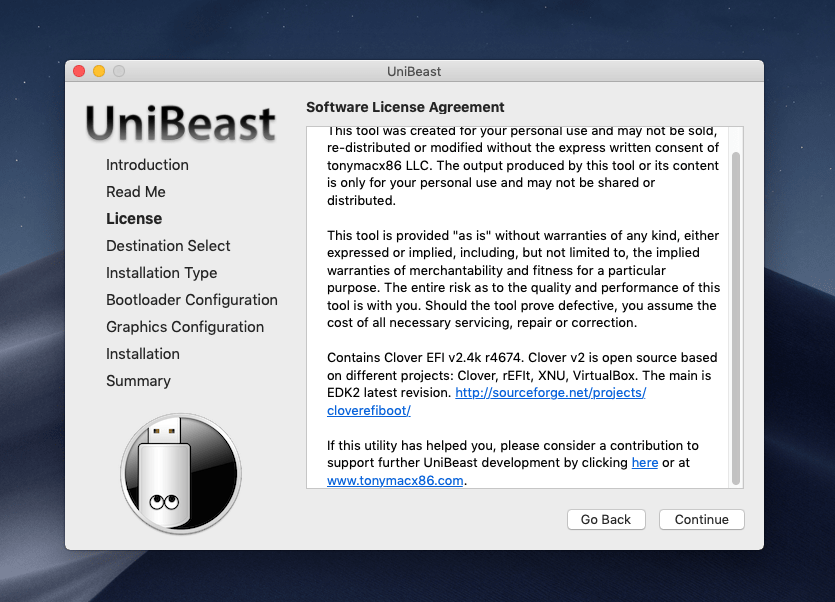
If you’ve some time, its good to note the software agreement. Anyway, Continue.

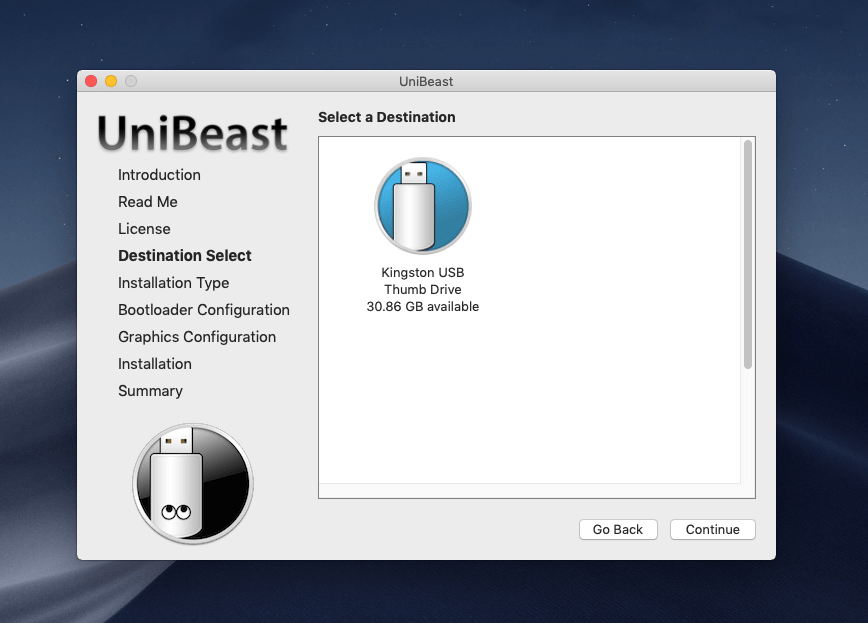
Here, you need to select the thumb drive and Continue.

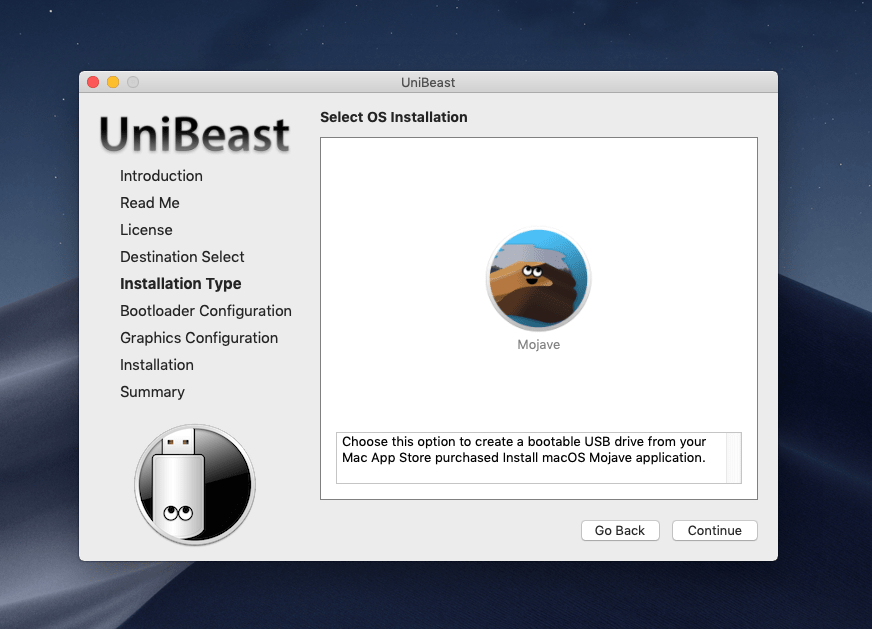
This appears if you had downloaded the file from App store, click on it and Continue.

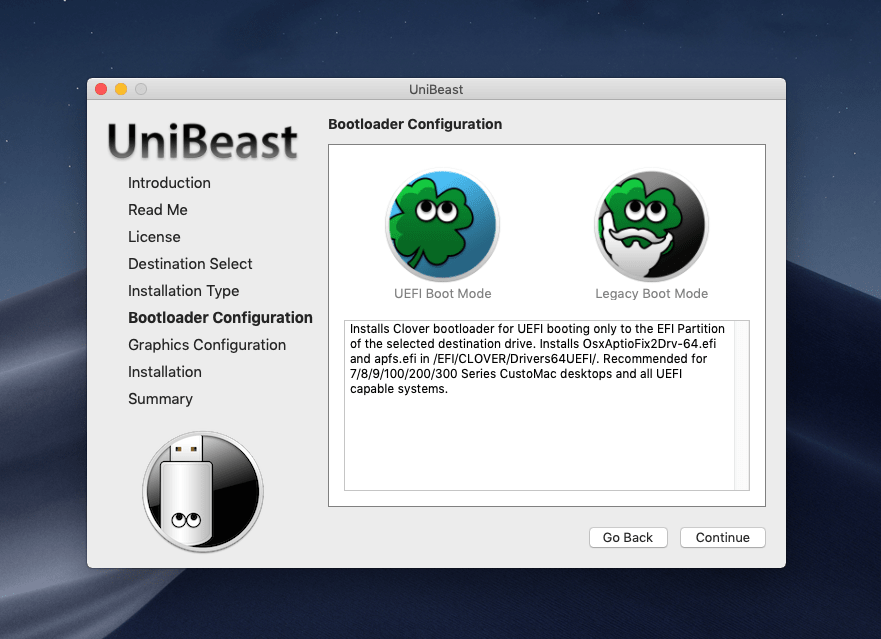
In this screen, select the proper boot configuration for your system, and click Continue.

For graphics, choose the appropriate graphics option you have, if you don’t have those, don’t select any of them as mine and Continue.


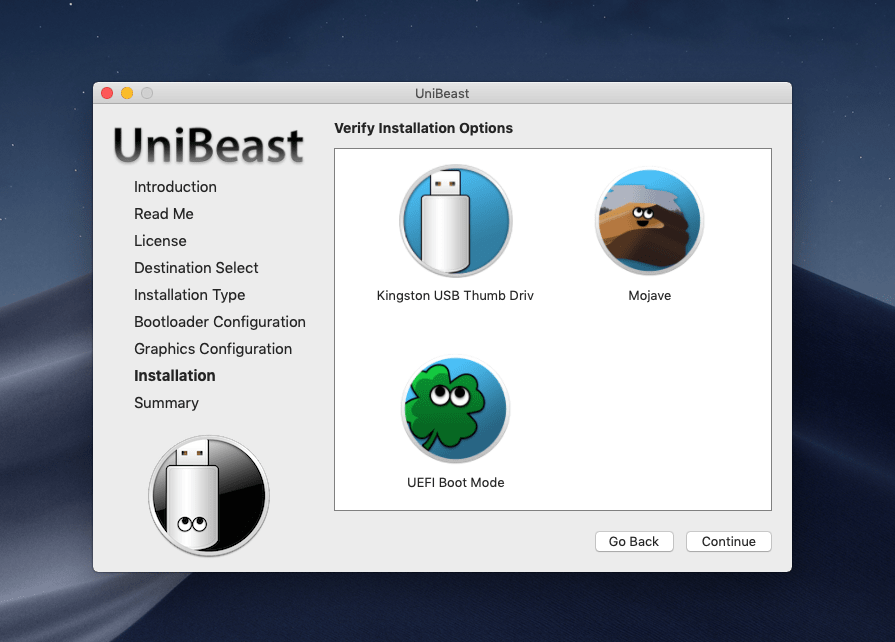
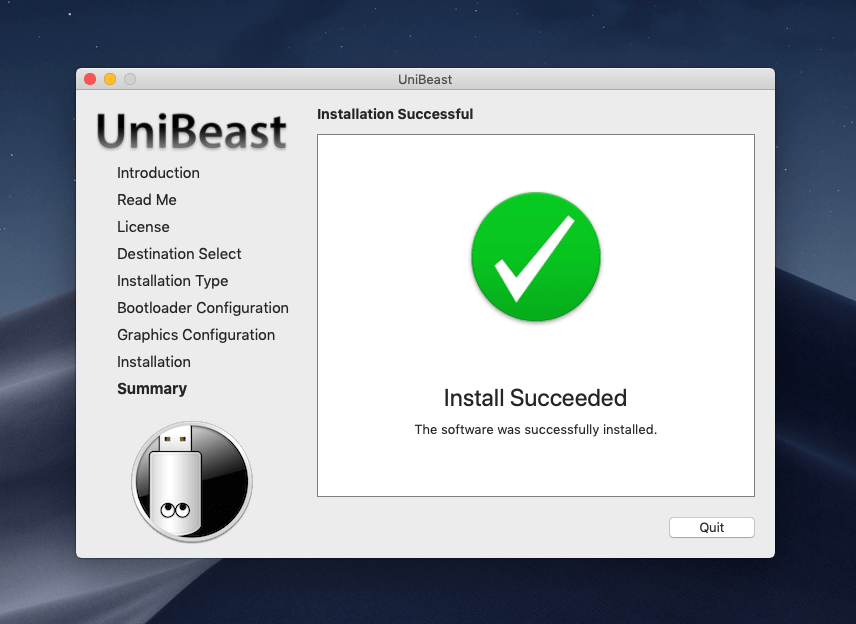
The installation page confirms the configuration you’ve chosen, just click Continue.

When the installation proceeded, exit from there with Quit key.

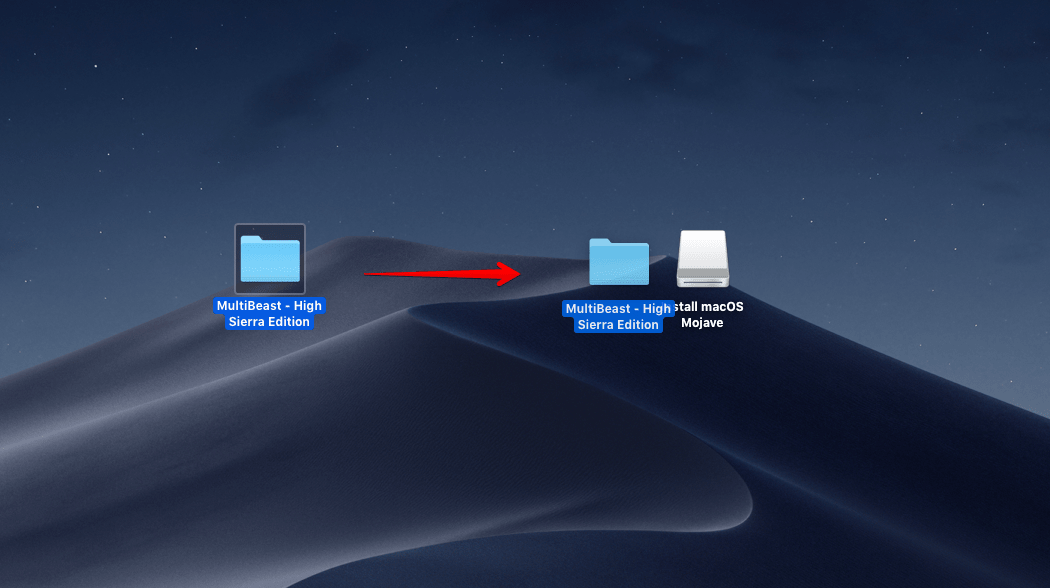
This part, you’ll need to drag Multibeast to your drive and that’s it.

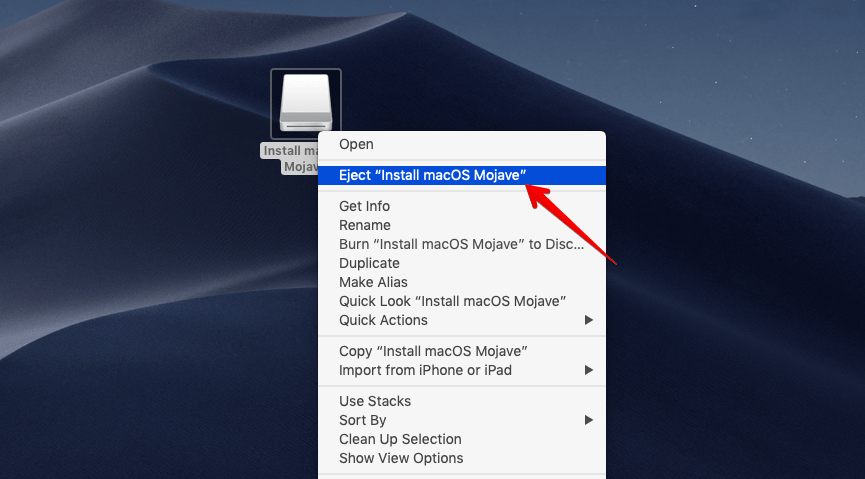
Then, eject the bootable USB when you’re done with it, important! or else, it may damage or harm your drive.

Congrats! Finally, you’re done. And you’re now completely prepared for installation and not surprisingly, you may have to fiddle up with a little more configurations with your system BIOS that will let you boot up.
That’s it. If there’s something left to tell or you’ve important things to say, let me hear in the comment form.