


The macOS (installed on the virtual machine) is probably the only Mac you have with you and most of the time that’s gonna be your operating system as a secondary at least. So you may use and store your personal files that are way important, so you also need to make sure you are keeping those significant things backed up. Here is How to Backup & Restore Your macOS Mojave Virtual Machine
Backups are necessarily important and more importantly, doing it regularly, as bad moments may happen anytime. Like your Mac hard drive could fail and not work entirely next time when you switch on your Mac, so if you do not backup every day, you may lose some days of your files that you had not backed in.
While backups are important, but that’s not what you should do for all of the files on your Mac. That would entirely waste your time and space where you store it. Here’s what you need to know about it.
Table of Contents
Which Files Should You Backup?
Before you actually go through backing your files, it’s important to know which files do you need to back up. While you can create the whole drive and even operating system backups which include from your macOS system files to apps, settings and your personal files, but that doesn’t necessarily mean you should do it, unless you really need them. These backups will take much longer and larger to create. They are useful when you don’t want to do little things like settings or have something really important. This is possible and easily done with the VMware default tool “Snapshot”.
With that in mind, it’s worth noting that you will need to take snapshots regularly as it will not take backups automatically by default.
The most important thing is to back up your entire personal files and folders which will not be recovered once they are lost. Including that, you can also add to backup your downloaded, music, documents, and videos or any other files that matter. However, you can also exclude files specifically you don’t want to be in the backup like your downloaded files. To do this, you will need to use the macOS built-in tool “Time Machine” that is provided on Mac by default.
How to Backup Your macOS Mojave Virtual Machine
Backing up a PC is different from backing a Mac, but not that different which you couldn’t do it. There are many ways you can back up your data, from backing up your virtual machine to your Windows computer to creating copies of your data to an external drive or cloud. When it comes to back up, you have different options to go with.
We will use the common secure way to back up your data is creating a from the VMware integrated tool “snapshot” or backing up your data using macOS built-in backup utility “Time Machine” which also works well with Mac.
Back Up With Snapshot
One of the easiest and most convenient ways to back up your macOS virtual machine is to use snapshot. This great backup tool, integrated into VMware with every virtual machine, creates a full backup of your Mac to your Windows computer which is easy to restore them. The backup will include the entire virtual machine including your personal files, system files, apps, settings. This backup will be stored on your actual Windows PC that you can copy it to another external drive, upload it to a cloud server and copy it to multiple places to maximize your data recovery.
This is really useful and works like the “Previous Versions” feature of Windows. Also, you can definitely restore the snapshot when your virtual machine is in a problem, which will restore your virtual machine and start back your virtual machine from that point.
Speaking of the time and space it will take, this might take a bit longer depending on the number of your files. The space that it will take specifically for system files will not be much but mostly depends on your personal files. This can a massive amount of your time with the easy way of its backup. How to Backup & Restore Your macOS Mojave Virtual Machine
There is only one exception to this rule, this tool will not take snapshots automatically like the Time Machine. So regularly back up is a must that would make you and your files not only feel safe but really safe. Without that, it’s probably your choice for backing your entire virtual machine if you don’t mind giving it some time and space, so here’s how to do it in an easy way.
Back Up With Time Machine
When it comes to backup on Mac, Time Machine is the simplest backup programs for Mac around.
This useful tool, built-in with every Mac, keep backup seamlessly time to time, hourly, daily and weekly backups for the moments. Once enabled, it won’t stop backing up and will backup files when the Time Machine backup drive is not there. Those files will be stored on the internal drive until when the backup disk is not connected. When the drive is plugged in, the backups are copied across to it. This is processed all automatically you don’t have to worry about.
When the drive is full, the oldest backups are deleted by default. You can also configure and set up specific files or even the entire operating system to backup as you don’t need them necessarily but it makes your work with settings pretty much easy once you have restored.
If you compare snapshot back up with the Time Machine backup, the snapshot backup is a complete backup of your entire virtual machine which might take a bit long and space but it is quite useful and easy when you are done with your disk or in serious trouble. The backup and restore process can be simply done from the virtual machine. However, this cannot back up specific files or even entirely automatically.
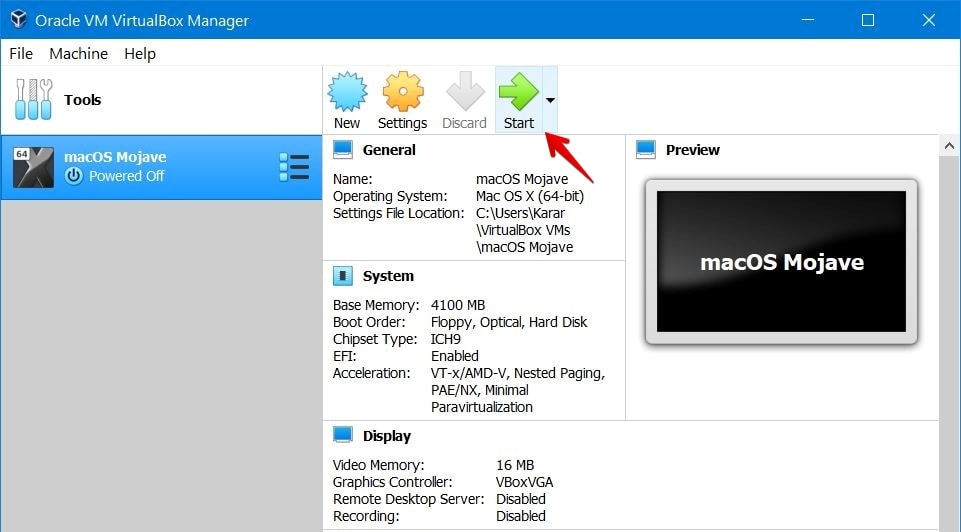
The Time Machine is Mac’s built-in backup option and is really convenient to back up Mac. This backup option is helpful when you want to back up specific files or entire operating system automatically hourly, daily, weekly for all the previous month. This is the advantage. Here’s how to use your Mac’s built-in backup options to take an entire backup of your files. So let’s get started. The process is more than similar for macOS running on VMware or VirtualBox.
The first step is opening VirtualBox and switching on the virtual machine.

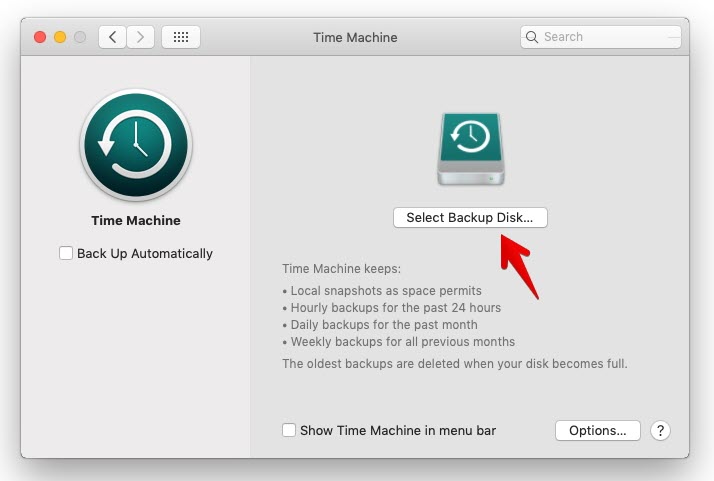
When you are into it, open Settings and click on Time Machine.


Now click the Select Backup Disk.

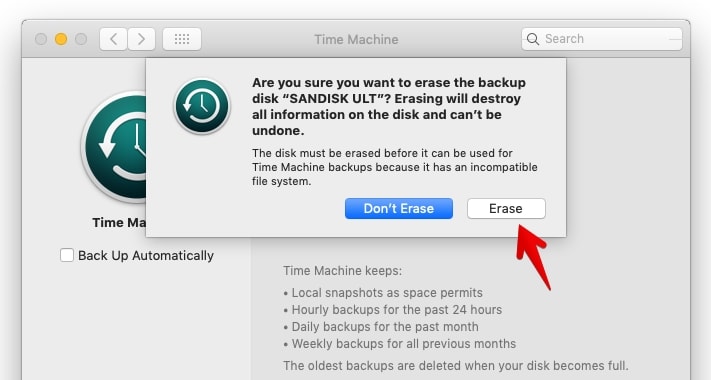
From here, select the disk you want to backup and click Use Disk. You can also Encrypt Backup Disk to make your backup secure with your credentials.


To use this disk, you will need to erase this disk which is incompatible for the Mac file system, click on Erase.

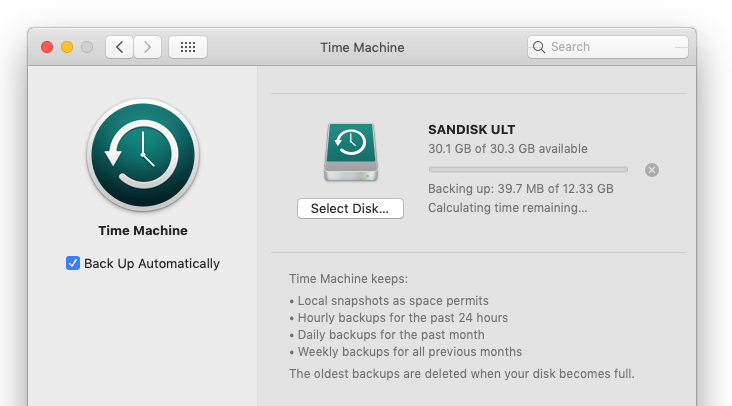
This will immediately begin backing up you can see the progress. This will backup when the drive is connected or the network location is available.
The Back-Up Automatically will be enabled after you enable the backup which will then back up without you know. You can also keep a copy of your Mac back up to multiple places, so you should not lose your files after a copy of your back up is removed or damaged. It’s always a good idea to backup your files to an external drive or even better to a cloud.

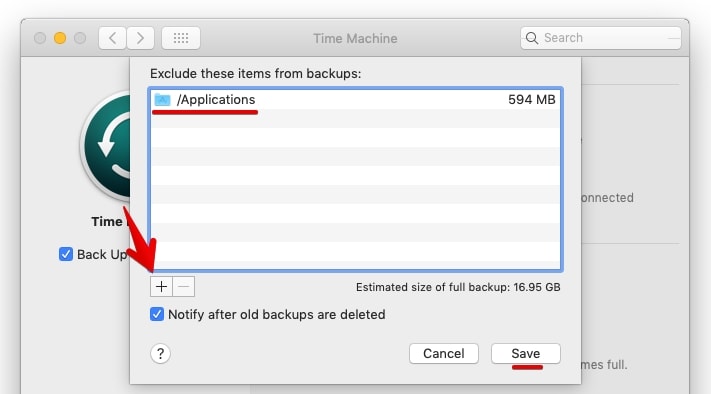
While the Time Machine backups everything by default, if you want to exclude some folders you don’t want to back up. To do that, click on the options and add the folders you want to exclude.

How to Restore an Entire macOS Virtual Machine
The Time Machine is available in every Mac and almost everywhere you need it. With this, you can restore specific files or an entire Mac.
To do this, you will need to access the Recovery mode. When you are there, you will see the option that will allow you to restore your Mac from a backup or local snapshot.

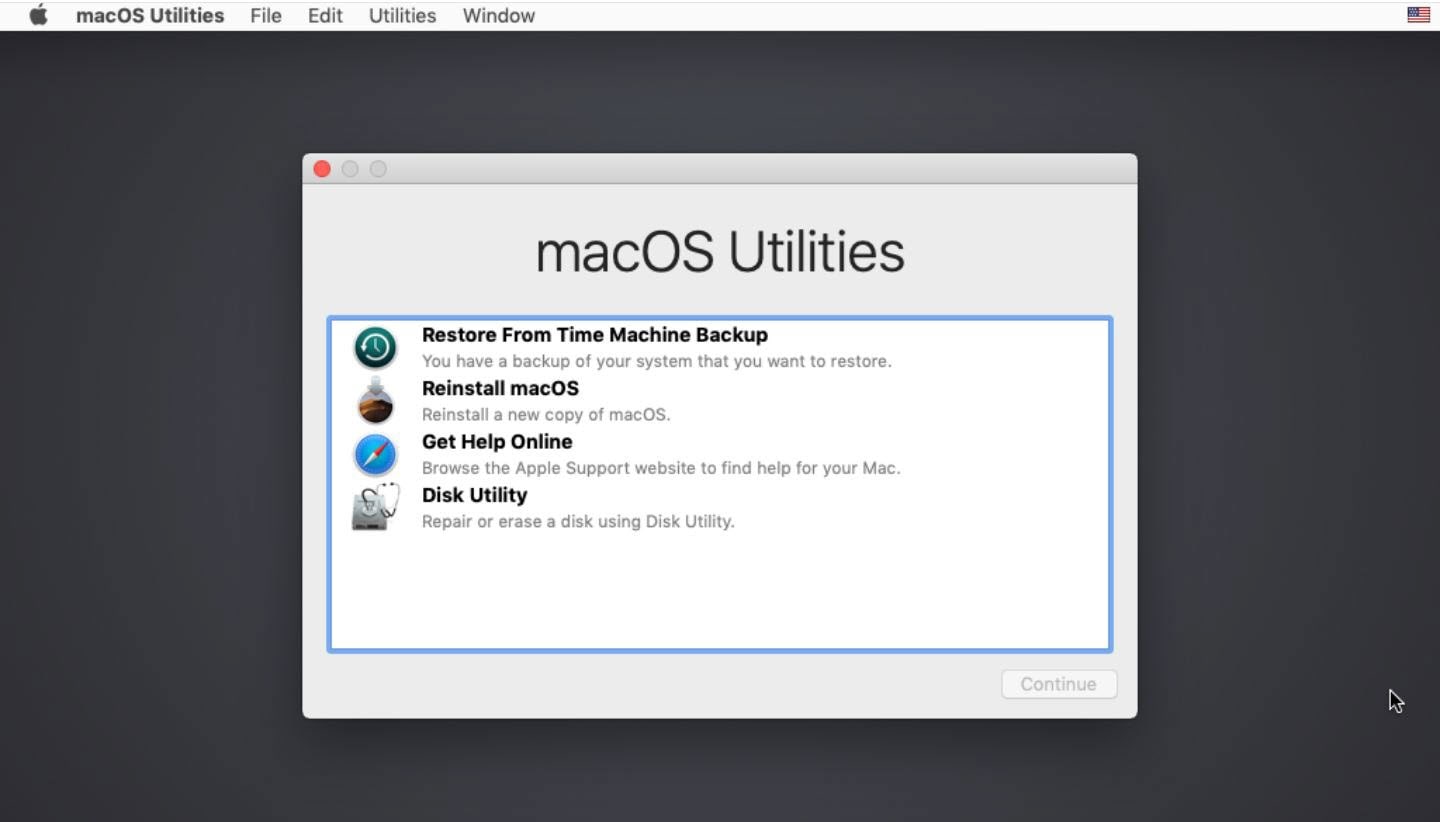
From that point forward, you can connect your external backup drive and proceed with it. This is easy.
How to Restore Particular Files From a Backup & Local Snapshot
Enabling the Time Machine will also enable the “local snapshots” feature which is different from the VMware snapshot. When your backup drive isn’t connected, Time Machine can’t save any information, so it stores the backup data on your startup disk as a Local Snapshot. When you connect your Time Machine drive, the backups are copied across to it. How to Backup & Restore Your macOS Mojave Virtual Machine
When enabled, your Mac will save a daily as well as a weekly snapshot of your files to the internal disk when your backup drive isn’t available. This provides you an extra layer to recover deleted files or restore previous versions of files without your backup drive. While this keeps a backup, but it’s not what you should rely on, and you should take your Time Machine backups regularly. This can be useful when restoring some corrupted or accidentally deleted files so don’t count on this.
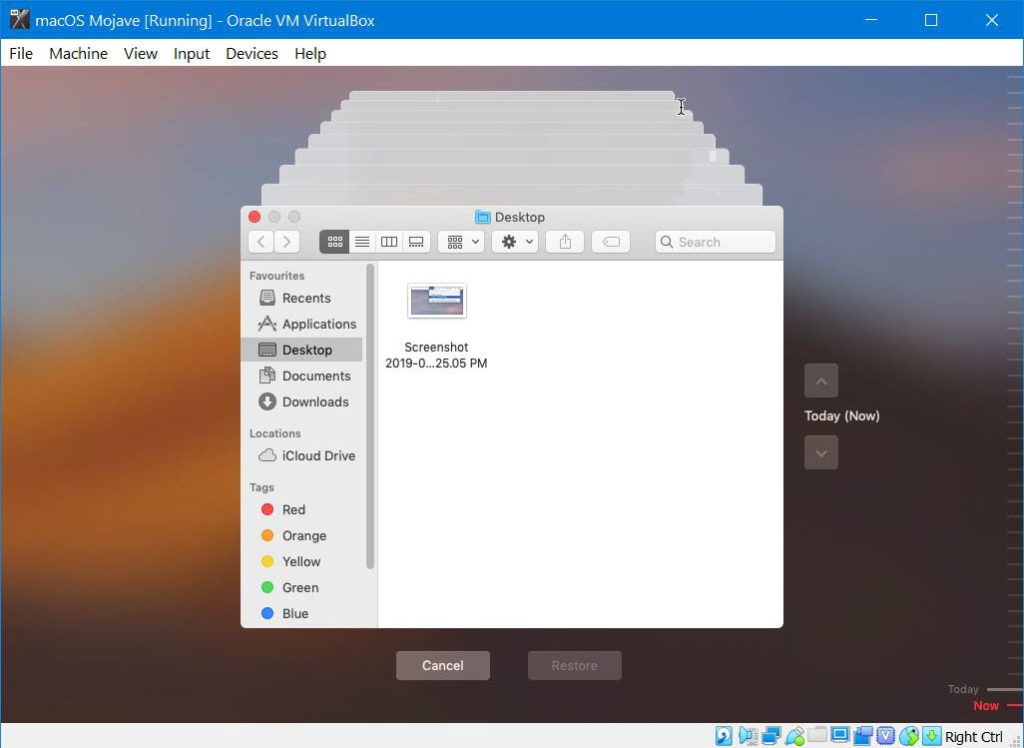
When you have a backup whether, on an external drive or local snapshot, you can restore specific files or your entire operating system. The process to restore specific files from a backup and the local snapshot doesn’t have any difference.
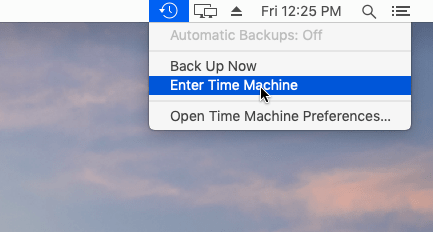
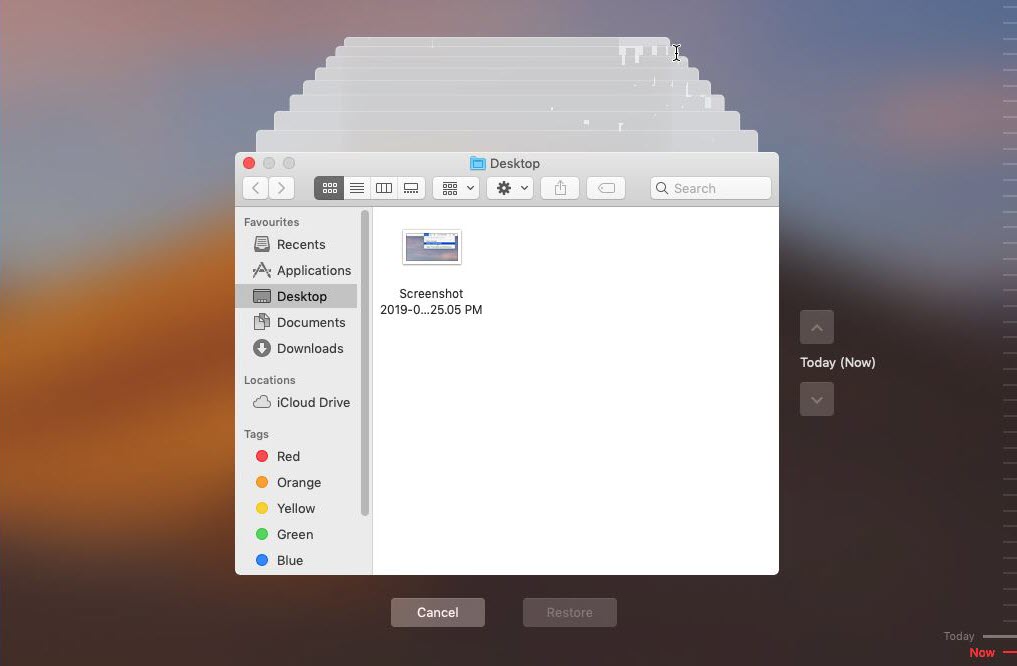
To recover a file, connect your back up drive first, then click the Time Machine icon and select the Enter Time Machine.

When the restore interface opened, you can locate the deleted file and restore it.
Navigate to the right side panel and select the time and date where the file was available. The Dates in pink indicate the backup is on an external drive, while the dates in white indicate local snapshots stored on your Mac’s internal storage.
Now search the file from the search area and when the file appeared, select it and click Restore to restore it to the same folder on your Mac. If the file was not available, you may change the time and date where the file was available, and restore it.

How to Restore Backups on Another macOS Virtual Machine
When you have a backup on an external drive, you can restore files from Time Machine on another Mac.
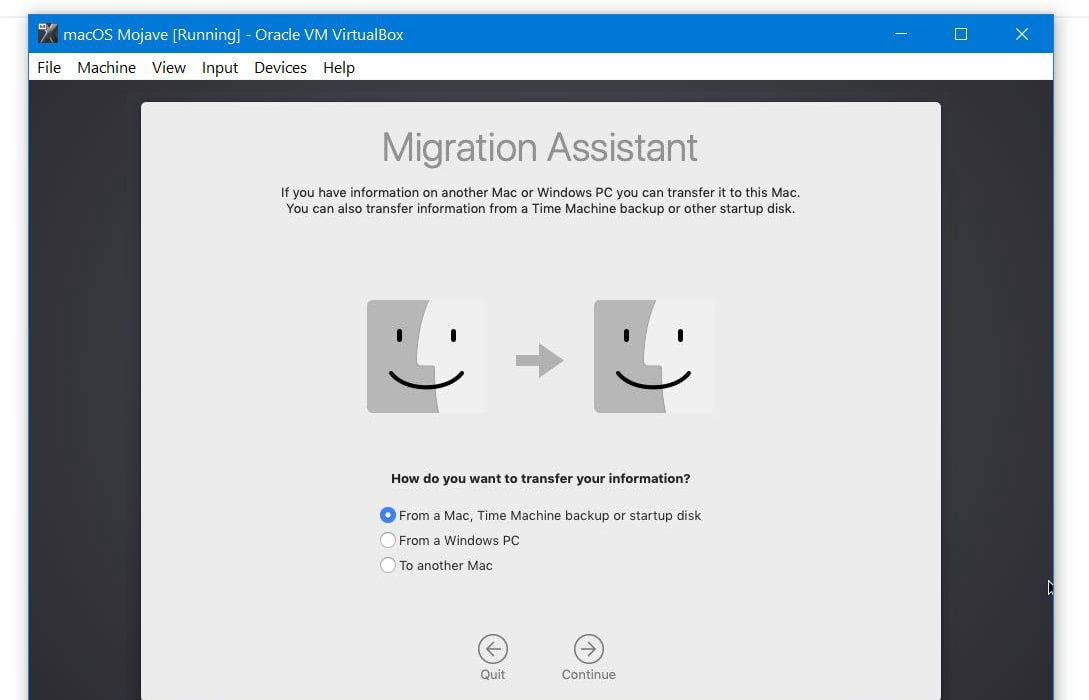
Connect your Time Machine backup drive, and open Applications, Utility folder then open the Migration Assistant on your Mac. This application is also available when you install macOS Mojave to quickly restore your files from Time Machine.


To back up all of your personal files, choose the “From a Mac, Time Machine backup or startup disk” and you can restore your entire files to your new Mac.

When you are done, you can eject your back up the drive from Devices > USB > Select your device.

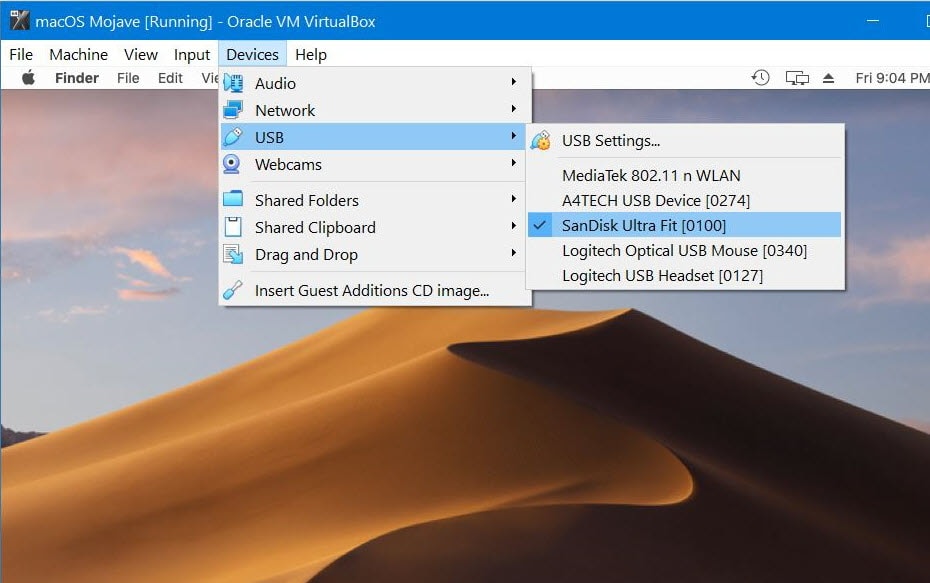
While Windows doesn’t support the Mac file system, so when you eject the device, the dialog box will pop up prompting you to format the device to make it useable on Windows, be careful, not to do that. Just close the box and eject the device.
If you’d like to access the backup, you will need to install an application like the free HFSExplorer that can read an HFS+ file system and copy files from it.
Hopefully, you should have backed up your files with this. If there’s something you’d like to mention, here you go with comments.